Update Helpdesk Tickets via Zalo
Guide Info
Note
Out of scope for this guide:
Create new ZBS message templates or submit for approval: see Create and Manage ZBS Message Templates (Admin/IT)
Link customer Zalo accounts: see Manage Zalo Partner Links
Reply to free-form messages (Advisory Messages) from customers: see Reply to Zalo OA Messages
—
Why Send Ticket Updates via Zalo
When a customer submits a support request, what they want most is to know “where is my ticket?” Without proactive notifications, customers often send follow-up messages to ask, create new messages, or even open duplicate tickets thinking the original request was overlooked. Each time a customer has to ask again erodes their confidence in the support process.
Sending updates via Zalo solves this without requiring customers to check email or log into the portal: notifications arrive directly on the app they use daily, right when ticket status changes.
Example used throughout this guide: Ms. Tran Thu Ha — production manager at An Phat Packaging JSC — reports that a label printer finished running but did not create a shipping document (ticket HD/2026/00412). Helpdesk staff Minh receives the ticket, assigns it, updates the stage, closes it, and requests a service rating — sending a ZBS notification at each step directly from the ticket chatter. Without these proactive updates, Ms. Ha would typically send two or three follow-up messages per ticket, adding 10–15 minutes of interrupt handling per case across the support team.
Viindoo provides five pre-built ZBS (Zalo Business Solutions) message templates for the helpdesk ticket lifecycle:
When to Send |
Template |
Main Content to Customer |
|---|---|---|
Just received the request |
Ticket Created <ticket_code> |
Ticket code, status, creation date, portal link |
Just assigned staff |
Ticket Assigned <ticket_code> |
Ticket code, assigned staff, team, assignment date, portal link |
Progress update available |
Ticket Update <ticket_code> |
Ticket code, new status, update date, portal link |
Ticket closed |
Ticket Resolved <ticket_code> |
Ticket code, status, close date, portal link |
After closing, request feedback |
Service Rating <ticket_code> |
5-star rating template — customer clicks directly on Zalo |
—
Prerequisites
Before opening a ticket to send, confirm all four conditions are met:
Ticket has the correct customer. The customer field on the ticket must be the correct partner — not an internal contact or placeholder name from a quick create.
Customer has a Zalo link or phone number in the system. The system looks for the customer’s Zalo UID via the partner link first; if not found, it uses the phone number for routing. The Zalo button in chatter only appears when the partner has at least one of these. If both are missing: see how to link at Manage Zalo Partner Links.
Helpdesk ZBS templates have been approved by Zalo. All five Helpdesk templates must be submitted and approved by Zalo before use. If a template is not in Approved status, it won’t appear in the selection list when sending. Verify at Create and Manage ZBS Message Templates (Admin/IT).
Ticket has enough data for the template being used. Each template pulls information directly from the ticket: customer name, ticket code, stage status, assigned staff, team, assignment date, close date. If a ticket lacks data (for example, no assigned staff when sending the Assigned template), the corresponding variable in the message will show empty.
Warning
Sending to the wrong customer is a serious business risk.
ZBS message content includes ticket code, status, assigned staff, and portal link — valuable internal data. If the ticket customer is incorrectly linked to someone else’s phone number or Zalo account, the message goes to the wrong person with no way to recall it after sending. Always verify the recipient name in the Send Zalo Message dialog before clicking Send.
—
Scenario: Printer Error Ticket from An Phat Packaging Company
Ms. Tran Thu Ha, production manager at An Phat Packaging JSC, reports an issue: the label printer finished running but did not create a shipping document in the system. The workflow is blocked and the warehouse team is waiting. Viindoo Helpdesk staff member Minh receives, handles, and notifies Ms. Ha via Zalo at each major step.
Ticket data used throughout this guide:
Ticket code: HD/2026/00412
Customer: Tran Thu Ha — An Phat Packaging JSC
Issue: Label printer not creating shipping documents
Assigned staff: Nguyen Van Minh
Team: Technical Support
—
Step 1 — Receive Request and Confirm Receipt
After a ticket is created, Ms. Ha hasn’t received any confirmation. Without an early notification, customers typically follow up after 15-30 minutes asking “has my request been received?” — adding unnecessary handling on both sides. Sending the Ticket Created template immediately on receipt breaks this loop.
Go to and open ticket HD/2026/00412.
In the chatter area (below the ticket form), click the Zalo button.
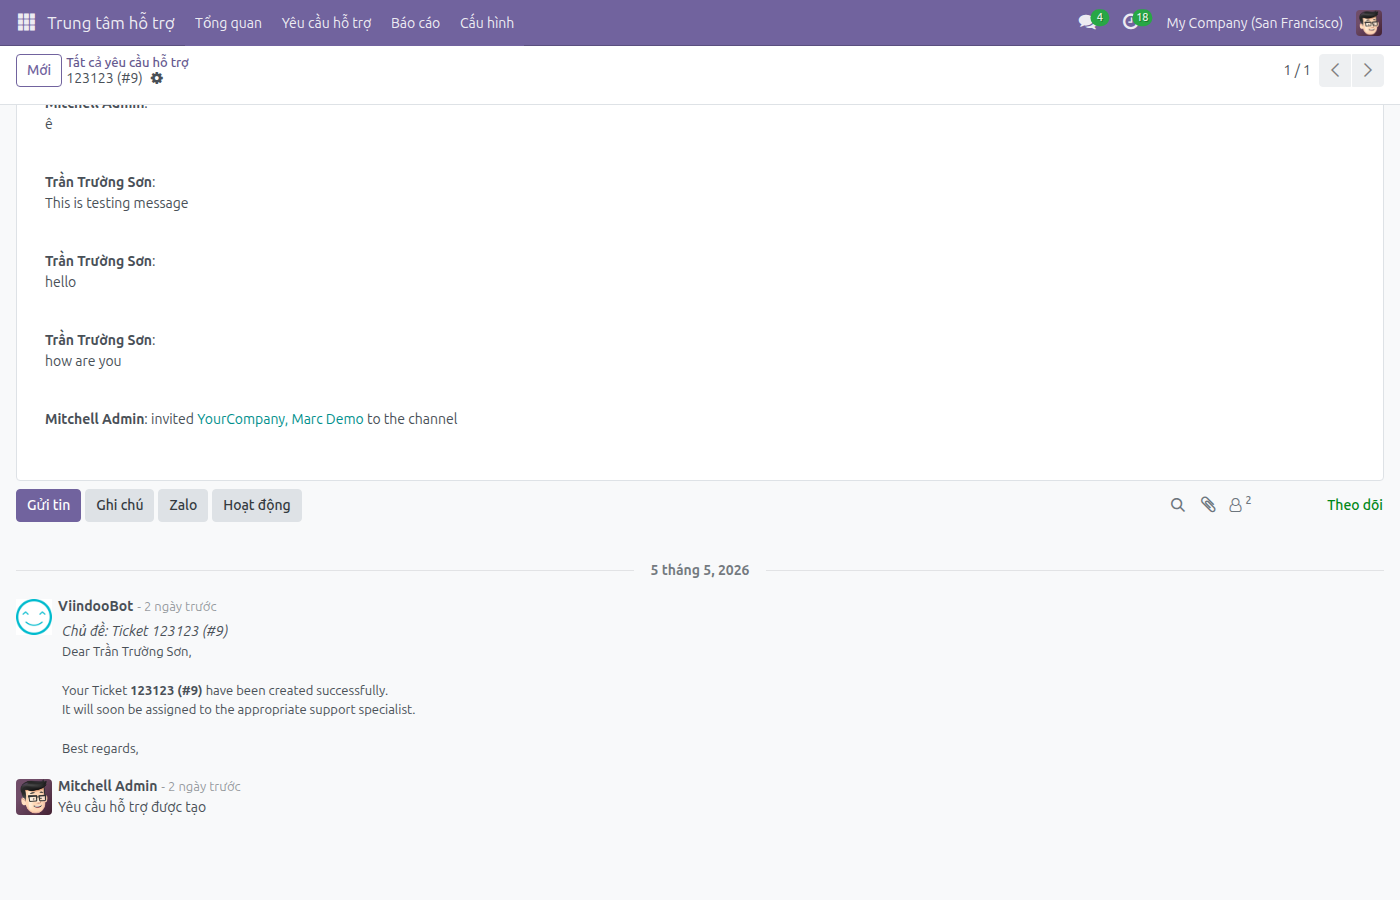
A recipient field appears just above the compose box, showing “To: Tran Thu Ha” (the name from the customer field on the ticket). This shows the system found Ms. Ha’s Zalo link or phone number and can send.
Click the expand arrow icon in the compose box to open the Send Zalo Message dialog.
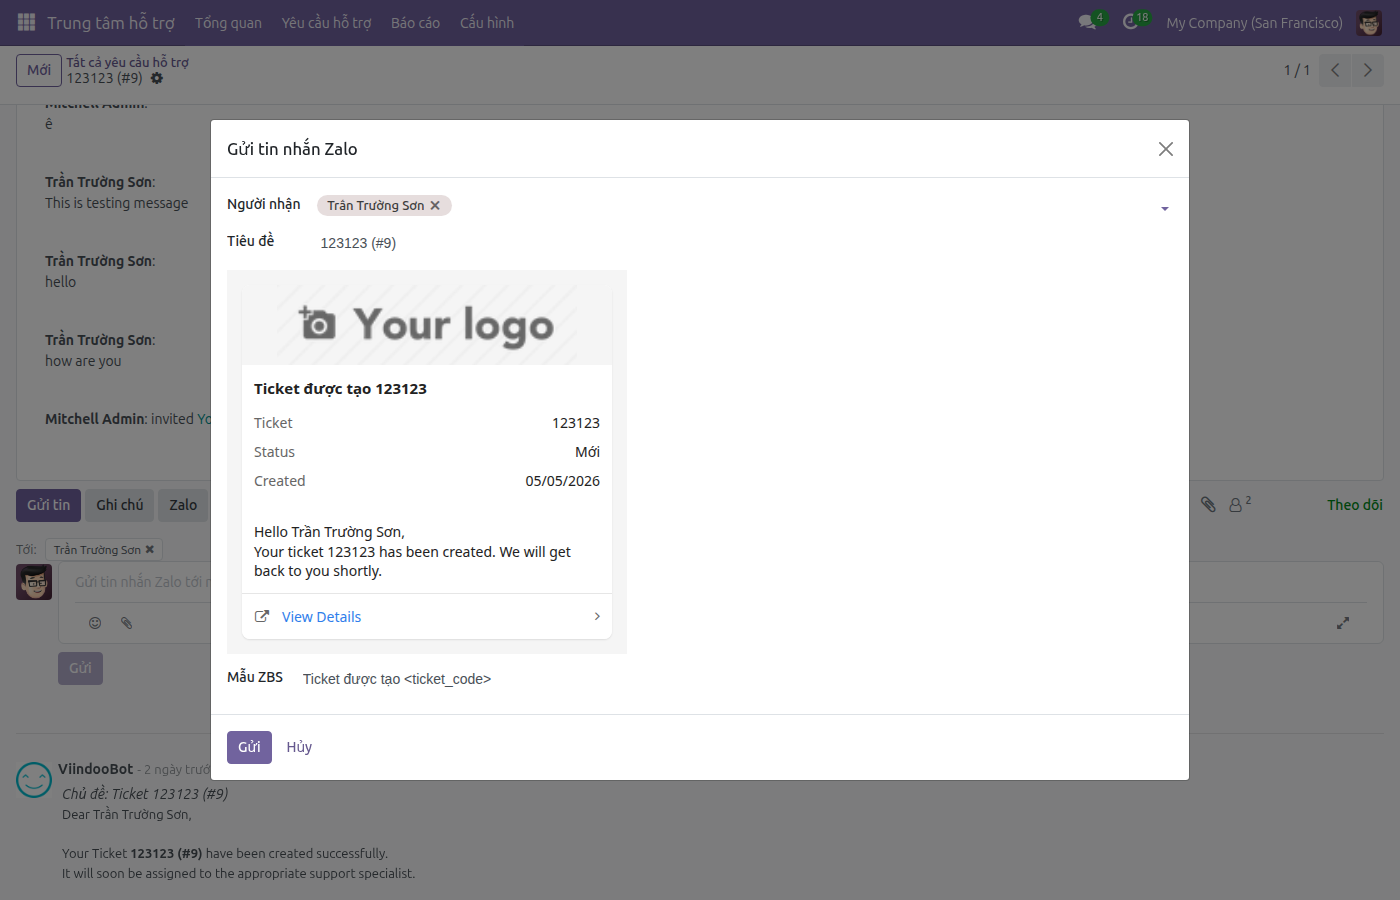
In the dialog:
Verify Recipients displays “Tran Thu Ha” correctly.
In the ZBS Template field, select the Ticket Created <ticket_code> template.
Content preview appears: ticket code, current stage status, creation date, and View Details link to the portal.
Verify no variables show unreplaced placeholder text like
<variable_name>.Click Send.
The dialog closes after successful send. The message is recorded in Ms. Ha’s Zalo conversation in Discuss — the ticket chatter does not change.
Tip
Verify Step 1 Completed Correctly:
Recipient name in the dialog is Ms. Tran Thu Ha (not another contact in An Phat Packaging JSC).
Message preview shows ticket code HD/2026/00412 — not a different ticket code.
After sending: open Discuss and go to Ms. Ha’s Zalo conversation — the just-sent message appears in the chat stream with content matching the Ticket Created template.
—
Step 2 — Assign Staff and Notify Assigned Handler
On a ticket, there’s often a time gap from receipt until assignment — the customer doesn’t know who is handling their ticket. The Ticket Assigned template solves this: the customer knows exactly who is responsible, which team they’re on, and when they were assigned.
Important: this template pulls data from the assigned staff and team fields on the ticket. You must assign on the ticket first, then send the template — if you send before assigning, the staff and team info will show empty in the customer’s message.
On ticket HD/2026/00412, select Assigned To as Nguyen Van Minh and Team as Technical Support. Save the ticket.
In chatter, click Zalo → expand → open Send Zalo Message.
Select the Ticket Assigned <ticket_code> template.
Message preview displays: Ms. Ha’s name, code HD/2026/00412, Nguyen Van Minh, Technical Support team, assignment date.
Click Send.
Tip
Verify Step 2 Completed Correctly:
Preview shows the correct name Nguyen Van Minh and Technical Support — no empty fields or unreplaced variables.
Ms. Ha’s Zalo conversation has the just-sent message with content matching the Ticket Assigned template.
Ticket on the system saved the correct assigned staff and team before the send time.
—
Step 3 — Update Progress During Handling
The handling process may stretch through multiple stages (In Progress → Waiting for Customer → Waiting for Parts…). Each time the stage changes, customers won’t know unless notified. If the ticket is waiting for customer input, the Ticket Update template shows the customer the ball is in their court — reducing silence and inaction from customers unsure what they need to do.
Send Ticket Update when:
Ticket stage just changed to a new stage.
New information needs to be communicated to the customer (for example: waiting for customer response).
Ticket has been waiting long and the customer needs reminding of the progress.
If the ticket doesn’t fit one of these three cases, don’t send Ticket Update — sending too many times without real change undermines notification credibility.
On ticket HD/2026/00412, change the stage to an appropriate status (for example: In Progress). Save the ticket.
In chatter, click Zalo → expand → open Send Zalo Message.
Select the Ticket Update <ticket_code> template.
Preview displays ticket code, current stage status, and update date (from the ticket’s most recent modification time).
Click Send.
Tip
Verify Step 3 Completed Correctly:
The Status field in the preview matches the current stage name on the ticket — not the old stage.
Ms. Ha’s Zalo conversation has a new Ticket Update message with correct information.
If ticket is waiting for customer response: the next step is to wait — don’t send another Ticket Update until there’s new information or the ticket stage changes.
—
Step 4 — Notify Resolution Complete
When a ticket closes, the customer needs to know immediately to stop worrying or opening duplicate tickets. The Ticket Resolved template confirms the issue is resolved and gives the customer a link to review details on the portal if needed.
Warning
Close the ticket first, send the template after.
The Ticket Resolved template pulls the close date directly from the ticket. If you send before the ticket is in a closed stage, the close date will show empty in the customer’s message. Close the ticket (change to an end stage) before sending this template.
On ticket HD/2026/00412, change the stage to a closed status (for example: Resolved). Save the ticket.
In chatter, click Zalo → expand → open Send Zalo Message.
Select the Ticket Resolved <ticket_code> template.
Preview displays ticket code, closed stage status, and ticket close date.
Click Send.
The message is recorded in Ms. Ha’s Zalo conversation in Discuss. The ticket is now in closed status on the system.
Tip
Verify Step 4 Completed Correctly:
Preview shows the close date — not empty. If empty, the ticket hasn’t been closed to the correct stage.
Ms. Ha’s Zalo conversation has the Ticket Resolved message.
Ticket on the system is in closed status, no longer in the open ticket list.
—
Step 5 — Request Service Rating
After closing the ticket, this is the right time to request feedback on support quality. The Service Rating template is special: the customer receives a message with a 5-star rating interface right on Zalo — no need to open external links or log into the portal. Fewer steps means higher response rates.
Send this template after the customer has read the Ticket Resolved message — usually 30-60 minutes later, or right away in the same session if the customer’s response shows satisfaction with the outcome.
In chatter of ticket HD/2026/00412, click Zalo → expand → open Send Zalo Message.
Select the Service Rating <ticket_code> template.
Preview displays the rating request and ticket code.
Click Send.
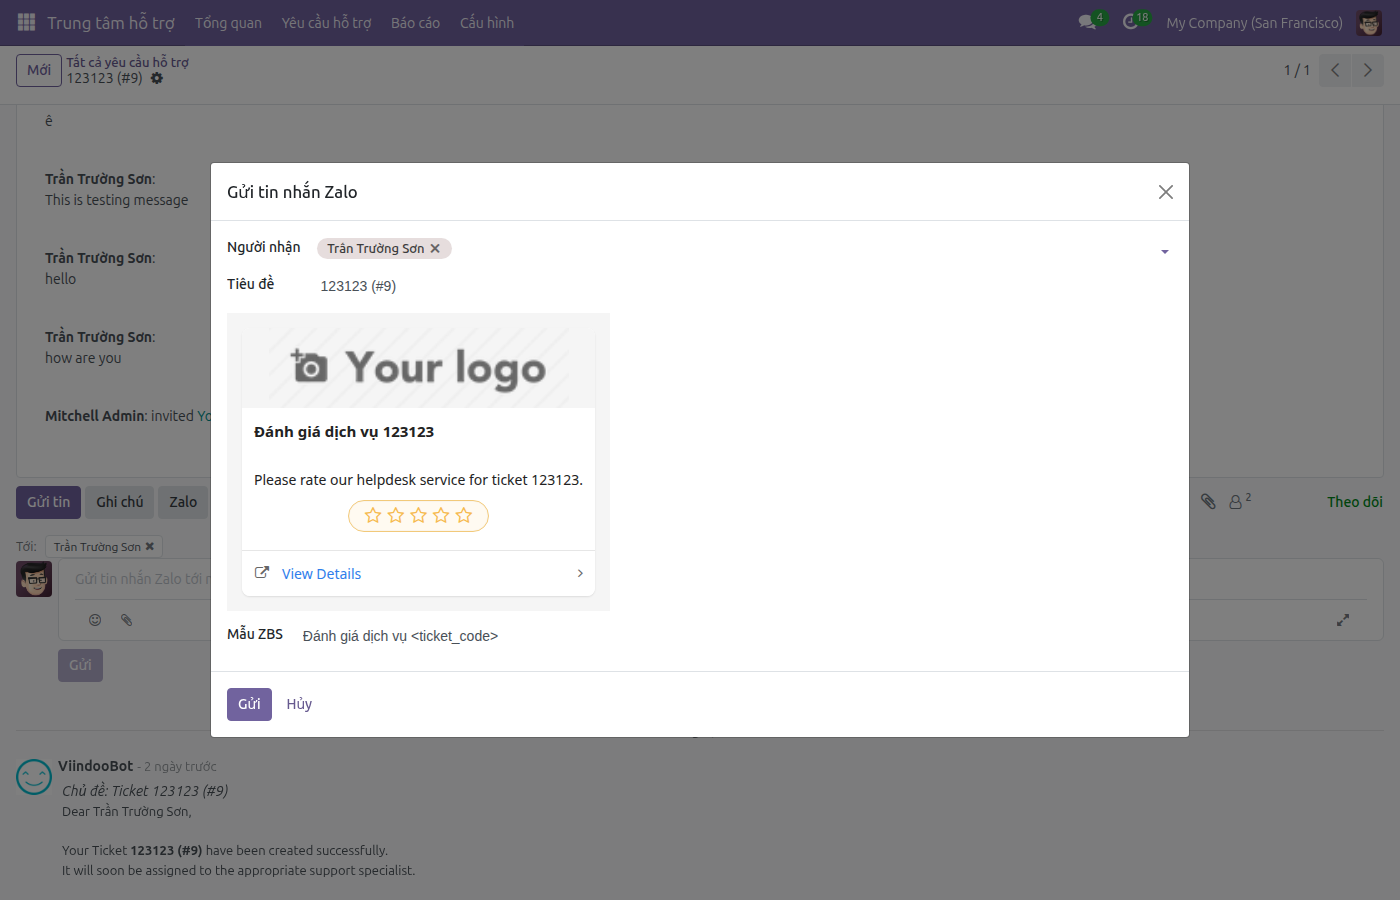
Ms. Ha receives a message on Zalo with a 5-star rating interface (Very Dissatisfied / Dissatisfied / Neutral / Satisfied / Very Satisfied). When she selects a level, Zalo shows the next question and thank you message per the template configuration.
Tip
Verify Step 5 Completed Correctly:
Ticket HD/2026/00412 is in closed status before sending this template — don’t send rating request before closing the ticket.
Ms. Ha’s Zalo conversation has the Service Rating message with code HD/2026/00412 — not a different ticket code.
Sent message is recorded in Ms. Ha’s Zalo conversation in Discuss, viewable anytime.
—
Track Rating Feedback from Customer
When Ms. Ha clicks to select stars on Zalo, Zalo records the choice via the ZBS rating API callback mechanism. The feedback does not automatically record into ticket HD/2026/00412 or chatter — this is the current integration limitation.
Note
Currently, star rating results are not synced to the Customer Rating field on the ticket. To view customer feedback, Admin can check Zalo event logs in the OA account’s API Logs. To compile rating data, Admin exports from the Zalo Business Portal (outside Viindoo).
—
View Send History
All ZBS messages sent from a ticket are recorded in the corresponding Zalo conversation in Discuss. To review:
Open
Find the customer’s Zalo conversation (customer name or phone number in the channel list).
Scroll up to see ZBS messages sent to Ms. Ha — each message shows preview content and send time.
This history proves what was sent, when, and the conversation status.
Note
Discuss screen when viewing Zalo history: left sidebar shows Zalo channels organized by OA; main chat frame displays messages in chronological order — ZBS messages appear as cards with title and buttons (if the template has them), plus send status icons. Each message from staff shows the sender’s name above it.
—
Handling Common Issues
Helpdesk Templates Not Appearing in the ZBS Template List
Symptom: Open Send Zalo Message dialog from ticket, but the ZBS Template field is empty or missing a specific template.
Common causes:
Template has not been submitted and approved by Zalo (status is not Approved).
User lacks permission on the template or doesn’t belong to the template’s OA.
Template belongs to a different OA than the one configured for the current company.
Solutions:
Report to Admin to check template status at Create and Manage ZBS Message Templates (Admin/IT).
If template is Pending or Rejected: process the approval again before proceeding.
If template is Approved but still missing: verify user permissions on the OA and template.
Preview Shows Empty Fields or Unreplaced Variables Like <assigned_to>
Symptom: After selecting a template, preview shows blank fields or strings like <assigned_to>, <closed_date> not replaced.
Common cause:
Corresponding field on ticket has no data: no assigned staff (for Assigned template), ticket not closed (for Resolved template), or stage not changed.
Solutions:
Close the dialog.
Update missing data on the ticket (assign staff, change stage, etc.).
Save the ticket, reopen the dialog, and select the template again to see the updated preview.
Warning
Don’t send messages with empty variables.
Messages to customers with blank fields or <assigned_to> look unprofessional and the customer can’t read the information they need. Always check the preview before clicking Send.
Error Message When Clicking Send
Symptom: Click Send in the Send Zalo Message dialog but the system displays an error message and the dialog doesn’t close.
Common causes:
Template status just changed (no longer Approved) while you had the dialog open.
Zalo API returns an error due to expired OA token or quota.
Solutions:
Read the error message content to identify the cause.
If error relates to token or connection: report to Admin to check at Monitor and Troubleshoot Zalo.
Don’t click Send multiple times in a row when encountering an error — messages may arrive to the customer multiple times if some sends actually succeeded.
Recipient Name in Dialog Does Not Match the Ticket Customer
Symptom: Name in the Recipients field is not Ms. Tran Thu Ha but someone else, or the customer name on the ticket and in the Zalo conversation don’t match.
Common causes:
Customer on ticket is incorrectly linked to someone else’s Zalo account.
Multiple contacts share the same phone number in the system; the system picked the wrong one.
Solutions:
Stop sending immediately. Close the dialog without clicking Send.
Report to Admin or CS Lead to verify and fix the Zalo link at Manage Zalo Partner Links.
Resend after Admin confirms the link is correct.
—