How to plan for maintenance and manage maintenance requests
During equipment management, businesses offer determined maintenance plans for each piece of equipment to minimize the damage risk midway through operation, affecting productivity. The Viindoo Maintenance app supports two standard maintenance methods:
Corrective maintenance;
Preventive maintenance.
This article will show you how to create a maintenance request, plan, and manage these maintenance requests in Viindoo software.
Requirements
This tutorial requires the installation of the following applications/modules:
Maintenance planning
Planning maintenance on a fixed schedule
For equipments that require maintenance frequently at specific intervals (e.g., every 90 days, every 365 days, etc.), Viindoo software helps maintenance managers quickly set up their own maintenance plans.
To use this feature, navigate to Apps and activate the Preventive Maintenance Mode module (you can search with viin_maintenance_preventive_mode).

To set up a maintenance plan with a fixed schedule, follow these steps:
Configure maintenance frequency
Navigate to , select an equipment and go to the Maintenance tab to create the maintenance plan for it.
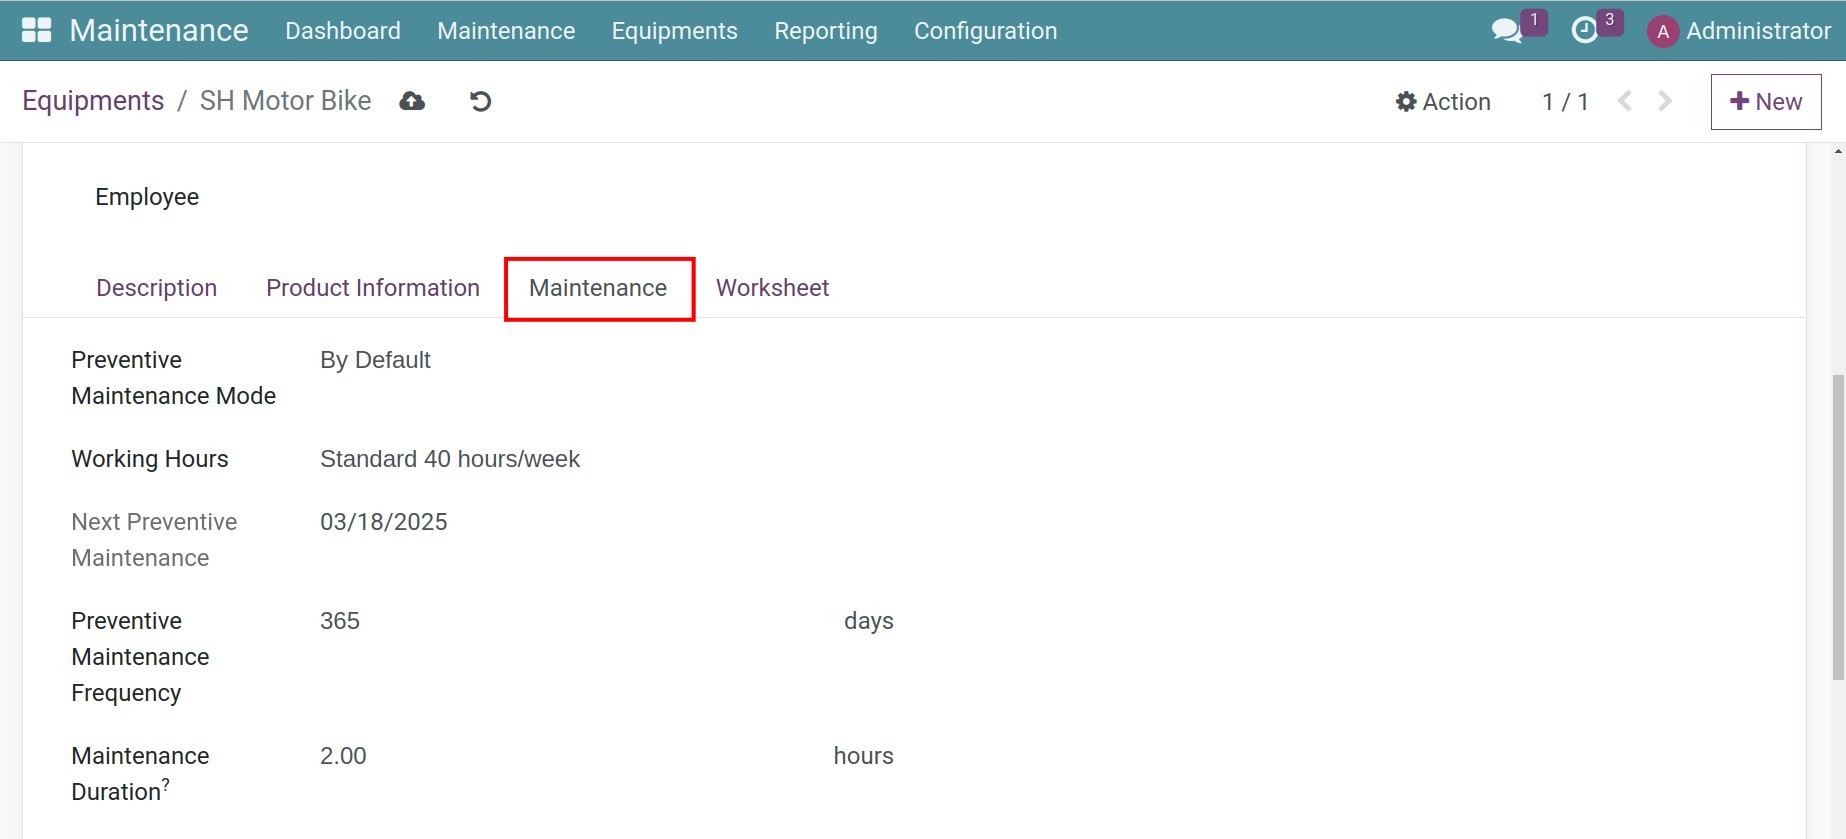
From here, equipments manager needs to declare the following equipment information:
Preventive Maintenance Mode: Select By Default to create a fixed schedule for maintenance.
Preventive Maintenance Frequency: Type the frequency you want to maintain (e.g. 7 days, 30 days, 365 days, etc.).
Maintenance Duration: The time required to perform a regular maintenance.
Next Preventive Maintenance: Auto-calculated based on the above frequency.
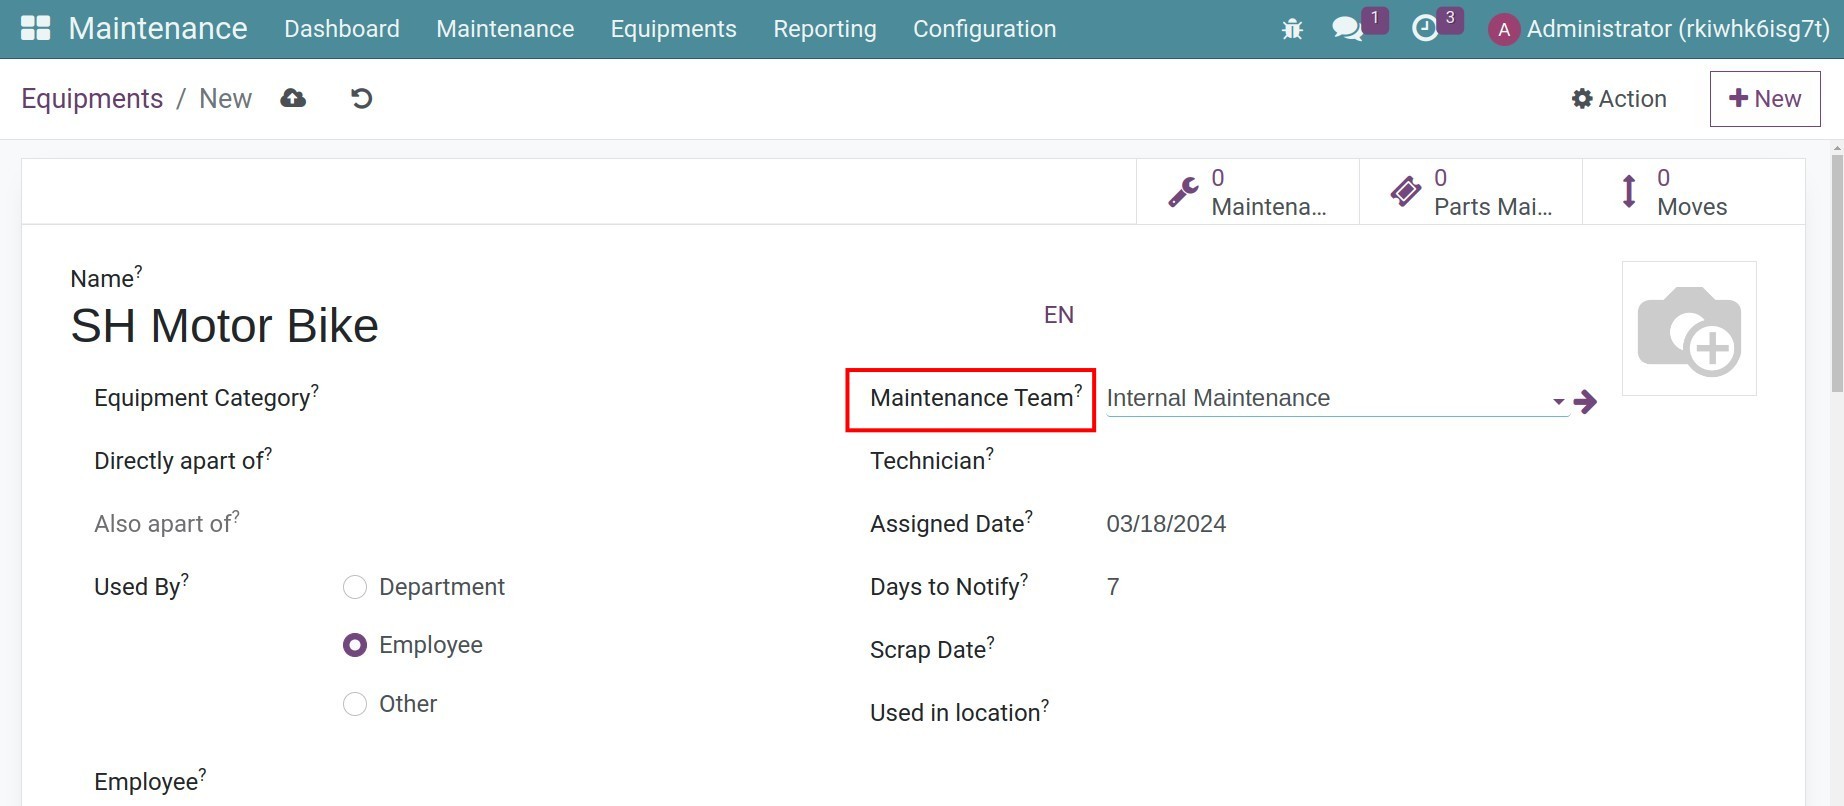
Assign a maintenance team to the equipment
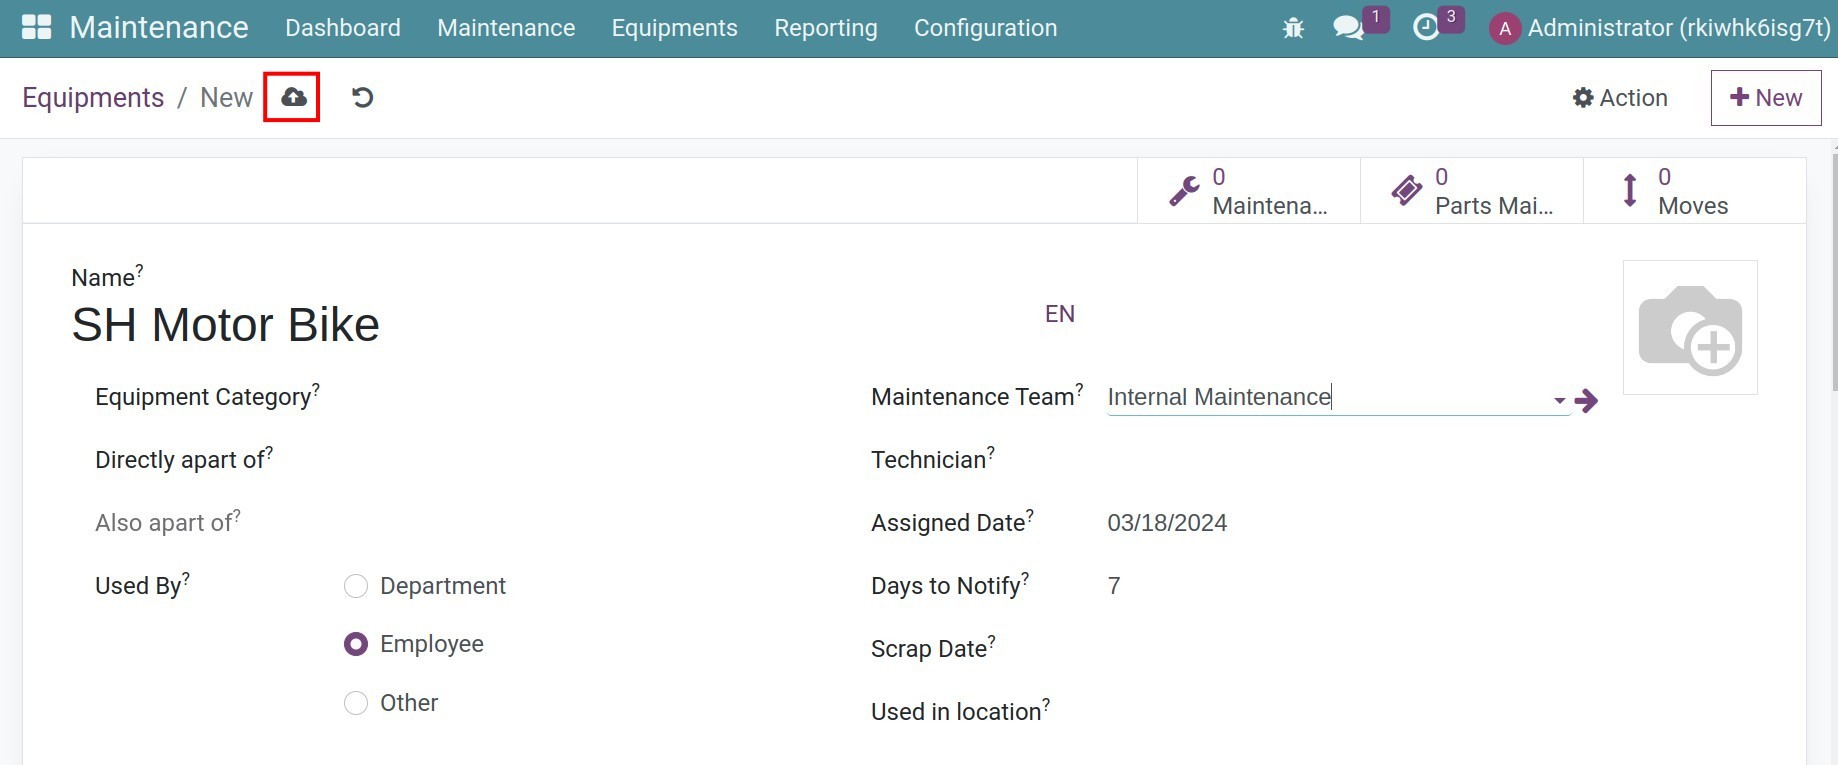
Click the Save manually icon to save the info.
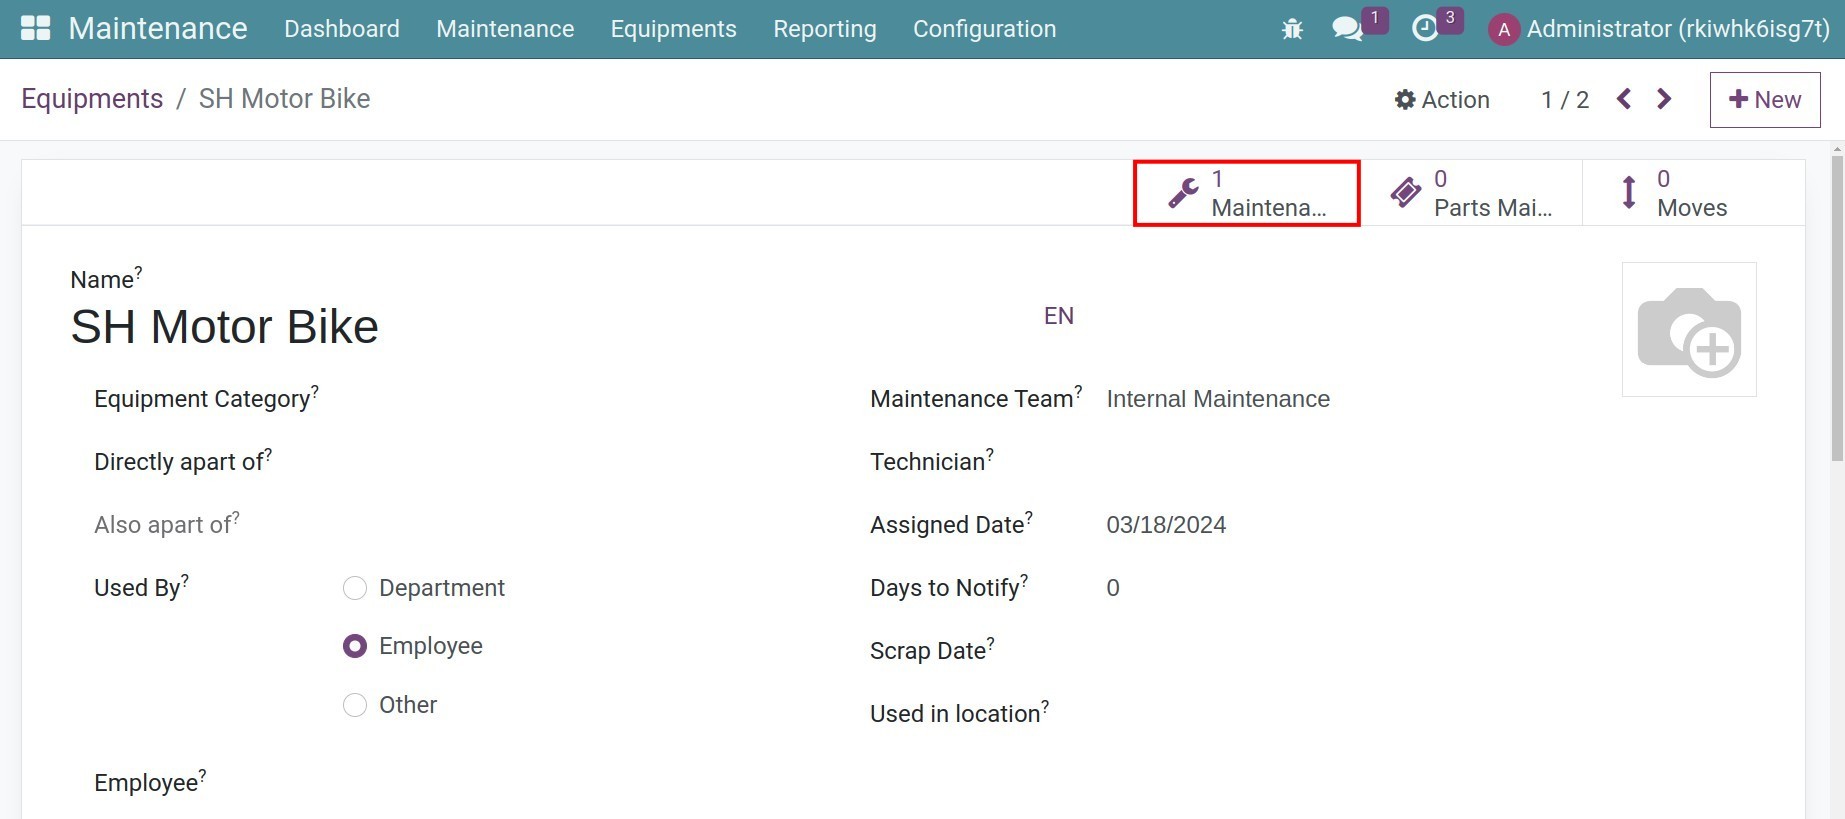
Preventive maintenance requests will be periodically generated for equipment when due (e.g., every 7 days, 30 days, 365 days, etc.). The timing of when the maintenance ticket is created depends on the duration set in the Days to Notify field for each specific equipment.
Planning maintenance on milestones
For industrial machinery used frequently, even a minor malfunction of one piece of equipment can directly impact the progress of the entire production line. Therefore, the maintenance of such equipment need to be carried out more regularly, typically based on usage cycles or machine operating hours. For example: After every 100 hours of machine operation, after the machine has produced 200 meters of finished fabric, etc.
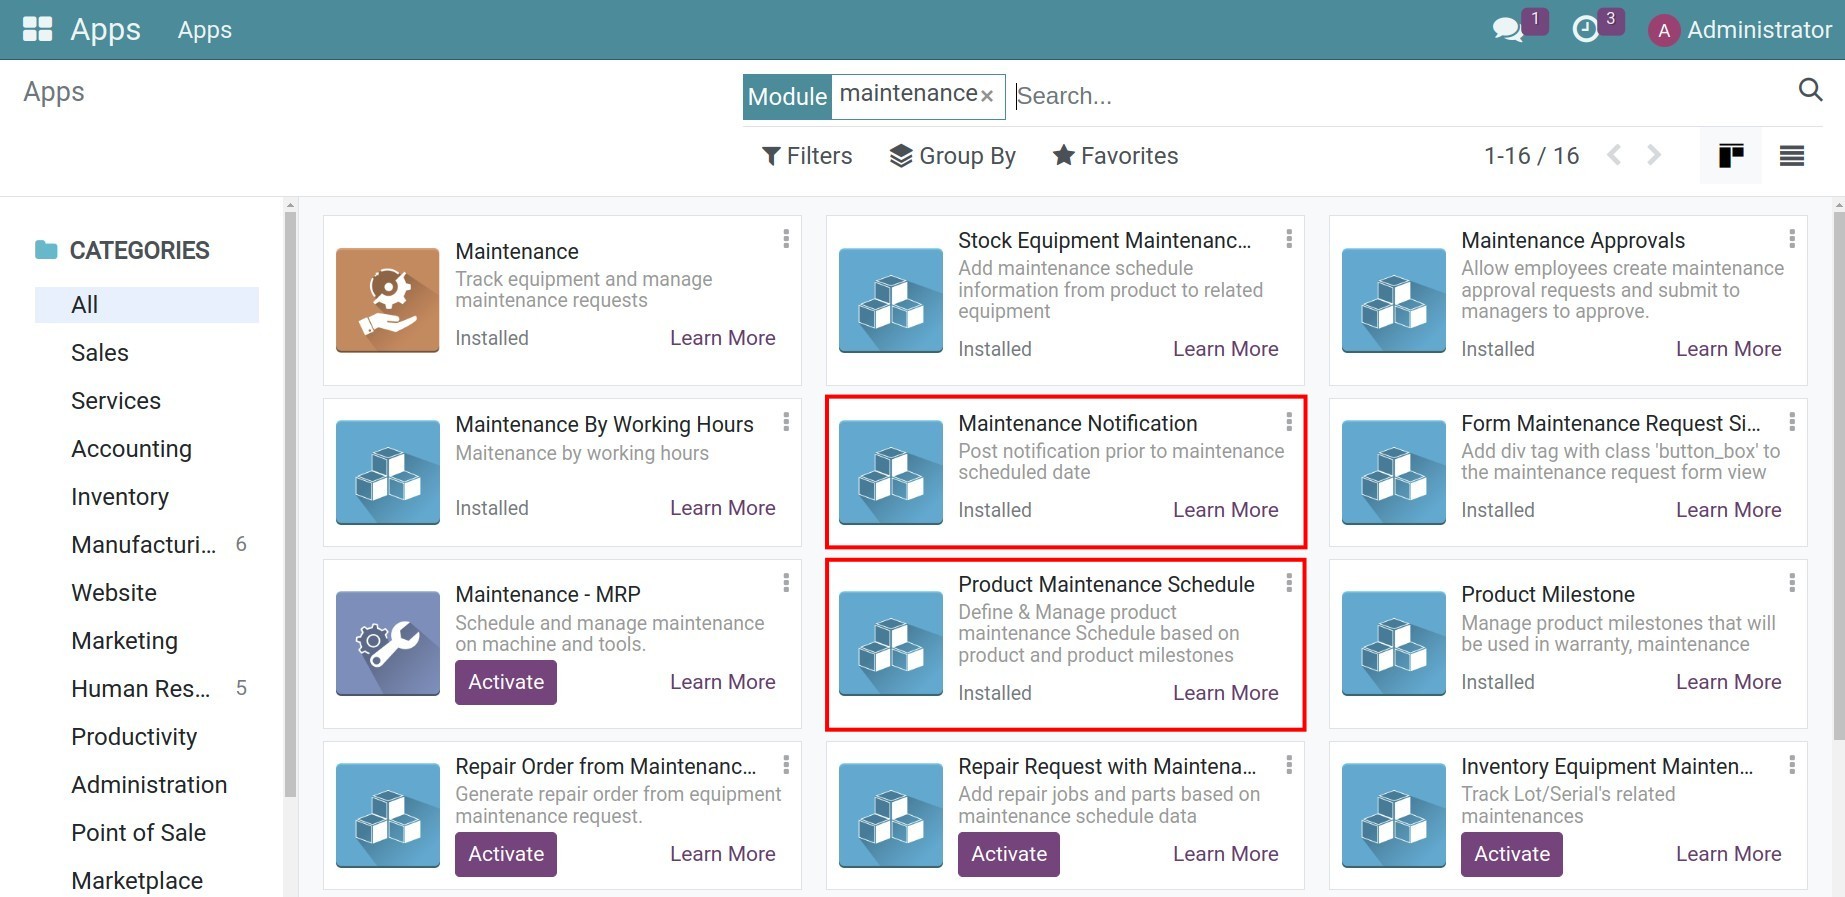
To plan maintenance schedule for each milestones in an equipment’s lifecycle, you will need to activate both the Maintenance Notification (to_maintenance_notification) and the Product Maintenance Schedule (to_product_maintenance_schedule) modules.
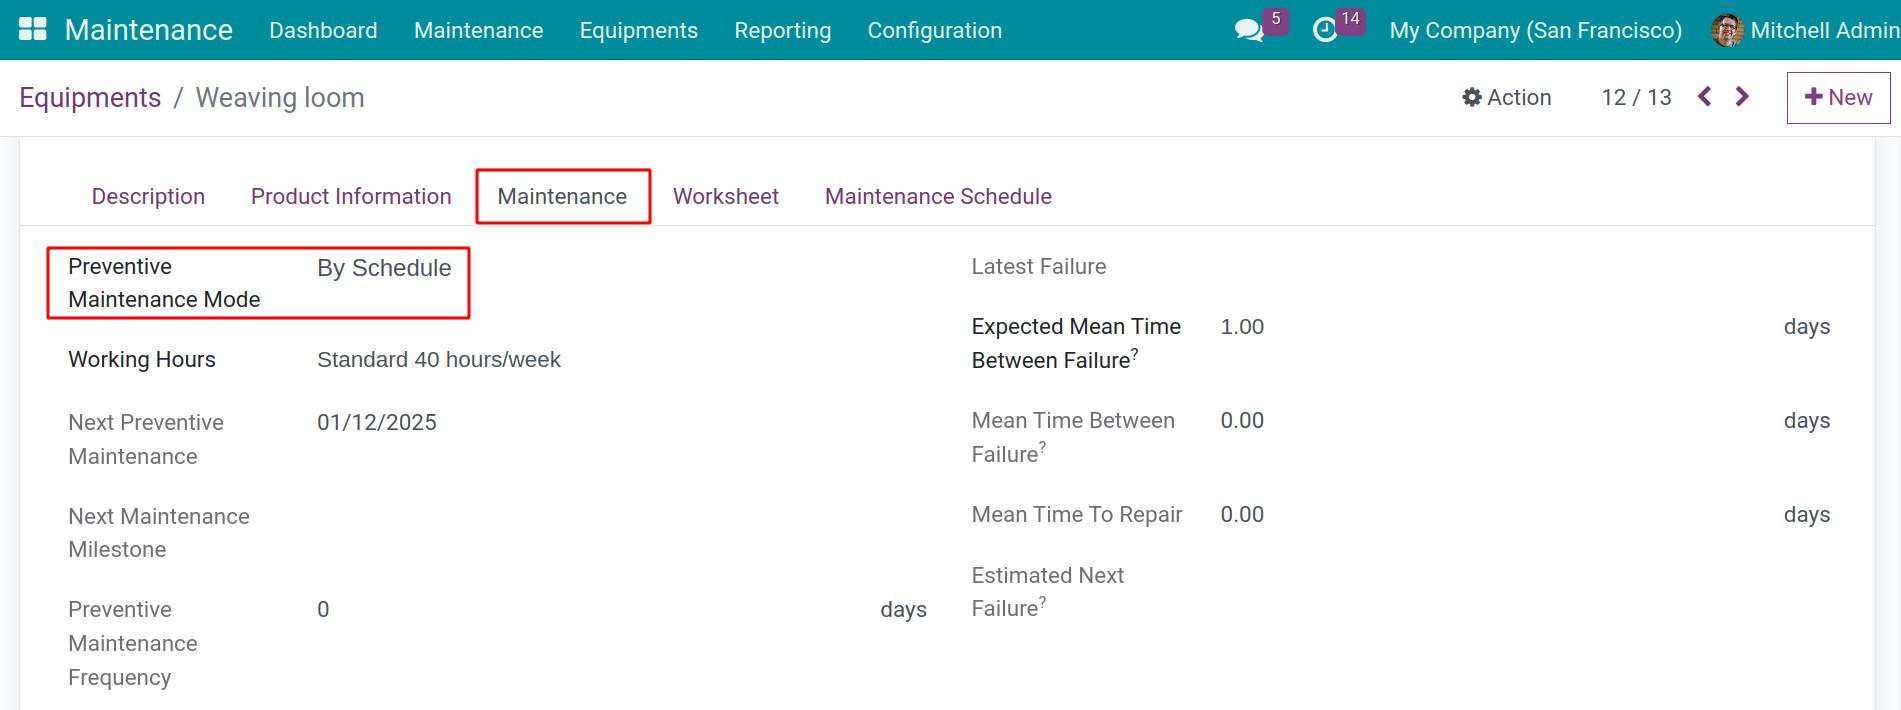
Once done, you can start setting up maintenance schedule for each equipment by clicking on the Maintenance tab on each equipment and select By Schedule on the Preventive Maintenance Mode field.
One of the main characteristics of milestone-based maintenance is the maintenance requests are automatically generated based on usage milestones throughout the product’s lifecycle. To set up, do the following steps:
Configure the working hours schedule applied to an equipment
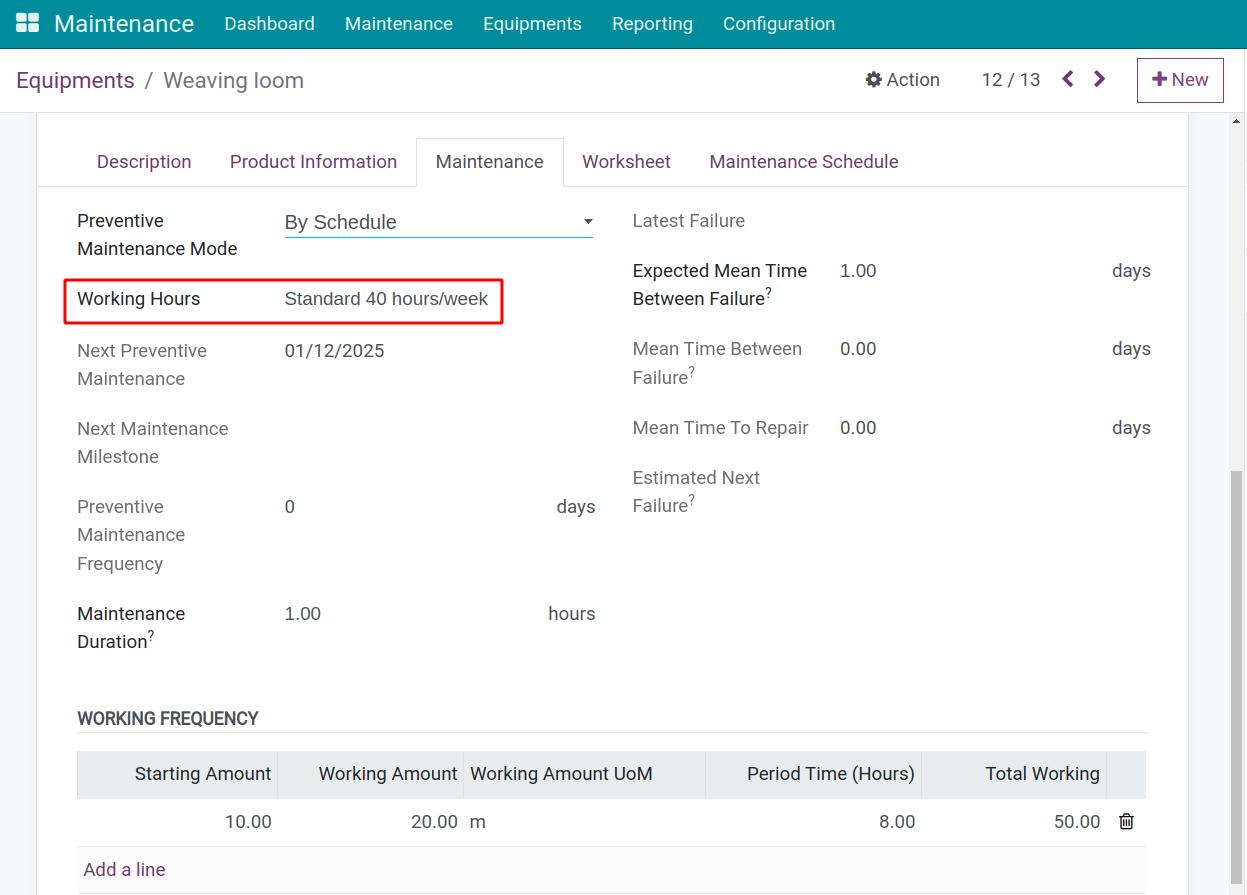
Define working frequency for the equipment
Go to the Maintenance tab, add details to the Working Frequency table.
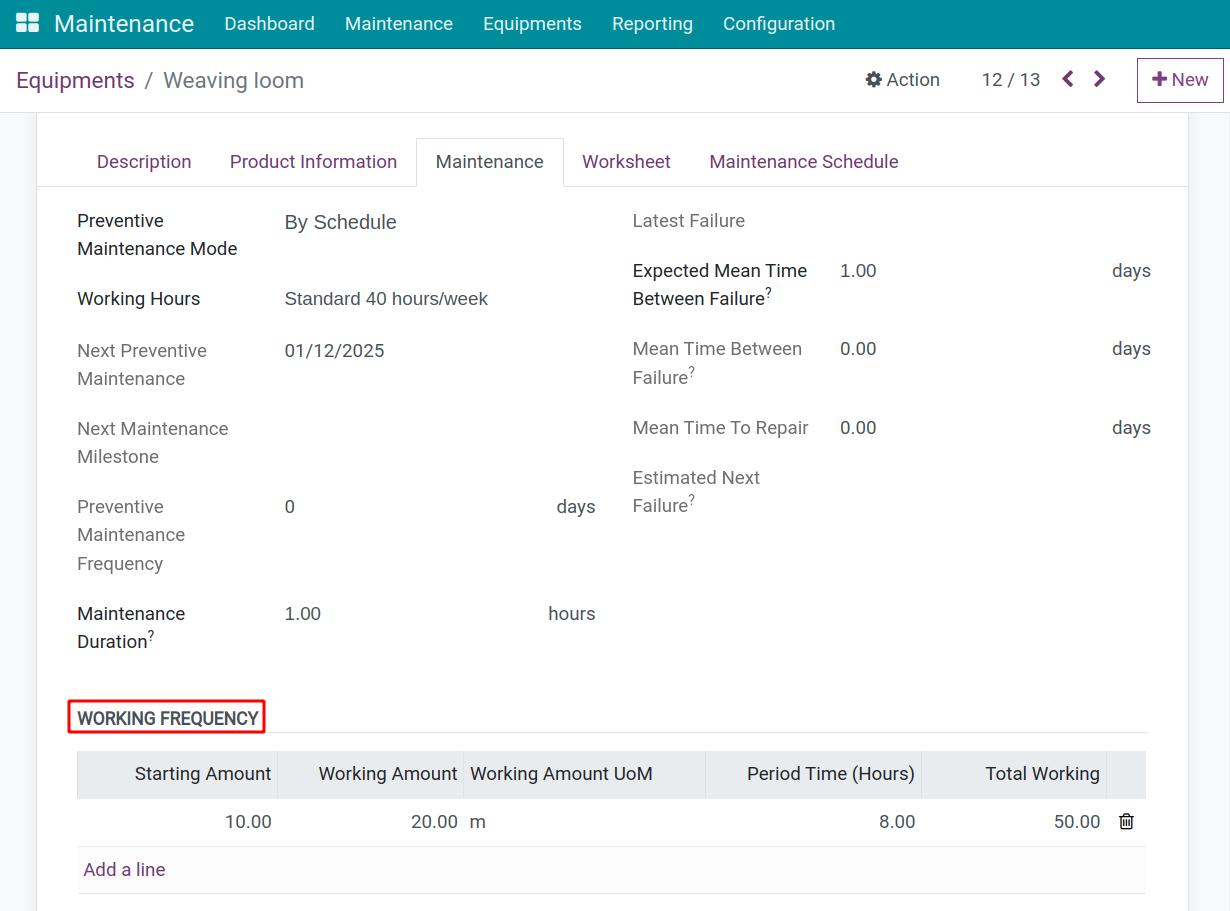
The information provided on this table will help equipment managers track the operational status of machinery and equipment based on the theoretical usage frequency of the equipment (e.g., a weaving machine produces 20 meters of fabric in 5 hour). Based on the input, the system will calculate the total workload or total output produced by the equipment up to this moment, starting from the Assigned Date of the equipment.
The total workload of an equipment up to the current moment is calculated as follows:

In which:
Starting Amount: When you purchase a used equipment for your company, this represents the amount of work the equipment has previously performed. If the equipment has never been used, enter the number 0.
Working Amount: The workload that this equipment performs within a specific period of time. For example: Produce 20 meters of fabric in 1 hour.
Working Amount UoM: The unit to measure the work.
Period Time (Hours): Define a time period that will be used as measurement for the working frequency. In this example, the period is 1 hour. But if your machine can produce 20 meters of fabric in 8 hours, then add 8 here.
Total Working: Total workload performed by the equipment up until now.
Configure maintenance schedules for the equipment
Go to the Maintenance Schedule tab and click Add a line.
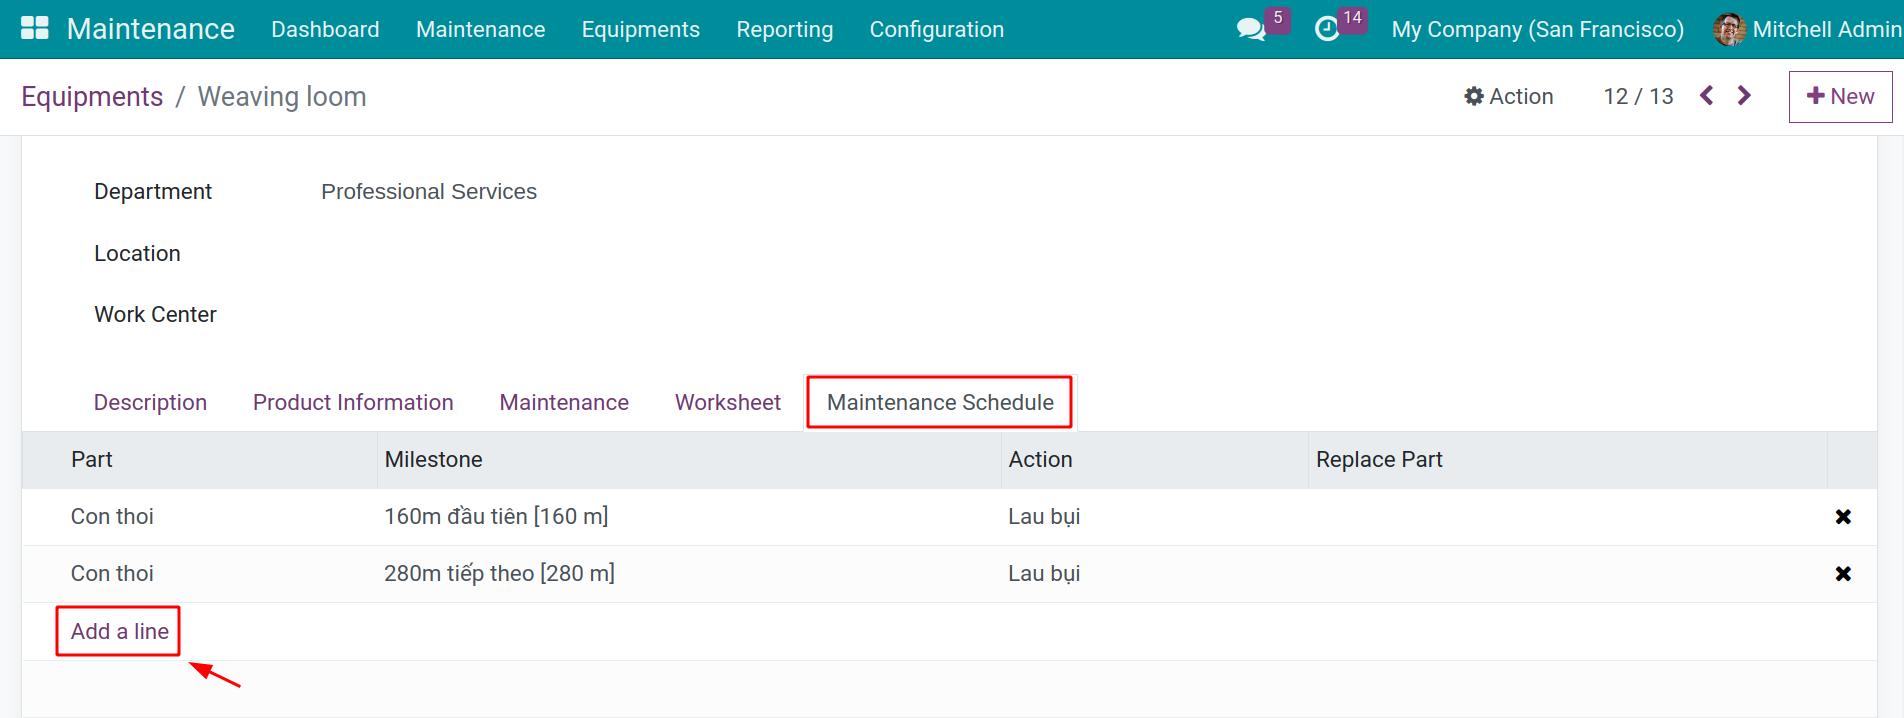
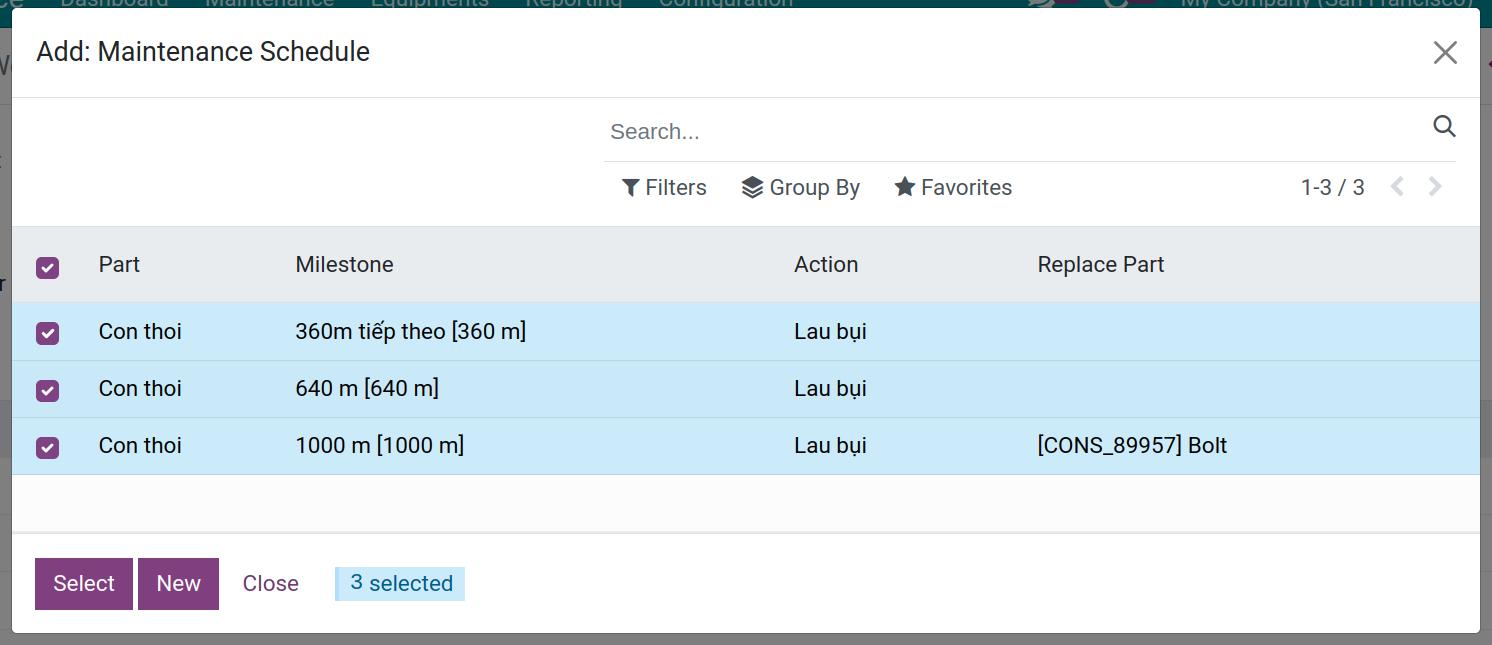
On the Maintenance Schedule pop-up window, select available maintenance milestones or press New to create a new one.
In case you need to create a new maintenance schedule, on the creation widget, add the following information:
Part: Select the part you want to maintain.
Milestone: Select or create the milestone when the equipment needs to be maintained (e.g. 24 months, 100 hours, or 100km, etc.).
Action: The action that the maintenance employee needs to do when the equipment reaches this milestone.
Replace Part: Select the replace part for the Part above (optional).
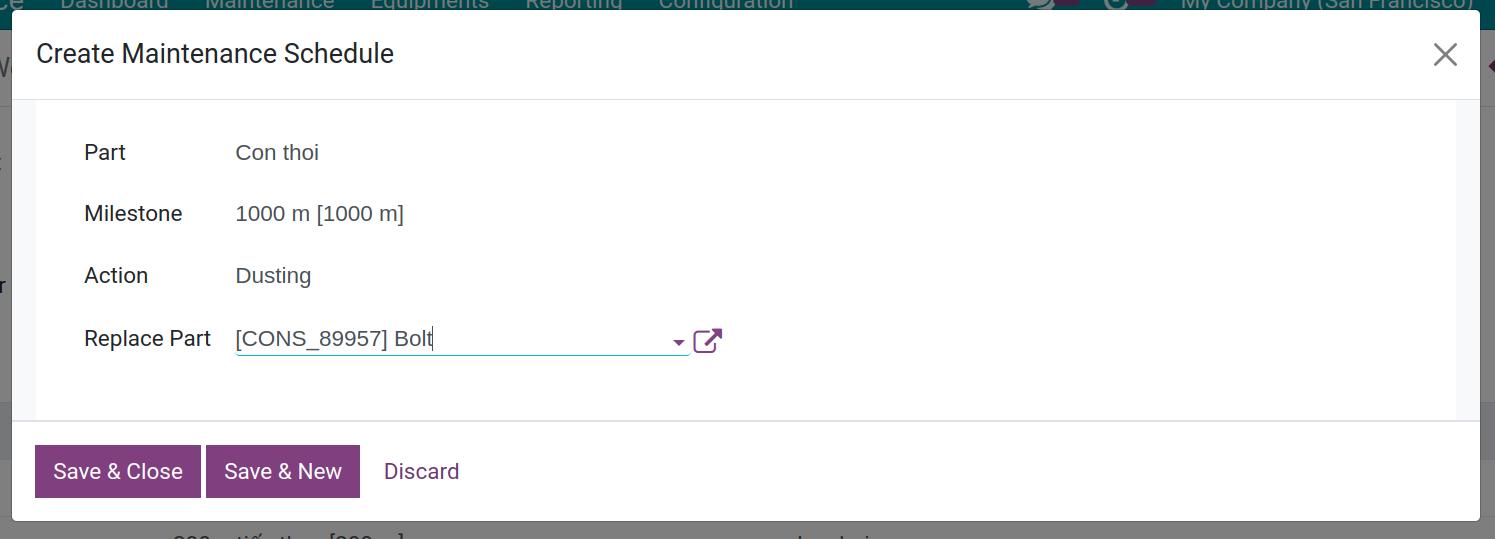
When you finish, click Save & Close to close or Save & New to create a new schedule.
Once finished with the settings, the system will auto-calculate the next preventive maintenance date based on the milestones you create and create the corresponding maintenance requests.
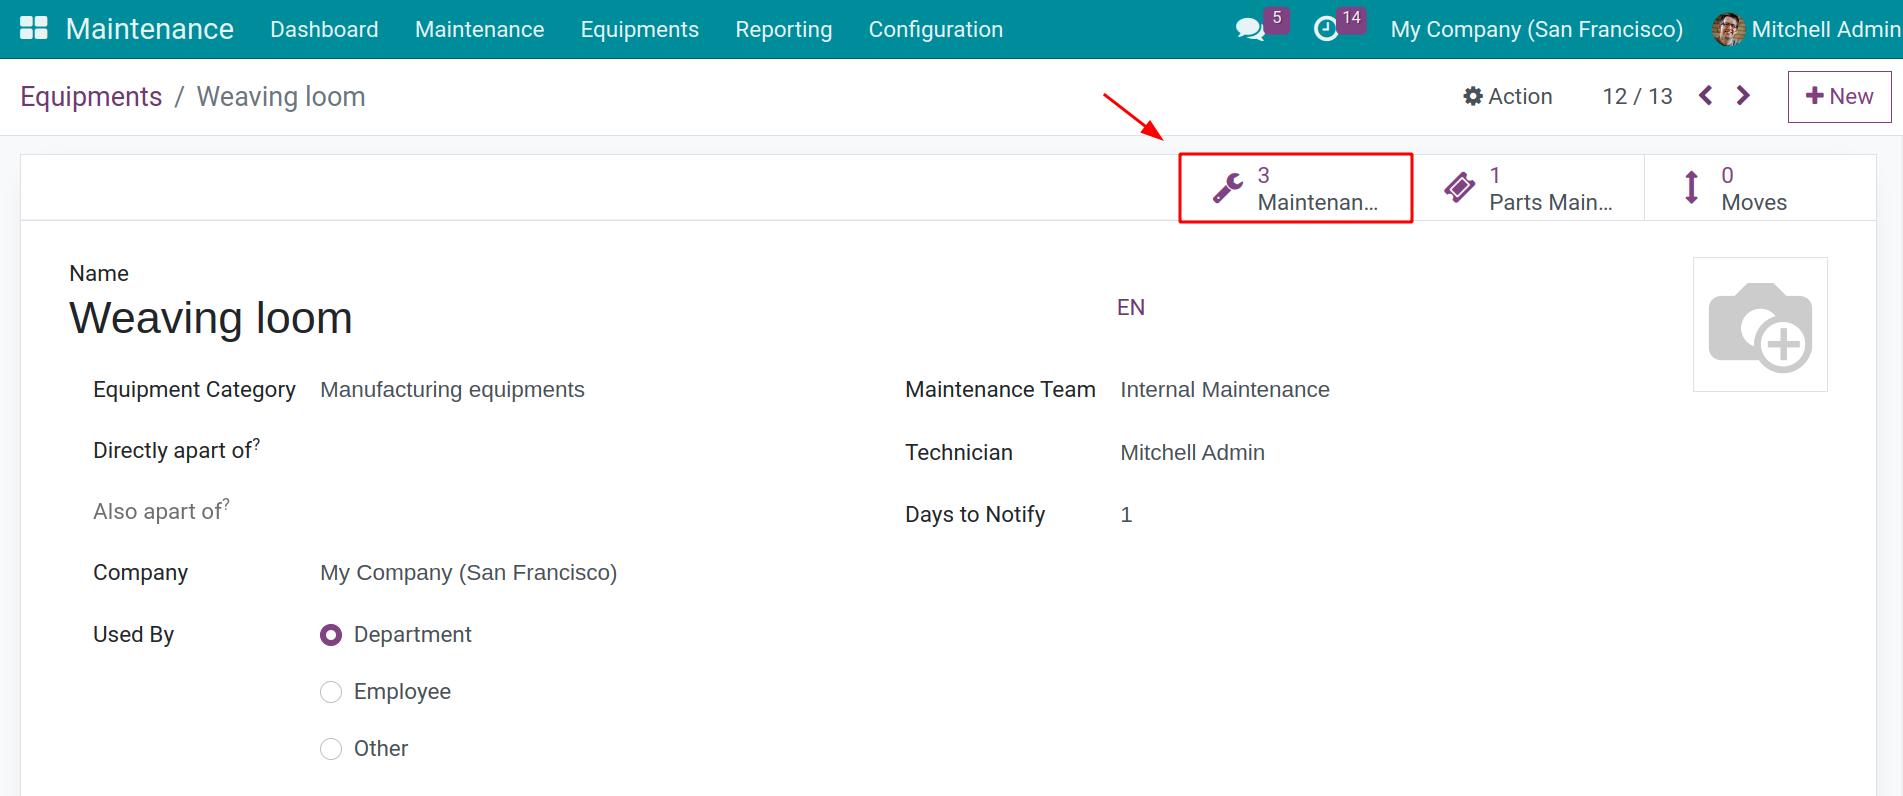
Tip
User with Administrator access rights in the Maintenance module can create list of milestones by navigating to menu .
Planning maintenance on working hours
In order to configure maintenance schedule based on working hours of each equipment, go to Apps and activate the Maintenance By Working Hours (to_maintenance_by_working_hours) modules.

Once installed, on the Maintenance tab of each equipment, you will now have By Hour as one of the options available at the Preventive Maintenance Mode field.
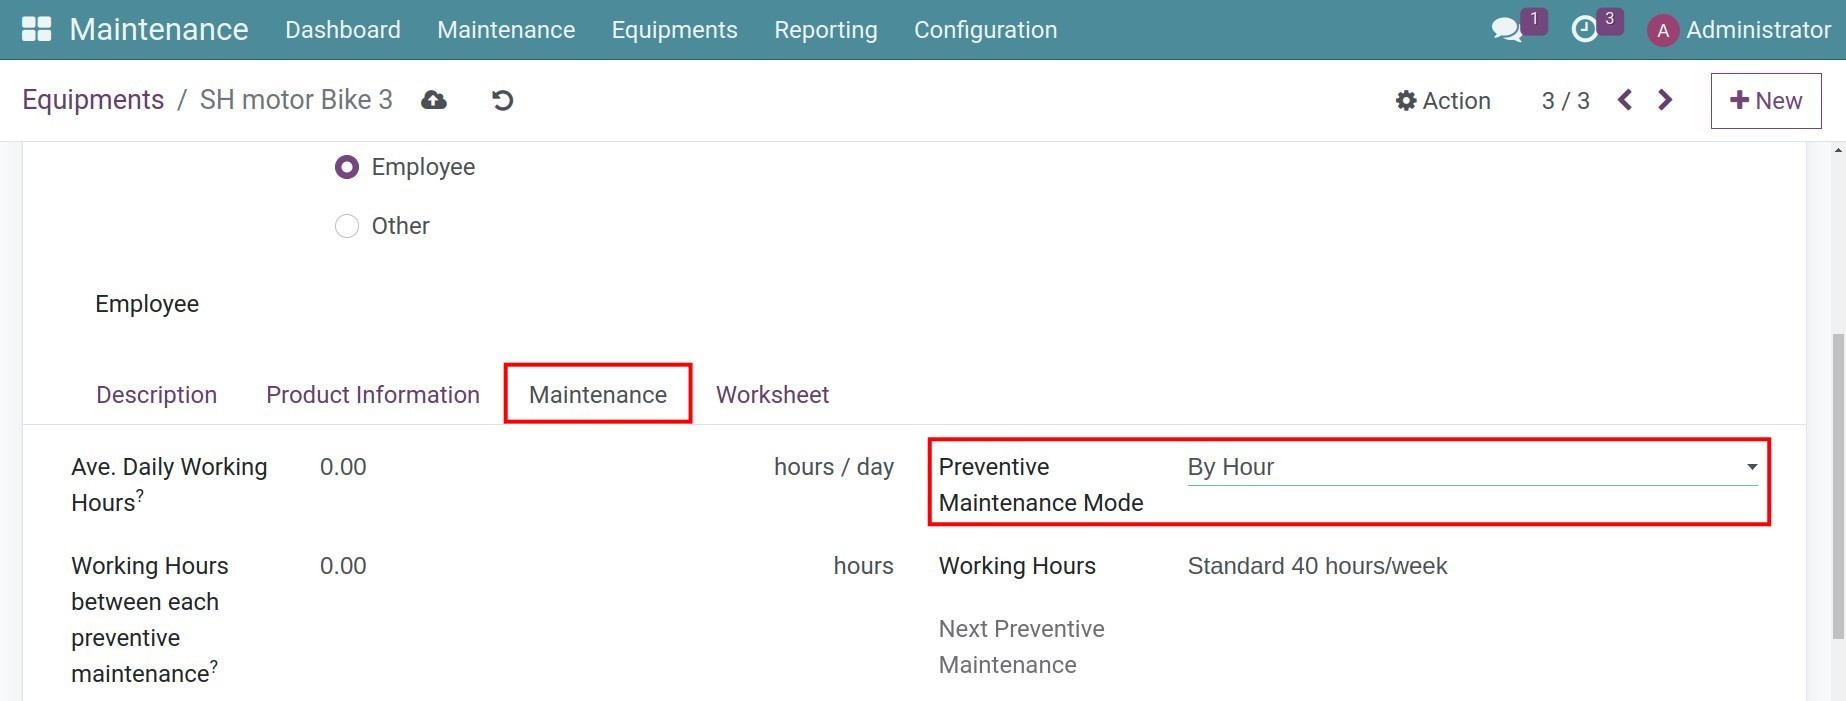
From here, set up the following maintenance information of your equipment:
Ave. Daily Working Hours: The average daily working hour of the equipment.
Working Hours between each preventive maintenance: Number of working hours between each preventive maintenance.
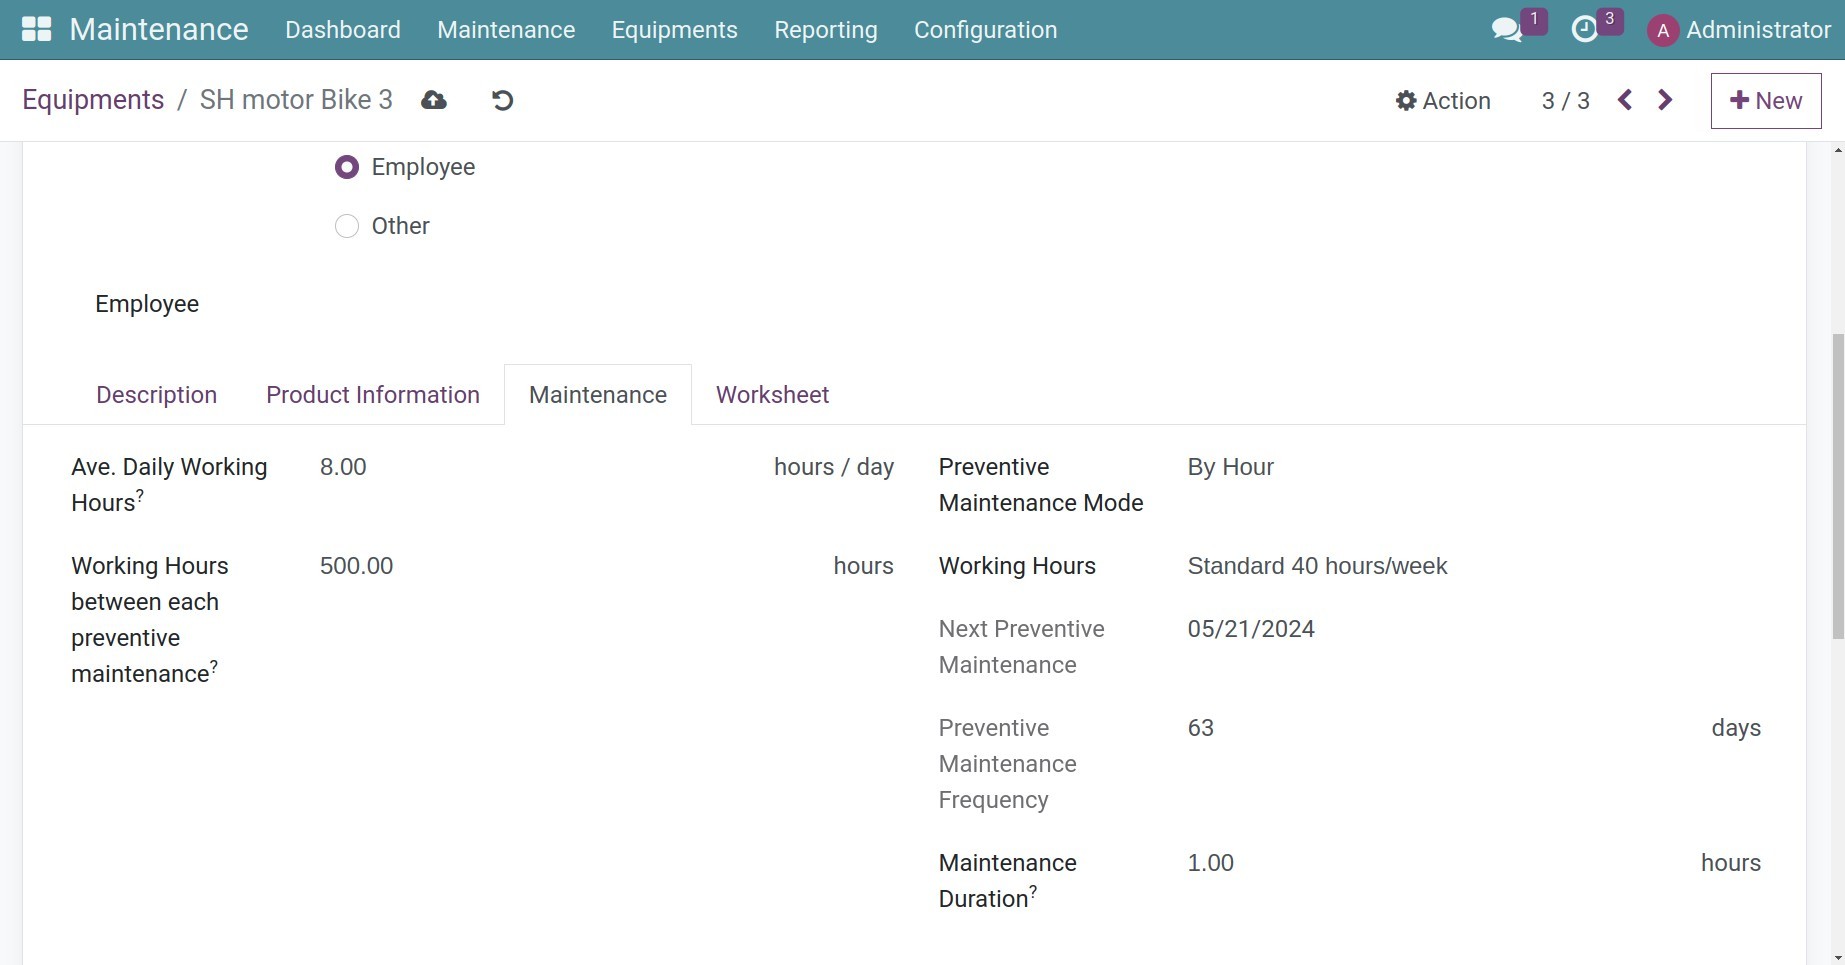
After you set up, the system will auto-calculate the next preventive maintenance date based on the working hours you set up and create the corresponding maintenance requests. The next maintenance date is also calculated and updated on the Next Preventive Maintenance field.
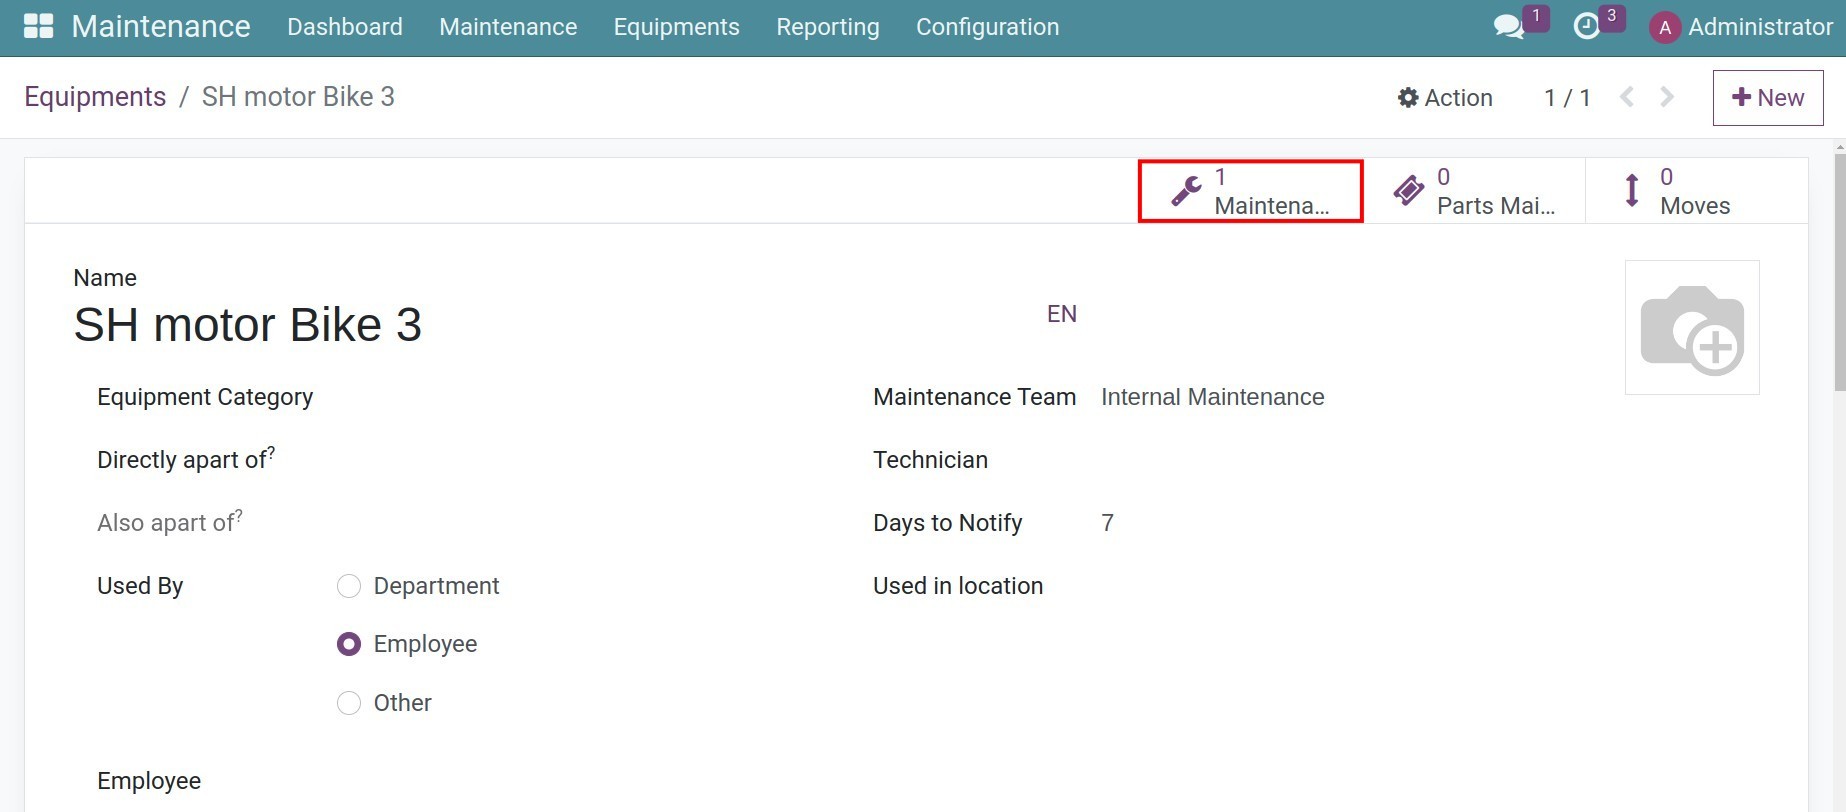
Create a maintenance request
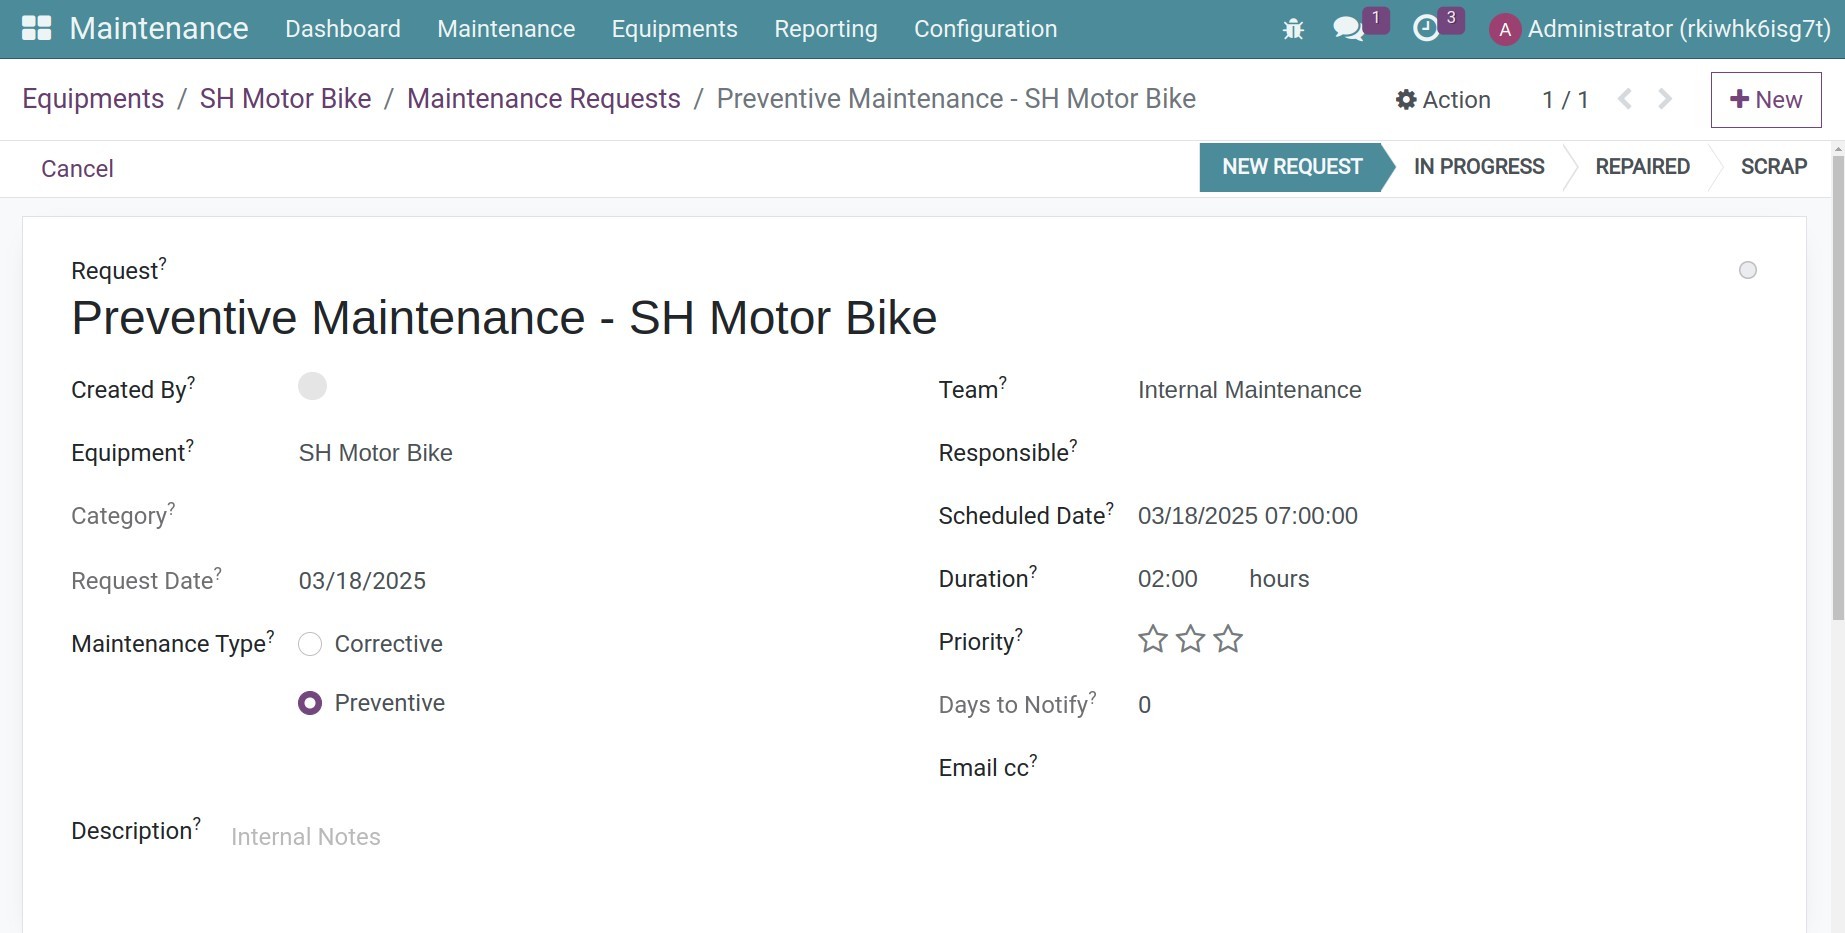
Manual creation is usually applied when you need to troubleshoot an equipment malfunction or a request for maintenance outside of scheduled inspection. Navigate to , press +New to generate a new request.
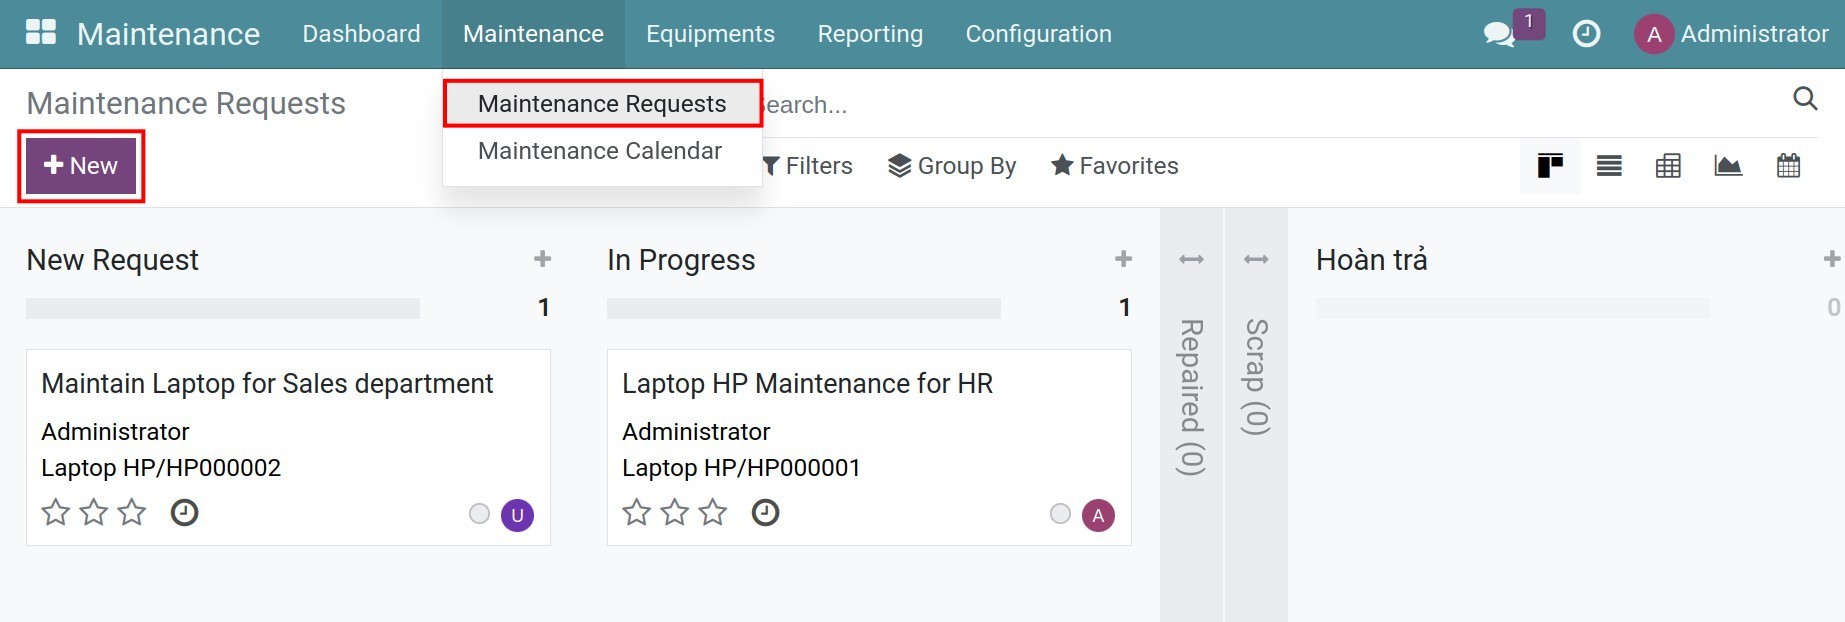
From here, you need to add the following information:
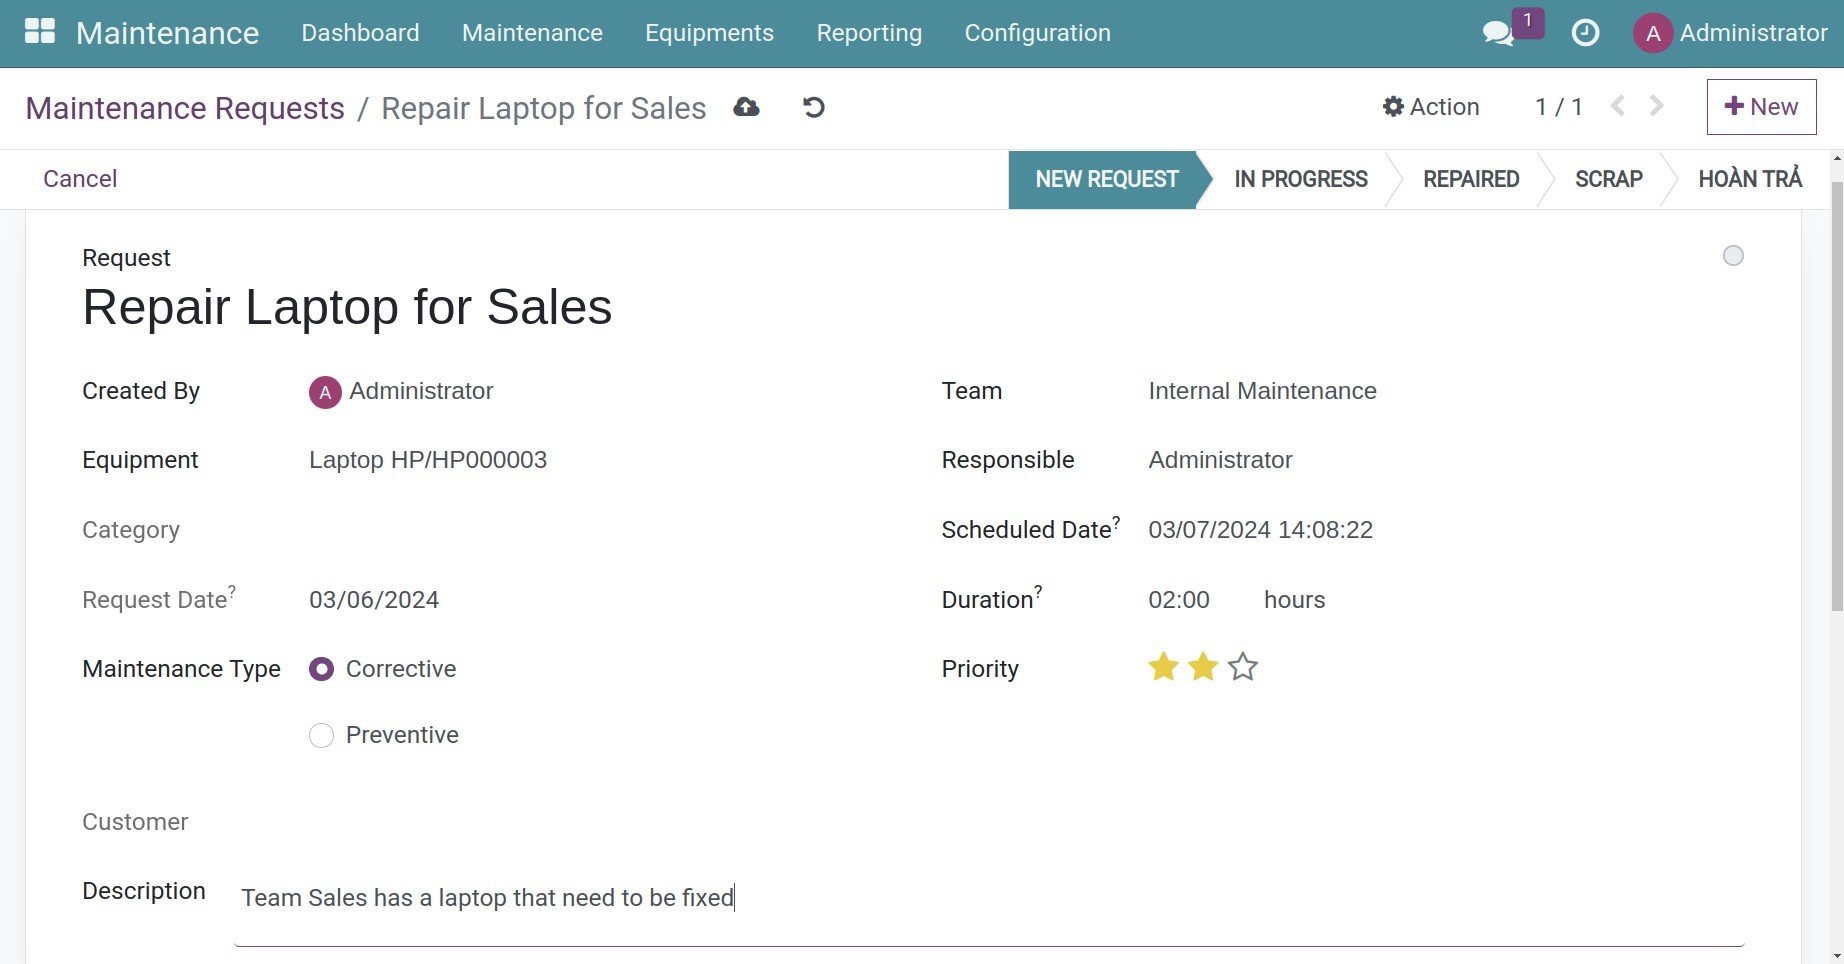
Title: A summary of the maintenance information.
Created By: By default, the system displays the name of this request creator. However, you can change this information if you are creating a maintenance request on behalf of another employee.
Equipment: Select the equipment that needs to be maintained.
Request Date: Record the maintenance request creation date.
Maintenance Type:
Corrective: Use this maintenance type when you need to troubleshoot equipment malfunction.
Preventive: Select this type when you need to perform scheduled/random maintenance to ensure that the equipment does not have any issues during operation.
Team: Select a specific Maintenance team to take care of this maintenance request.
Responsible: The technician who will perform the maintenance.
Scheduled Date: The expected maintenance date.
Duration: The expected duration of the maintenance, measured by hours.
Priority: The urgency of this maintenance request. Currently, the priority is measured by stars, ascending from 0 to 3 stars, which are interpreted as Very low, Low, Medium, High respectively.
Internal Notes: Record some important information to keep in mind while performing the maintenance on this equipment.
Manage maintenance requests
Following maintenance requests
To follow up on existing maintenance requests, navigate to .

All the maintenance requests are displayed here in a calendar form. You can change between the day/week/month/year calendar view or see the maintenance schedule of the technician in charge.
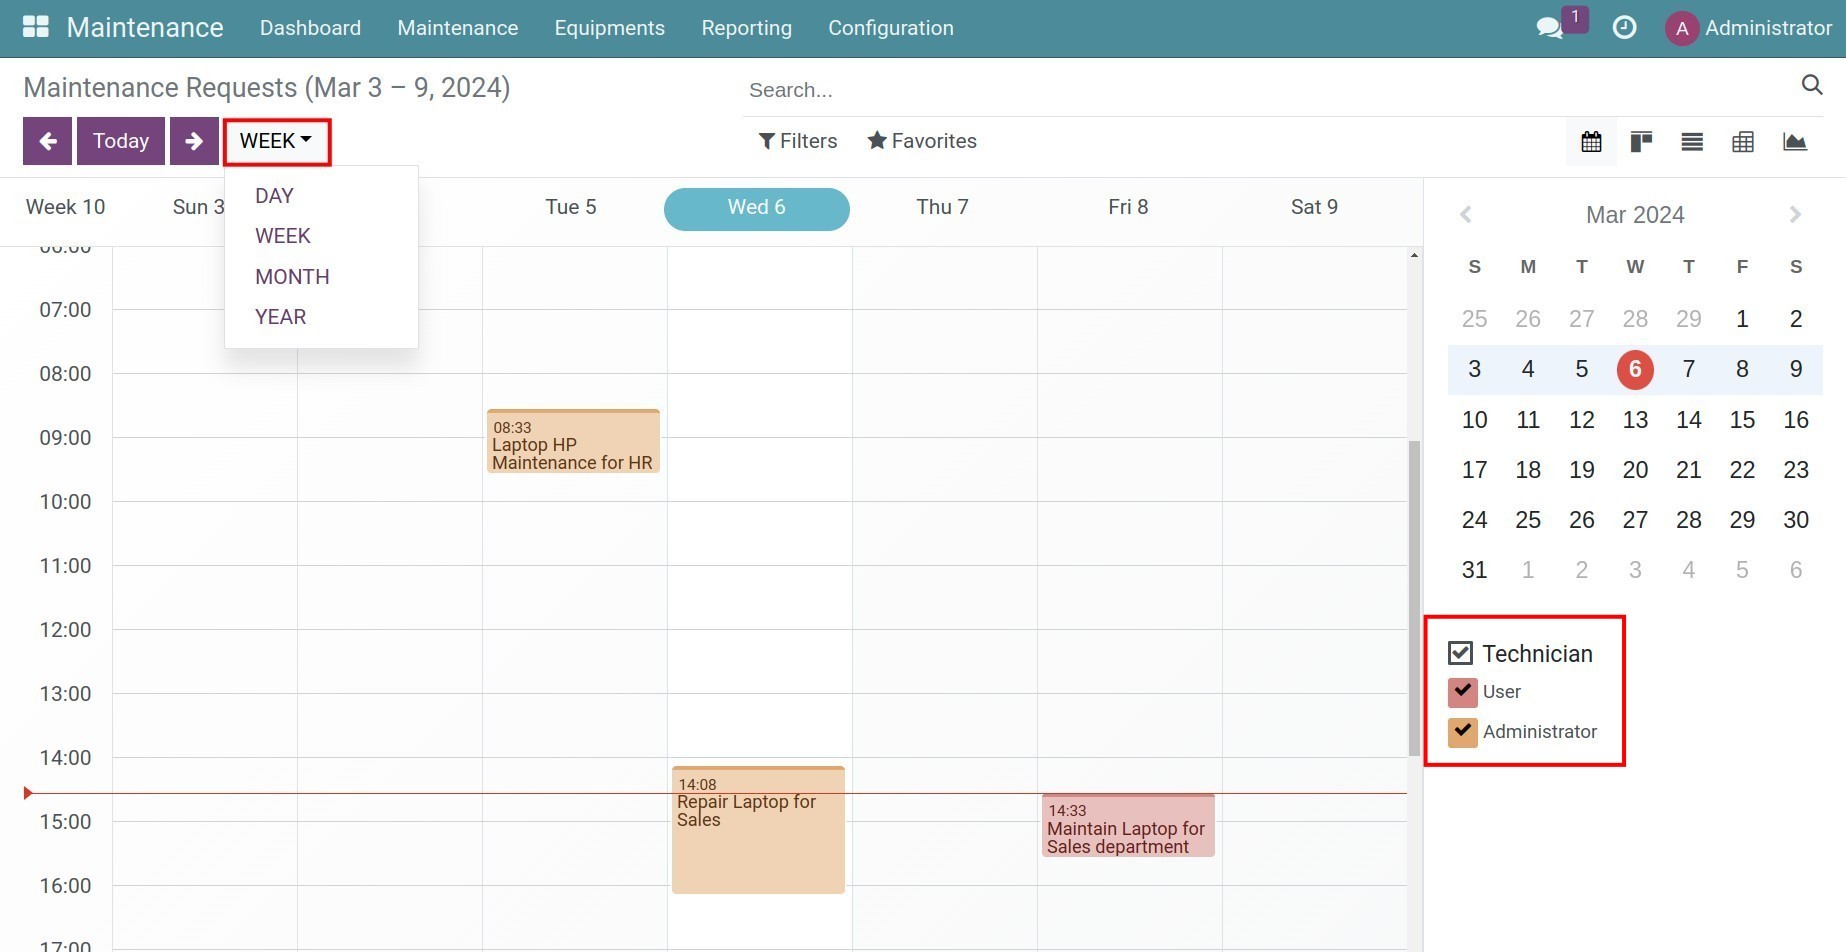
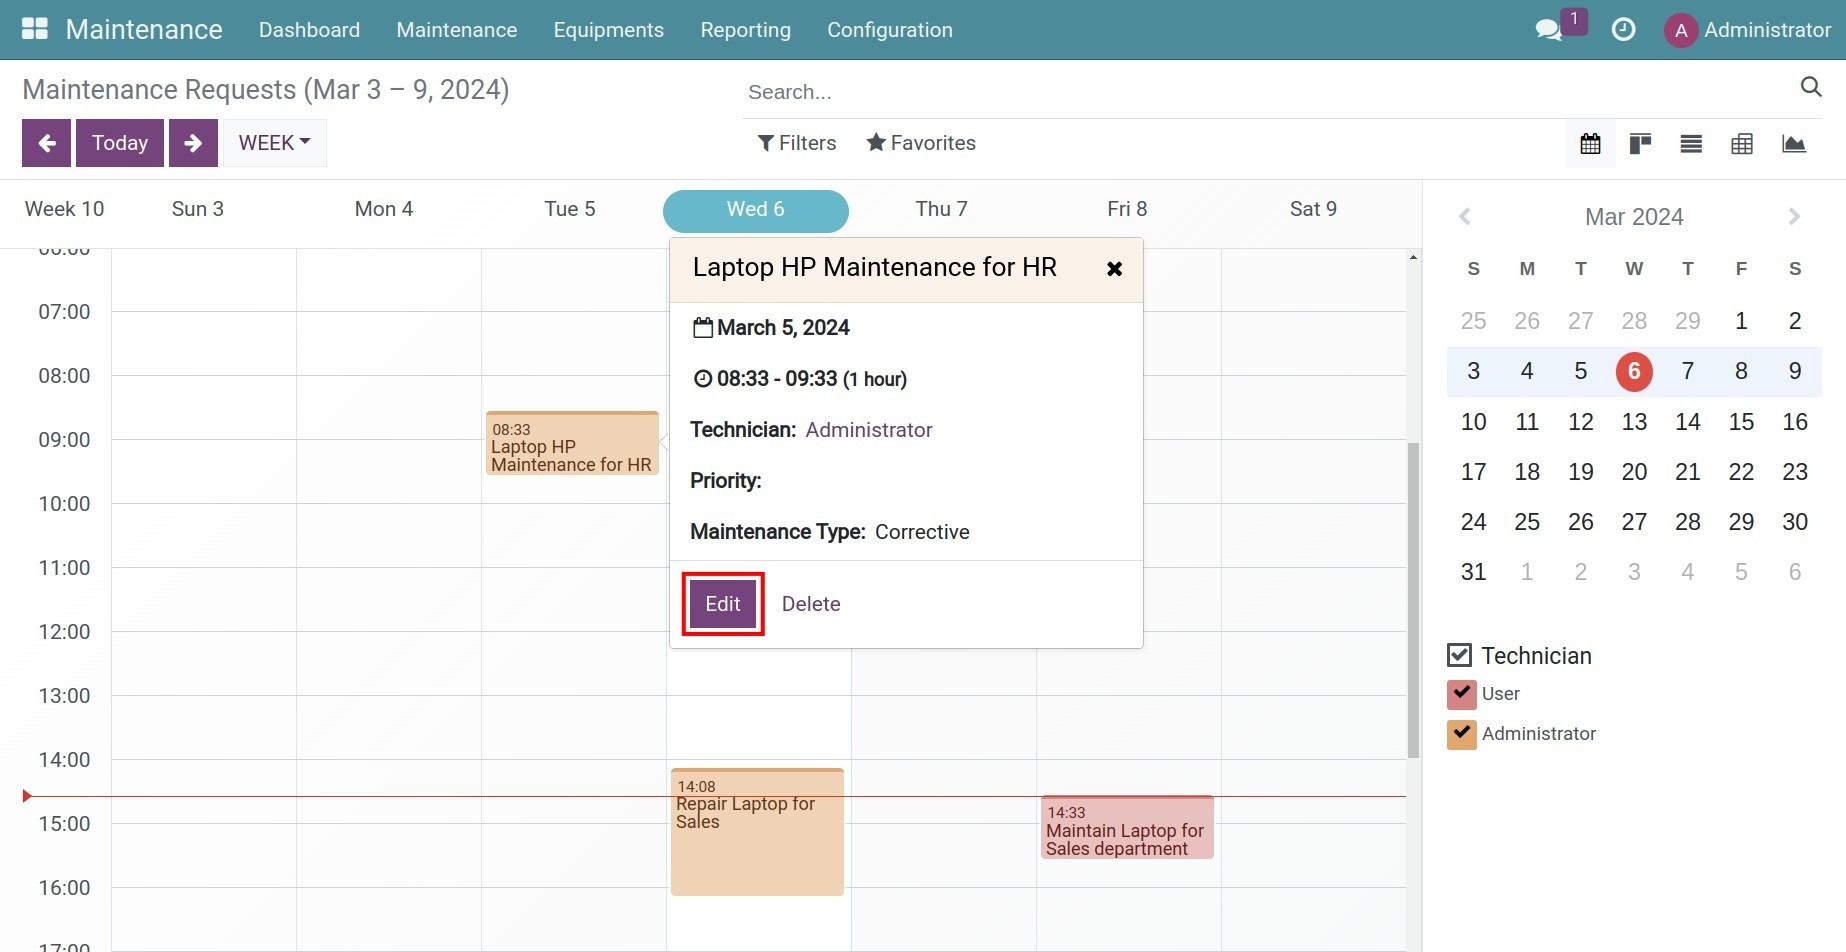
Click on each time slot to view the summary information of the maintenance request, including time, technician name, priority, and maintenance type. To read more details of a certain request, press Edit on the maintenance schedule from the calendar.
Change maintenance request stage
At the maintenance time, the technician in charge will access the assigned request and change this request stage.
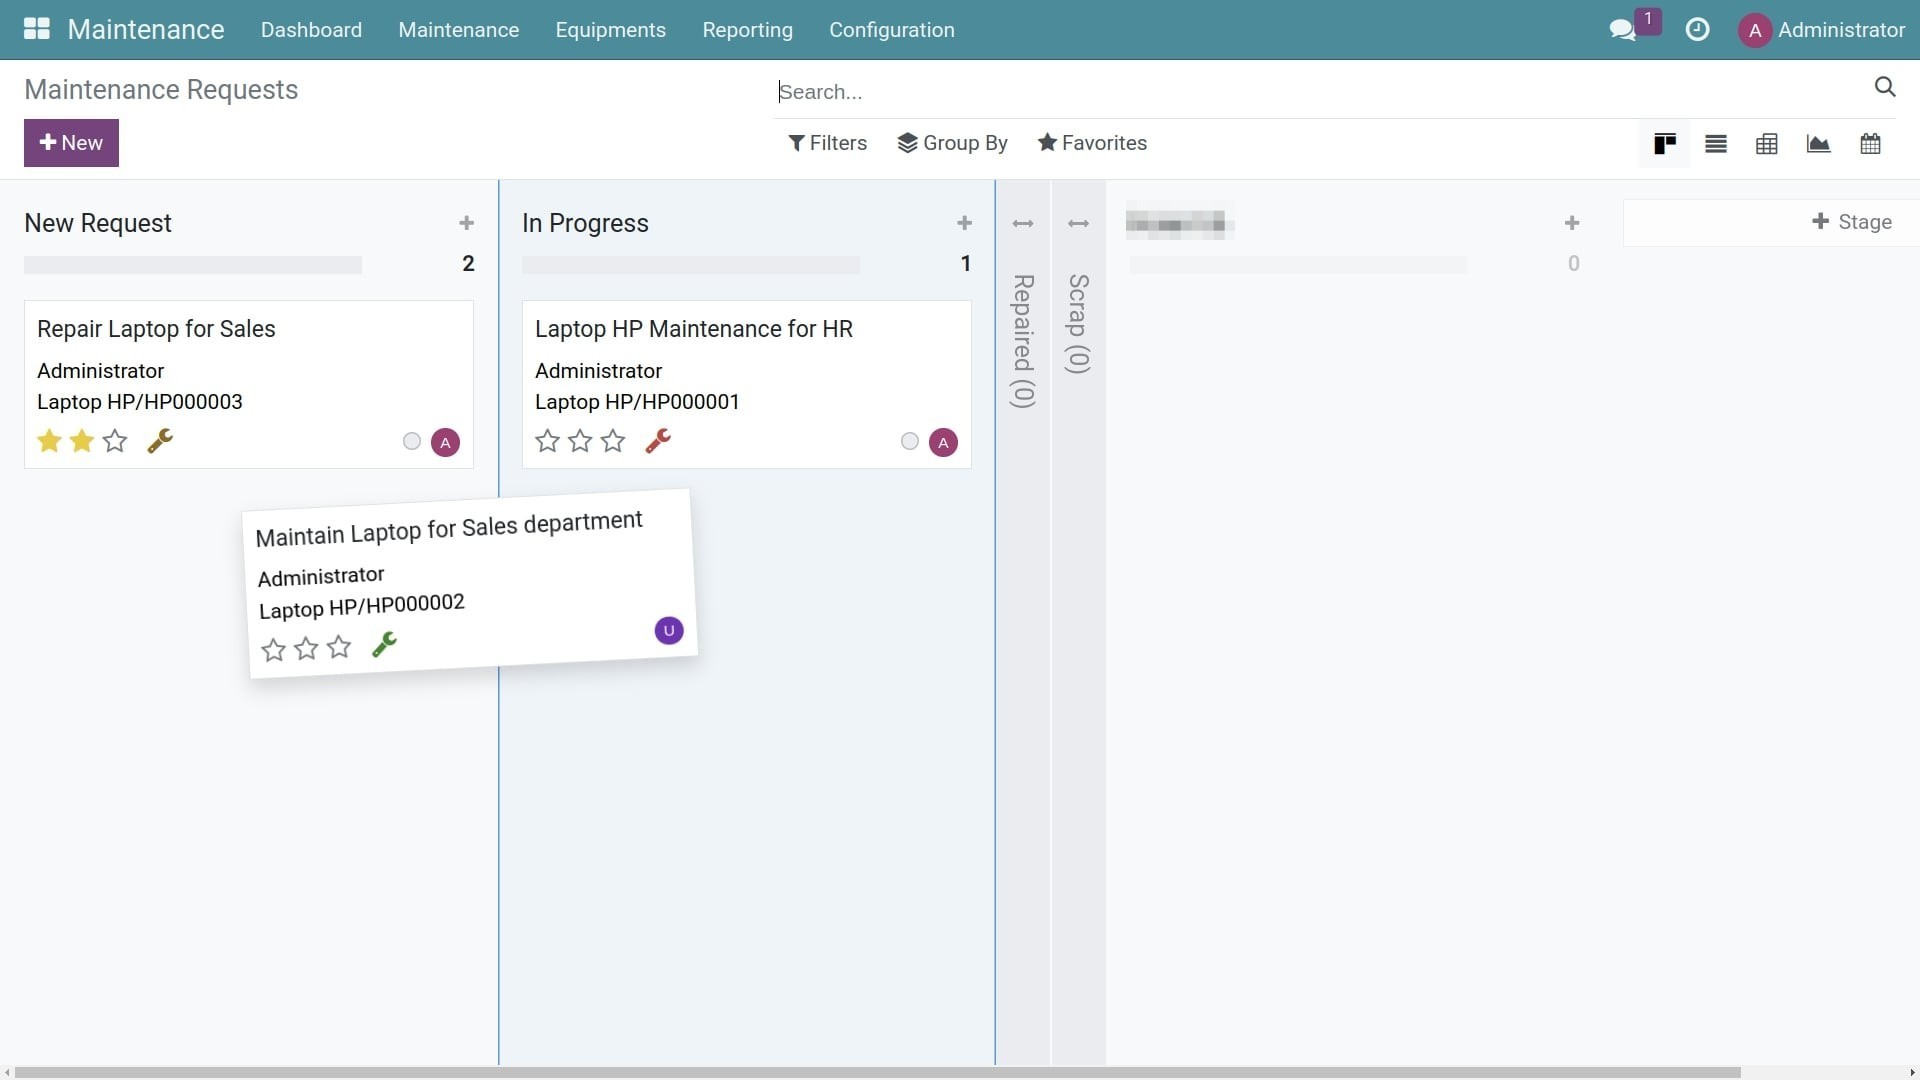
Navigate to to see all the existing maintenance requests in a kanban view. To change a request stage, you can drag and drop the request card to the respective stage.
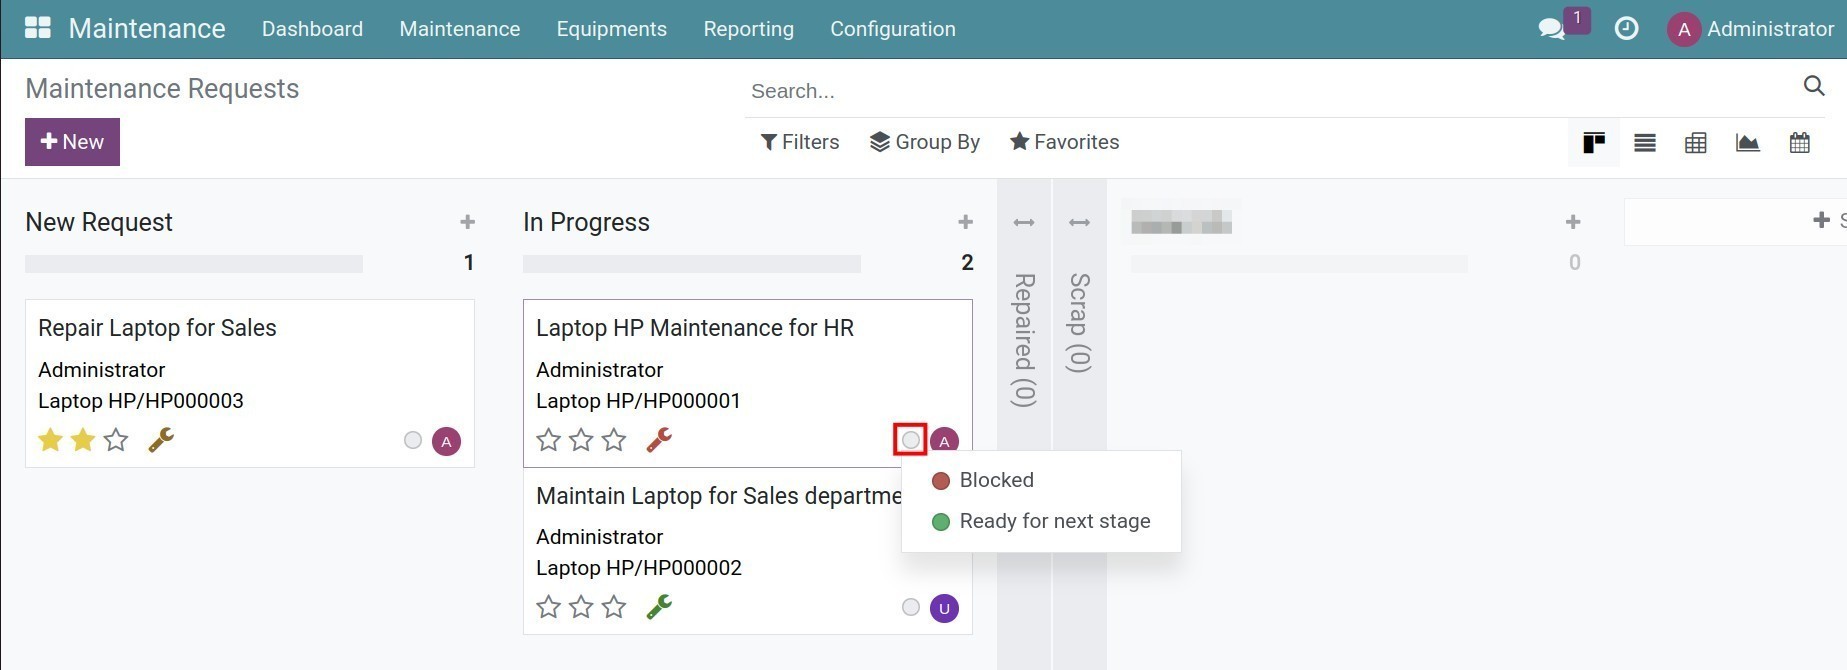
In each stage, you can block or notify that a maintenance request is ready for the next stage by clicking on the round button on the top right of the screen.
See also
Related articles
Optional module