How to organize your events professionally
Depending on the business purpose and strategy, companies organize their events.
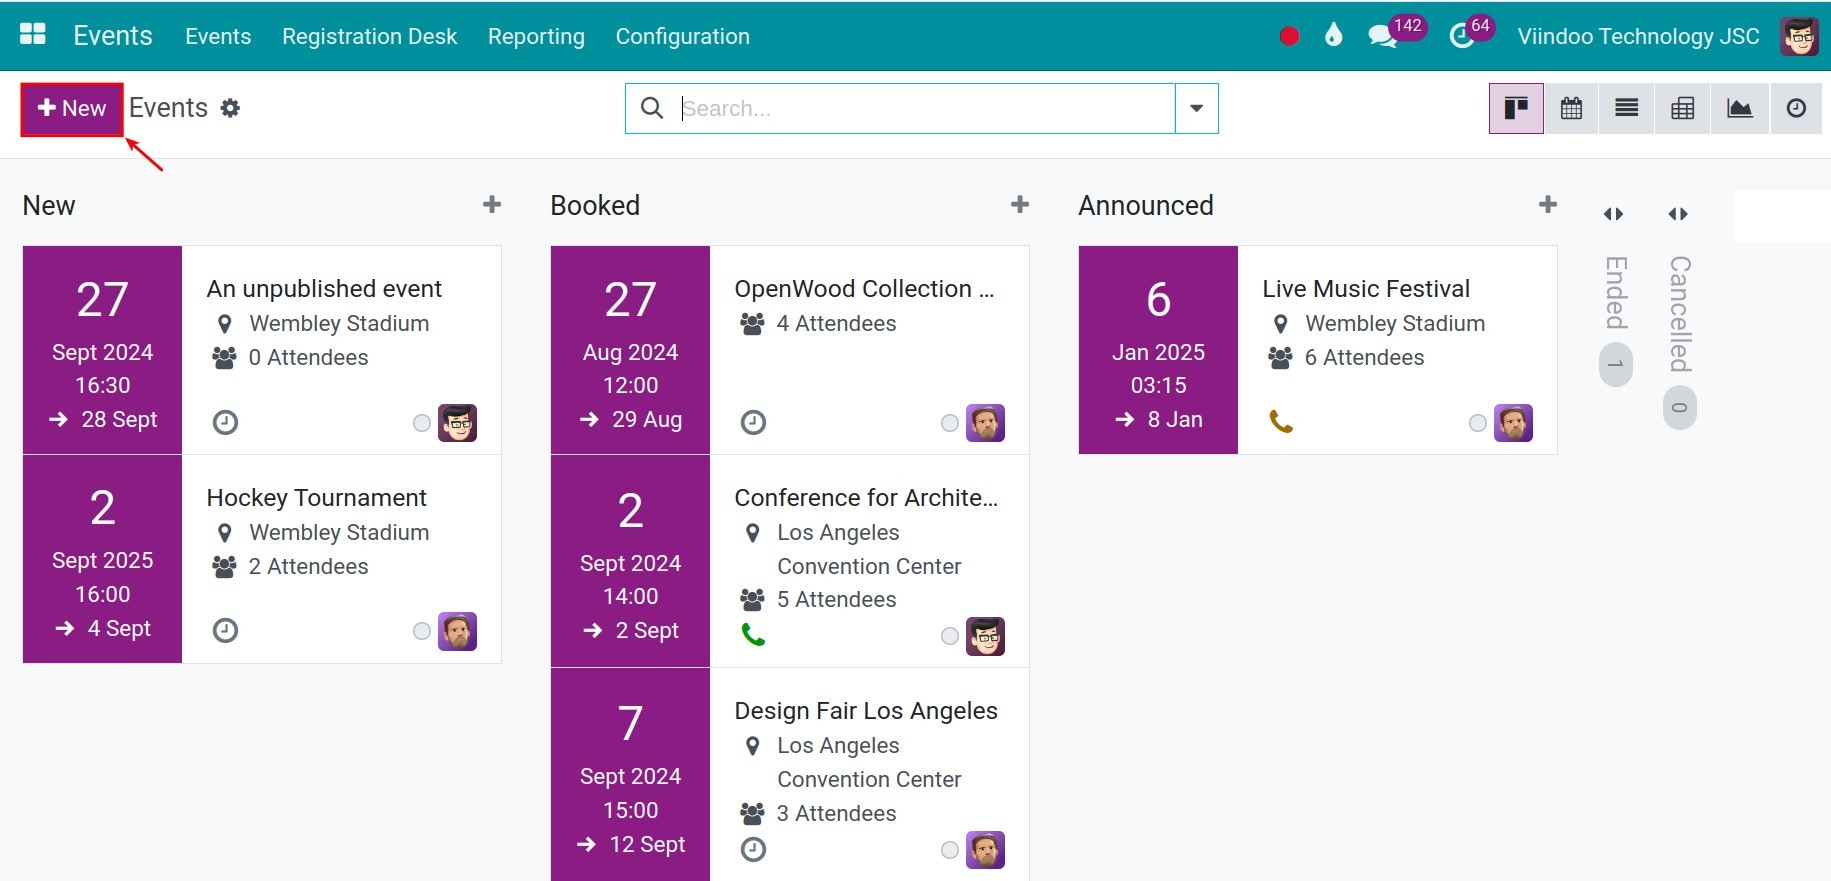
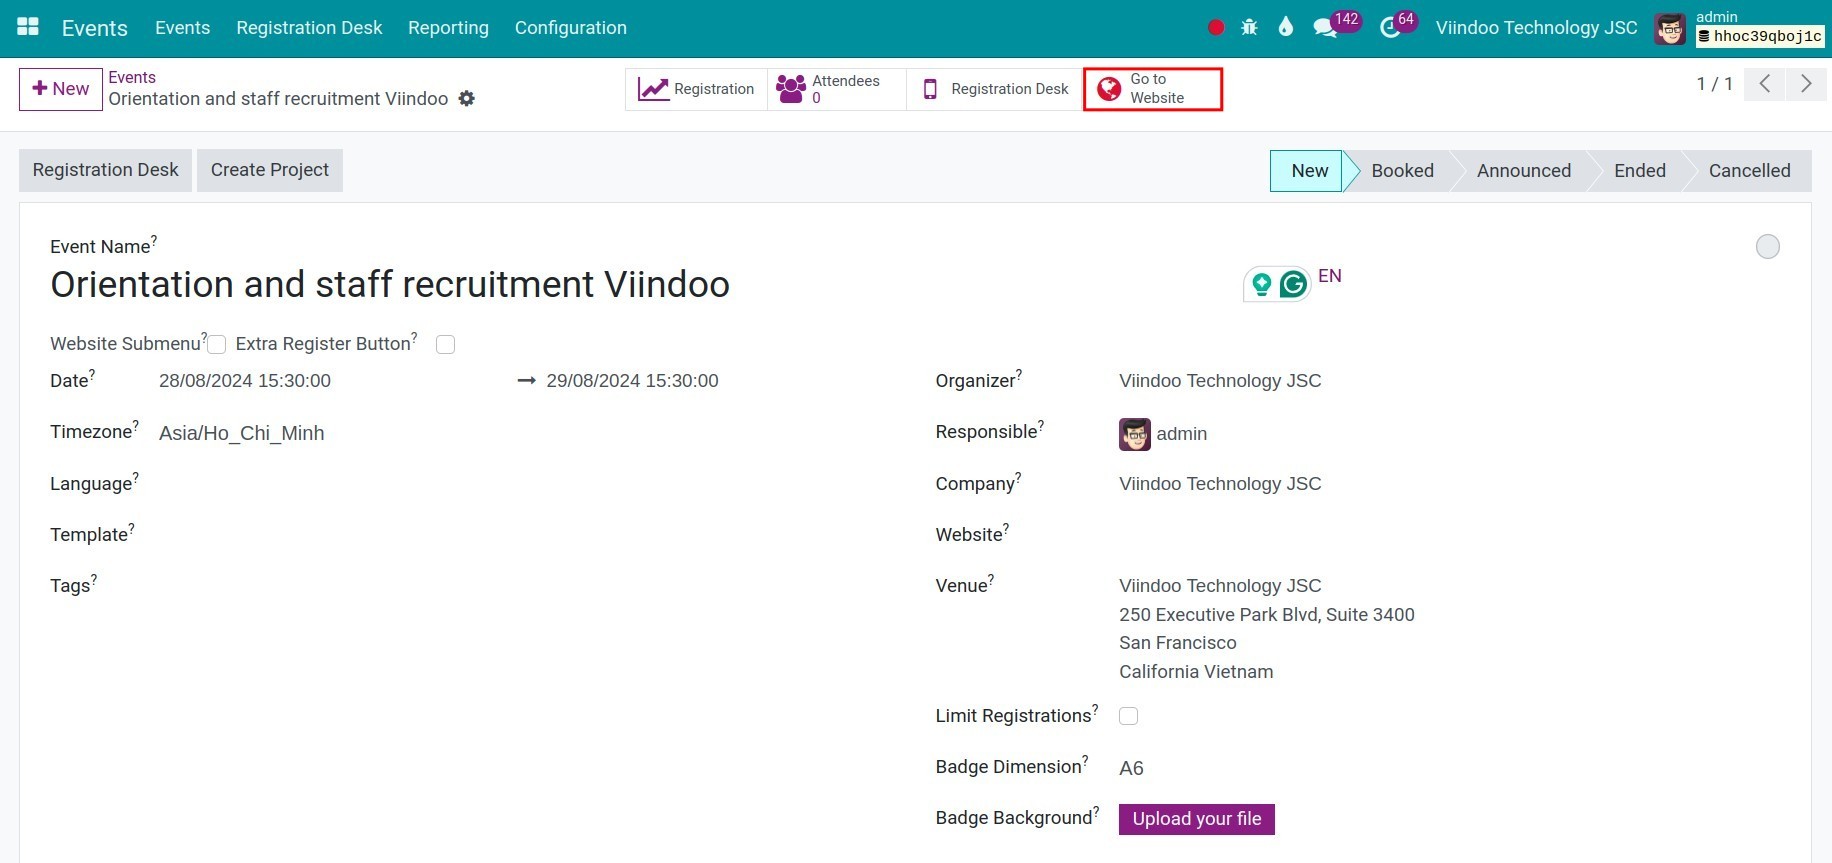
In the overview when navigating to Events module, the users could see all events that are happening or have been completed. Click + New to create a new event.
Note
In order to see all the fields when you create a new event, you should activate the Developer Mode feature.
Enter the necessary information of the events:
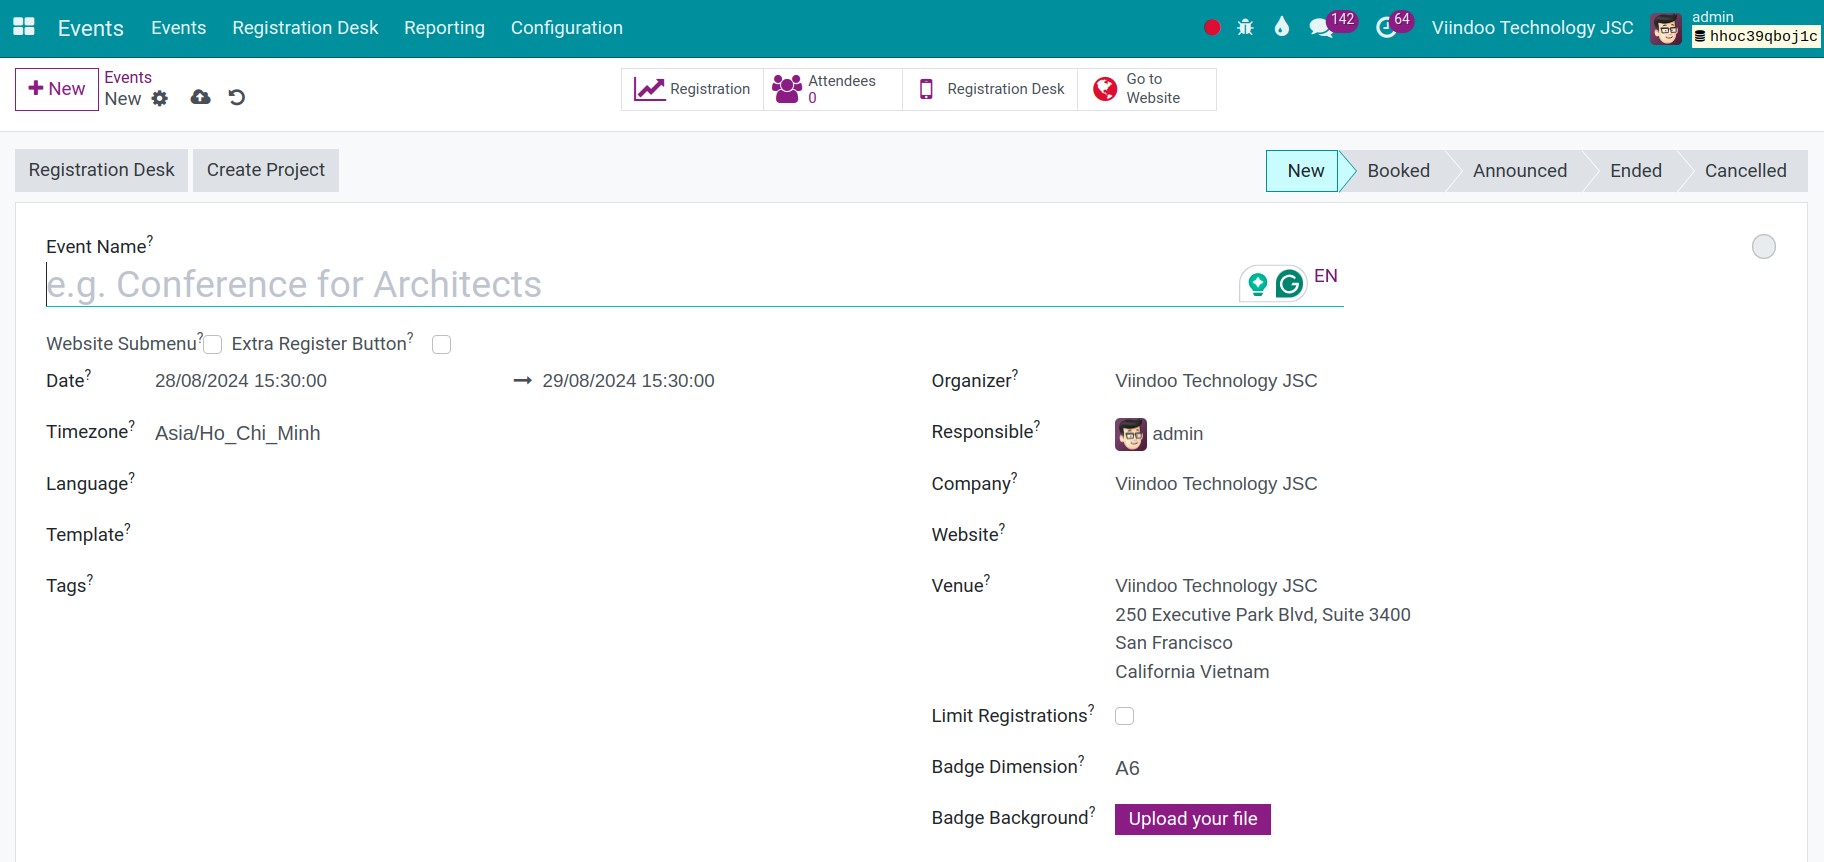
Event Name.
Website Submenu: Activate this feature if you want to display and manage event-specific menus such as introduction, location, register page on the website. This field is only shown when you activate the developer mode.
Extra Register Button: Show up the extra register button on the website and allow you to navigate to the register page. This field is only shown when you activate the developer mode.
Date: The event time will be organized. It is possible to set details up to the time and date of the organization.
Timezone: Depending on the time zone at the event venue choose accordingly.
Language: All the communication emails sent to attendees will be translated in this language.
Template: The event template was already created. The users set up this template by navigating to Events module ‣ Configuration ‣ Event Templates.
Tags: Helps users to find events faster.
Organizer: The organisational agencies from the contact list.
Responsible: The internal user who is in charge of this event.
Company: This field appears when you are operating with multiple companies on the Viindoo software. You can set up for this event will display on a specific company.
Website: Website for this event. The event information will be posted on all the company’s websites if this field is left blank.
Venue: Event location.
Limit Registration:
Checking on this box: Enter the maximum number of attendees. If this number is exceeded, further registrations will not be allowed.
No checking on this box: The number of attendees is unlimited.
Badge Dimension: You can select the desired paper format for badges. These badges will be printed from the software and sent to attendees. The system supports various paper formats, including A4 foldable, A6, and 4 per sheet.
Badge Background: You need to upload a badge background if you want to print badges. If this field is left empty, the system will print out a plain white file.
Create event tickets
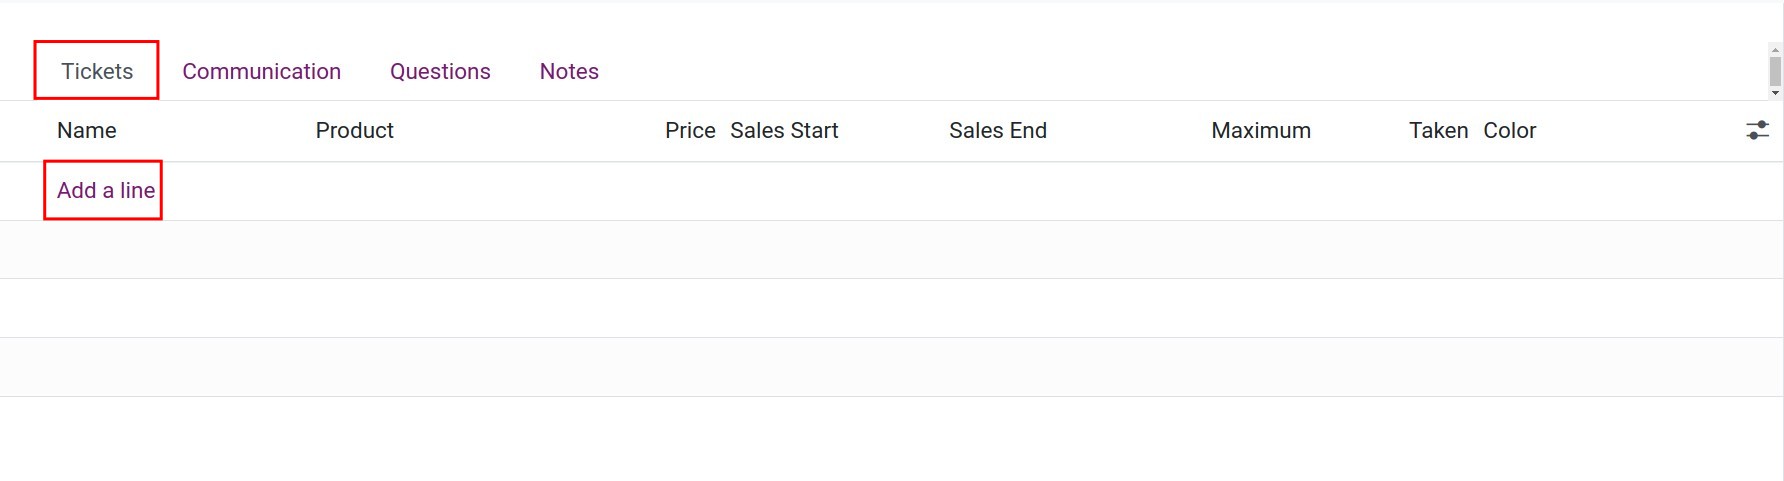
In the Tickets tab, select Add a line to create tickets for this event.
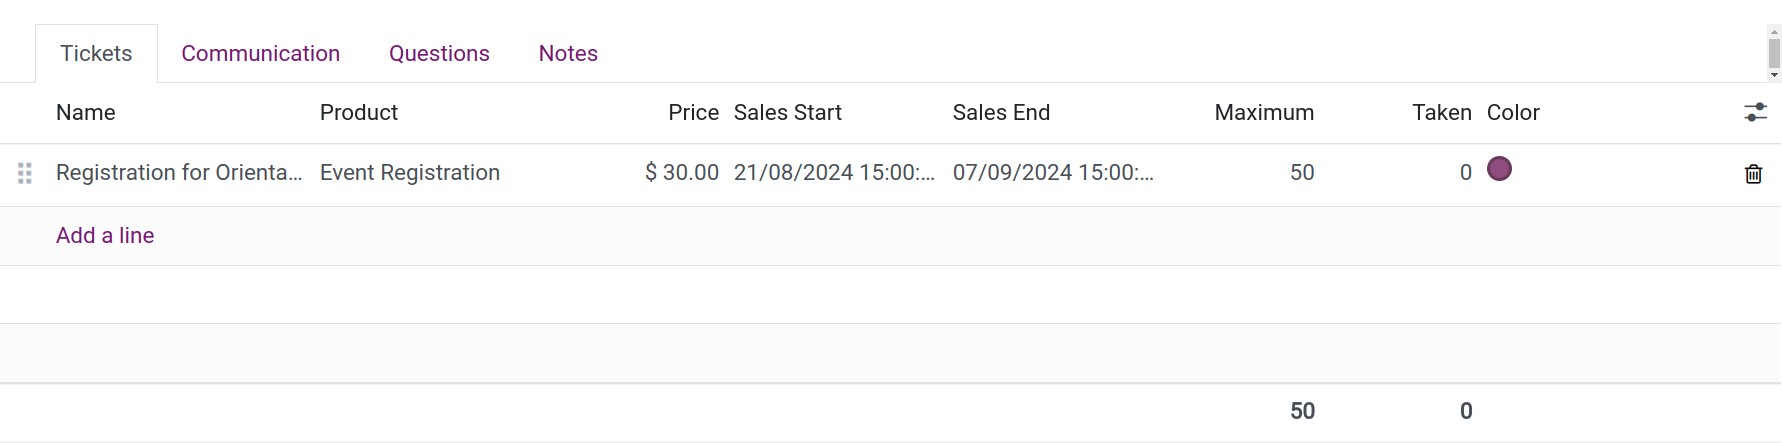
Name: The name for tickets to this event.
Product: This field enables you to sell event tickets. Refer to: How to sell event tickets.
Price: You enter the sale price for a ticket, which will be visible to attendees.
Registration Start: Enter the registration time to receive tickets. The registration for receiving tickets will not be opened on the website before this time.
Registration End: Enter the end time to receive tickets. If this time is exceeded, the receiving registration will no longer be possible.
Maximum: The maximum number of tickets to be registered for this event. If not filled in, there will be no limit on the number of tickets.
Taken: This field will automatically calculate tickets that are sold to attendees.
Color: When you print badges for attendees, each badge will display additional ticket information. The Color field allows you to differentiate the badge color from the ticket color, making it easier for users to verify the details. You should choose a color distinct from the Badge Background color is recommended.
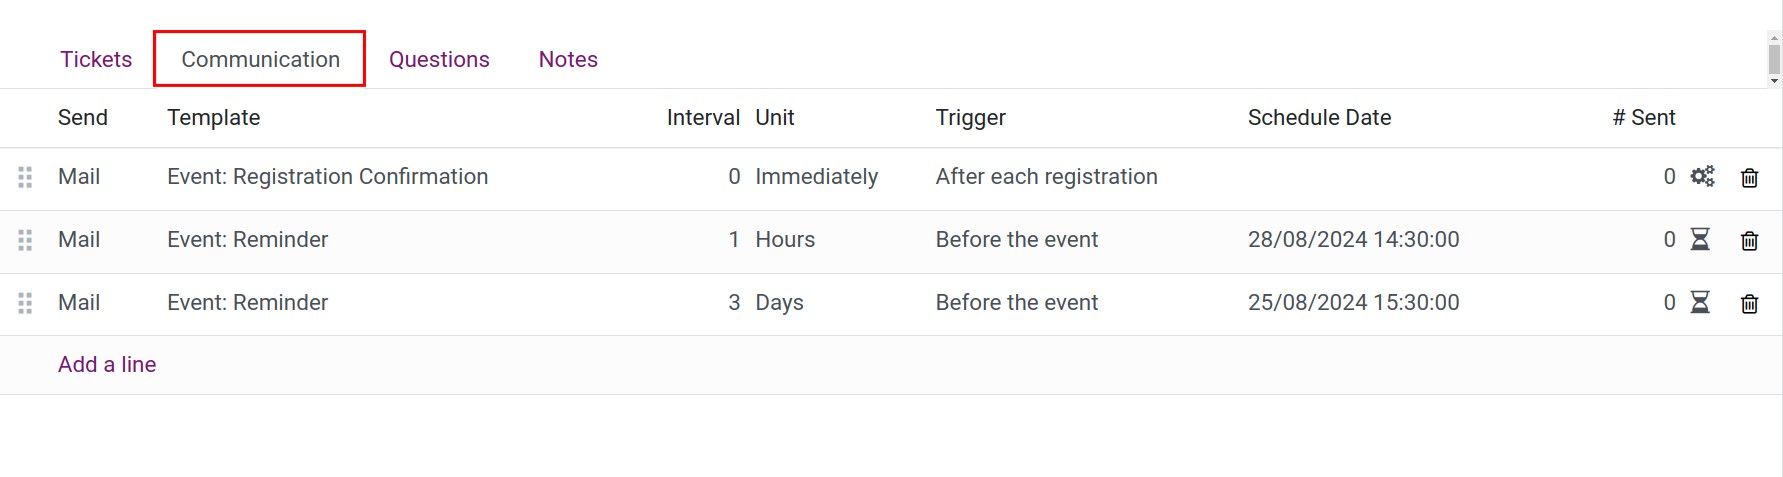
Create communications
The Communication tab will set up a confirmation form when customers register to attend the event.
Send: Sending confirmation to registered customers via SMS or Email.
Template: Select one email template for sending email.
Interval: A confirmation template will be sent after this Interval period.
Unit: The time allows the mail template to be sent automatically.
Trigger: The confirmation template will be sent based on the event time.
Schedule Date The day will sent to attendees, calculating and depending on the Interval and Unit fields.
Sent: Automatically displayed when the confirmation template is successfully sent to registered customers.
Note
Additionally, the information in the Communication tab will be auto-added when checking on the Templates field in the event information settings above.
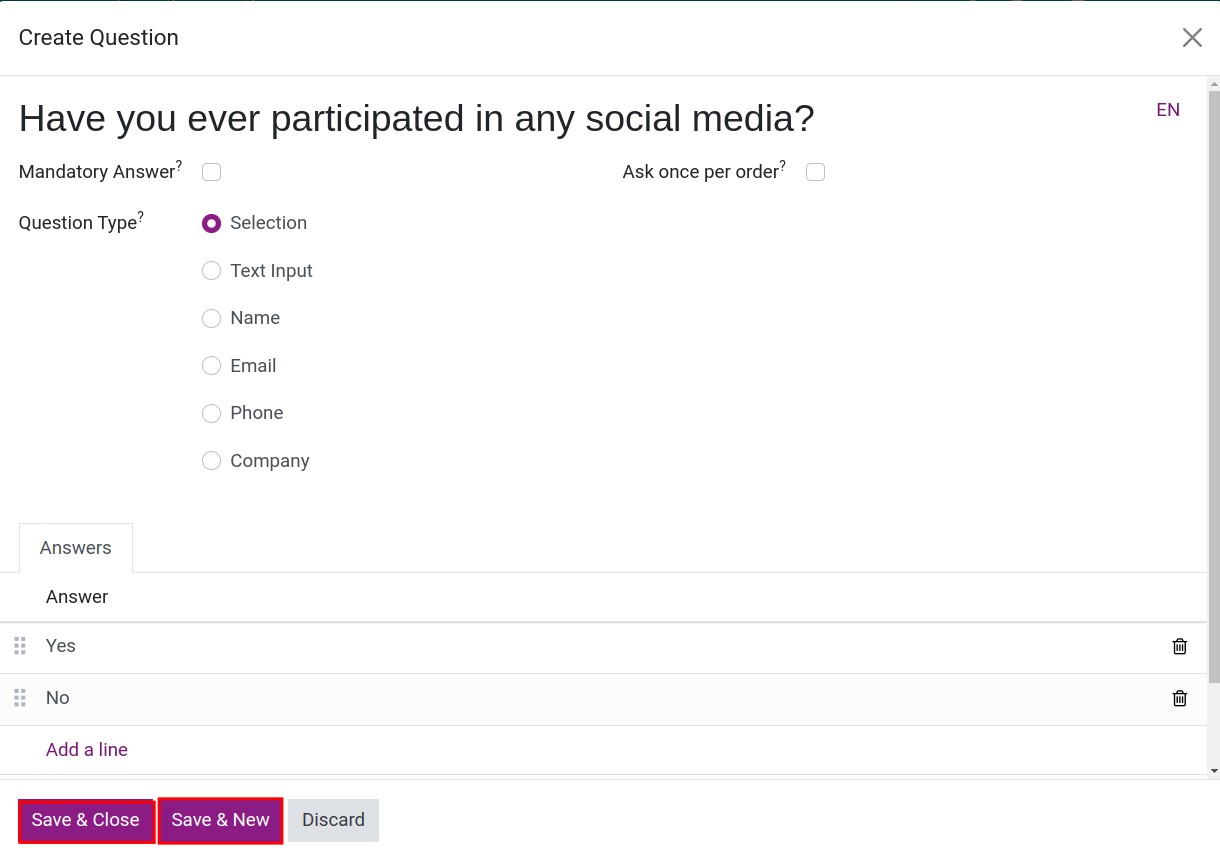
Create questions
In the Questions tab, the users could add questionnaires to know better the demands of customers when attending this event by using Add a line.
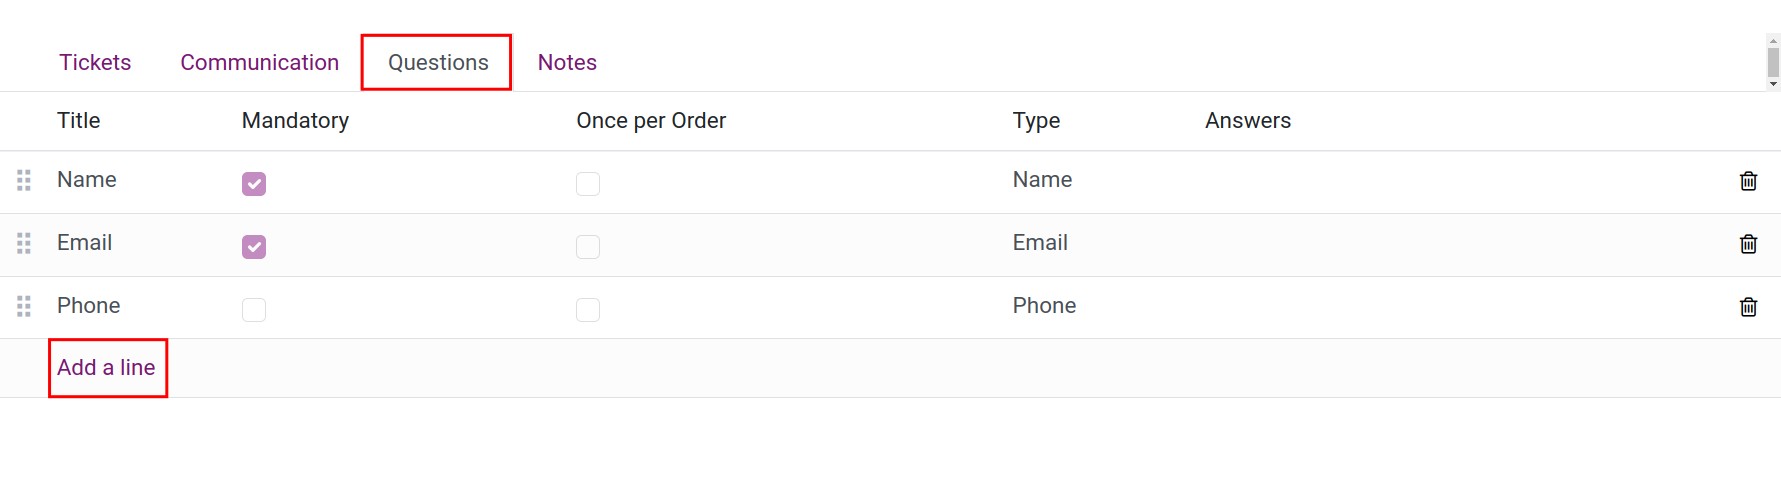
Title: Questions for registered customers.
Mandatory Answer: This field allows you to set up a mandatory question, which customers need to answer.
Ask once per order:
Checking on: If customers register in a group, they will only ask once and the answer will apply to the whole group.
Not checking on: Each customer in the group will answer questions according to each individual’s opinion to the contrary.
Type: Customers shall be responded to a written or chosen from the given answers.
Answer: Enter the answers if you want to choose a multiple-choice question.
Note
To configure the questions, navigate to and activate Questions feature.
Otherwise, in the Note tab, you can take some notes for this event and also the ticket introductions which will be printed on the tickets.
Click Save to save the information.
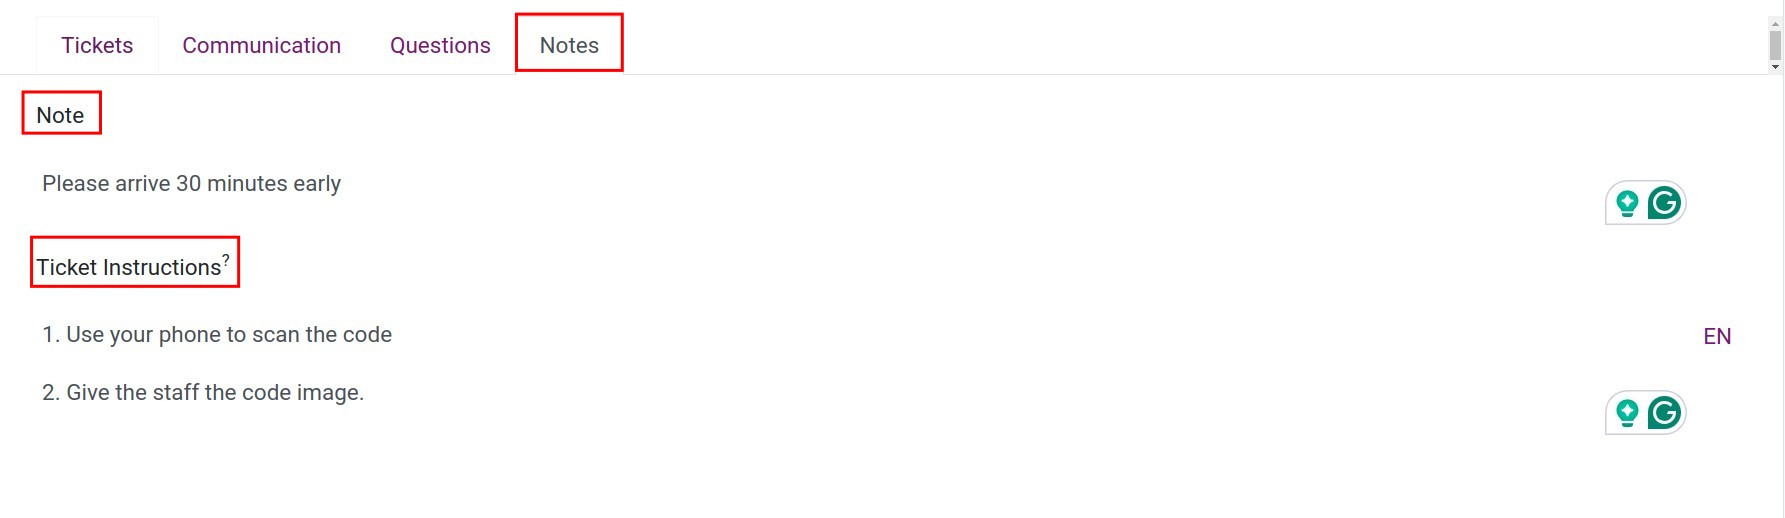
Create notes
The system will create two information sections in the Notes tab. These are the Note and Ticket Instructions sections. So, you can take note of some information you feel is important for this event as shown below.
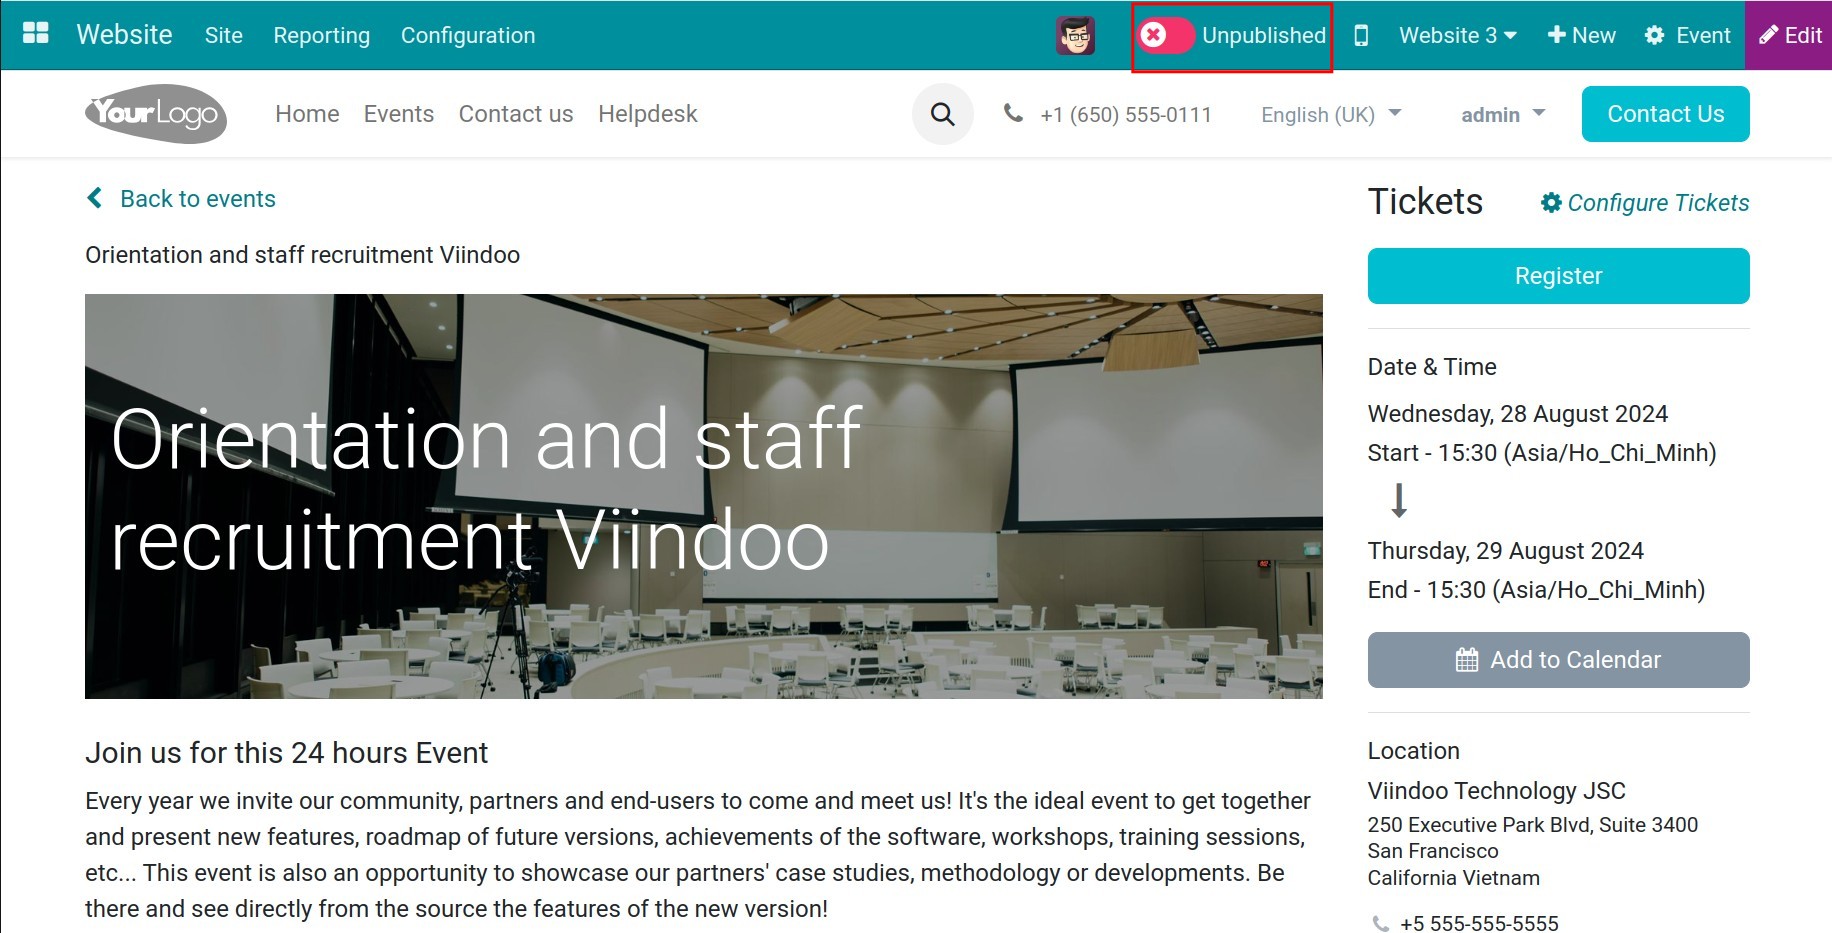
Publish events
After reviewing and approving the content , the event shall be published on the website to inform customers.
Select Go to Website button to view the event on the company’s website.
Enable events by clicking on Unpublished button to change the event’s status to Published.

Tip
You can configure the above information for the event template by going to . When creating a new event using this template, it will automatically pre-fill that information.
See also
Related articles
Optional modules