Lending Management
Requirements
This tutorial requires the installation of the following applications/modules:
Create Lending contract
In the Loan Management app, start creating a new lending contract by navigating to Lending > Contracts and click New.

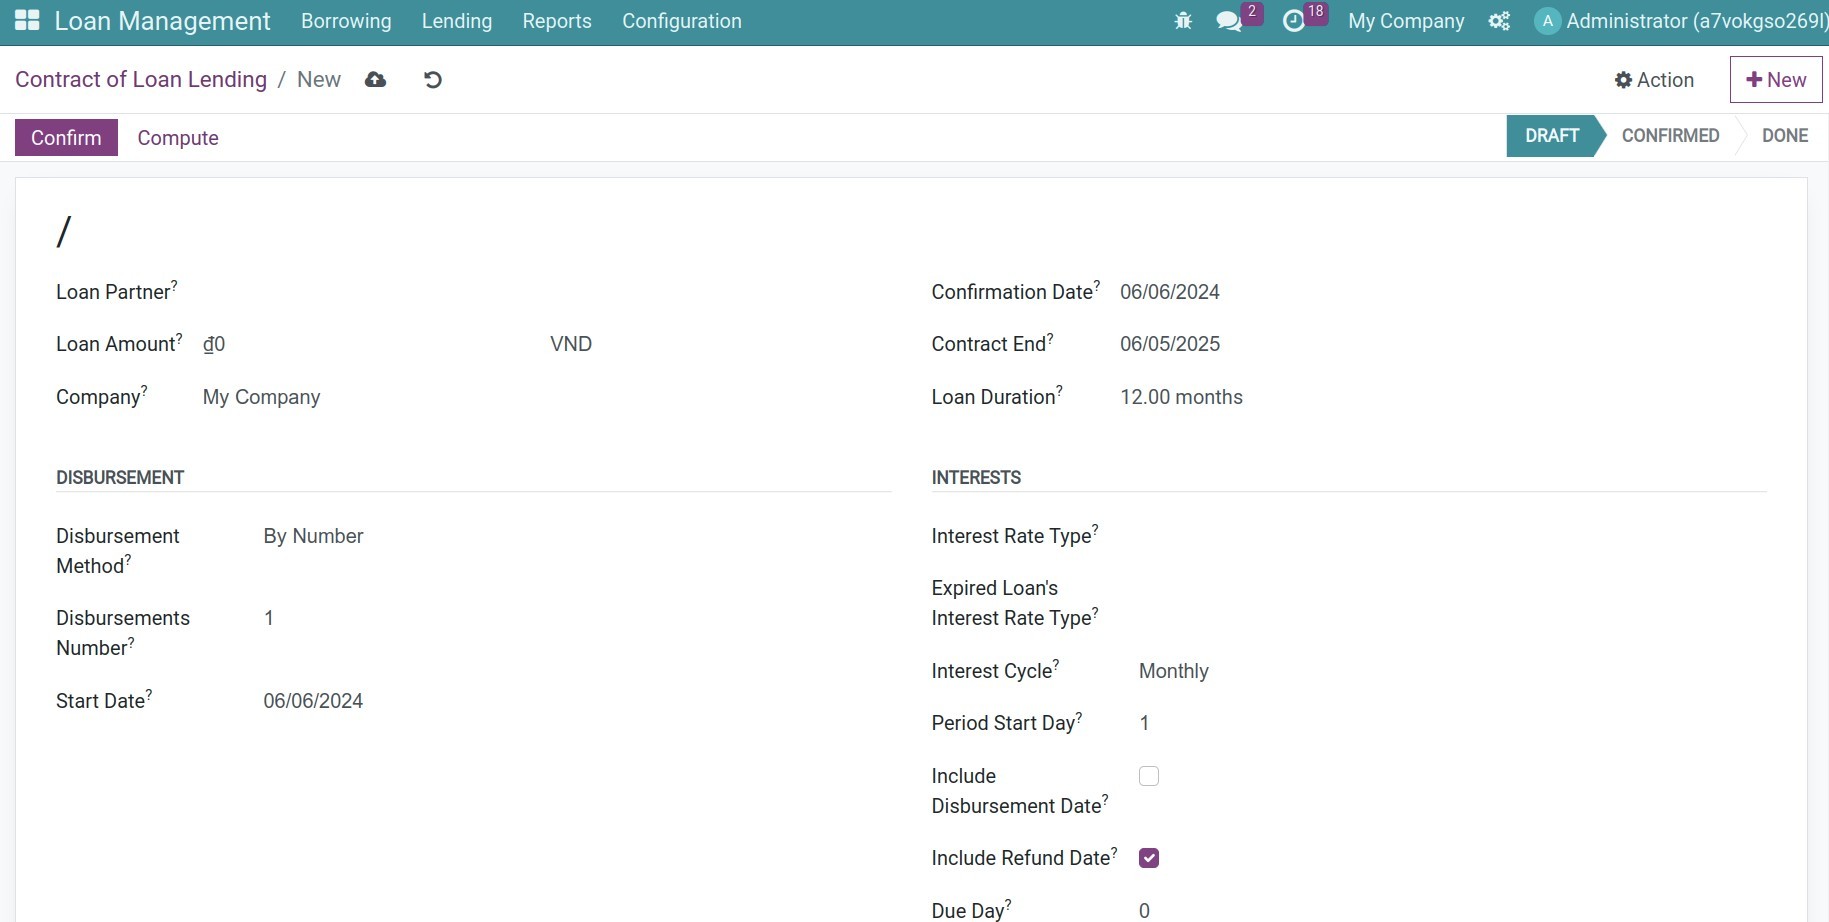
General information
From here, proceed to add details of your loan agreement such name the borrower’s name, loan amount, and loan duration. In which:
Loan Partner: Name of the borrower;
Loan Amount: The total amount being borrowed, which also is the principal of the loan;
Confirmation Date: The time the agreement goes into effect;
Contract End: The date on which the contract will expire;
Loan Duration: The length of the contract, calculated in months.
Disbursement details
The Viindoo Loan Management app support various methods of loan amount payment to the loan borrower.
Disbursement By Number: The total loan amount will be paid evenly in multiple installments. The first day will be the date set in the Start Date field. The disbursement amount will depend on the Disbursements Number.
Disbursement By End Date: The total loan amount will be evenly disbursed over multiple installments. The first disbursement date will be automatically calculated based on the configured Disbursements Number, Disbursement Period Months and on the End Date.
Disbursement Upon Request: The disbursement is carried out as per requested, and users will manually create disbursement as needed.
Interests
In this section, you can define details related to the interest of your loan contract. In which:
Interest Rate Type: Select the suitable type for the lending loan contract, or you can create a new Interest Rate Type by clicking on the dropdown list and press Create and Edit.
Expired Loan’s Interest Rate Type: Define the applicable Interest Rate Type for the principal amount that the borrowing party has not yet repaid when overdue.
Interest Cycle: Define how the interest of the loan contract is computed.
Period Start Day: The first date of the interest calculation period. The default value is 1 means the standard period is applied (week starting from Monday, month starting from the 1st day).
Include Disbursement Date: If checked, the interest calculation date includes the disbursement date.
Include Refund Date: If checked, the interest calculation date includes the loan refund date.
Due Day: The payment due date is certain days away from the last day of the interest cycle. By default, the Due day is 0, which means that the payment due date is the last day of the interest cycle. Add a positive value if the due date is after the last day of the interest cycle; or add a negative value if the payment should be done before the cycle ends.
Accounting information

By default, information related to journal and accounting account are pre-determined. You can modify this section according to your local accounting standard.
Principal refunds
There are 2 types of principal refunds supported that can be applied to a lending contract:
By Number: The principal repayment will be done in multiple installments. The first repayment date is the Refund Start Date, and the principal repayment amount will depend on the Refund Numbers.
By End of contract: The principal will be repaid in one lump sum at the end of the lending contract.
After adding the lending contract details correctly, save the information. Press Confirm to start the contract.

Details related to principal refunds, interests, disbursements, etc. will then be automatically computed.

Register disbursement
Depending on each contract, you can disburse the lending amount all in once or multiple times. To see the disbursements list, navigate to Lending > Disbursements. To search the disbursemnts of the specific lending contract, you can use the Group By or Filters to search.
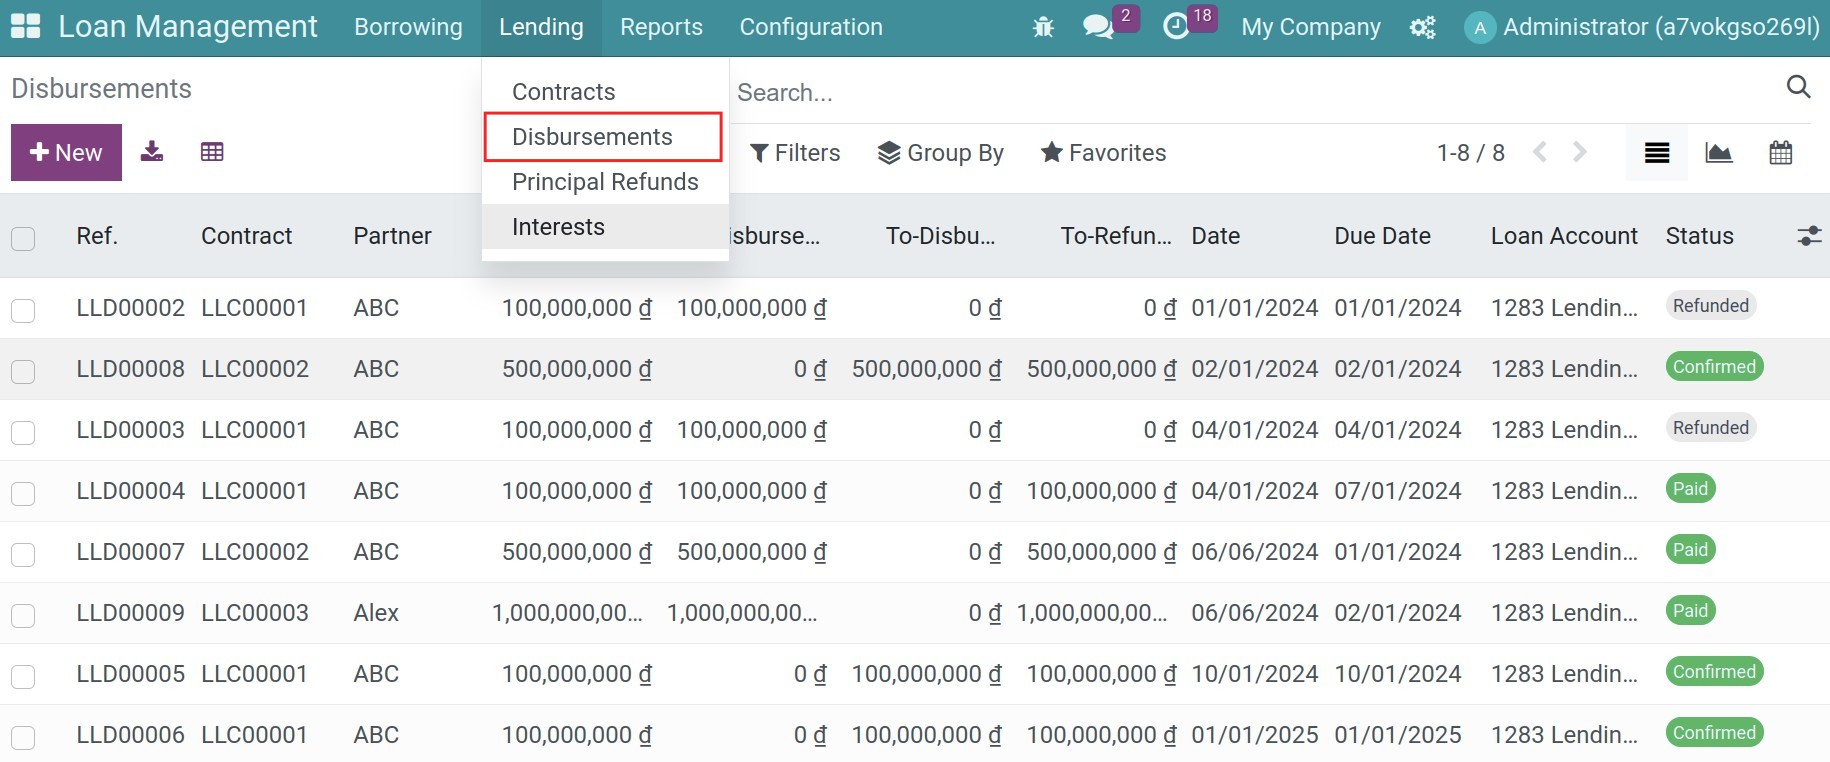

You can check the disbursements schedule, open the respective disbursement, press Send Money to record the payment.
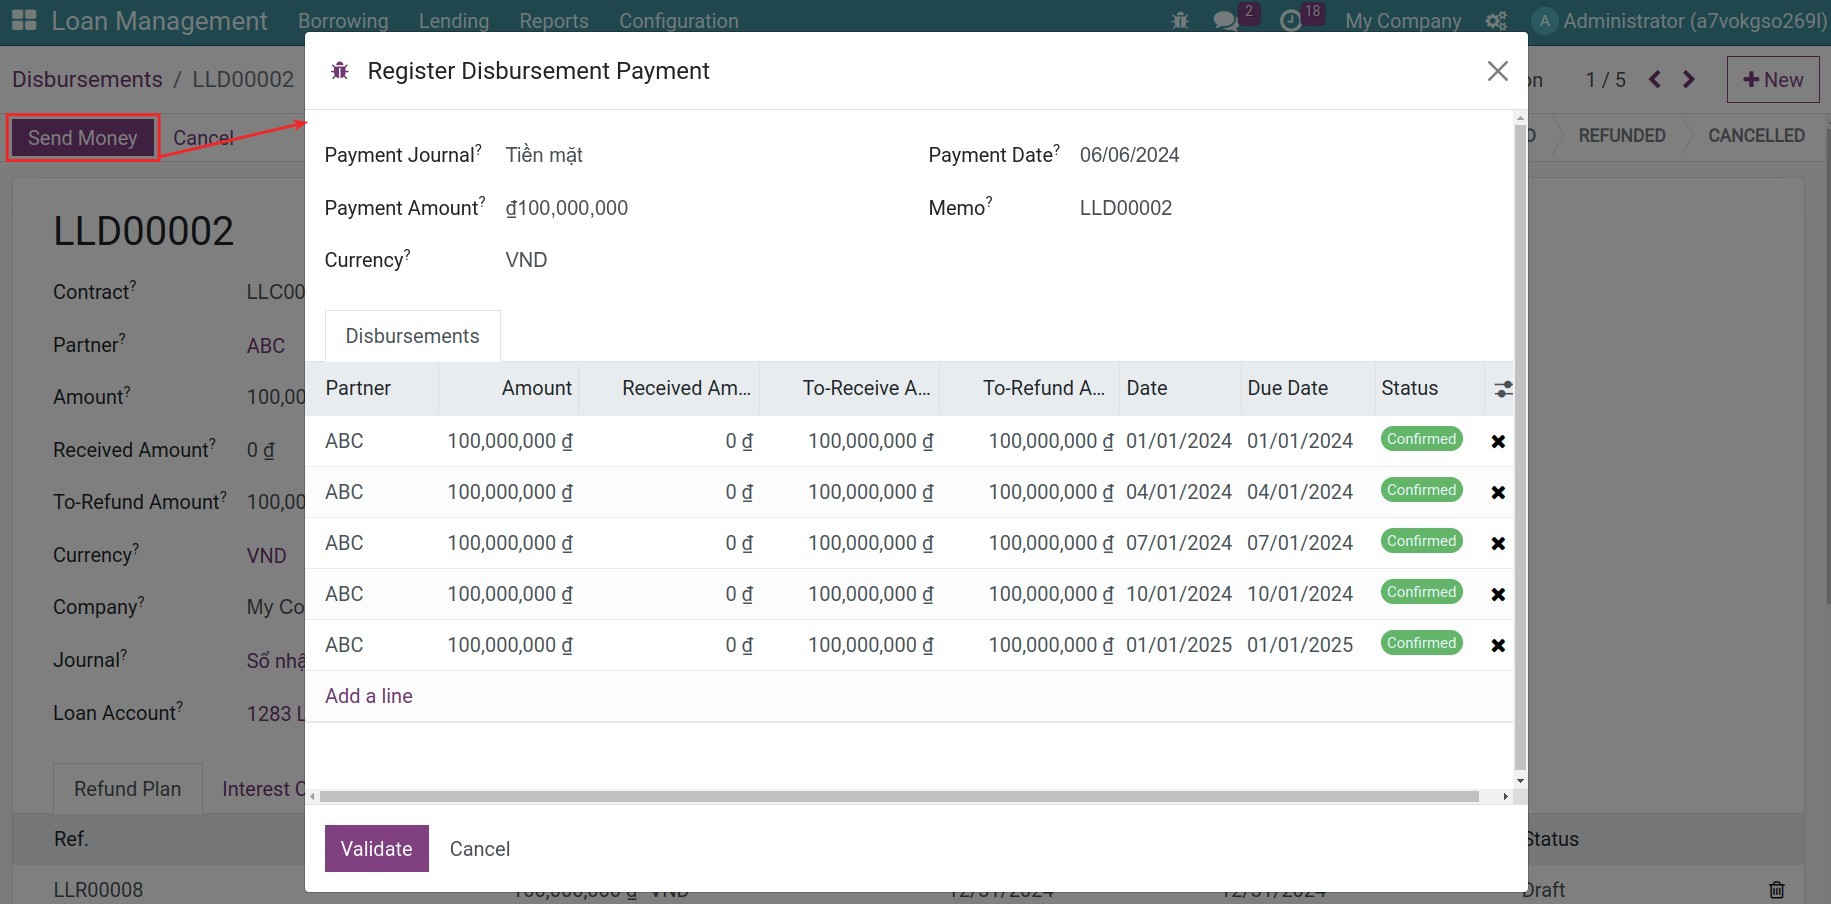
A widget will pop up with details of the disbursements that could be paid, based on the lending contract details. From here, you can start modify payment details such as payment amount, select an accounting journal to register this payment, or select the disbursements that will be processed, etc. In which:
Payment Journal: Select the suitable accounting journal for this disbursement, for example: in cash, via bank transfer, etc.
Payment Amount: The disbursement amount is computed based on contract details by default. You can adjust this info if necessary.
Payment Date: The date when the disbursement is paid, which is the same payment creation date by default. Modify the date if necessary.
Memo: Note the memo for the disbursements.
Once done, click Validate to finish recording the payment. Respective journal entries will be created and posted right away.
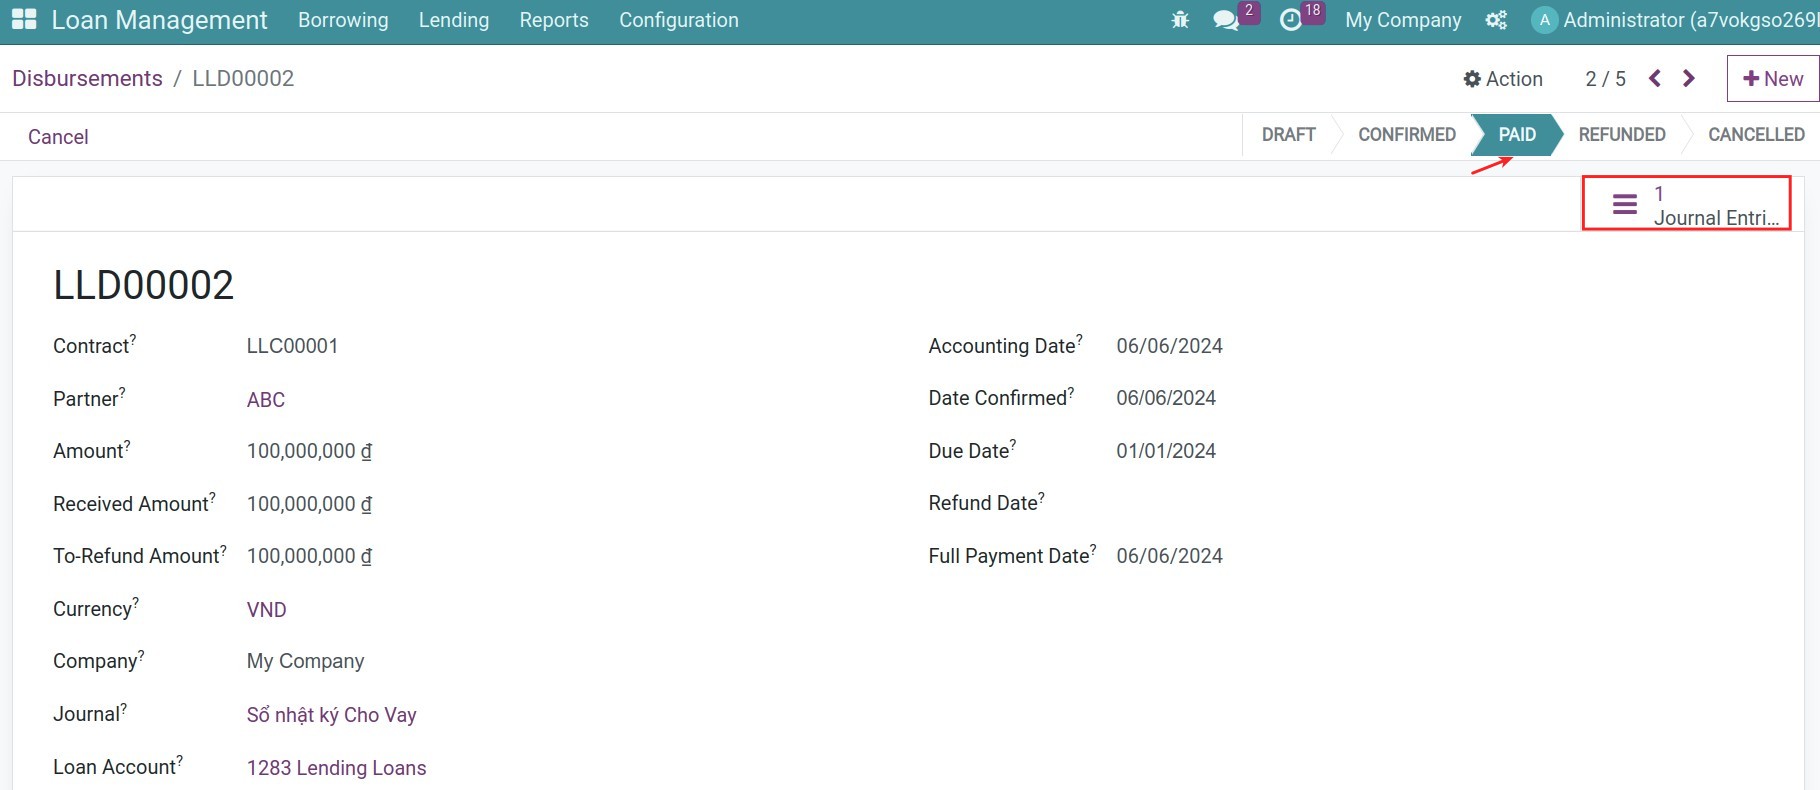
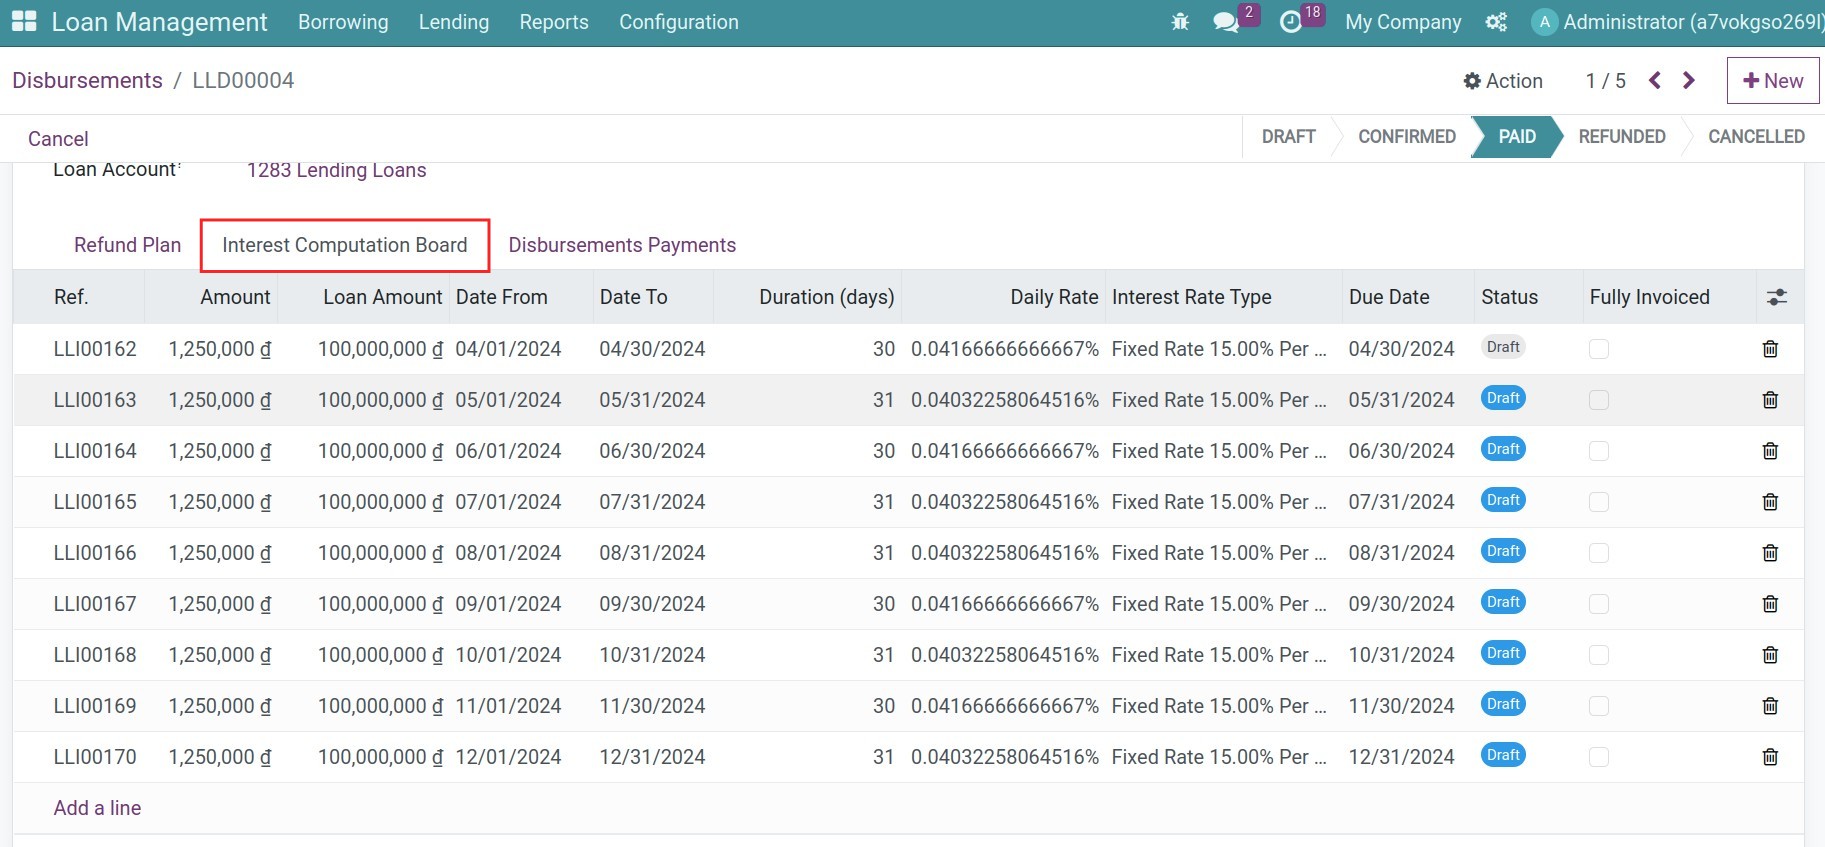
After validating the payment, the system will automatically generate the refund plan in Confirmed status and the withdraw interest plan:

Monitor Interest Payments
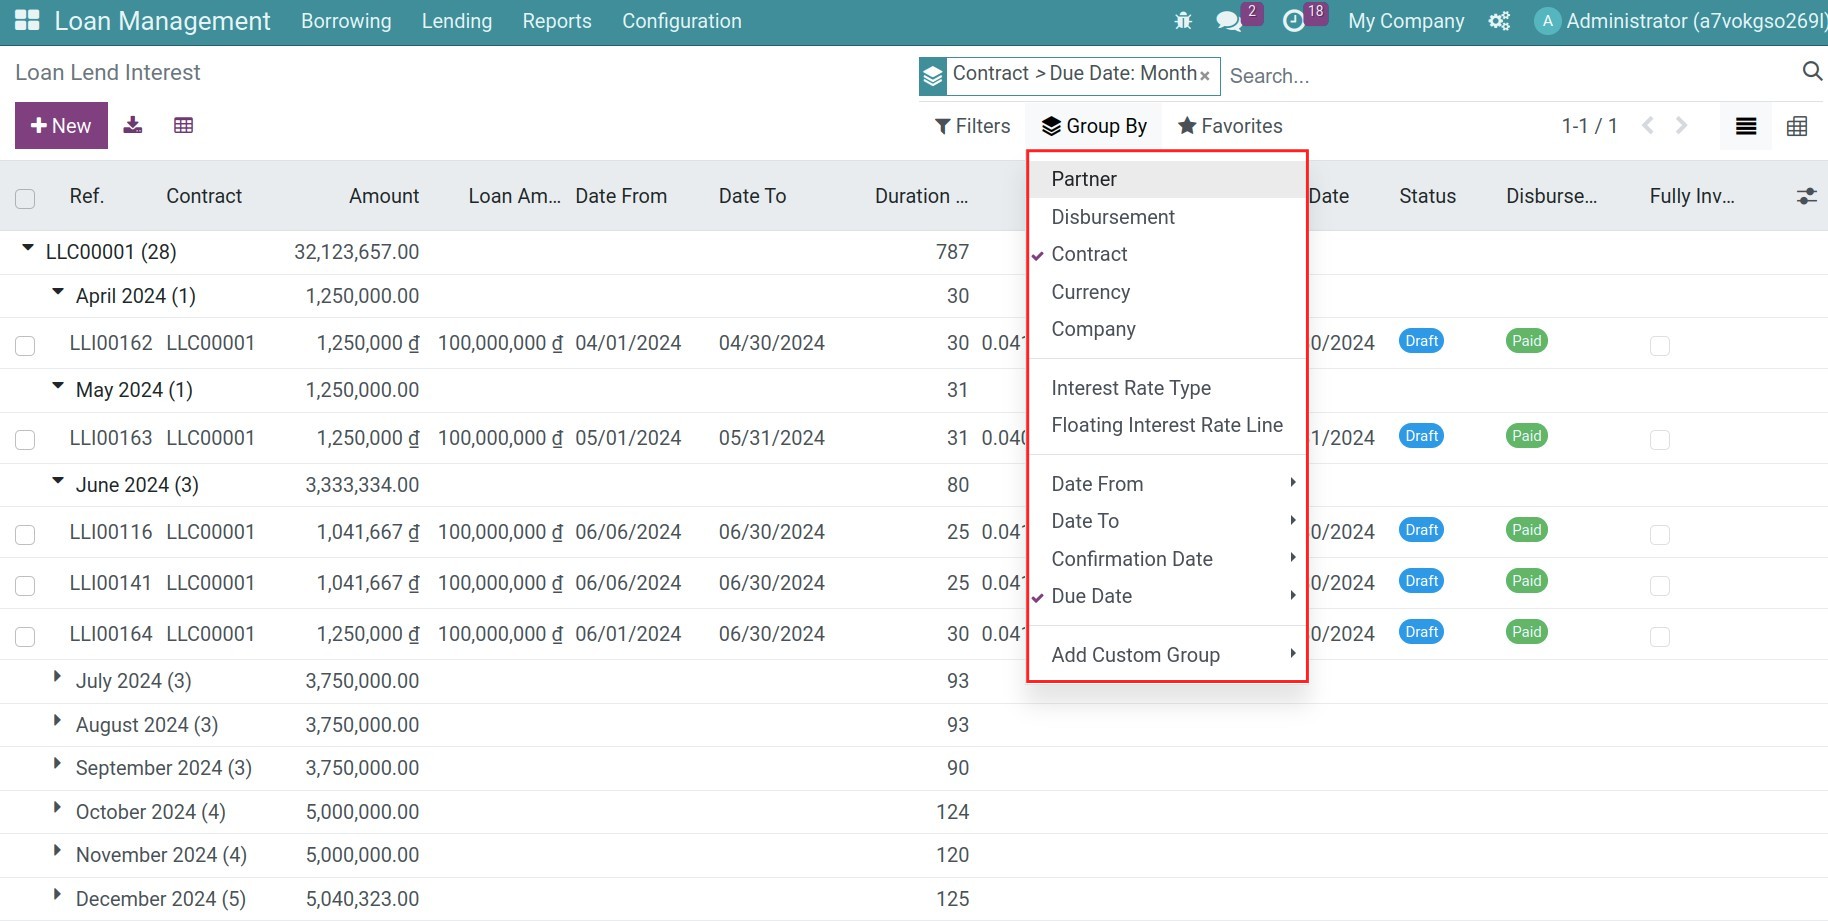
To see the interest list and see what interest record need to be processed, navigate to Loan Management > Lending > Interests, use the filter, and Group By to search. You also can see their Due date to decide too.
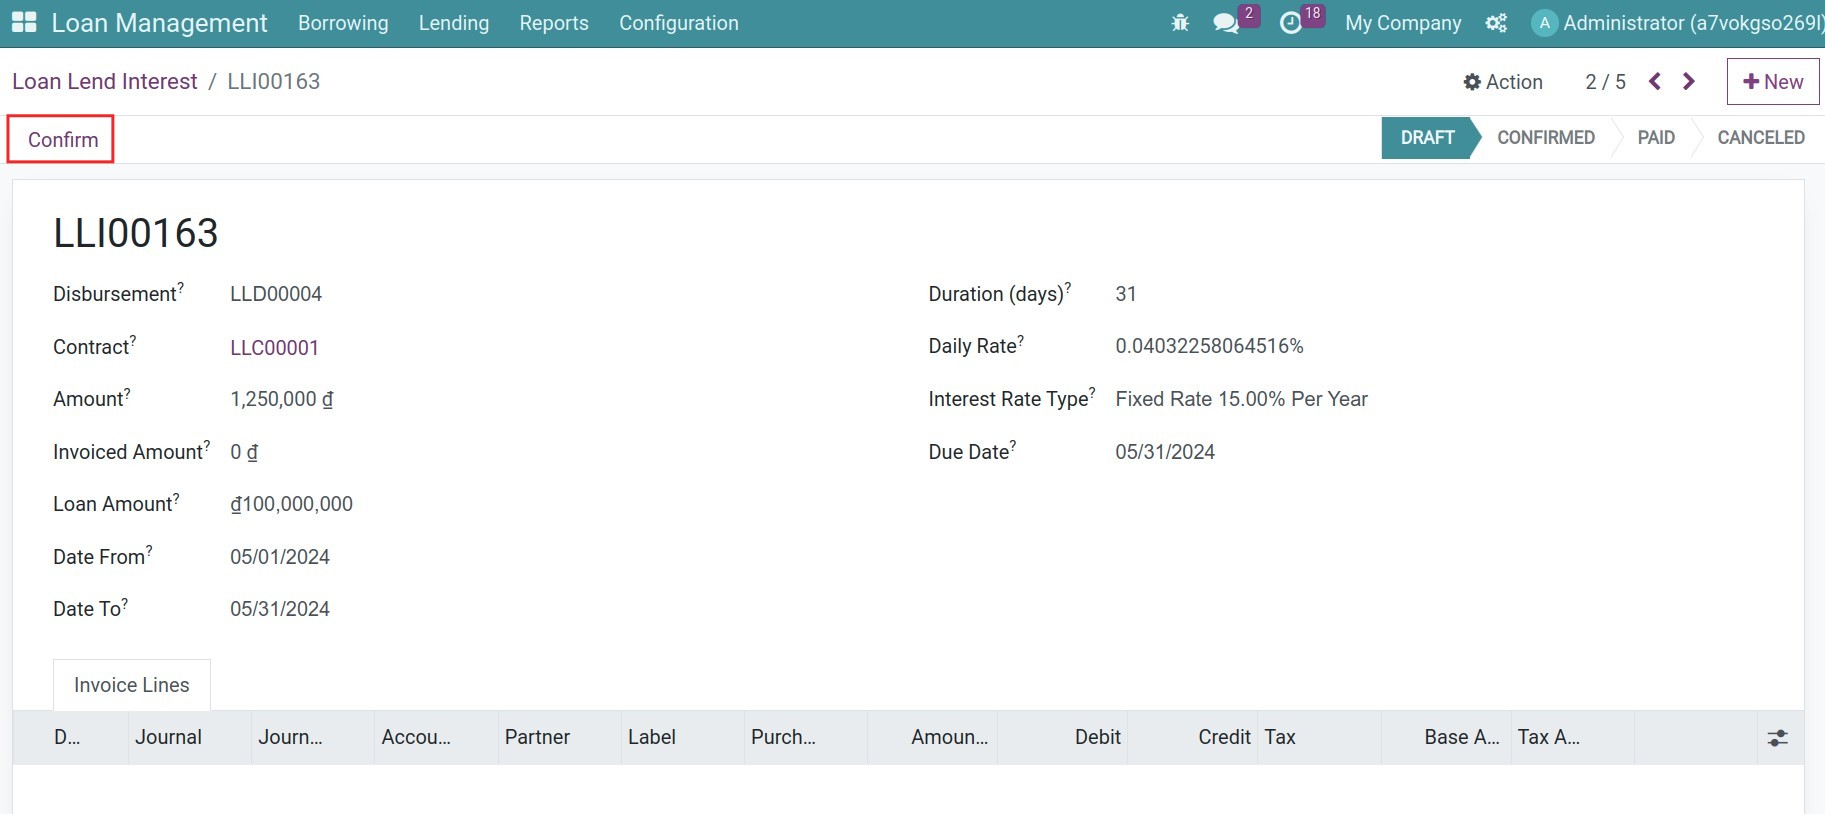
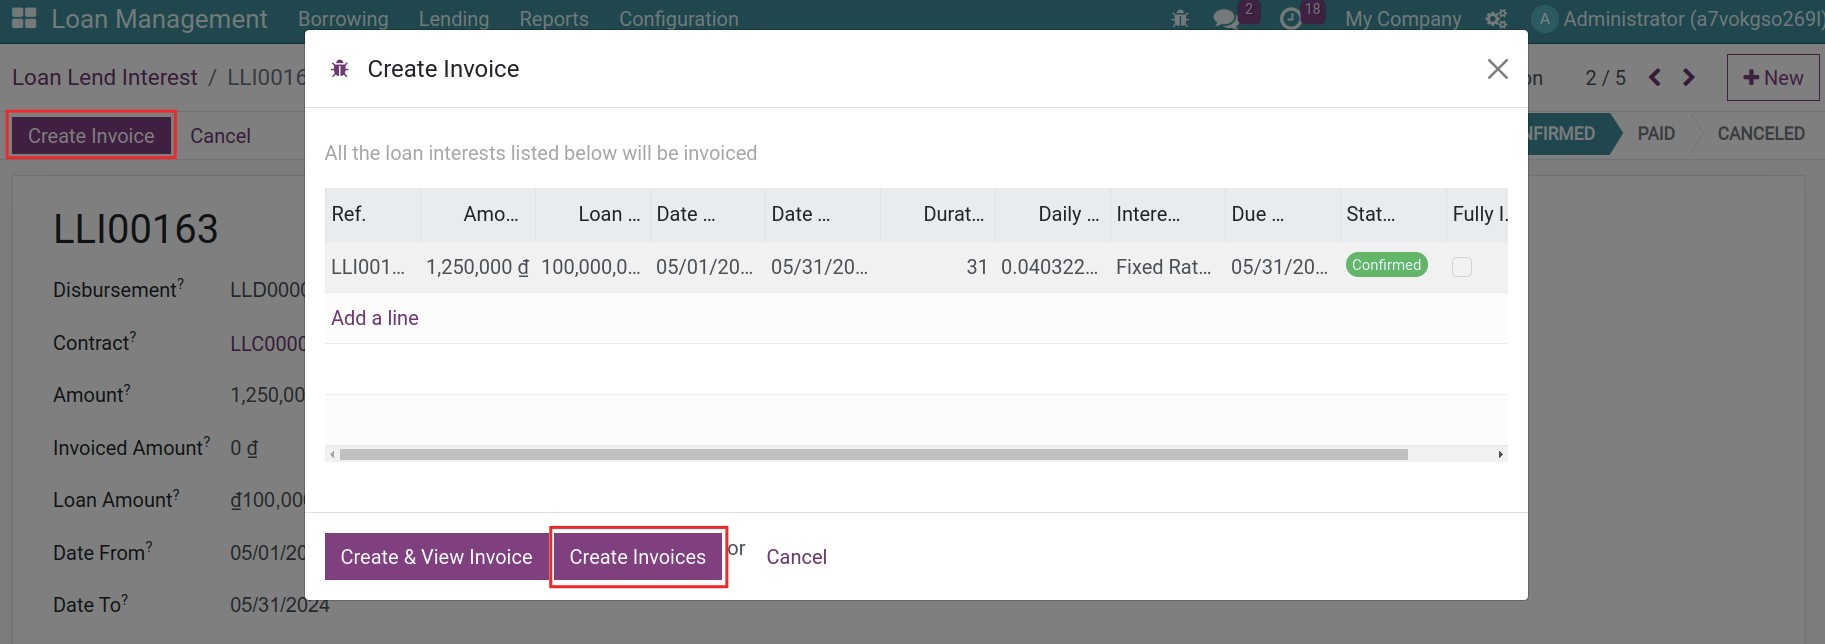
Open the respective interest record, press Confirm and then Create Invoices:
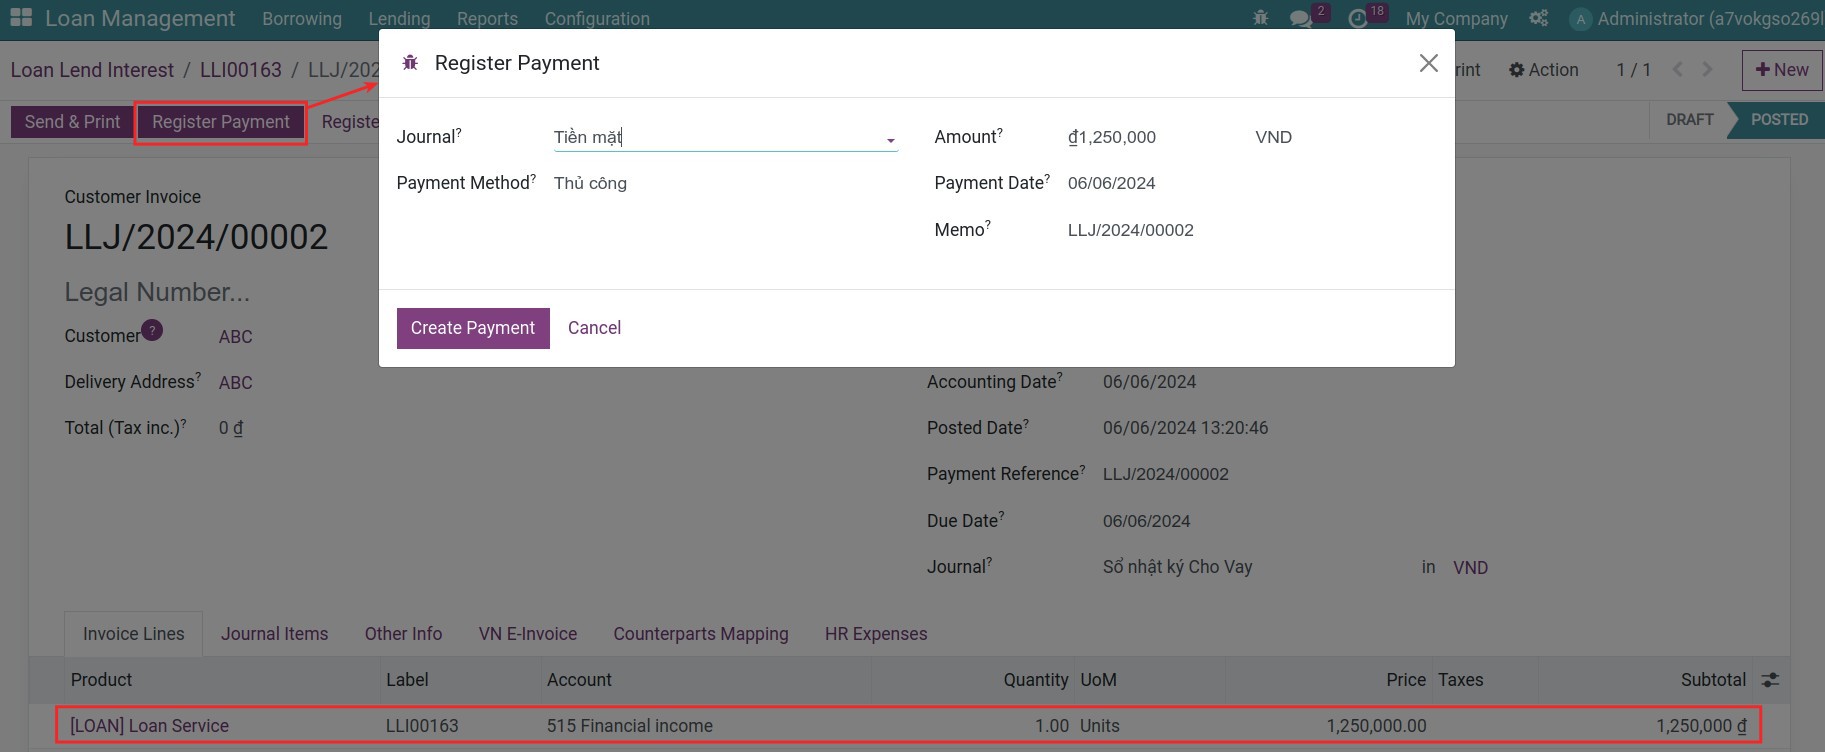
After confirming the loan lending invoice, you can register the payment for the interests:
Back to the loan lend interest record, you will see its status is Paid.
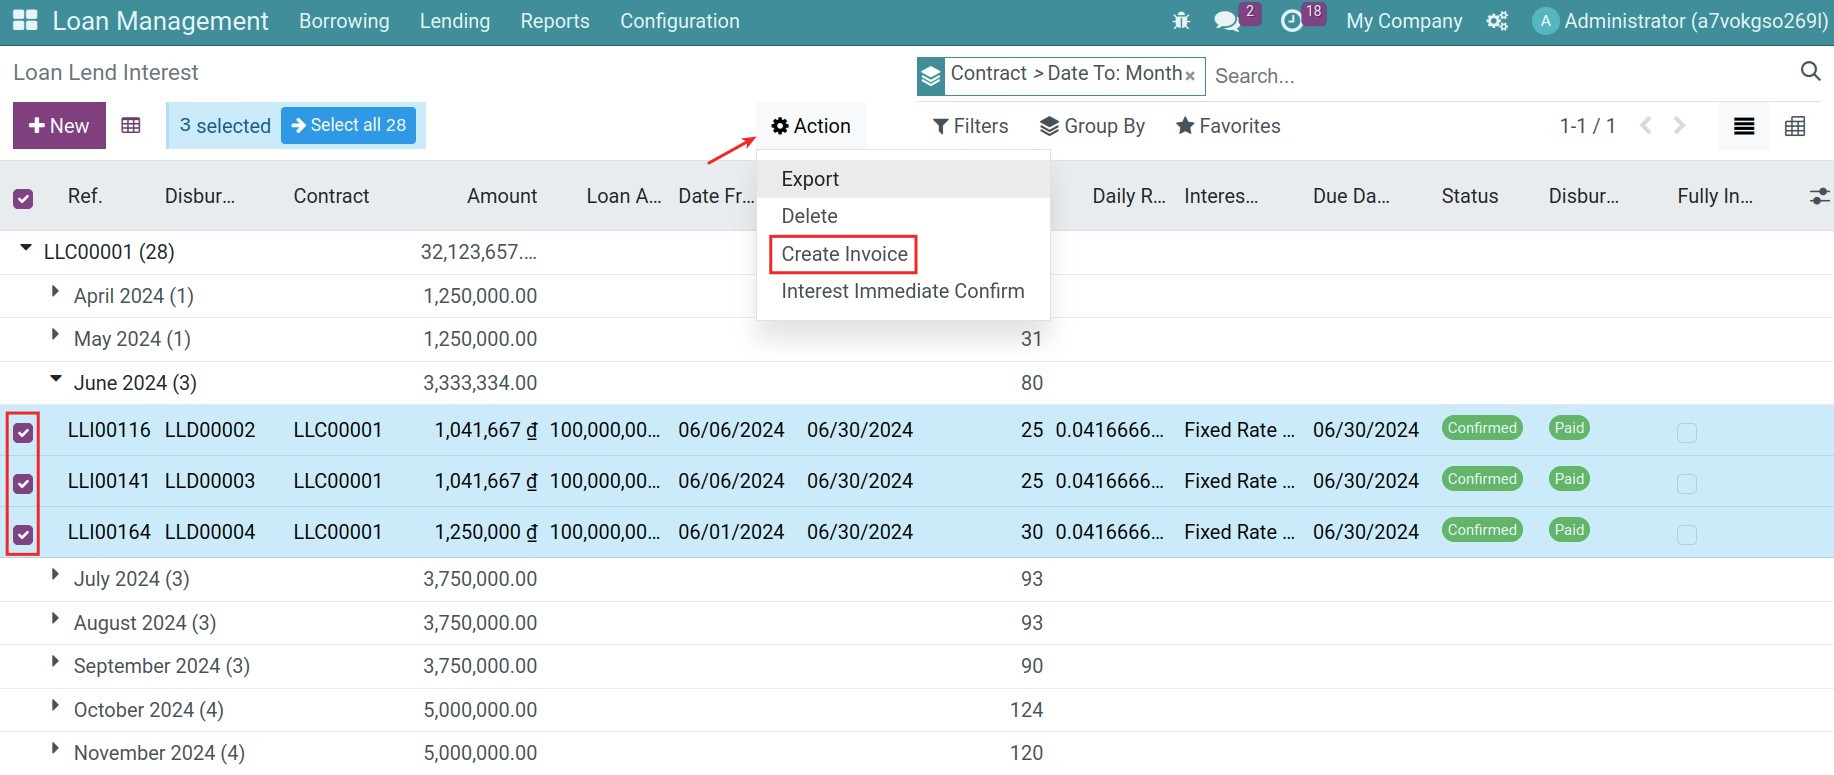
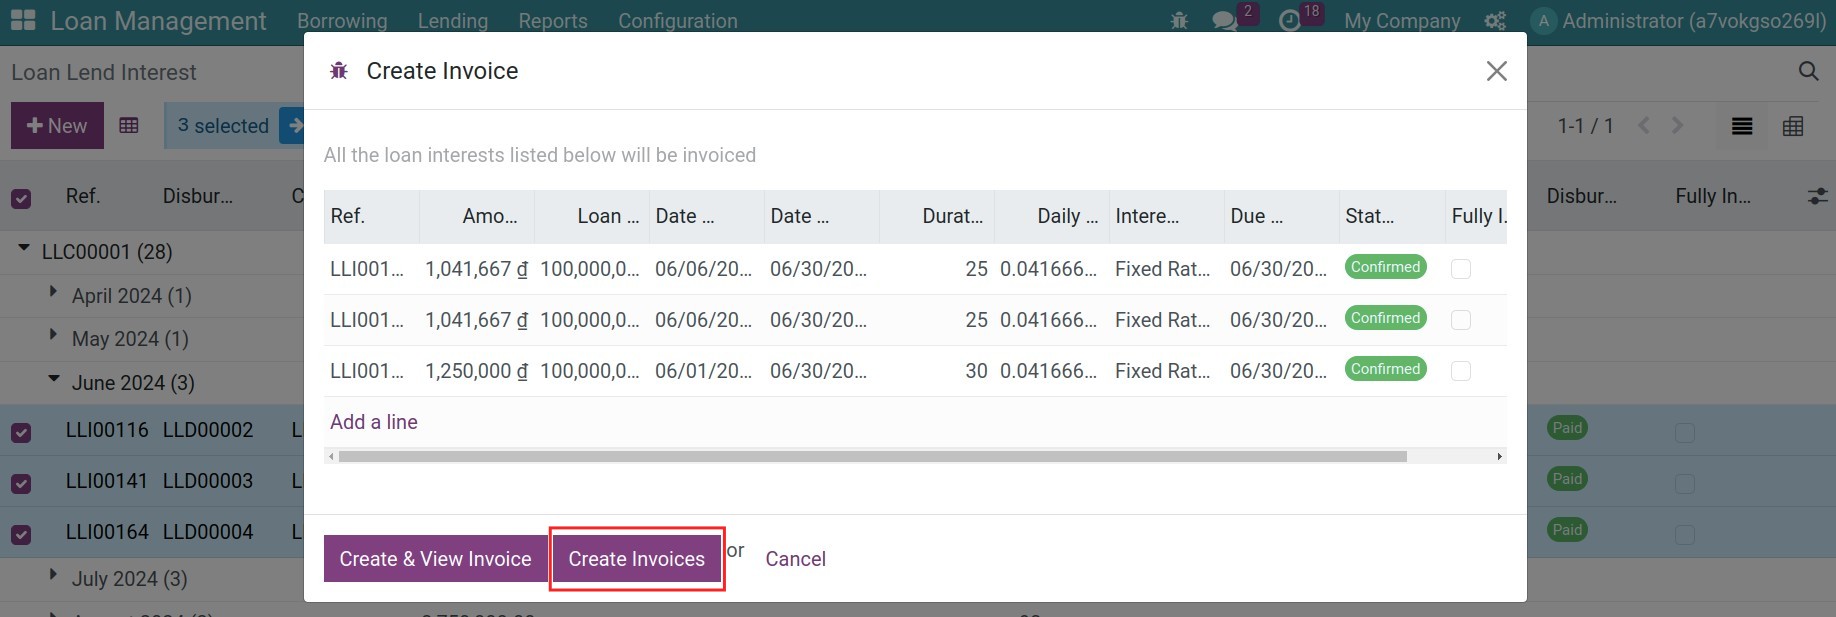
Suppose you have multiple loan lending interests of one partner in one period. In that case, you can create one invoice and one payment for all by choosing the needed interest records, pressing Action > Create Invoice, and then registering the payment as usual.
Record principal refunds
In the Loan Management app, navigate to Loan Management > Lending > Principal Refunds to view the list of repayments for all the existing lending contracts in your instance. From here, you can select the one that due for payment, press Register Refund to record the repayment. On the pop-up window, add the register refund payment details then press Validate once done.

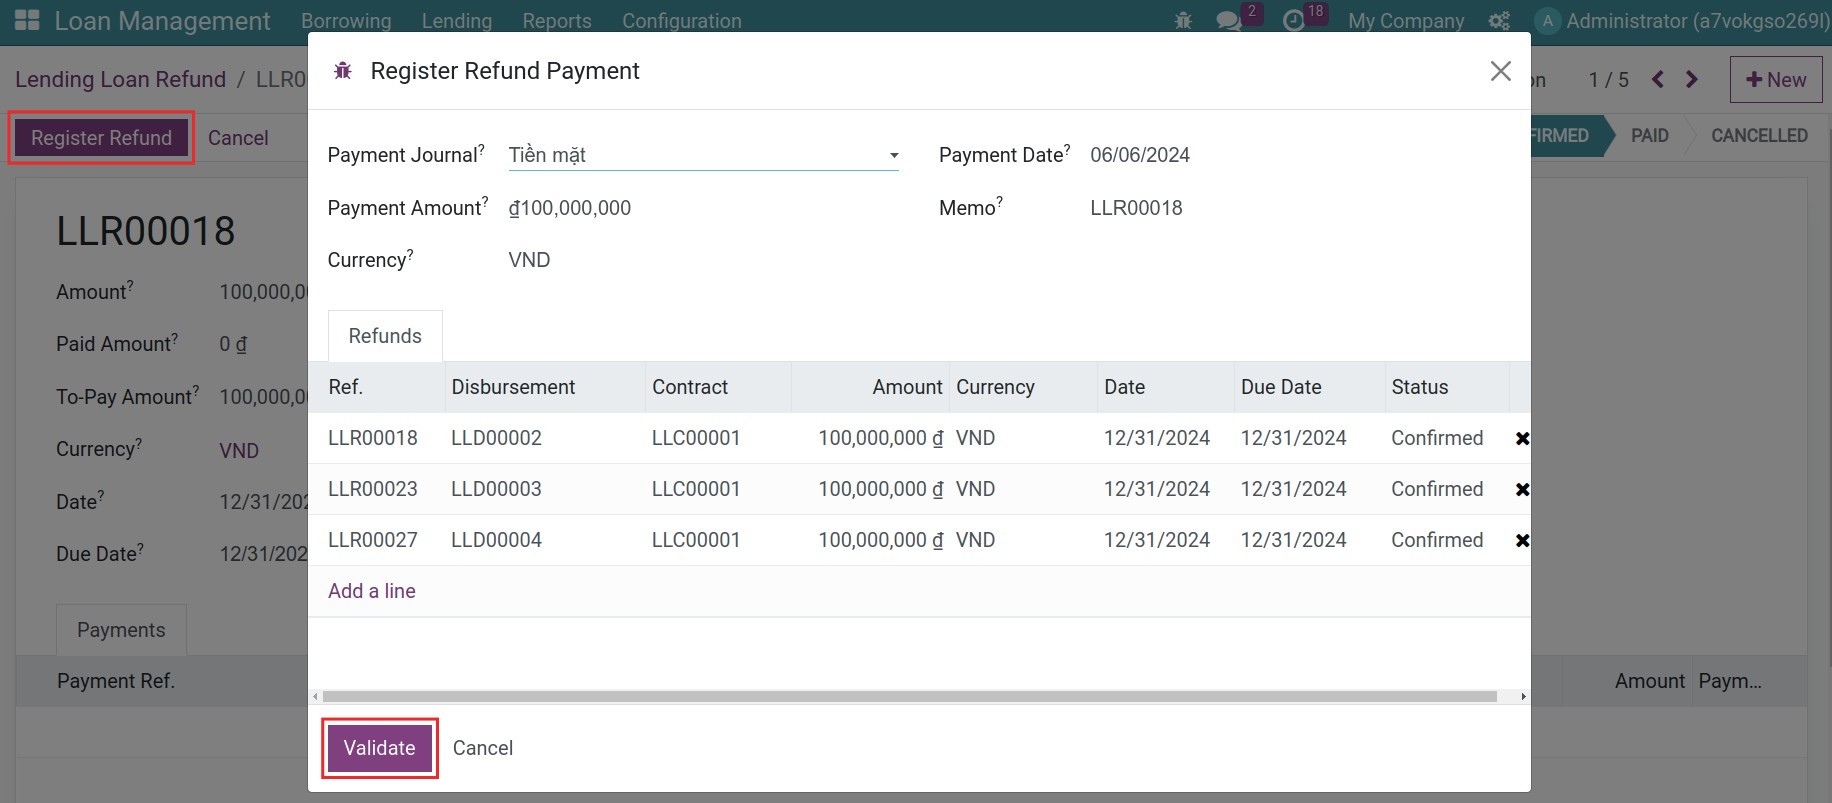
Or if you need to register multi refund payments with the same due, you can go back to the list of the refunds, choose the multi respective refunds, and then press Action > Register Refund Payment:

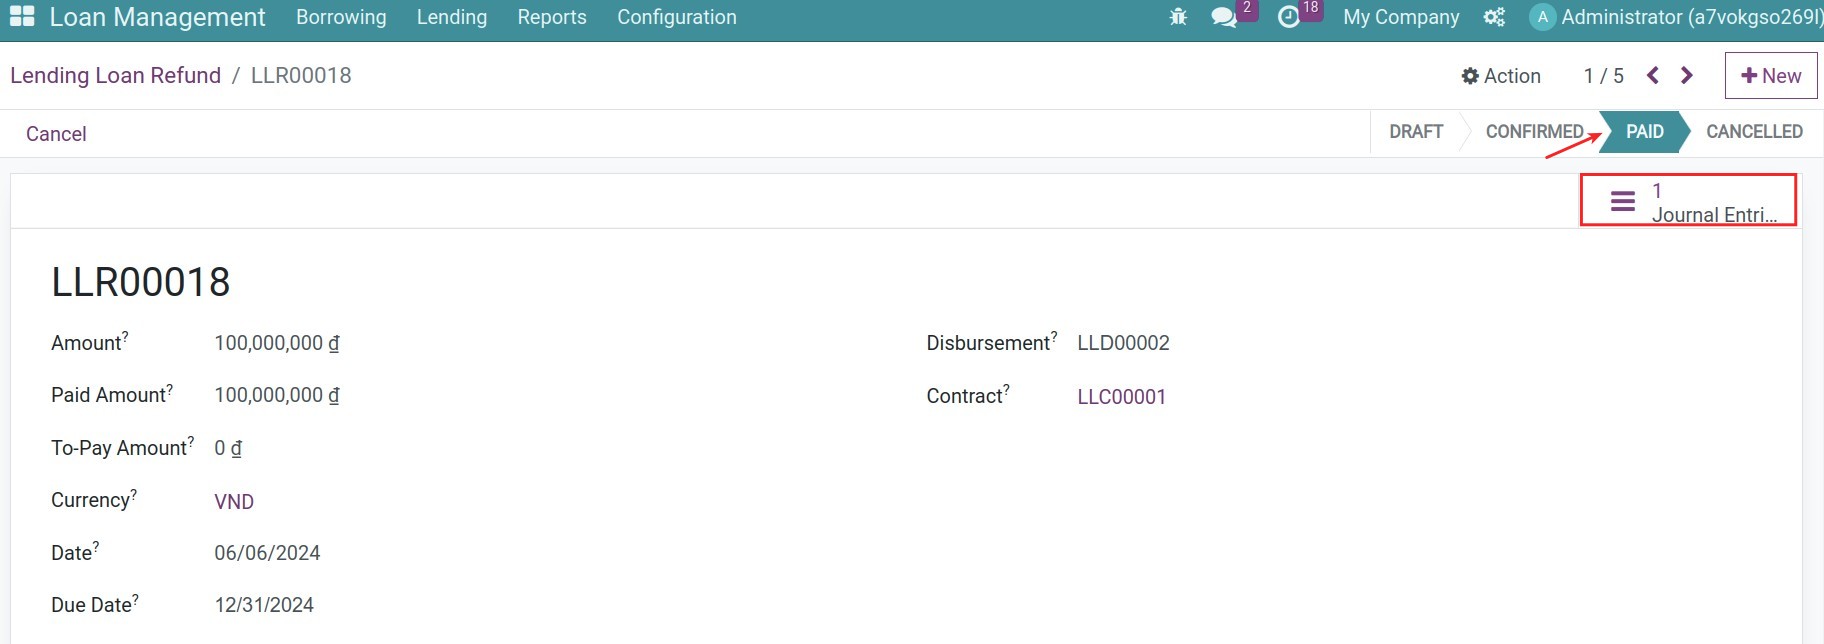
When the payment is confirmed, the refund will be in the Paid status, and the respective journal entries will be automatically created and posted to your accounting journal.
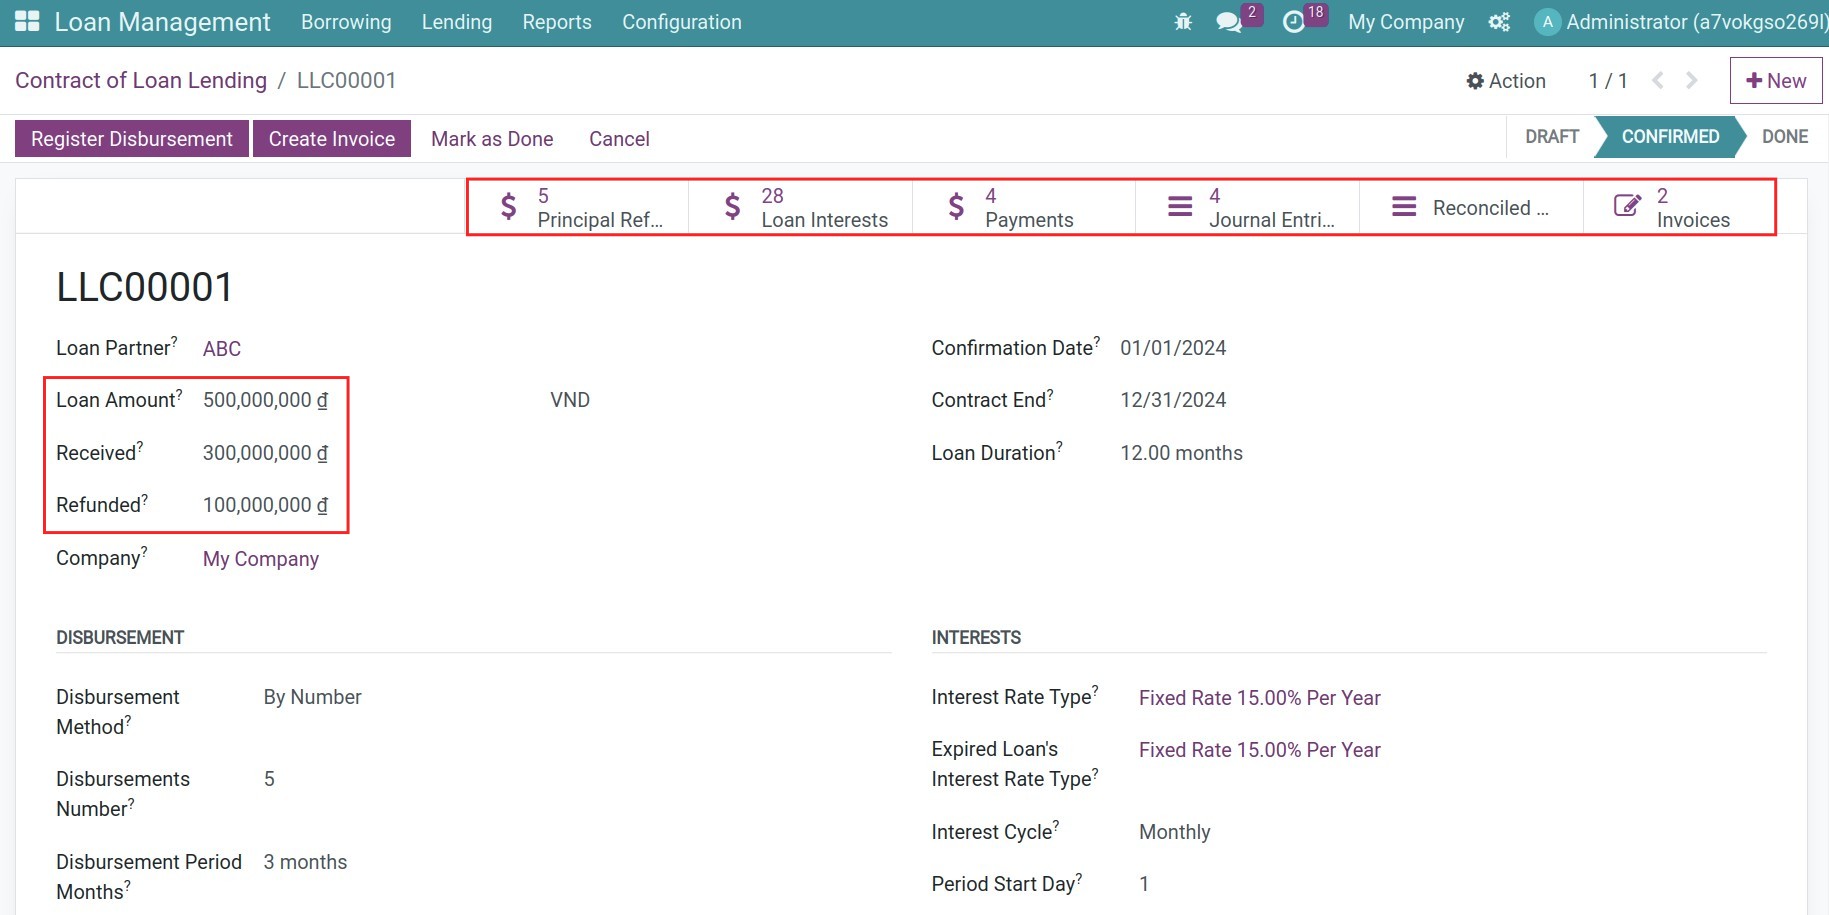
Back to the origin contract, the system will gather all the related data, so you can see and track their histories.
After finishing all the transactions of the Lending Contract, press Mark as Done to close the contract.
See also
Related article
Optional module