Connect The IoT Box
The IoT box is responsible for collecting data and controlling devices connected to the IoT box. To enable Viindoo software to connect to these devices, we need to connect the IoT box to the server. In this section, we will learn how to connect an IoT box to the server.
Connecting IoT boxs to the server can be accomplished through the following methods:
Directly connect the IoT box to the server
To directly connect from the IoT box to the server, we need to prepare the following peripherals:
IoT box.
Standard 5V-3Ampe power supply, with a Type C connection standard.
Monitor with an HDMI port.
HDMI cable with a micro HDMI to HDMI connection standard.
Computer keyboard and mouse.
Ethernet cable with internet connection.
Other peripherals wanting to connect to the server.
- Step 1: Connect the peripherals to the IoT box.
Connect the HDMI monitor to the IoT box.
Connect the internet Ethernet cable to the IoT box.
Connect other peripherals.
The last step is to connect the power supply to the IoT box.
After the startup time (approximately 2 minutes), the IoT box will display the following screen.
![Log in the IoT box to the server.]()
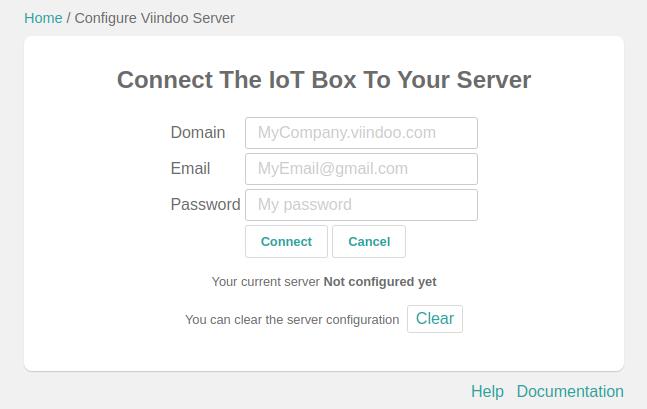
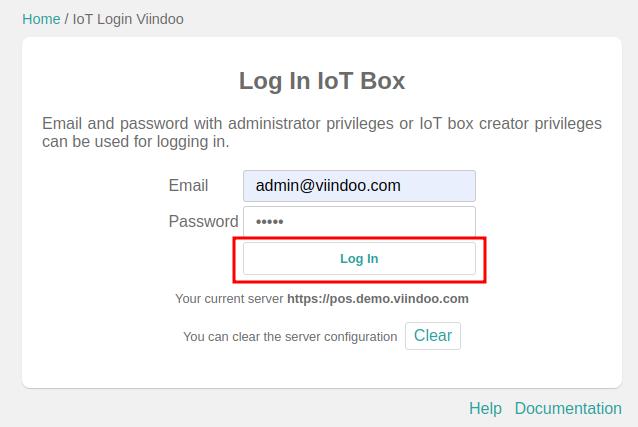
Step 2: Log in the IoT box to the server.
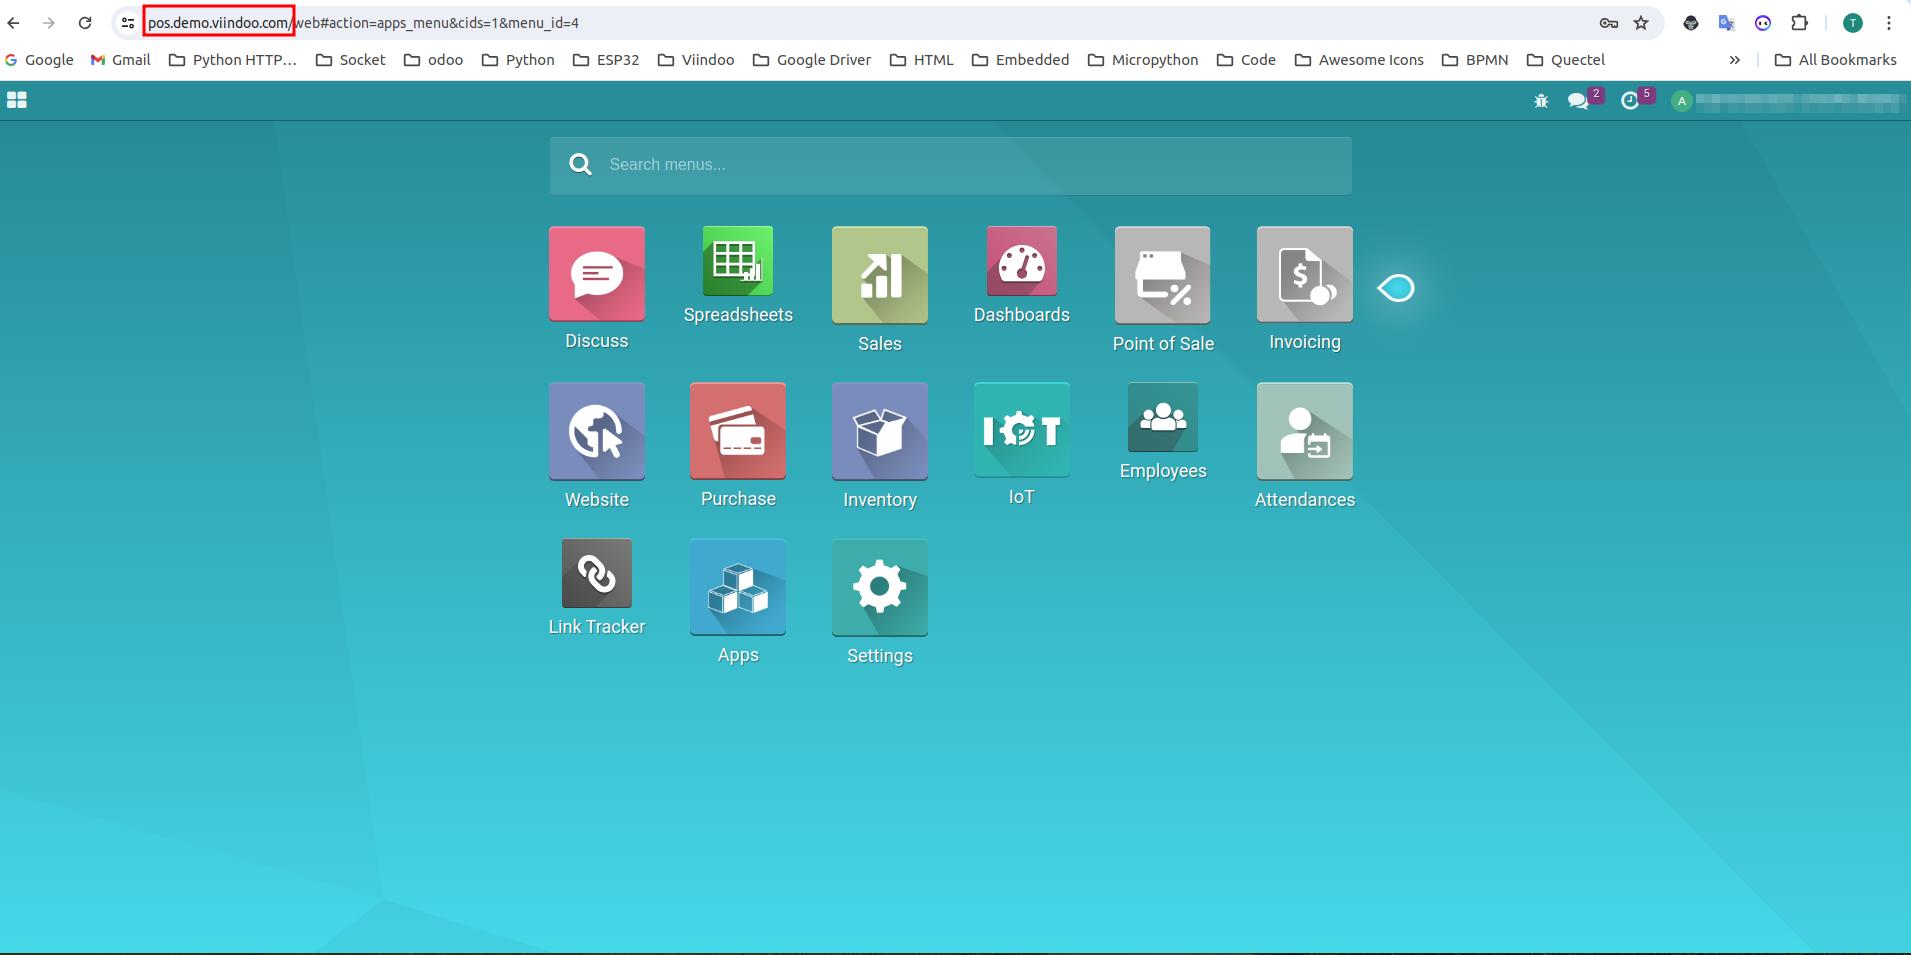
Enter your Domain address. It’s the address to access your website:
For example: pos.demo.viindoo.com
![Address instance]()
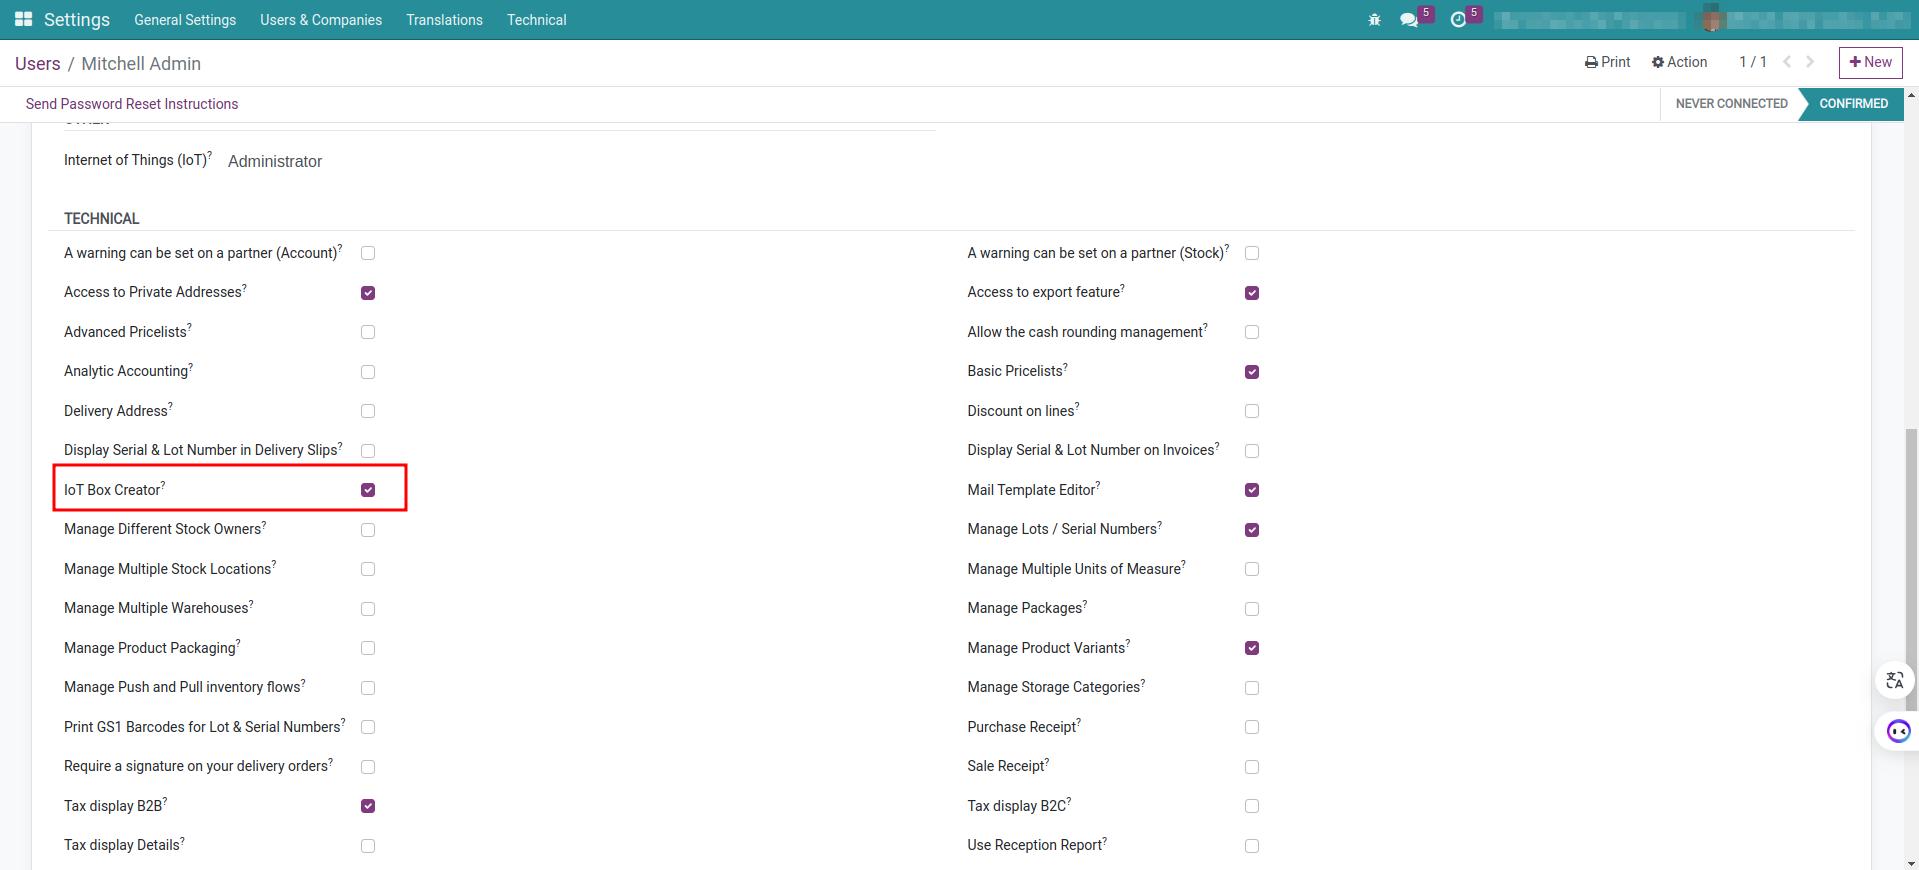
Enter the Email which is the login email of an internal user granted permission to create new IoT boxes. You can refer to: Advance Access setting up for User account
For example, the user with the email address admin@viindoo.com is granted permission to create new IoT boxes.
![Users granted permission to create new IoT boxes]()
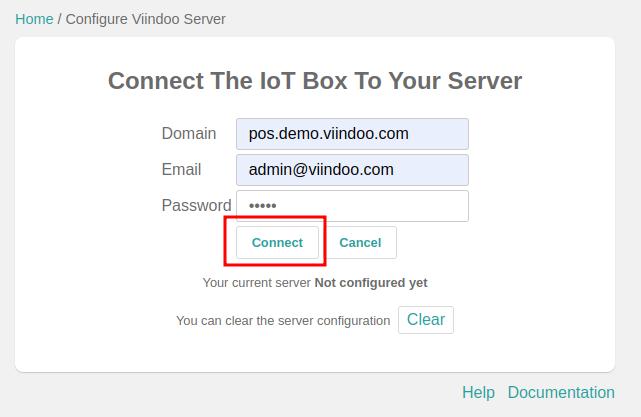
Enter the Password, which is the login password of the user account.
After filling in all the login information into the system, press the Connect button as shown in the following image.
![The screen filled with all the login information.]()
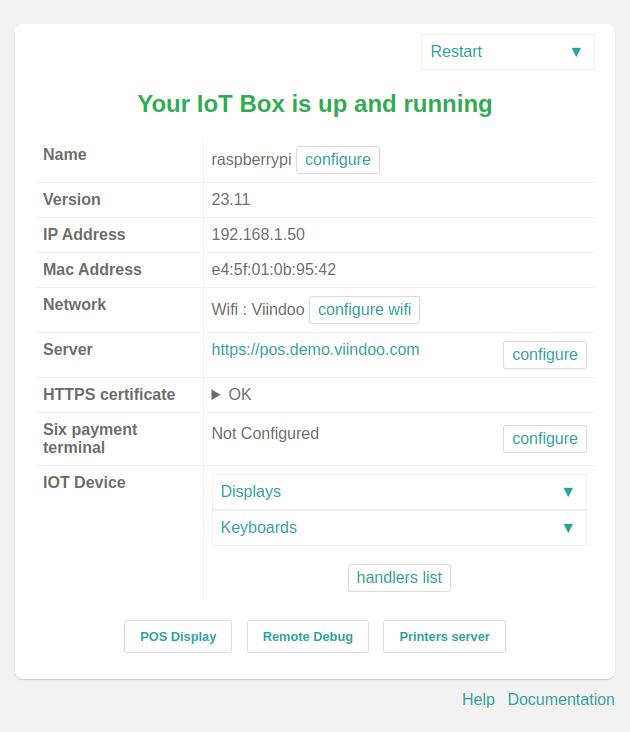
After successfully logging in, the software will navigate to the following dashboard page.
![The successful login screen]()
Connect the IoT box to the server through a web browser on a computer
Note
To determine the Homepage address of the IoT box, you need to connect the IoT box to the bill printer (thermal printer) via the USB port. The computer used to connect to the IoT box must be on the same LAN network as the IoT box.
To connect the IoT box to the server through a web browser, you need to prepare the following peripherals.
IoT box.
Standard 5V-3Ampe power supply, with a Type C connection standard.
Ethernet cable with internet connection.
Thermal printer (also known as a thermal bill printer) with a connection via USB port.
USB type A-B cable to connect the printer to the IoT box.
Computer with network connection compatible with the IoT box’s network.
Other peripherals wishing to connect to the server.
- Step 1: Connect the peripherals to the IoT box.
Connect the bill printer (thermal printer) to the IoT box via the USB port (ensure the printer is powered on).
Connect the IoT box to the internet via the Ethernet cable.
Connect other peripheral devices.
The final step is to connect the power supply to the IoT box.
Step 2: Connect to the IoT box through a web browser.
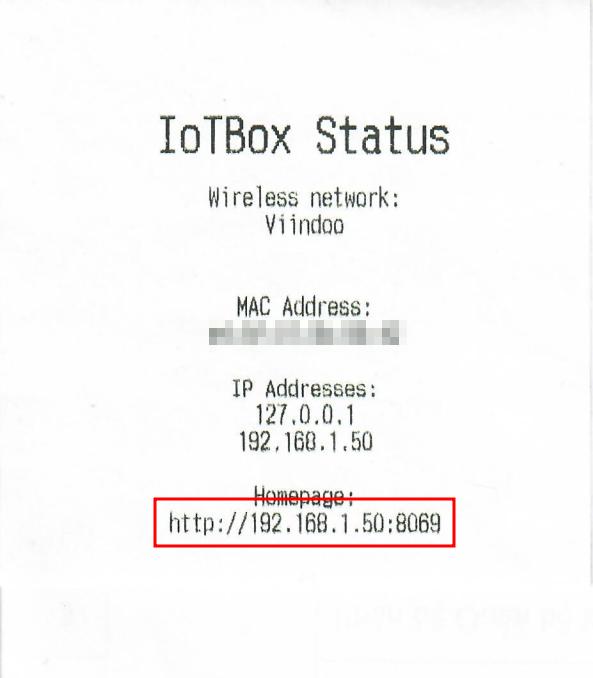
After the startup time (approximately 2 minutes), the IoT box will automatically print out one receipt on the thermal printer.
This receipt contains some information, including the Homepage address of the IoT box.
![The address of the IoT box is printed from the thermal printer]()
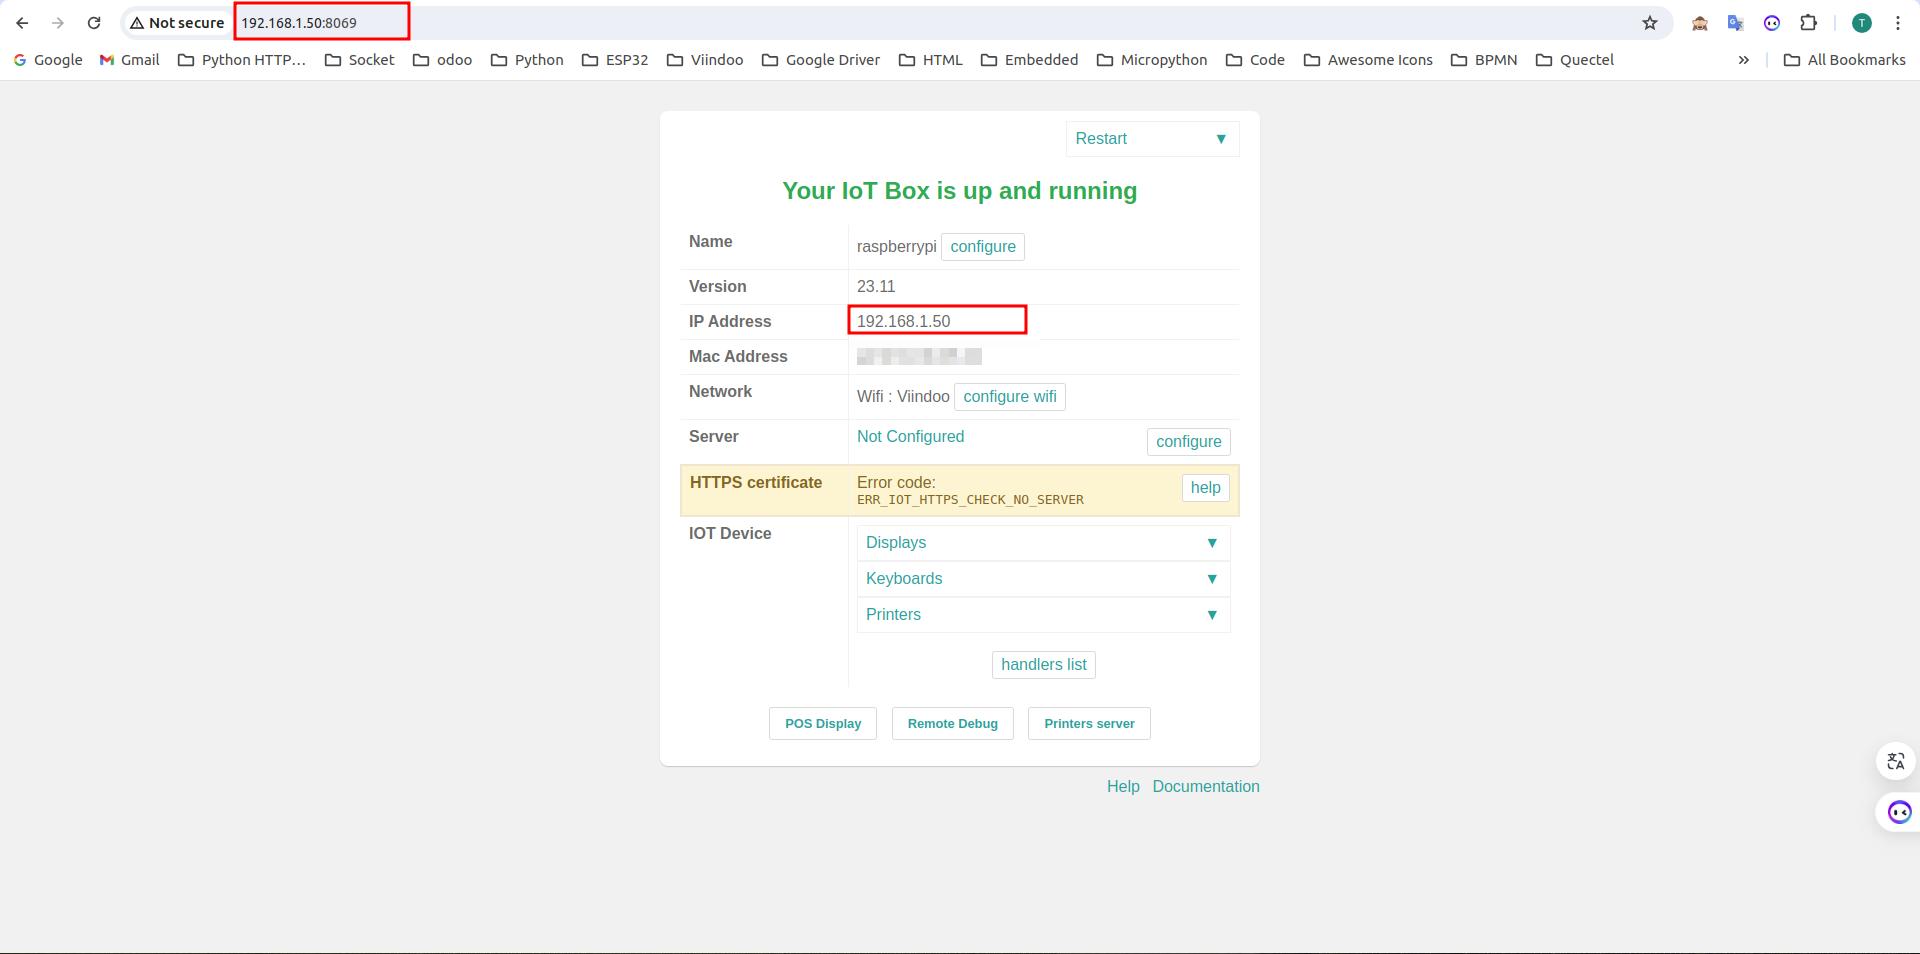
Type the address from the Homepage line into the browser to connect to the IoT box.
![The screen after connecting to the homepage address of the IoT box.]()
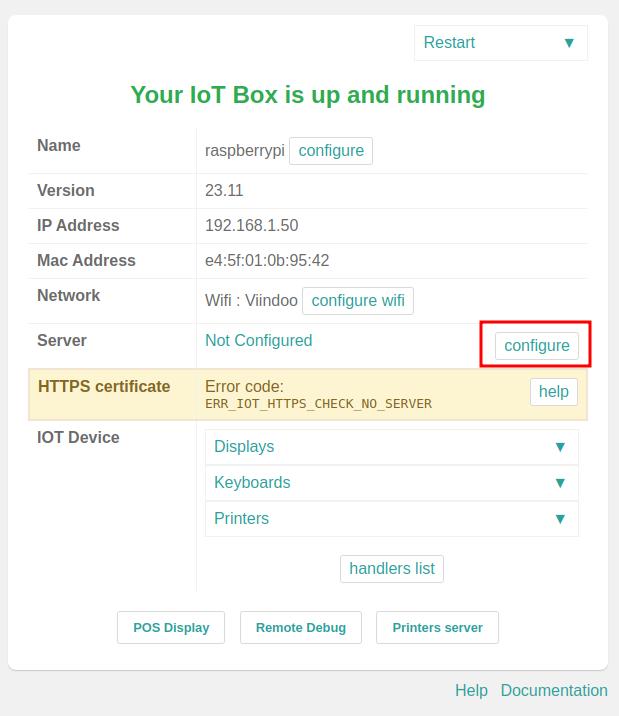
Press the configure button in the Server section as shown in the image below:
![The screen instructing how to log in to the IoT box on the server]()
Then, the login screen will appear.
![Log in the IoT box to the server.]()
Step 3: Log in the IoT box to the server.
This step is performed similarly to Step 2 in the section Directly connect the IoT box to the server
Connect the IoT box to the server via Wi-Fi network
Note
The Wi-Fi card on the IoT box may experience instability with certain 5GHz Wi-Fi bands. Therefore, it’s advisable to choose a Wi-Fi network with a 2.4GHz band for more stable operation.
- The devices needed to prepare include:
IoT box.
Standard 5V-3Ampe power supply, with Type C connection standard.
Other peripheral devices wanting to connect to the server.
Computer with Wi-Fi connectivity capabilities.
- Step 1: Connect the peripheral devices to the IoT box.
Connect any peripheral devices to the IoT box if available.
Connect the power supply to the IoT box.
Step 2: Connect to the Wi-Fi network of the IoT box.
After the startup time (approximately 2 minutes), use the prepared computer to search for available Wi-Fi networks.
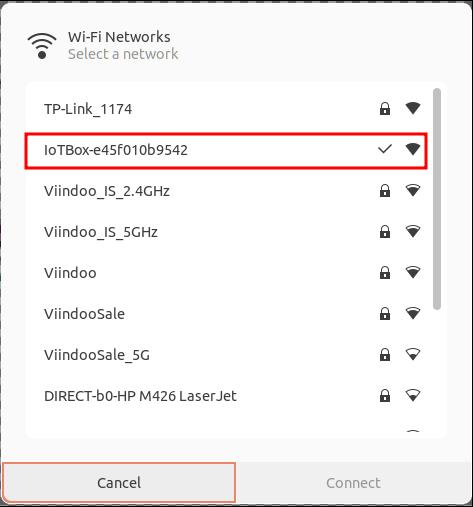
Select and connect to the Wi-Fi network with the following name: IoTBox-*
![Search for available Wi-Fi networks.]()
- Step 3: Connect the IoT box to the Wi-Fi network.
When the computer is connected to the Wi-Fi network of the IoT box, the following login page will appear.
![Log in to the Wi-Fi network of the IoT box.]()
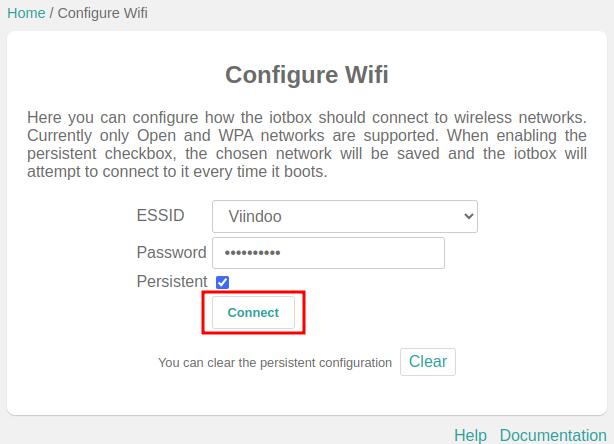
Select the Wi-Fi network name to connect to in the list: ESSID.
Enter the password of the Wi-Fi network.
Check the box for Persistent.
Press Connect to connect the IoT box to the Wi-Fi.
![Log in to the Wi-Fi network.]()

Note
It’s advisable to check the box for Persistent to remember the connected Wi-Fi.
The IoT box can only remember one Wi-Fi address.
After logging into the Wi-Fi network (approximately 1 minute), the IoT box will automatically print out one receipt on the thermal printer.
![The address of the IoT box is printed from the thermal printer.]()
- Step 4: Connect to the IoT box through a web browser.
Use the address in the Hompage line to connect to the IoT box. Then, repeat from Step 2 as in the section Connect the IoT box to the server through a web browser on a computer
Log in to the IoT box after connected to server
For the security and safety of the IoT box, once it’s connected to the server, access to the IoT box requires logging in.The login credentials are the same as your system login credentials. This account must be granted admin privileges or IoT box initialization privileges. You can refer to Advance Access setting up for User account
After successful login, the website will navigate to display the homepage of the IoT box.
See also
Related Article
Optional Module