Initial Configuration of the Helpdesk app
Requirements
This tutorial requires the installation of the following applications/modules:
When using the Helpdesk app, you need to set up some initial configuration to use features like:
Divide the helpdesk team according to using purposes such as business, department, etc.
Manage the tickets in stages.
Classify the tickets.
Service Level Agreement (SLA Policy).
Get customer reviews for tickets.
Stages
To set up stages for the helpdesk tickets, navigate to .

There are 4 default stages New, Assigned, Resolved, Cancelled. In case you want to add more stages, click +New and fill in the following information:

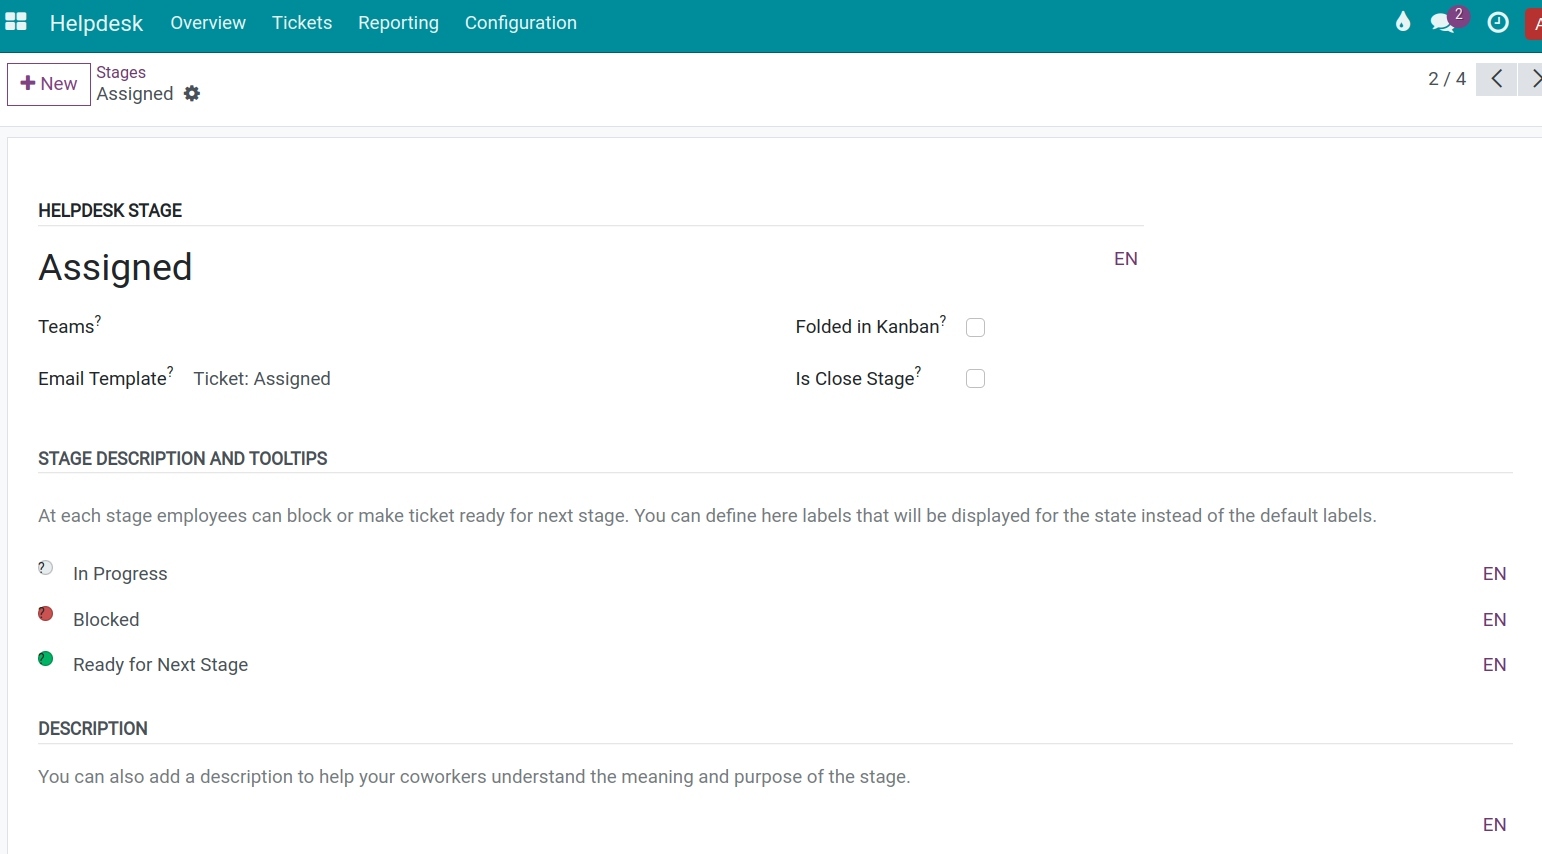
Helpdesk Stage: Type a name for the stage.
Email Template: If set up, an email template will be sent to customers every time a ticket is moved to this stage.
Folded in Kanban: Fold the stage when displayed in Kanban.
Is Close Stage: Check if this is the final stage in the support process. Any tickets moved into this stage will be considered resolved.
Stage Description and Tooltips: At each stage, the user can block or announce a ticket being ready for the next stage. You can redefine the default label here by editing each label.
Description: Briefly describe for users to understand the meaning of this stage.
Press the Save manually icon to save the information and create the stage.
Helpdesk Team
To set up a helpdesk team, navigate to .
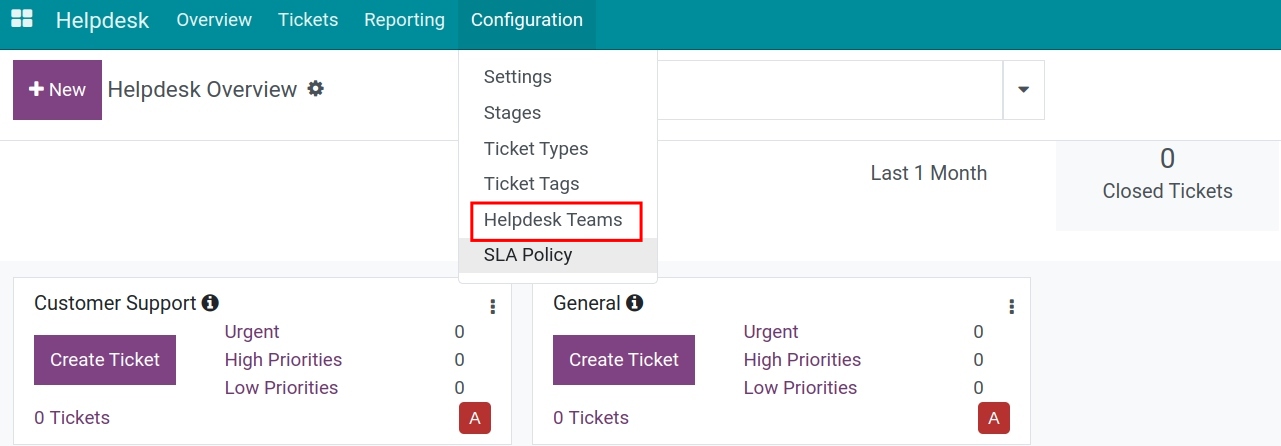
Press +New and fill in the following information:

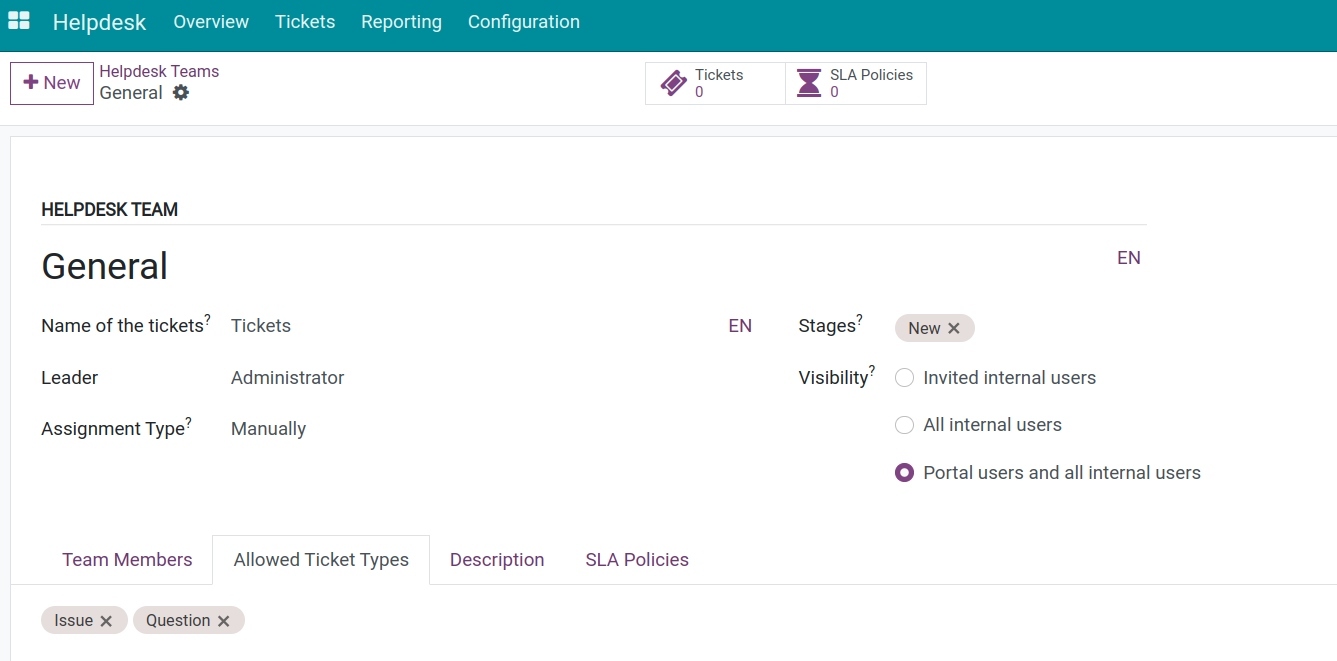
Helpdesk Team: You can name the team corresponding to a particular department or a particular business area.
Name of the tickets: The label that will be used for the ticket of the team (e.g. tickets, support requests, etc.). You can see the name of the tickets on the Helpdesk Overview.
Leader: The team leader in charge of this helpdesk team.
Assignment Type:
Manually: The new ticket will be assigned manually by the leader.
Balanced: When a ticket is created, the system will automatically assign it to the team member with the least number of in-progress tickets. There is an additional Team Leader Excluded check box, the helpdesk leader won’t be assigned any ticket.
Random: When tickets are created, members will be assigned the same number of tickets. There is also the Team Leader Excluded option here.
Stages: Select default stages for the helpdesk team.
Visibility:
Invited internal users: Only the internal users can only see the team.
All internal users: All internal users can see the team.
Portal users and all internal users: All internal users and portal users can see the team.
Tab Team Members: The list of all the members of this team. Click Add to add more members.
Tab Allowed Ticket Types: The ticket types that will be used as default for a ticket team during ticket team creation for the current company.
Tab Use rating on helpdesk: Track customer satisfaction on Helpdesk.
Tab Description: Brief description of the helpdesk team.
Tab Email: Create an Email Alias for this helpdesk team.
Tab SLA Policies: The system automatically integrates based on the SLA policy setting.
Now when you navigate to the Overview menu, the helpdesk team that you have just set up will be displayed as a Kanban card.
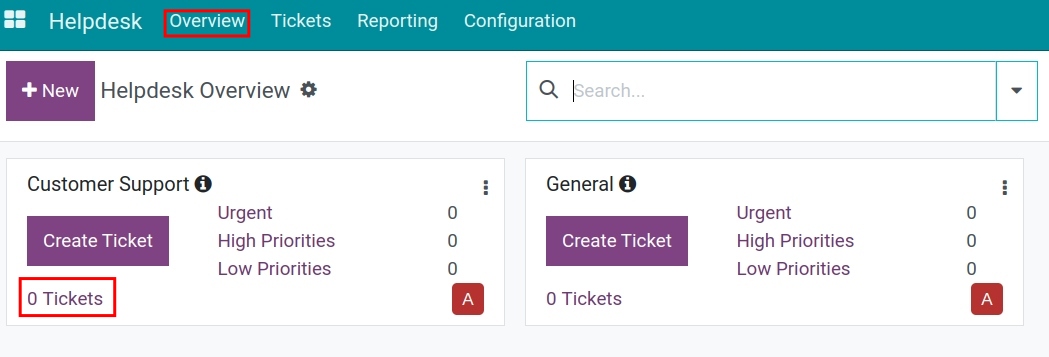
Each view, which you have just configured, includes statistical information such as the total number of tickets. The tickets are prioritized by 3 levels Low Priority, High Priority, Urgent. In addition, you can create a ticket directly from this view by hitting the Create Ticket button.
Ticket Types
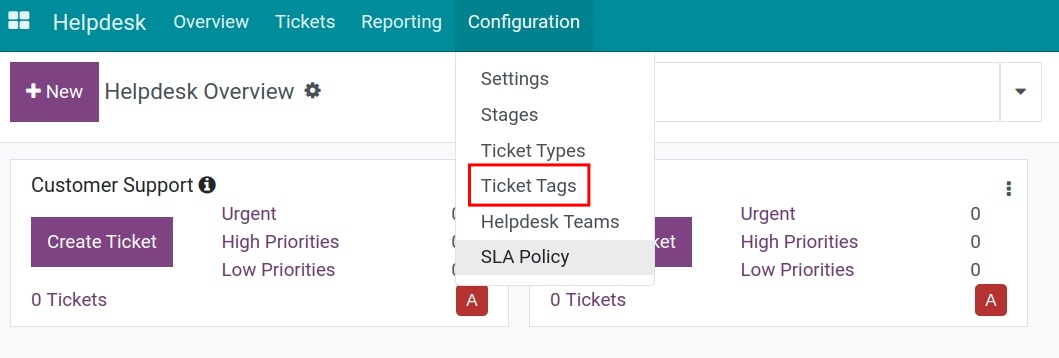
The ticket type makes it possible for users to distinguish the contents of tickets within a helpdesk team. To configure ticket types on the entire system, go to .

Hit +New and fill in the following information:
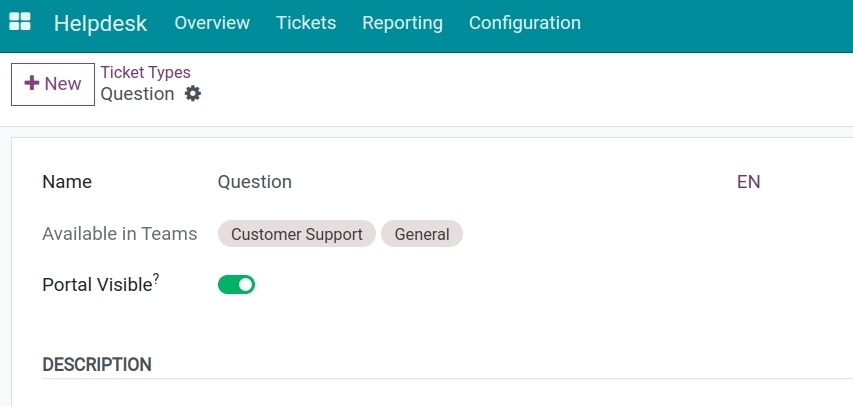
Name: Name of the ticket type.
Available in teams: Select the support team for which this request type is available.
Portal Visible: Activate if you want to show this type in the web portal.
Description: Brief description so that the user can identify the intended use of this type of ticket.
SLA Policy
The SLA policy is a measure of how effectively an employee supports the work of a ticket. To set it up, navigate to .

Hit +New and fill in the following information:

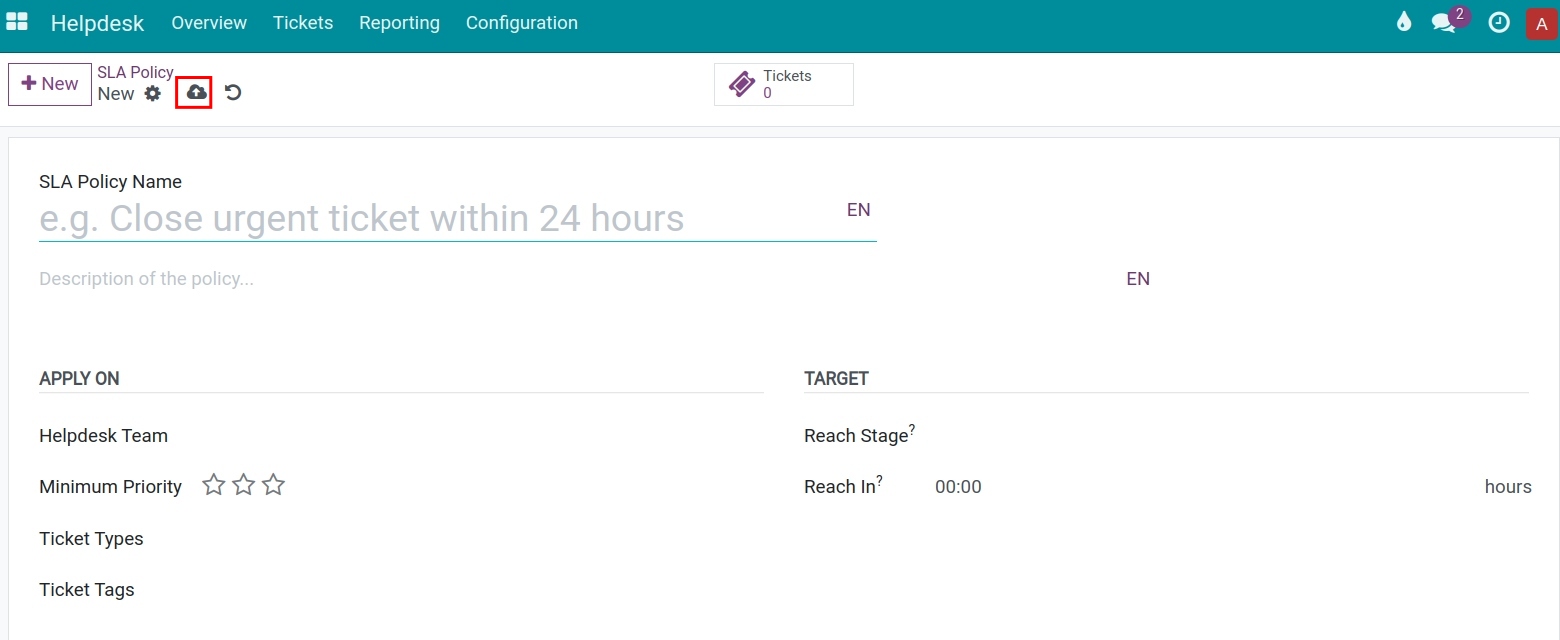
SLA Policy Name: Enter the name of the SLA policy.
Description of the policy: Enter a brief description or purpose of the SLA policy.
Helpdesk Team: Only one team is allowed to apply this policy.
Minimum Priority: Set the minimum priority to apply this SLA policy.
Ticket Types: Select the ticket type to apply this policy.
Ticket Tags: Select different tags the policy applies.
Reach Stage: The ticket stage to apply this SLA policy. For example, here select the Resolved stage. The ticket needs to reach the Resolved stage to meet this SLA policy.
Reached in: The maximum hours to reach the stage set on the Reach Stage field, calculated from the moment the ticket is created. Let’s continue with the example above, if we set 10 hours in this field. The ticket must reach the Resolved stage within 10 working hours from the creation of the ticket in order to be qualified for this SLA.
Note
SLA Policies are not allowed to have the same condition.
Hit the Save manually icon to save the information.
Rating on tickets
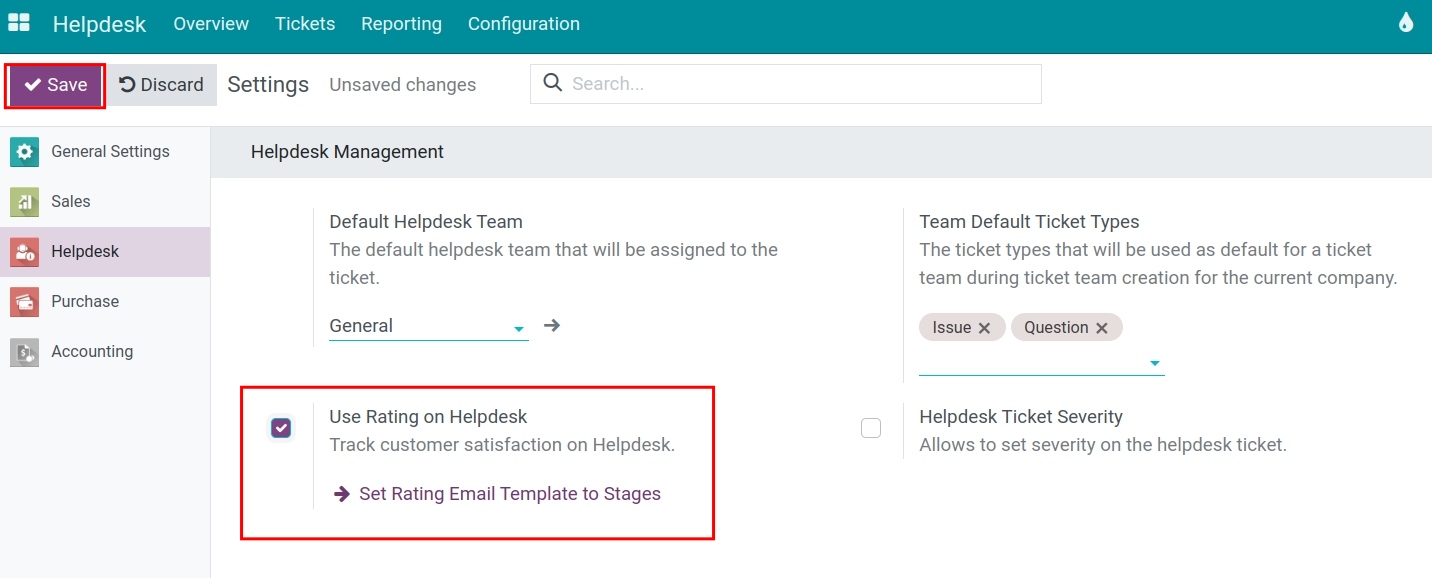
After resolving a helpdesk ticket, you can send a rating email to the customer to receive their feedback on the customer support they have received. To enable the rating feature, navigate to .
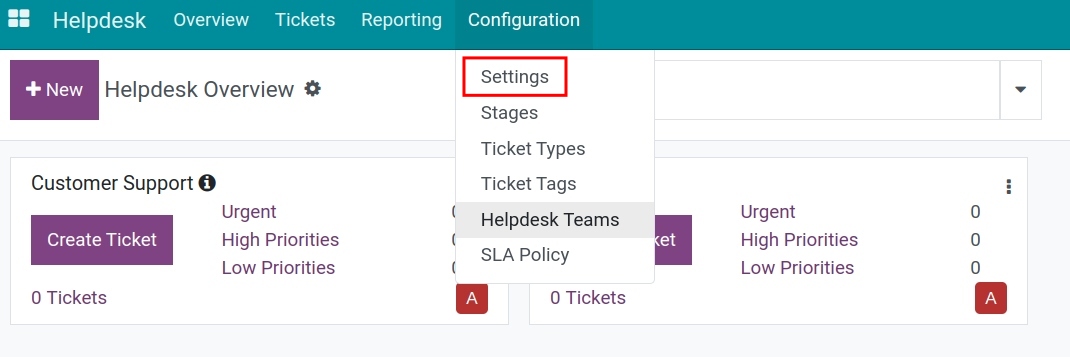
Enable Use Rating on Helpdesk, then hit Save to save the change.
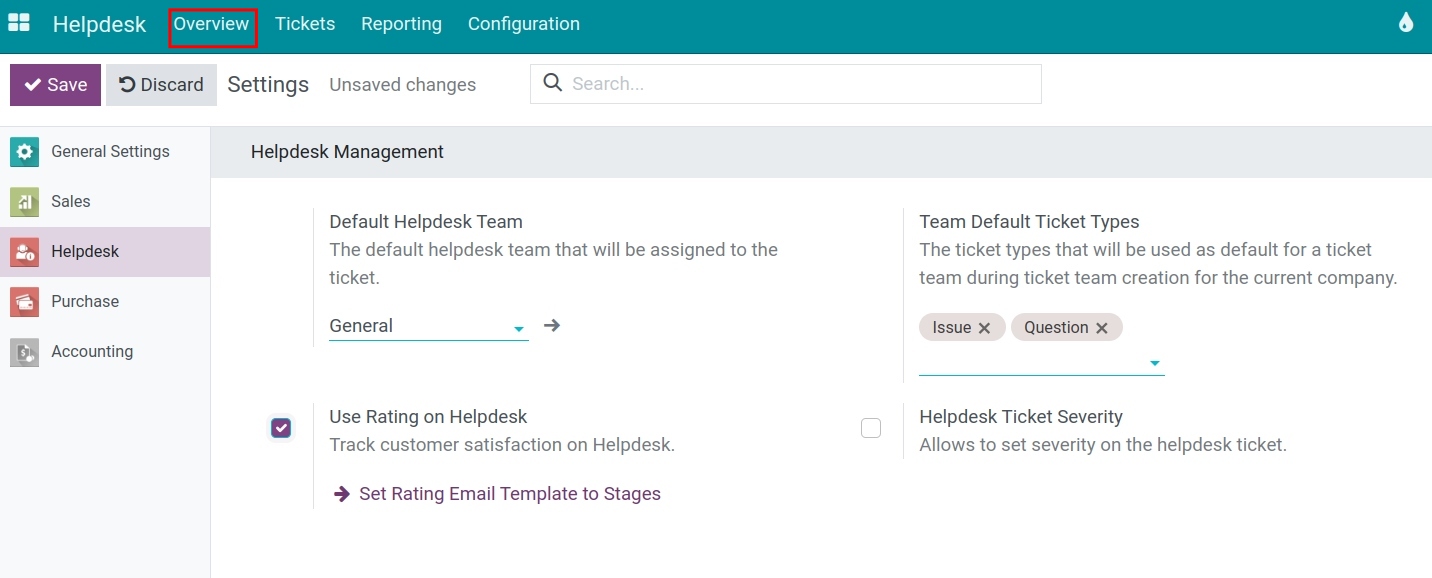
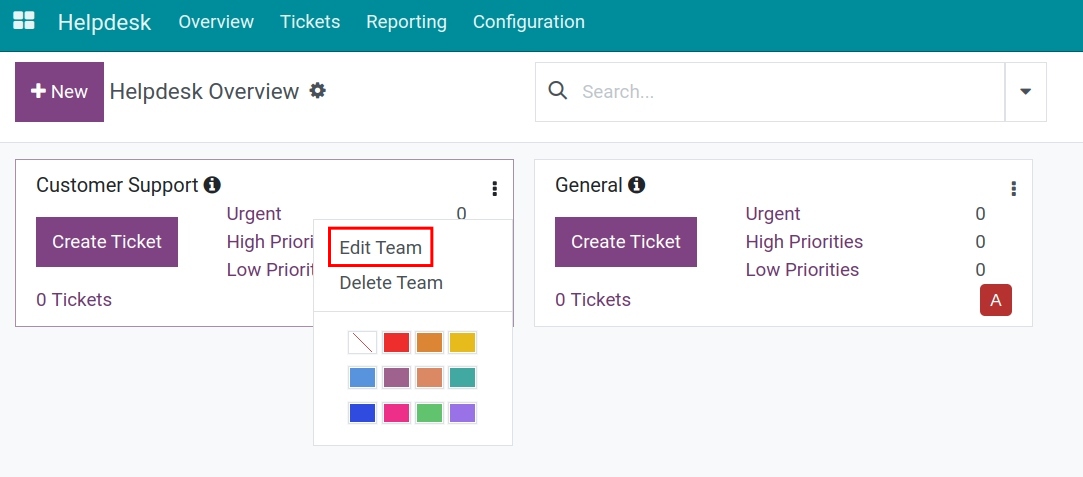
Return to the Overview menu, in the Helpdesk group, hit the 3 dots icon, and select Edit Teams to view the details.
On the detailed view, there is now an additional Customer Ratings tab, there are 3 options as follows:
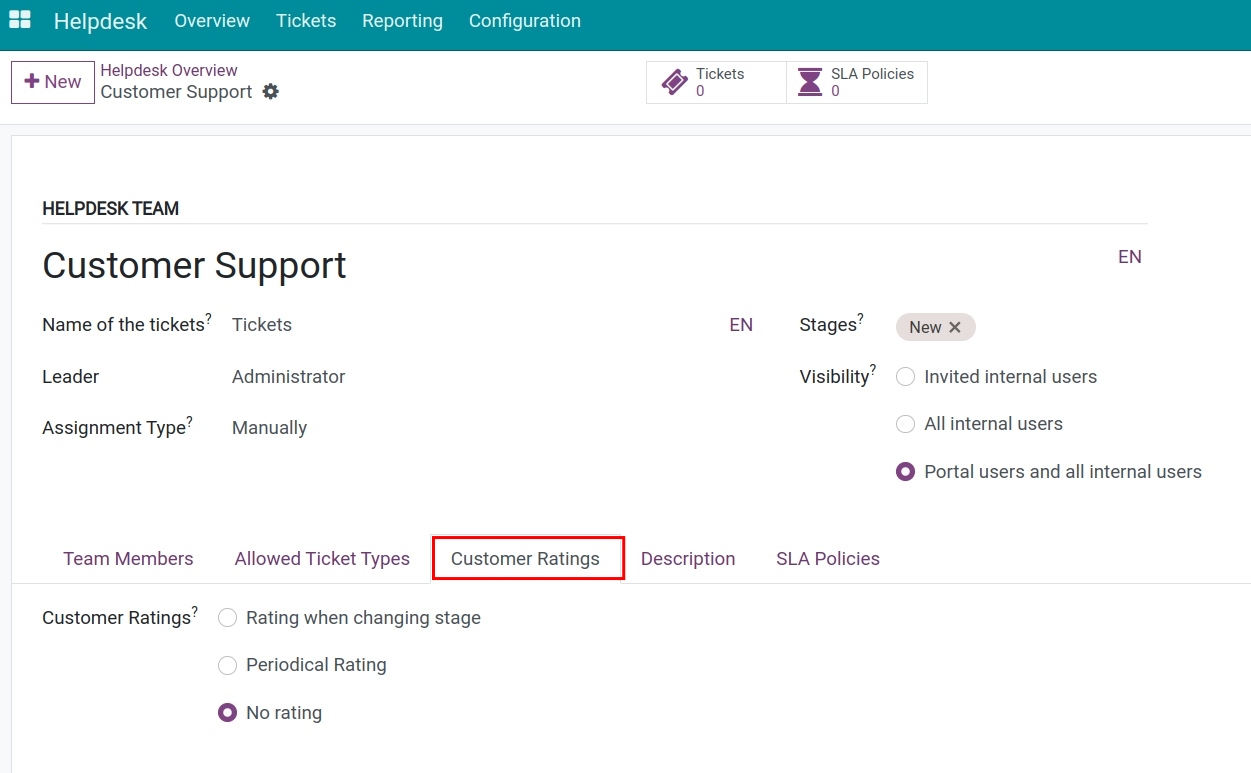
- Rating when changing stage:
The rating email will be sent to the customer upon the stage changes. The email templates will be set up on the configuration of each stage.
- Periodical Rating:
Sends rating emails periodically at a pre-set time. Checking on the Rating visible publicly option will allow customers to rate on the website browser.
- No Rating:
The helpdesk team will not be rated.
Configuration of the rating types will be applied across all tickets attached to the helpdesk team. However, this option can also be edited on each ticket.
See also
Related article
Optional module
