Create Payslips Batches
Viindoo’s Payroll management app gives you the ability to create payslips in the same payslips batches for all employees in a company or for each department, workshop, etc. depending on the salary structures of the company. To create a payroll, you can choose automatic or manual generation.
Manual payroll generation
To create a payroll, go to Payroll ‣ Payslips ‣ Payslips Batches:
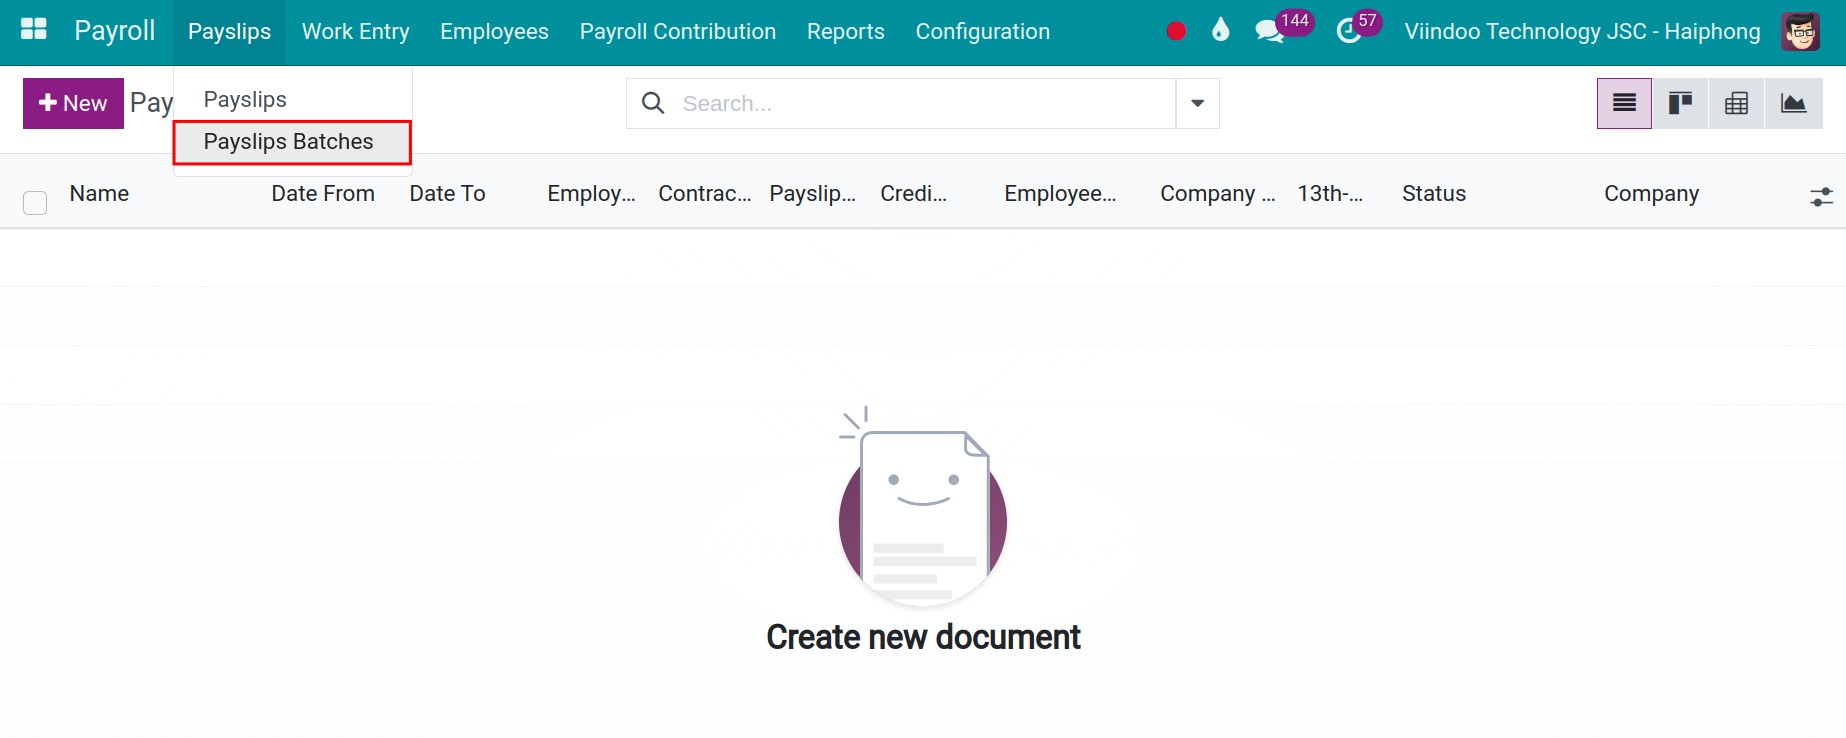
Click New button to open the view of the payroll and fulfill the below information.
General information on payroll
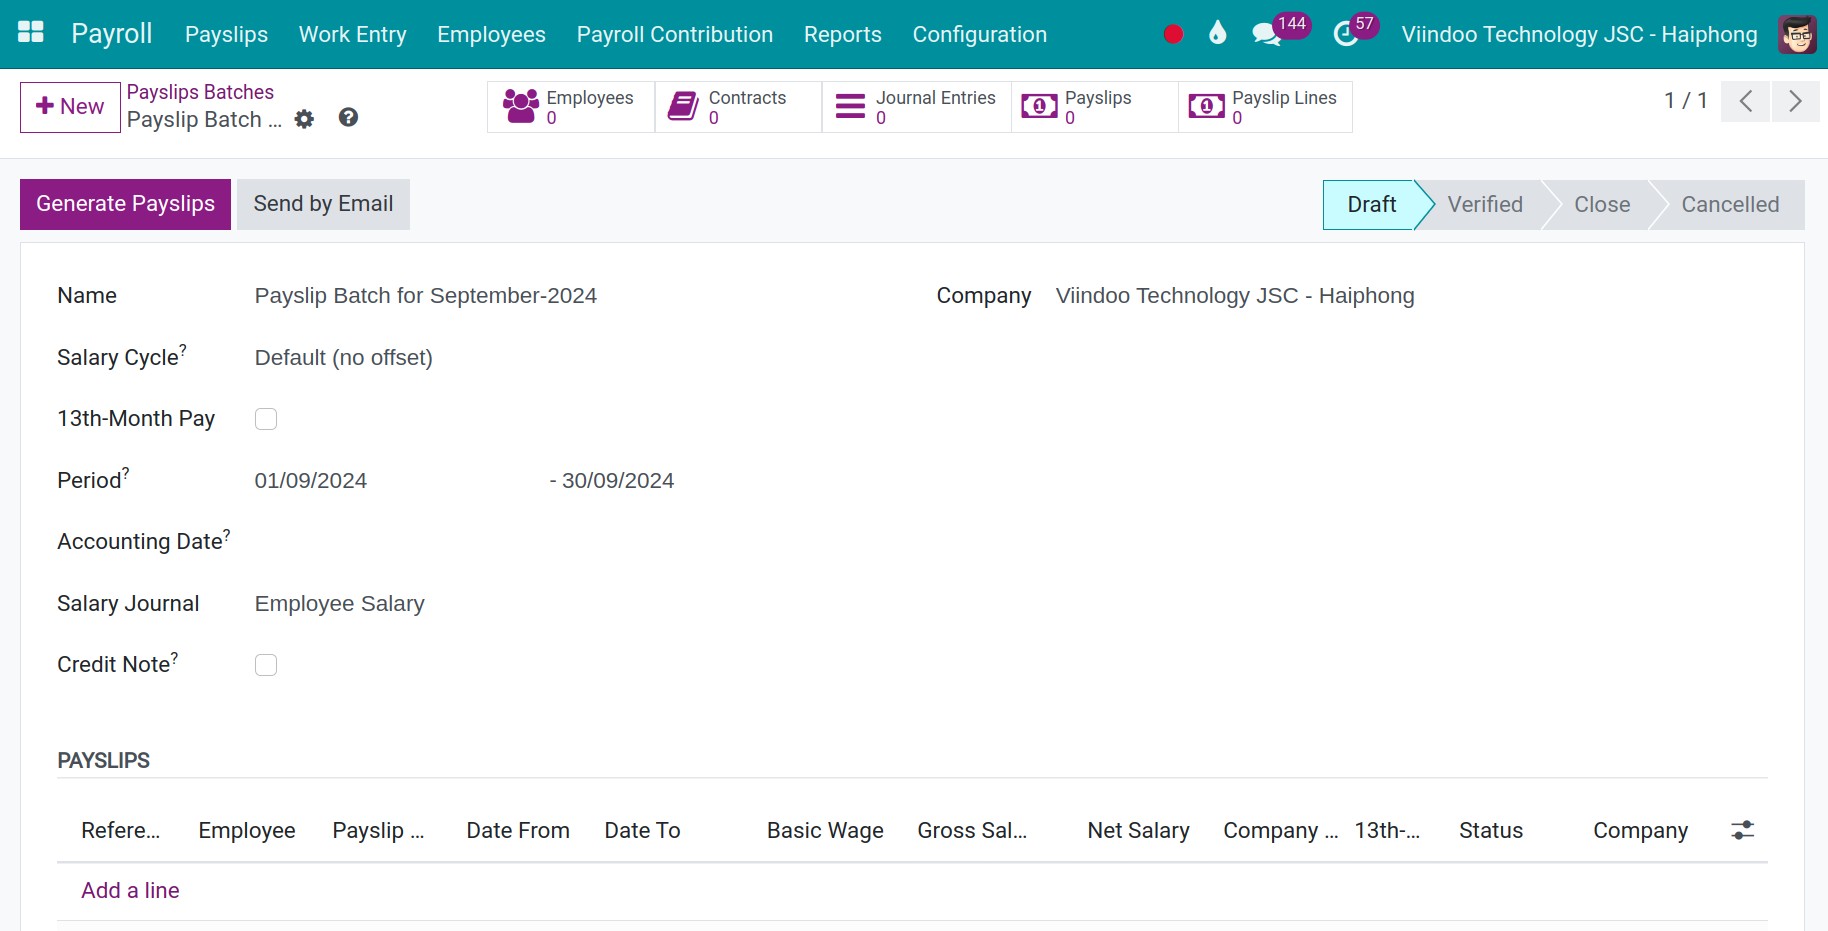
Name: Name the payroll. The system will suggest to you the name of the current monthly payroll. In case you create the payroll for each department, factory workshop, etc. you can assign the department name on the payroll name for easy lookup. For example: Equipment PX - February 2020 Payroll.
Salary Cycle: Select your company’s salary cycle. The system will automatically suggest the default salary cycle configured in Payroll ‣ Configuration ‣ Settings.
13th-Month Pay: Enabled this feature when you want to calculate the 13th-month salary.
Period: This period will be automatically suggested based on the salary cycle you have set and selected above. You can adjust the time in this cycle according to the actual payroll.
Accounting Date: The accounting date of the journal entry is auto-generated from this payslip batch. Keep this field empty if you want to use the period of the validation end date.
Salary Journal: Choose the journal to gather the salary journal entry.
Credit Note: If checked, all the payslips on this payroll will become refund slips.
Payslips generation
After filling in the general information fields, press the Generate Payslips button to generate payslips:
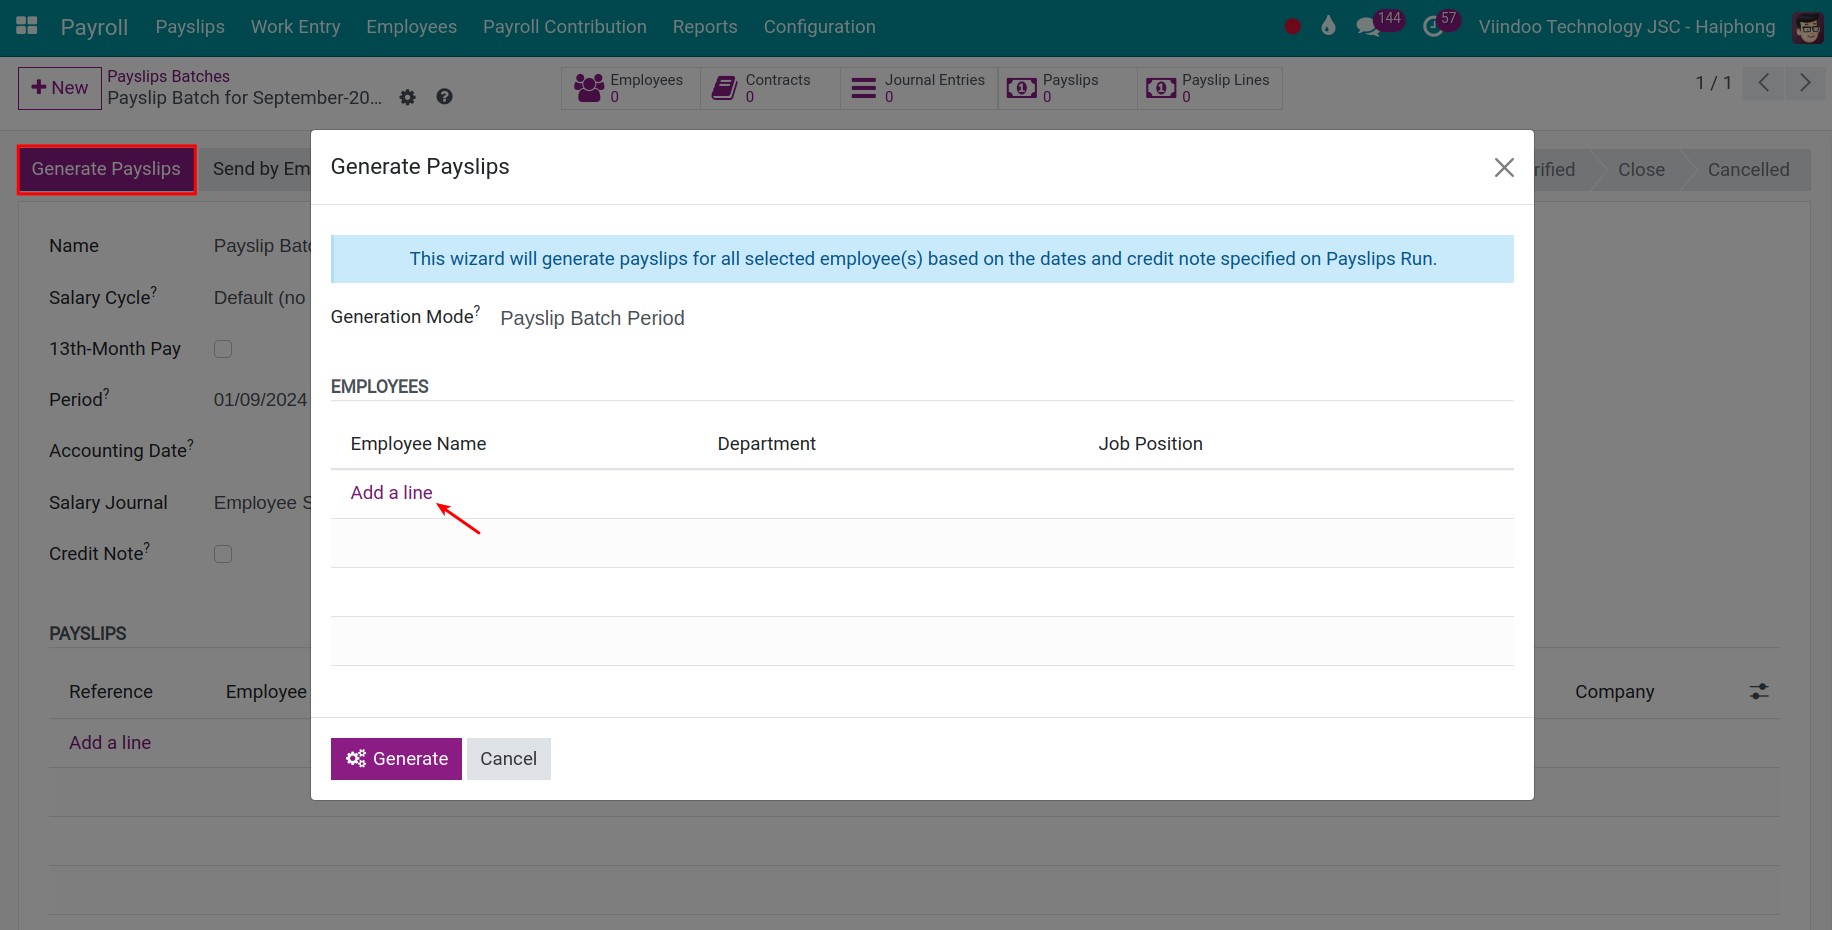
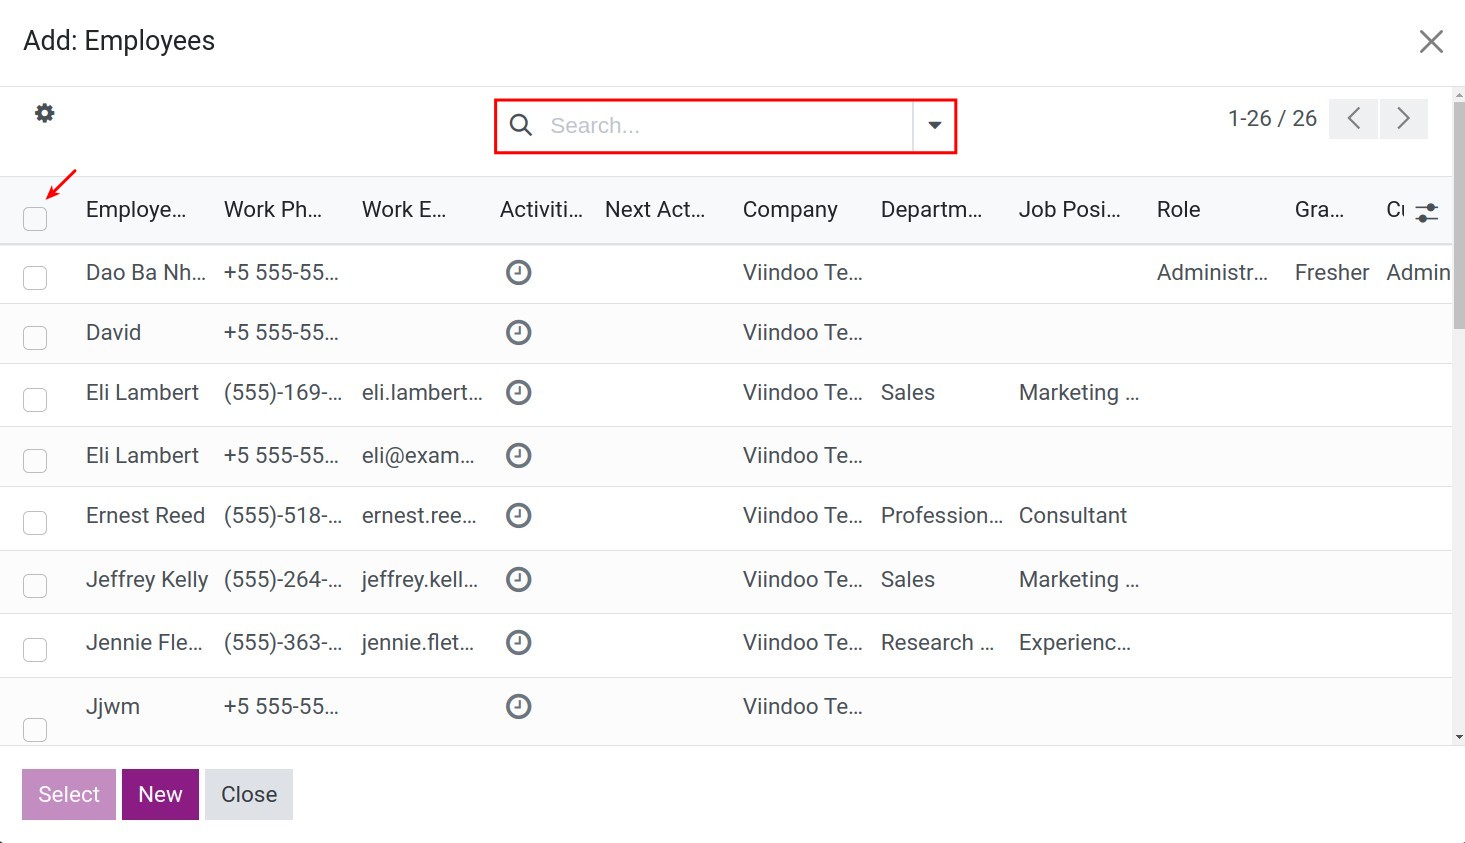
Step 1: Click Add a line to select employees who need to generate payslips. At this view, you use the group by feature and the filter for this purpose, check batch selection, then press Select.
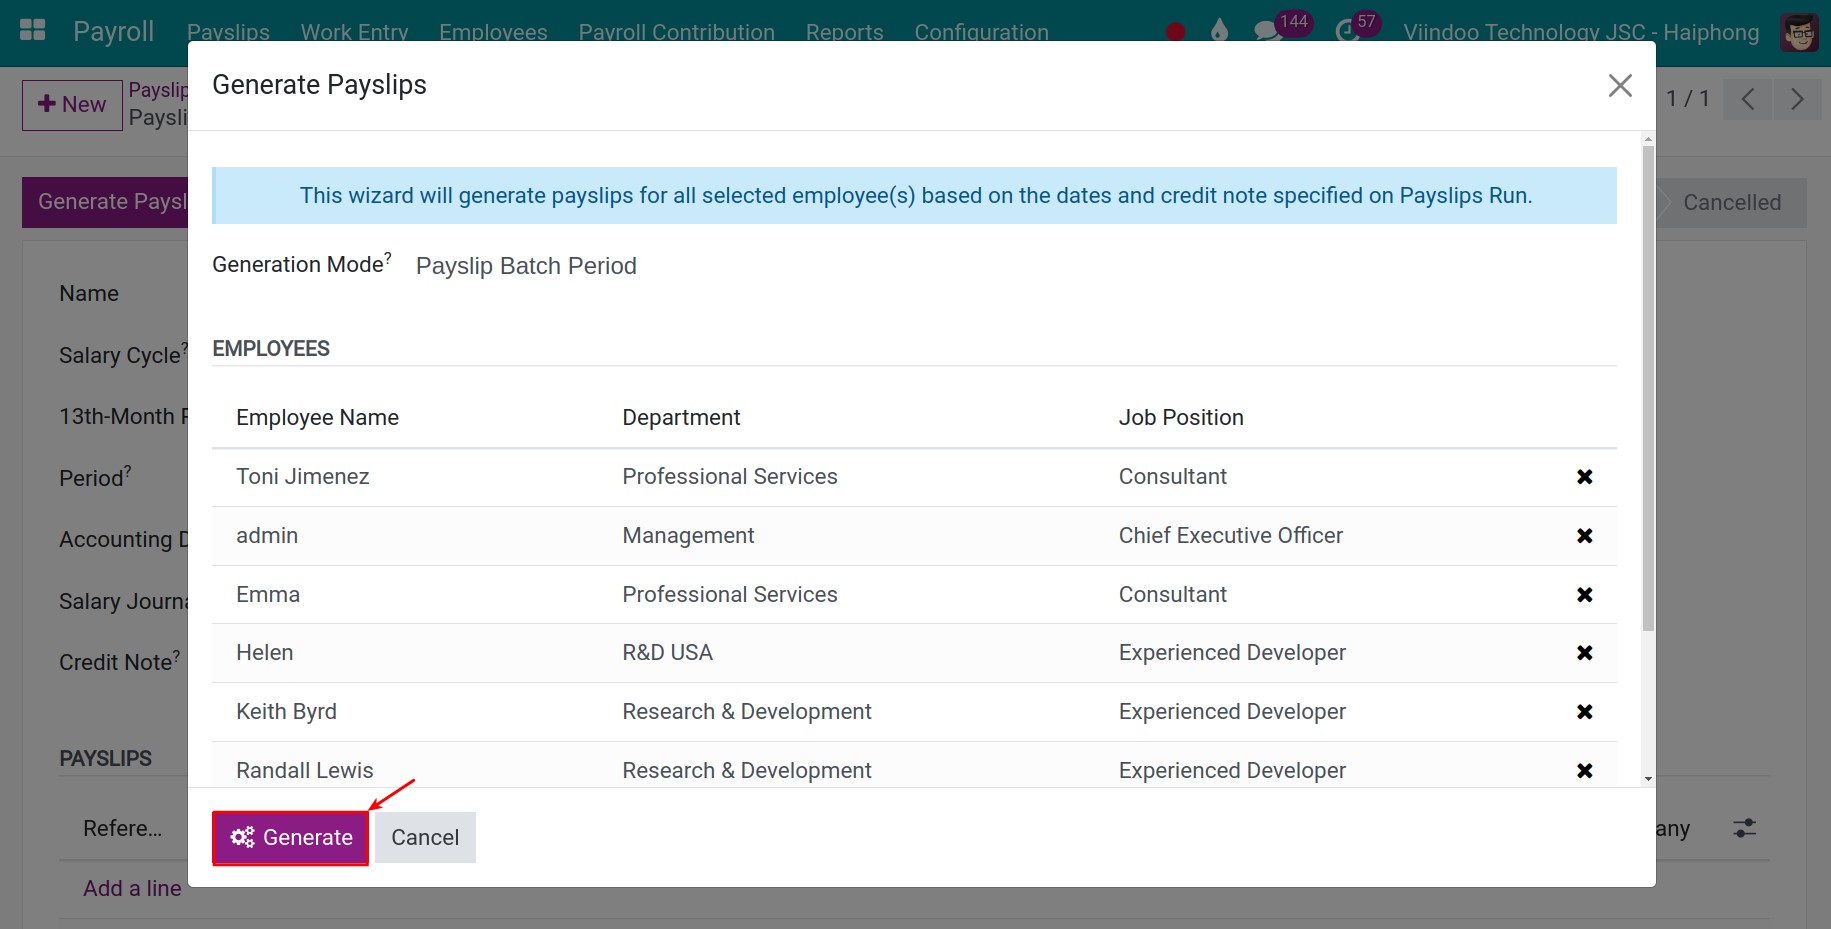
Step 2: Click Generate on the payslip generation window to generate payslips:
Note
In the same salary cycle, the system will only calculate for the running/expiring contracts with non-overlapping durations.
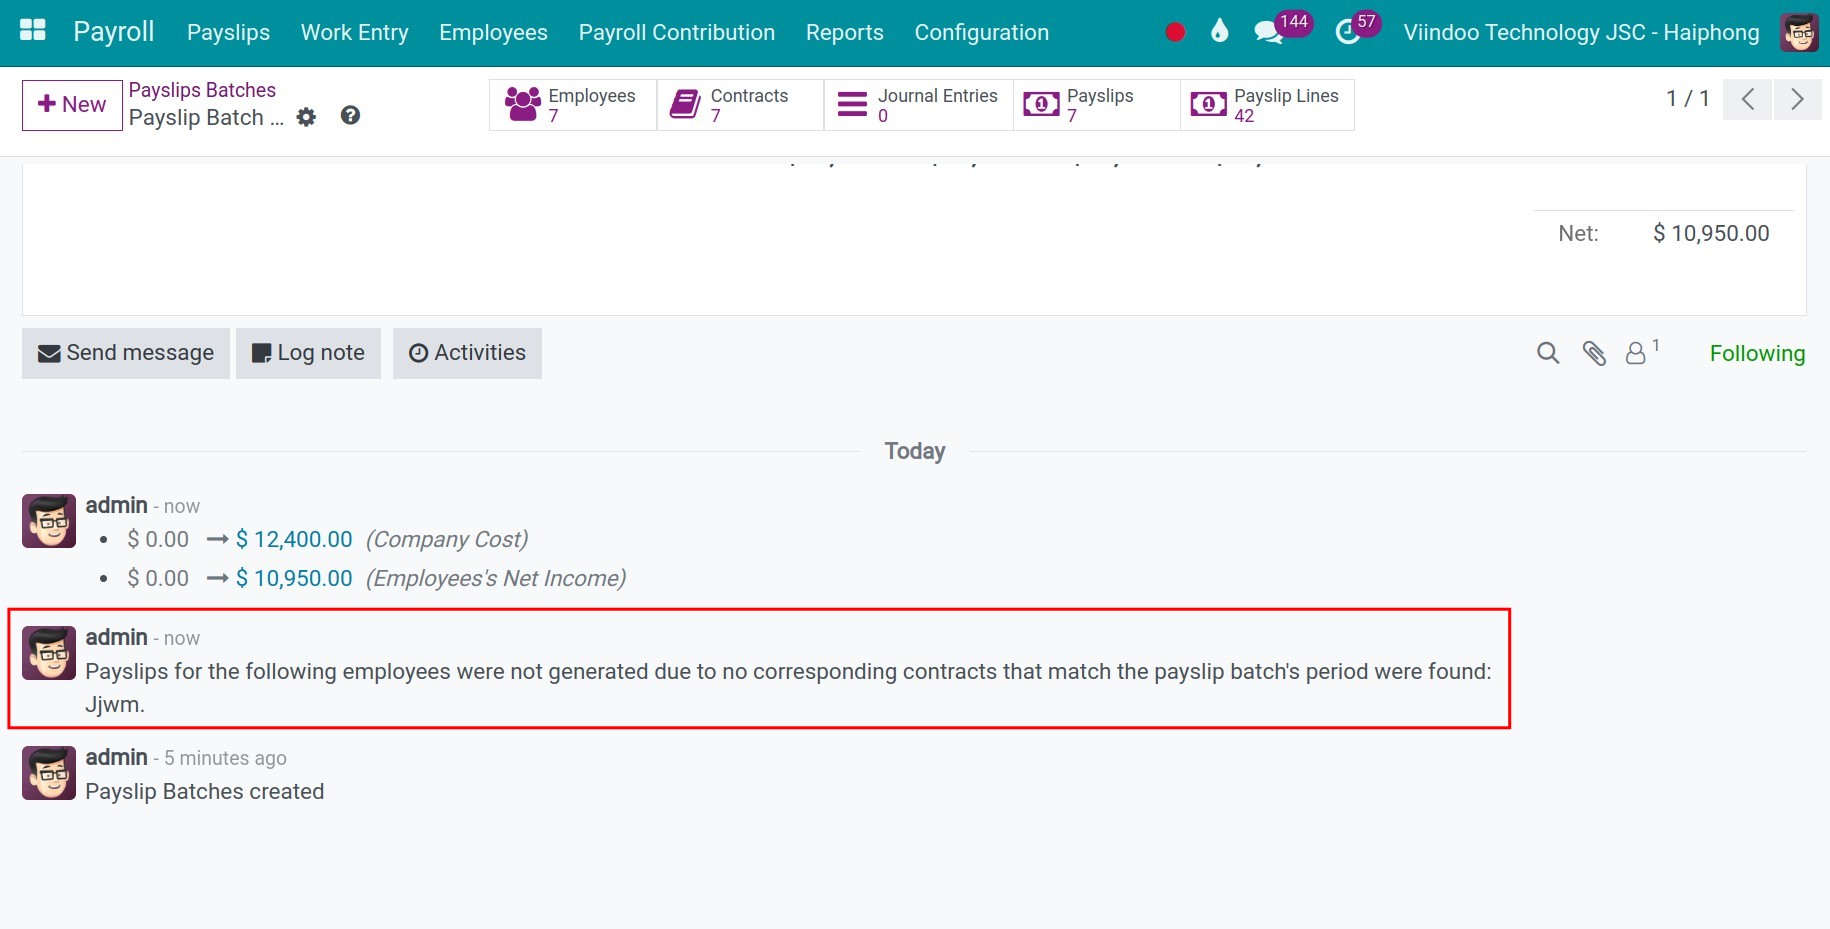
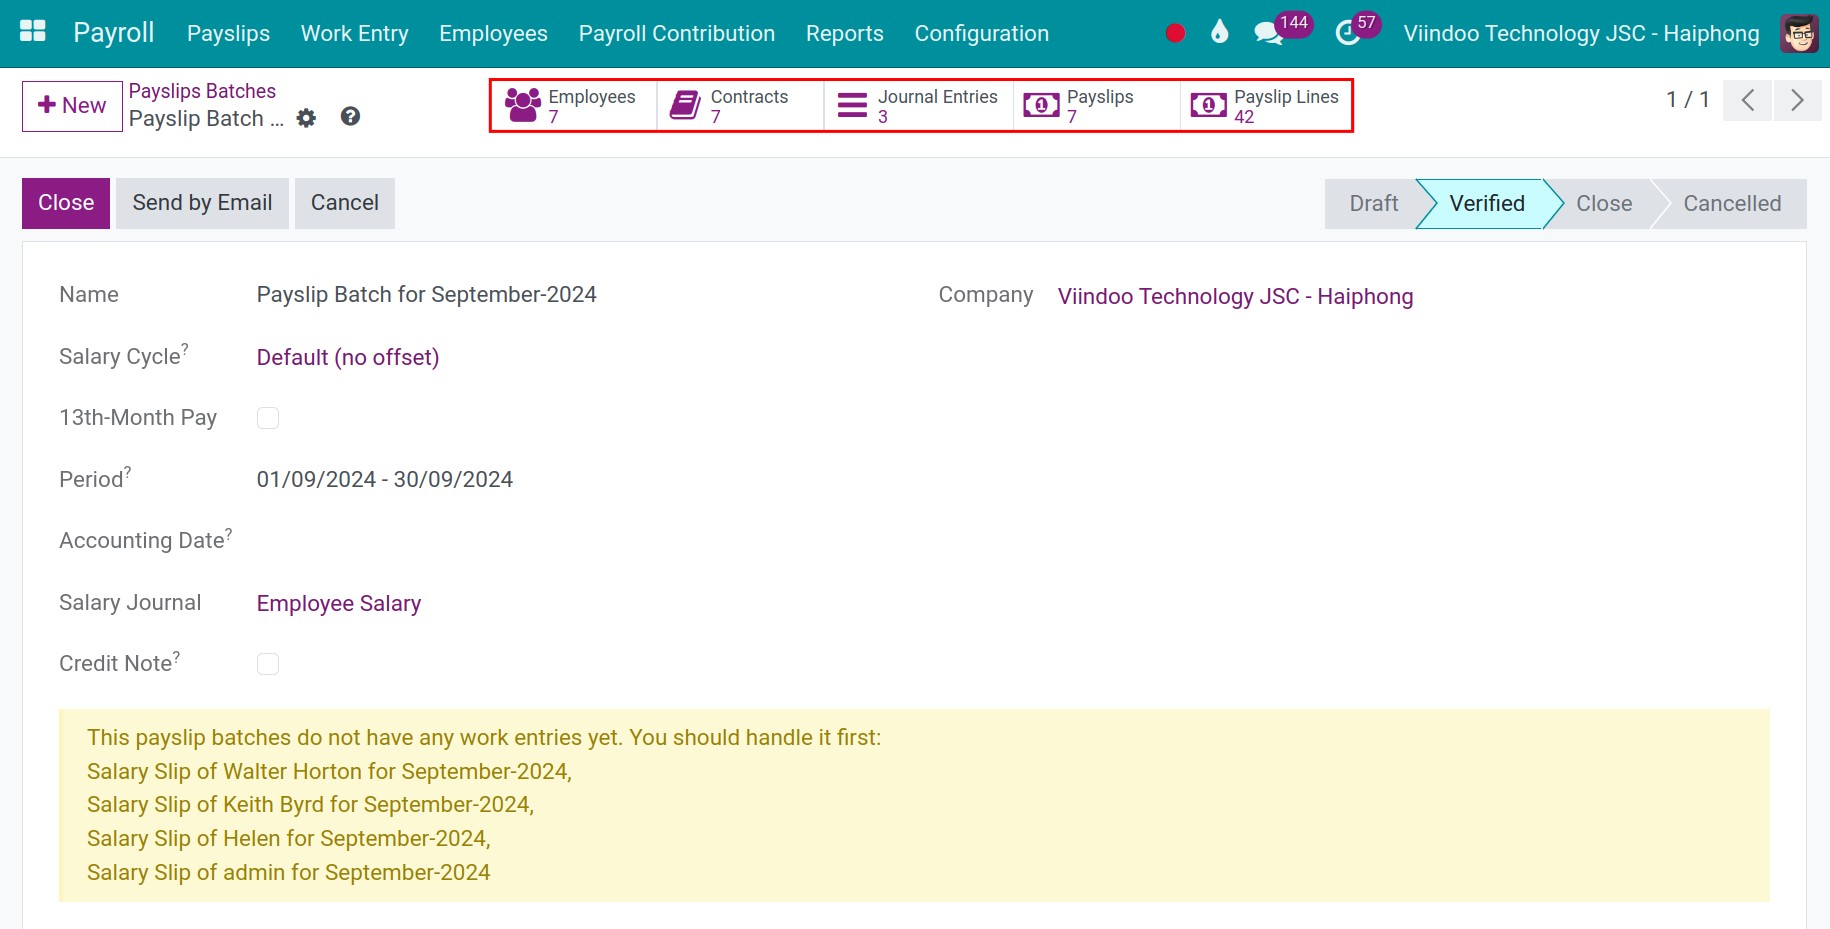
On the payroll will also list generated payslips. For employees who cannot create payslips, the system will notify them in the notes section of the payroll:
![Send payroll to the bank - Payroll management software Viindoo]()
Step 3: Press Compute Payslip Batch or Calculate Wages to gather and calculate the payroll amount. In case your related payroll information such as time-offs or overtime records, etc have been adjusted, you use Compute Payslip Batch button. If you only adjust the amount directly in the payslips, you can use the Calculate Wages button to recalculate.
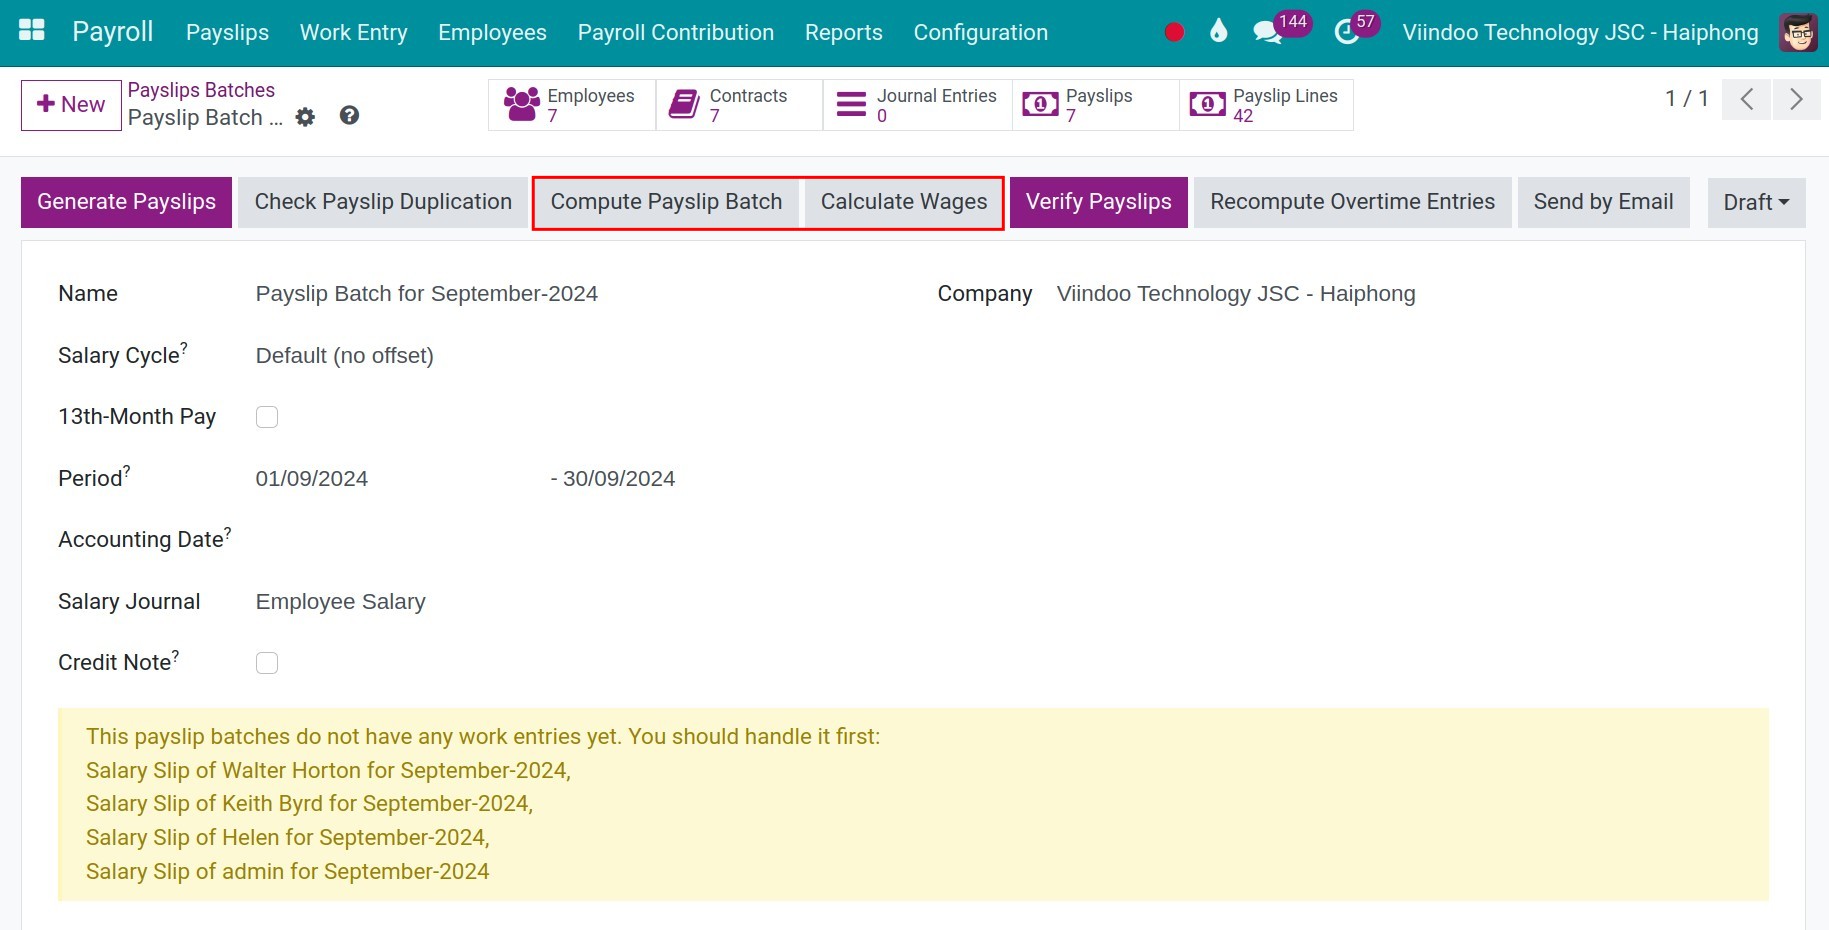
Step 4: Press Verify Payslips after checking the payroll data to confirm.
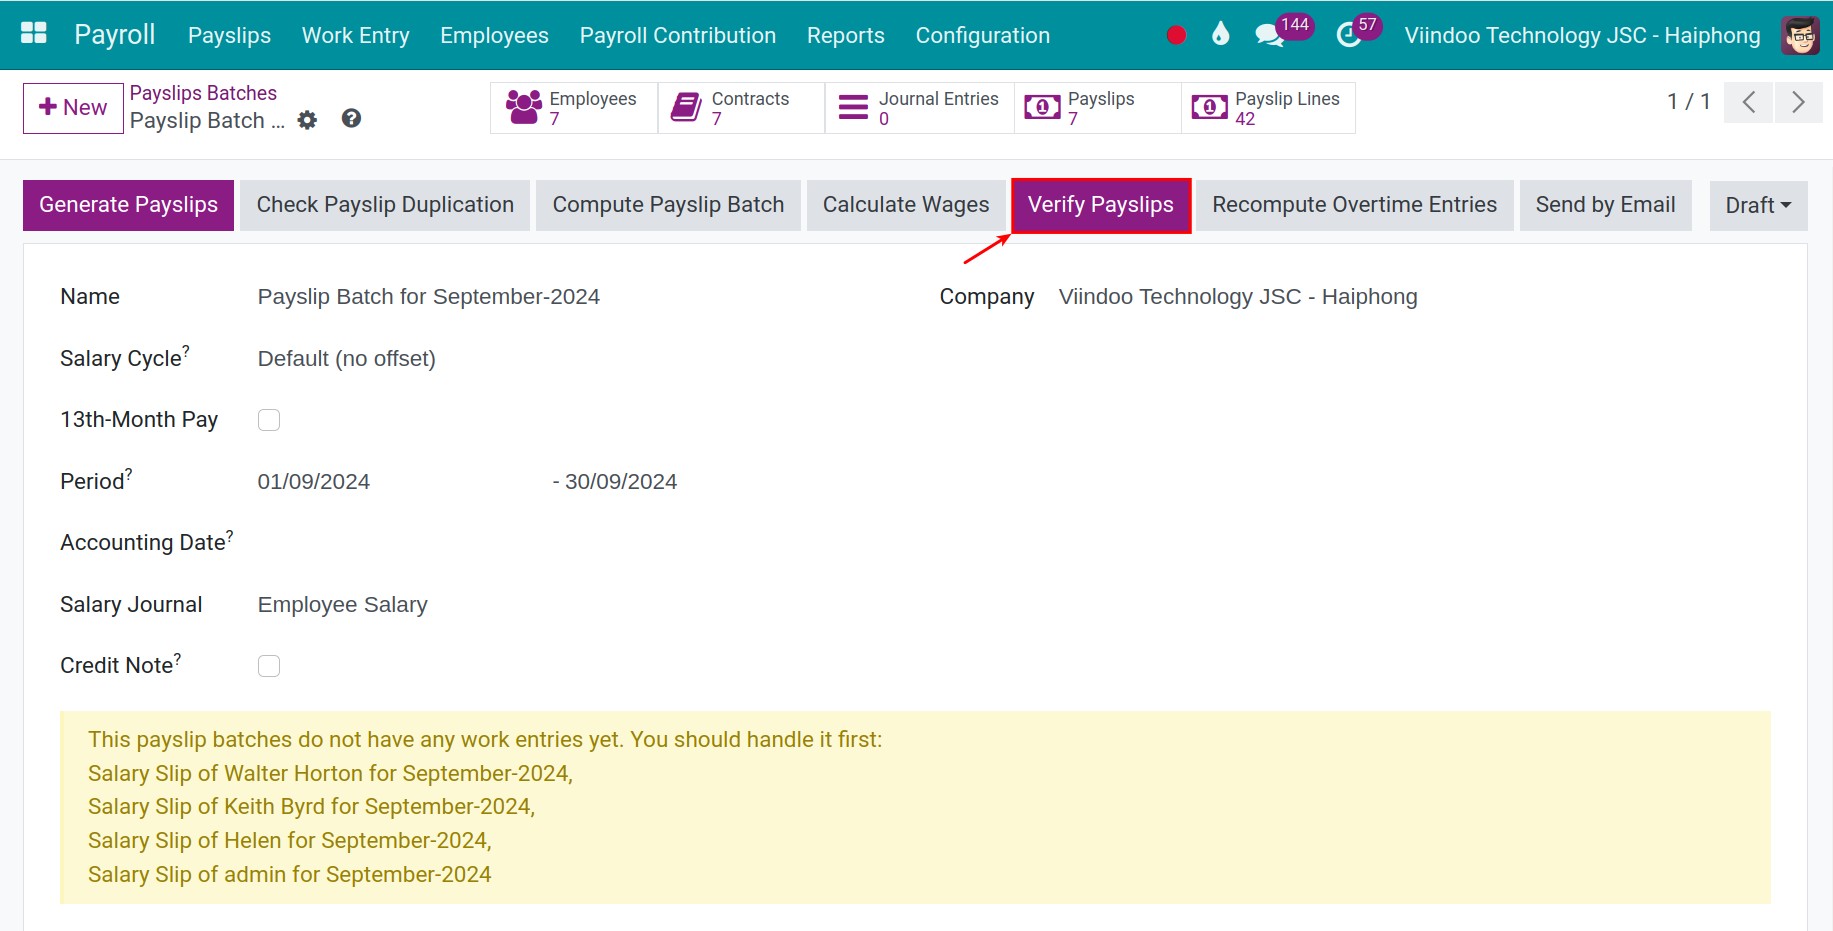
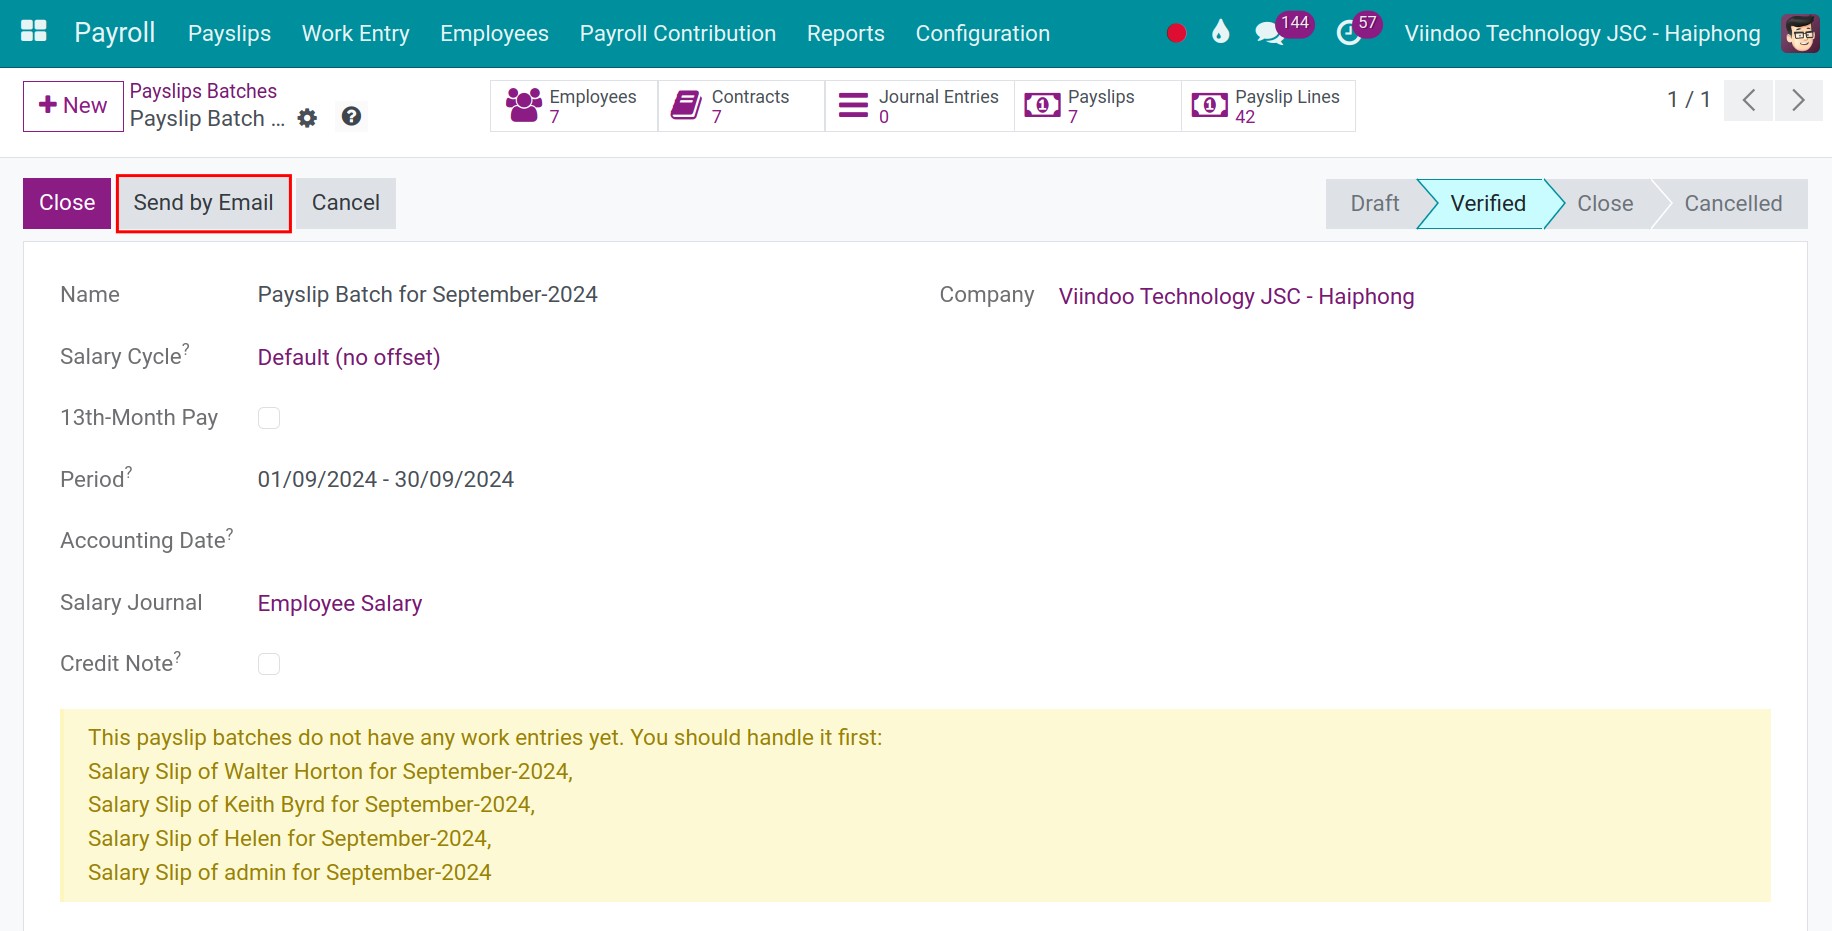
Step 5: Press Send By Email to send payroll information to banks or managers by adding relevant emails in the Recipients field on the view:
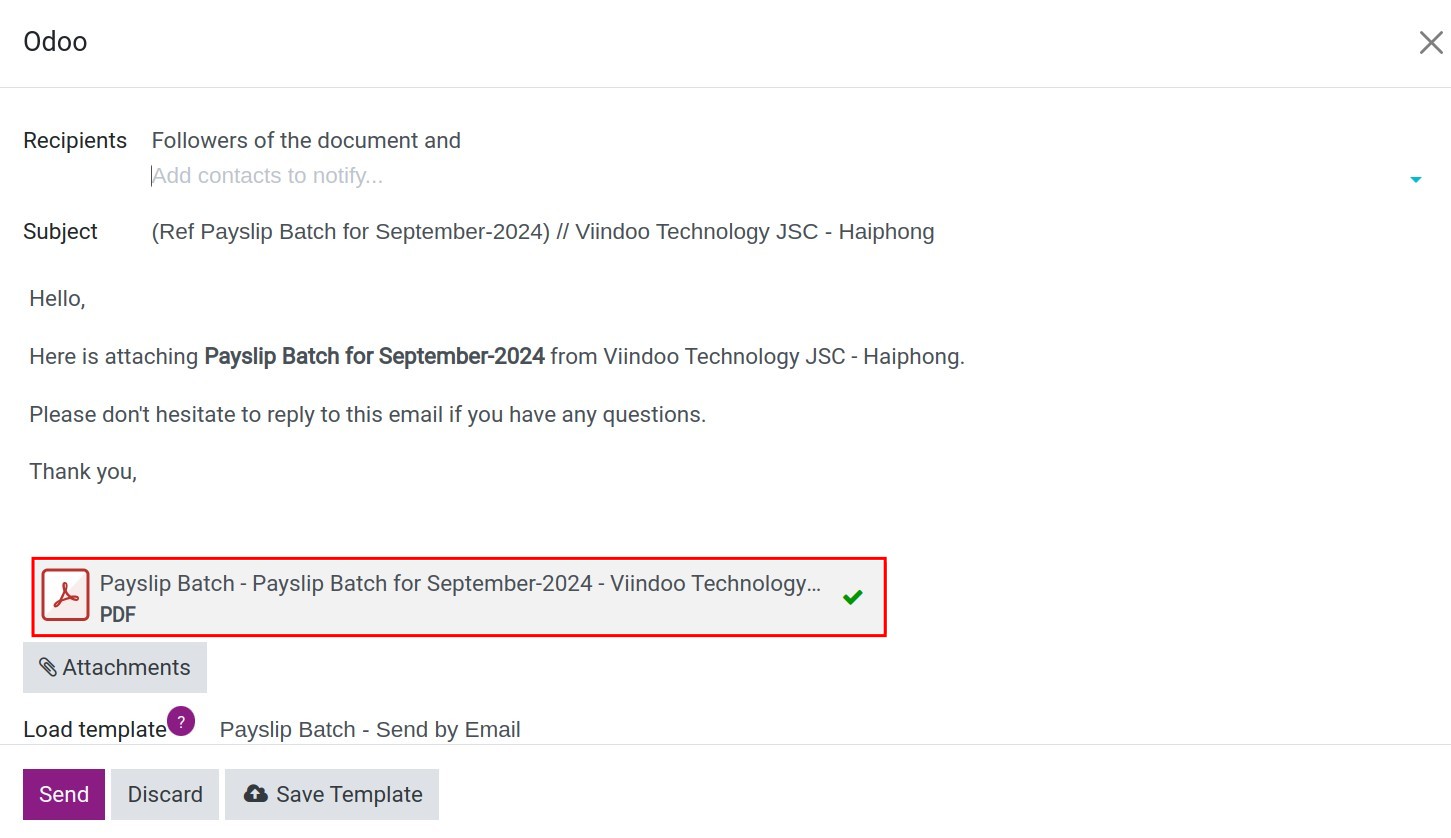
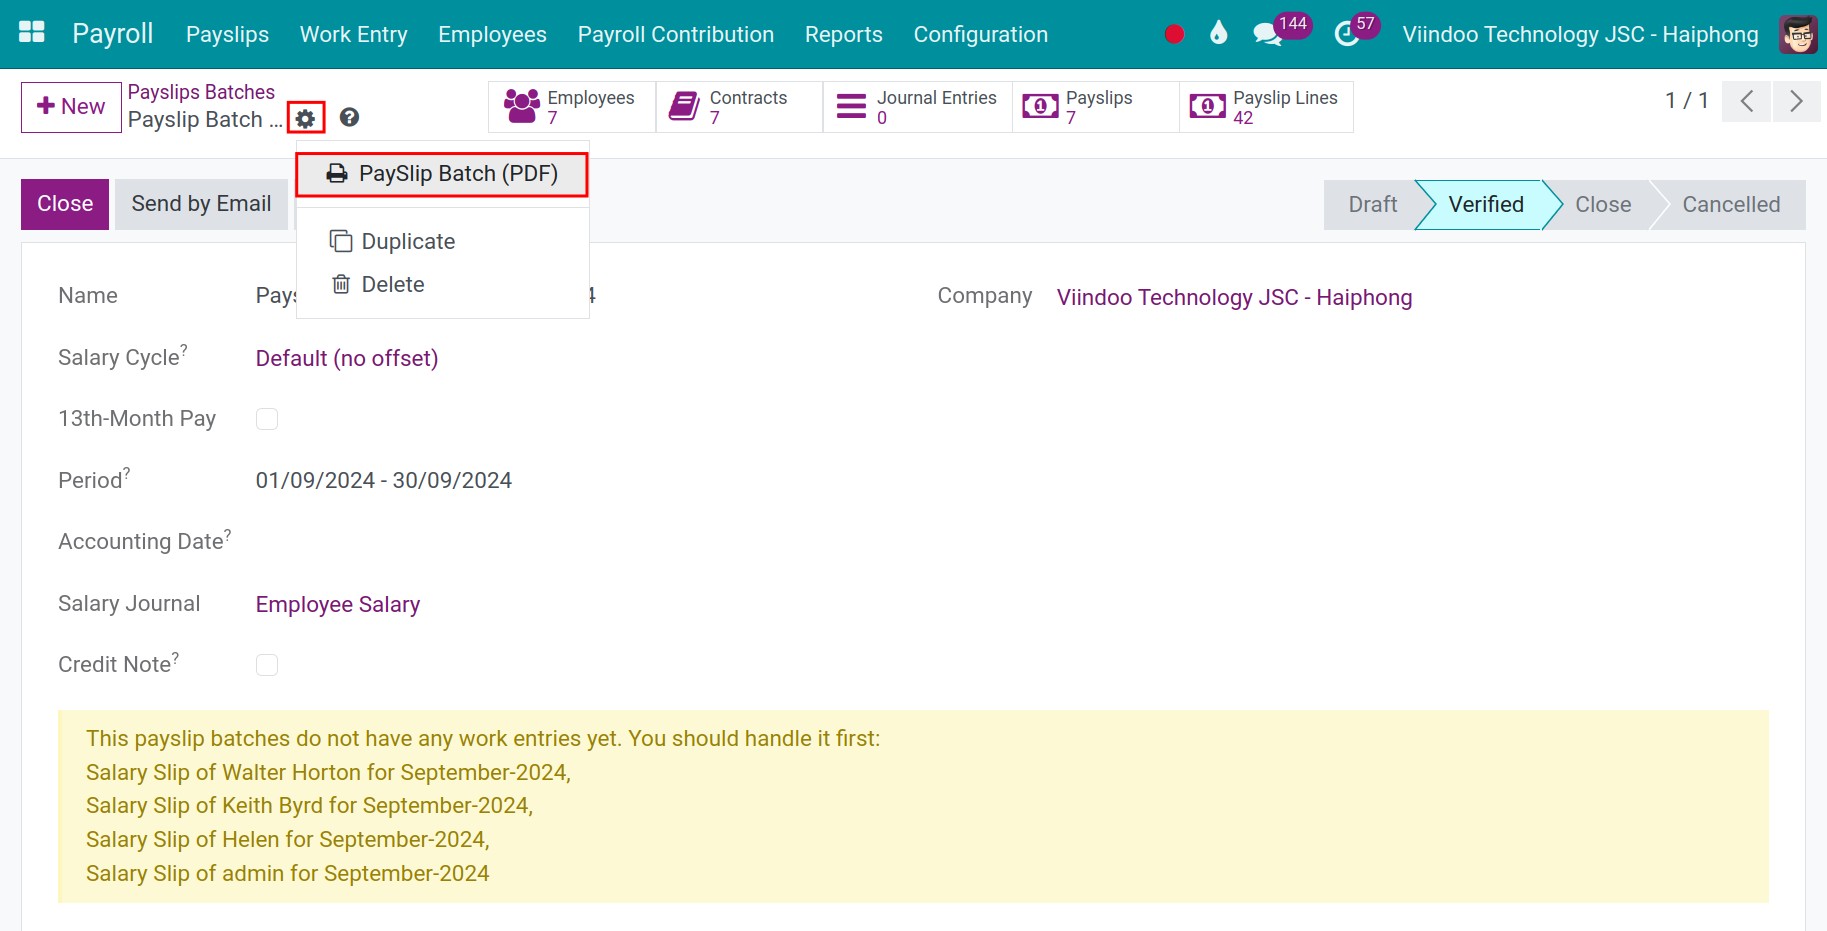
Step 6: In addition, you can print payroll in PDF format by clicking the Actions icon at the top of the view:
Payslips Automation
To configure automatic payroll generation, you need to enable it first by going to Payroll ‣ Configuration ‣ Settings:
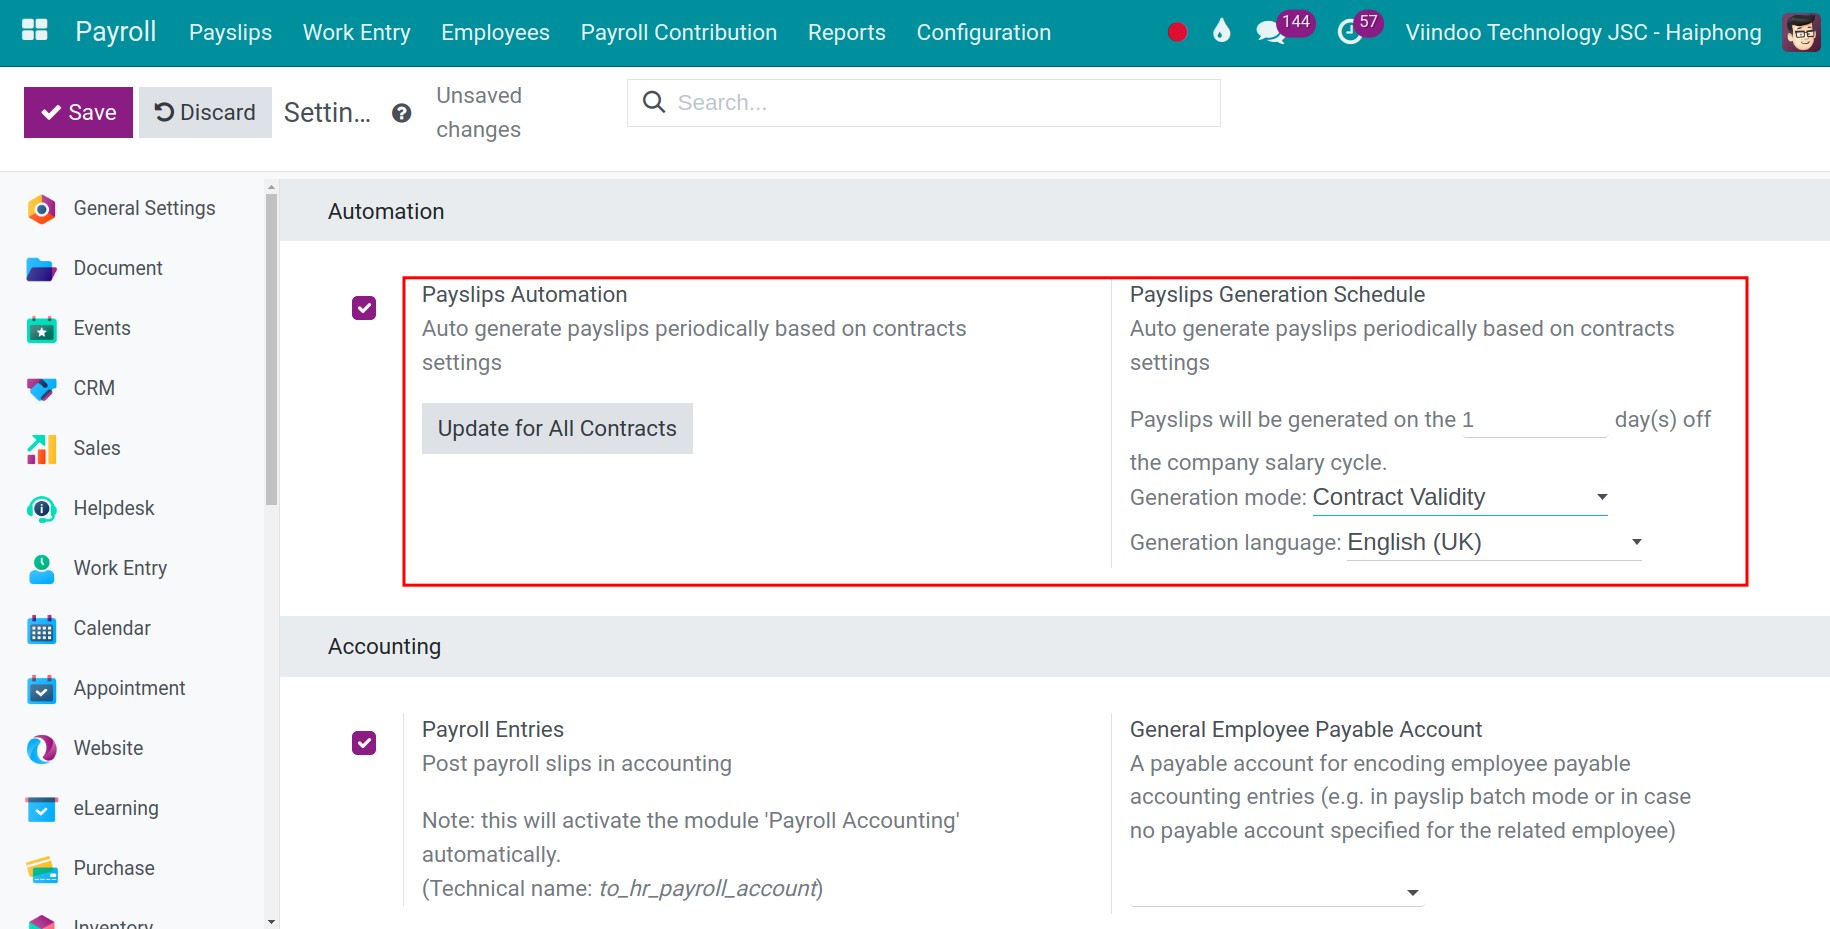
Check Payslips Automation, you will also be able to configure:
Payslip Generation Schedule: Choose how many days in the salary cycle so that the system automatically generates payslips on that day.
Generation mode: Select payroll generation mode by payroll cycle or by contract term.
Generation language: Select the language for the payroll.
Then click the Update Contracts button to update automatic payslip generation for all running contracts.
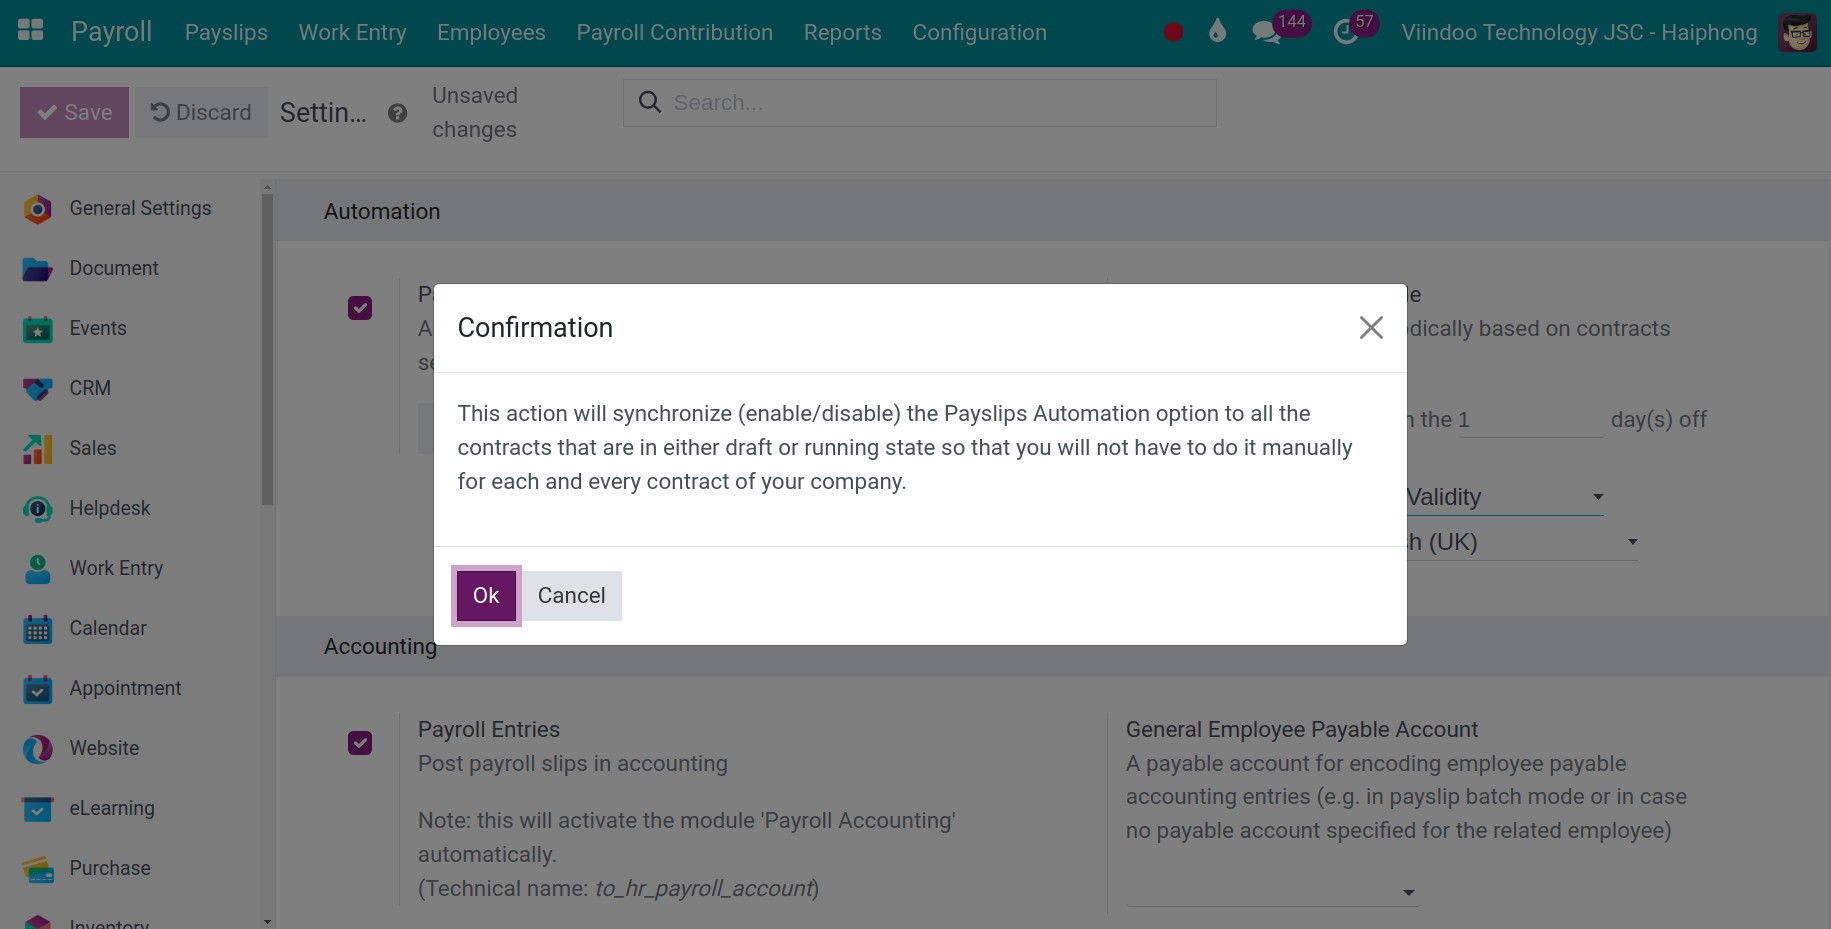
The activated feature is in the employee’s contract.
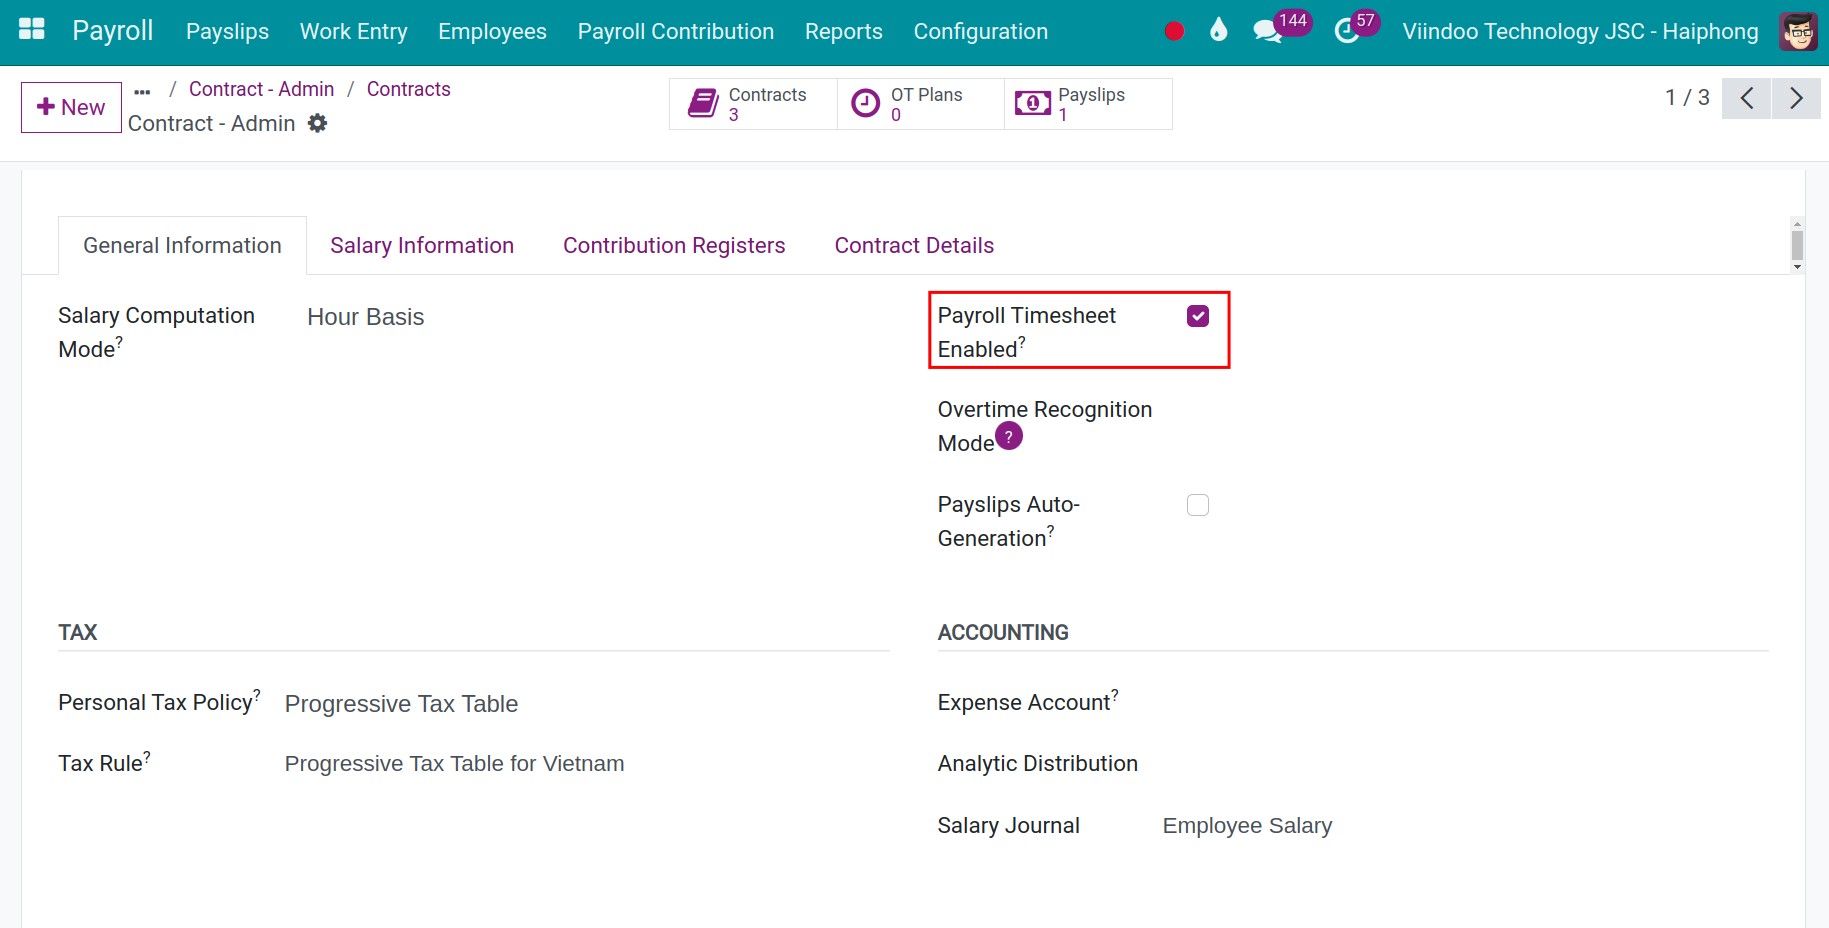
Once the payroll automation feature is configured, on the set date, the system will automatically generate payroll with the corresponding payslips of the employees in the respective salary cycle. Once the payroll has been automatically generated, you can manipulate and use the payroll features in the same way as create manual payroll.
See also
Related article
Optional module
