Guidance for Ticket management
Requirements
This tutorial requires the installation of the following applications/modules:
After installing and configuring the Helpdesk app, you can create new tickets. At the main dashboard, select the Helpdesk team and press Create Ticket.

Enter the following information:
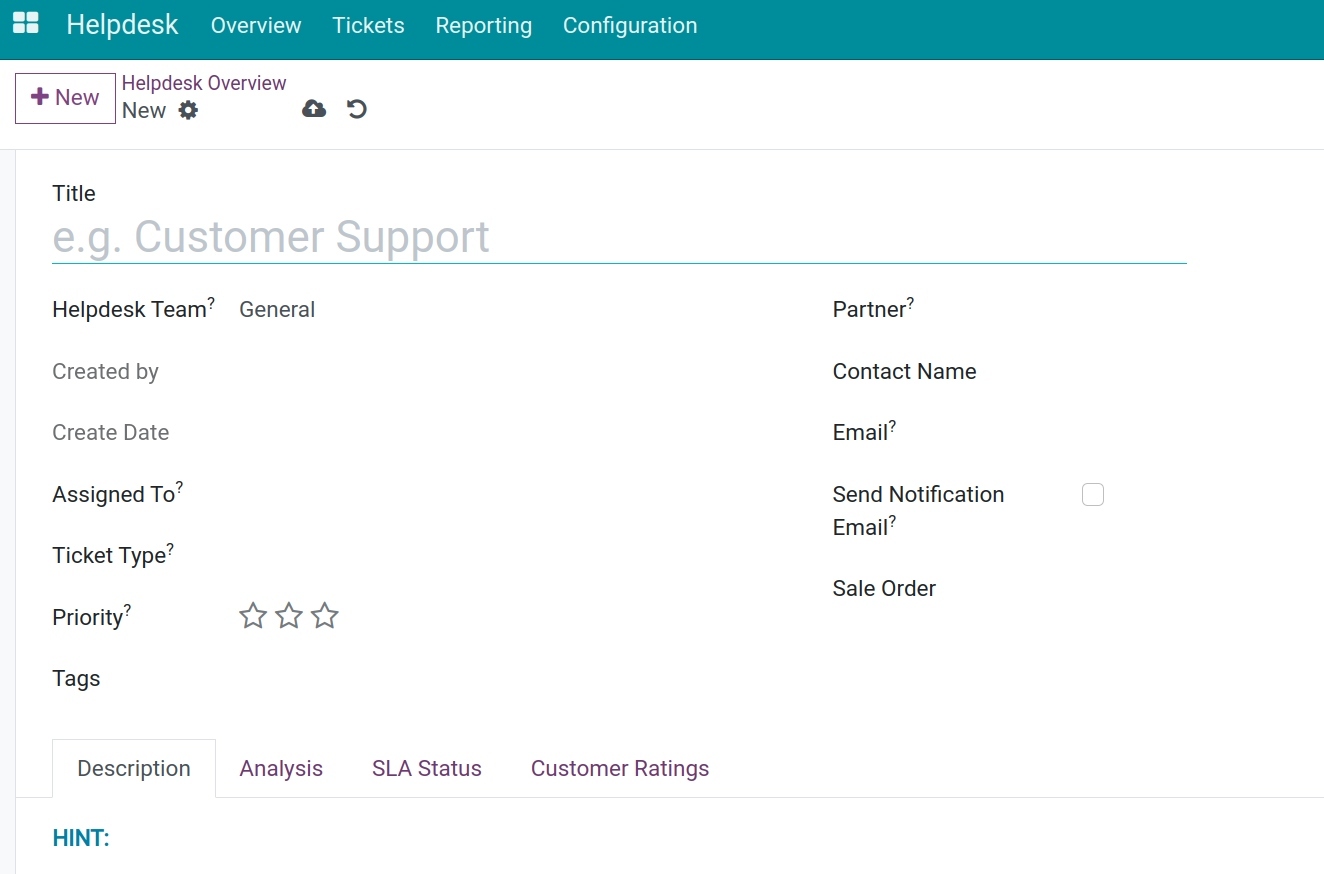
Title: A short description of the issue, this is the same as an email title;
Helpdesk Team: The helpdesk team you selected will be set as default, but you can change to another group;
Assigned To: The employee in charge of this ticket. The Helpdesk Team with the manual assignment type, this field will be blank by default. The group leader after receiving the notification will assign it to a team member. If the assignment type is Random/Balanced, the system will suggest an employee.
Ticket Type: Used to categorize the tickets based on specific subjects. For example, Questions, Issues, Feature Requests, etc;
Priority: Priority levels of this ticket. There are 3 levels: 1 star means Lower priority, 2 stars means Higher priority, 3 stars means Emergency;
Tags: Another way to identify the ticket, for searching;
Partner: You can choose a partner if you want them to follow this ticket;
Contact Name: The contact name of the partner. This field will disappear if you select a partner on the Partner field;
Email: Partner’s email;
Send Notification Email: If checked, the system will send an email every time the ticket changes to the stage where the email template was set up;
Description tab: A detailed description of the issue;
Analysis tab: Record the following information:
![Ticket analysis in Viindoo Helpdesk app]()
Assign Date: The time the ticket is assigned;
End Date: The time the ticket is moved to the final stage;
Assign Duration: Total time since the ticket is created until it’s assigned;
Resolved Duration: Total time since the ticket is assigned until it’s moved to the final stage;
Ticket Life: Total time since the ticket is created until it is moved to the final stage.
SLA Status tab: The list of the SLAs (Service Level Agreement) applied on the ticket includes the following information:
![The ticket SLA status]()
SLA: Name of the applied SLA;
Deadline: The deadline to resolve the ticket;
Reached Date: The SLA actual finishing date;
Exceeded Working Days: The exceeded working days compared to the SLA deadline in case the SLA is late;
Status: Statuses of the SLA, ex: Ongoing, Finished, Failed.
Customer Ratings tab: Only appears when activating the Use Rating on the Helpdesk function. The customer’s rating will appear on the right corner of the ticket.

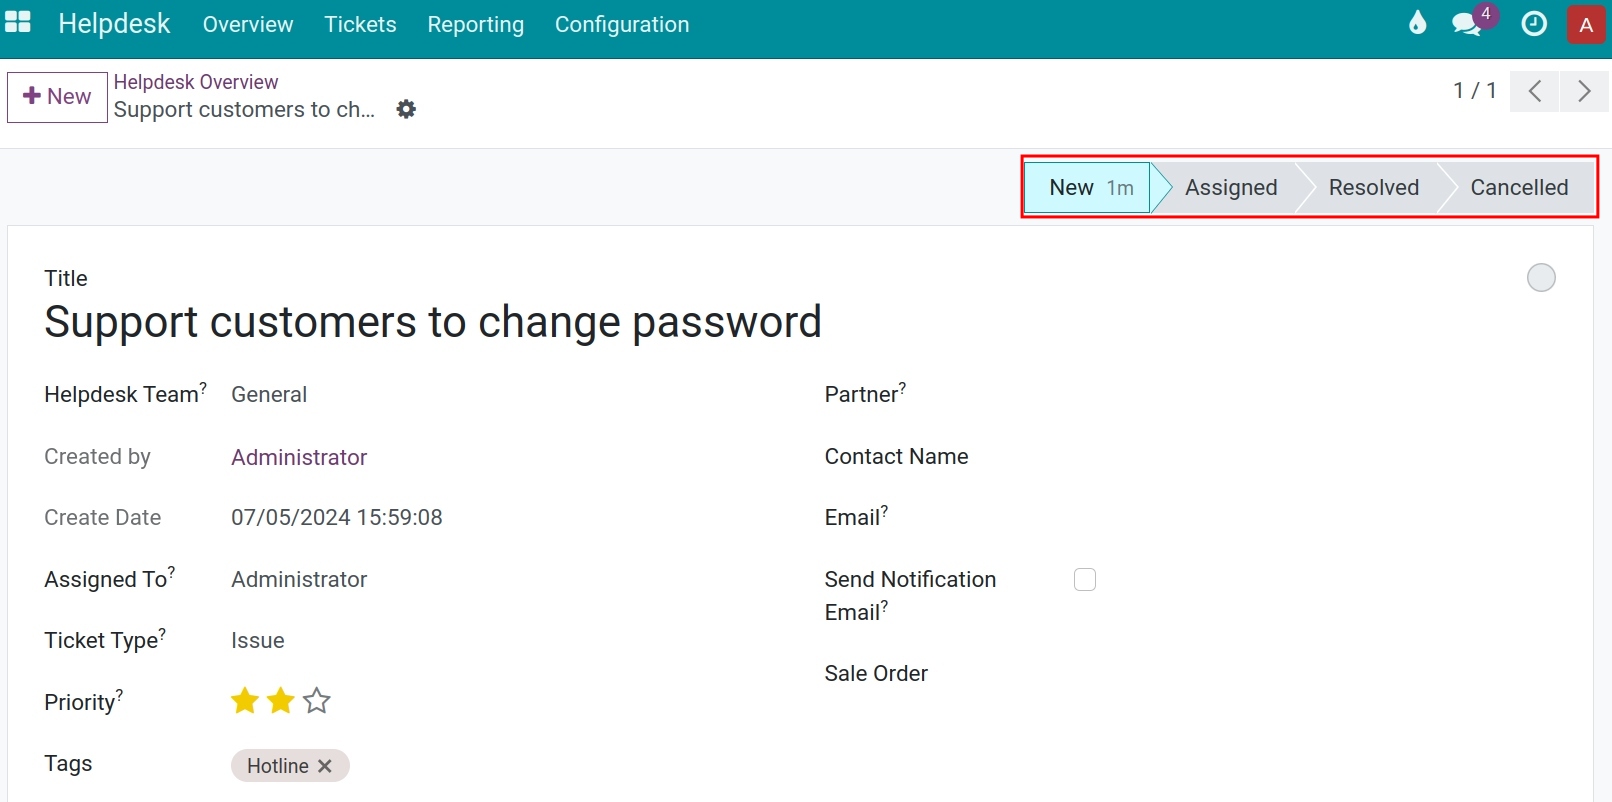
To change the ticket’s stage, you can press directly on the stages on the ticket view.
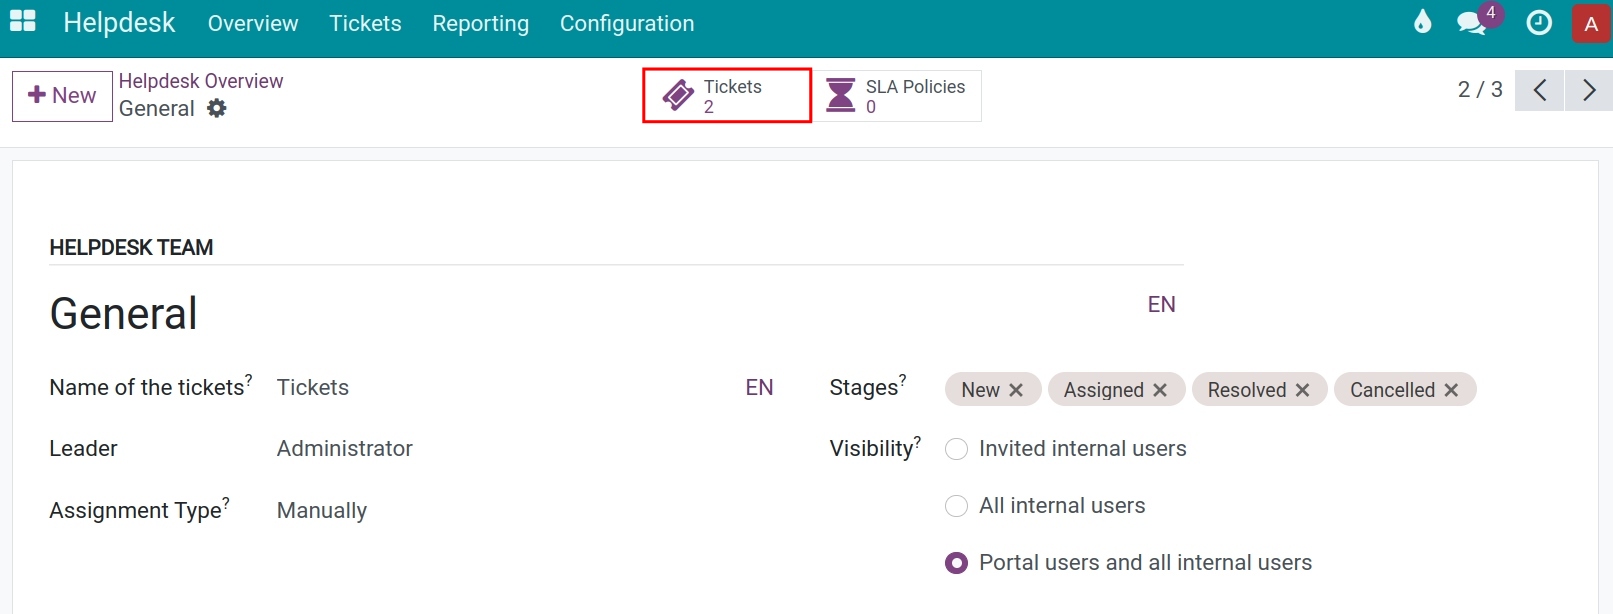
On the interface of each support team, you can view the total number of support tickets.
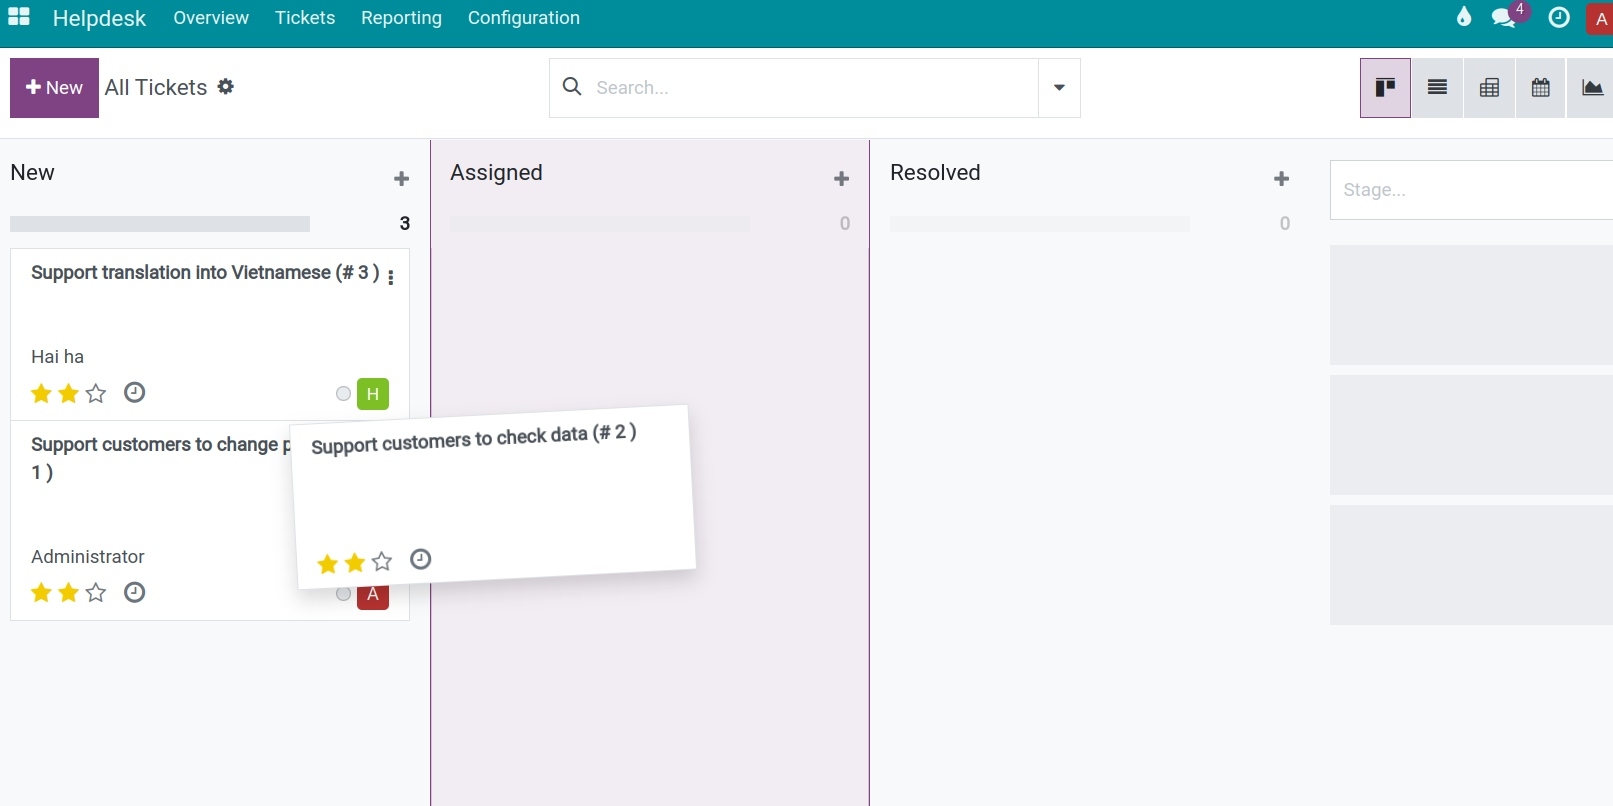
Navigate to Tickets > My tickets or All tickets. In this interface, the system also supports other views like lists, pivots, calendars, graphs. To change to a different view, select the corresponding icon.

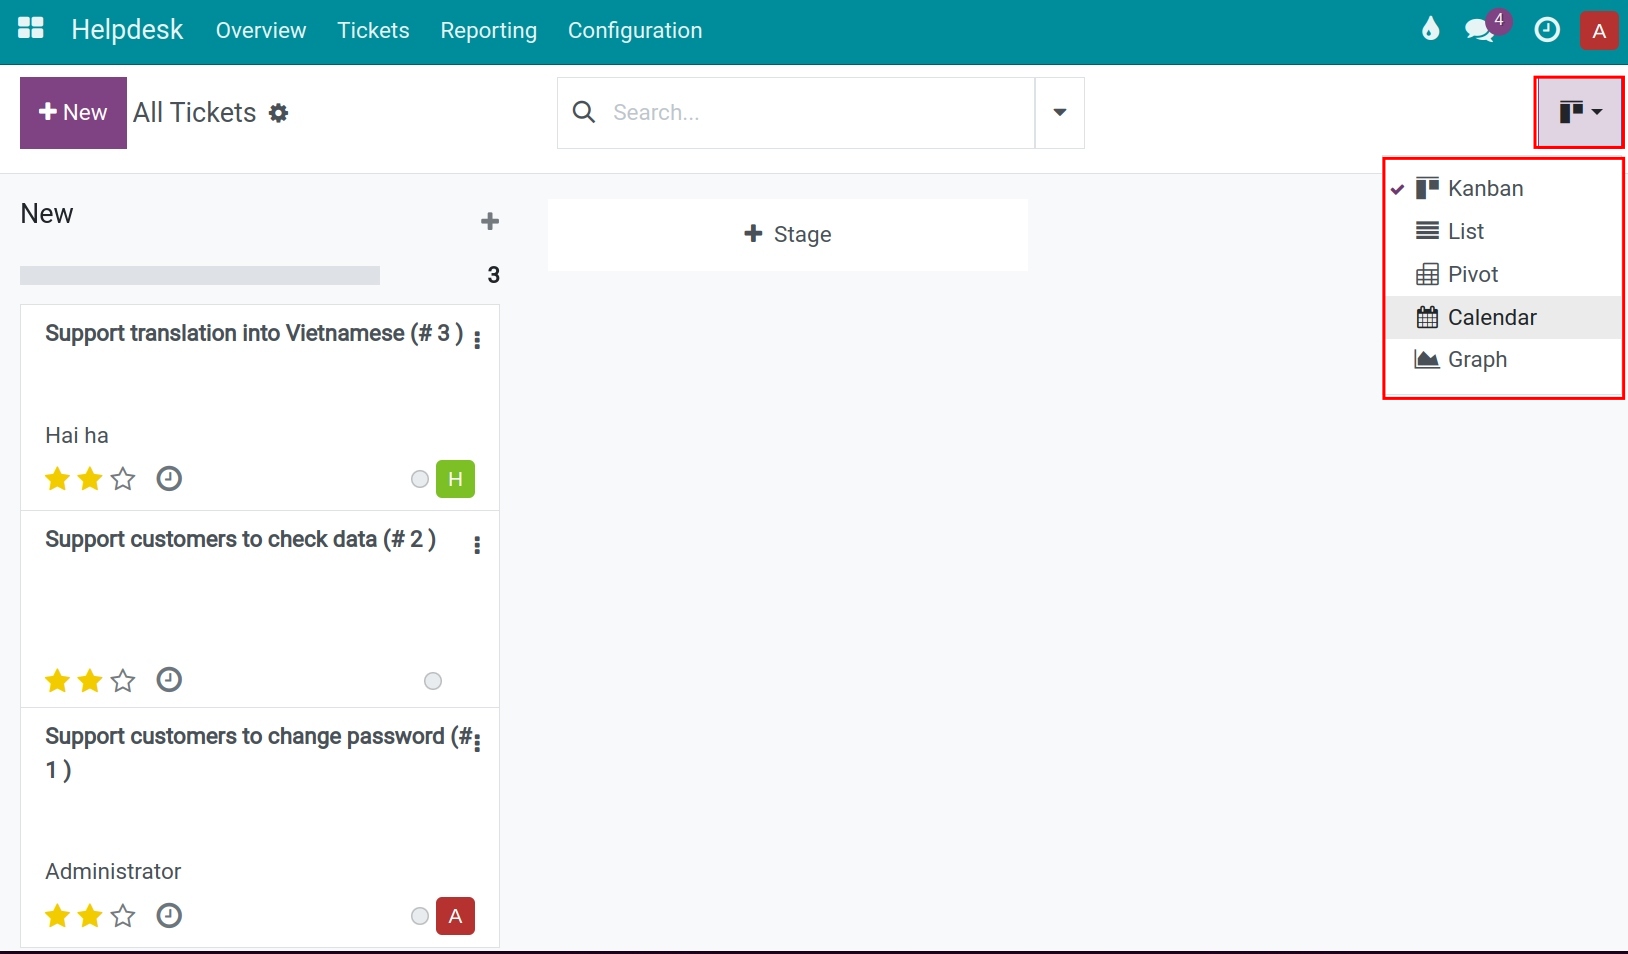
The ticket will be viewed in Kanban. Drag and drop to change the ticket’s stage.
See also
Related article:
Optional modules:

