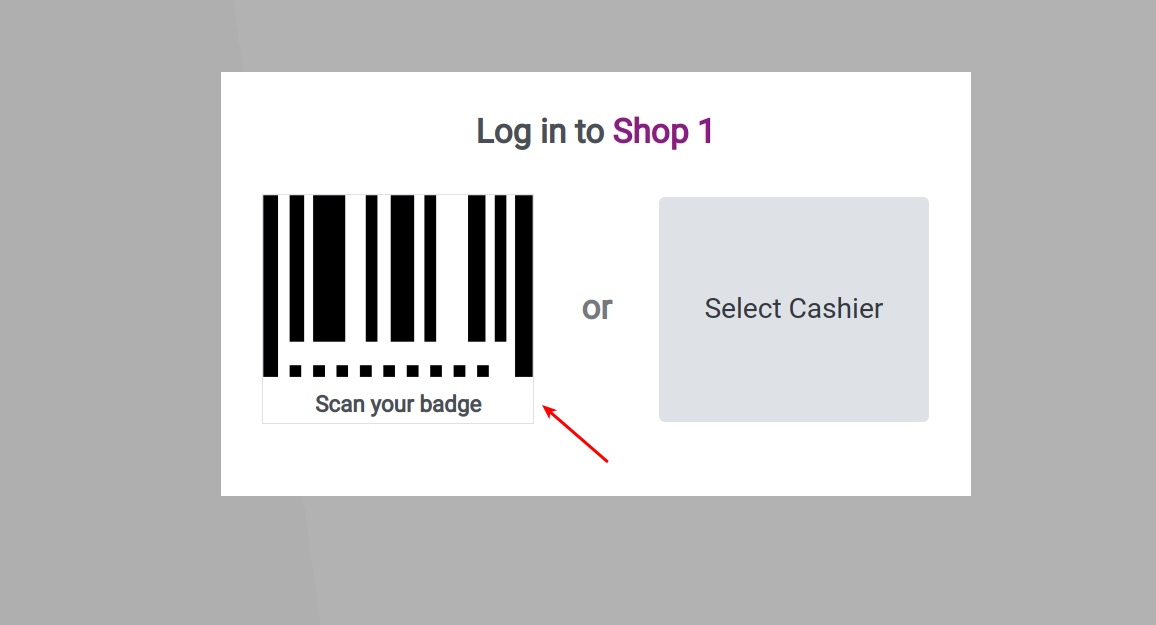
Steps for Cashiers to log in to PoS shop
In a PoS session, there can be multiple shifts that are performed by different employees. The management of login time, as well as the sales revenue of each employee, are necessary. Therefore, the Point of Sale Management App provides the Employees login feature to help the enterprise in managing the PoS more efficiently.
Requirements
This tutorial requires the installation of the following applications/modules:
Enable the Employee login feature
To activate this feature, you navigate to Point of Sale. In the Dashboard interface of the POS, select the desired POS for configuration and click on the three-dot icon, then choose Edit.

In the pop-up window that appears, check the box for Multiple Employees per Session. Set the employees who have the right to log in this POS in the field:
Basic rights: These are typically assigned to cashiers or salespersons with limited permissions. Basic rights Capabilities:
Employees with Basic Rights can log in and process sales within a session.
They can perform standard operations like creating sales, printing receipts, and handling payments.
Basic Rights users do not have access to advanced settings or configurations of the POS session.
They cannot perform administrative tasks like closing sessions, managing other users, or accessing detailed reports.
Advanced rights: These are usually assigned to managers or supervisors who need more control over the POS session. Advanced rights Capabilities:
Employees with Advanced Rights have full access to the POS session, including all administrative features.
They can open and close sessions, view and manage other users’ activities, and access advanced POS settings.
They can generate detailed sales reports and perform overrides that may not be available to Basic Rights users.
Advanced Rights users can configure session settings, manage refunds, and handle cash control more comprehensively.
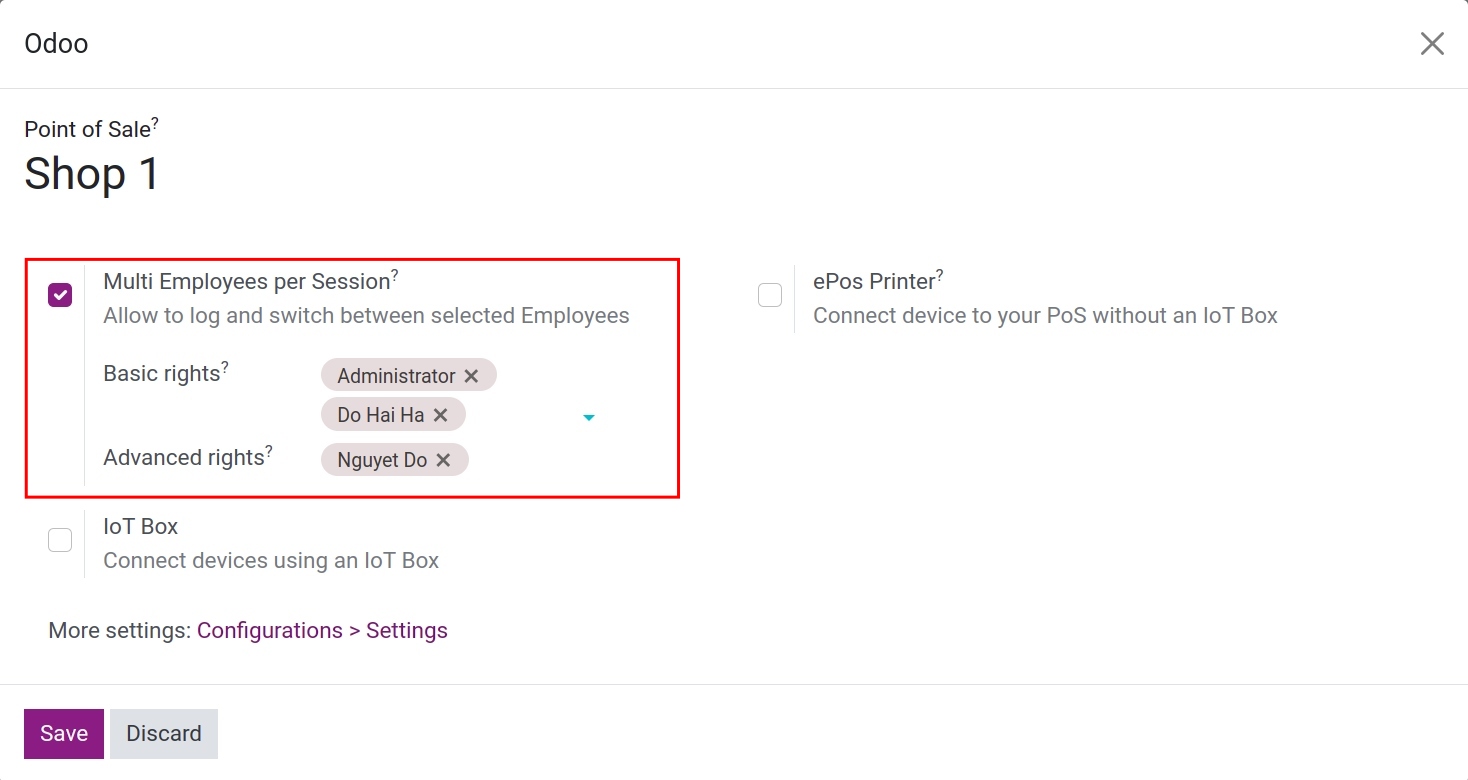
And click the Save button to save your settings.
Log-in Code Configuration for employees
You can create the Login Code for employees as Pin Code or Badge ID.
Create a PIN Code
When the employee logs into the system, this PIN code is like a password to open the session. To set up the PIN code for employees, you navigate to the Employee app, select the needed employee to configure. At the HR Settings tab, enter the code in the field PIN Code > Save.
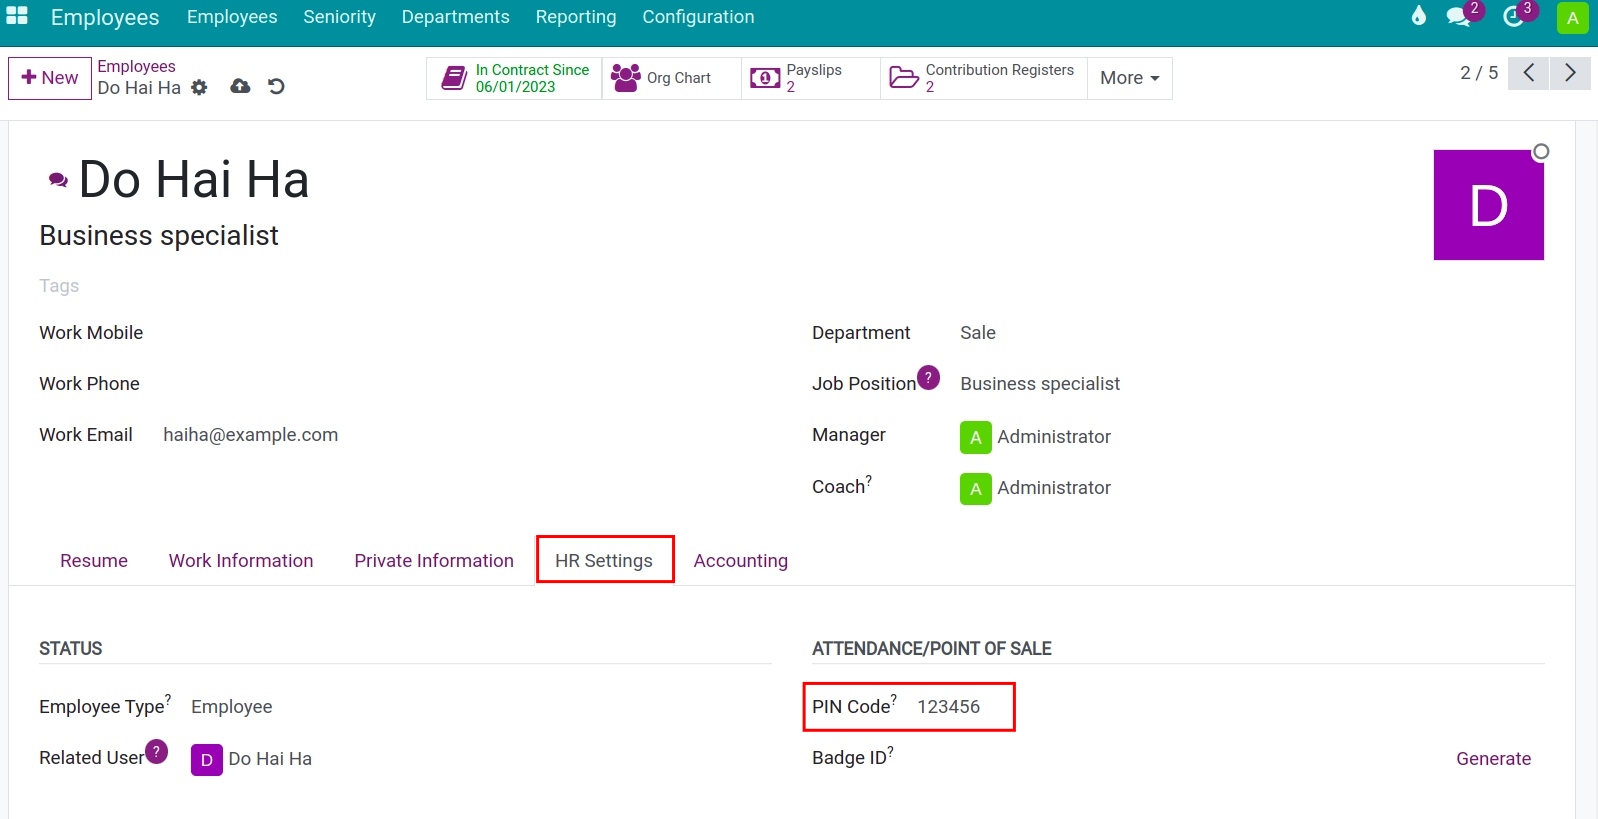
Create and print the Badge ID
Right on the Employee app, you can also configure the badge ID for employees to log in. Choose the employee you want to set up the badge, at the HR Settings tab, hit on the Generate button at the Badge ID. The system will automatically generate a sequence of numbers and encrypted badge codes.
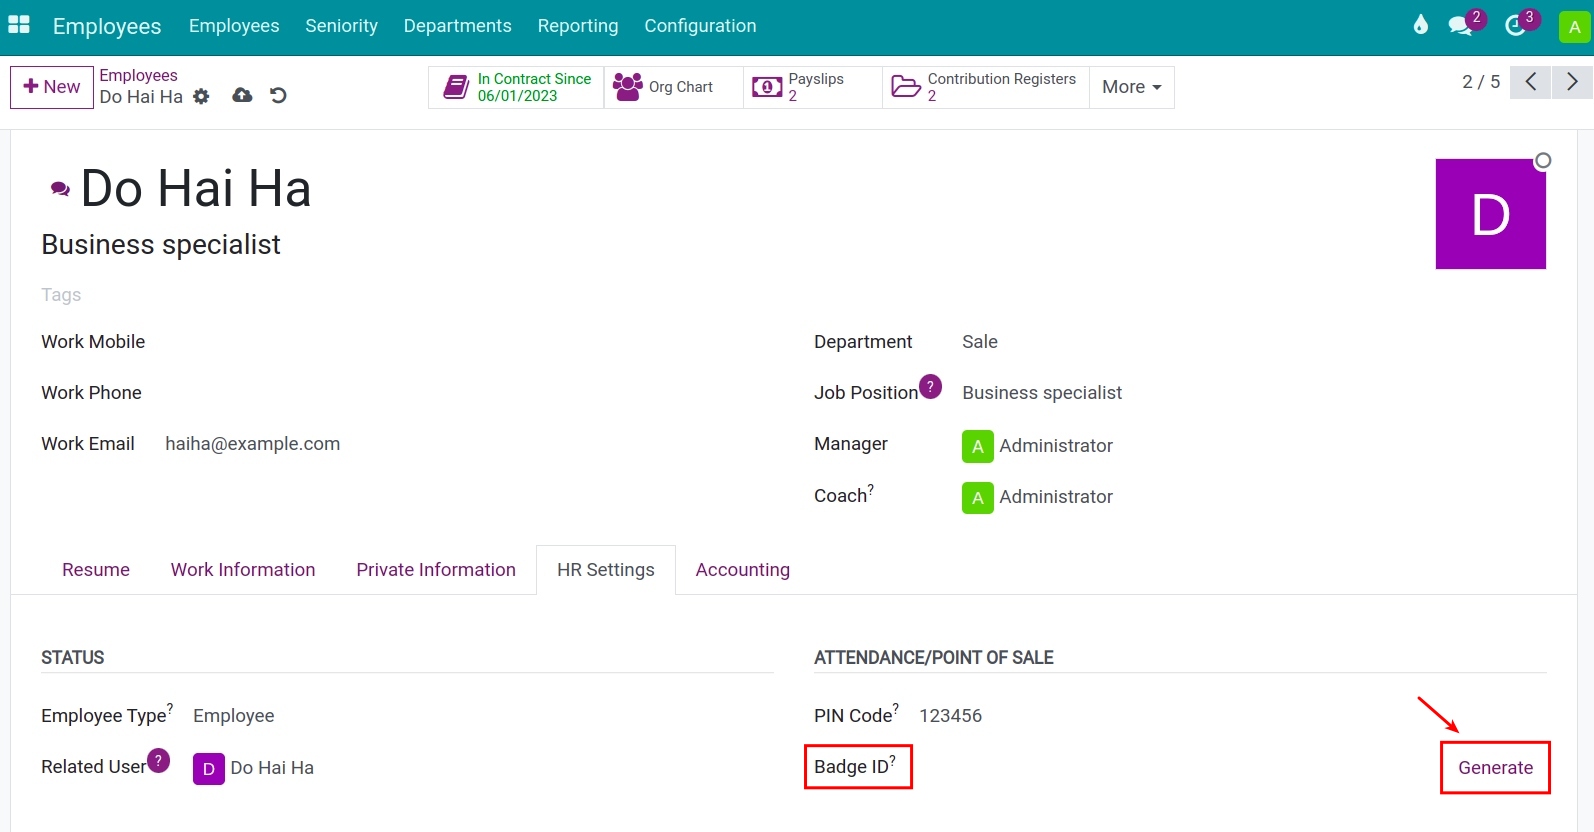
After successfully generating, you click on Print Badge to print the badge for the employee.
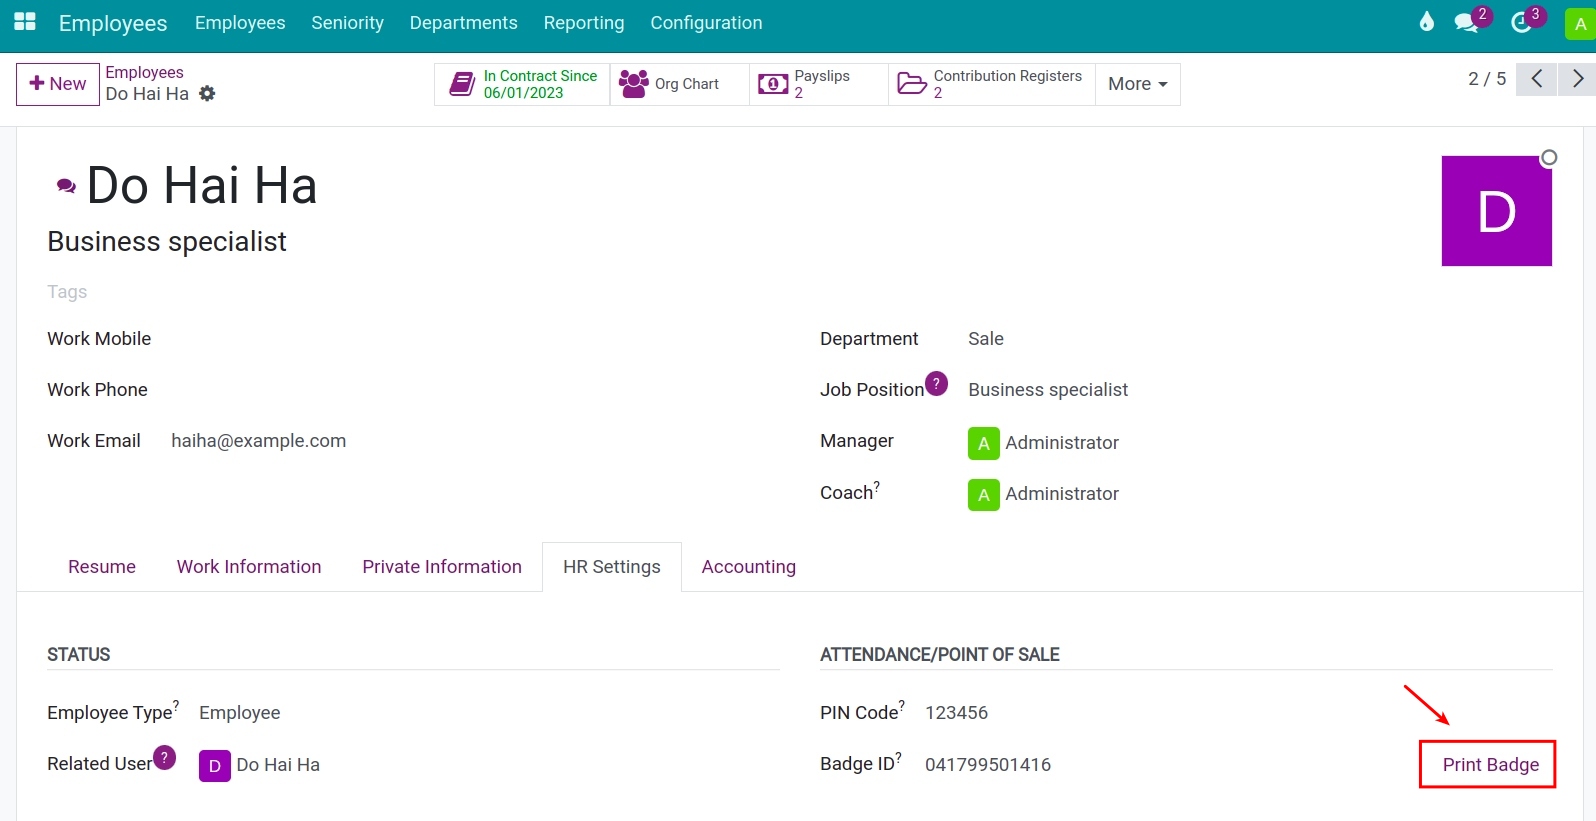
Employees can use this badge to scan for log into the session.

How to log in to the PoS app
After creating the login code for the employee, the system will allows switching between employee accounts.
Log in with PIN Code
With the created PIN code from above, navigate to Point of Sale. Choose the POS and start a session, you can select the way to log in as PIN code when hit on Select Cashier.
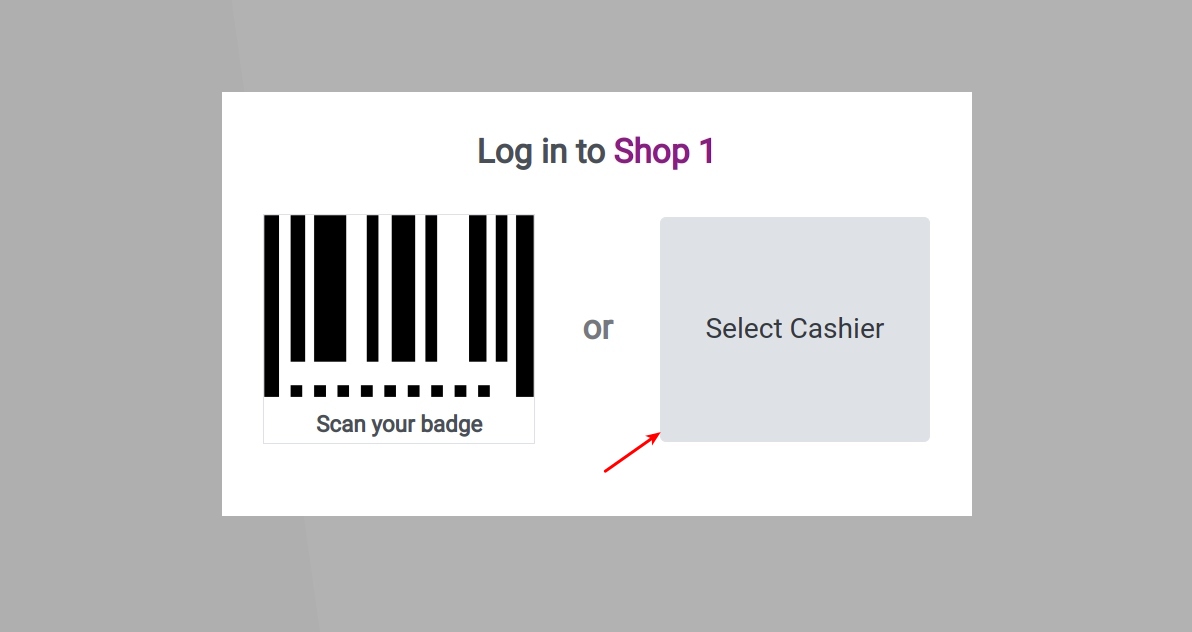
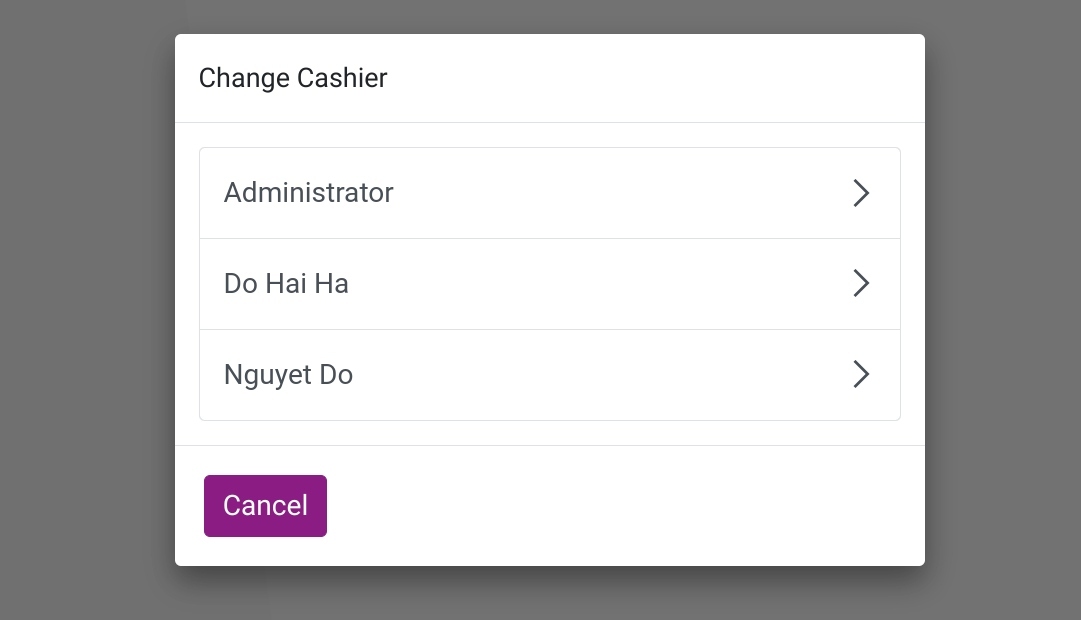
Choosing the employee to log in and enter the configured code for that employee.
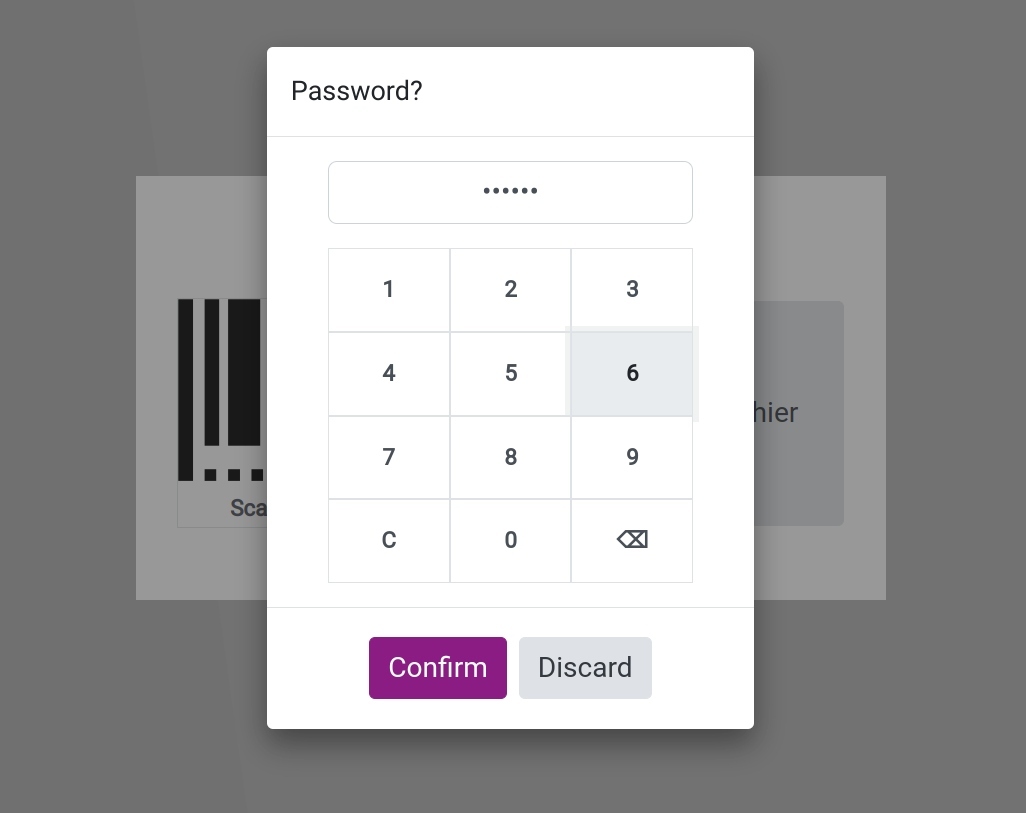
Log in without PIN Code
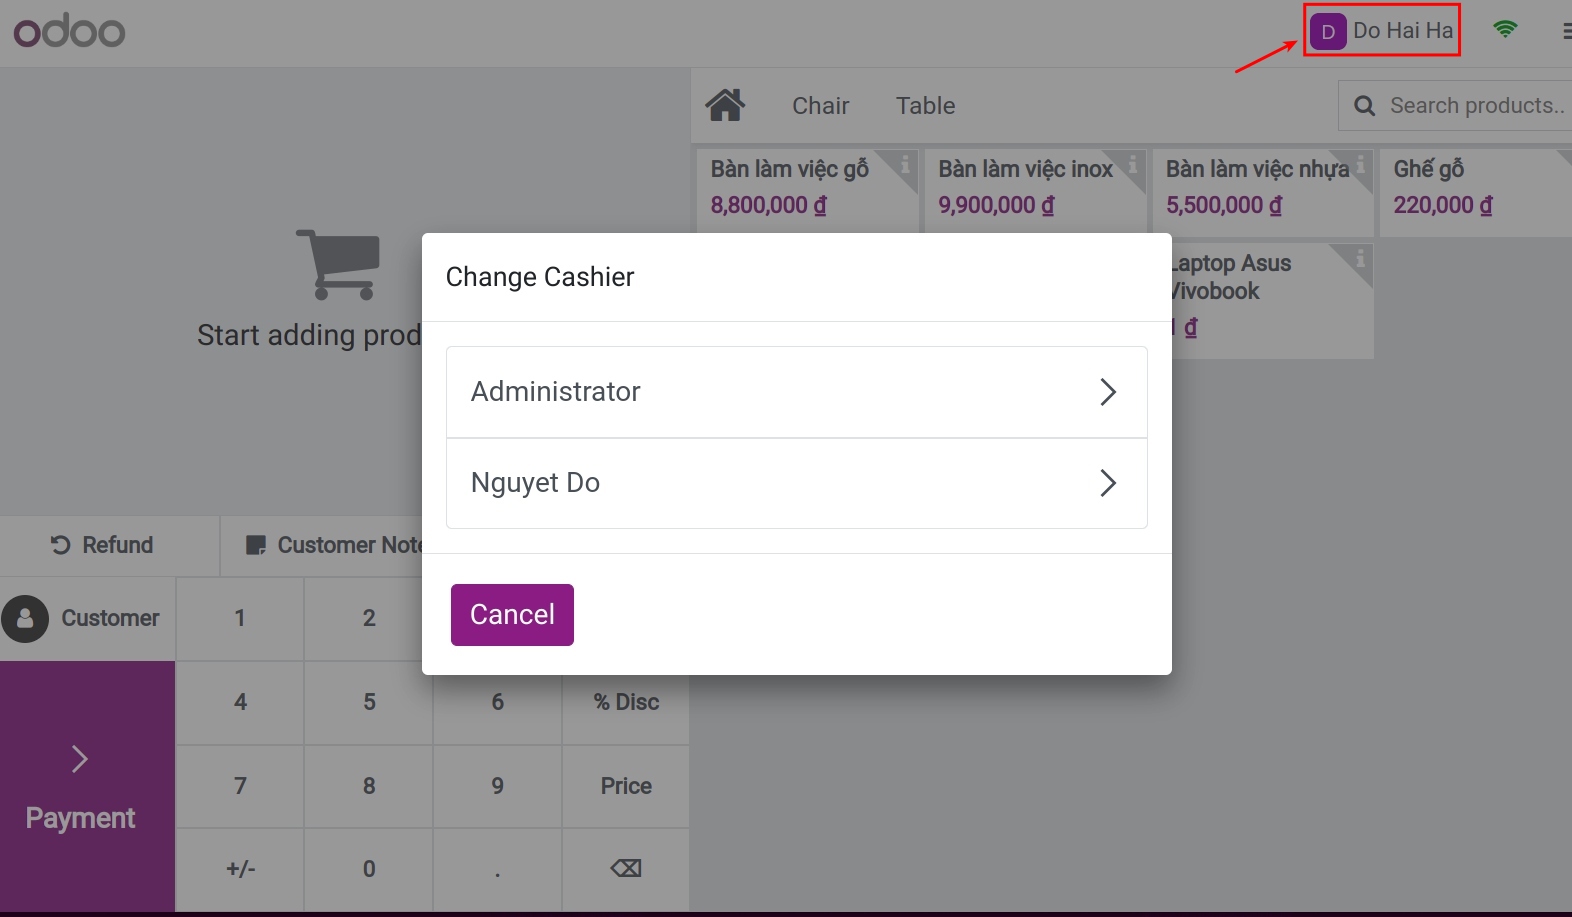
If you do not set up the PIN code for employees, the way they log in to the system will be faster. They just need to click on the employee’s name on the PoS view and select the name to log in and start their shift.
Log in with Badge ID
Along with the login screen when selecting a cashier, select Scan your badge with the badge ID created for the employee in the previous step. The employee will successfully log in to the PoS view.
