Integrate Facebook pages with Viindoo
Warning
The following instructions are based on Facebook’s policy for management apps. Please note that the interface may change depending on Facebook’s policy updates and version. In case the Facebook’s interface is changed, you only can find the way to finíh with some following keywords:
Create a Business-type App on the Meta for Developers platform.
Add the following products to the app: These products are required to manage posts, comments, and receive real-time interactions without calling additional APIs.
Facebook Login (Sign in with Facebook)
Webhooks
Messenger
Verify your business information with Facebook.
Register the required Facebook Advanced access rights through the App Review process.
pages_manage_metadata: Enables retrieval of metadata such as user IDs, needed for comment management.
pages_read_user_content: Allows reading user-generated content like comments on Page posts.
pages_show_list: Allows the app to retrieve the list of Pages the user manages for selection.
pages_manage_posts: Allows the app to create, edit, or delete posts on the connected Page.
pages_read_engagement: Allows reading engagement metrics such as likes, reactions, and shares.
pages_manage_engagement: Allows app to handle engagement actions including replying or hiding comments.
pages_messaging: Enables app to send and receive Messenger conversations with customers.
public_profile: Allows an app to read the Default Public Profile Fields on the User node. It’s mandatory for Facebook Login product.
Configure of three above products: The steps could be the same or different but the information will be the same.
Integrate with Viindoo.
Create Facebook App
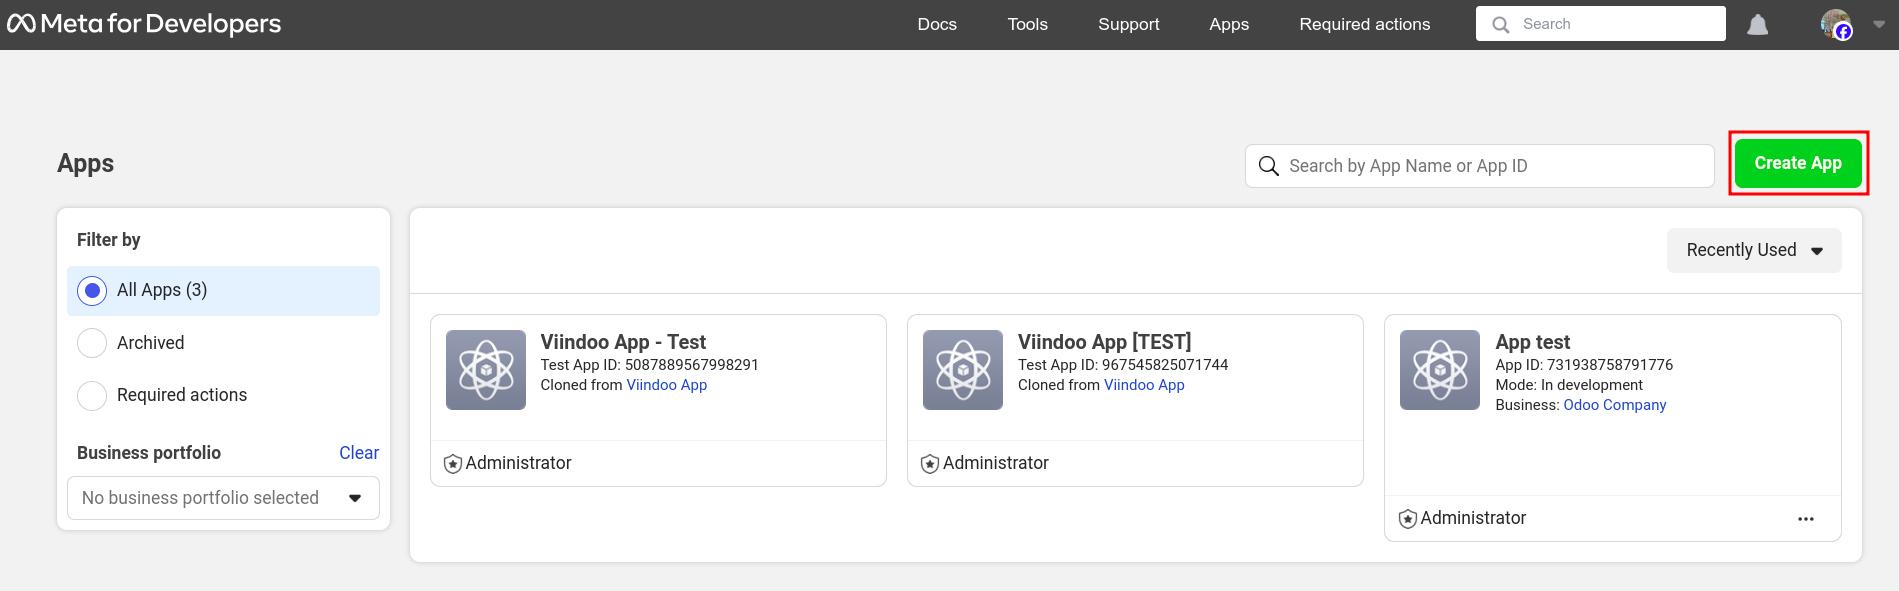
Sign in to Facebook Developer, press Create App to create an app on the website.
Note
In order to link Facebook account in Meta developers page, you need to be the Administrator of the integrated Facebook pages.
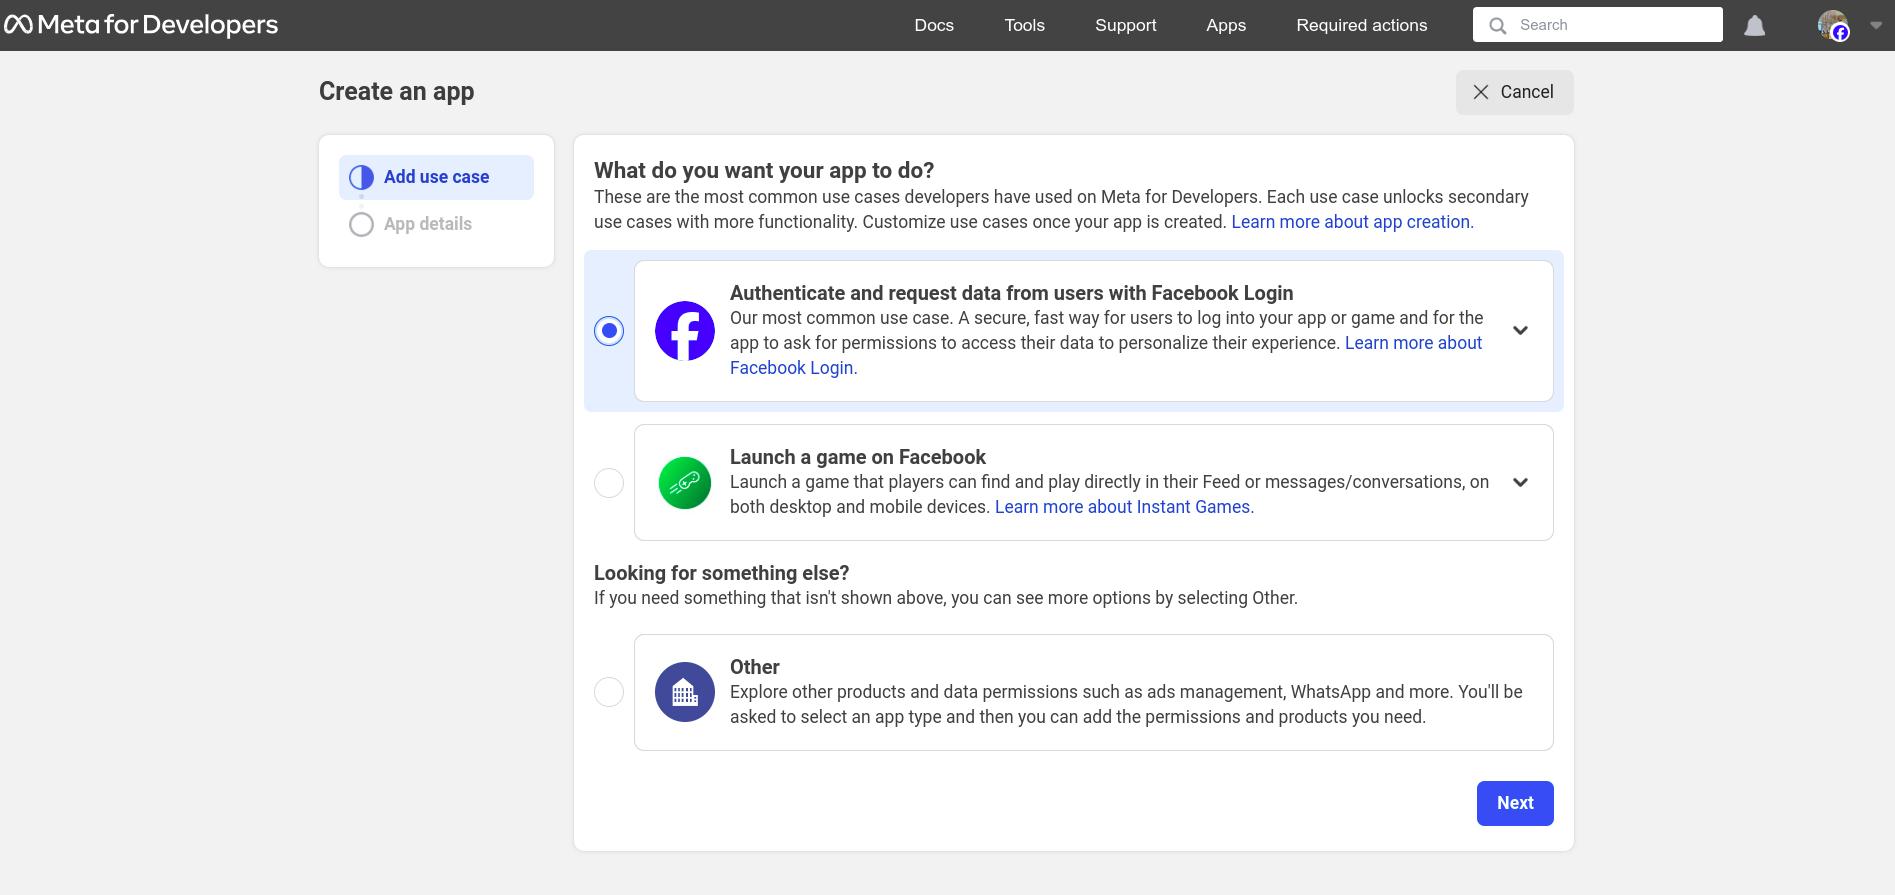
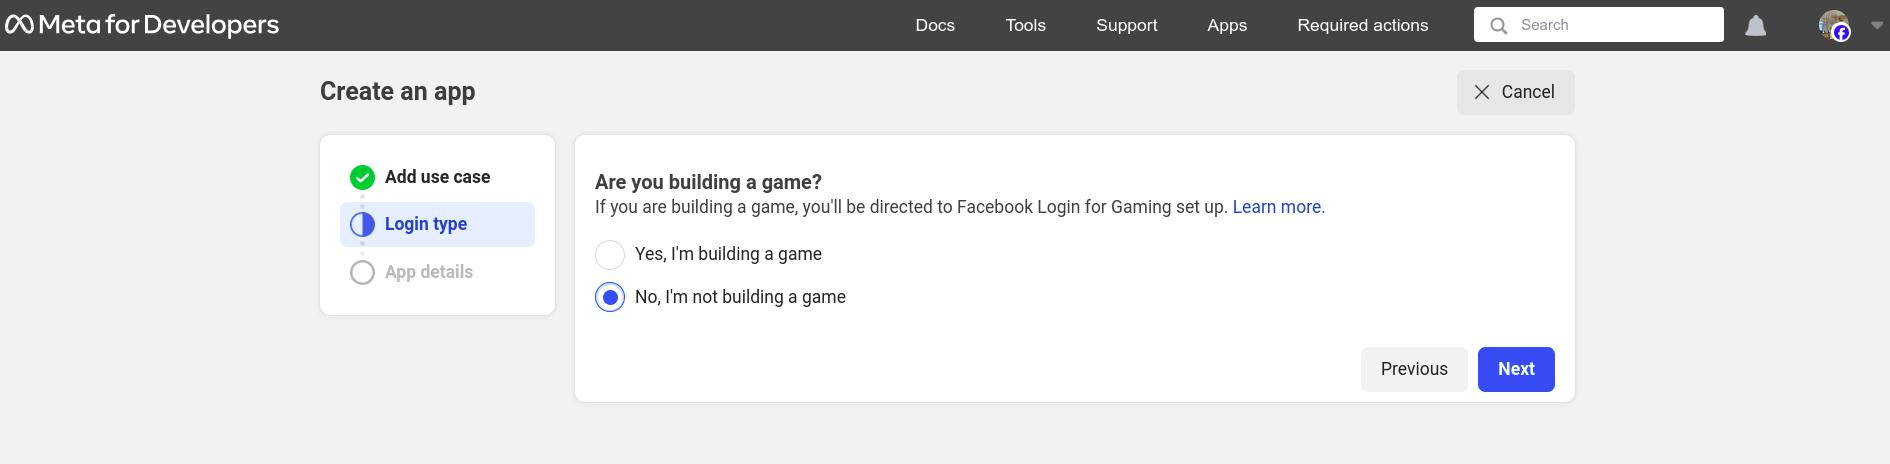
Select the Business app type, Others type and press Next to continue.
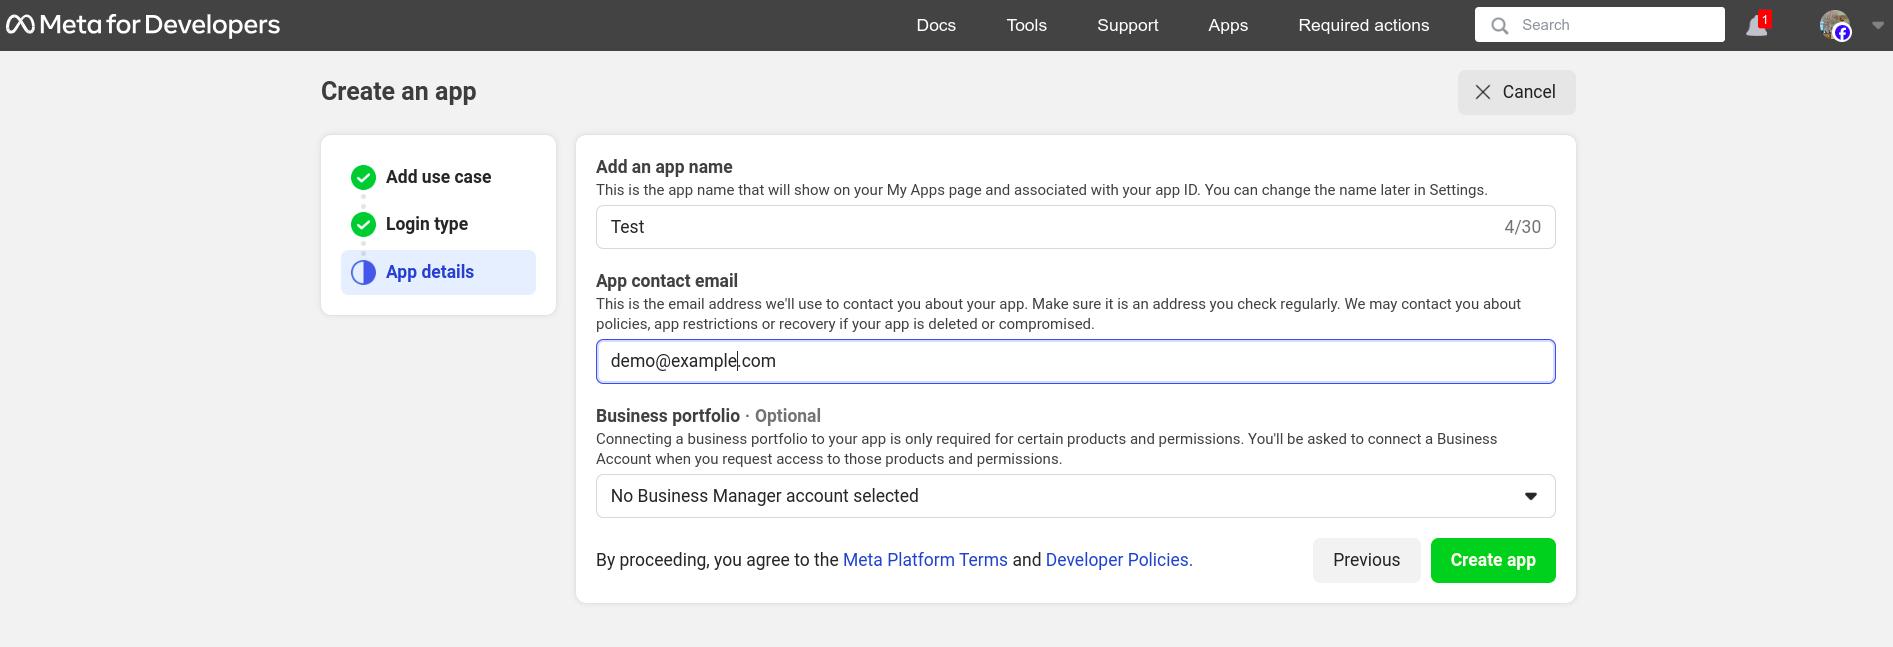
Here, select the app display name and contact email so that Facebook can contact you in case of emergency, press Create App to finish.
After you finish, the system will navigate you to the dashboard to continue.
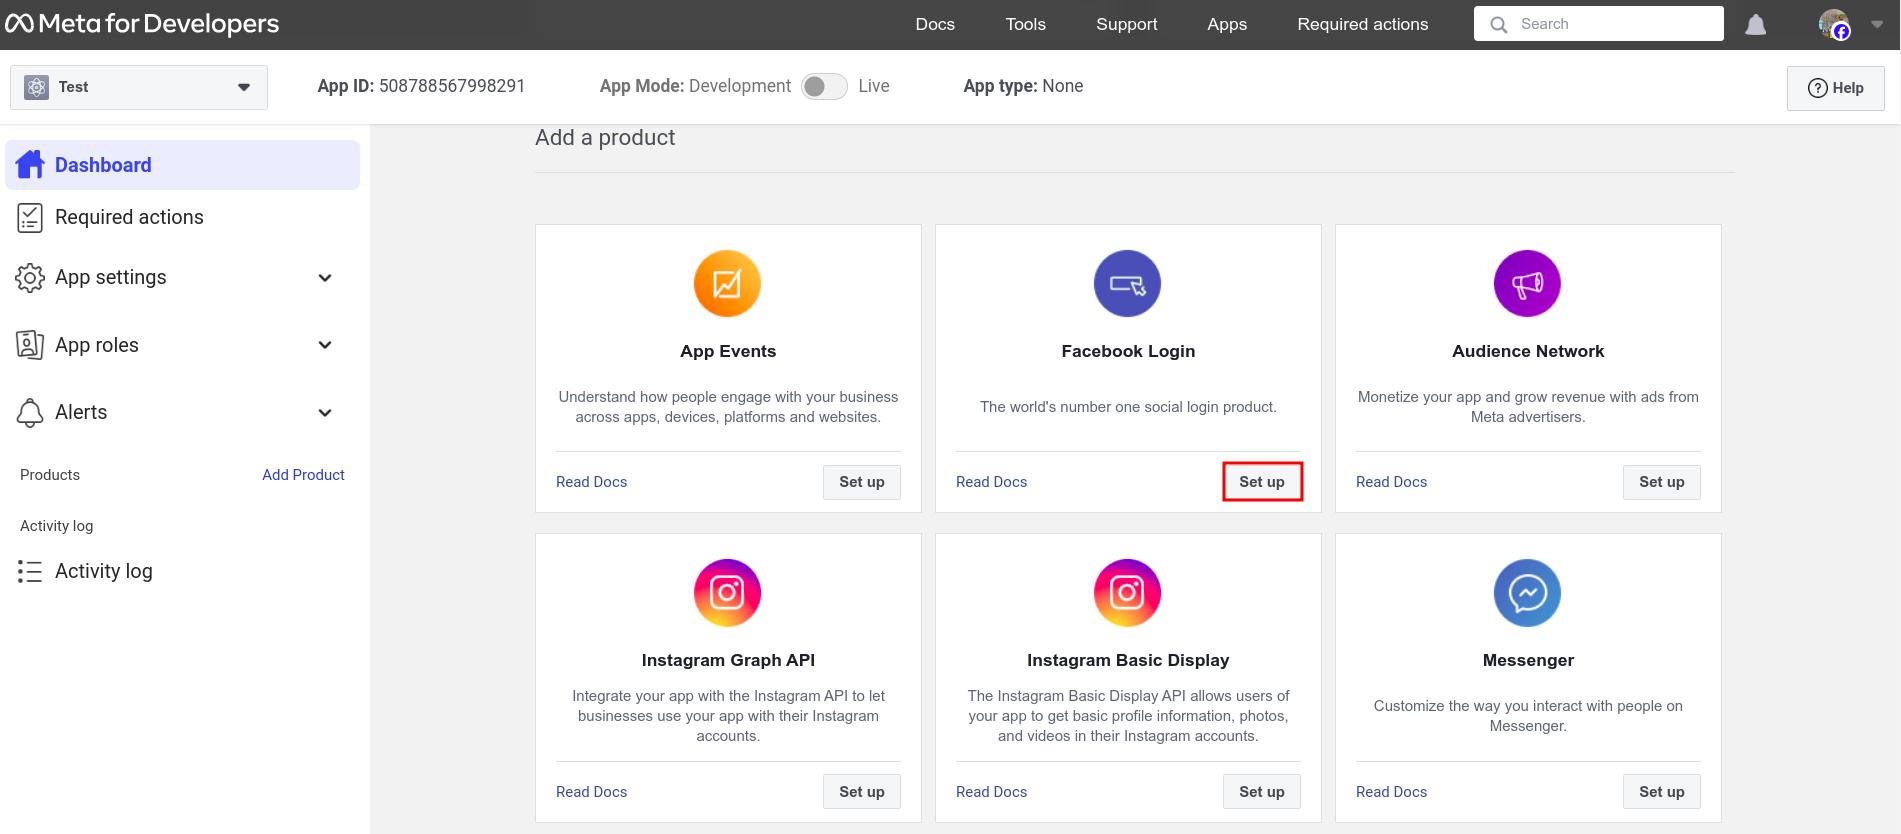
Choose the Facebook products for App
On the Dashboard , press Set up to add the following apps: Facebook Login, Webhook, and Messenger.
Verify your business information with Facebook
Follow the Facebook policy, you need to provide your business details, including the legal business name, address, phone number and website. Make sure the details you submit exactly match the details of your legal business entity. Also make sure your business’s website loads and is HTTPS compliant. For more details, please go to Meta’s helps.
The Facebook verify process can take times, from 1 to some days. Untill the Bussiness is verifed, you can not do the next steps.
Register the Facebook permissions access
Your app need to be verified and you also need Facebook permission access to data for the created applications to have a successful integration. To do so, on the Facebook developer, go to and request the following advanced access rights:
pages_manage_metadata
pages_read_user_content
pages_messaging
pages_show_list
pages_manage_posts
pages_read_engagement
pages_manage_engagement
public_profile
Follow Facebook’s policy: for each requested permission, you must include a clear description, a screen-recording demo, and user interaction steps when submitting your app for review. Facebook will evaluate as following:
Why your app requires the permission and how it’s used in Viindoo Social Marketing.
Step-by-step instructions.
Record a video showing actual usage of the permission follow the above instructions, and Facebook will verify these actions.
Note
For example with the permission: pages_manage_posts
Description: We use this permission to manage Facebook Page posts directly from our system. It allows content creators and managers to draft, approve, and publish posts on behalf of the Page through our interface.
Test Steps:
Log in to your [link instance] with the system administration account [Email/ password].
Go to Social Marketing app > Article, create a sample post, choose the pages, press Confirm > Post on Social Media.
Verify the post appears on the Facebook Page.
To edit the posts, press Cancel > Set to Draft, then edit and post again.
To delete the posts, press Cancel > Set to Draft, then choose Action button > Delete.
Screen Recording: The link of video which show all steps from login to the post appearing live on Page.
In alignment with Facebook’s policy, you are also required to register as a Technology Provider in order to request certain permissions. Please ensure this step is completed before proceeding with any production-level social marketing operations.
Configure the Facebook products
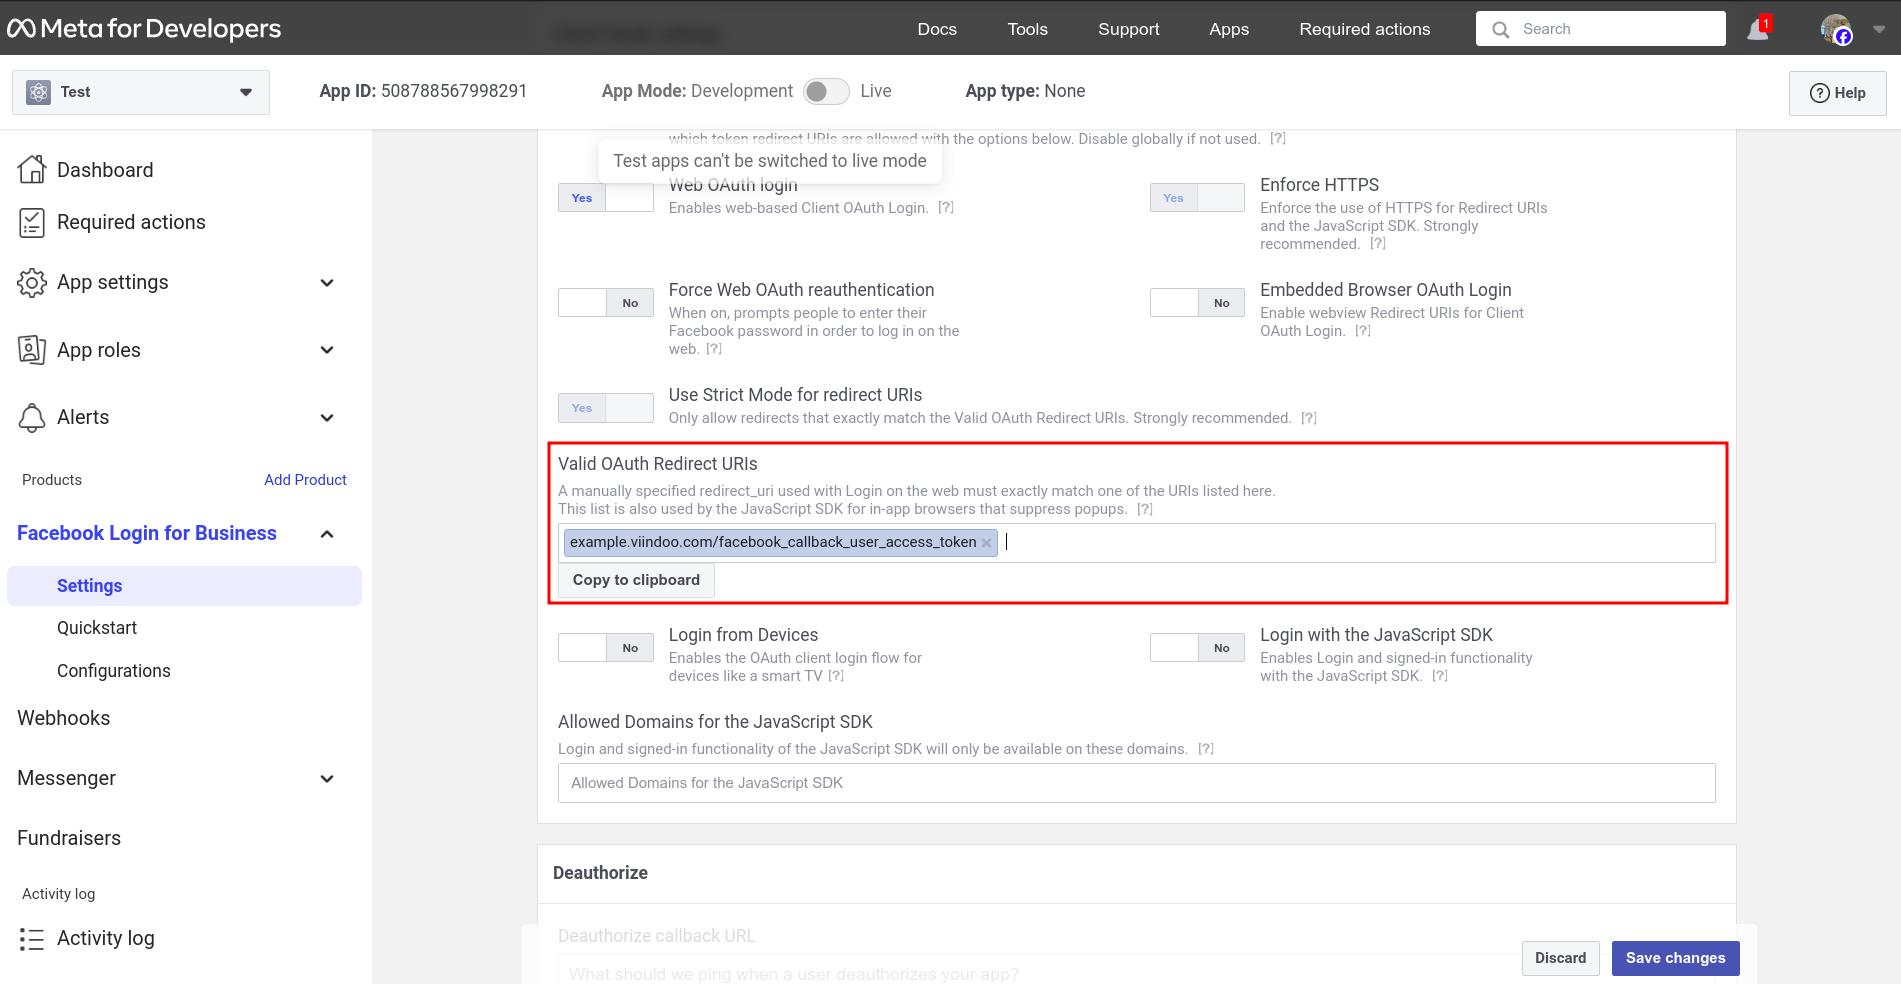
Facebook Login for Bussiness Configuration
On the left toolbar, select , at the Valid OAuth Redirect URIs field, type: domain name of the instance + /facebook_callback_user_access_token. E.g. example.viindoo.com/facebook_callback_user_access_token.
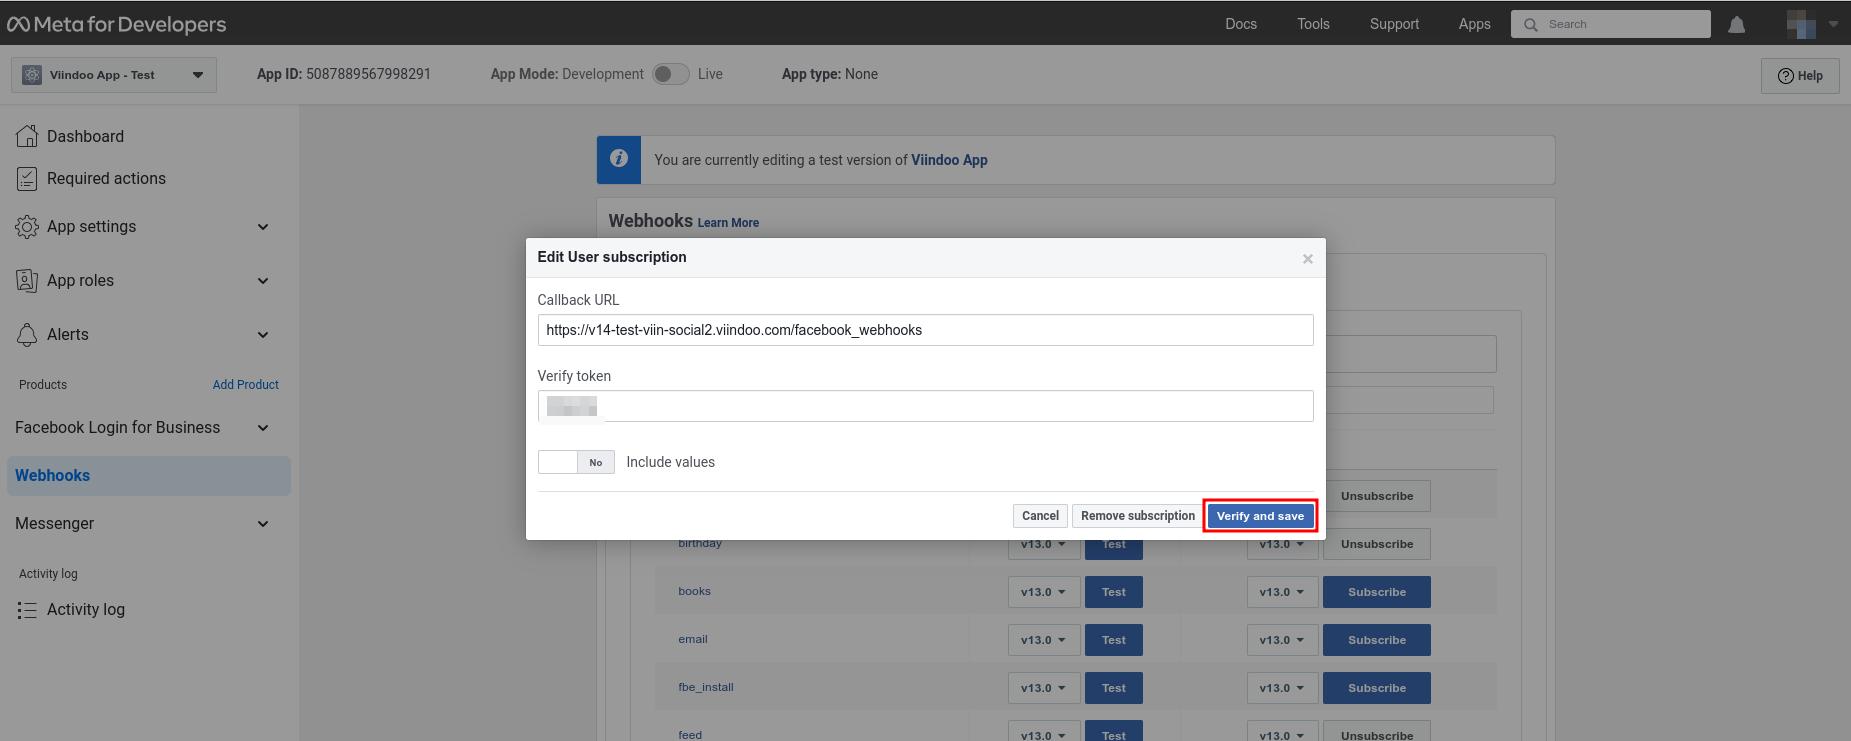
Webhooks Configuration
On the left toolbar, access Webhooks and select Page.
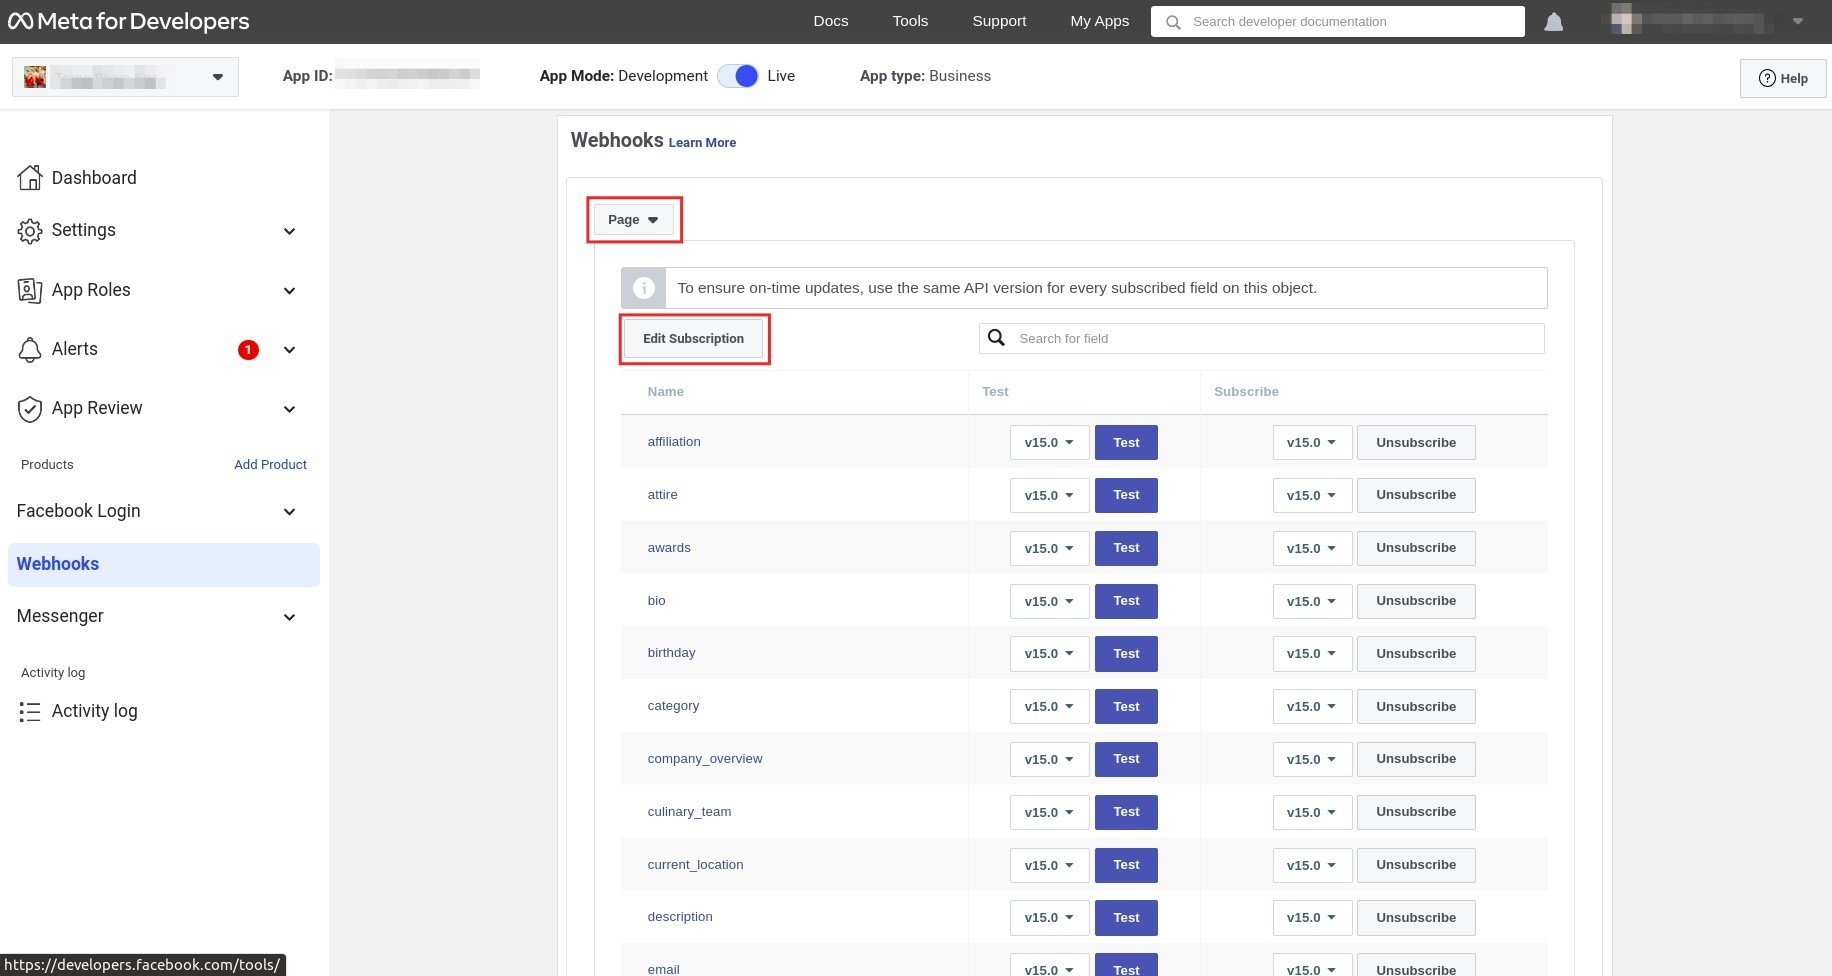
Press Edit Subscription. On the Callback URL, type: domain name of the instance + /facebook_webhooks. E.g: example.viindoo.com/facebook_webhooks and enter a Verify Token. Press Verify and Save.
Note
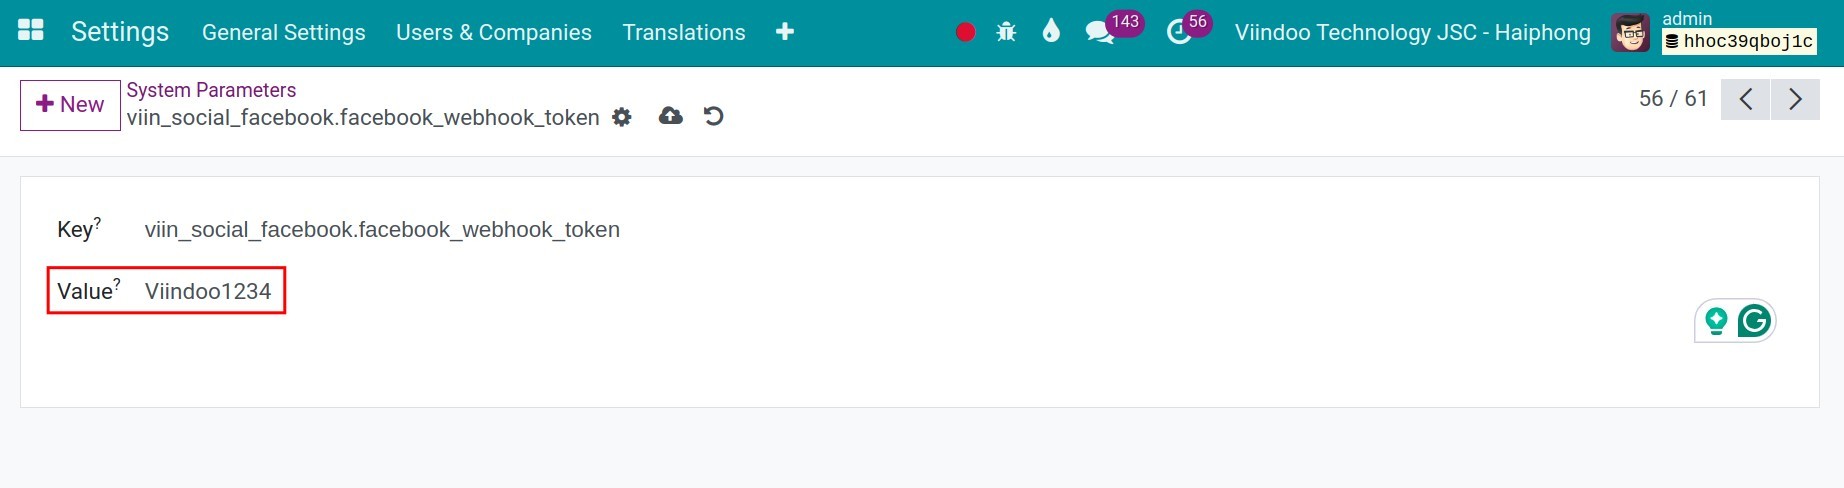
You can set up this token from your Viindoo system in the Developer mode by going to . From here, search for the viin_social_facebook.facebook_webhook_token key then add your desired token.
![enter token code]()
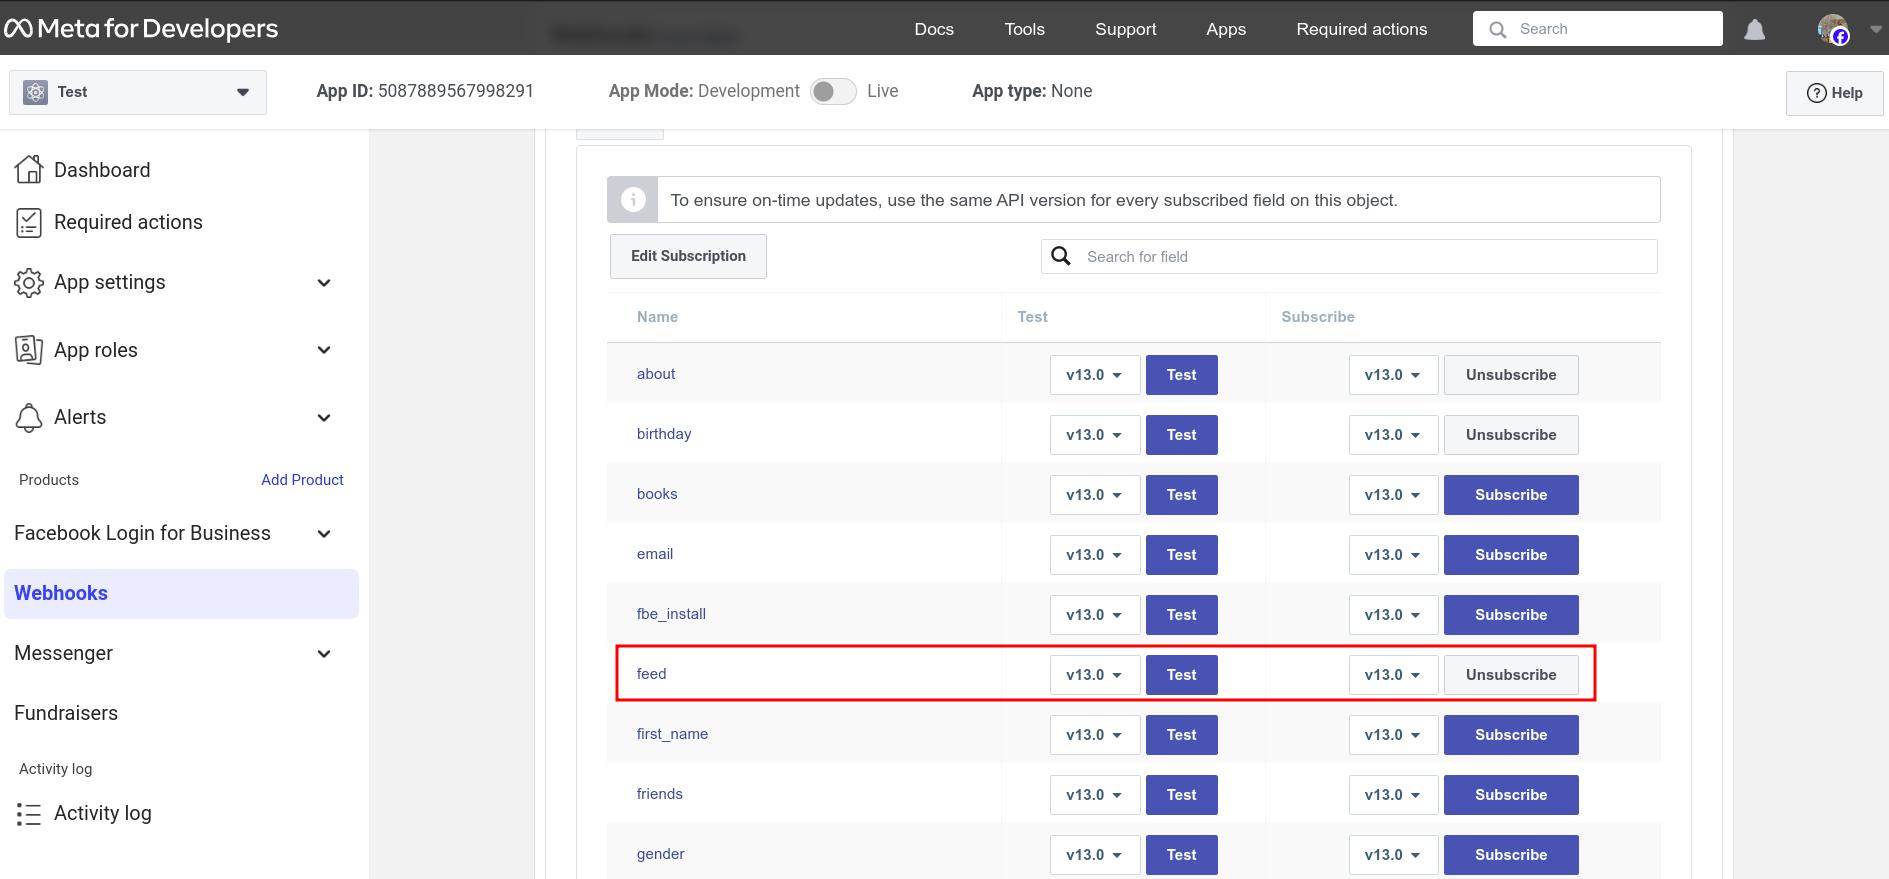
Then subscribe the feed field by pressing Subcribe.
Messenger Configuration
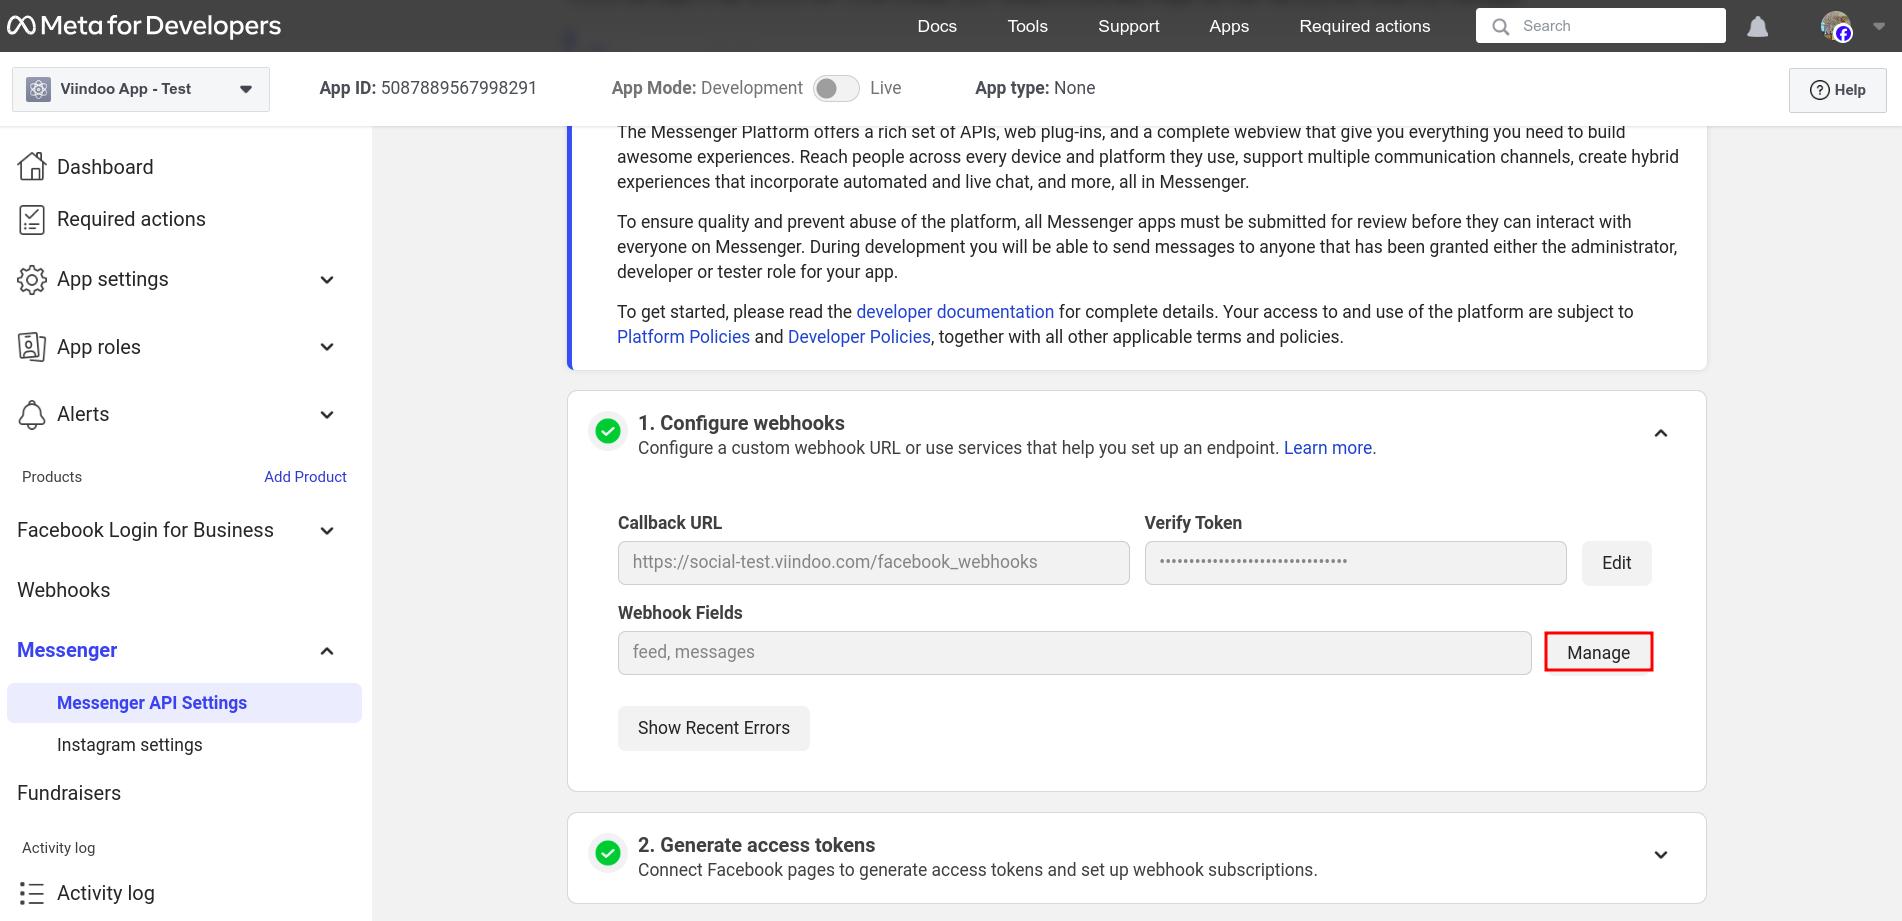
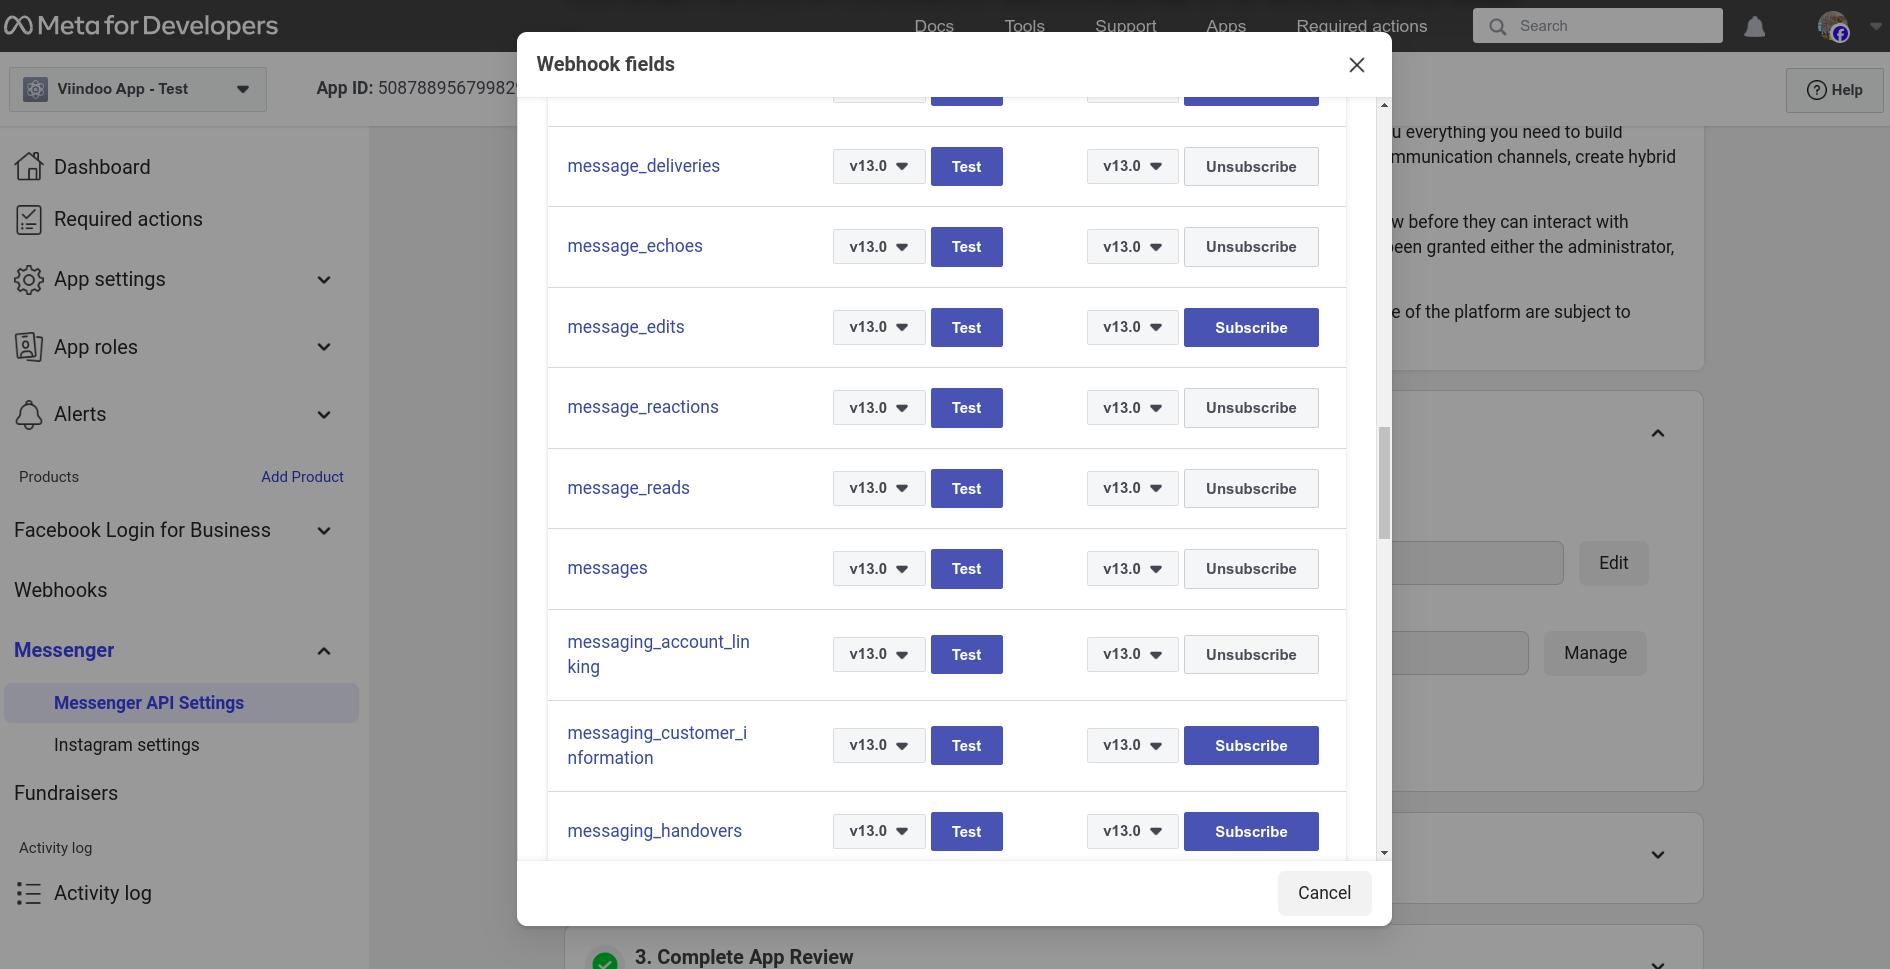
Navigate to , at webhook configuration, press Manage and subscribe messages fields.
Connect Facebook with Viindoo
Return to to copy the App ID and App secret.
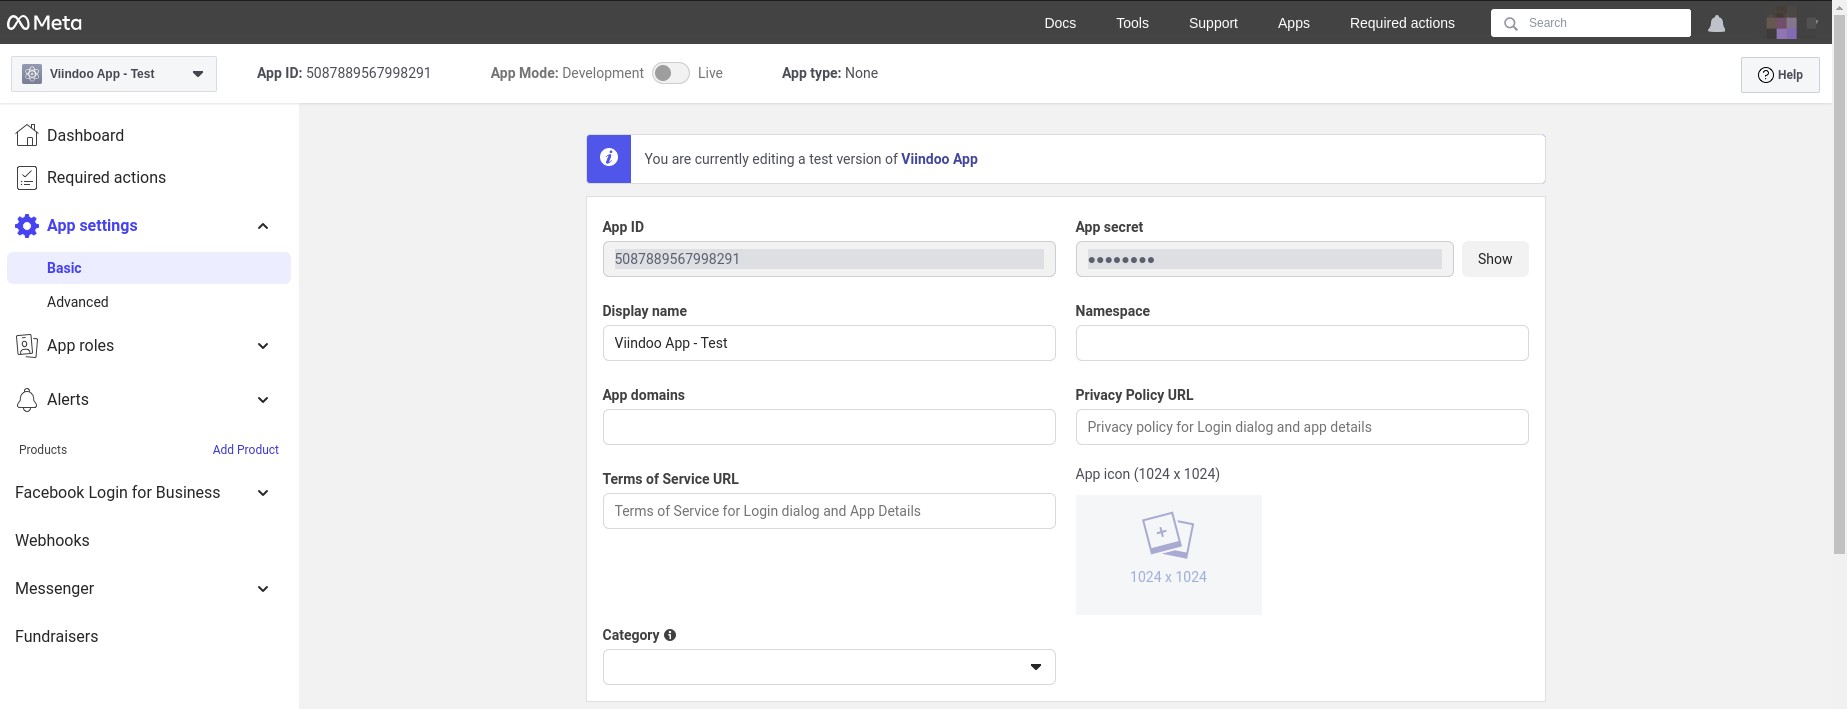
Note
You need to press “Show” to show the app secret before copying.
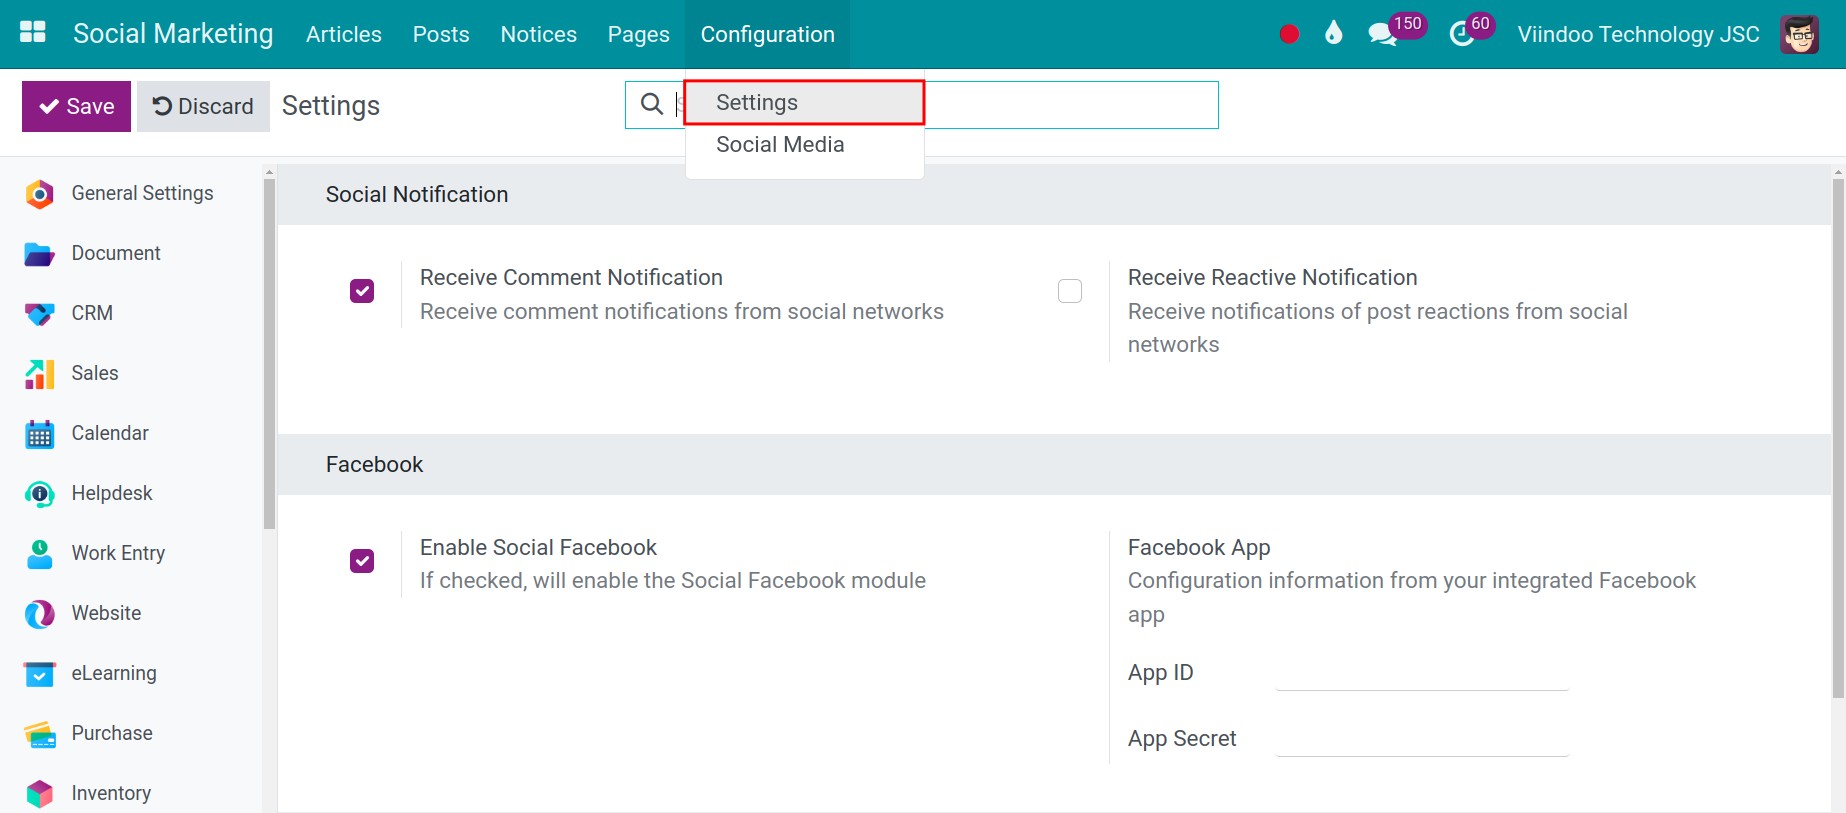
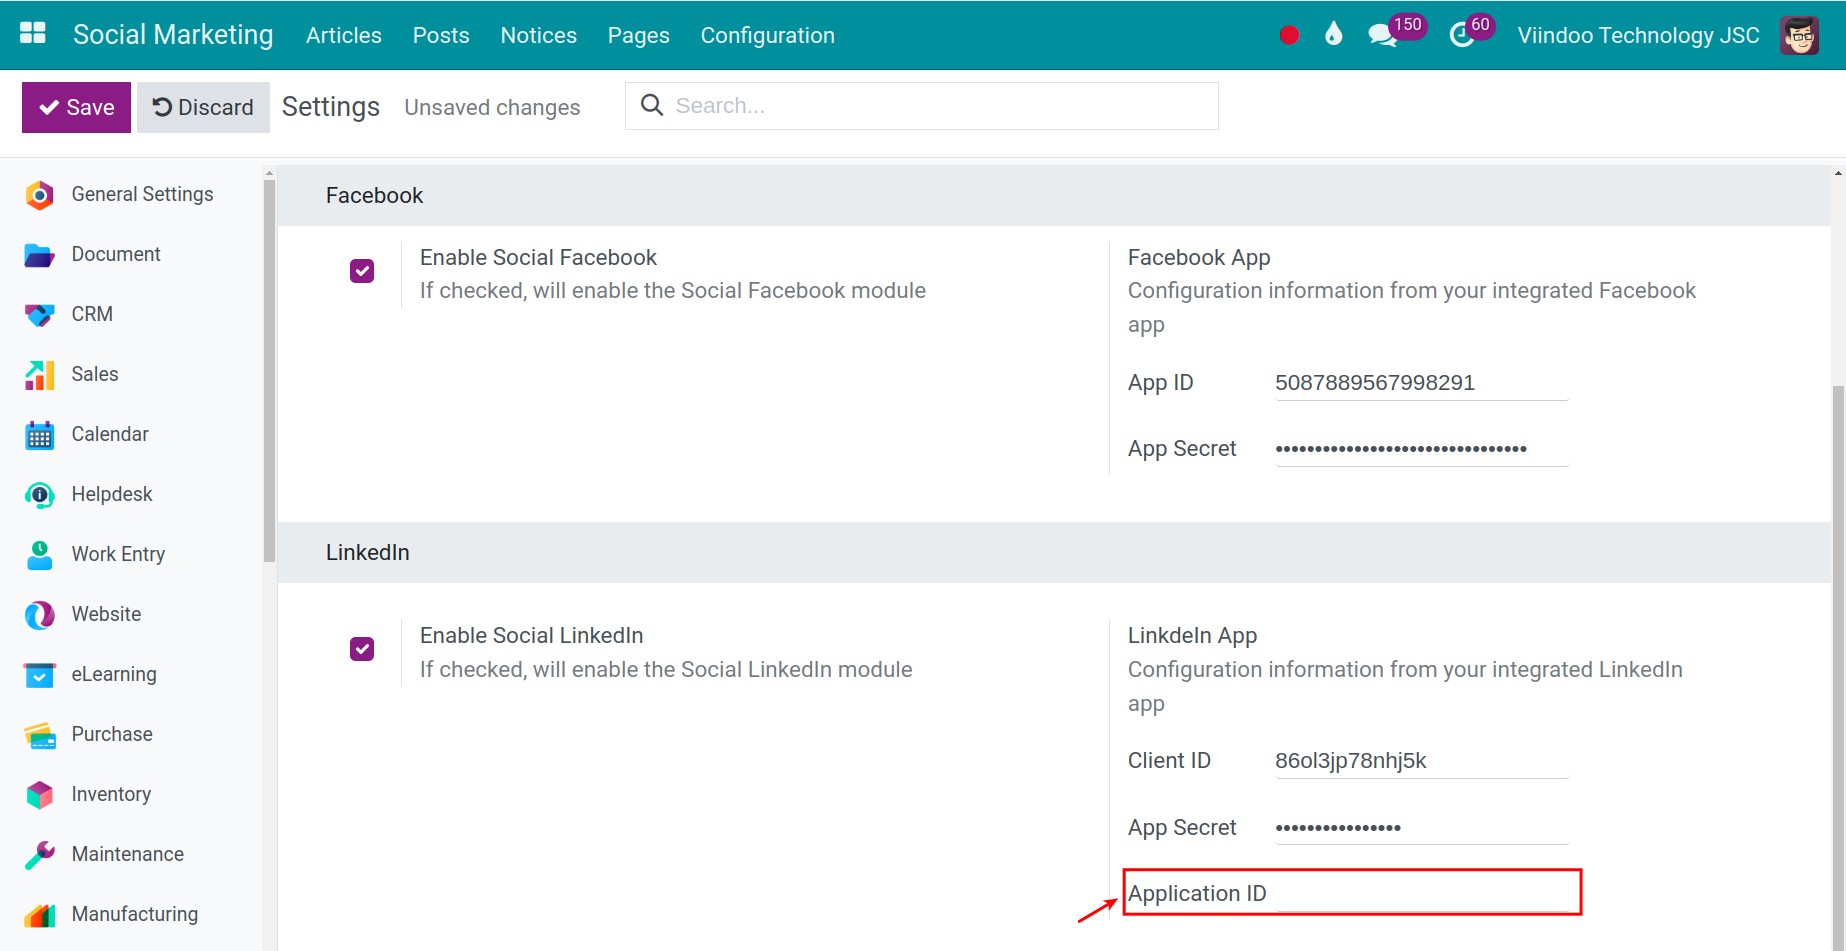
Return to the Viindoo system, navigate to . Scroll to the Facebook section and attach the App ID and App secret to the corresponding field.
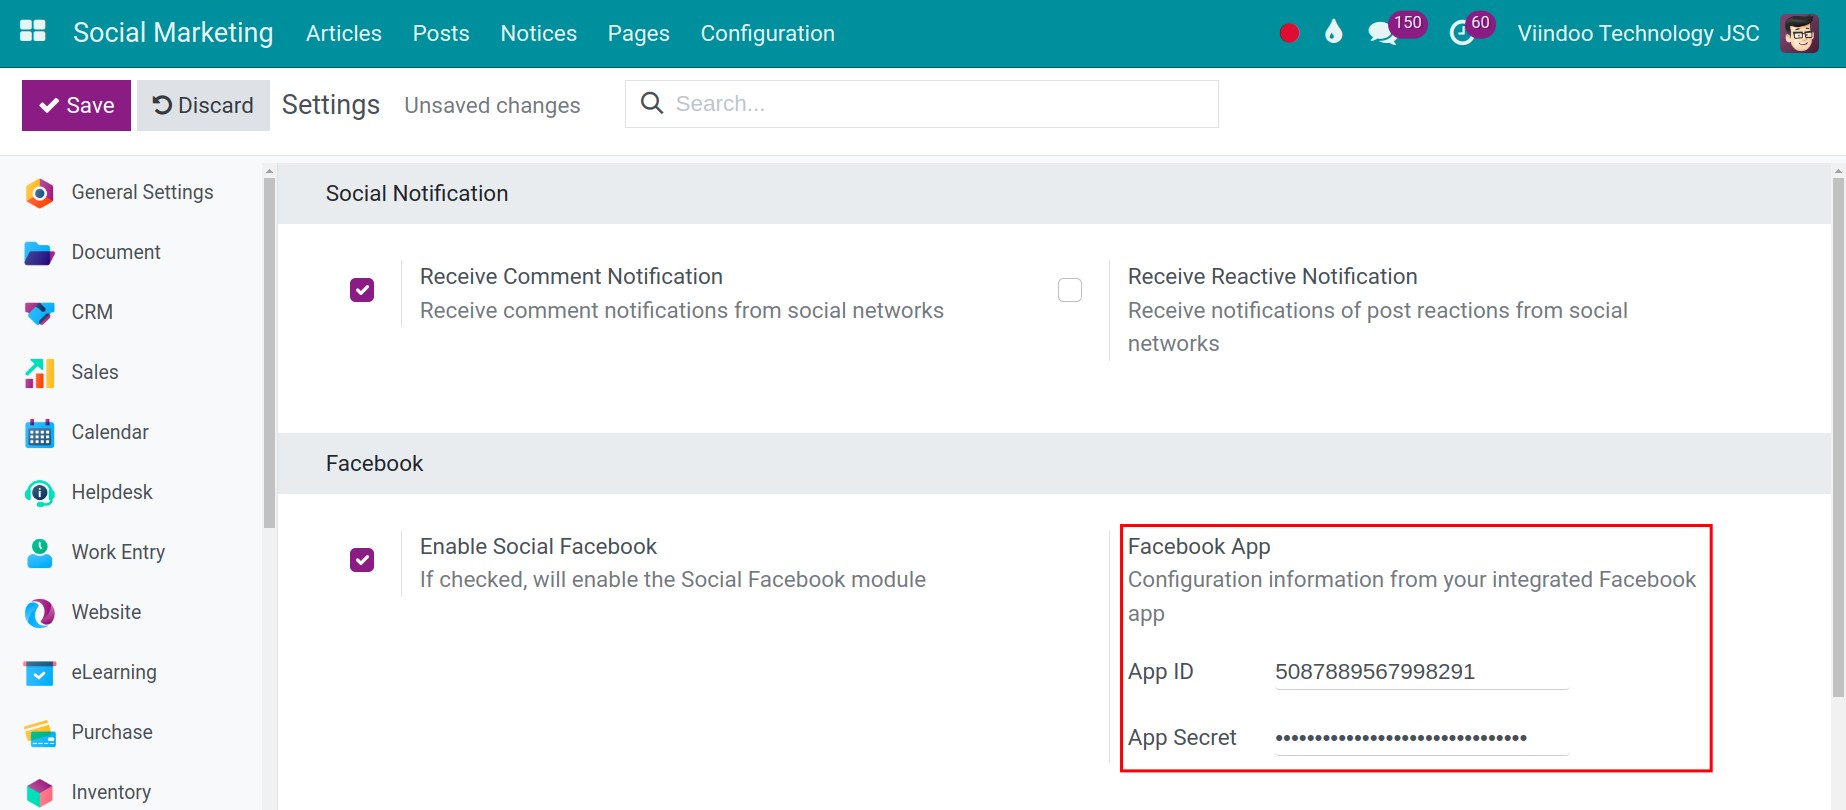
Then press Save to save. Now, you have completed the API integration with Facebook.
Integrate Facebook pages with the Viindoo system
After finishing the API integration, you need to link the system with specific social media pages that you want to manage.
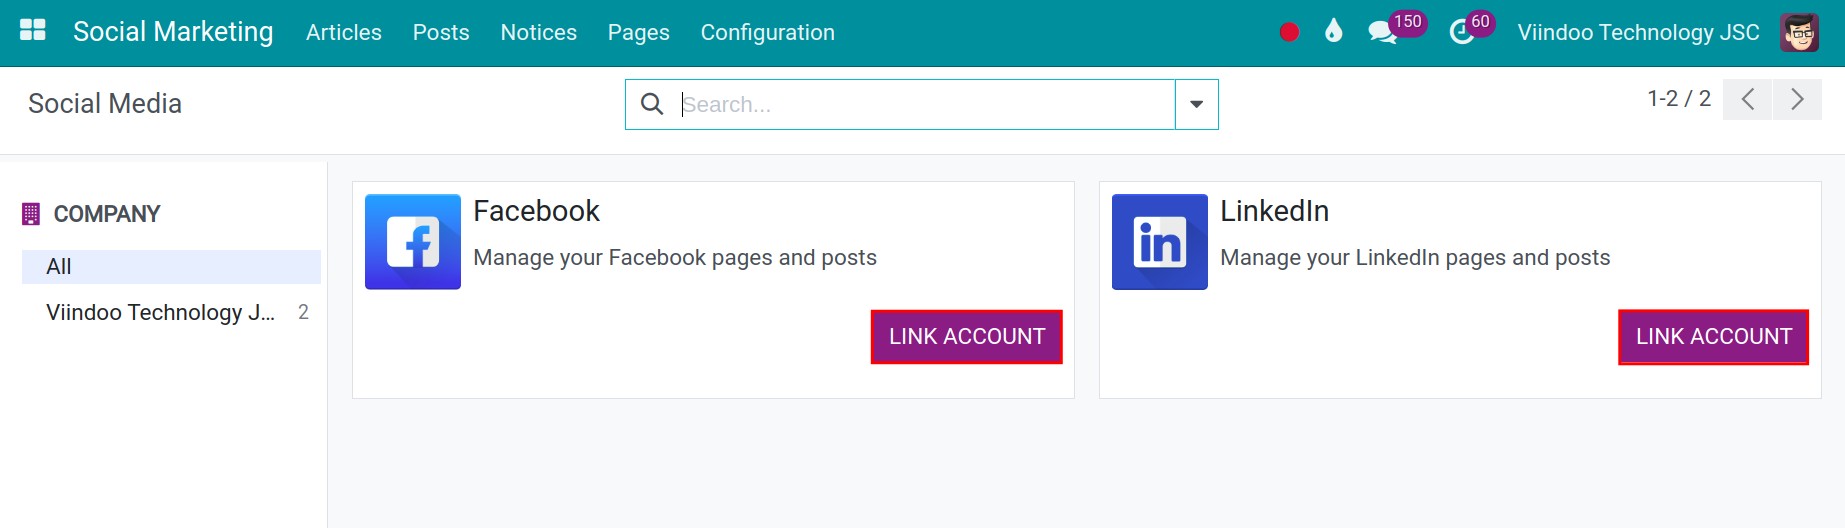
Navigate to . To link the Viindoo system with the enterprise’s Facebook page, choose the Facebook card that you want to link and press LINK ACCOUNT.
Warning
This step need the person have the administration of the Facebook account need to do.
The system will navigate you to a new tab with a Facebook interface. Here, log in to your account, choose the pages that you want to connect, and then complete the connection.
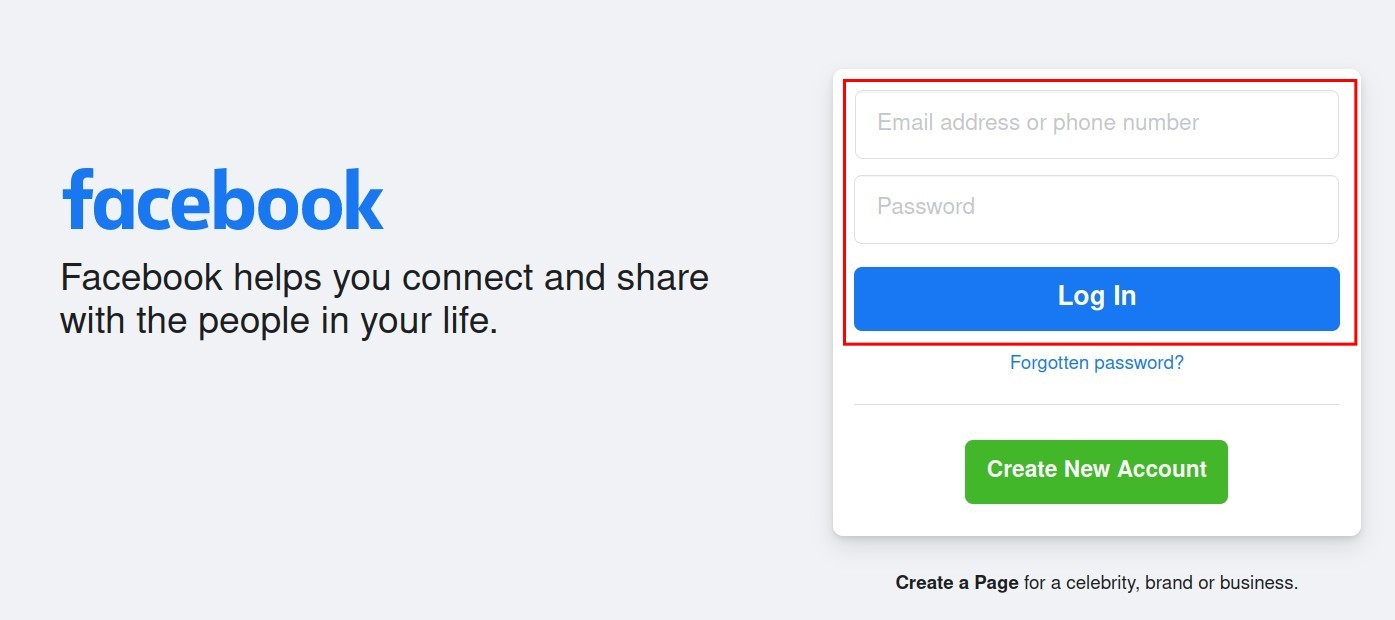
Note
You need to be be the administrator of the page.
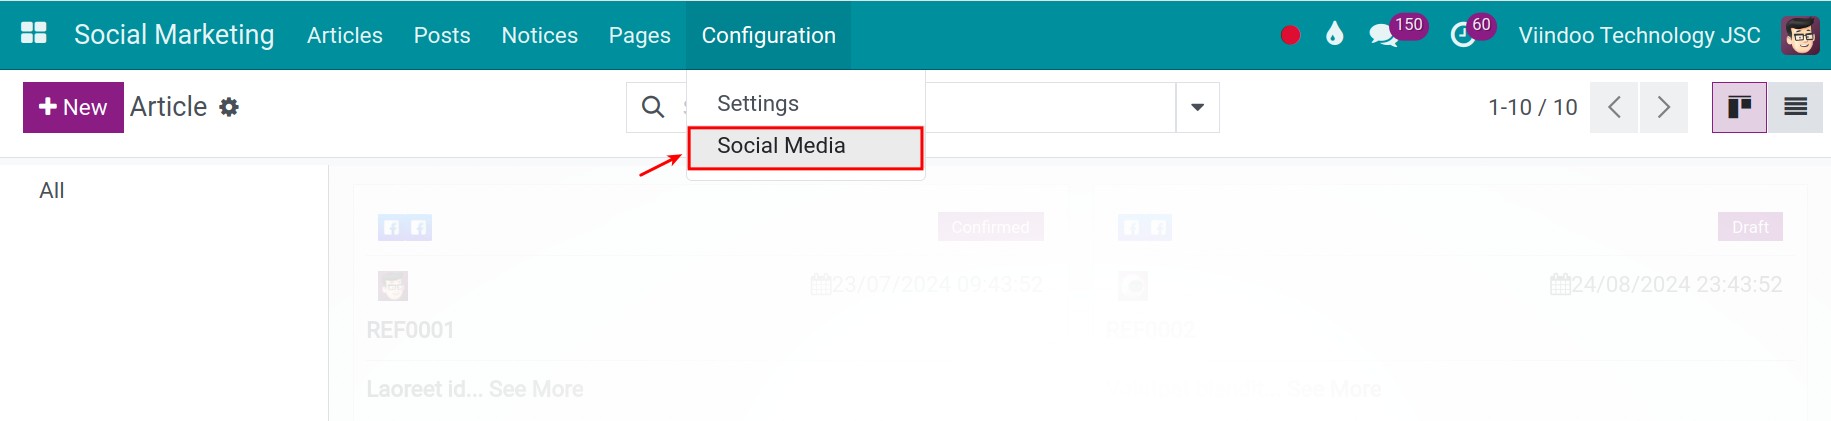
After finishing the connection, return to the system and navigate to . All the social media pages that are under your administration will appear here.
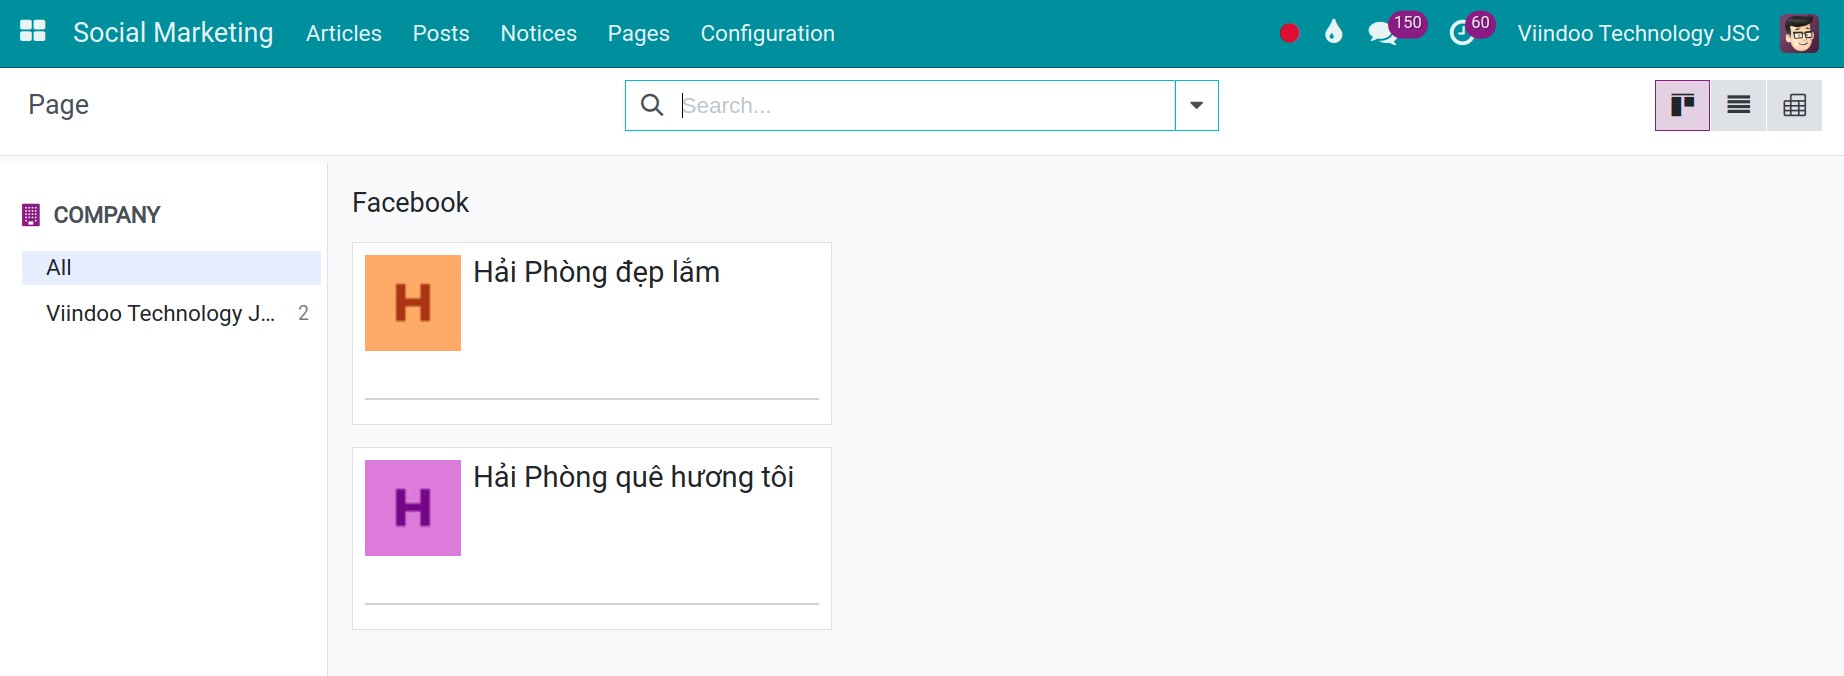
Note
If you cannot see your list of Facebook pages, go to Social Marketing > Configuration > Social Media, open the Facebook card, and click Synchronize Pages.
If the pages still do not appear, please review all the steps above. Ensure that you are using a Facebook account with Administrator access and that the necessary Facebook pages have been selected.
Integrate LinkedIn with Viindoo
Create LinkedIn app
Similar to Facebook, you need to create an app at Linkedin Developer by pressing Create App.

Here, enter the needed information and press Create App.

When you complete, the system will navigate you to the dashboard so that you can continue.
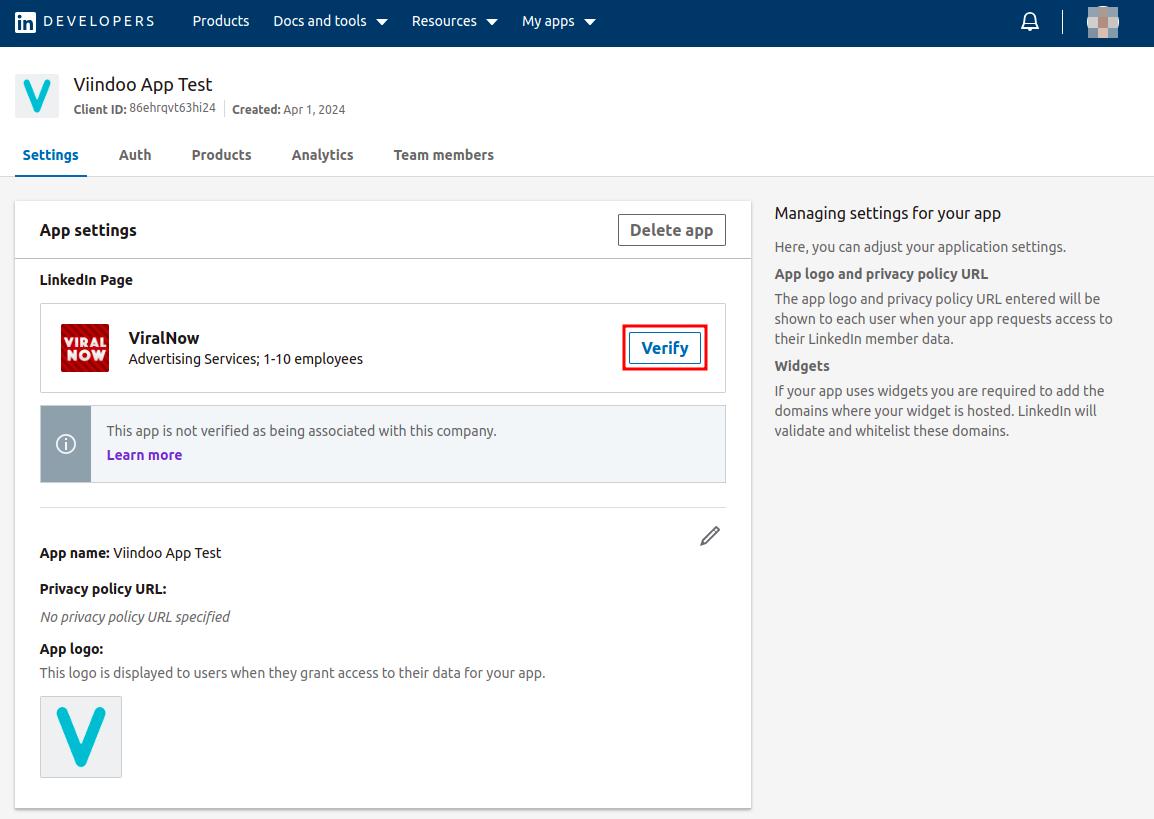
Verify LinkedIn app
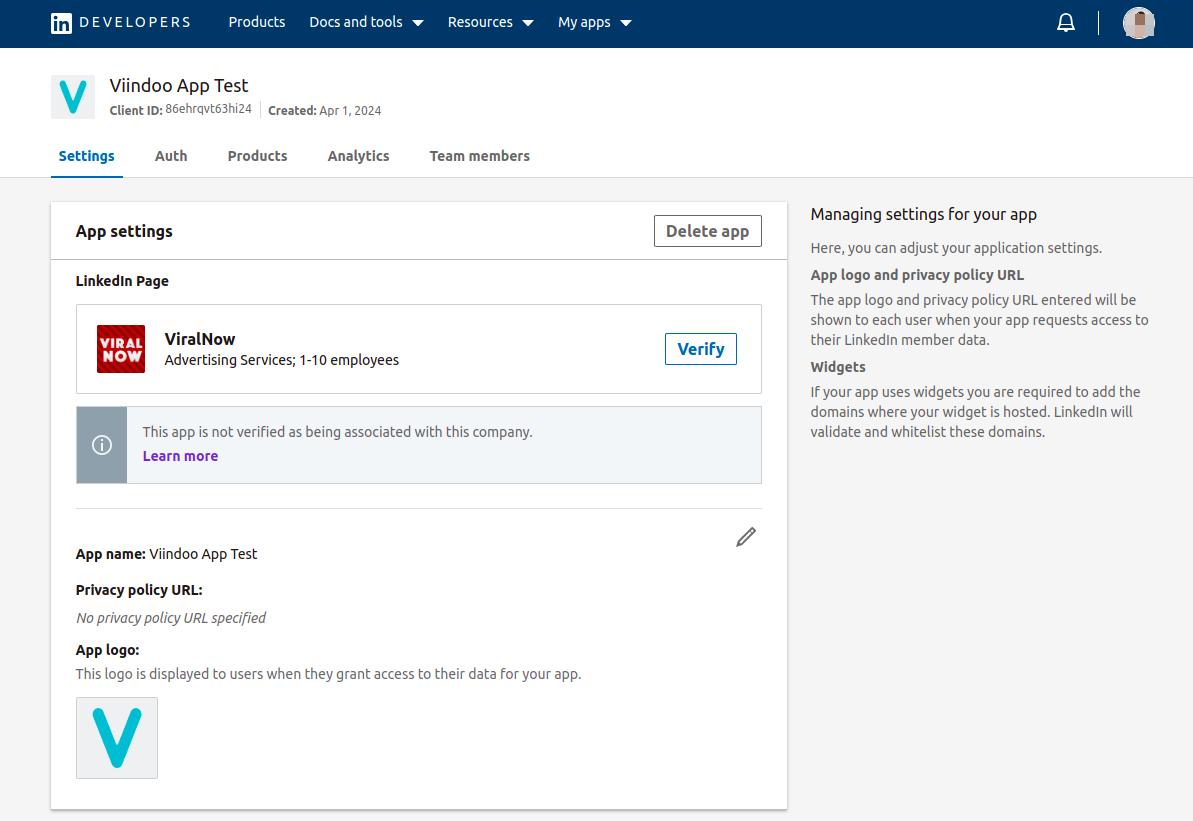
To verify company associate with the application, press Verify on LinkedIn Page, and complete the steps following the Verify company popup.
Choose the mandatory products
After the Linked In page is verified, you can request access product at Products tab by press Request Access button on each needed product line.
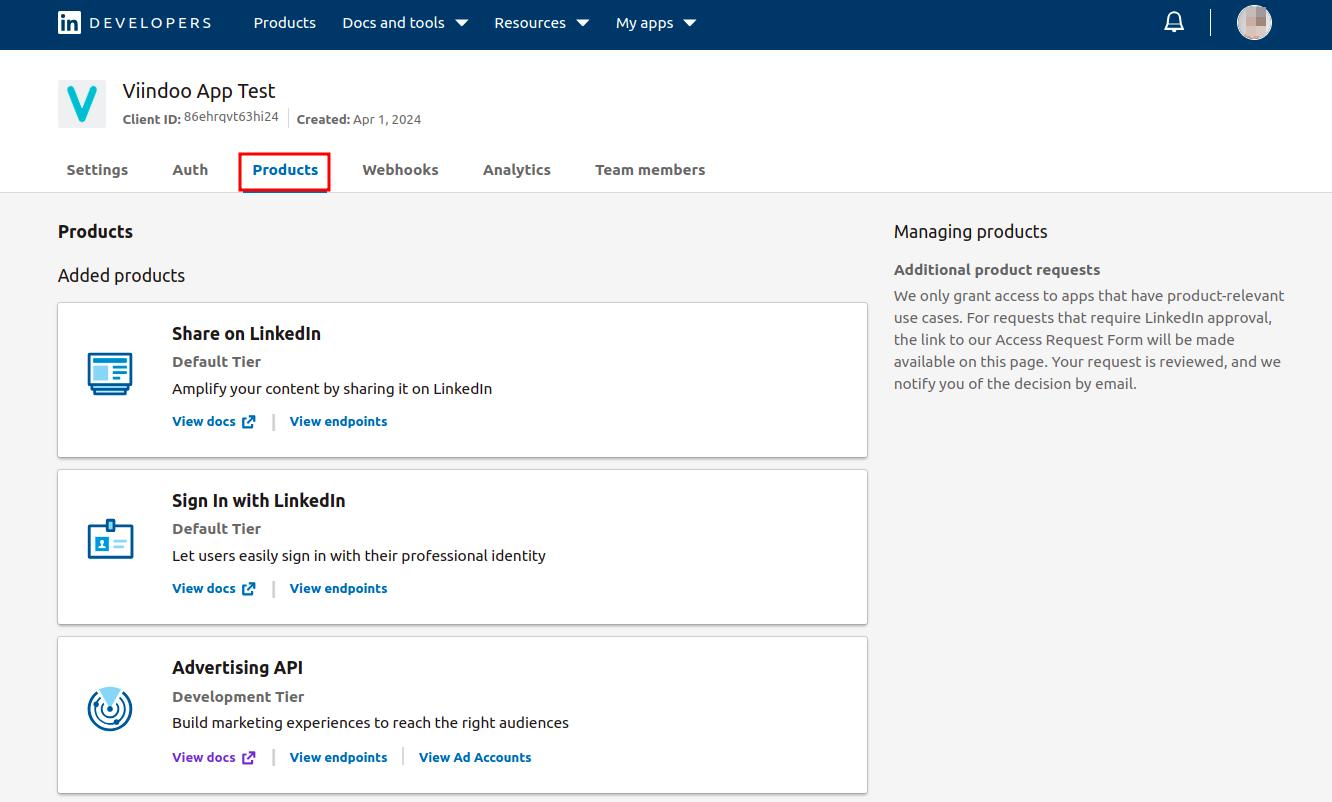
The mandatory products could be:
Sign in with LinkedIn: Used to authenticate the user when connecting via OAuth.
Share on LinkedIn: Allows to post the articles to LinkedIn pages.
Community Management API: Allows businesses to manage and engage with their posts, user interations on the LinkedIn pages.
According to LinkedIn’s policy, using the Community Management product requires verification by submitting relevant information to LinkedIn. After LinkedIn verify your products request, your App will have the corresponding permissions.
Connect LinkedIn with Viindoo
Move to the Auth tab, copy the app’s Client ID and Client Secret.
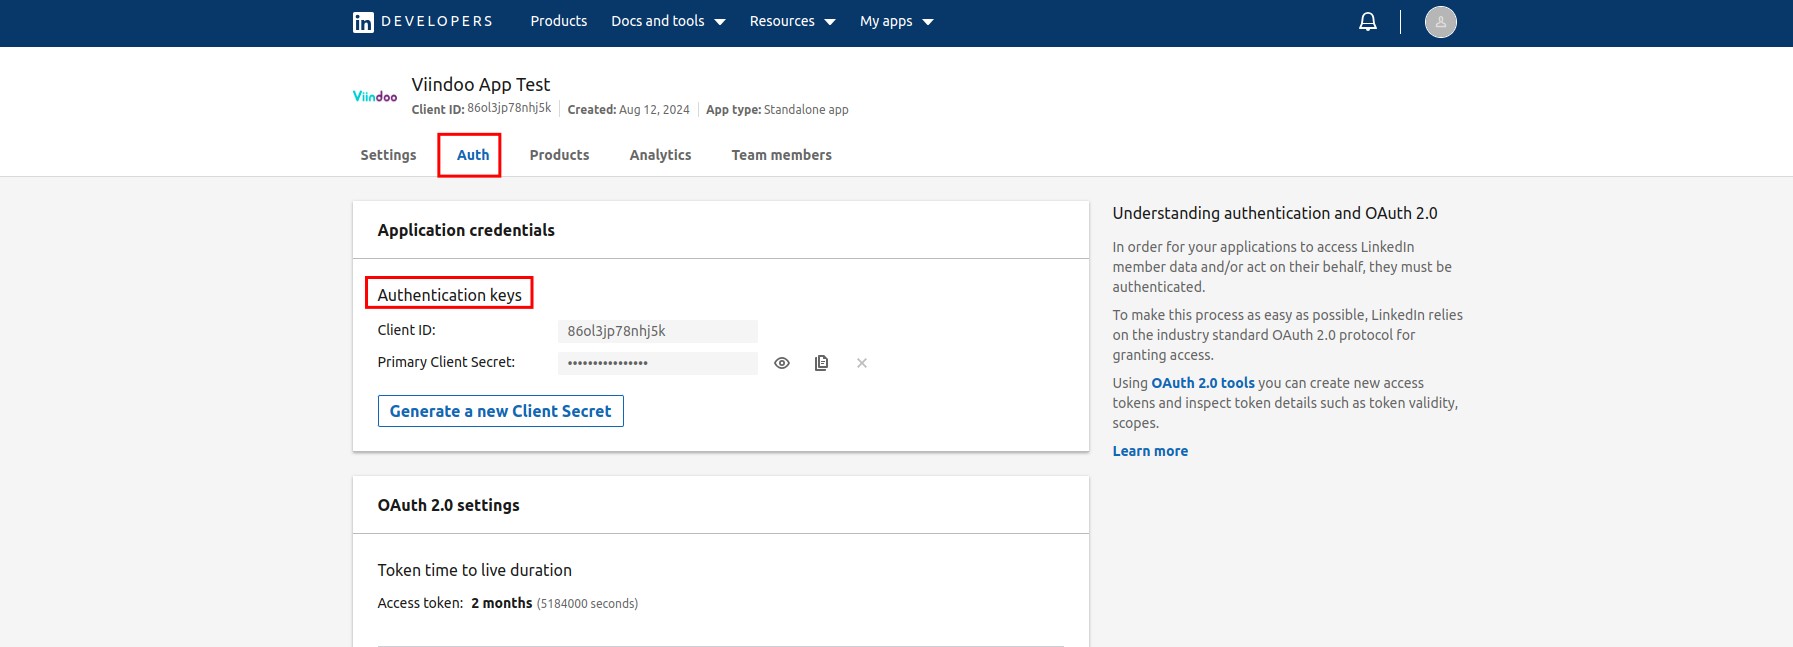
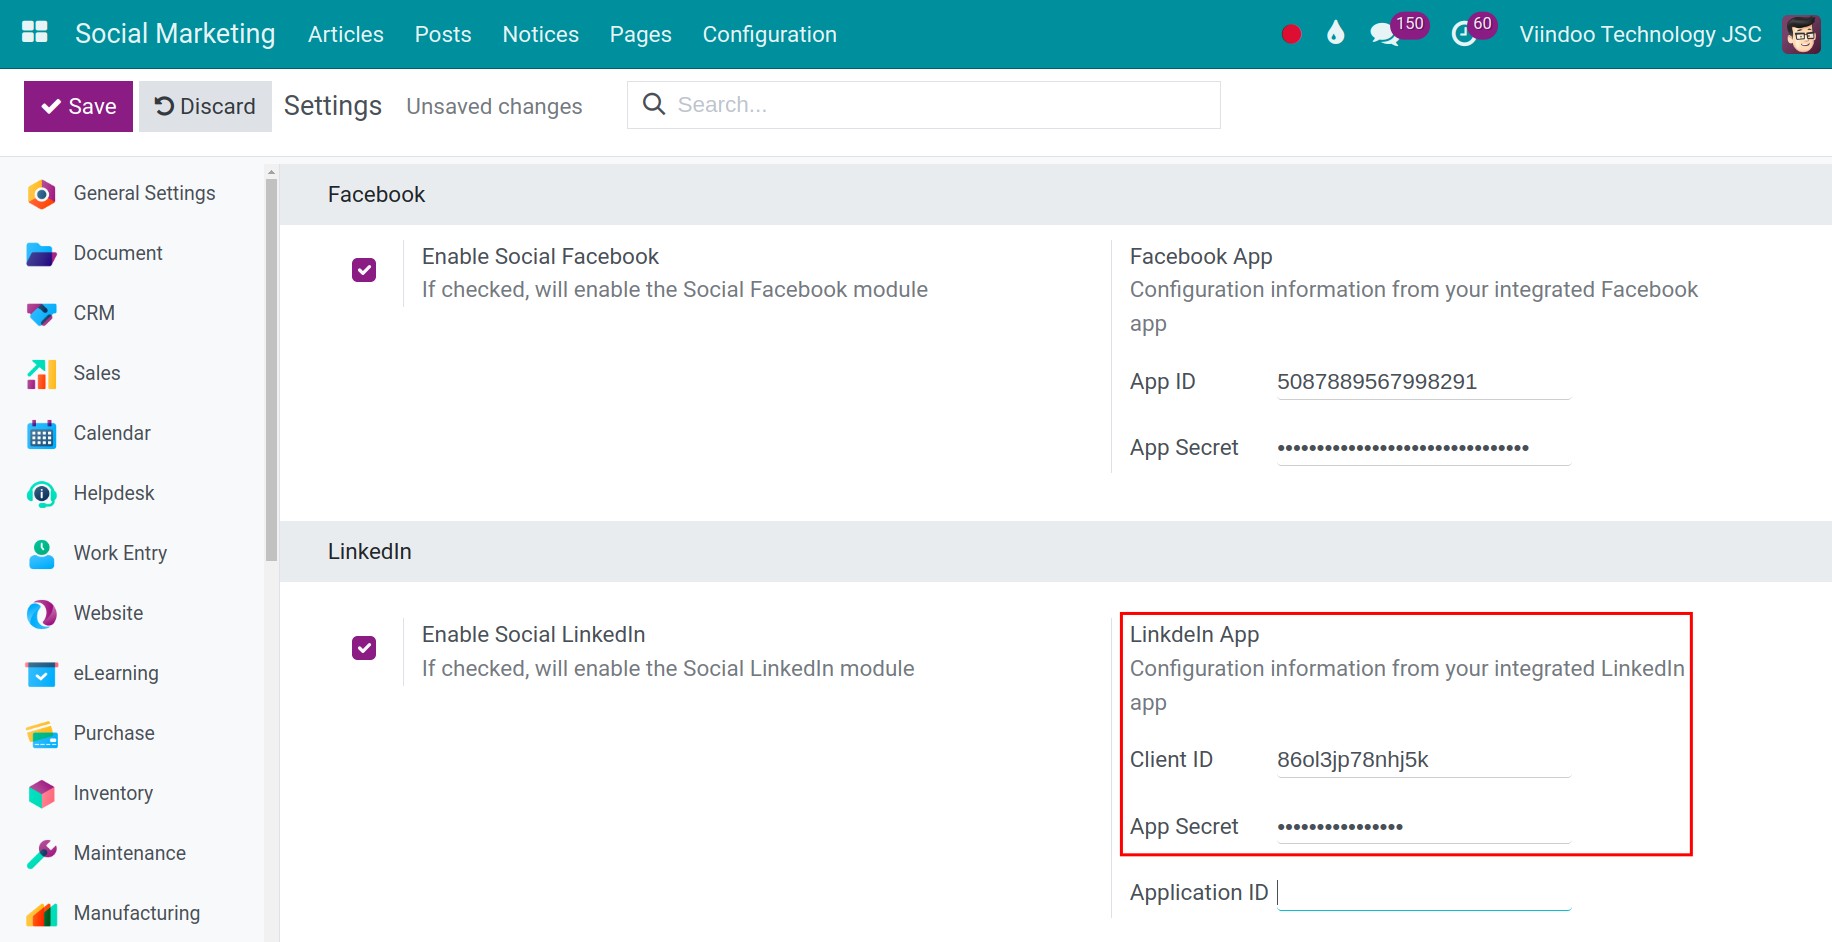
Return to Viindoo system, enter and attach the App ID and App Secret to the corresponding fields.
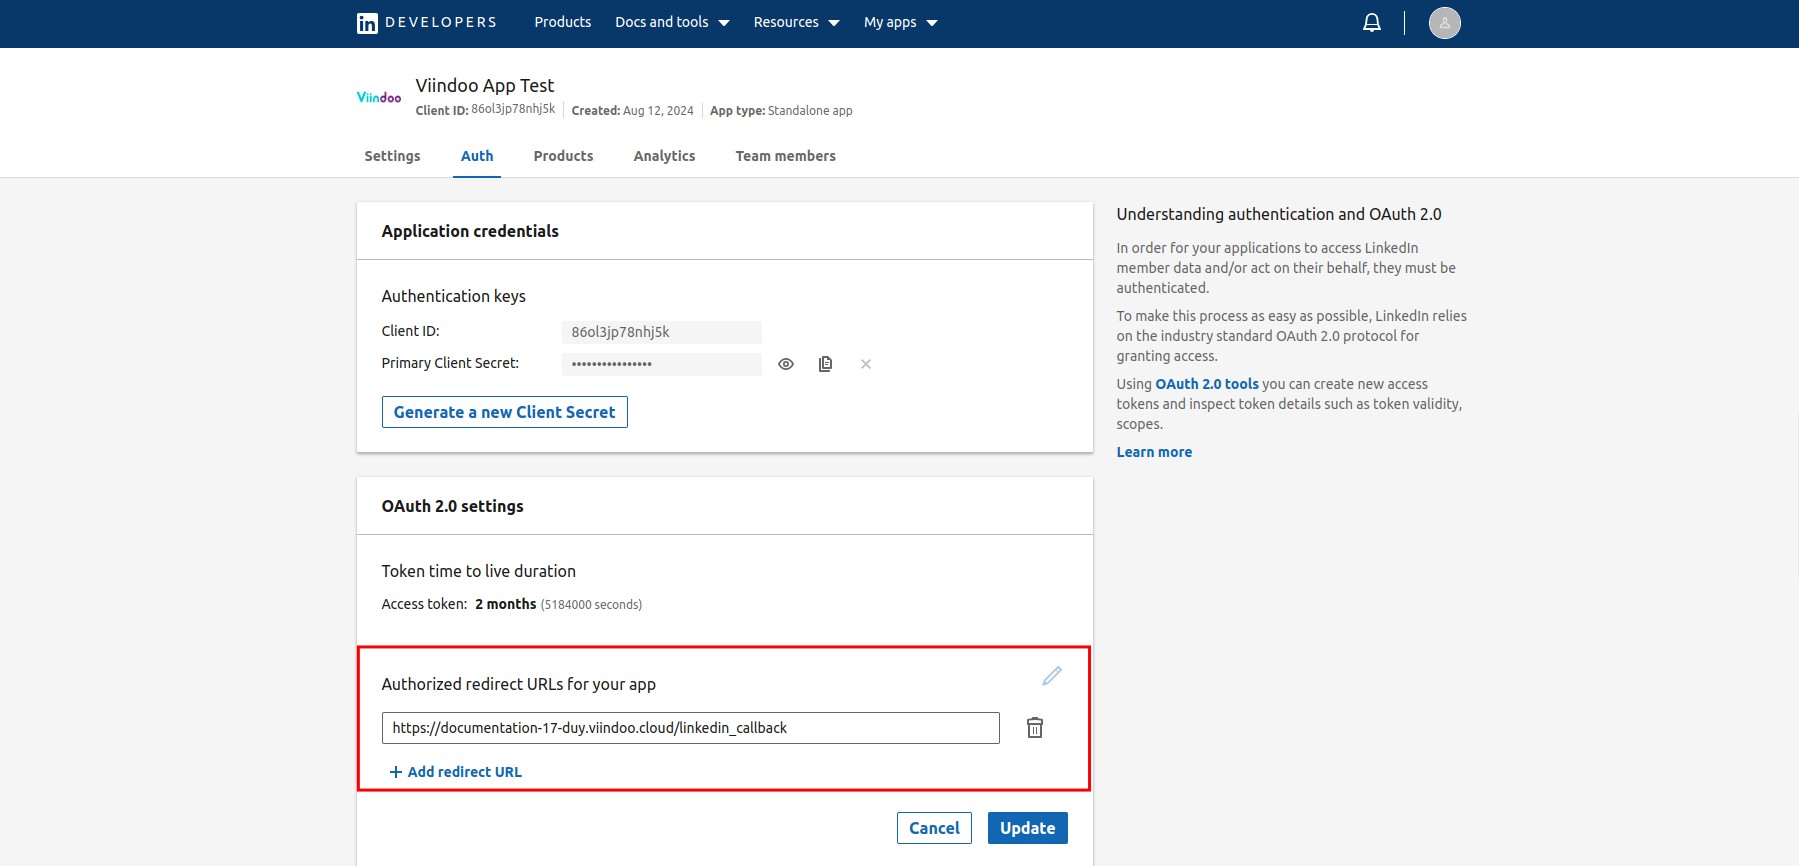
In tab Auth, you enter the following syntax into the Authorized redirect URLs for your app: instant domain + /linkedin_callback, e.g. viindoo.demo.com/linkedin_callback.
Webhooks Configuration
Note
The Webhook tab in LinkedIn’s developer will only appear when your API products are verified by LinkedIn.
The feature of receiving notifications for interactions on LinkedIn posts:
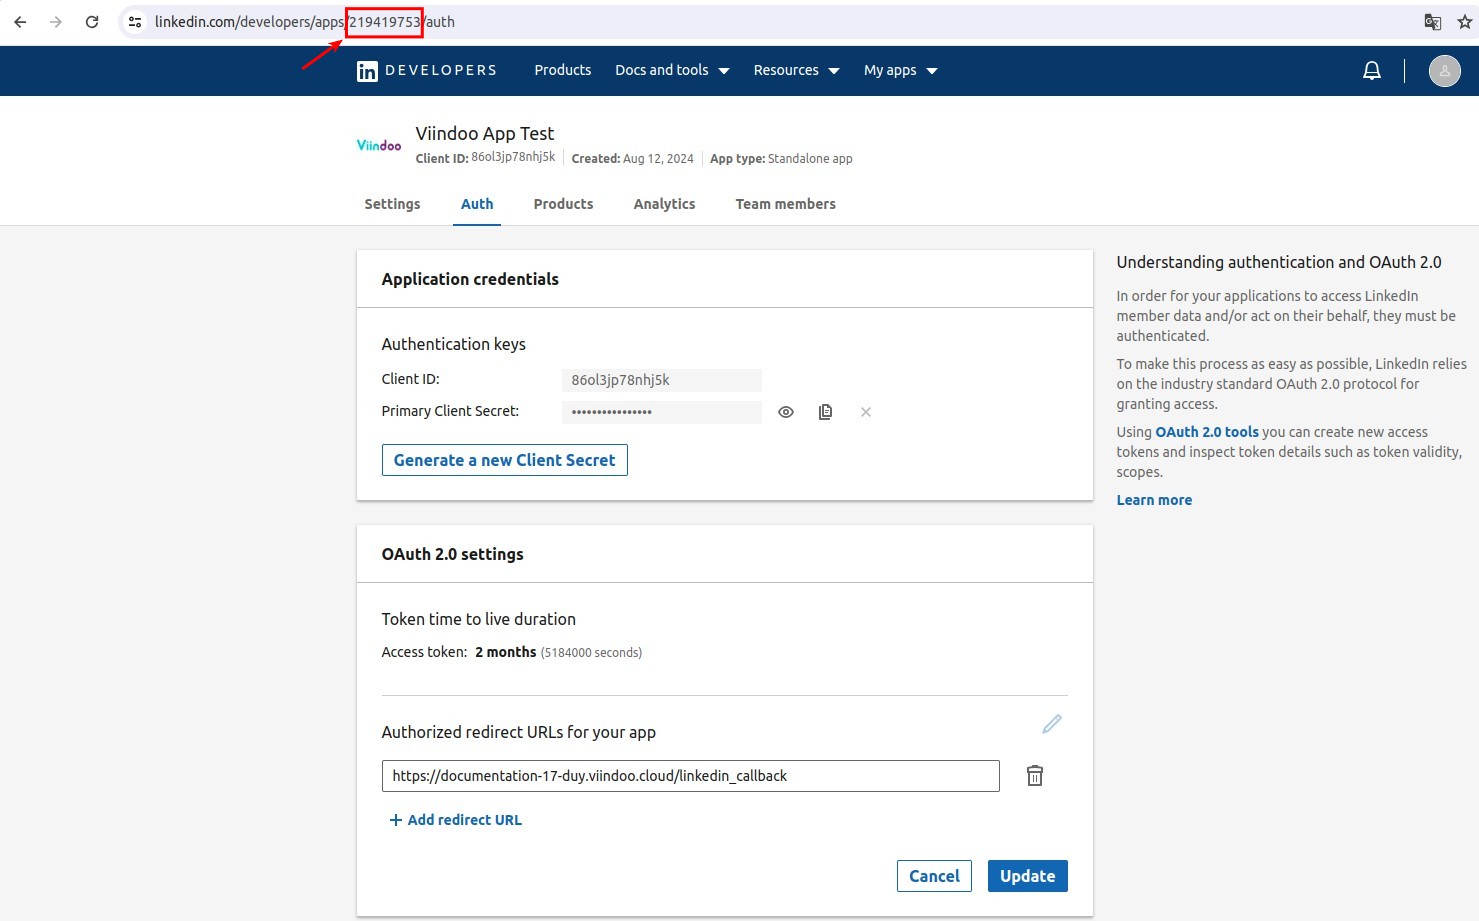
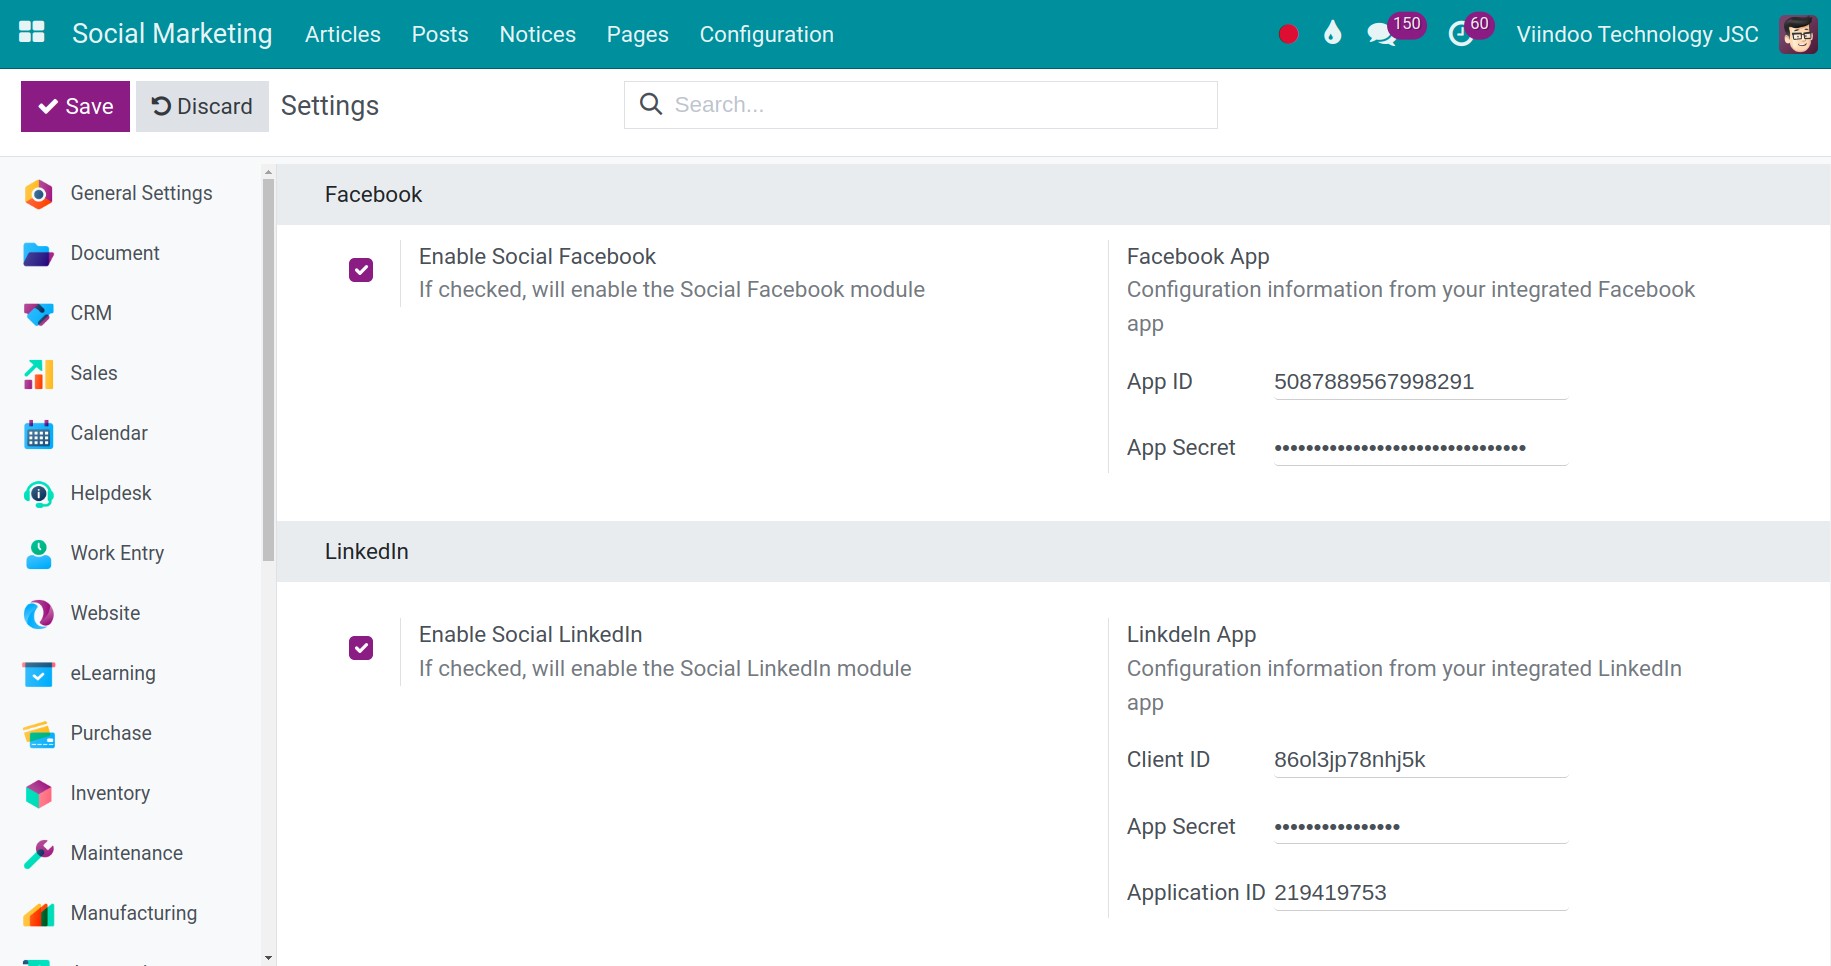
Copy ApplicationID’s LinkedIn App.
Go to Social Marketing > Configuration, then paste to LinkedIn Developer Application ID field .
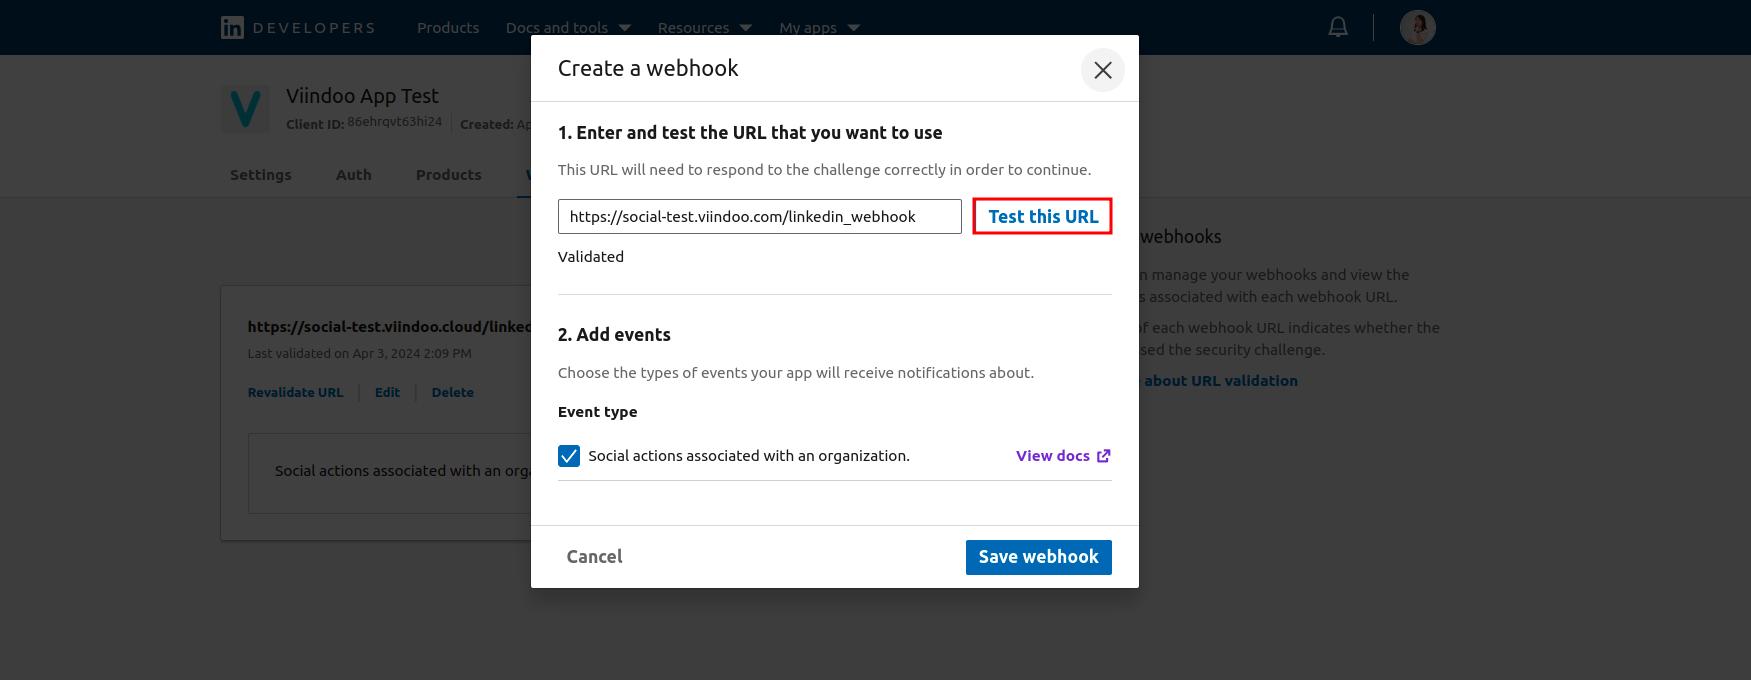
Navigate to developer facebook site, the Webhook tab on LinkedIn, press Create New and enter the following syntax: instant domain + /linkedin_webhook, e.g. viindoo.demo.com/linkedin_webhook.
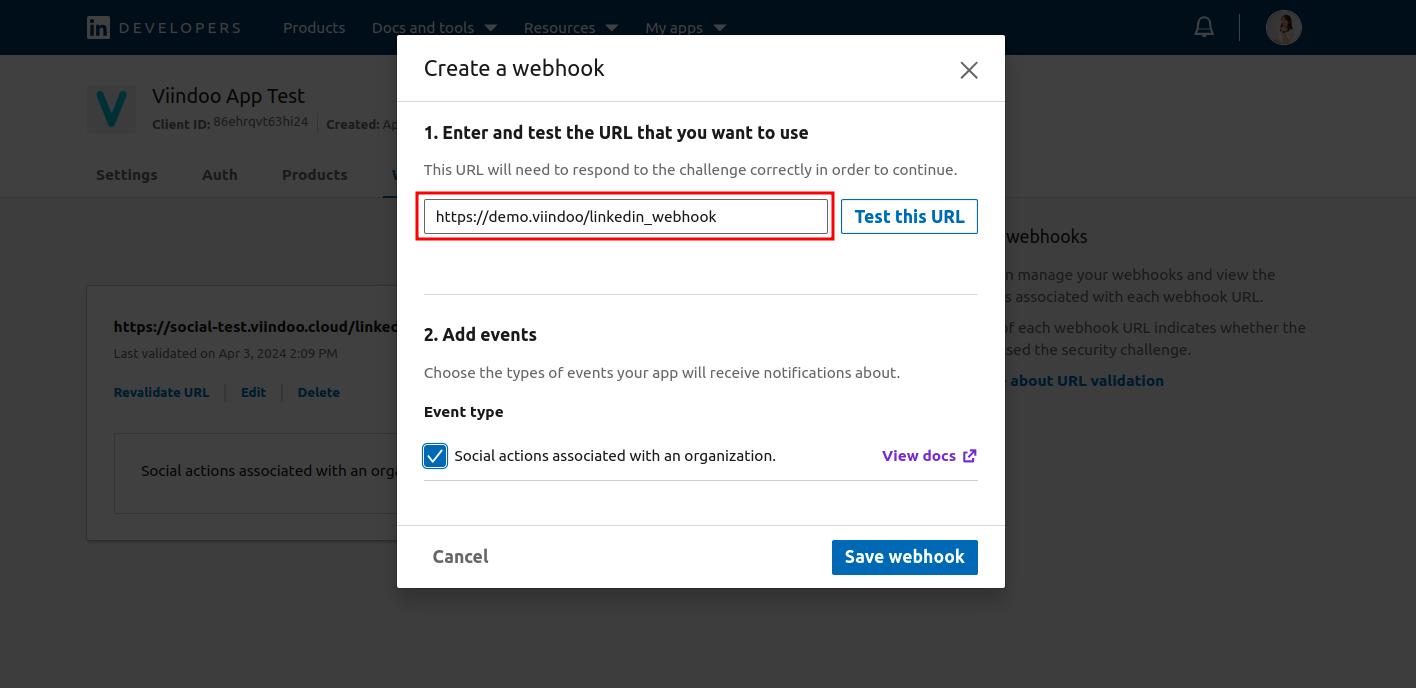
Press Test this URL
After the URL is authenticated, the label ‘Verified’ will be displayed under the URL link.
Note
You have to complete step 2 first so that when you click Test this URL. Encouraged to press 3 times within 3 minutes to quickly proceed to the next step. The system needs to ensure stability for at least 6 hours from the time the Webhook URL is validated. LinkedIn will perform several checks during that time.
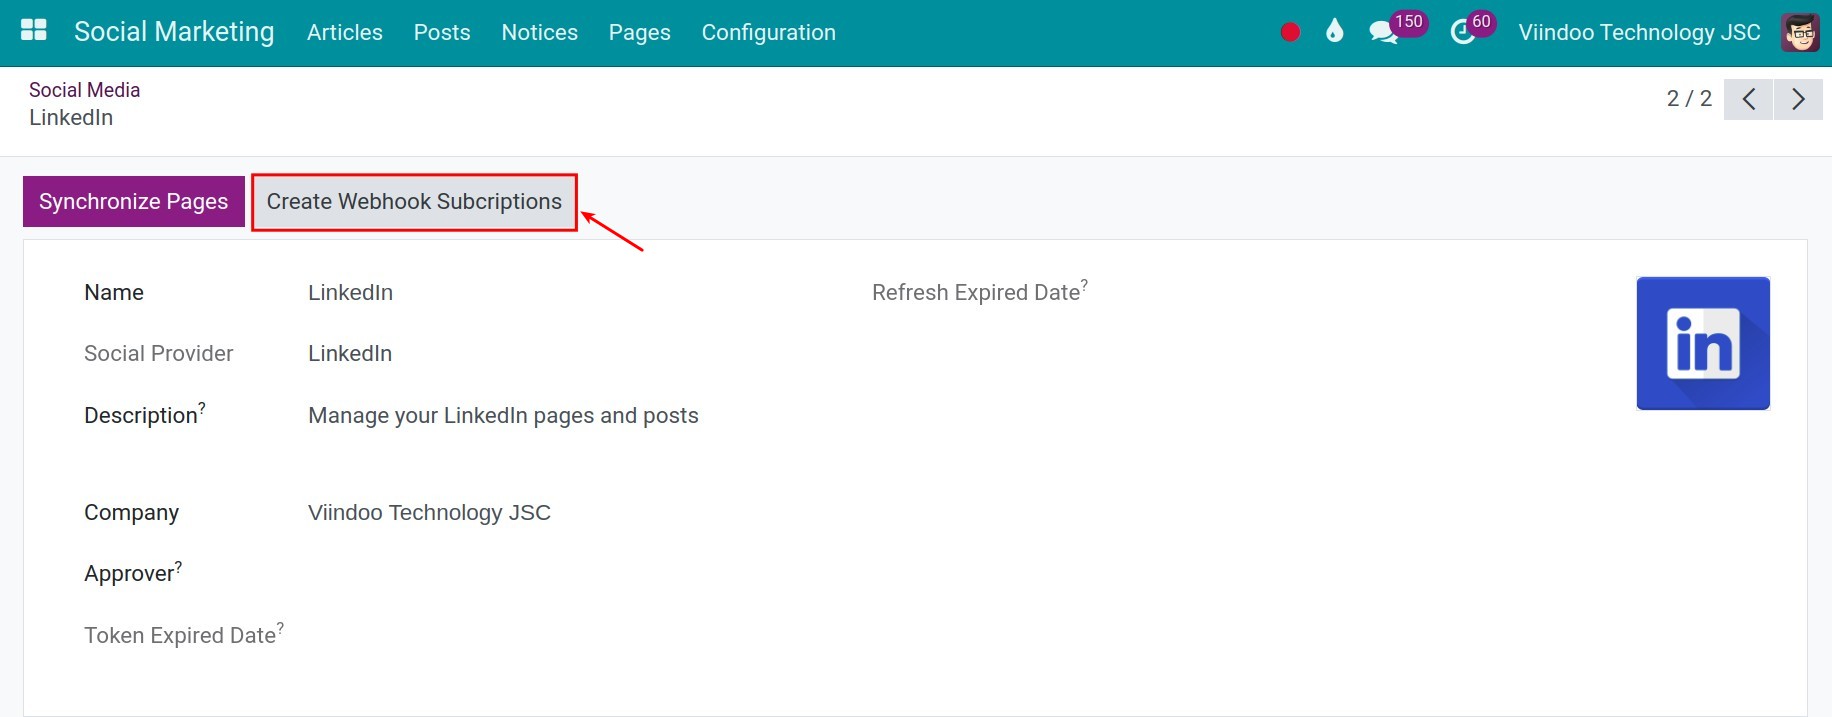
Set up to receive interaction notifications on the Viindoo system
Navigate to Social Marketing > Configuration > Social Media, press Create Webhook Subcriptions.
Integrate LinkedIn pages with the Viindoo system
After finishing the API integration, you need to link the system with specific social media pages that you want to manage.
Navigate to . To link the Viindoo system with the enterprise’s page, find the social media that you want to link and press LINK ACCOUNT.
The system will navigate you to a new tab with a LinkedIn interface. Here, log in to your account, choose the pages that you want to connect, and then complete the connection.
Note
The connected account must be the administrator of the page.
After finishing the connection, return to the system and navigate to . All the social media pages that are under your administration will appear here.
In case you only want specific pages, you can delete the connection by turning to list, selecting the pages, and pressing to disconnect.

Next, you can create the articles on the connected pages.
See also
Related article
Optional module