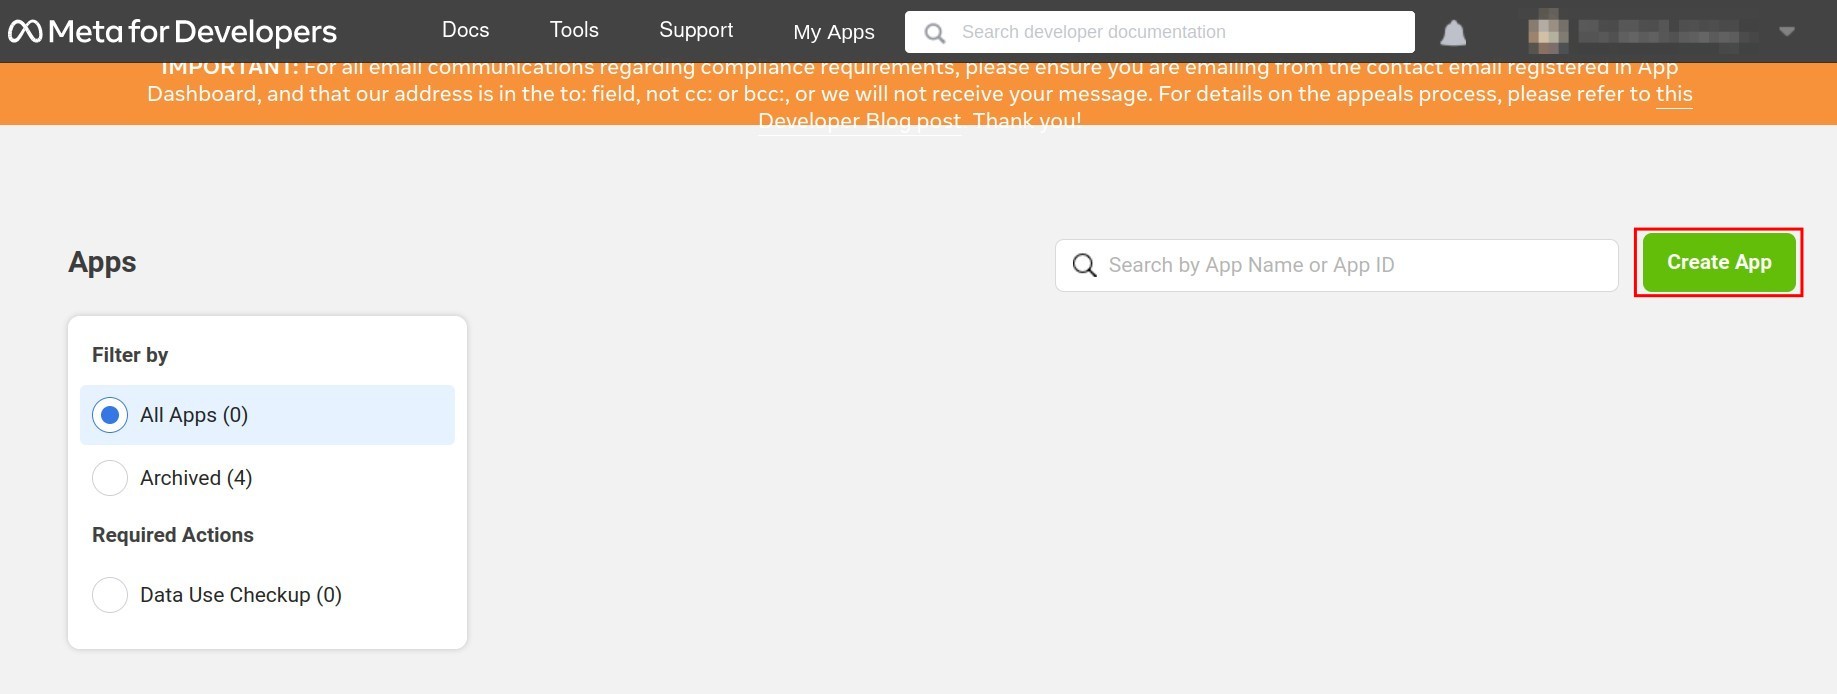
Connect API with Facebook
Sign in to Facebook Developer, press Create App to create an app on the website.
Note
In order to link Facebook account in Meta developers page, you need to be the Administrator of the integrated Facebook pages.
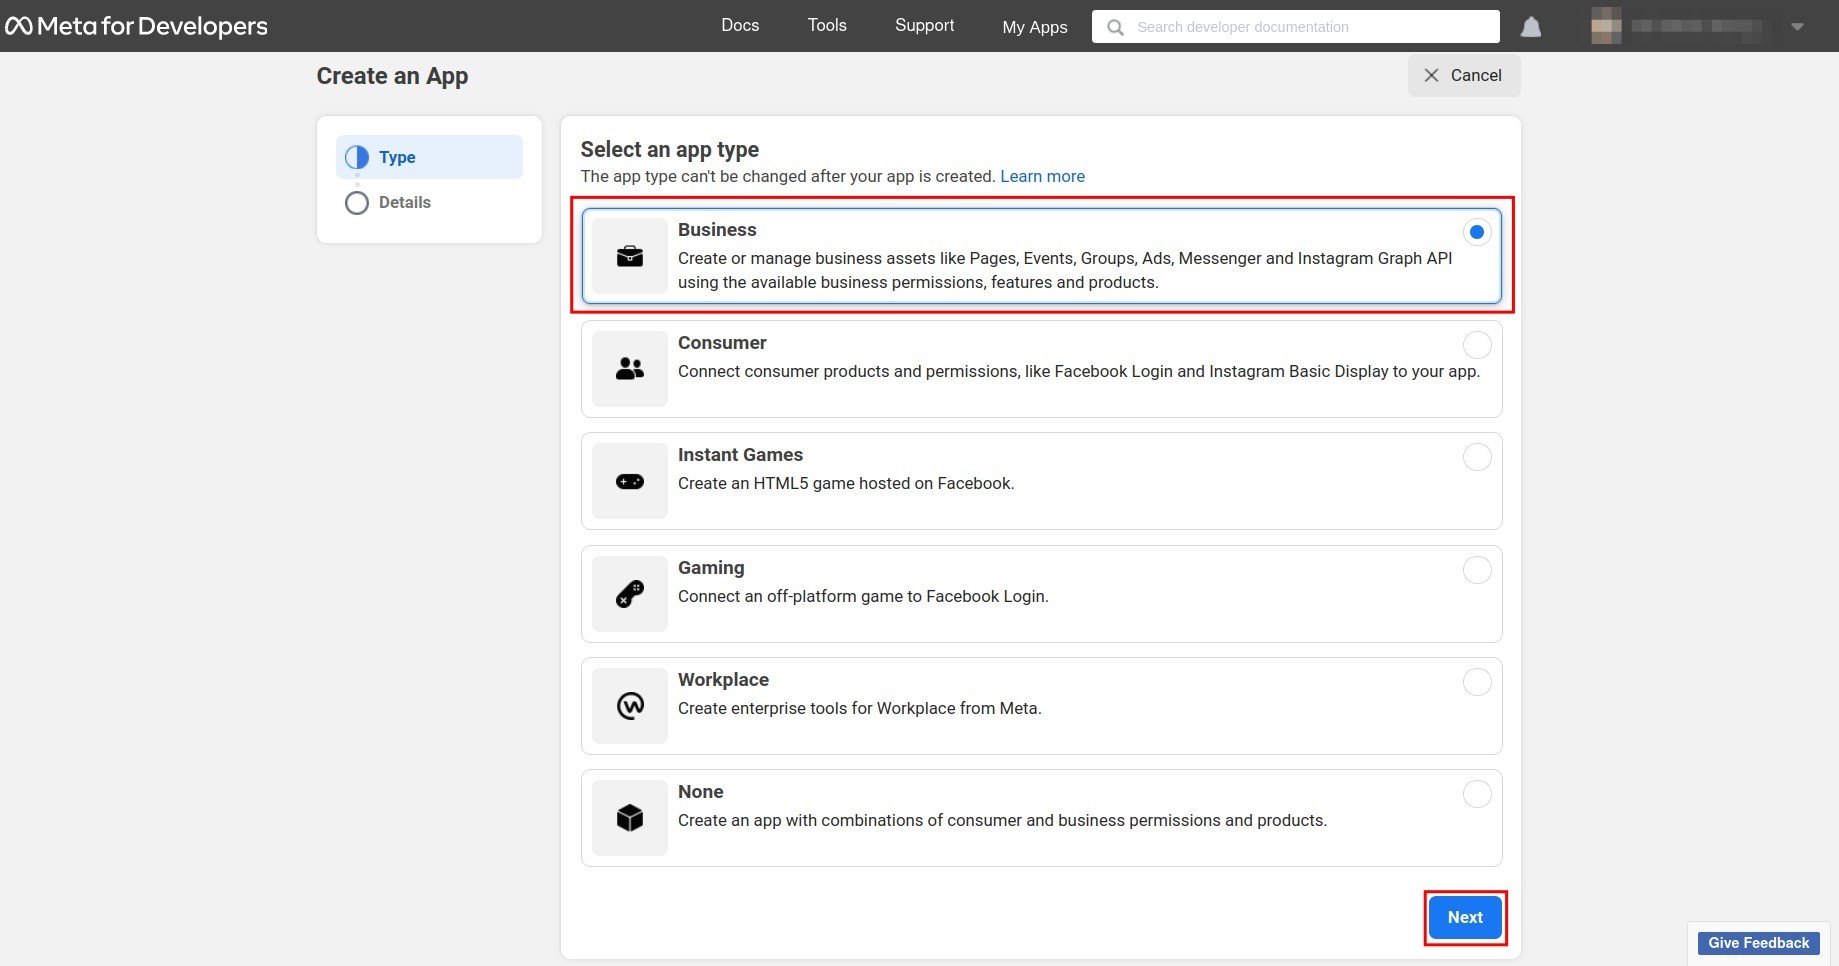
Select the Business app type and press Next to continue.
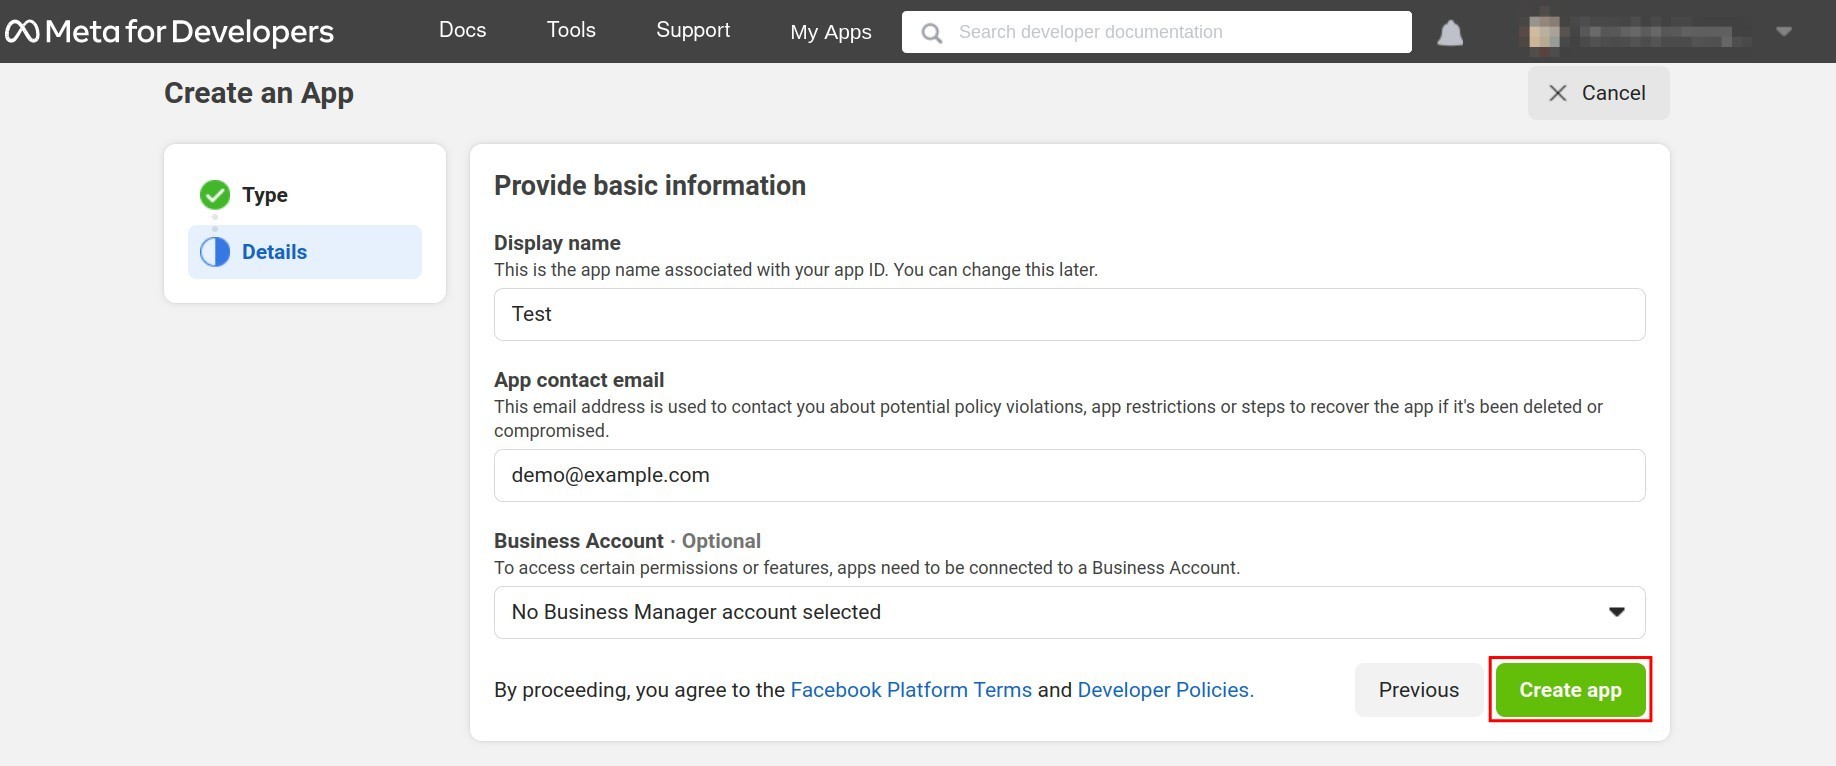
Here, select the app display name and contact email so that Facebook can contact you in case of emergency, press Create App to finish.
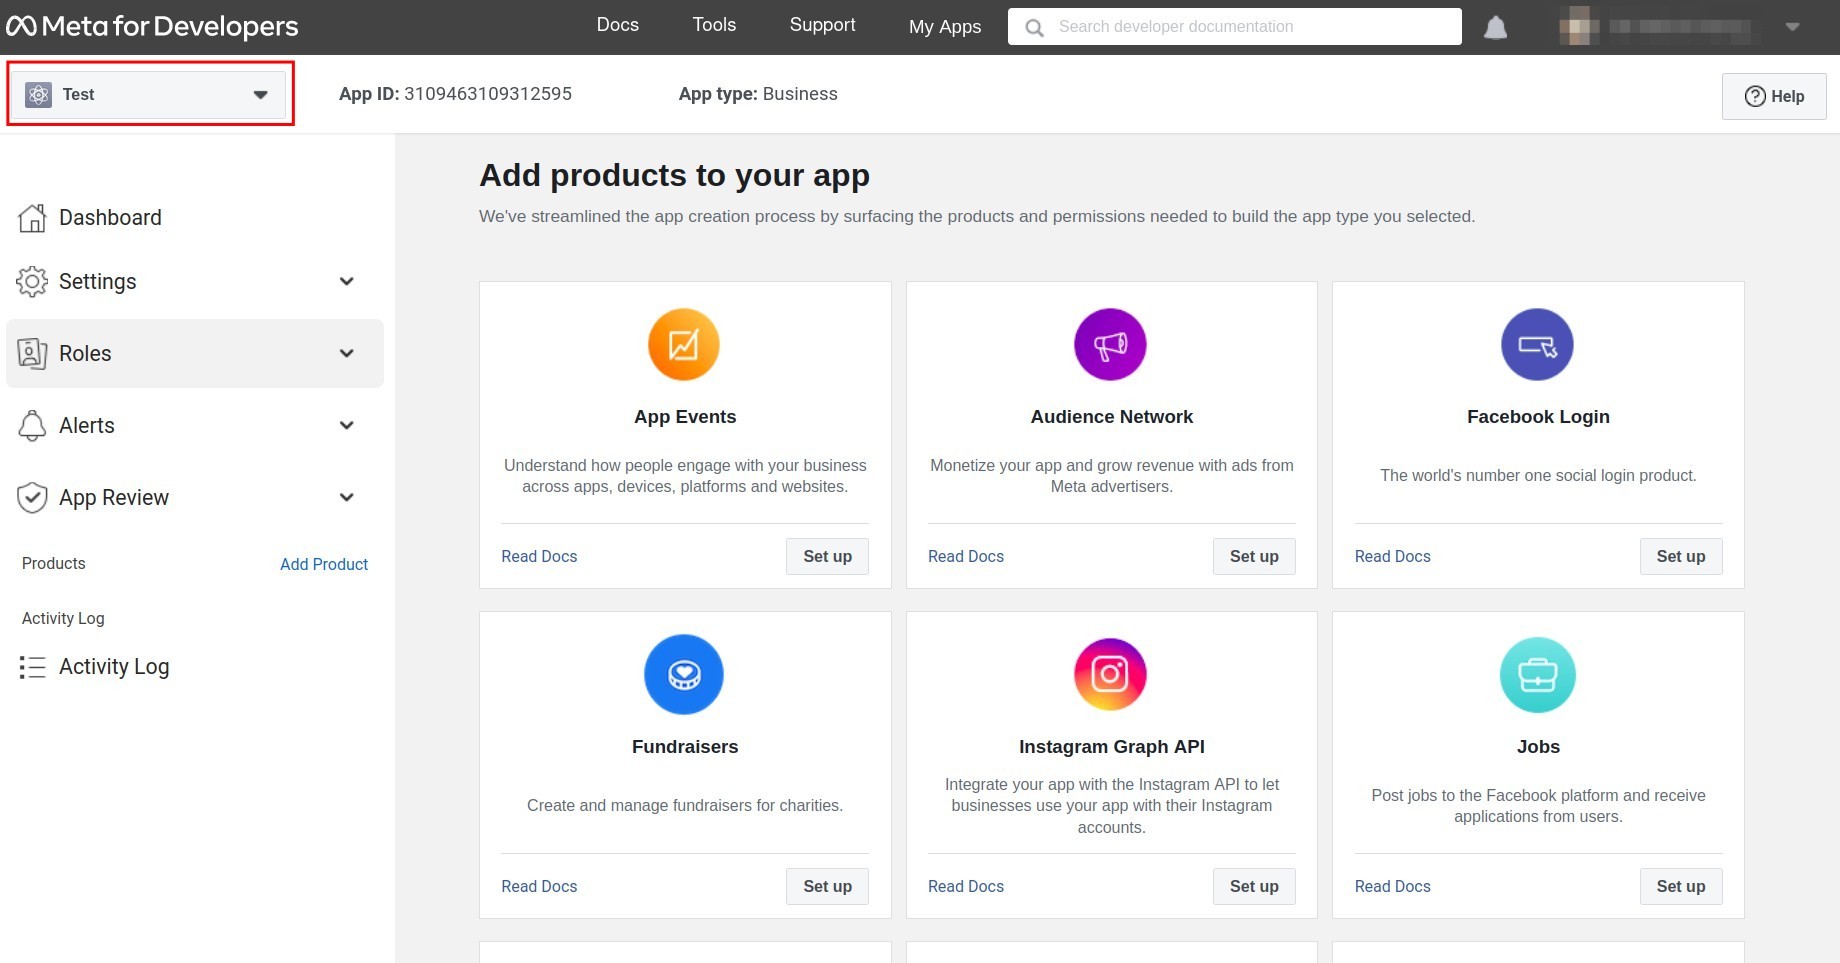
After you finish, the system will navigate you to the dashboard to continue.
Note
In addition to the settings instructed in this article, you also need Facebook permission access to data for the created applications to have a successful integration. To do so, go to and request the following access rights:
- Level: Advanced Access
pages_manage_metadata
pages_read_engagement
read_insights
pages_read_user_content
pages_messaging
pages_show_list
pages_manage_posts
public_profile
email
- Level: Standard Access
user_messenger_contact
Human Agent
Oembed Read
Business Asset User Profile Access
Page Mentions
business_management
pages_user_gender
attribution_read
pages_manage_engagement
catalog_management
Page Public Content Access
page_events
Page Public Metadata Access
pages_manage_instant_articles
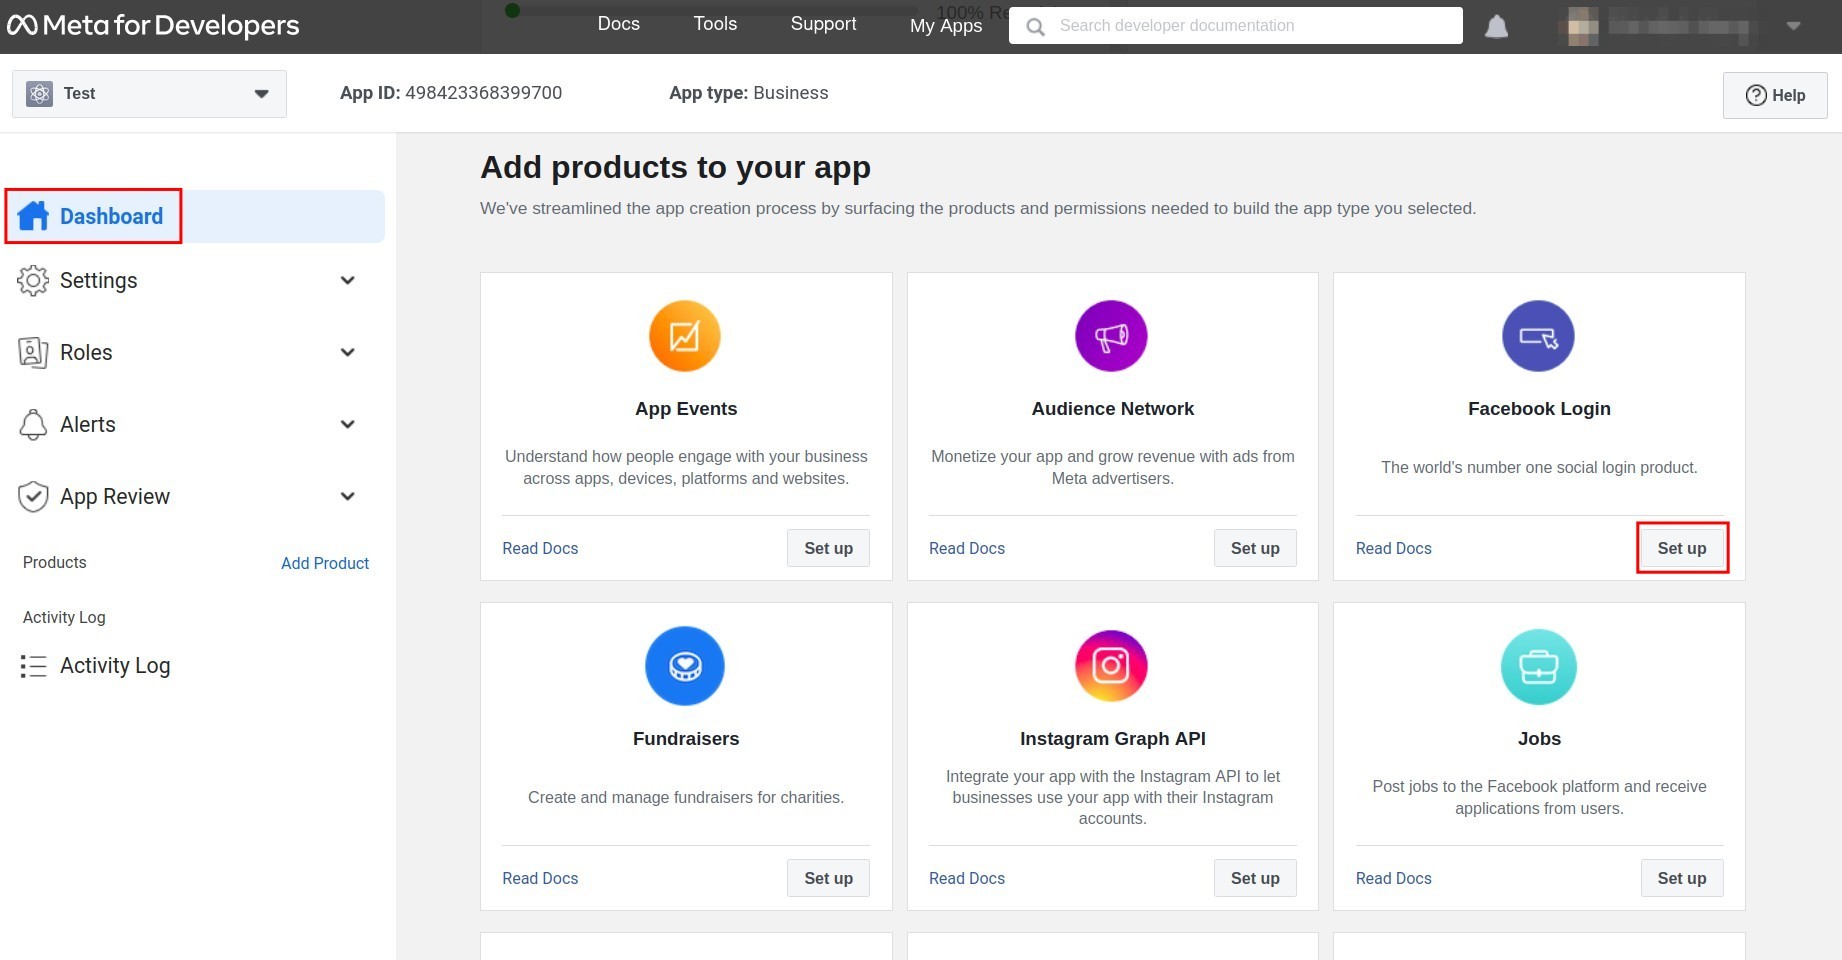
On the Dashboard, press Set up to add the following apps: Facebook Login, Webhook, and Messenger.
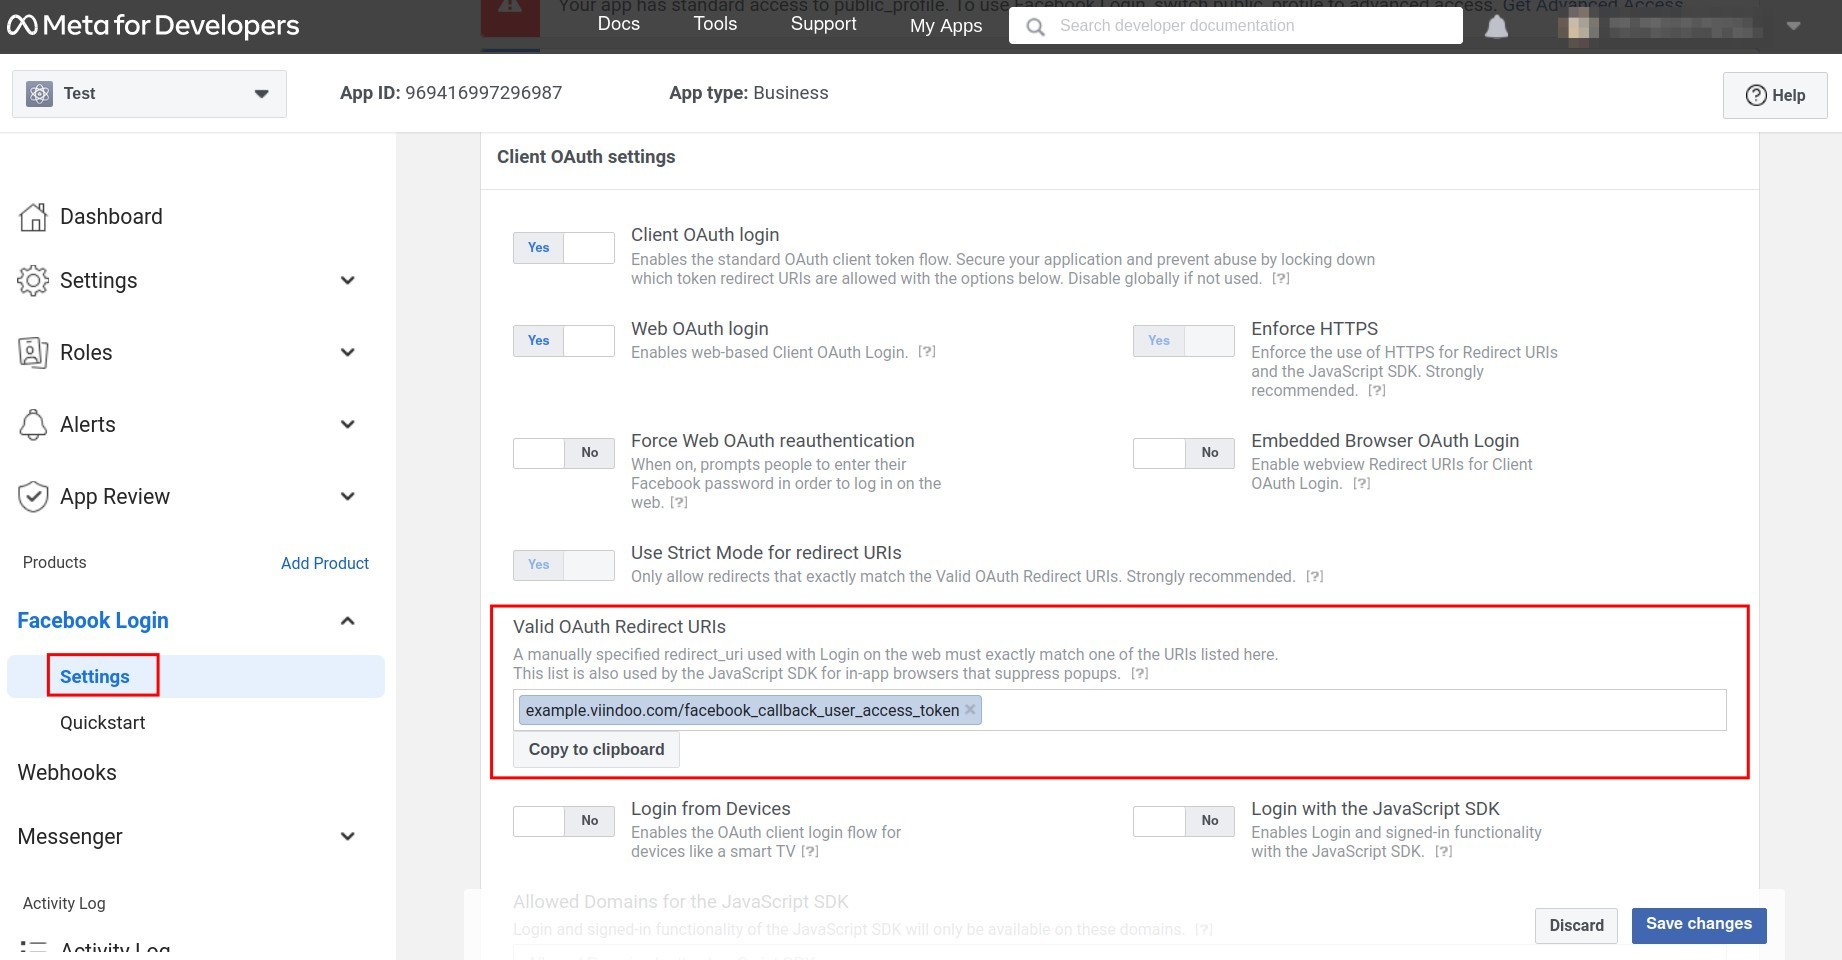
On the left toolbar, select , at the Valid OAuth Redirect URIs field, type: domain name of the instance + /facebook_callback_user_access_token. E.g. example.viindoo.com/facebook_callback_user_access_token.
Webhooks Configuration
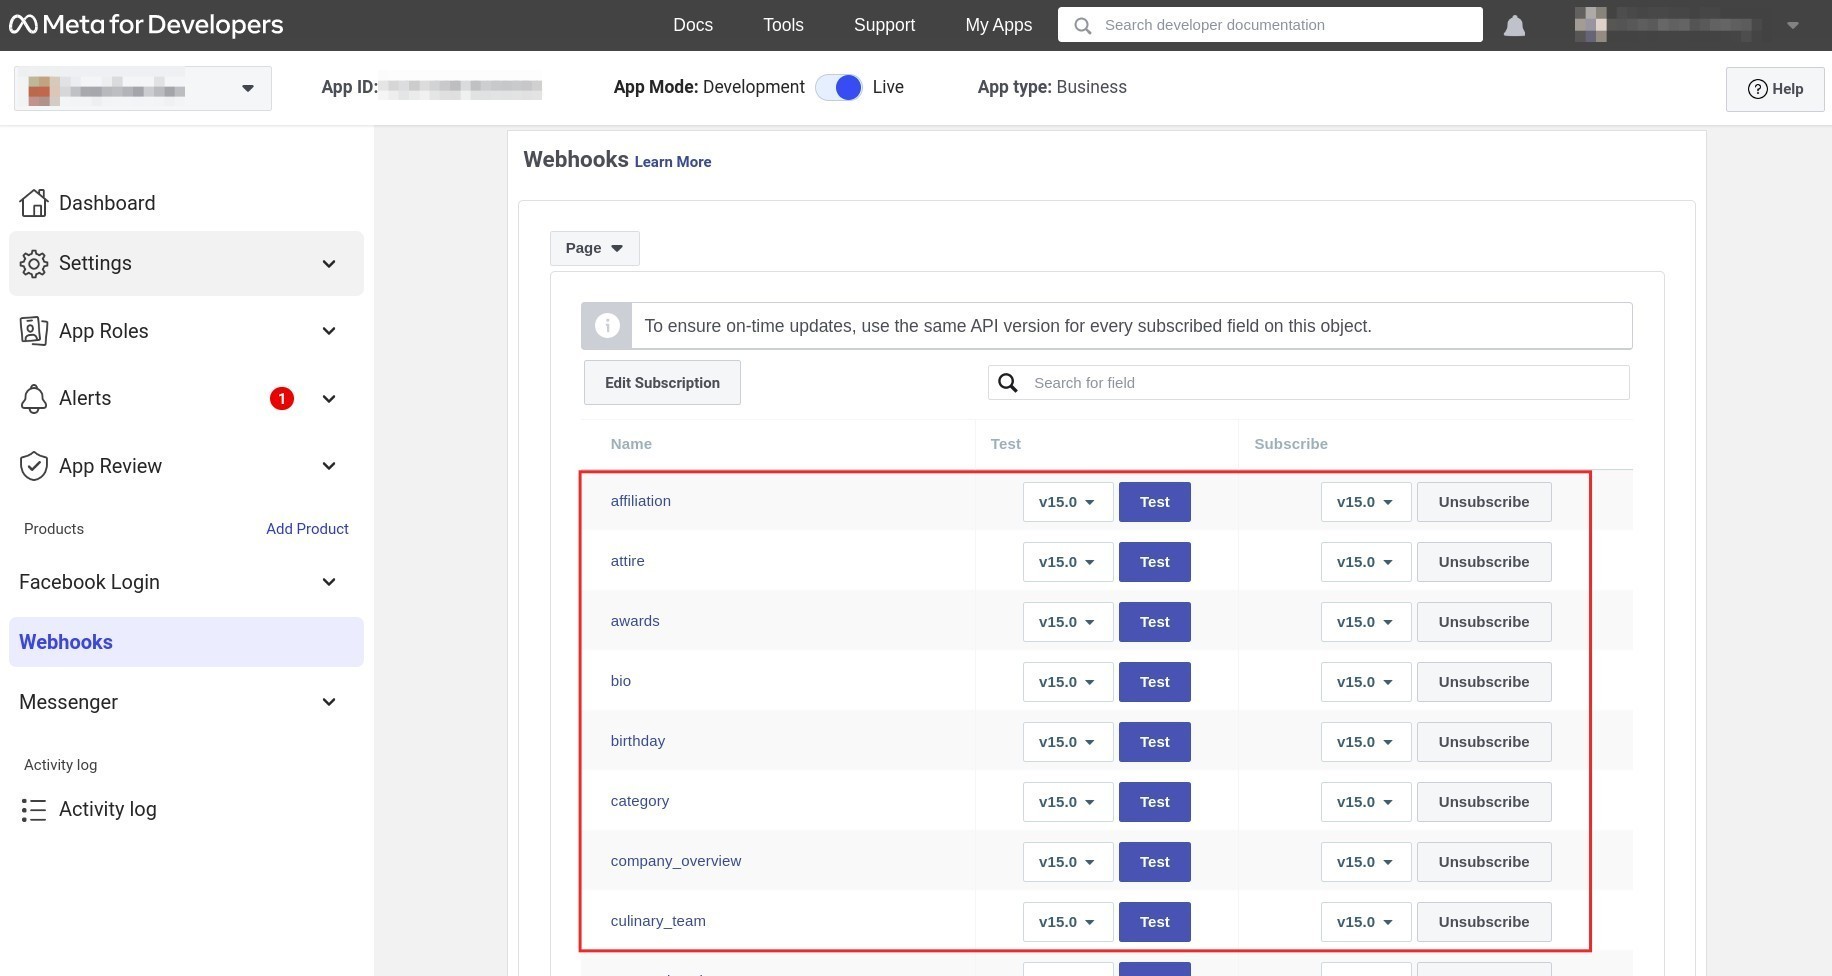
On the left toolbar, access Webhooks and select Page.
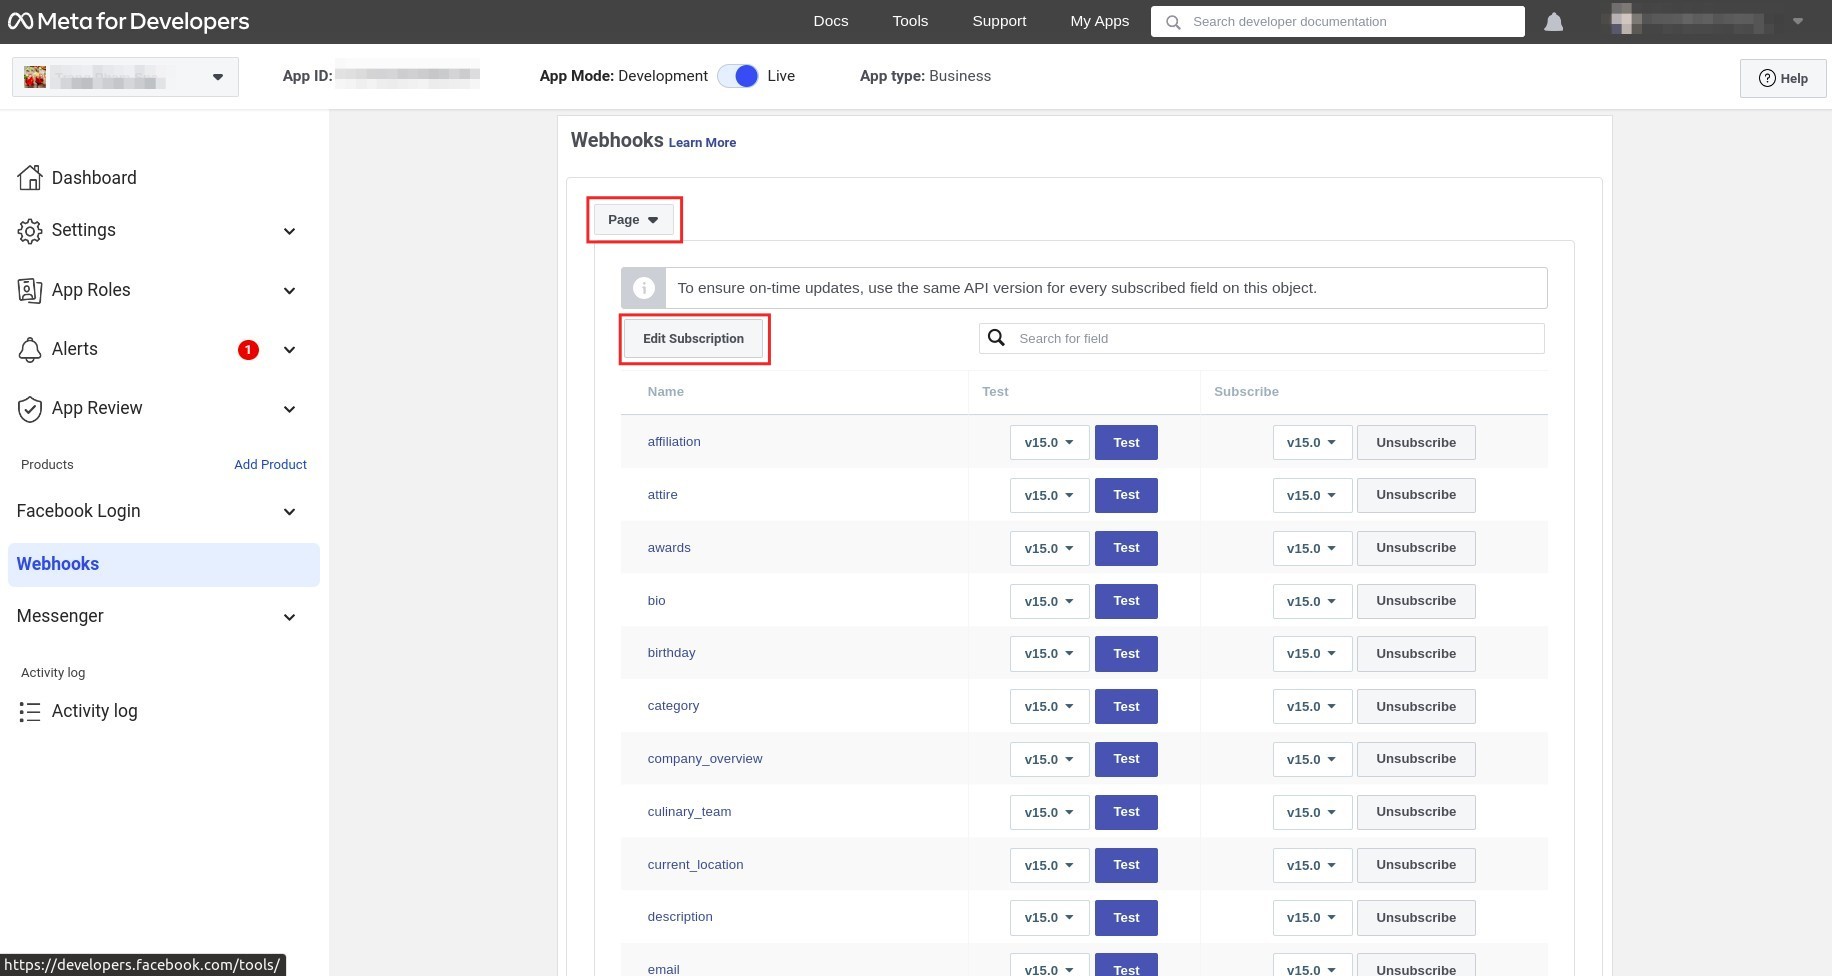
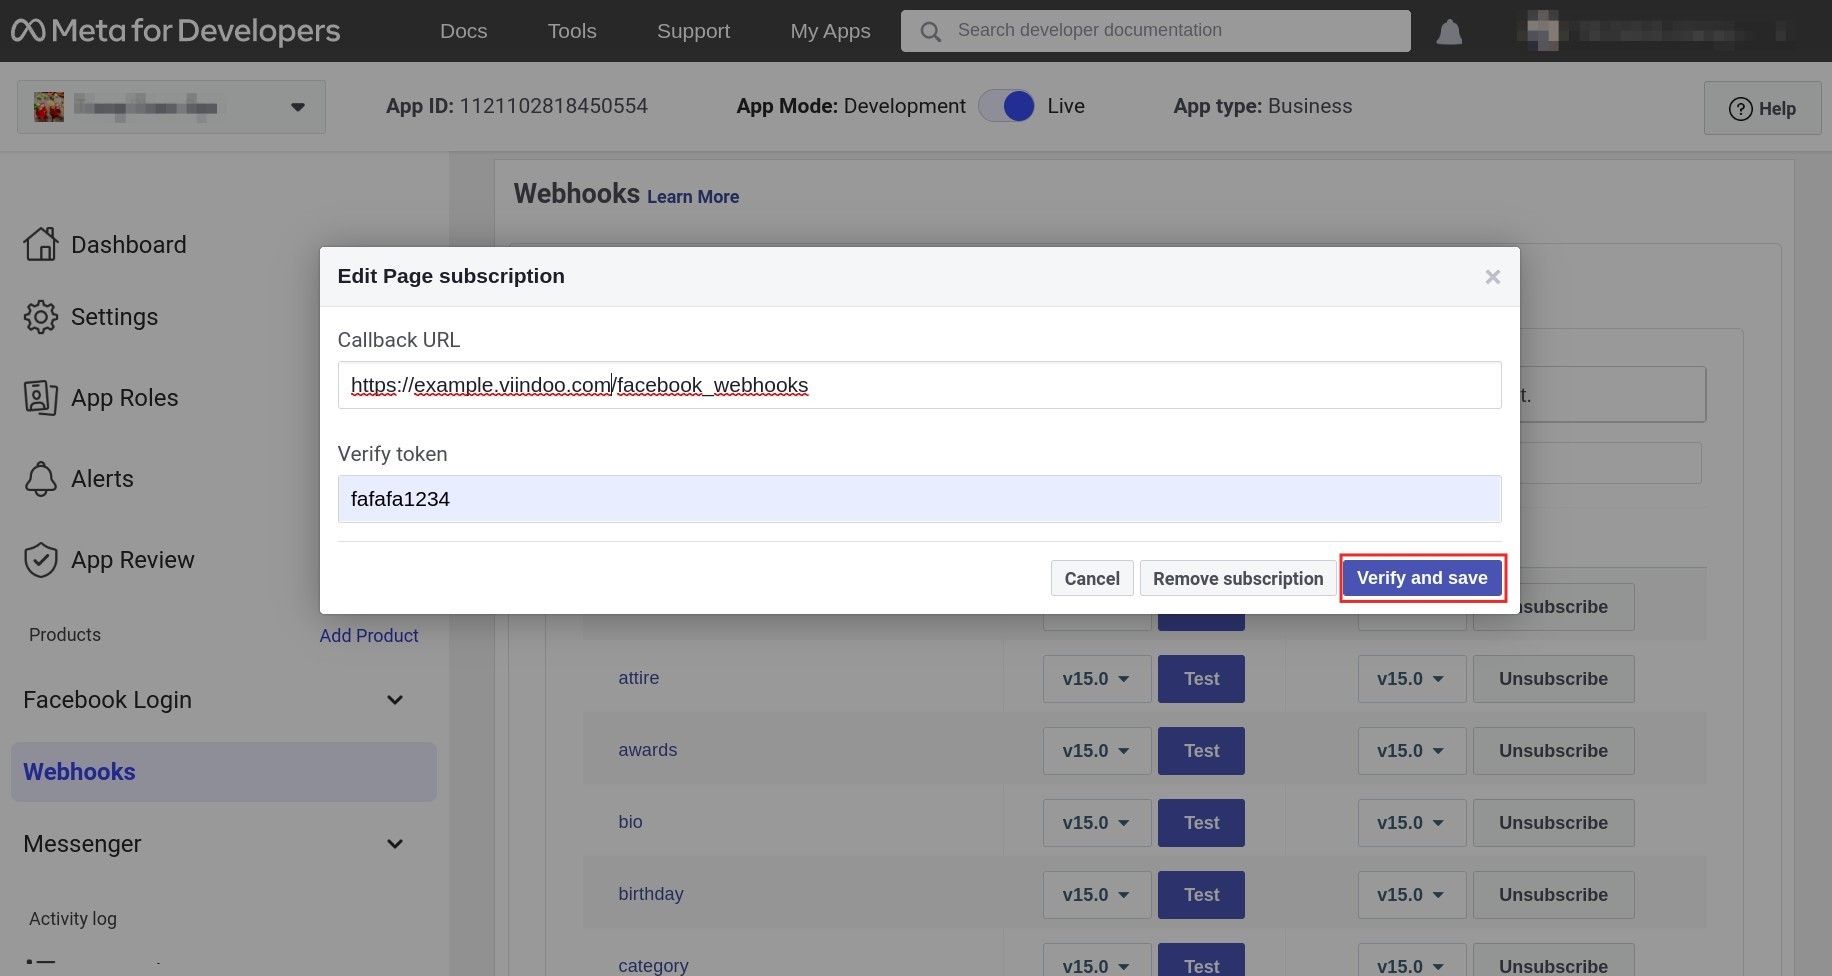
Press Edit Subscription. On the Callback URL, type: domain name of the instance + /facebook_webhooks. E.g: example.viindoo.com/facebook_webhooks and verify Token: fafafa1234. Press Verify and Save.
Then subscribe all the shown fields by pressing Subcribe.
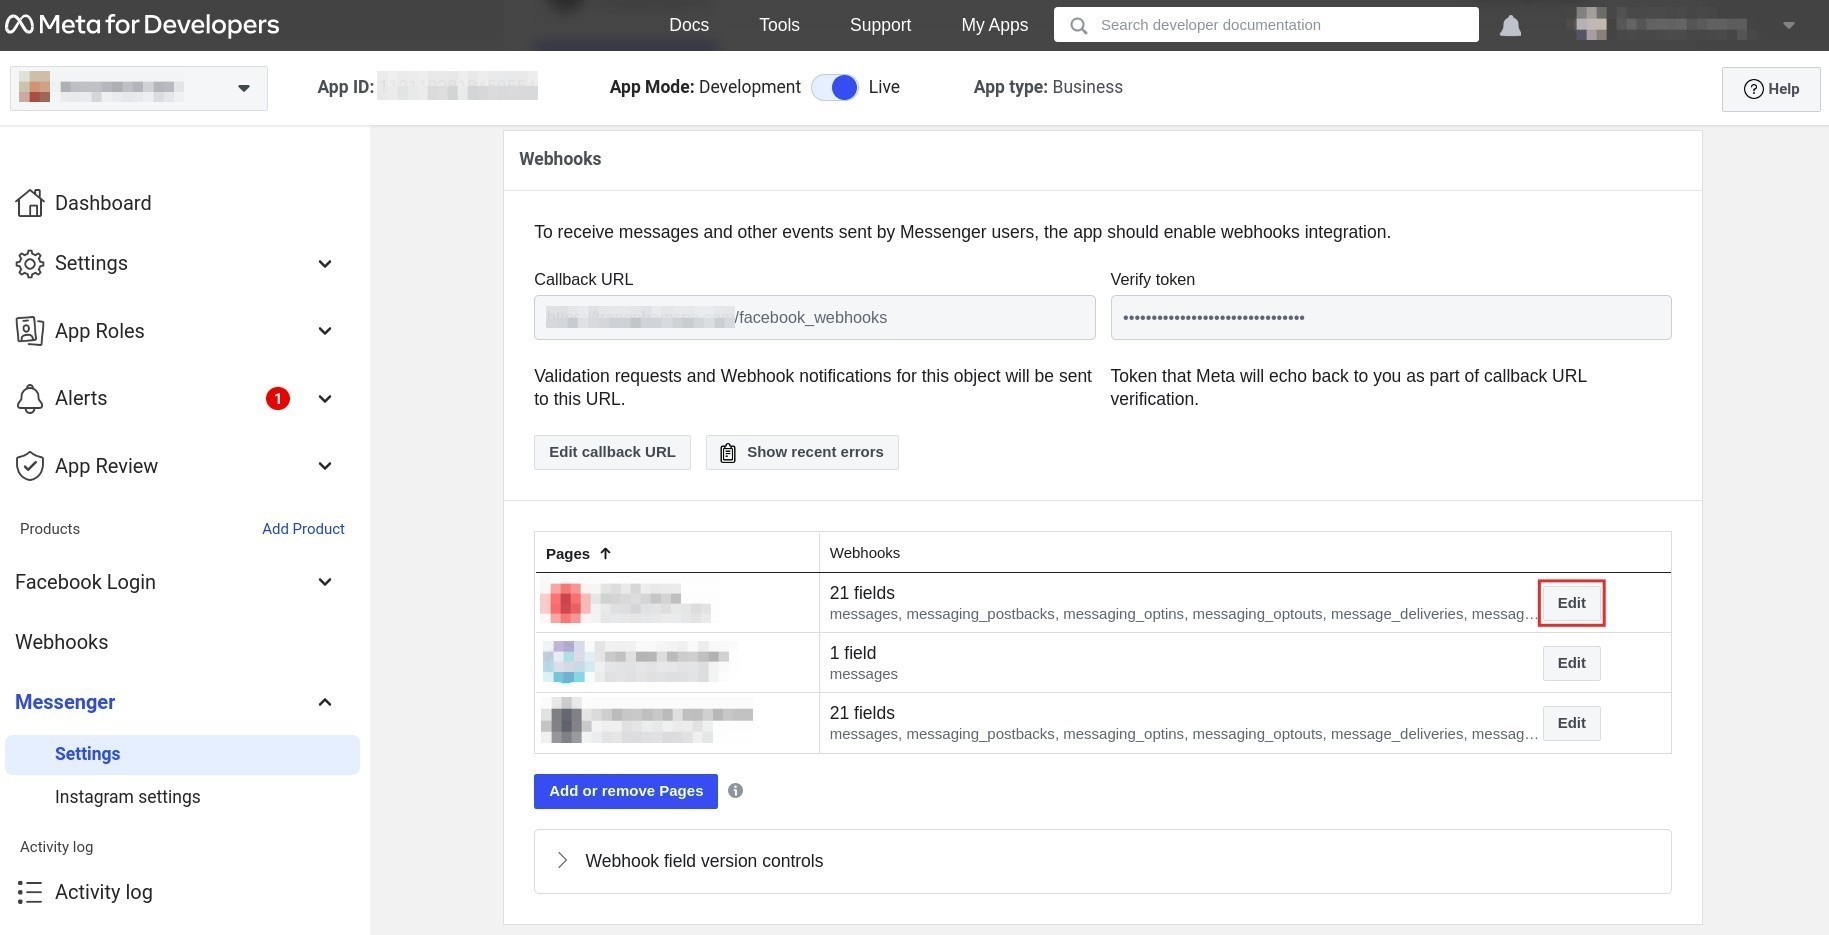
Messenger Integration
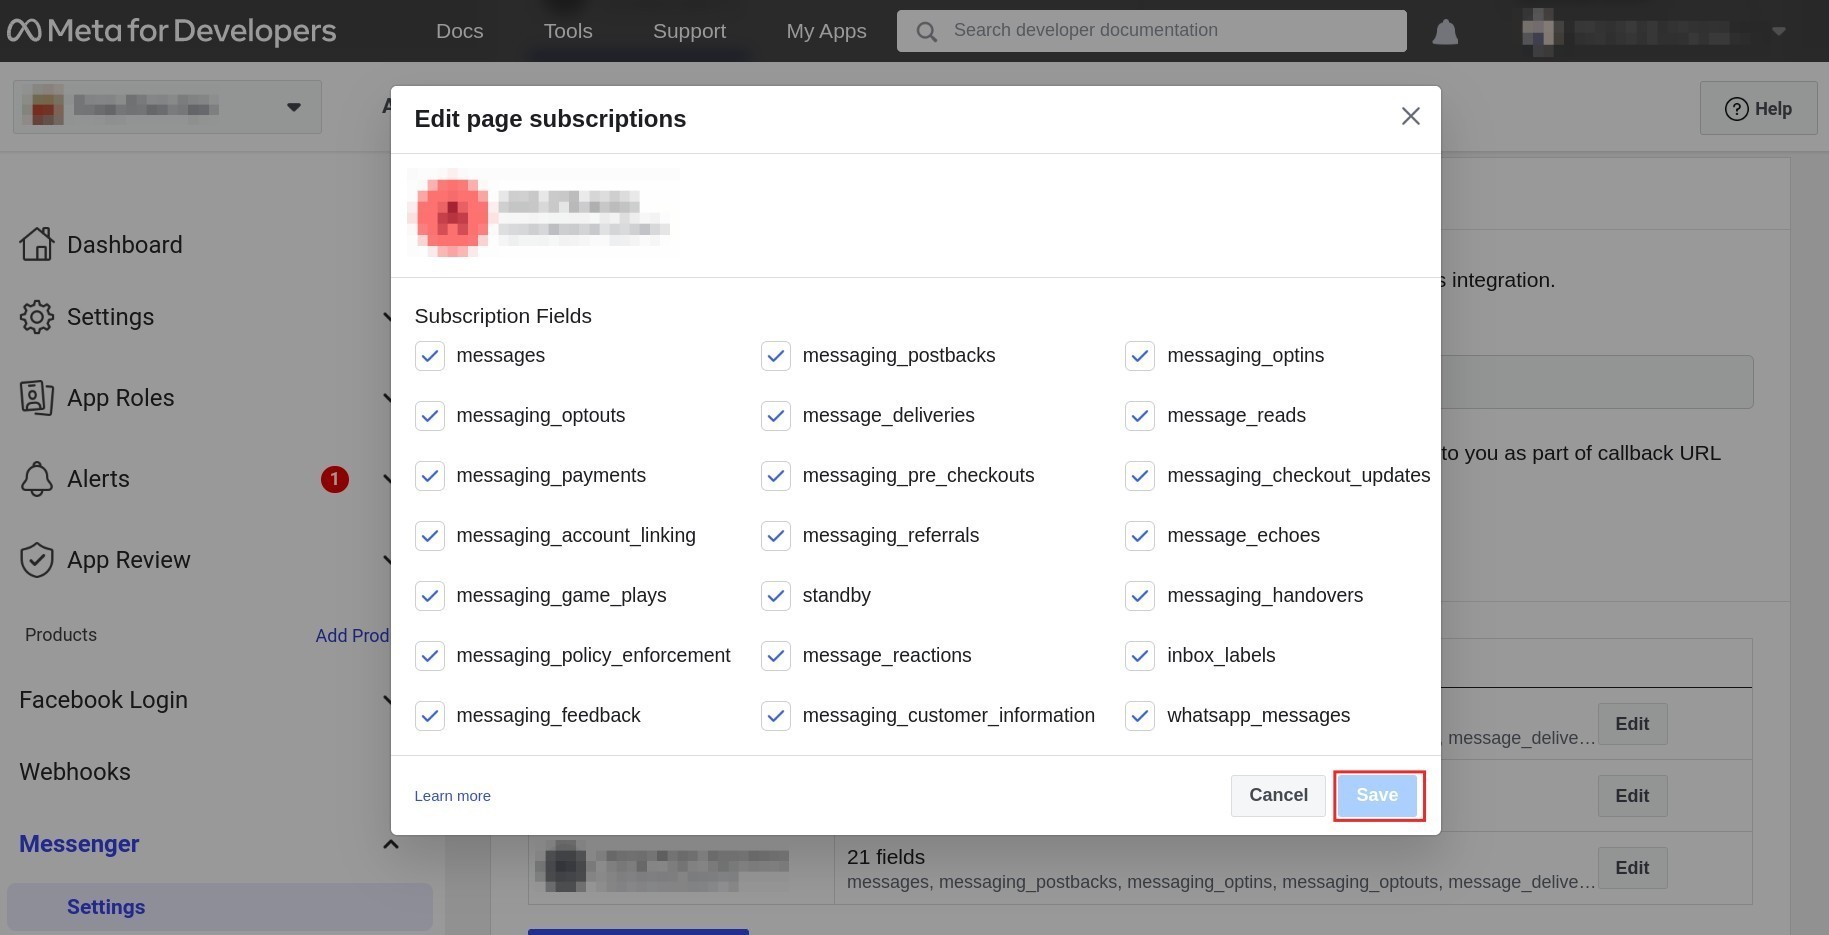
Navigate to , press Edit on the page and select all the subscription fields.
Connect Facebook with Viindoo
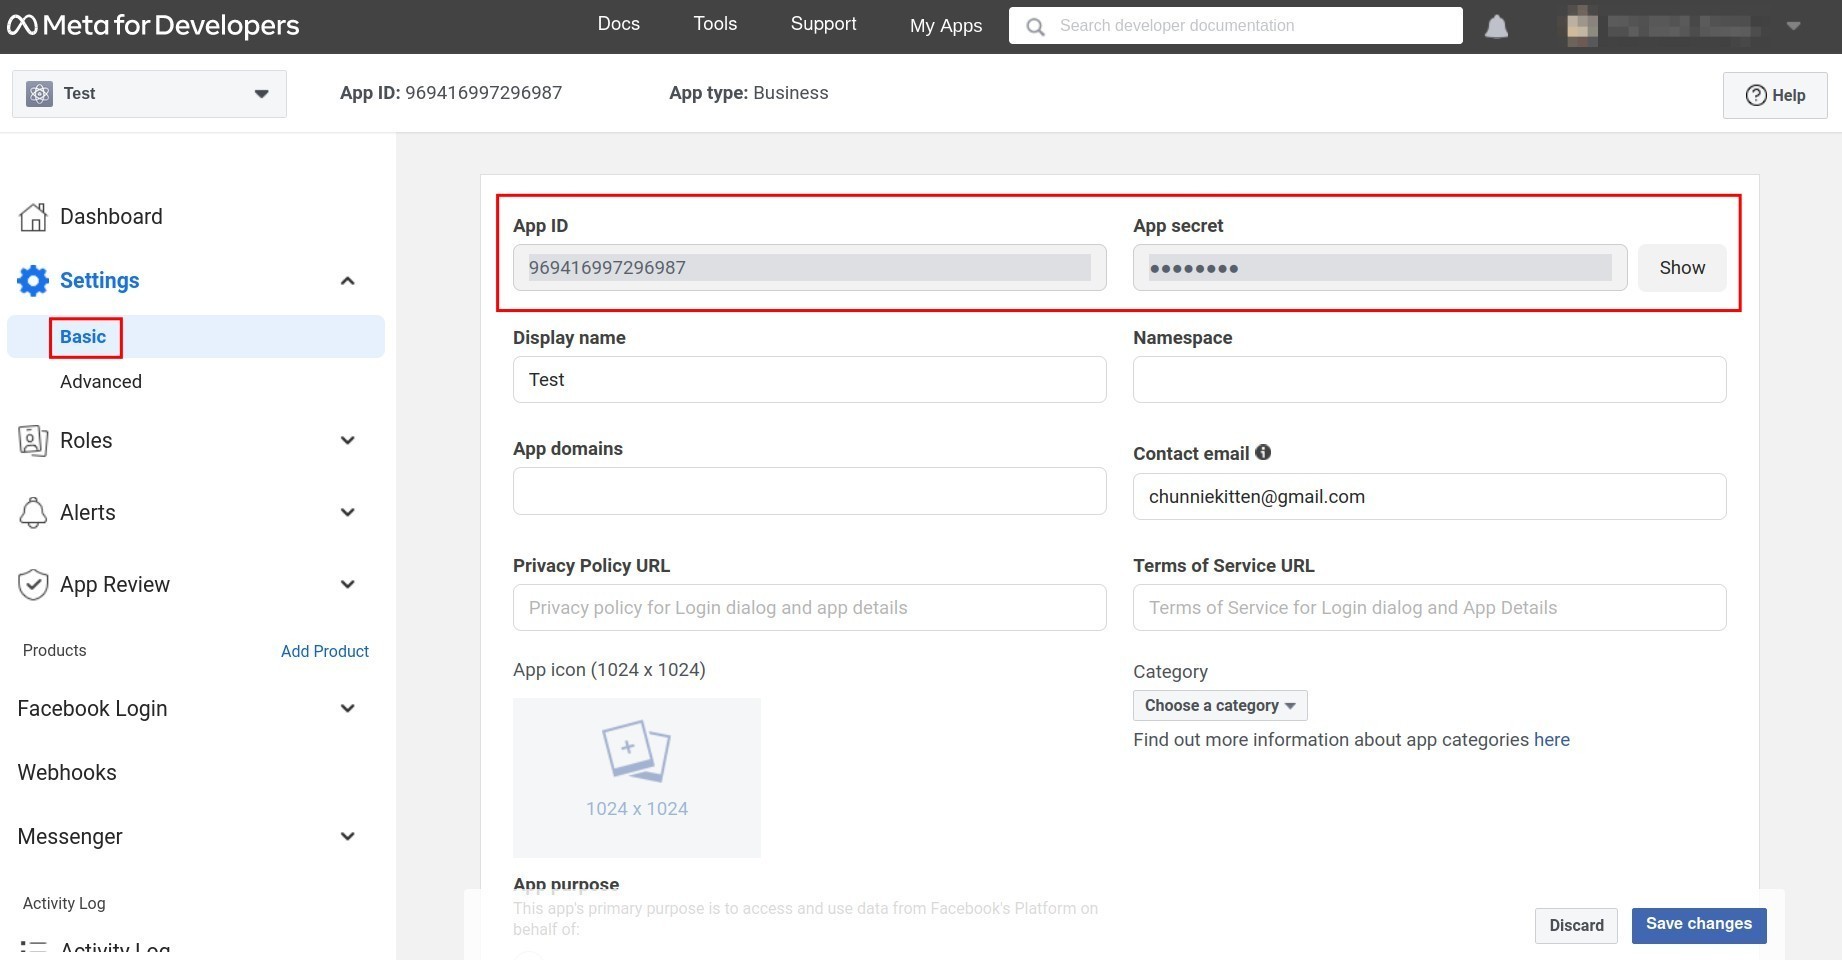
Return to to copy the App ID and App secret.
Note
You need to press “Show” to show the app secret before copying.
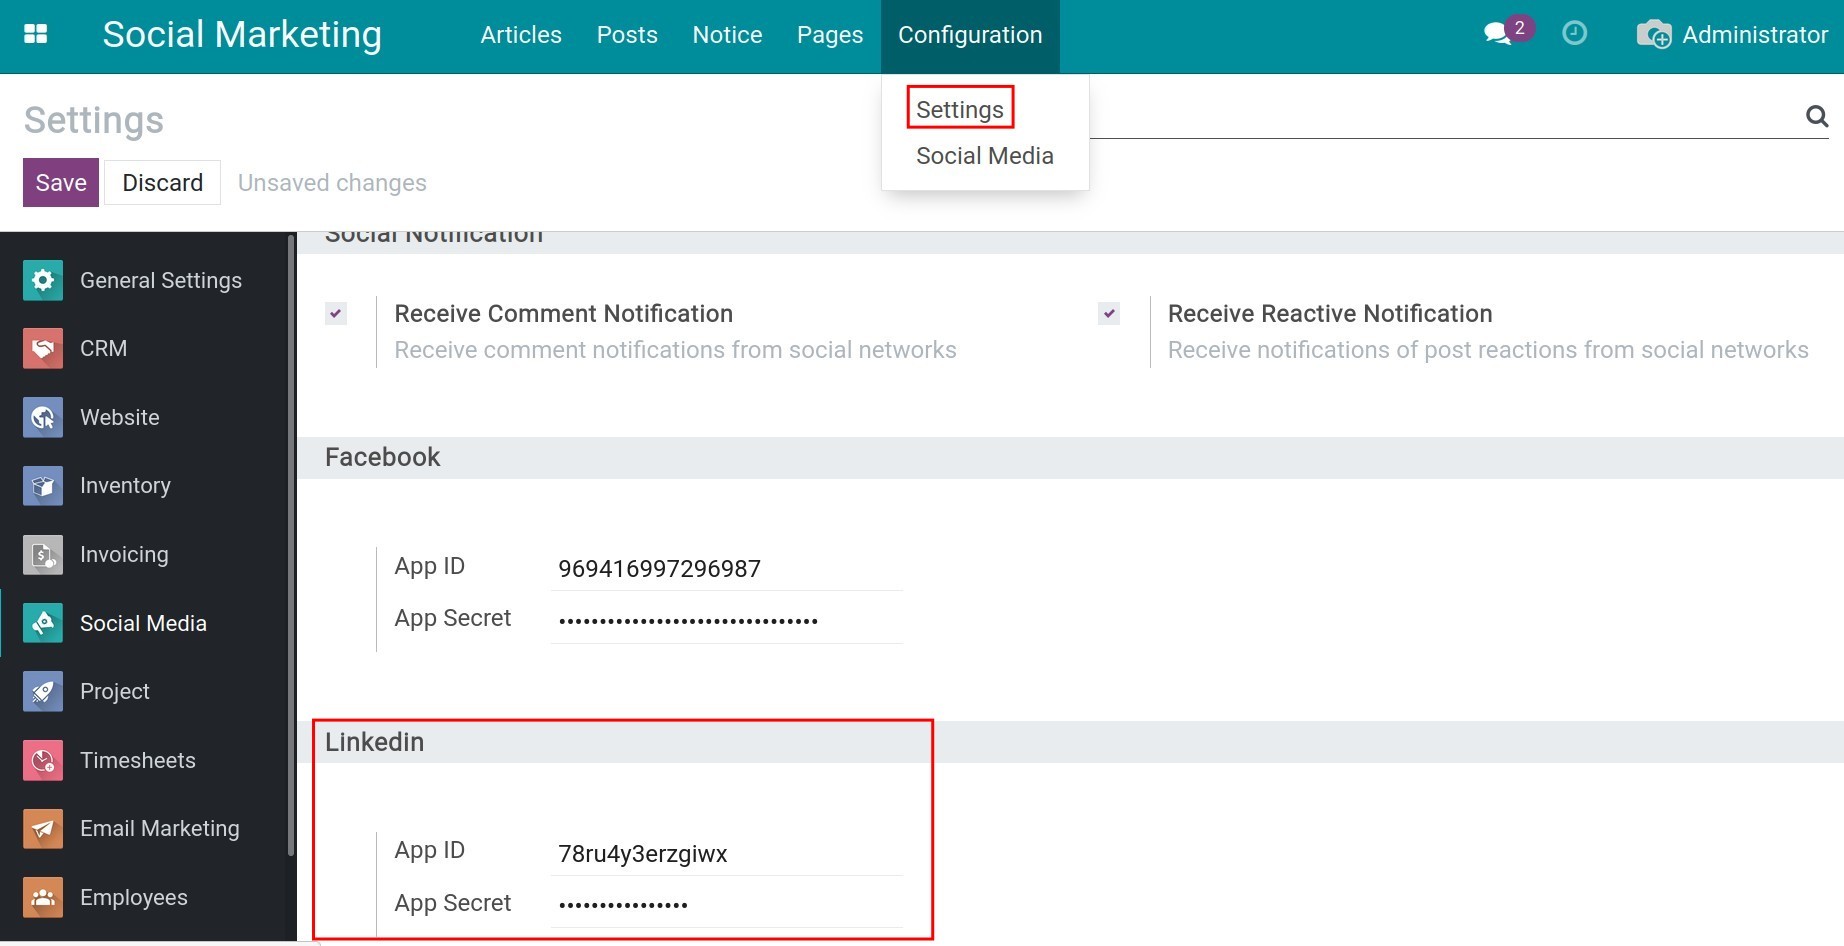
Return to the Viindoo system, navigate to . Scroll to the Facebook section and attach the App ID and App secret to the corresponding field.

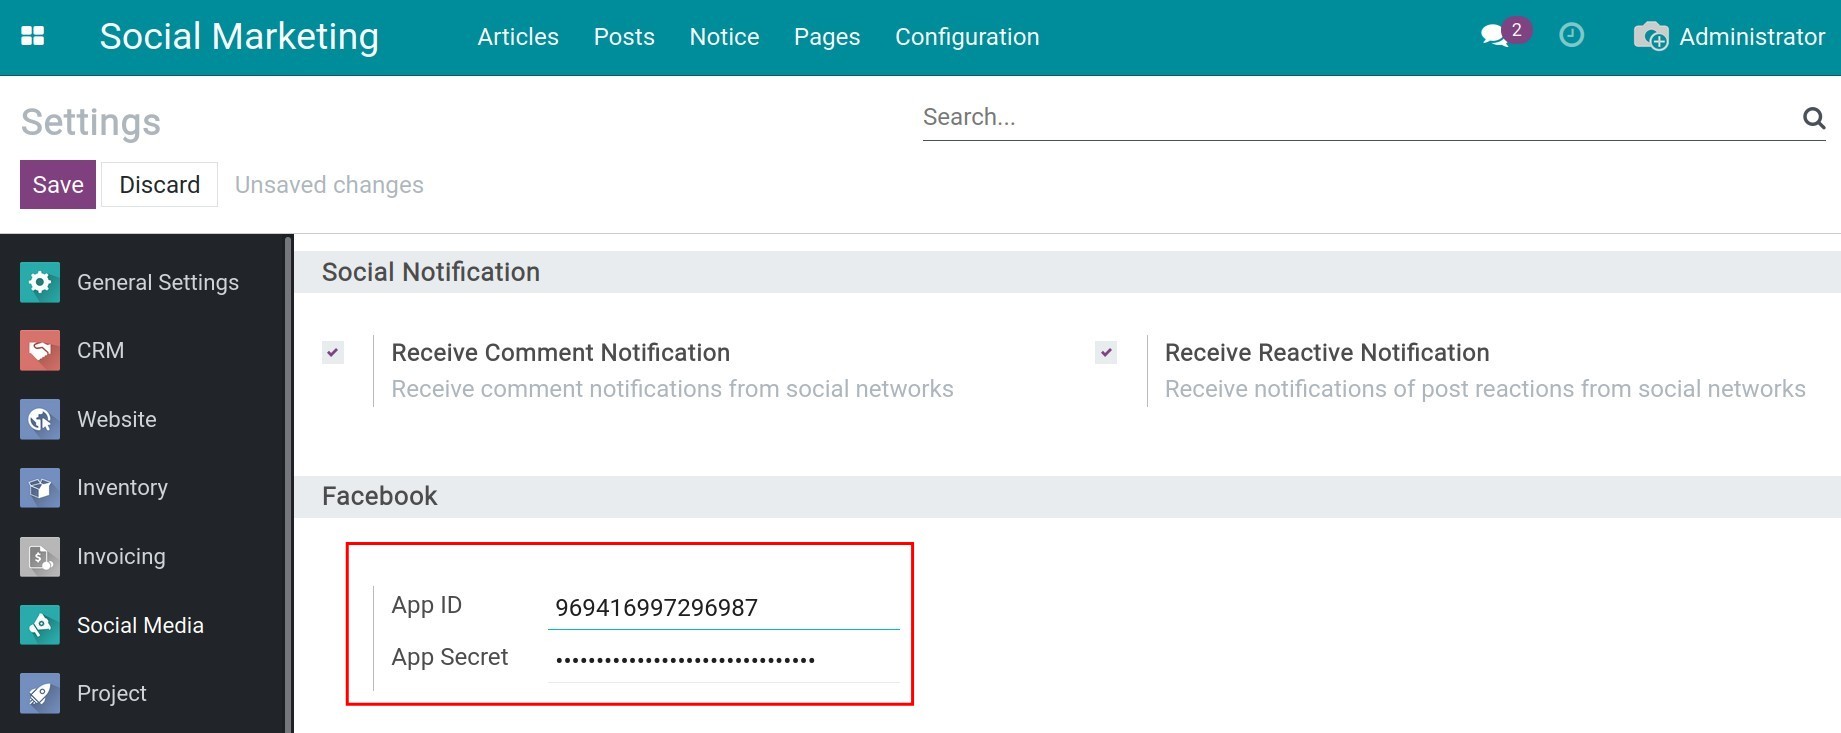
Then press Save to save. Now, you have completed the API integration with Facebook.
Integrate API with Linkedin
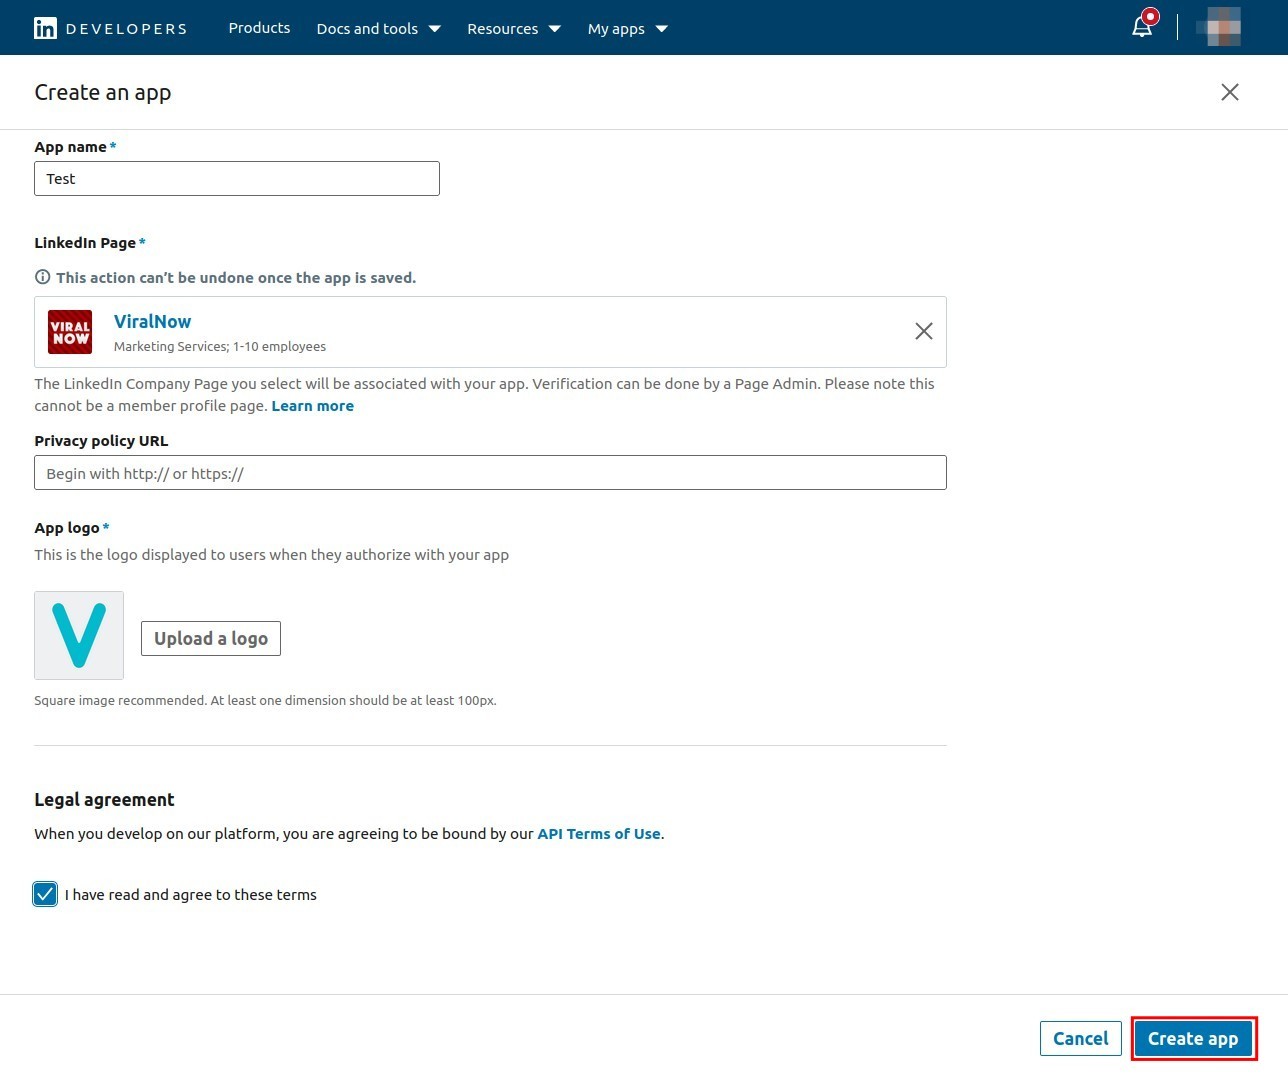
Similar to Facebook, you need to create an app at Linkedin Developer by pressing Create APP.

Here, enter the needed information and press Create App.
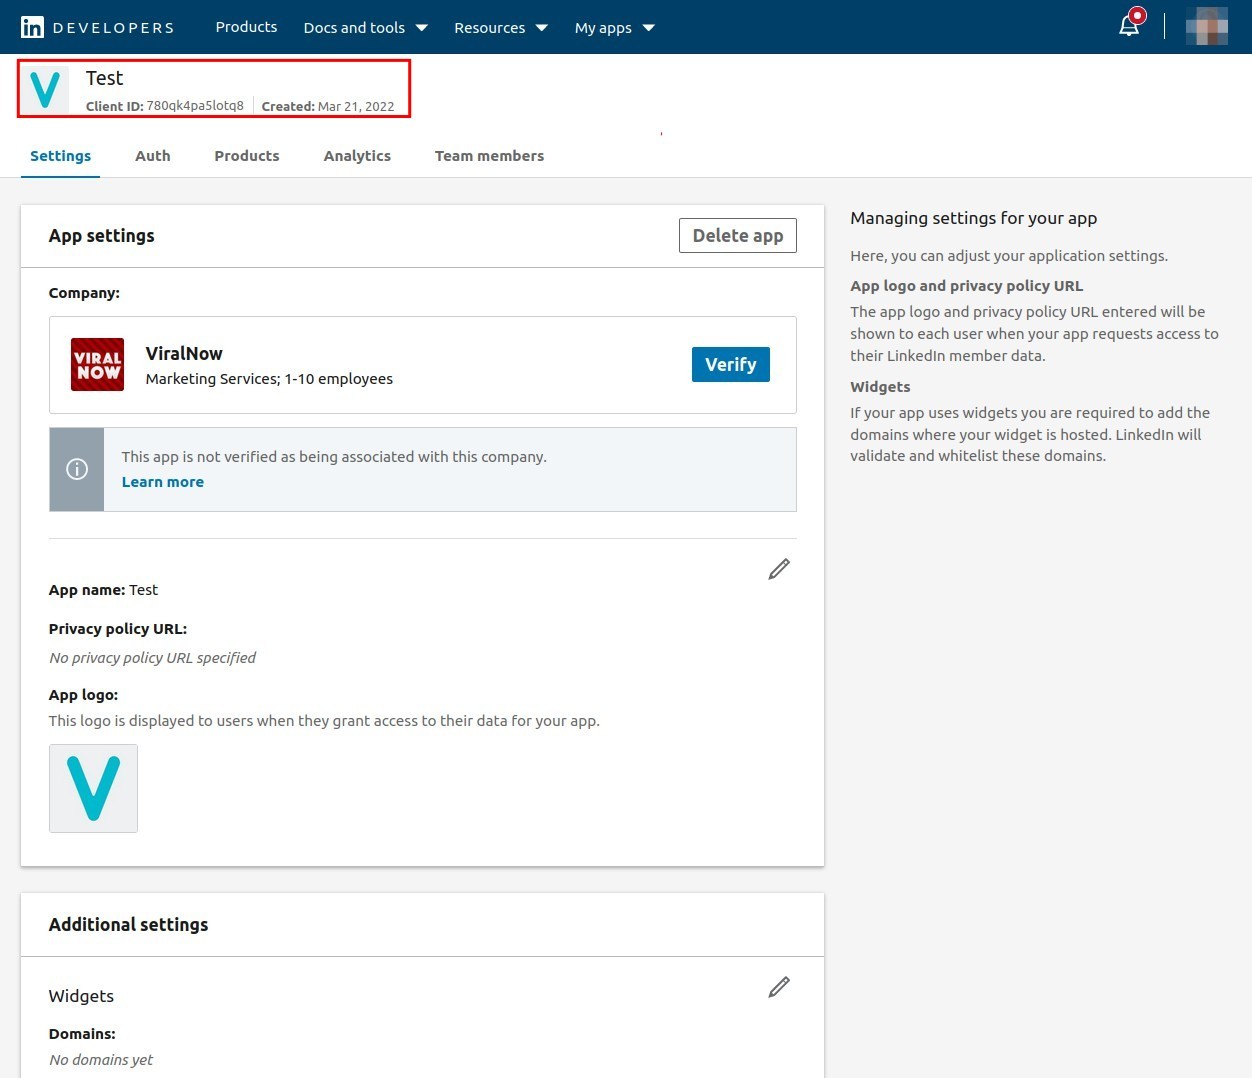
When you complete, the system will navigate you to the dashboard so that you can continue.
Note
For successful integration, in addition to the settings instructed in this article, you need to ask Linkedin to grant connect with their data for the created application as follows:
r_organization_social
r_1st_connections_size
r_ads_reporting
r_emailaddress
rw_organization_admin
r_liteprofile
r_basicprofile
r_ads
rw_ads
w_member_social
w_organization_social
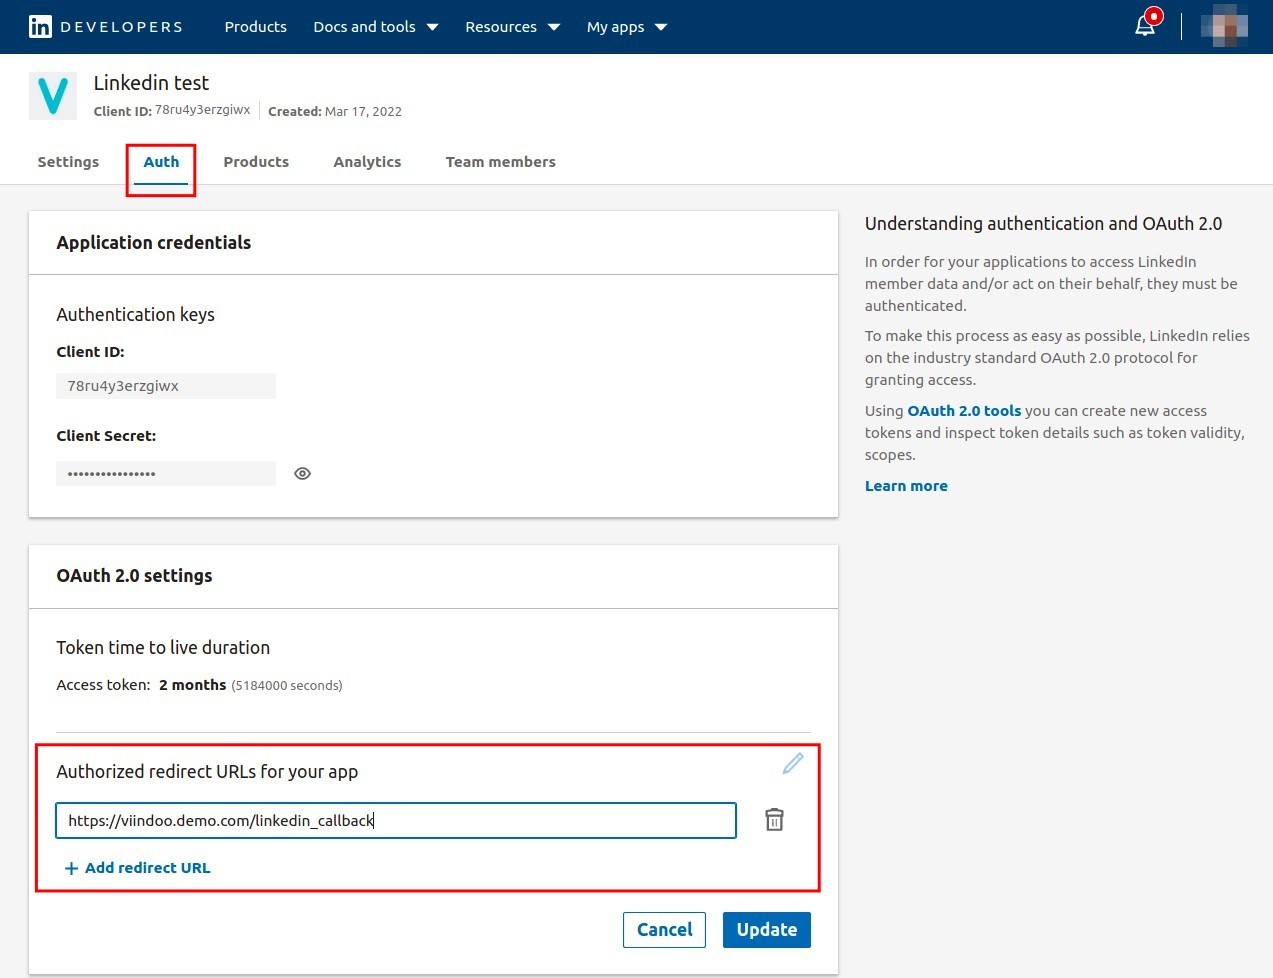
In tab Auth,you enter the following syntax into the Authorized redirect URLs for your app: instant domain + /linkedin_callback, e.g. viindoo.demo.com/linkedin_callback.
At the Products tab, add the following products: Share on Linkedin, Sign in with Linkedin, Marketing Developer Platform.

Move to the Auth tab, copy the app’s Client ID and Client Secret.
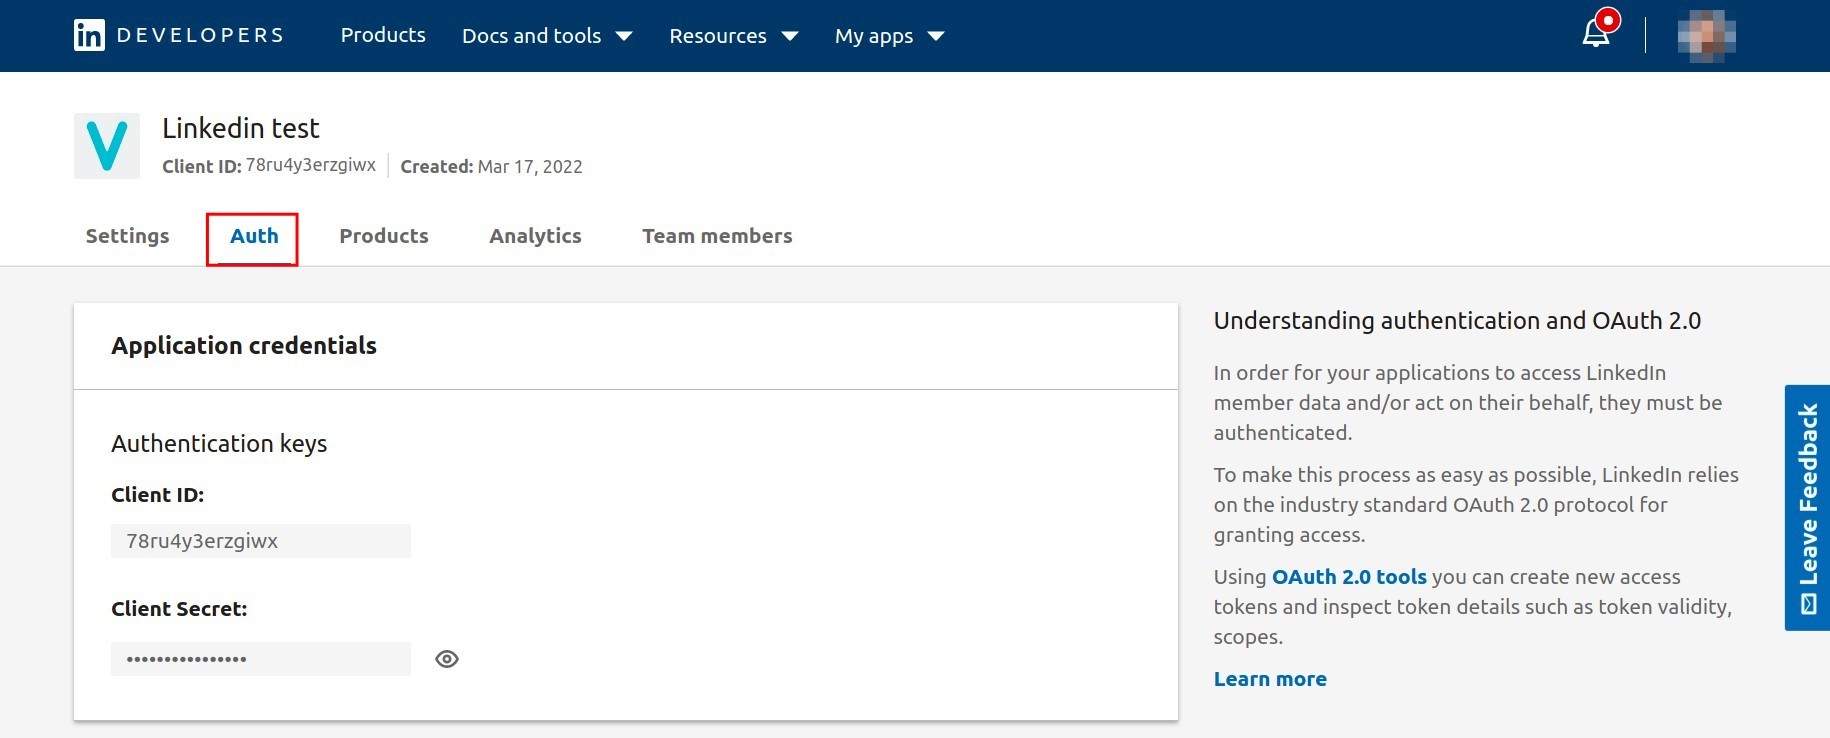
Return to Viindoo system, enter and attach the App ID and App Secret to the corresponding fields.
Integrate specific pages with the Viindoo system
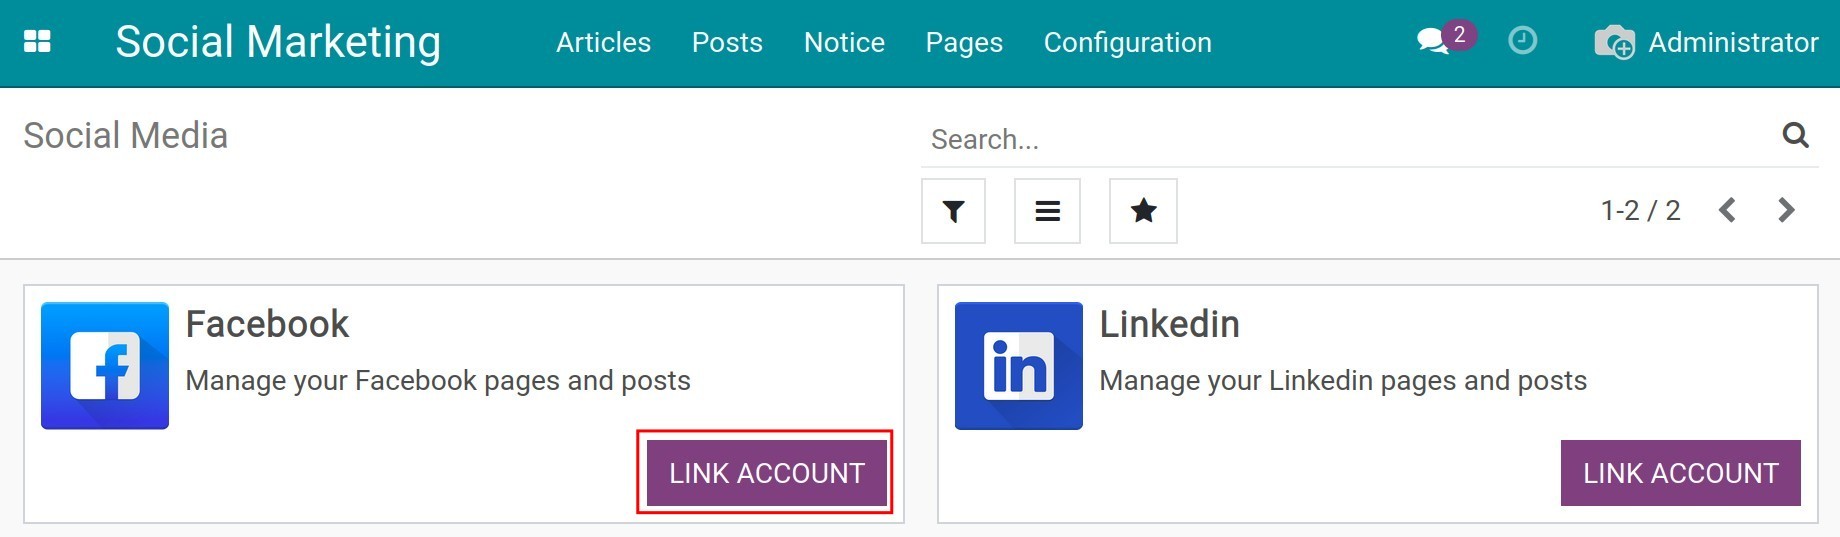
After finishing the API integration, you need to link the system with specific social media pages that you want to manage.
Navigate to . To link the Viindoo system with the enterprise’s page, find the social media that you want to link and press “LINK ACCOUNT”.

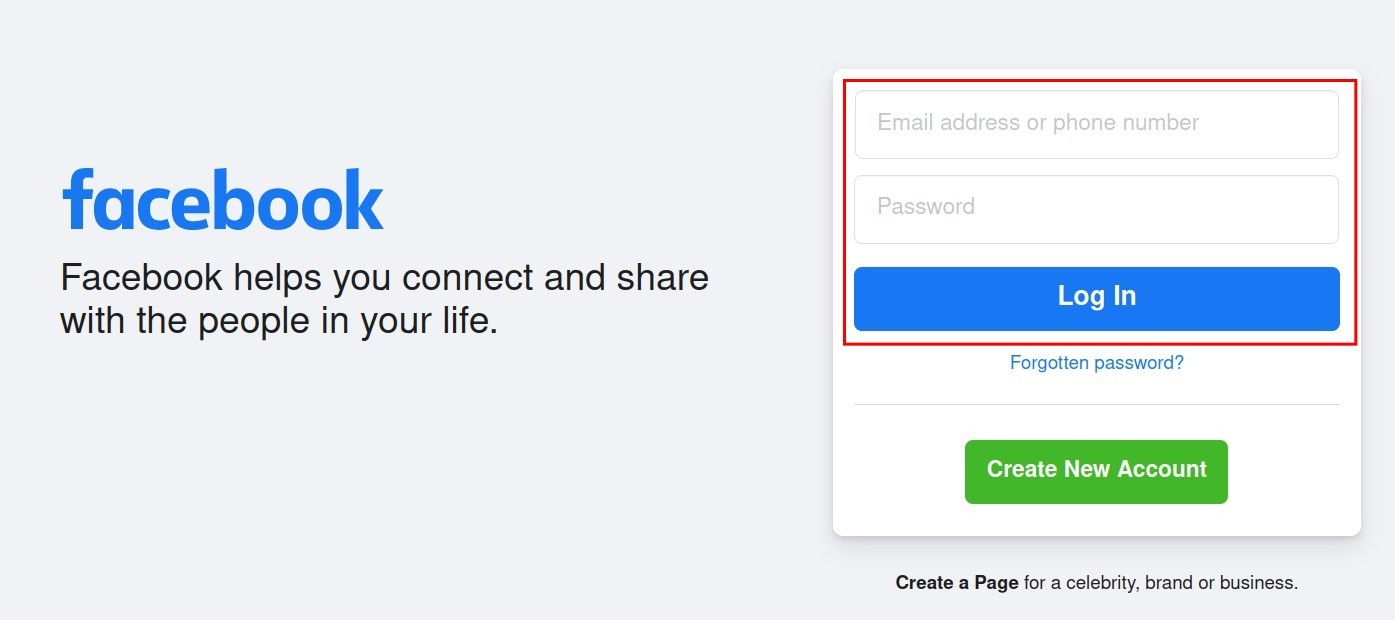
The system will navigate you to a new tab with Facebook/Linkedin interface. Here, log in to your account to complete the connection.
Note
The connected account must be the administrator of the page.
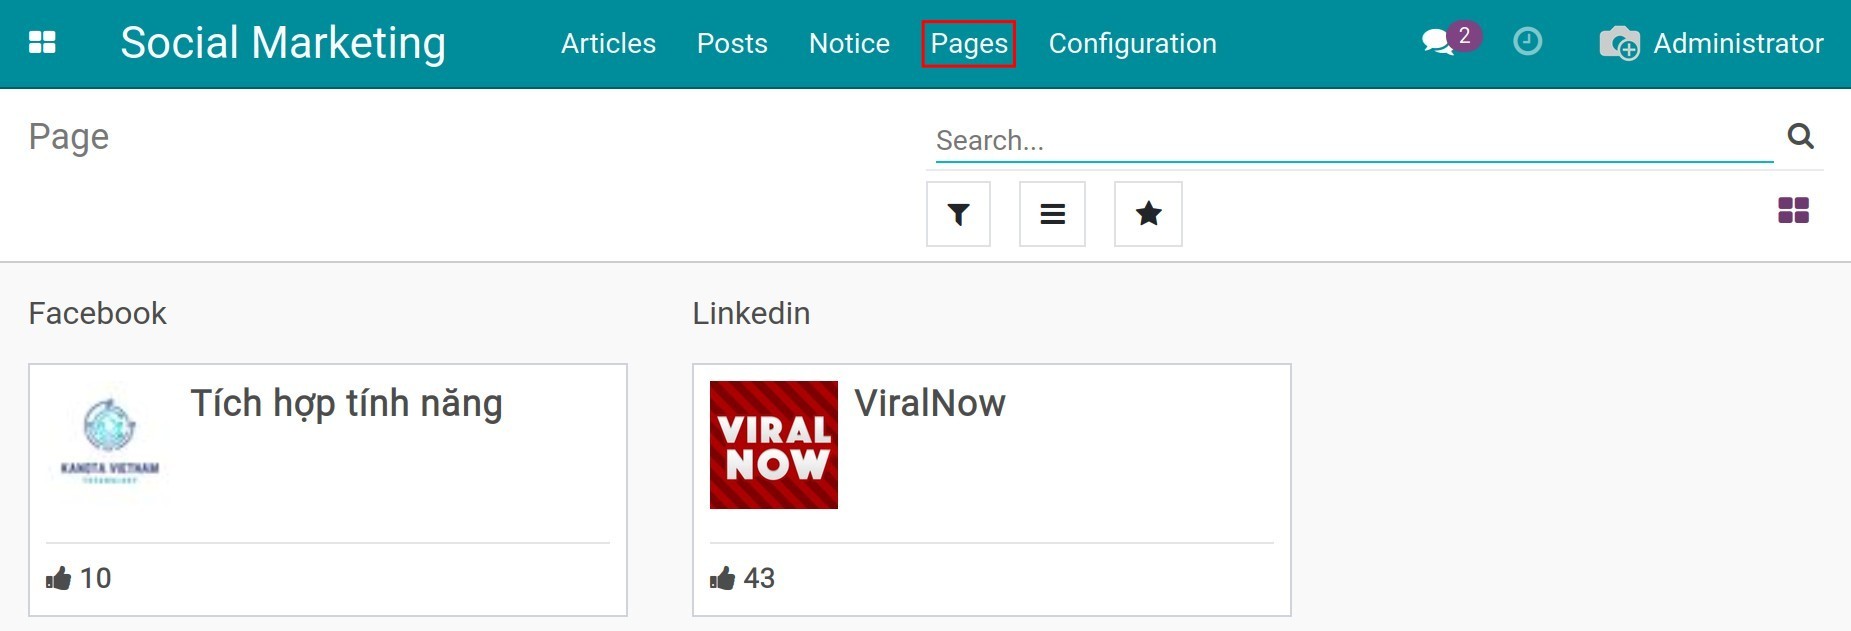
After finishing the connection, return to the system and navigate to . All the social media pages that are under your administration will appear here.
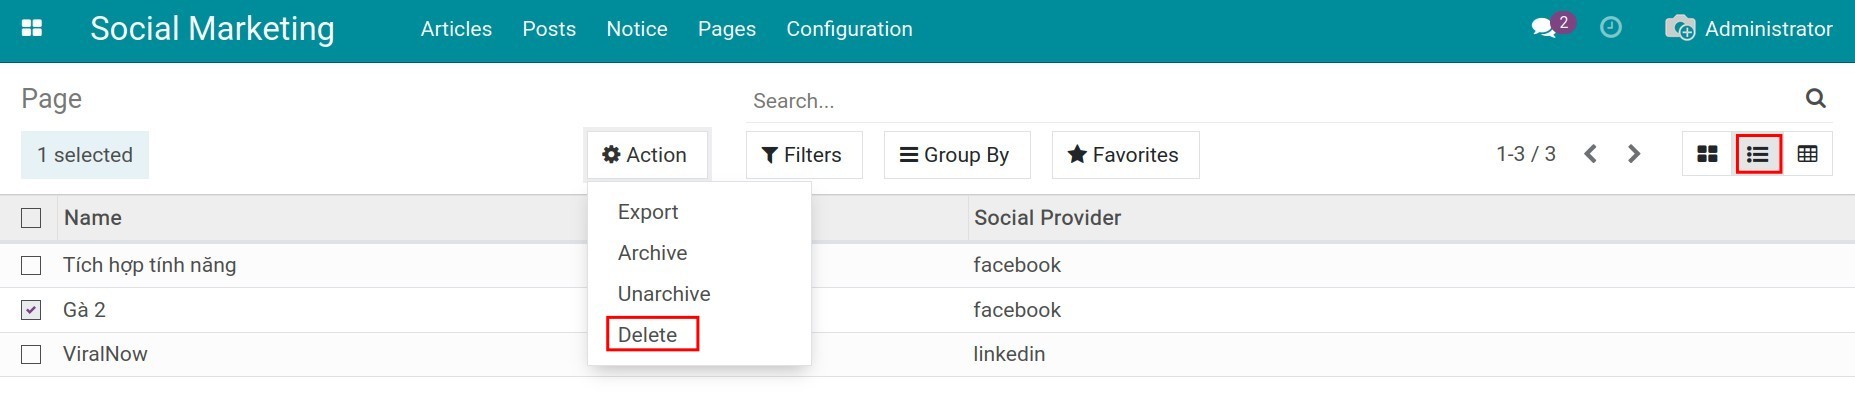
In case you only want specific pages, you can delete the connection by turning to list, selecting the pages, and pressing to disconnect.
Next, you can create the articles on the connected pages. Refer to Manage post on social media.