Receipt with Two-step flow: Input and Stock
In inventory management, other than one-step receipt (Receive goods directly), the Inventory App also enables users to make a goods receipt process in 2 steps (Receive goods in input and then stock).
Two-step Receipt Flow: The goods are transferred from the vendor’s location to an input location for counting and gathering before being stored in the warehouses. We call these two steps: Inputting and Stocking respectively.
To activate this two-step incoming shipment feature, first you need to activate Multi-steps routes .
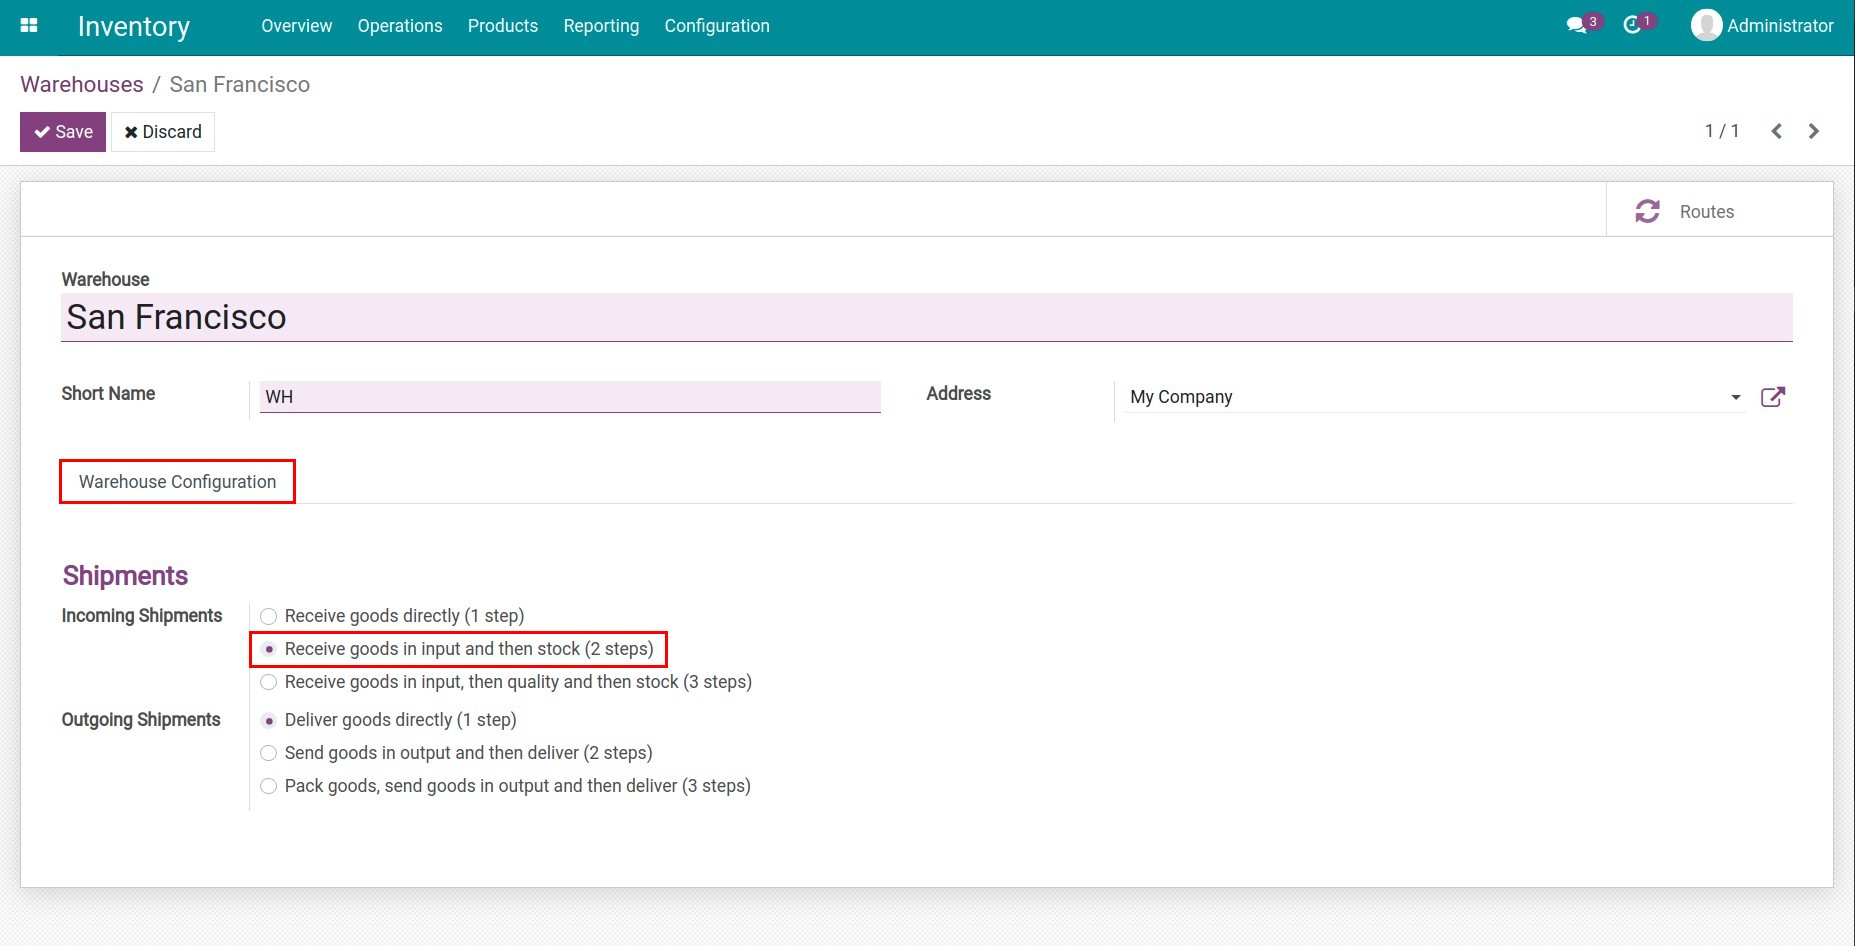
Navigate to Inventory ‣ Configuration ‣ Warehouses, then choose the right warehouse you want to configure, in tab Warehouse Configuration ‣ Incoming Shipments, choose Receive goods in input and then stock (2 steps).
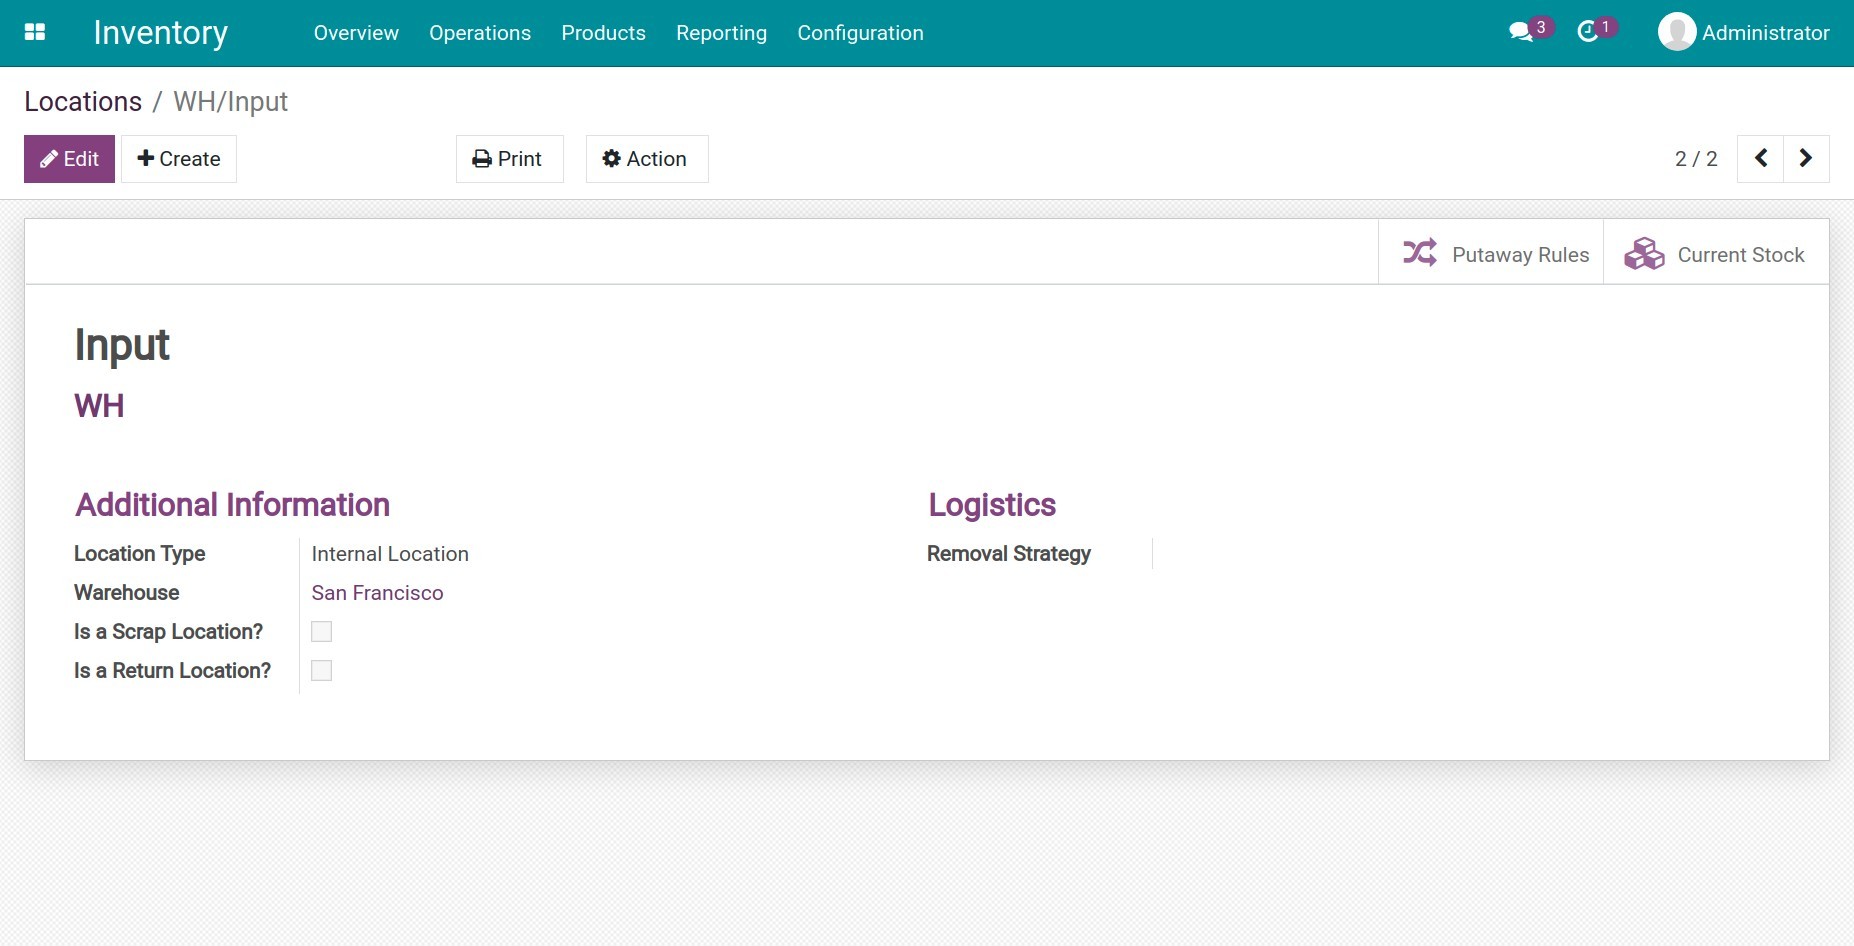
After successfully configuring the two-step incoming shipment feature, the system will automatically generate a new internal input location. If you want to rename it and configure more information related to this warehouse, you can navigate to Inventory ‣ Configuration ‣ Locations ‣ WH/Input.
A process of receipt in 2 steps (Receive goods in input and then stock)
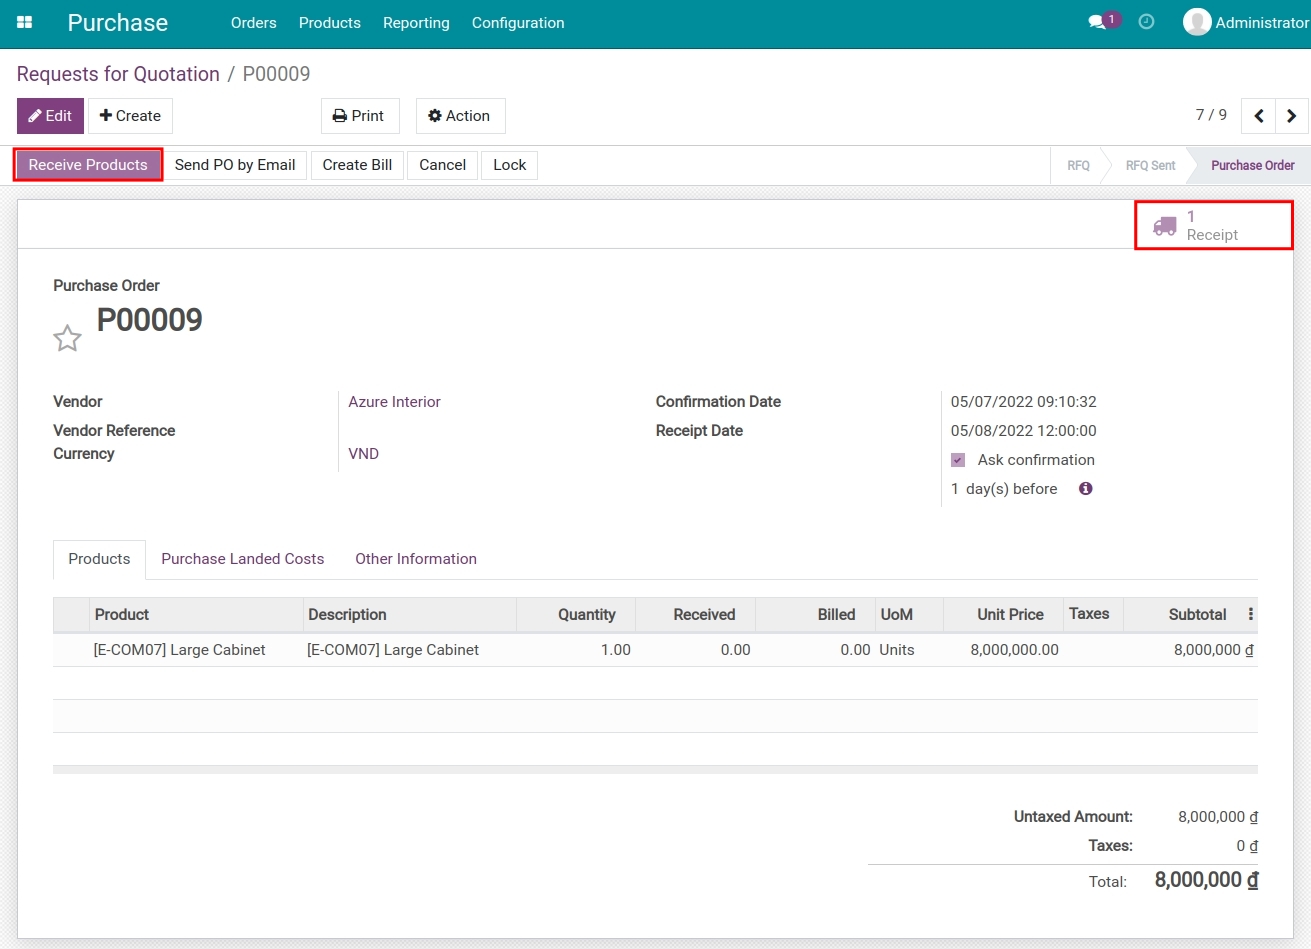
Once a Request for Quotation is confirmed, the system will generate a receipt for the created purchase order. Now, you can click on the Receipt button or select Receive Products, either way, will navigate you to the transfer slip of which status is Ready when you are in the Purchase application. This transfer slip is for the products which are transferred from Vendor’s location to the input location.
The goods will be received through two following steps:
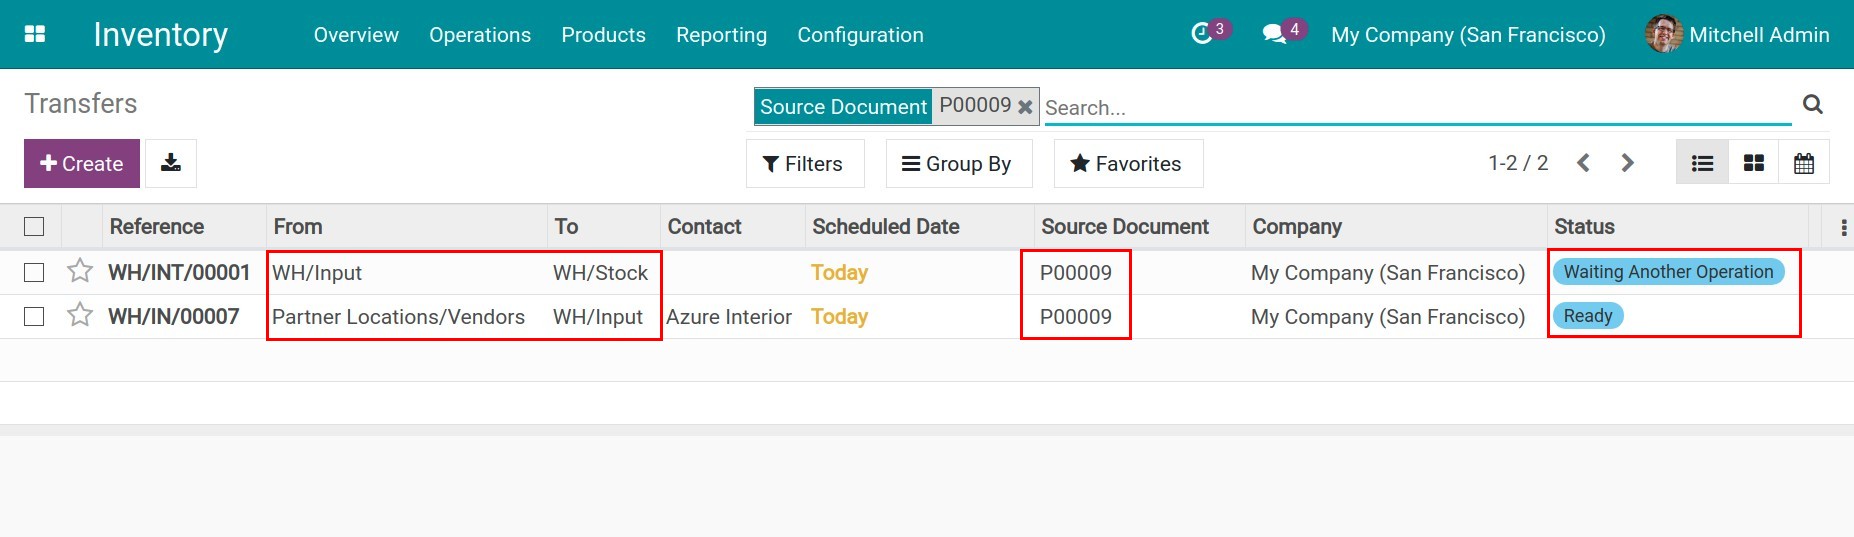
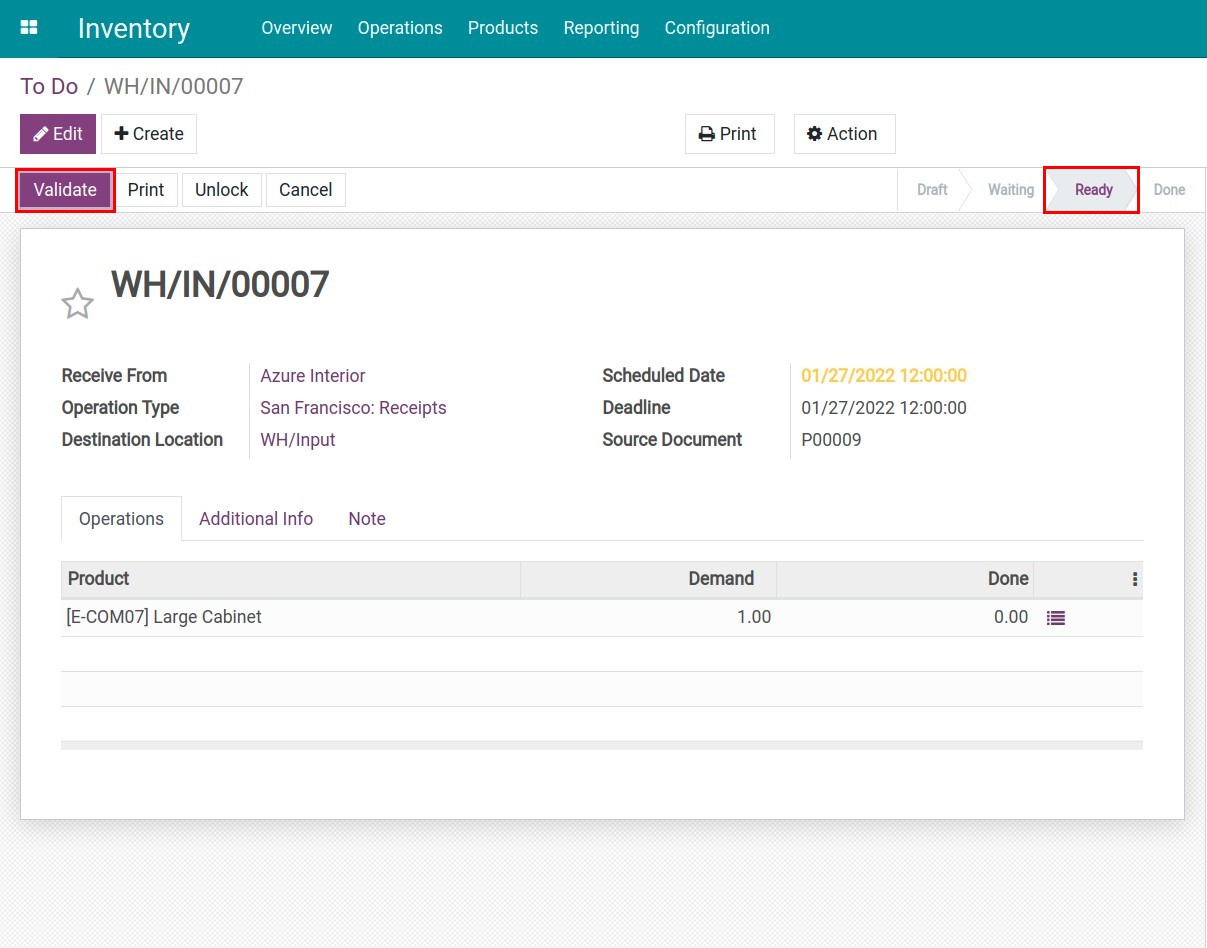
The first step takes place when the goods are received from the vendor to the input location, which can be seen in the WH/IN/00007 transfer slip with Ready status.
The second step is when the goods are transferred from the input location for entering the stock, which can be seen in the internal transfer WH/INT/00001 with Waiting for another operation status.
To check the receipt slips related to the purchase order, navigate to , search with purchase order reference in the search bar using Source Document criteria.
Note
Warehouse staff must have the user access right at the Purchase application to receive goods from the purchase menu interface.
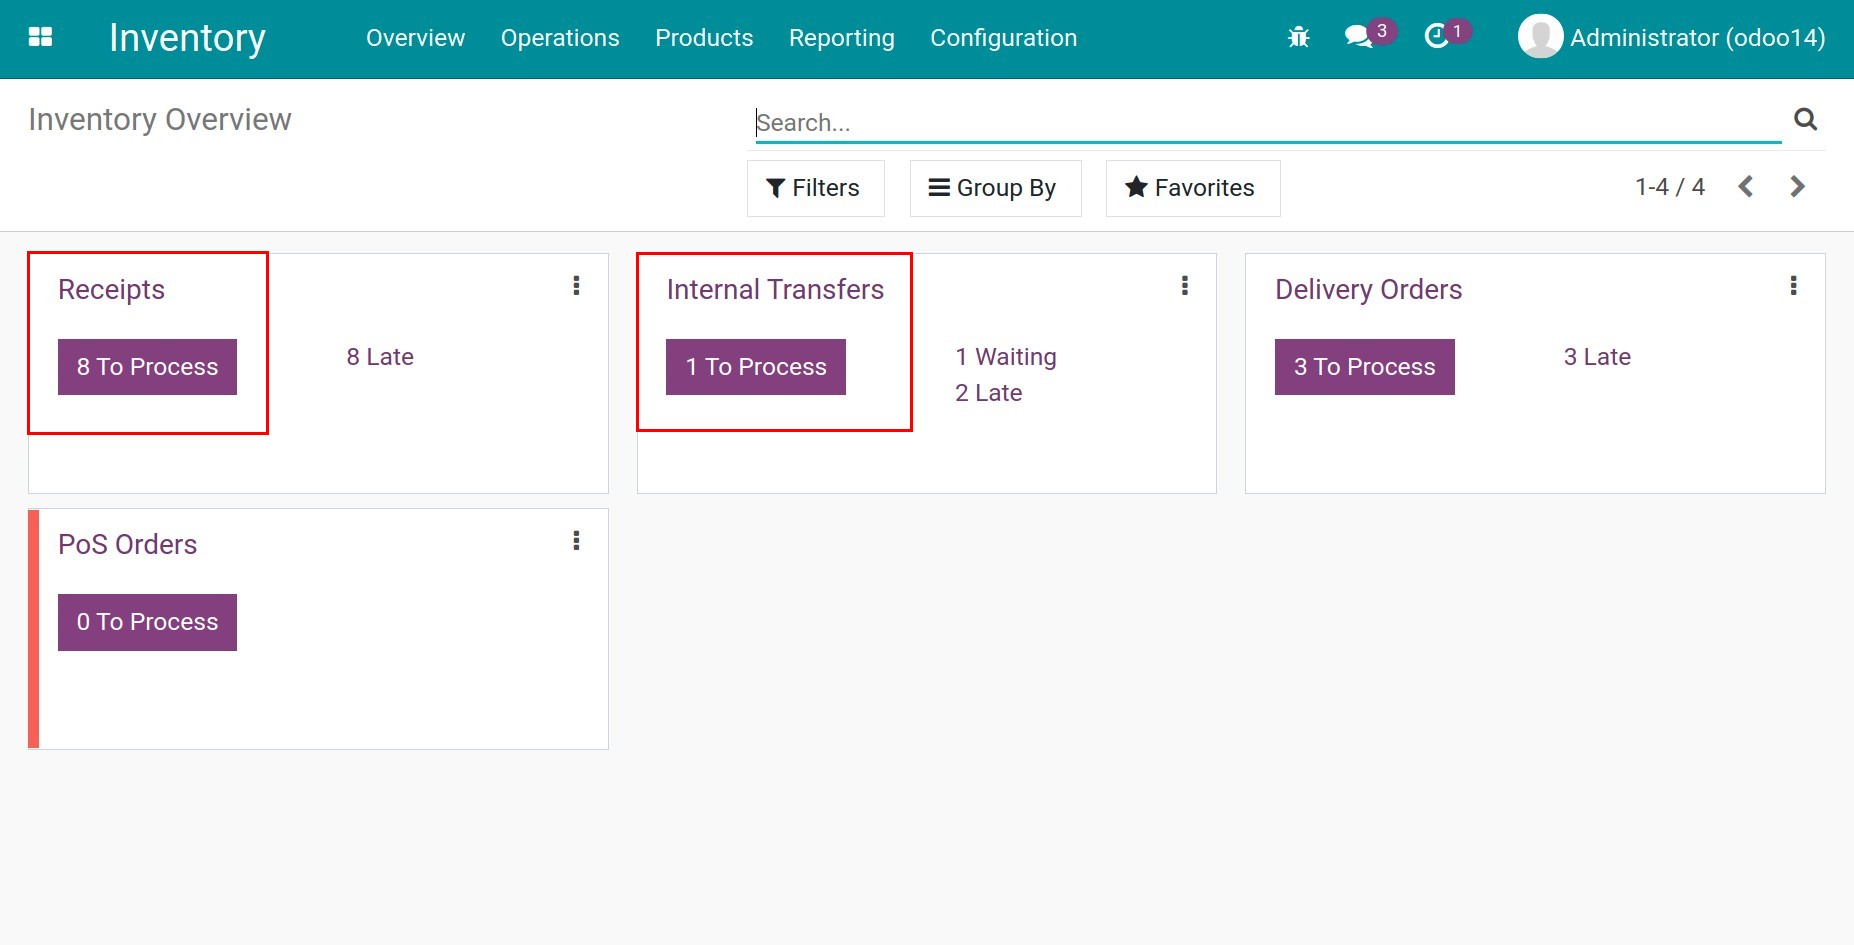
For an overview of numerous transfer slips in different transfers, you can navigate to Inventory > Overview, then operations will be presented in a kanban view . At the same time, you can go to any transfer slip in the Receipt and track the internal operations in Internal Transfers.
Step 1: Receive goods from vendors
Here, you can go to Receipt ‣ To Process, then choose a receipt slip that you want to validate and click Validate, the status will be changed to Done. This means that you successfully receive the goods from the vendor’s location.
Step 2: Store goods in stock warehouse
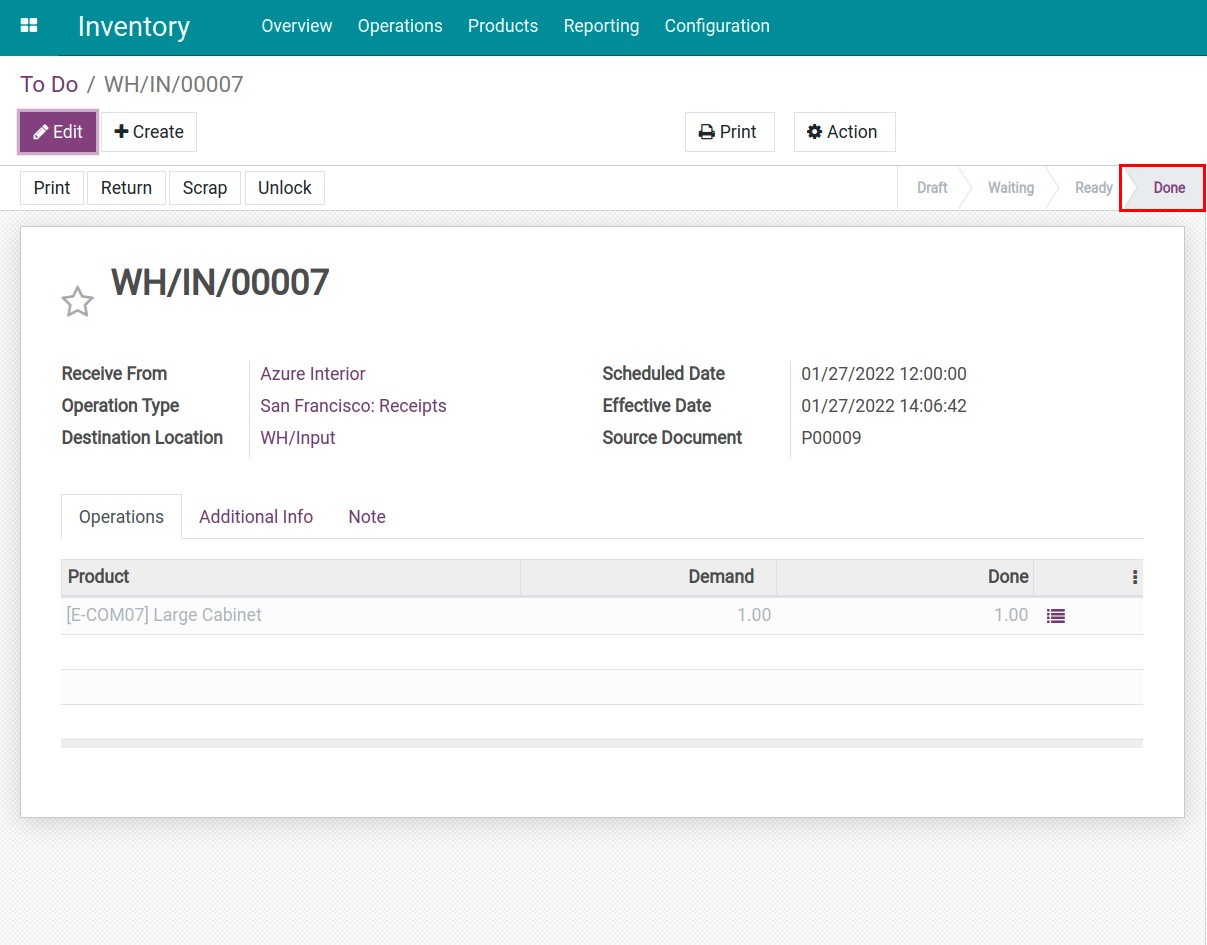
Once the receipt has been validated, the internal transfer from the input location to the receipt warehouse is ready to process. With the same steps as receipt, you navigate to Internal Transfers ‣ To Process, choose the right slip and click Validate, and the slip will be done.
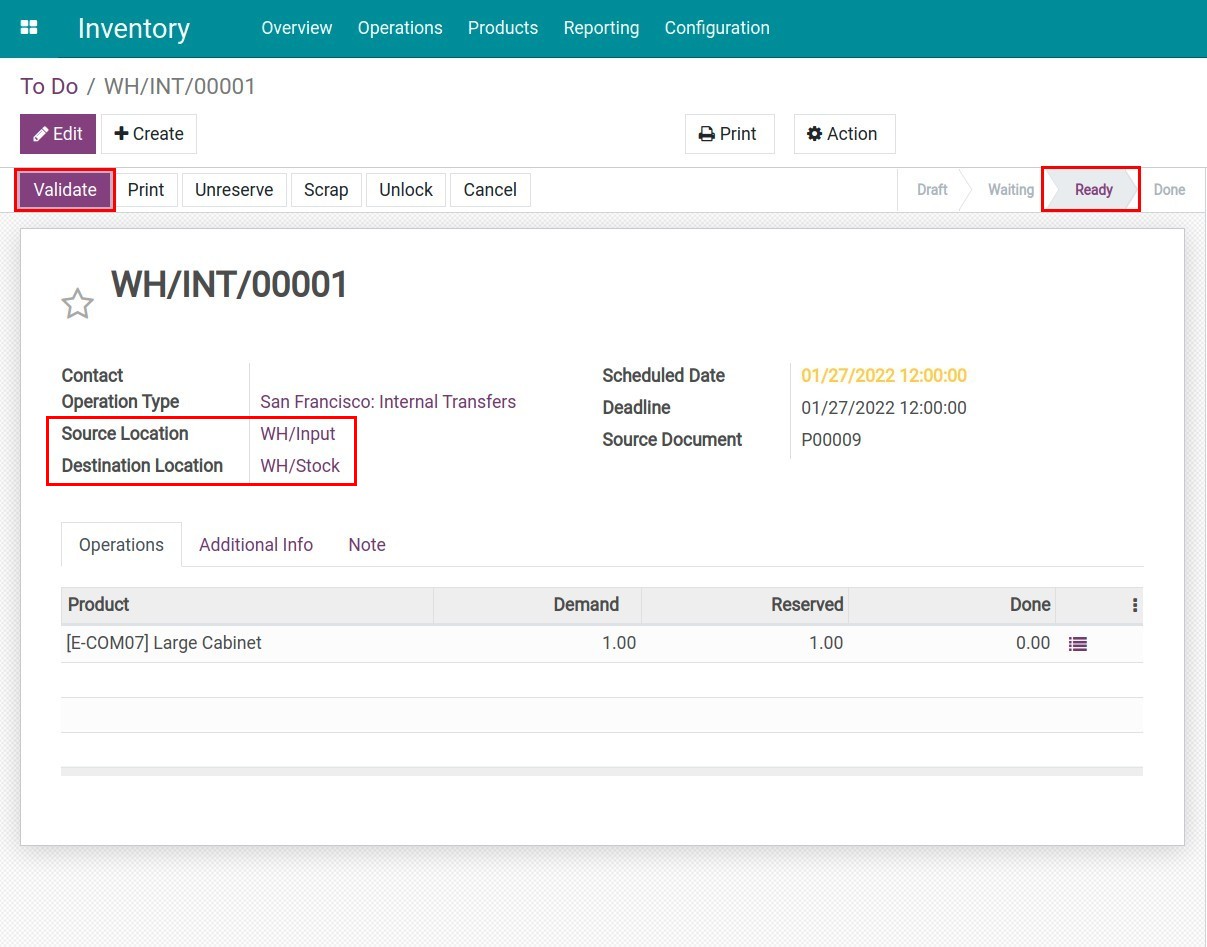
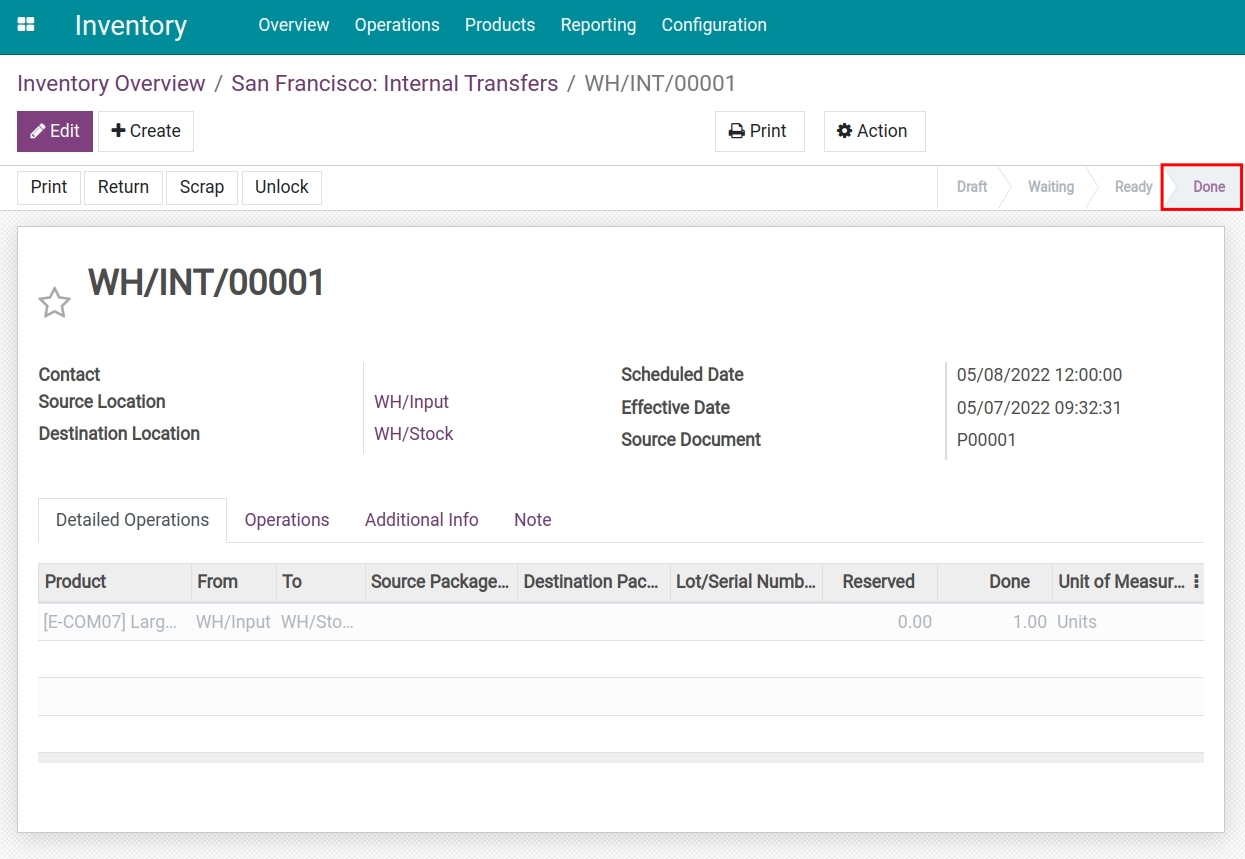
Here, the goods have successfully entered the stock and you can complete the two-step receipt process in Inventory Management Software.