Manage subcontracts in your manufacturing process
In manufacturing businesses, subcontracting to produce one or various stages in the production line is very common. This process can be easily and efficiently managed with the Viindoo Manufacturing Management app.
To understand the workflow of the subcontracting operation, let’s take a look at the actual operations of a desk manufacturer:
Company A manufactures desks, including tabletop, table leg, and necessary materials which will be used in the production of the finished products.
Company A hires a subcontractor for the painting process of table tops and table legs. The semi-finished products received from the subcontractor are painted table tops and painted table legs.
The manufacturer then assembles a painted table top with painted table legs to produce a desk as a finished product.
Before working with the subcontract feature in a manufacturing process, you need to:
Activate the Subcontract feature;
Configure semi-finished and finished products with adequate replenishment routes;
Configure Bills of Materials.
Refer to the Introduction to Subcontracting article for detailed initial settings.
Subcontract Management in Manufacturing
The process of manufacturing a desk consists of the following steps:
Step 1: Manufacture the semi-finished products including the Table top and Table leg;
Step 2: Subcontracting products mentioned in step 1 and transform them into painted Table top and painted Table leg;
Step 3: Manufacturing the finished product, which is a Desk.
Step 1: Manufacturing semi-finished products
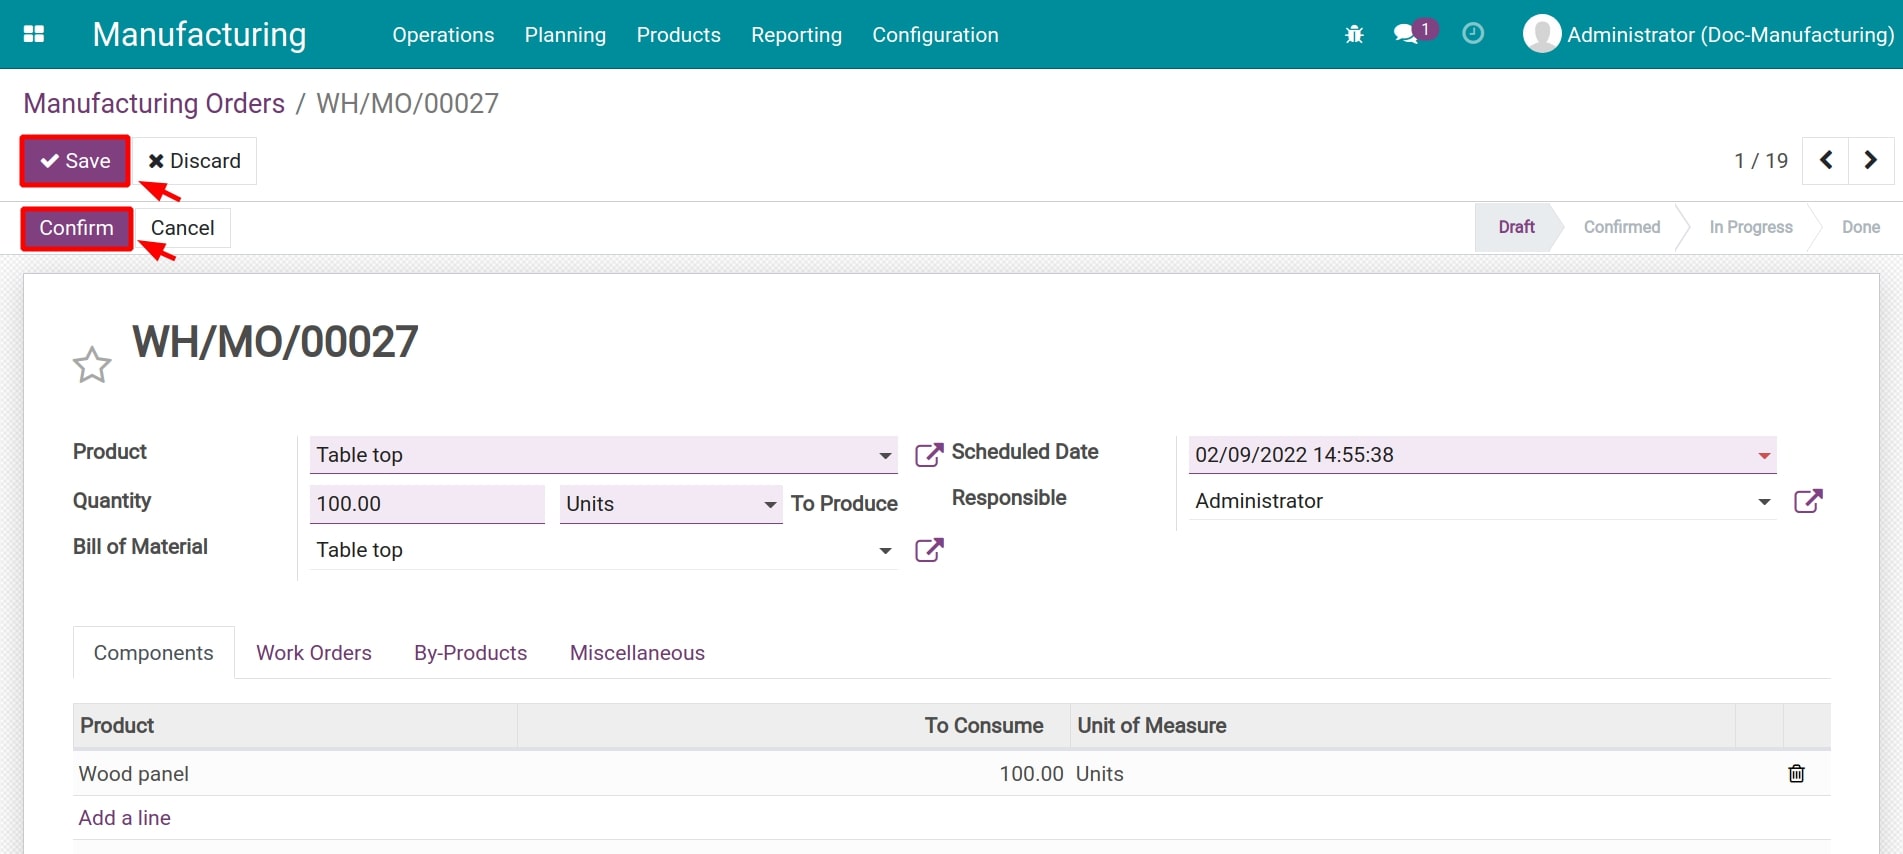
Navigate to Manufacturing > Operations > Manufacturing Orders, and select Create to generate a new order to manufacture the semi-finished products.

After fulfilling the information, you choose Save and Confirm.
In case the materials are available or have just been manufactured, you can click on the Mark as Done button to record the manufacturing process for these semi-finished products.
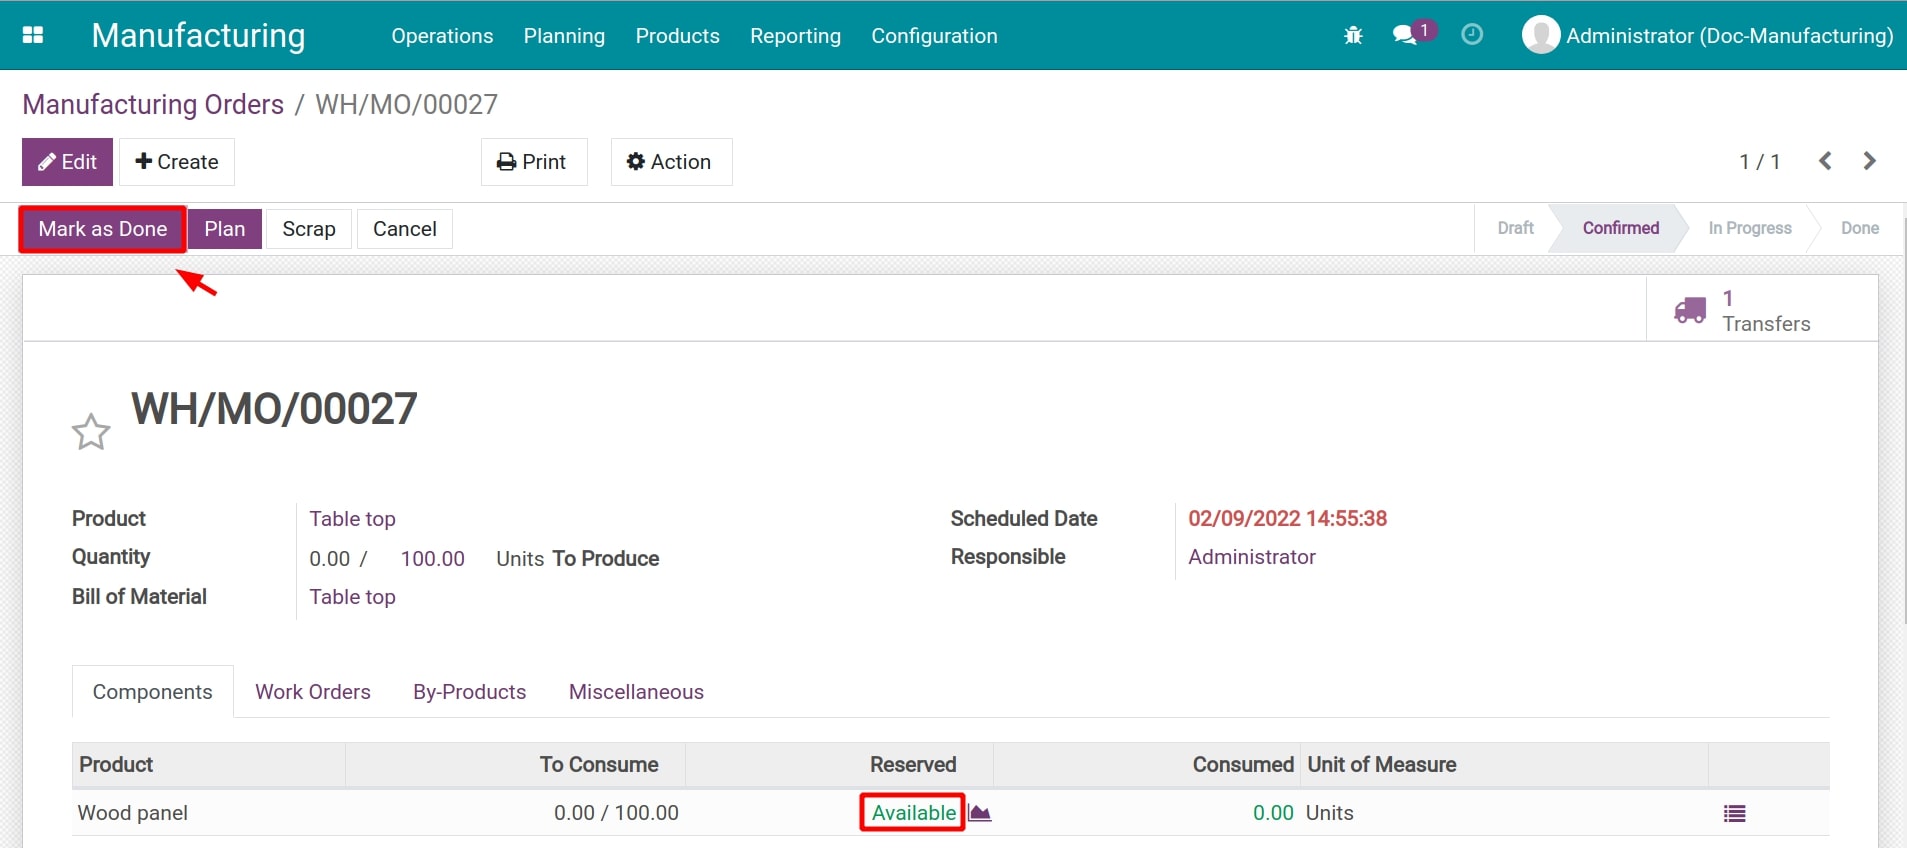
When finishing the manufacturing process, we can see the Product Moves button on the right corner of the screen, you can click on it to observe the occurred transfers during the process.

Step 2: Subcontracting
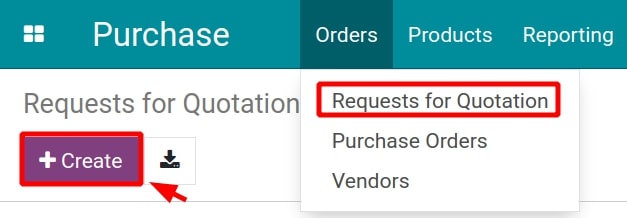
Access the Purchase application, navigate to Orders > Requests for Quotation, then hit on Create to create a purchase order for the subcontracted products.
After adding information for the PO, including vendor, product, and the unit price, etc., press Save and Confirm order buttons.
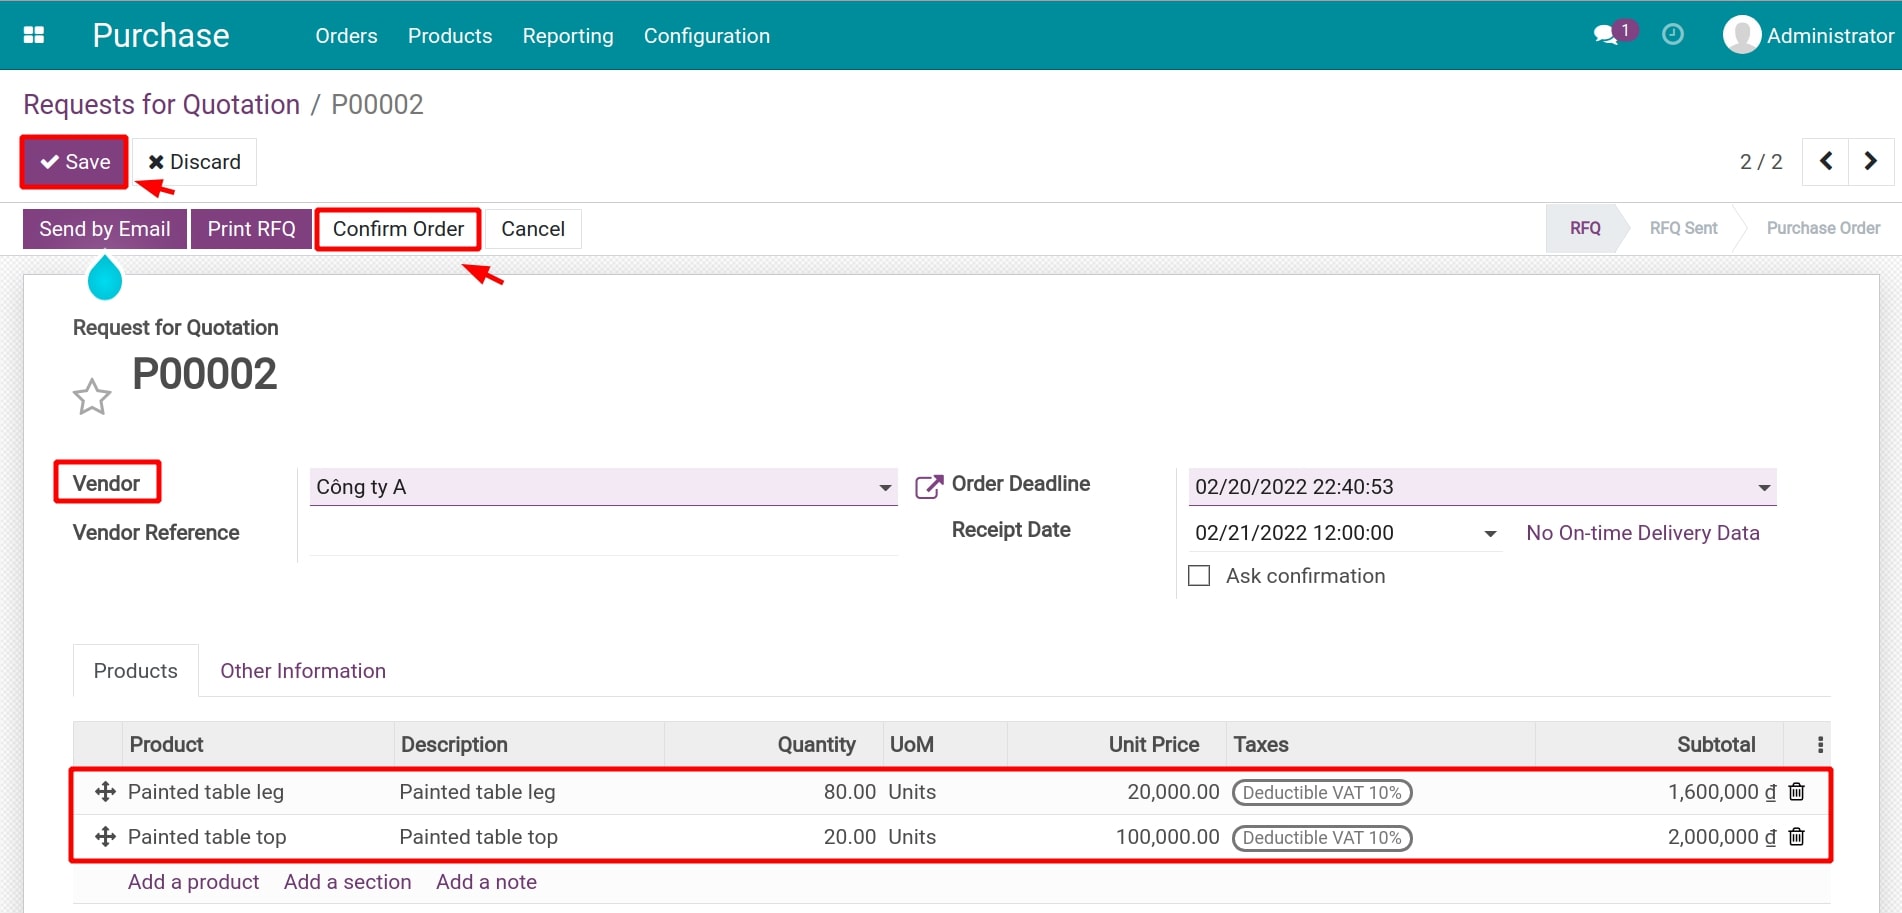
Once the PO is confirmed, navigate to Inventory > Overview and check the two automatically created stock delivery slips to send semi-finished products and raw materials to the subcontractor.

On the stock receipt request, press Check Availability to verify the amount of stock available.
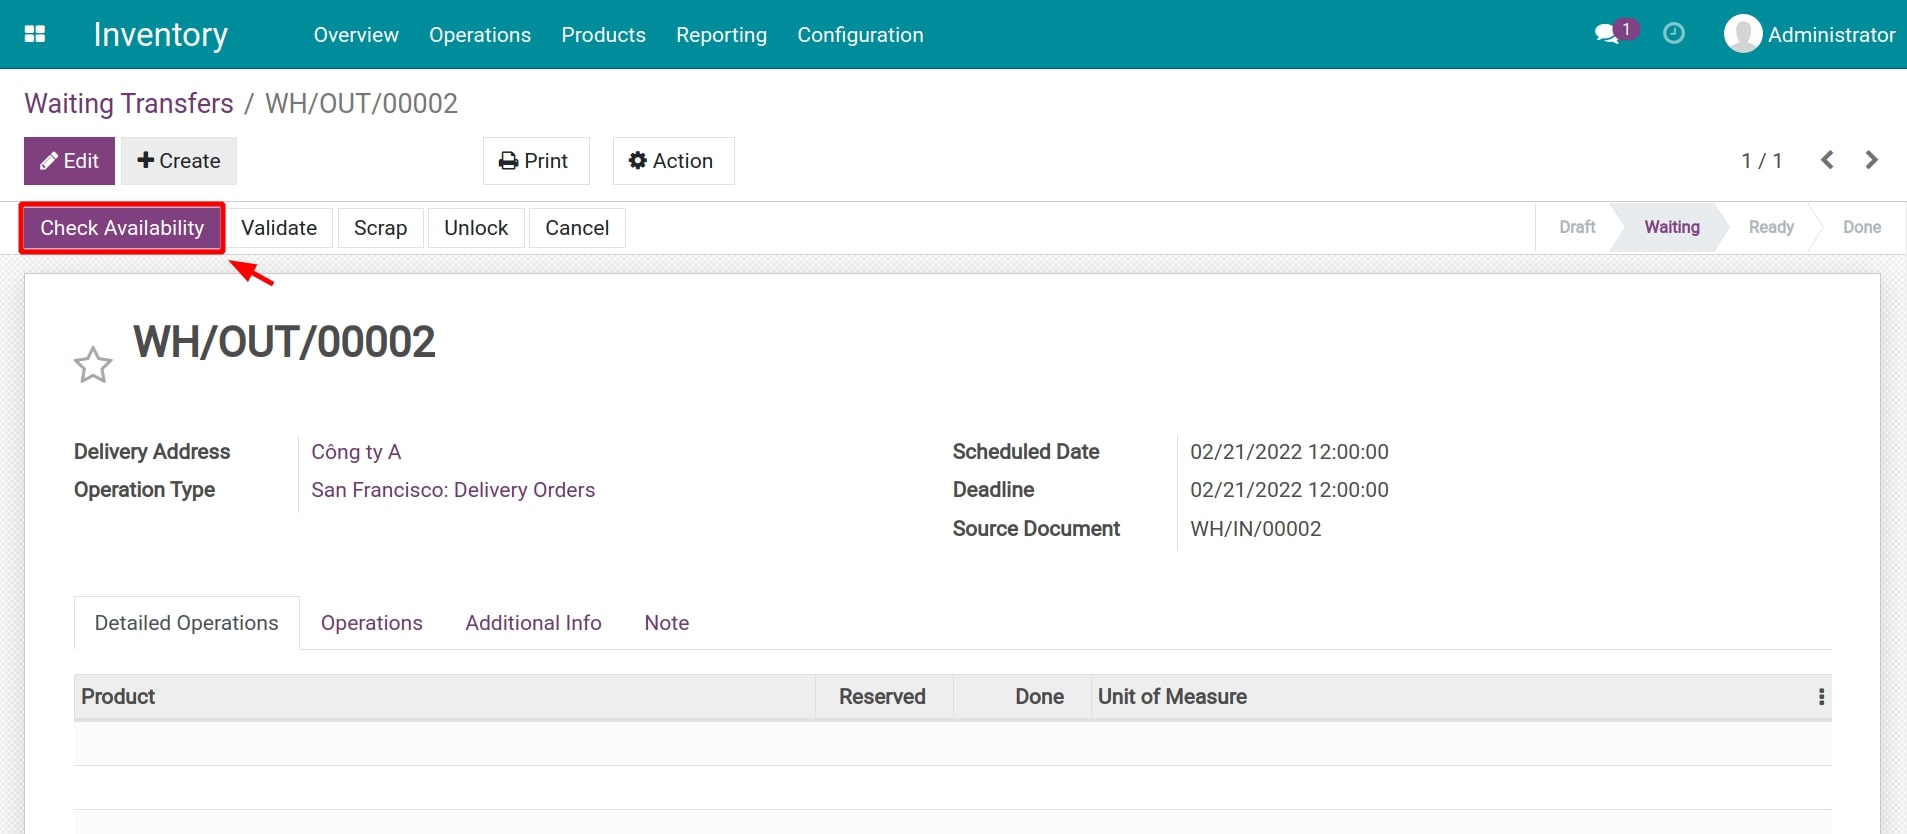
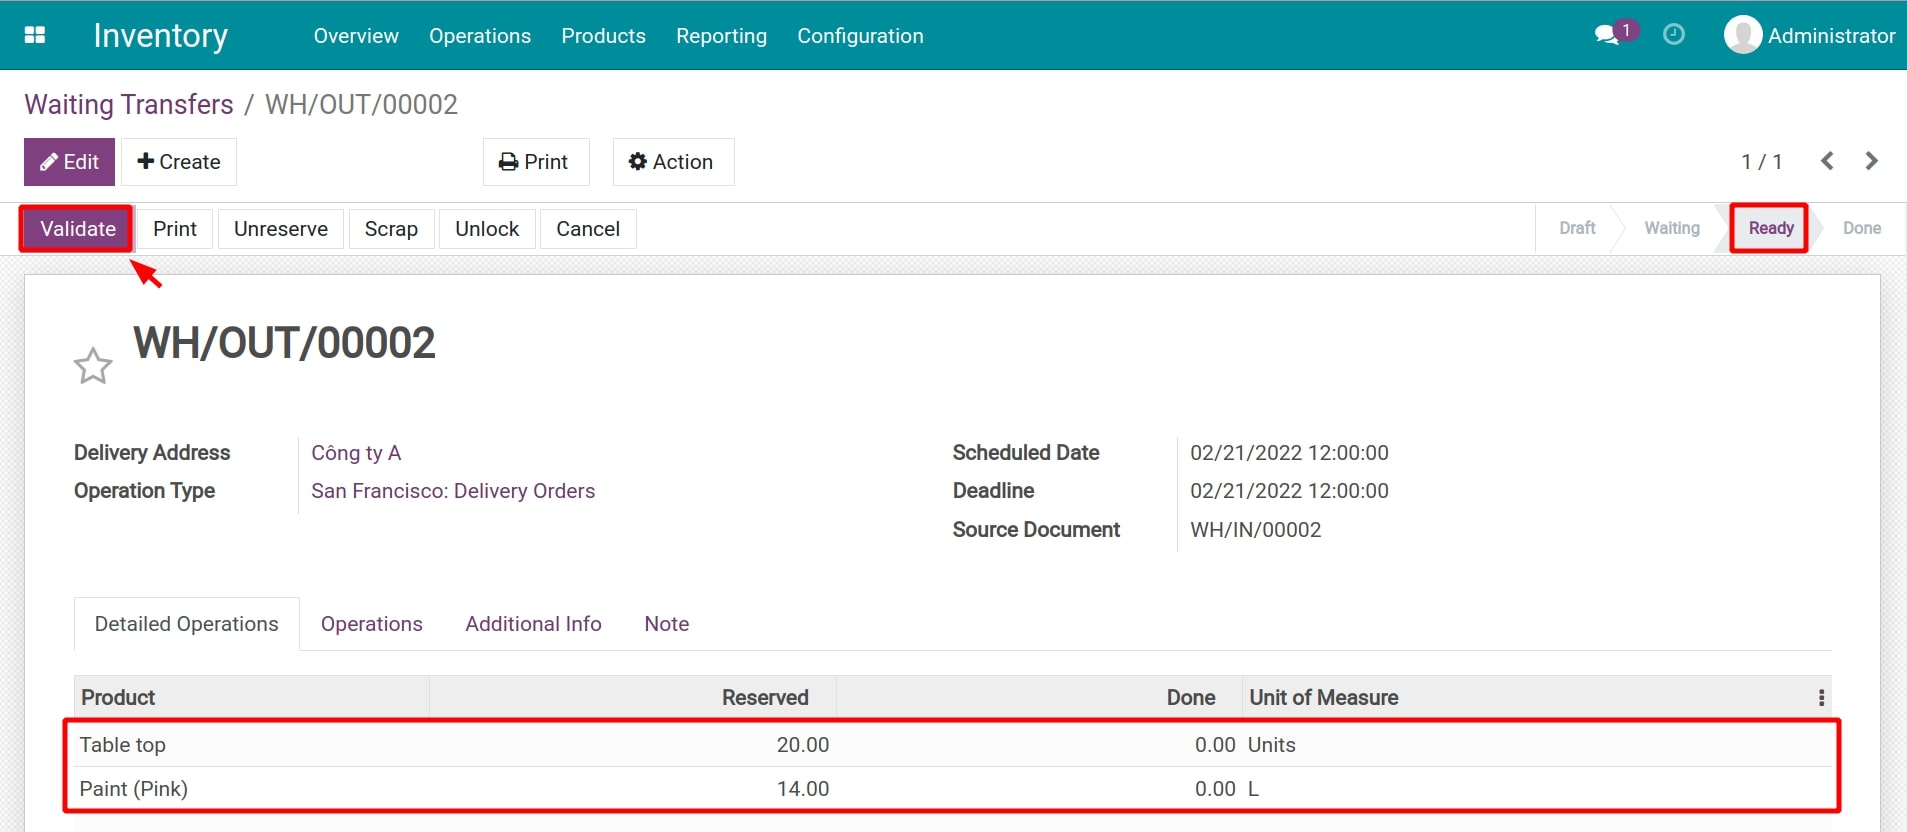
If the stock available can satisfy the need, the status of the request will be updated from Waiting to Ready, you can click on the Confirm button to complete the process of supplying the materials for the subcontractor.
To perform the stock receipt after completing the subcontracting process, navigate to Purchase > Orders > Purchase Orders, select the related PO, and verify the stock receipt request which is automatically generated after confirming the PO.
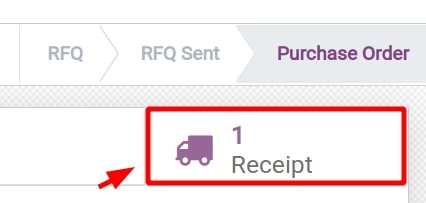
On the stock receipt, you click on the Confirm button to confirm the stock receipt for the Painted table top and the Painted table leg from the subcontractor.
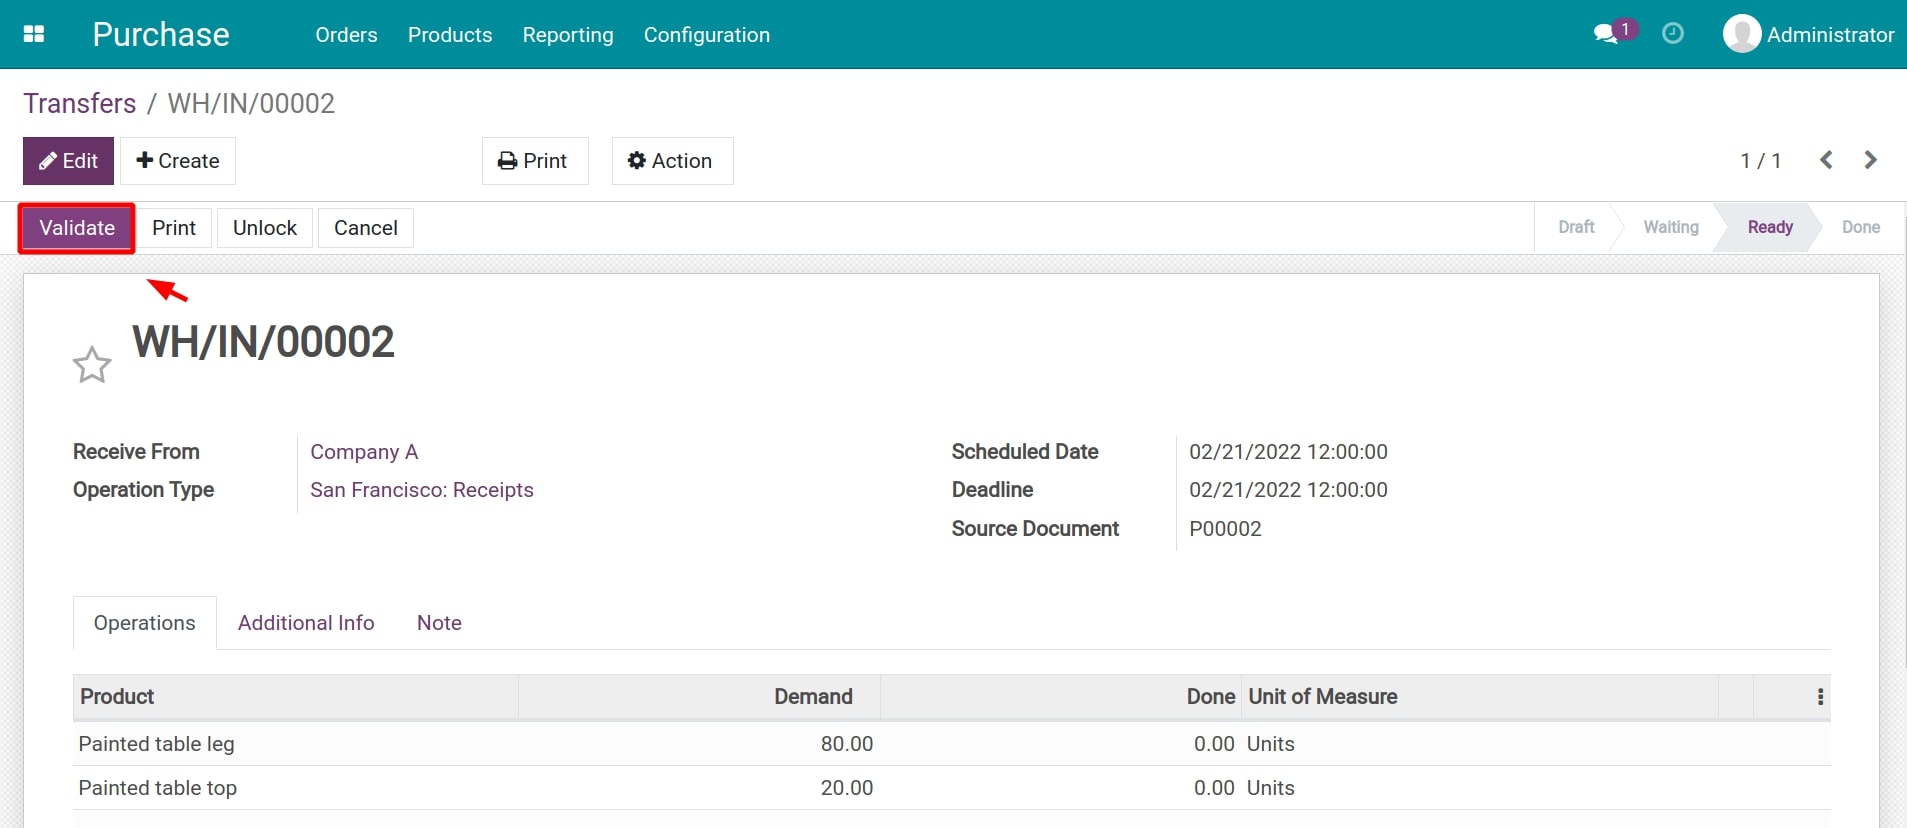
To track the product moves during the subcontracting process, you navigate to Inventory > Reportings > Stock Moves and filter the needed products for tracking.
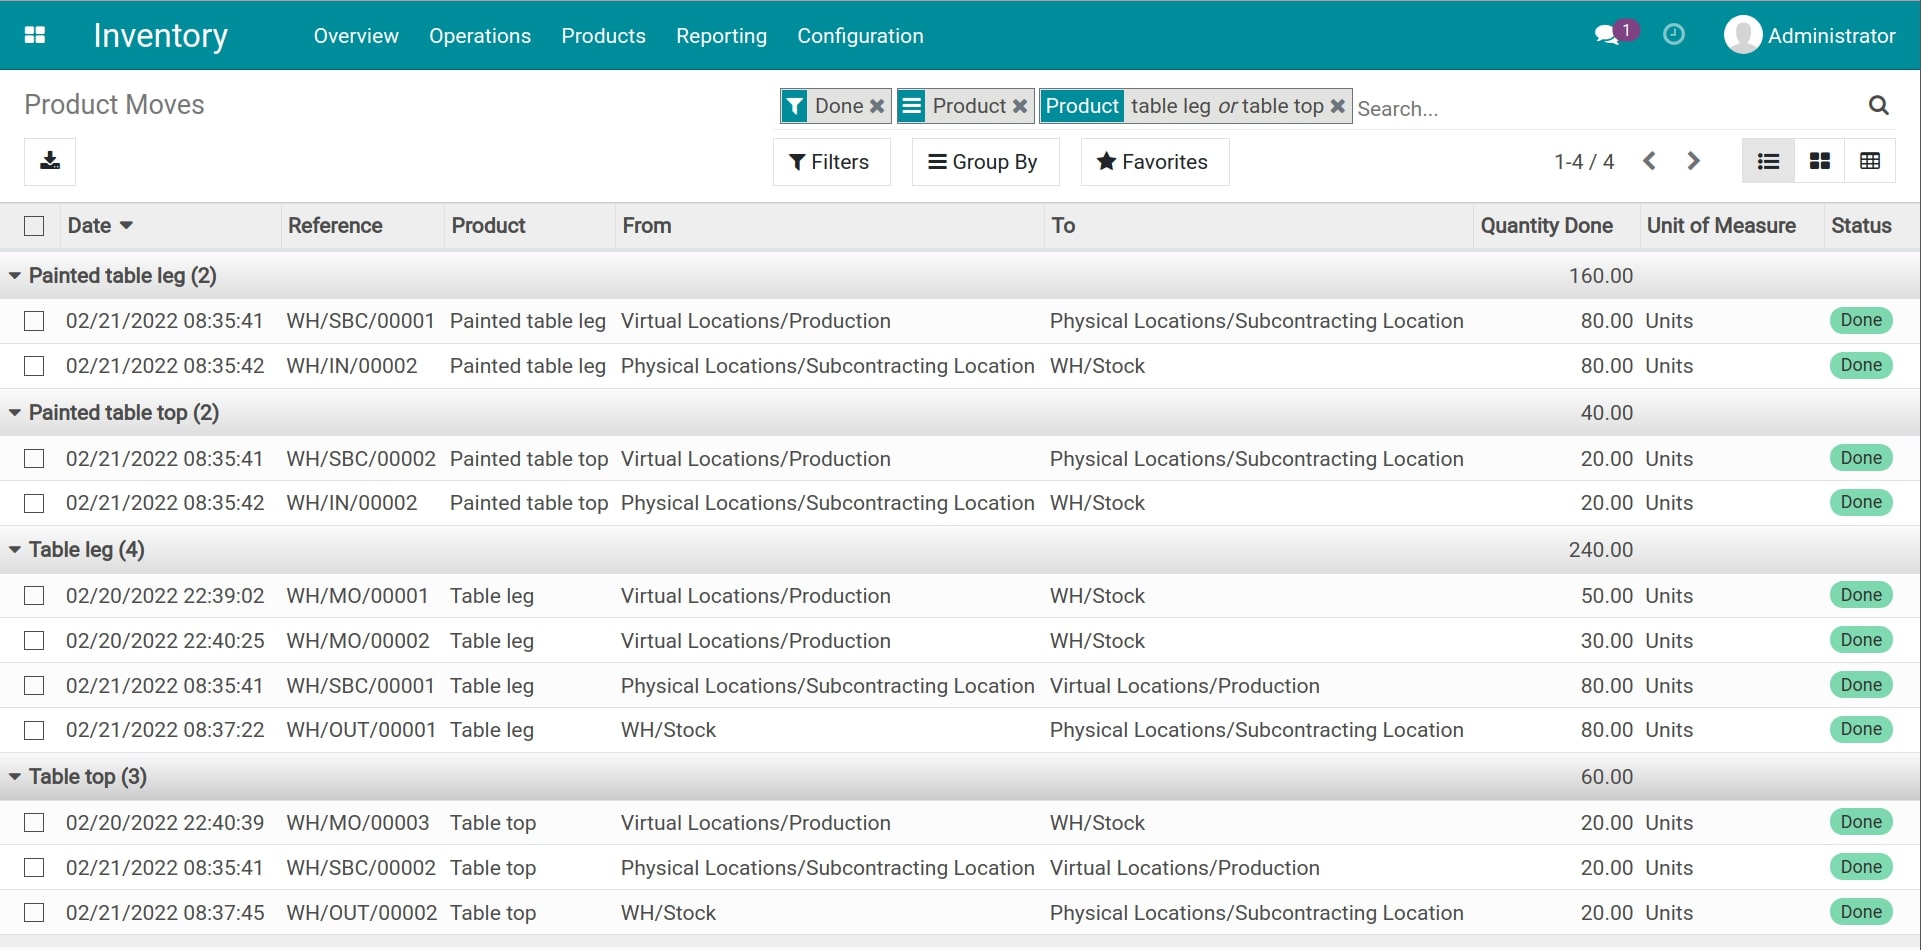
From here, you can view the occured transfers to supply materials for the subcontracting operation, including transfer necessary materials to the subcontracting location and receive semi-finished products which are the painted table top and table leg.
Besides, in this step, you need to split the subcontracting costs into the values of the Painted table top and the Painted table leg by using the Landed cost feature.
Step 3: Manufacturing the finished product
After performing steps 1 and 2, you have all the required materials to produce the finished product - the Desk. Next, go back to Manufacturing > Operations > Manufacturing Orders, click on Create to generate a new order.

Fulfilling the information and hit on Save and Confirm.
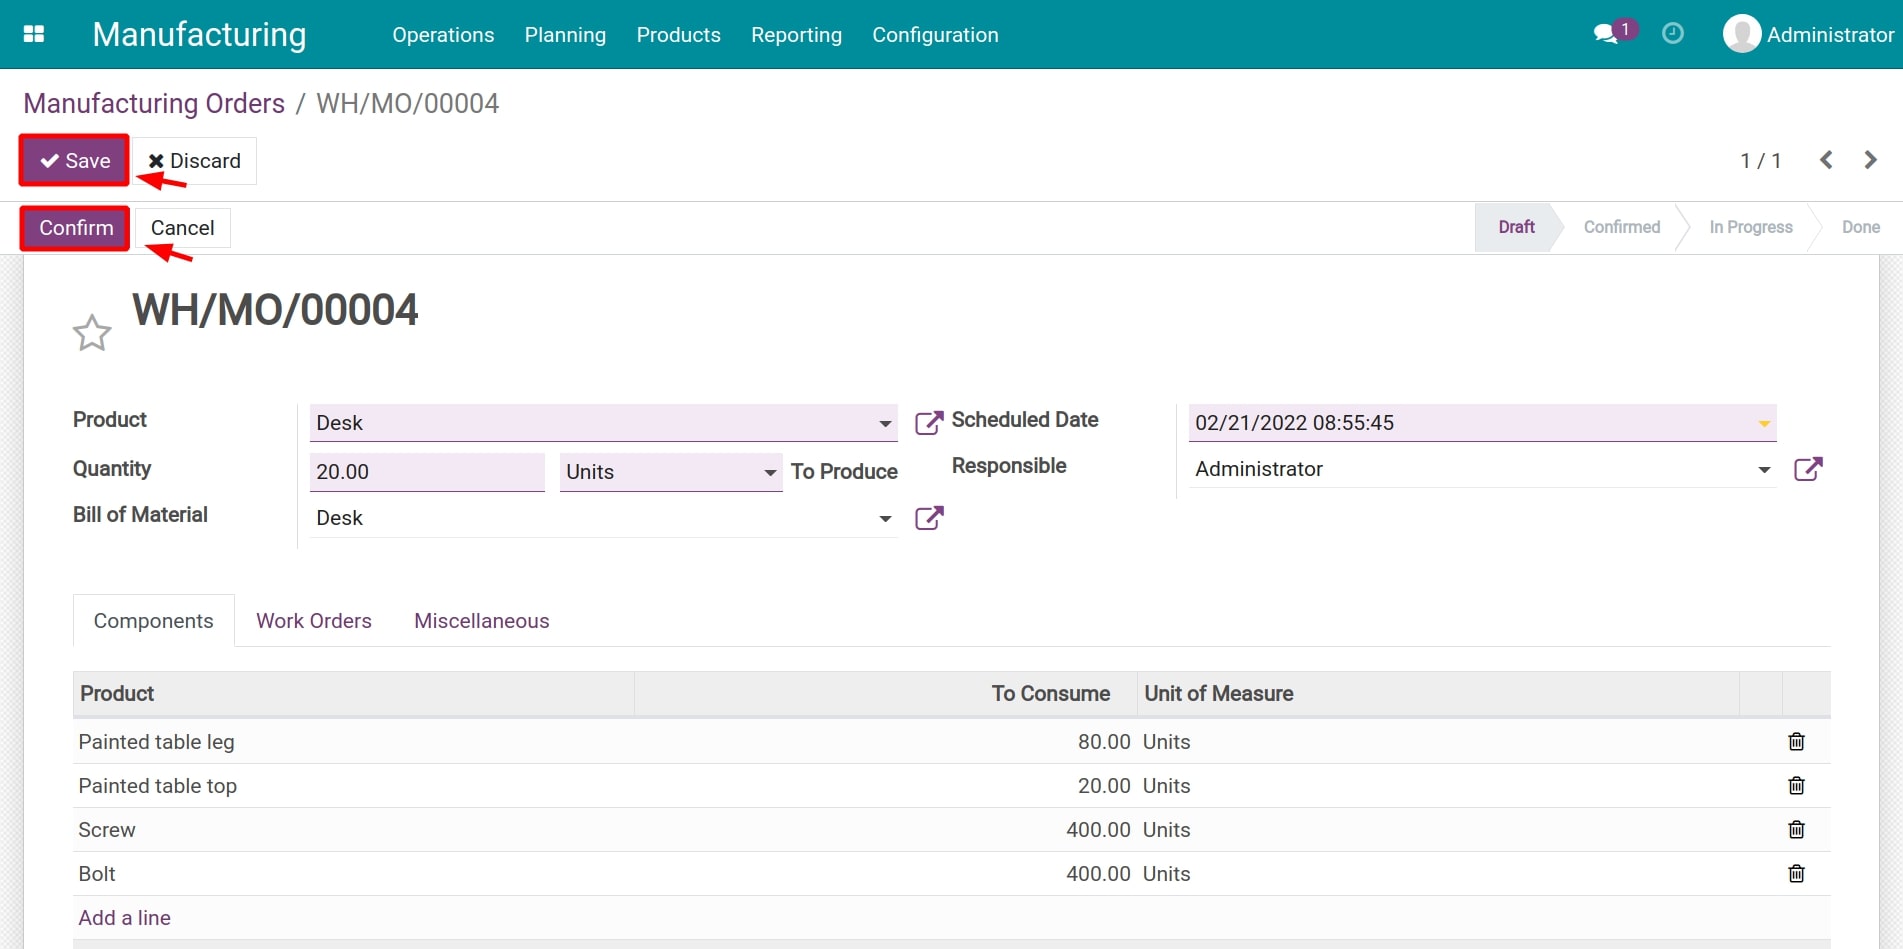
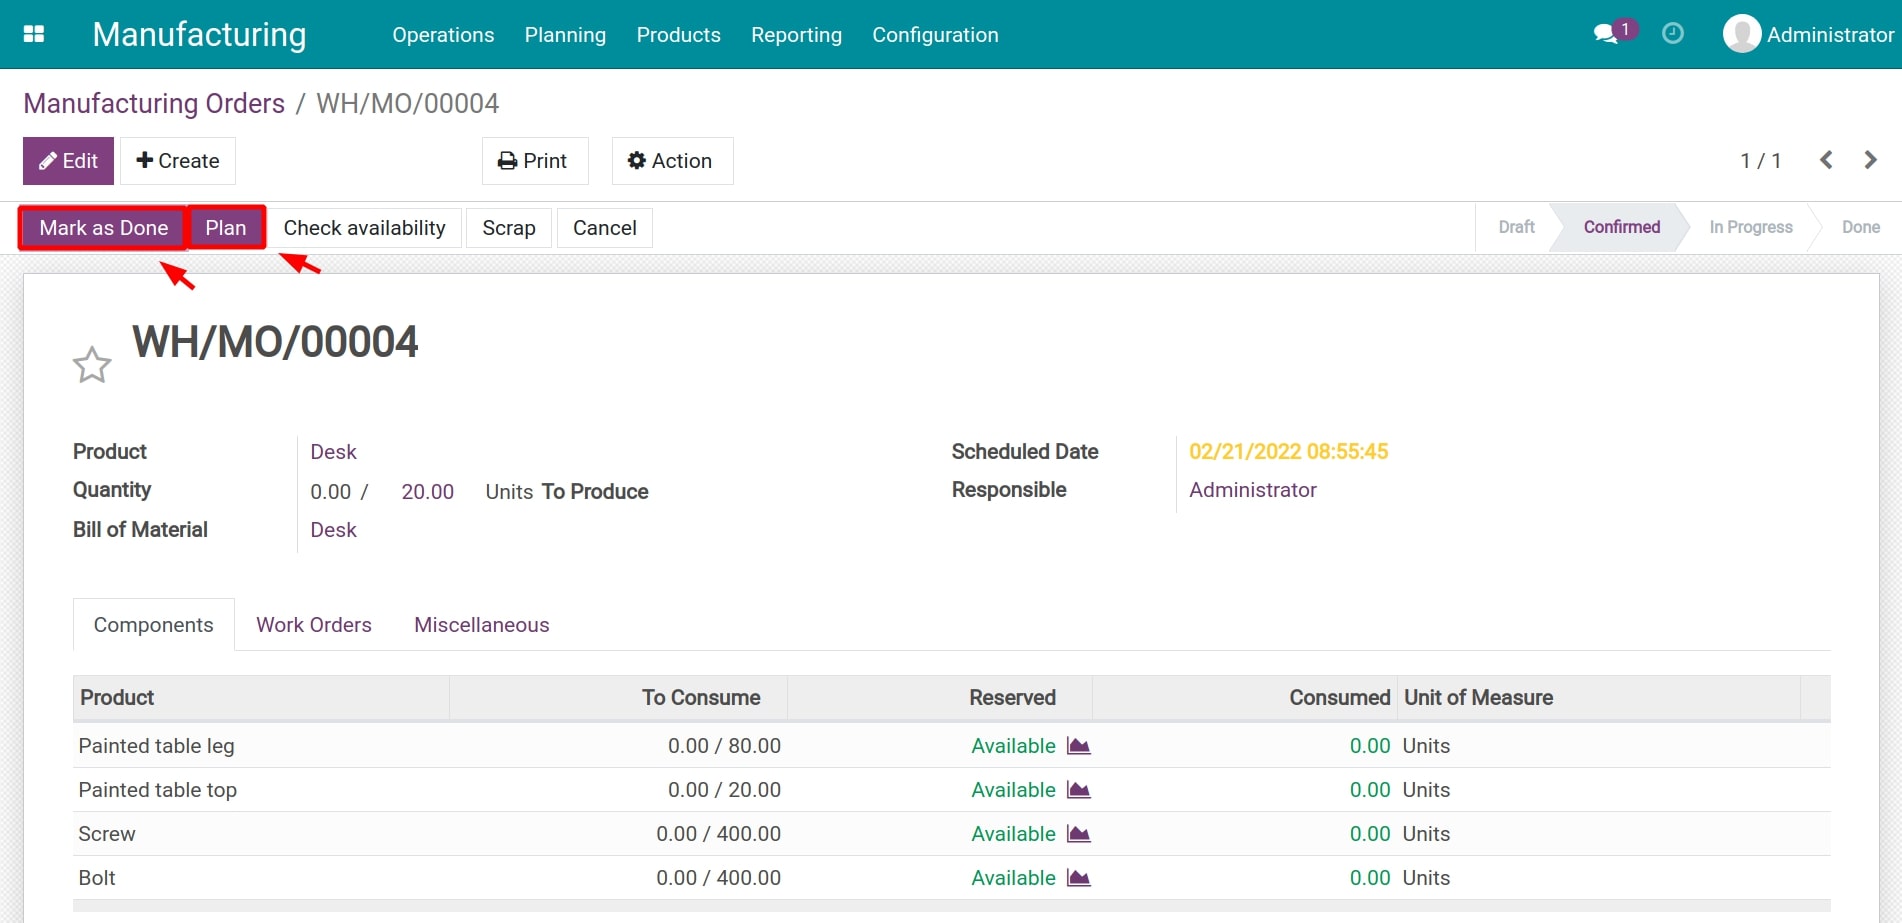
Now you can see 2 options which are Mark as Done and Plan. You can press either Plan to create the manufacturing plan at a specific time in the future or Mark as Done to complete the manufacturing process.
