Employee Expenses Process
This article will guide you through the steps in employee expense recognition on Viindoo software.
General settings
For each operation incurred, users need to create a corresponding expense product so that the accountant could identify them easily. Navigate to and click on Create to create a new product.

Enter the information as follows:
Product Name: Give a name for each incurred operation such as Entertainment expenses, Buying stationery, Transfer tool, etc.
Sale prices: Price at which the product is sold to customer.
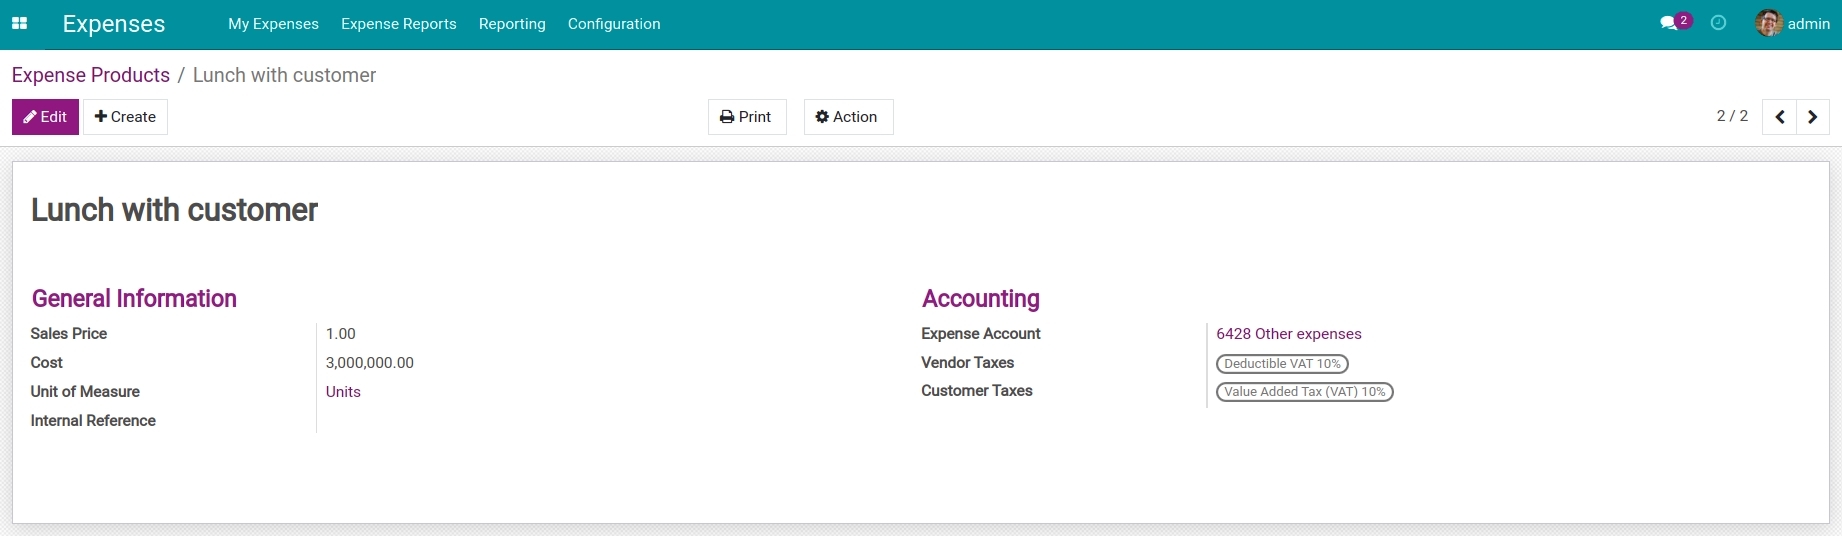
Cost: Value price of product in expense record.
Internal Reference: Internal Reference used in company.
Expense Account: Account to record the expenses incurred, e.g. 6428, 6418.
Vendor Taxes: Fulfil the taxes information of vendors, e.g. Deductible VAT 10%.
Customer Taxes: Fulfil the taxes information of customer, e.g. Value Added Tax VAT 10%.
Click on Save to store information.
After the setting is done, employees could generate the expenses.
Create expenses by employees
Navigate to Expenses app and click on the Create button.

The information to be filled in is as follows:
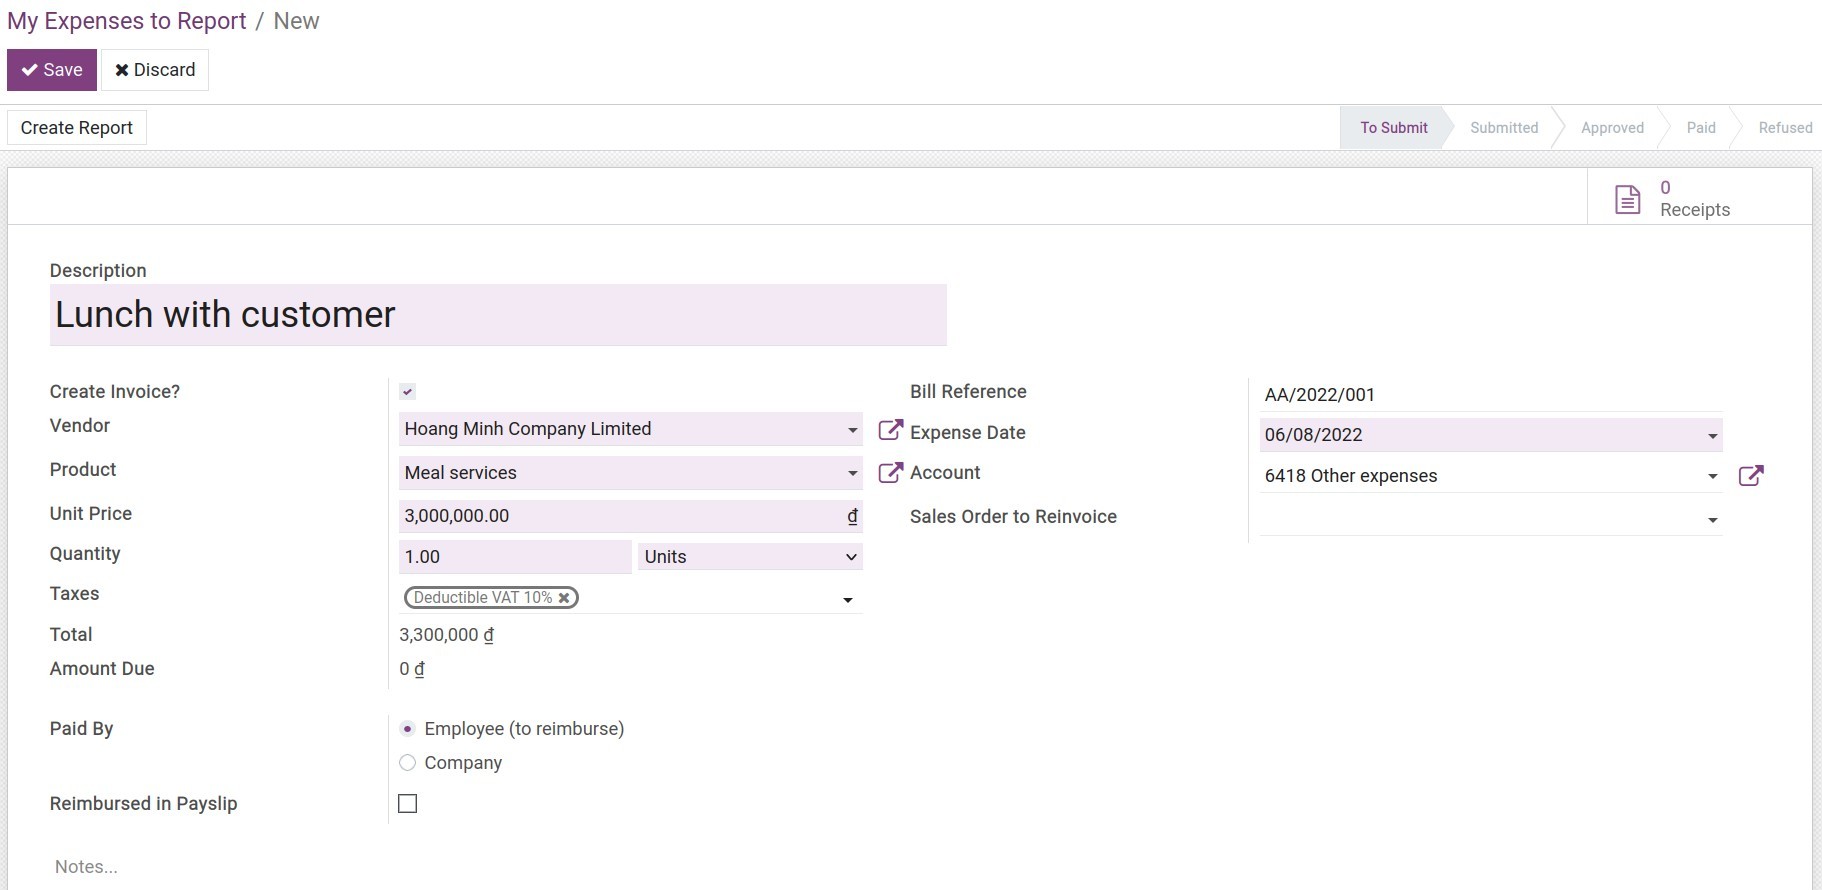
Create Invoice?: Choose this option if your expenses have invoices. When you check this box and post this expense, one invoice will be created automatically on the Vendor bills menu of the Accounting App.
Description: Briefly describe the expense information, e.g. Lunch with the customer;
Product: Select the corresponding expense product;
Unit Price: The amount paid;
Quantity: The number of expense products;
Total: The total including taxes;
Amount Due: The residual amount after paying;
Bill Reference: The invoice code issued by vendors;
Expenses Date: The date of expense incurred;
Paid By: Depending on the object of paying, you can choose one of two options:
Employee (to reimburse): Choose this option if the employee directly paid for vendors;
Company: Choose this option if the company directly pays for vendors.
Notes: Take some notes on the expenses.
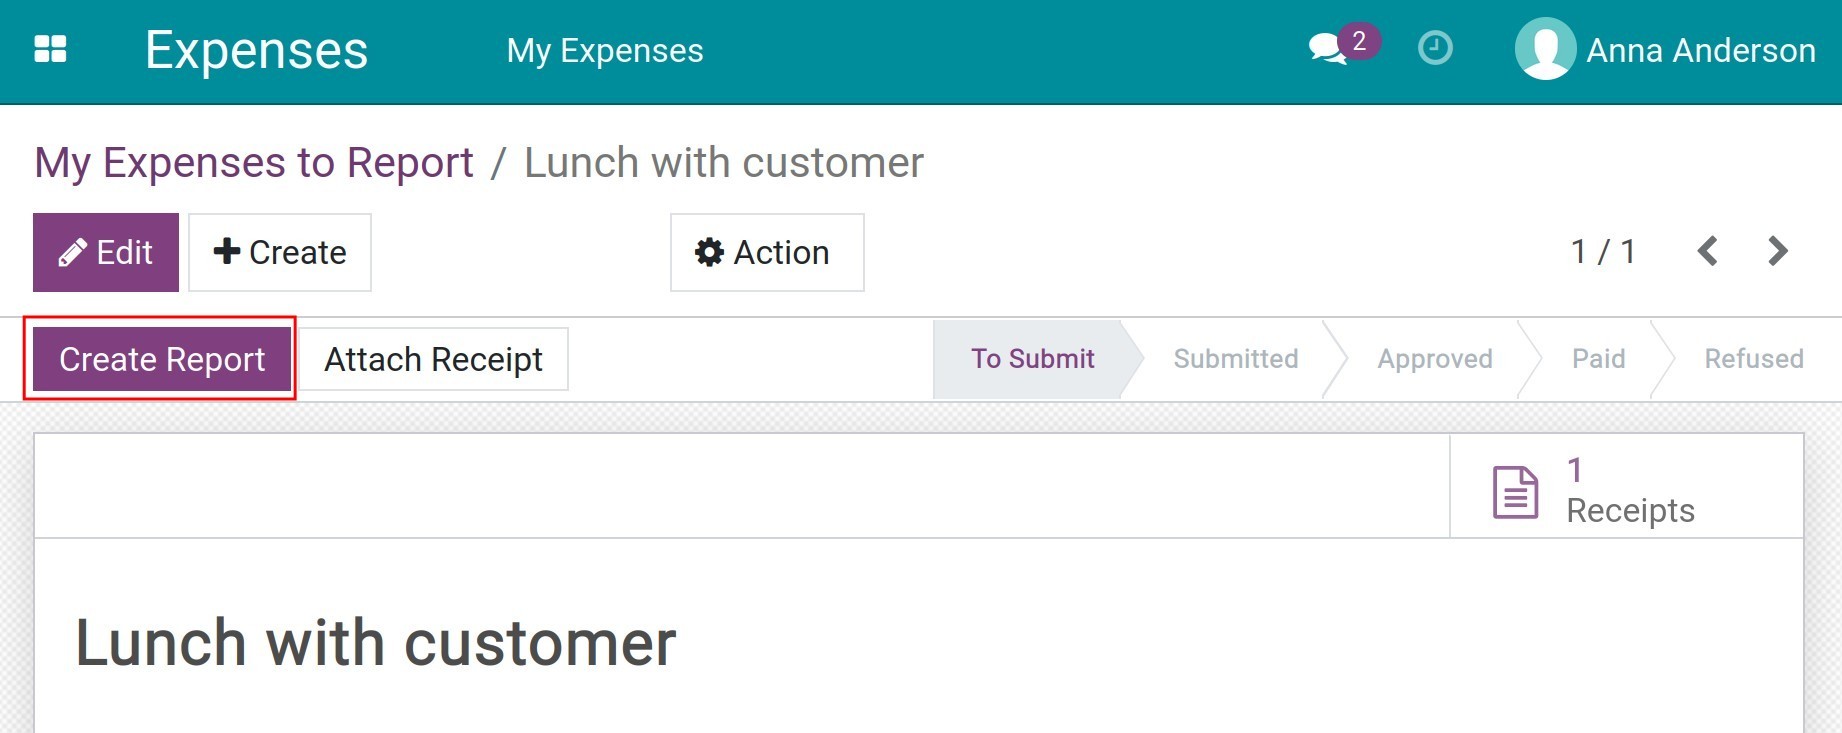
Click on Save to store information. If you want to attach issued bills/invoices, click on the Attach Receipt to add images/documents before submitting them to the manager for approval.
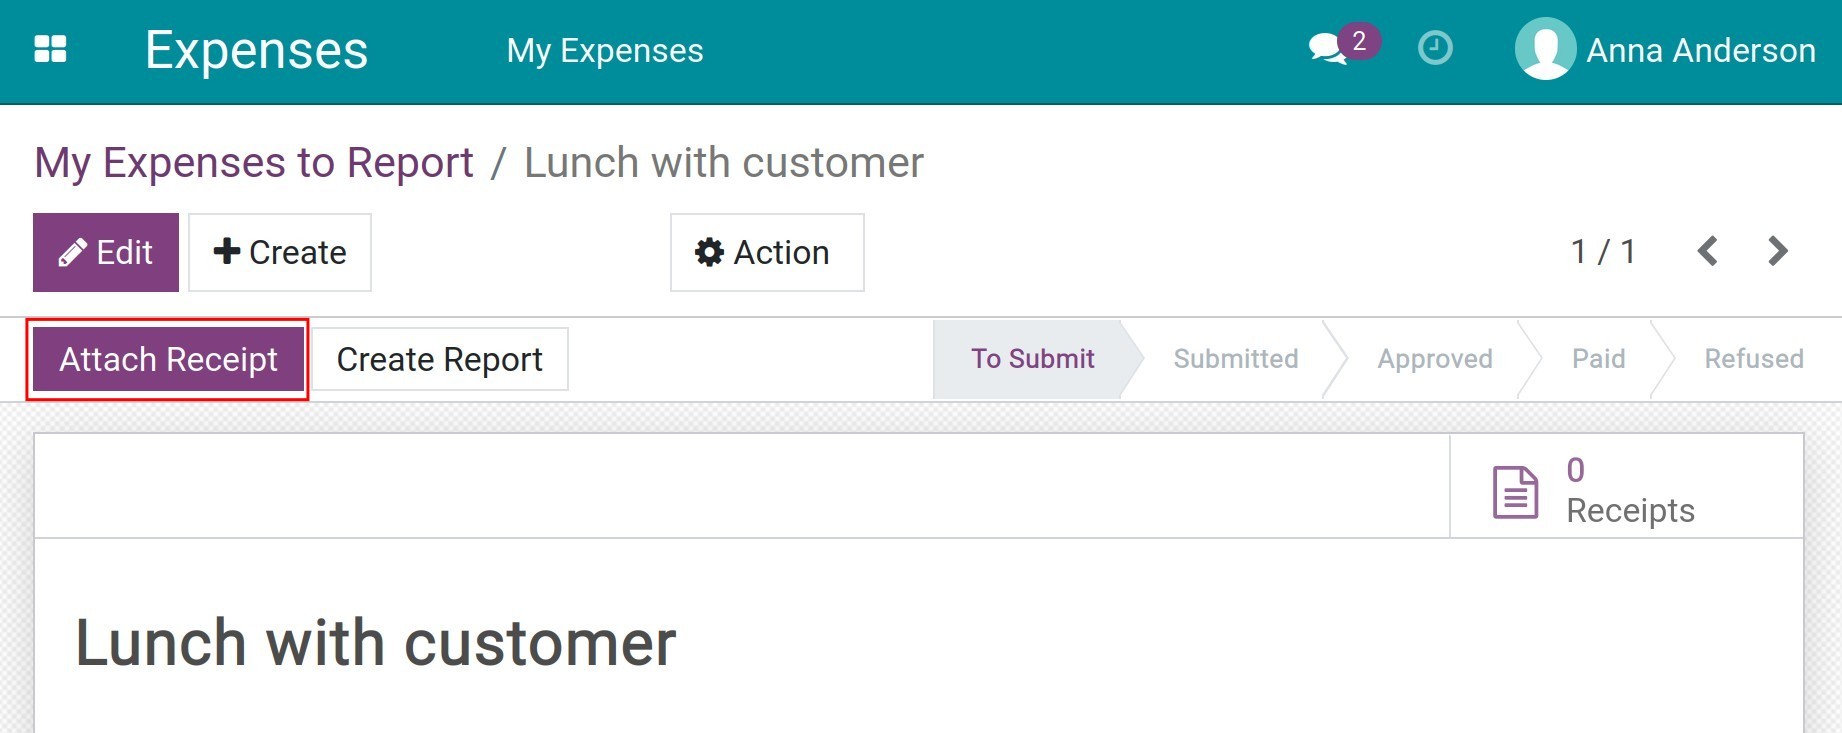
After attaching the receipt, click on Create Report to create a expense report.
Users could view the report that the upper manager needs to approve your expense reports. The upper manager according to the settings in department configuration and on the employee’s profile. Click on Submit to Manager to send the expense reports to the manager for approval.
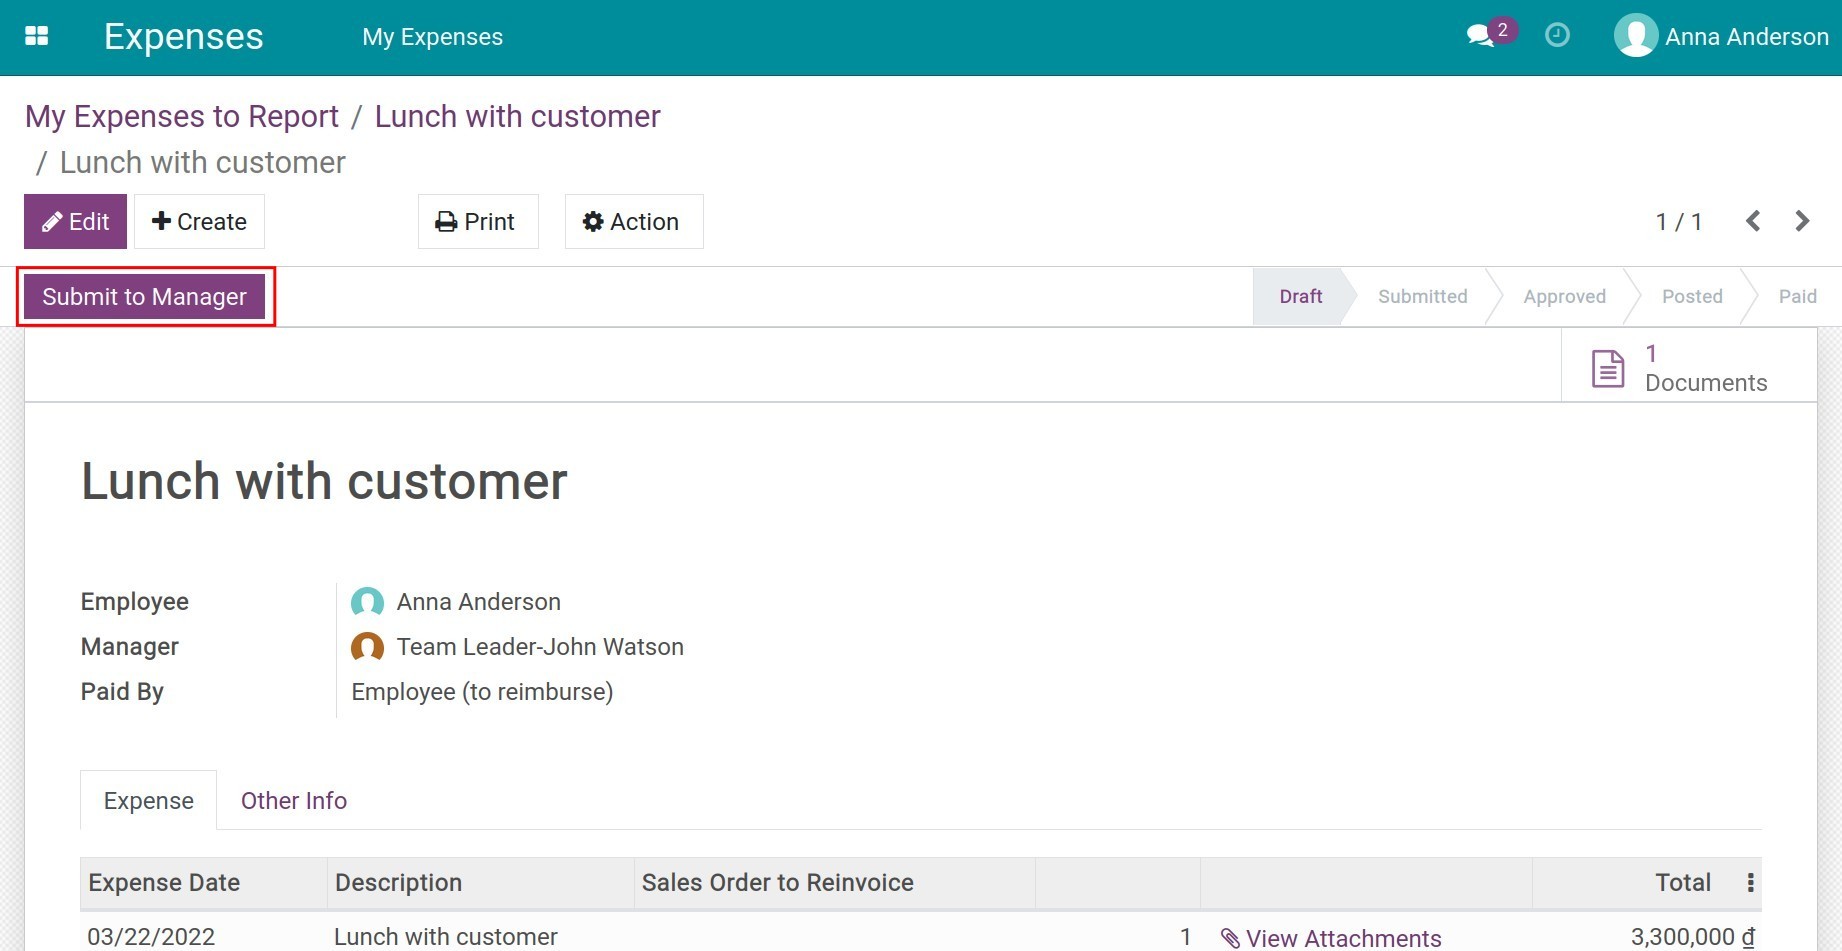
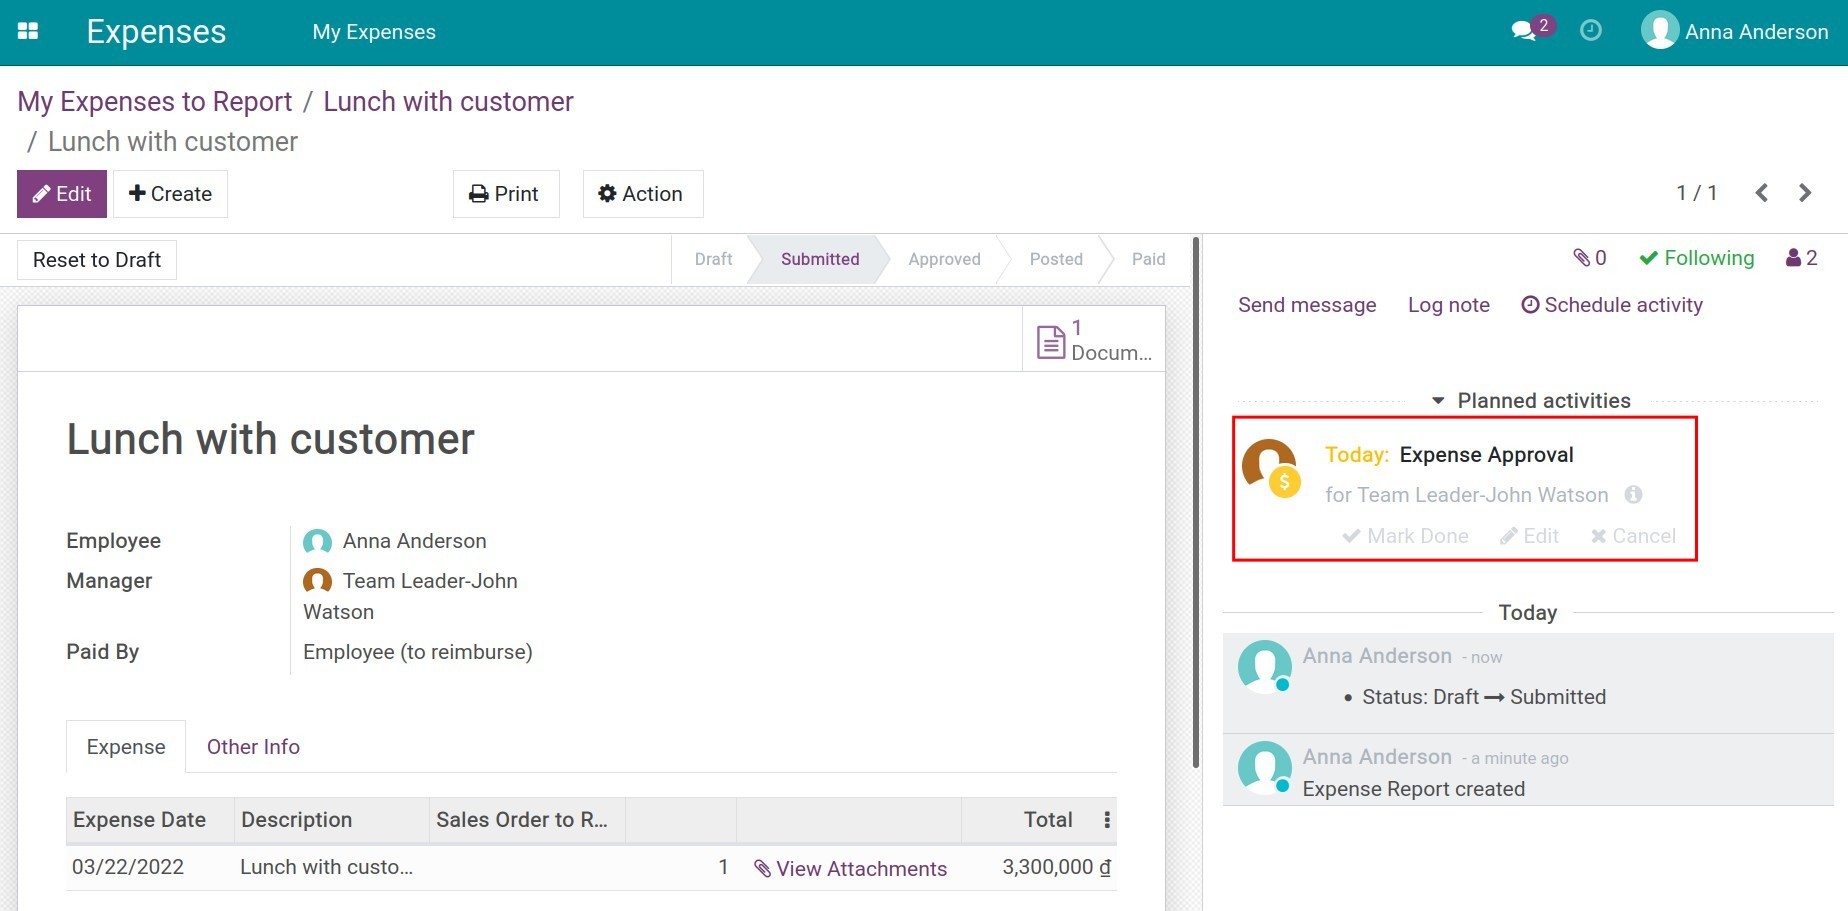
At that time, the system will schedule an activity automatically to the manager for approval and the status of the expense reports will be changed to Submitted.
Manager approves expenses
The manager will receive an activity assignment notification related to the expense report approval.

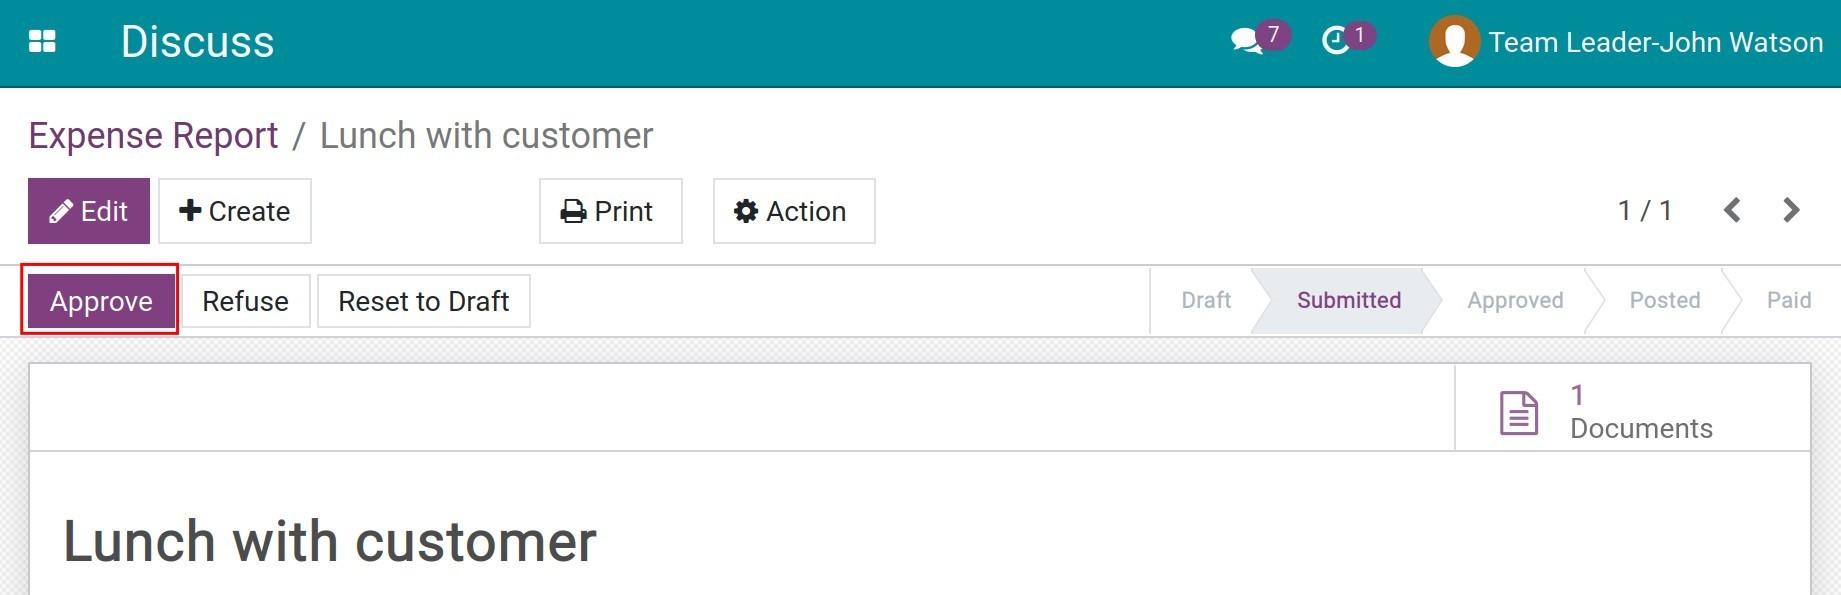
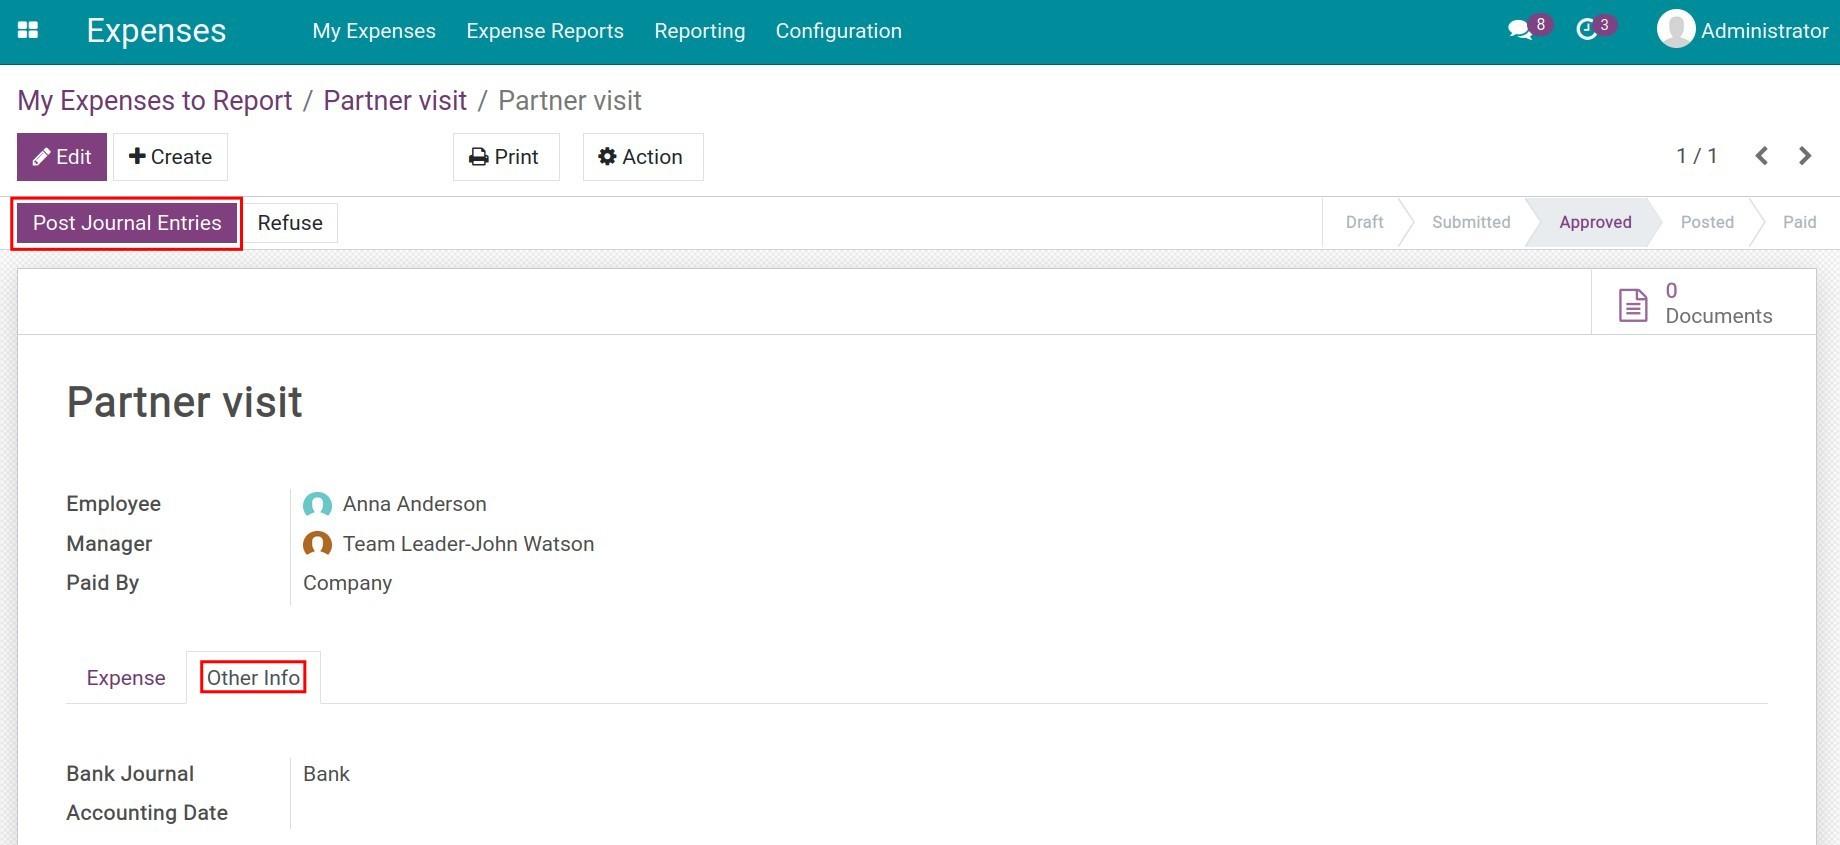
In the expense report, click on Approve or Refuse to approve the reports. At this time, the expense reports status will be changed to Approved or Refused and the activity assignment will be completed automatically.
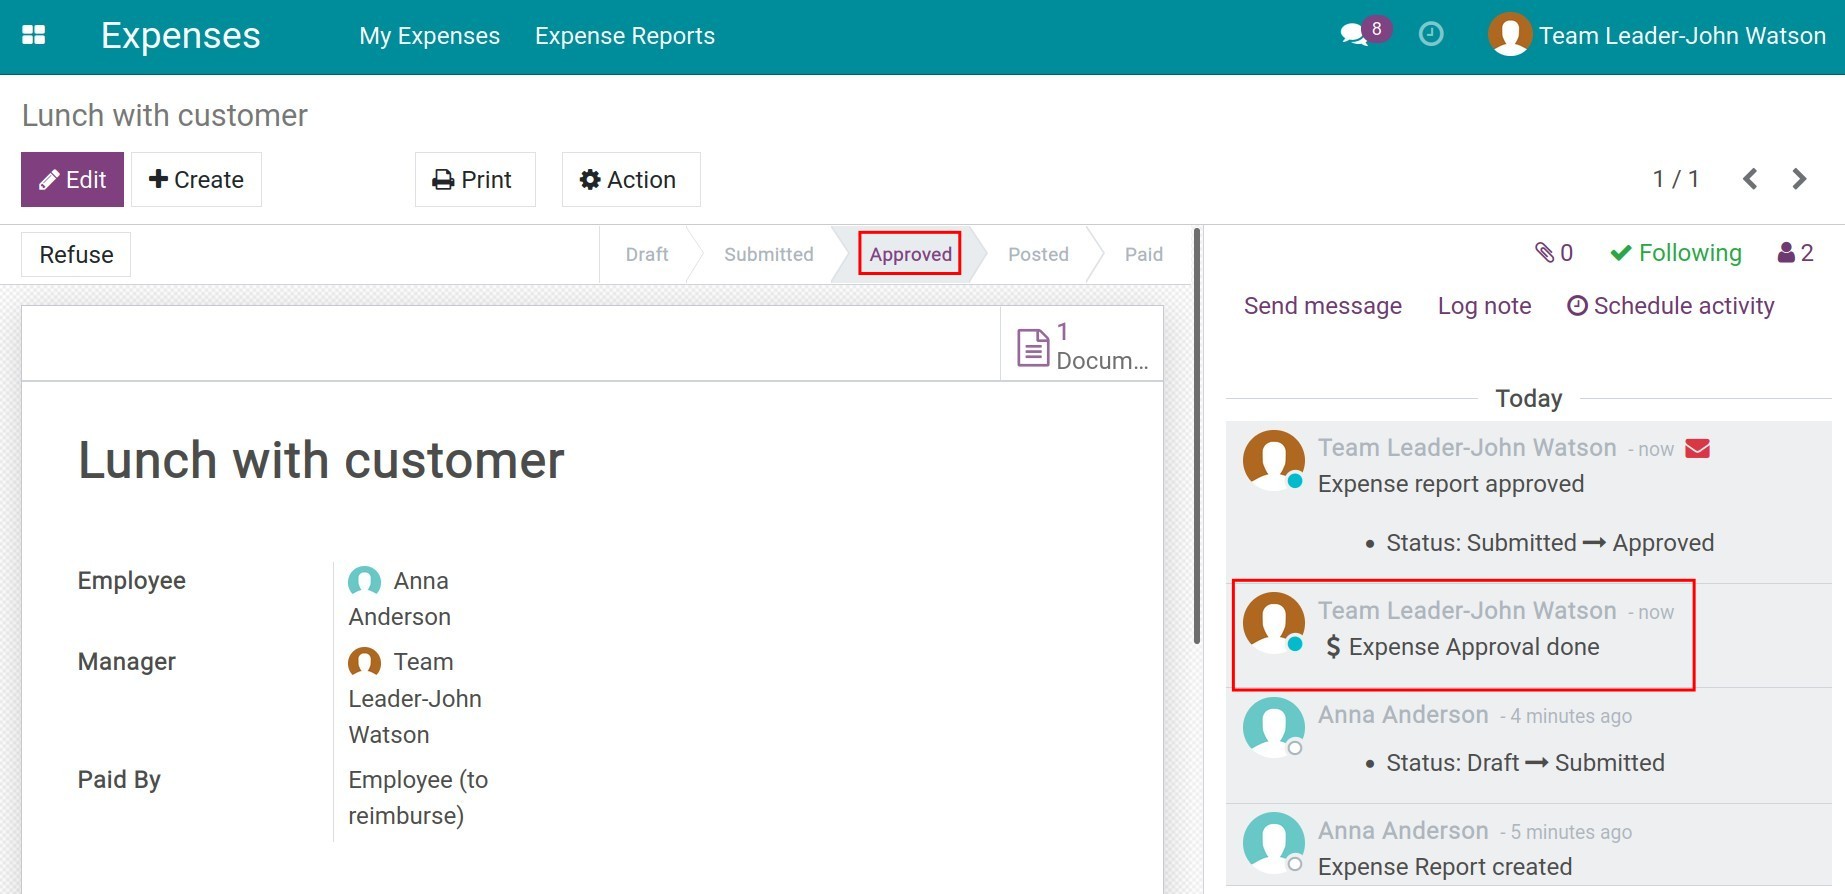
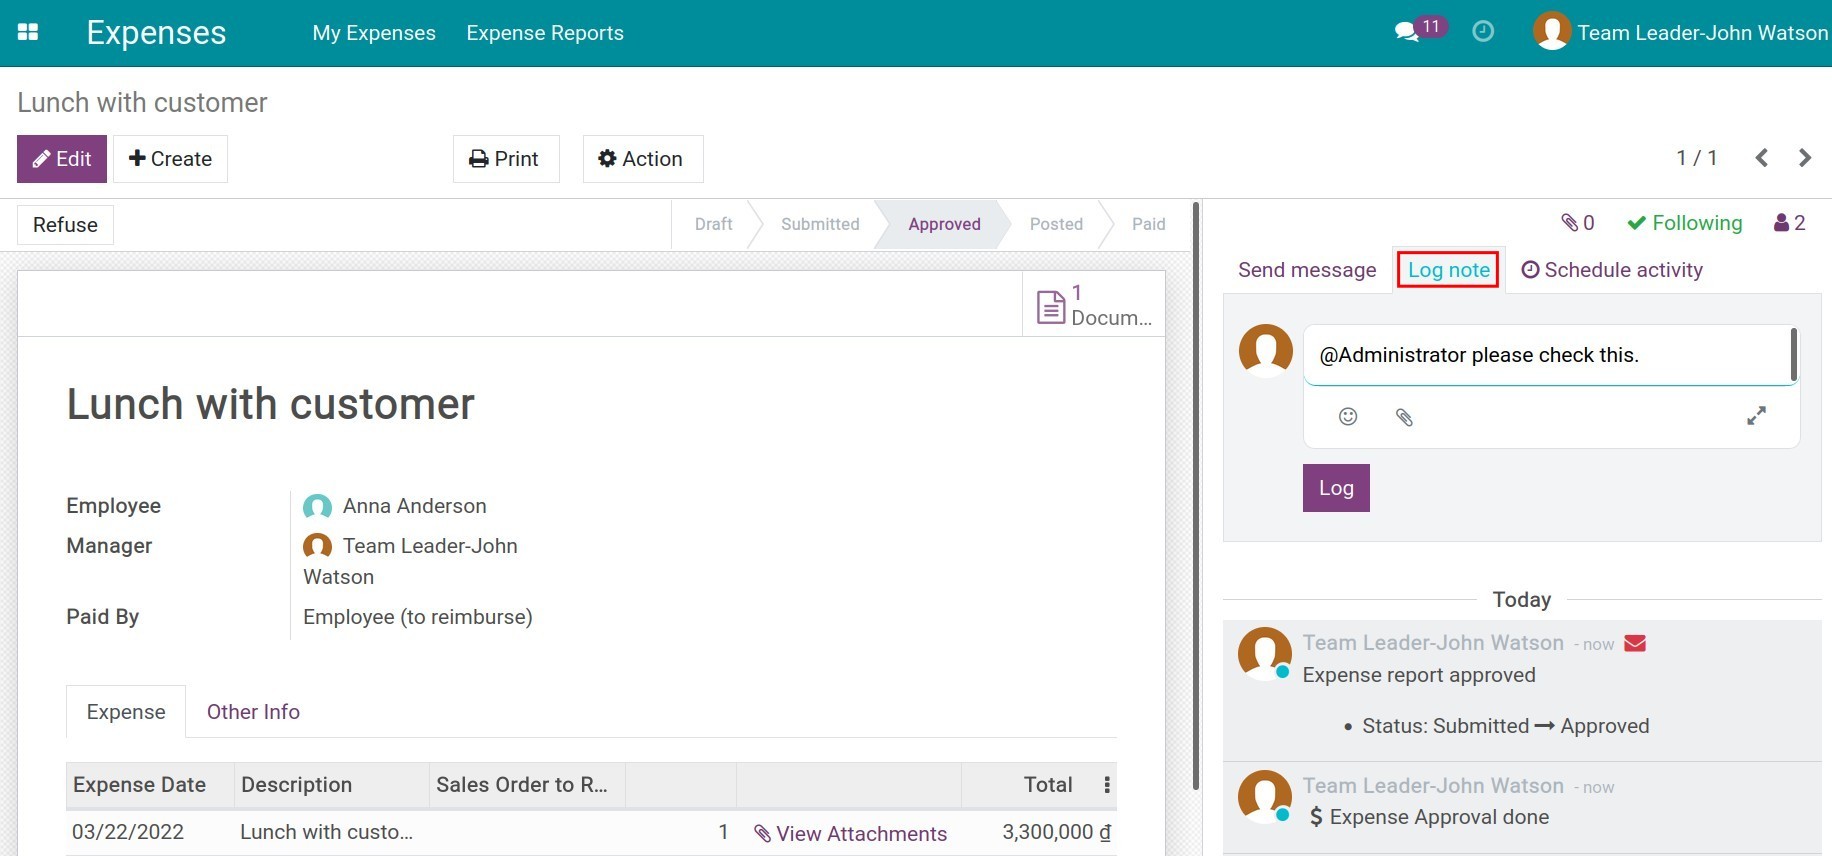
The manager need to inform about the expense to the accountant to post the new entries by using the Log note feature.
Accountant posts and records the payment
Expenses paid by employees
Posting expense report
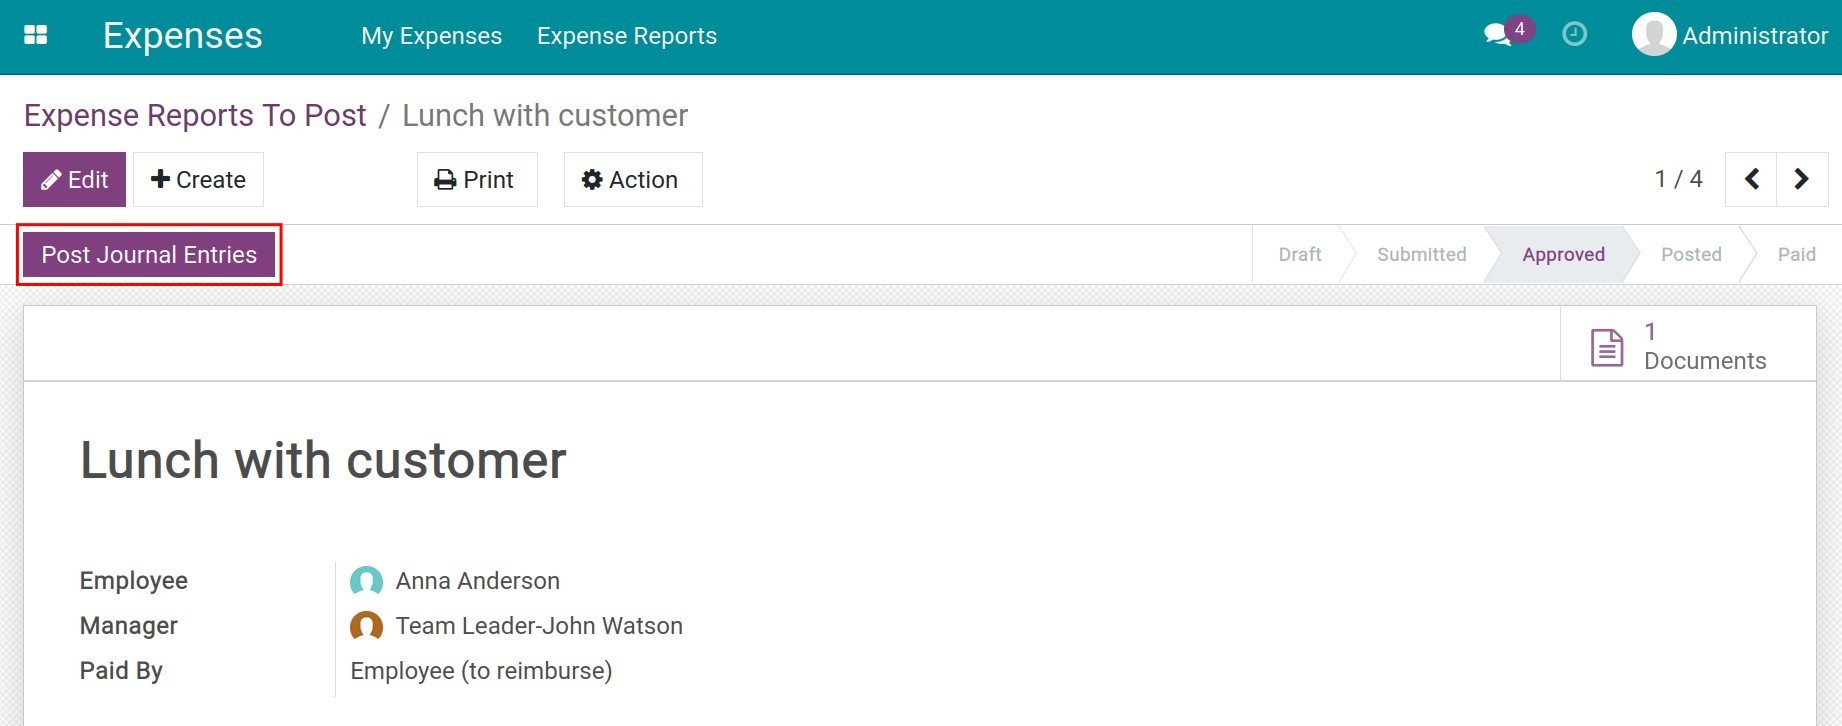
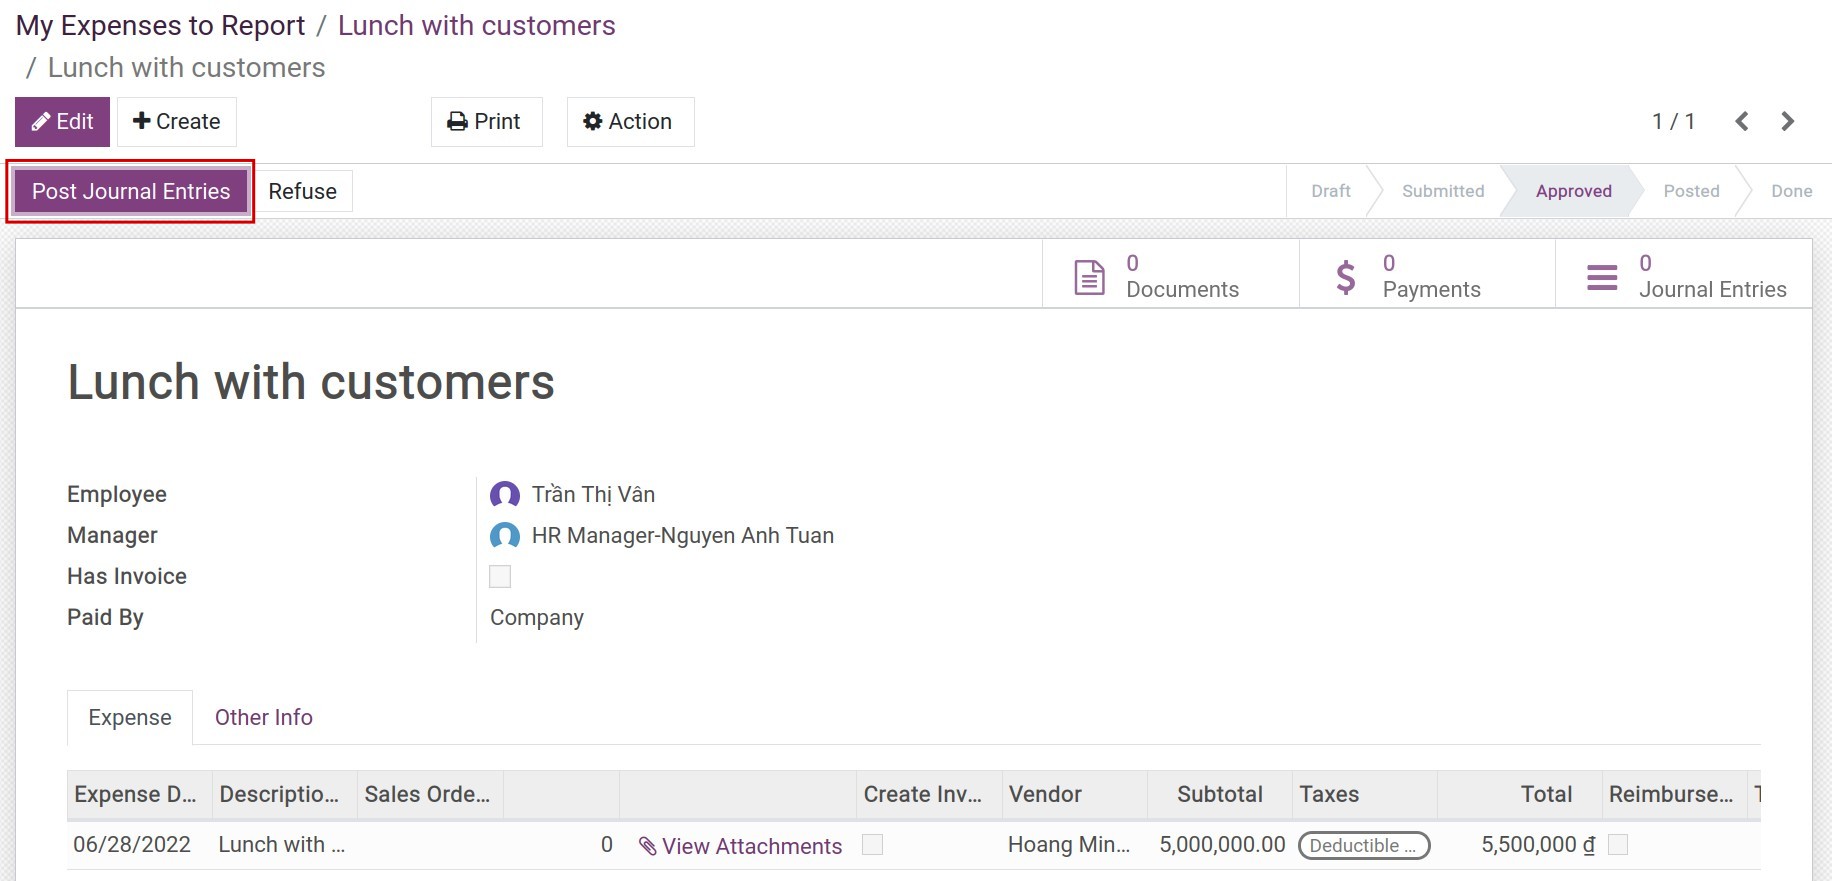
The accountant needs to navigate to and select the expense reports that needs to be posted.

In the expense report, click on the Post Journal Entries to post the entries.
Expense with invoice
After posting, in the Other Info tab, the posting date will be shown up in the Accounting Date field. You also can see the related journal of this expense report include Vendor Bills and Expense Journal.
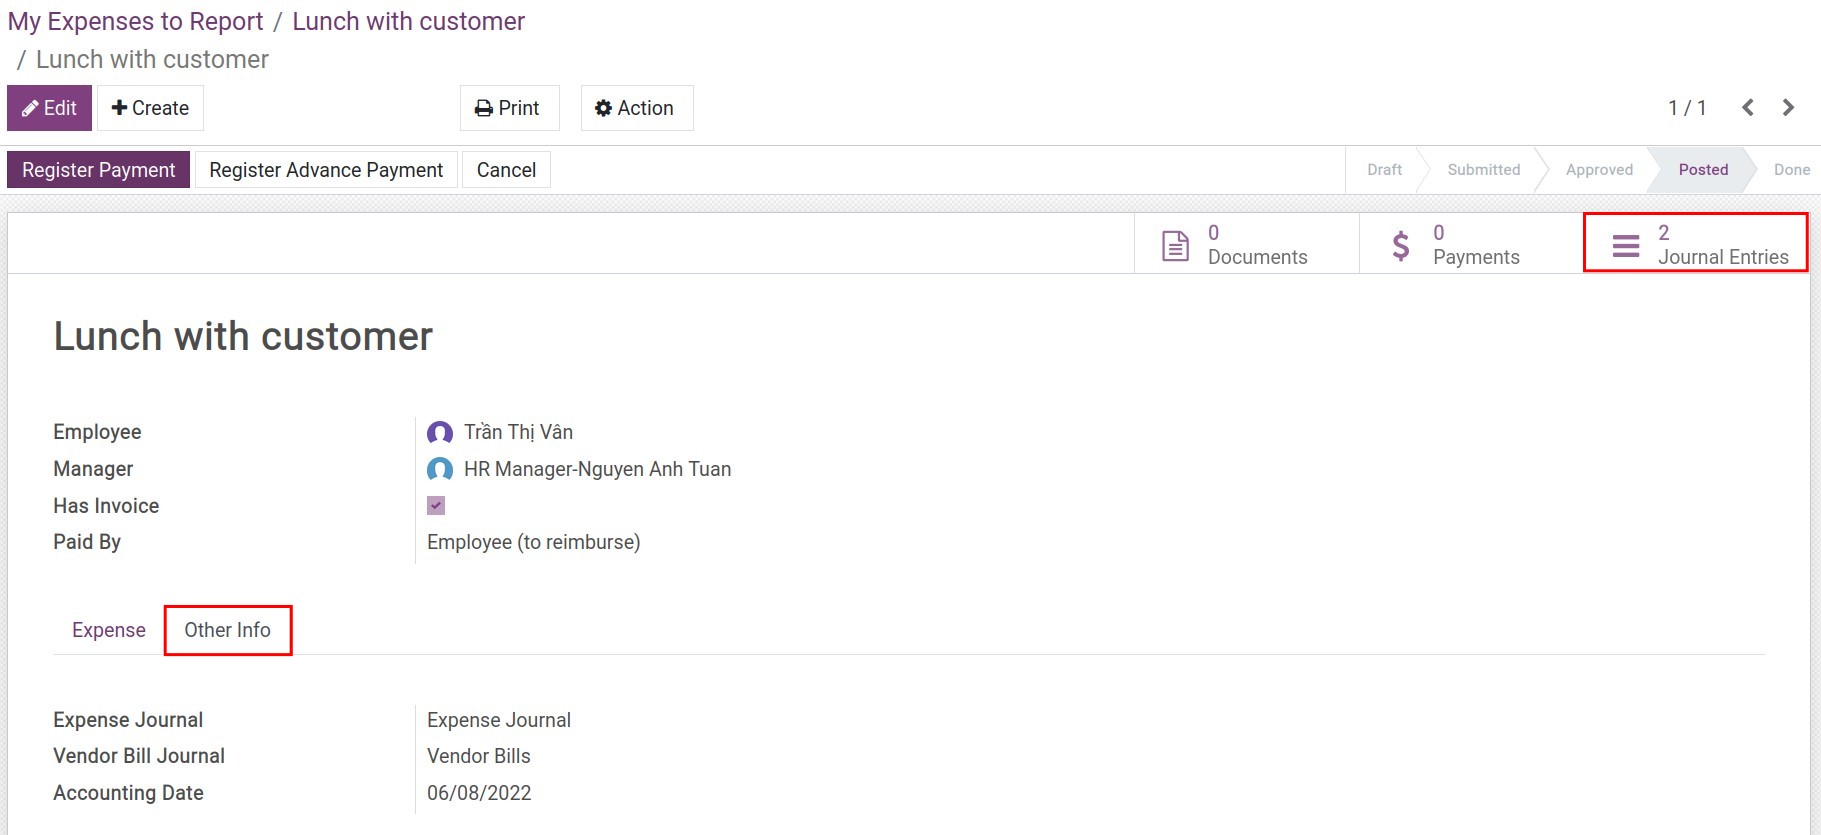
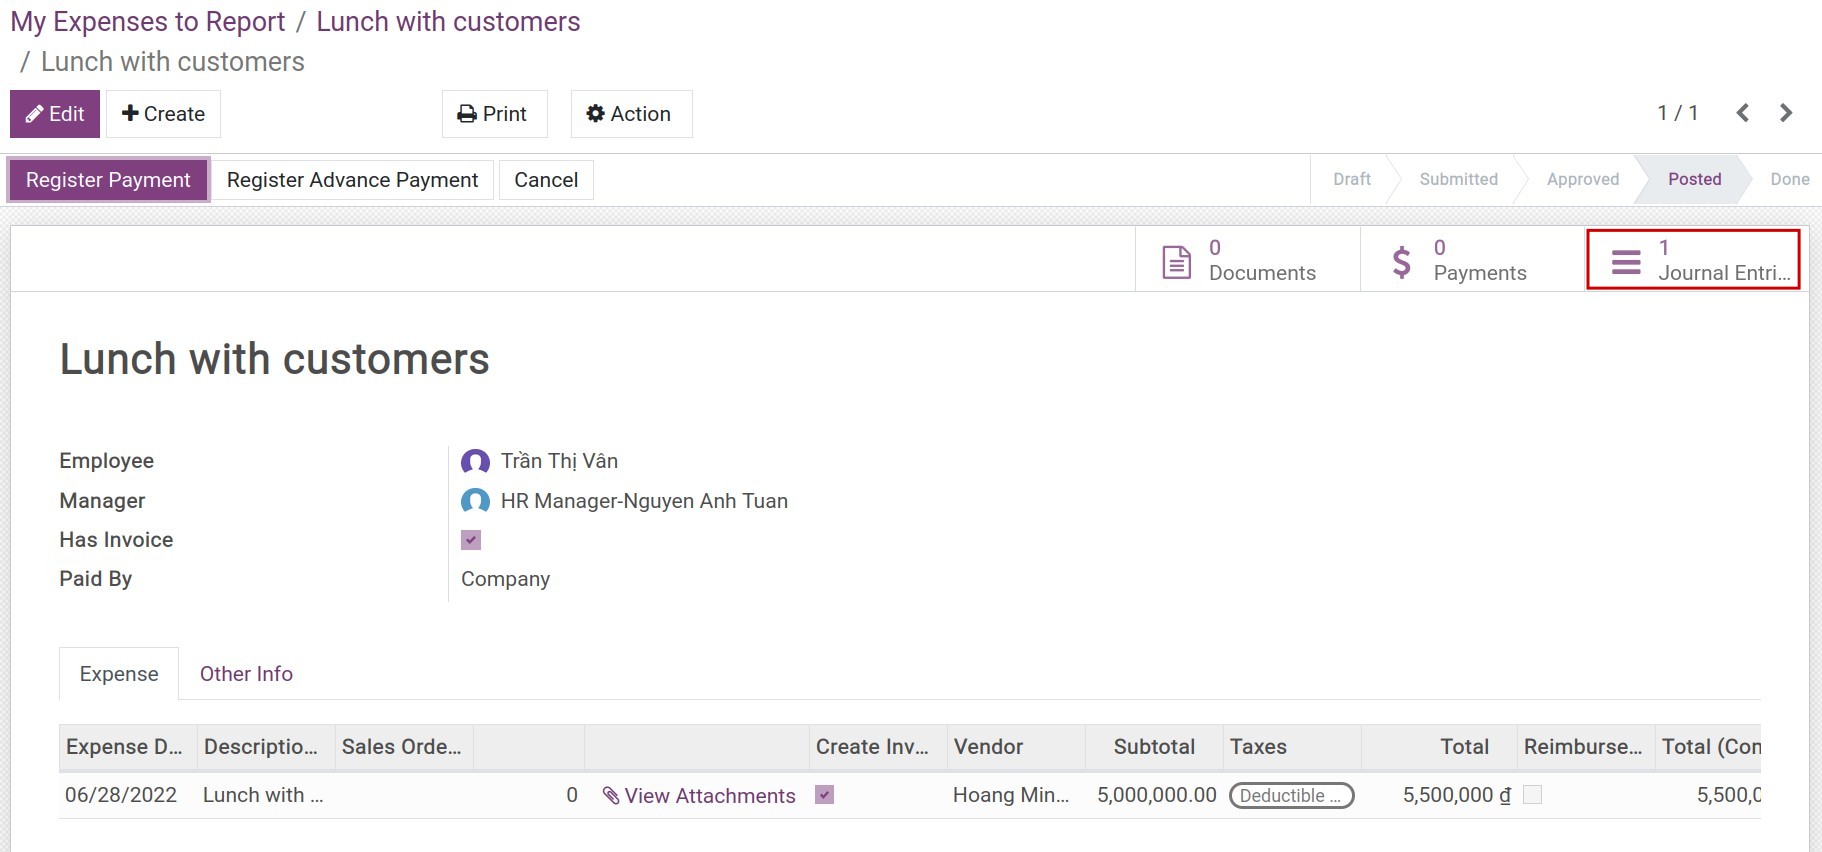
You can click on Journal Entries to see the list of entries of this expense report.

Expense without invoice
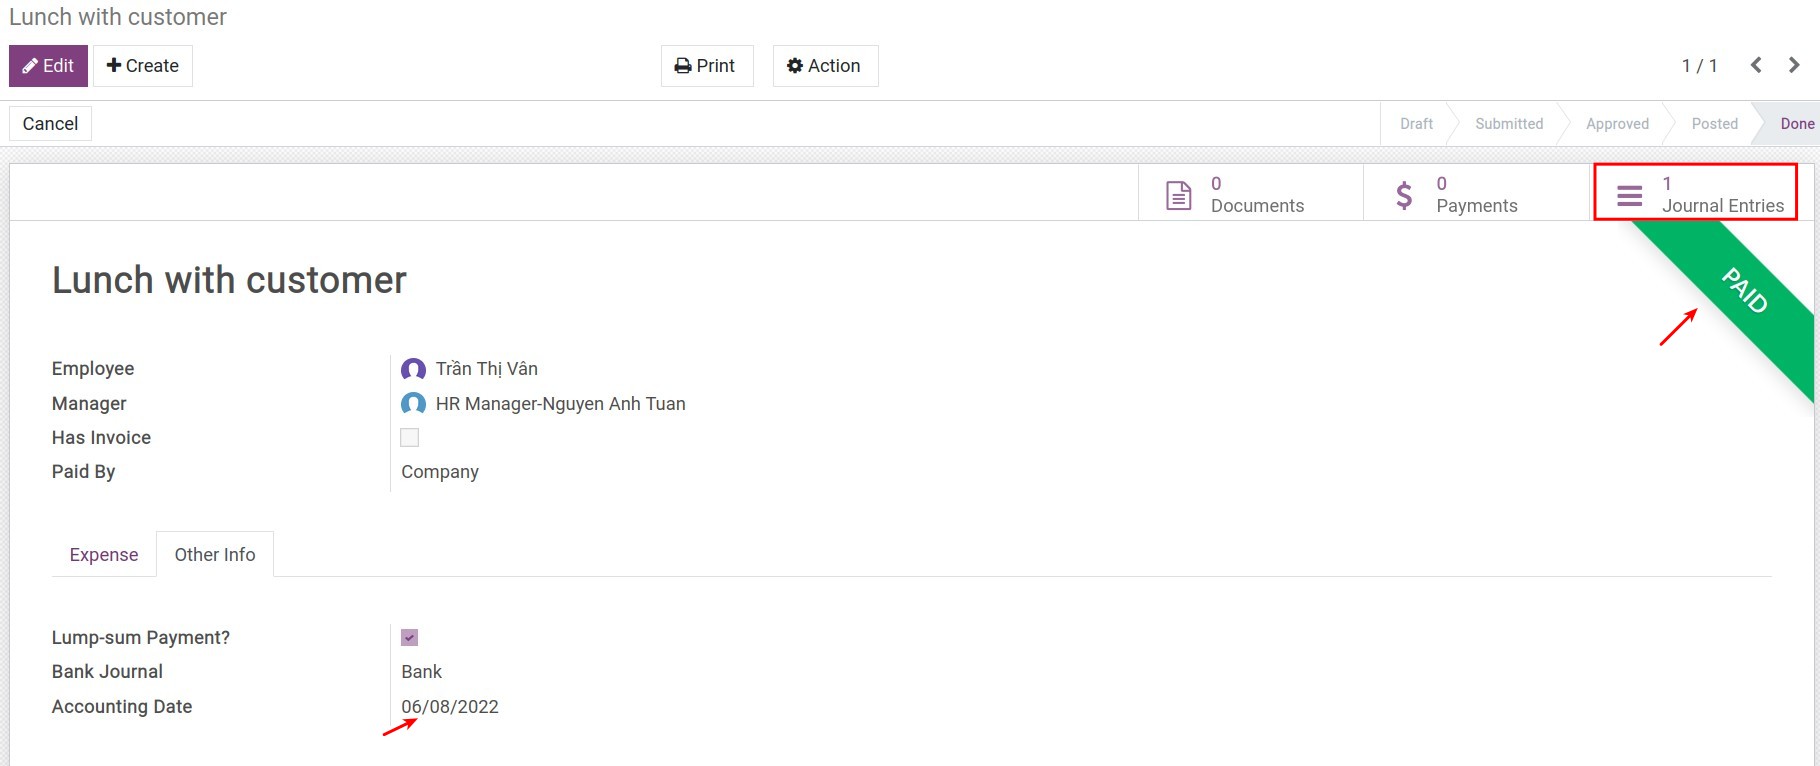
After posting, in the Other Info tab, the posting date will be shown up in the Accounting Date field. You also can see the related journal of this expense report is only Expense Journal.
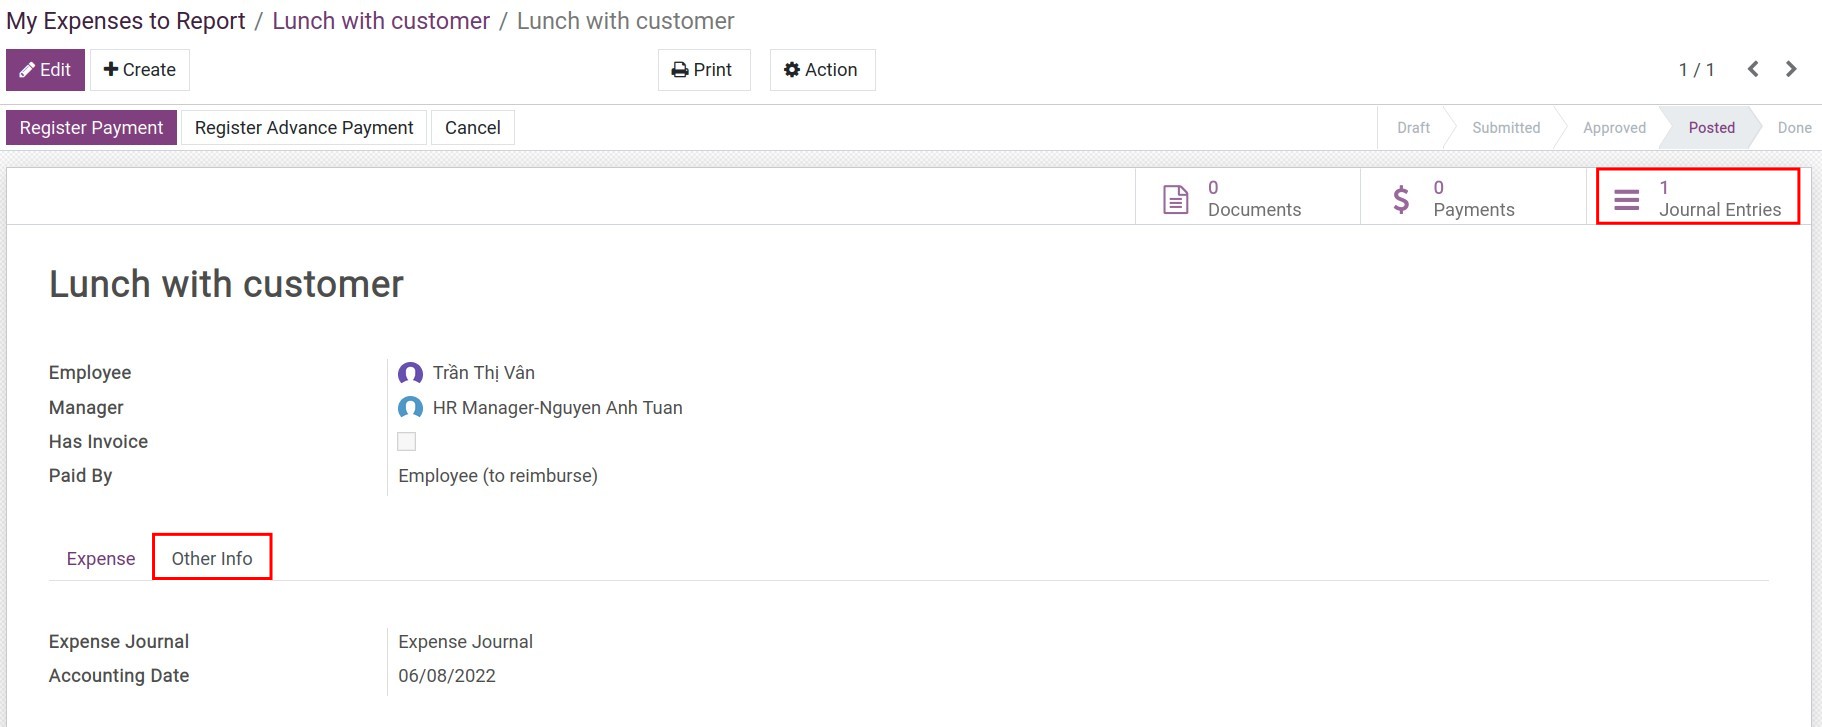
Click on Journal Entries to see an entry for this expense report.
Registering payment
In case the employee had advanced, click on Register Advance Payment to record the payment by the advanced amount.

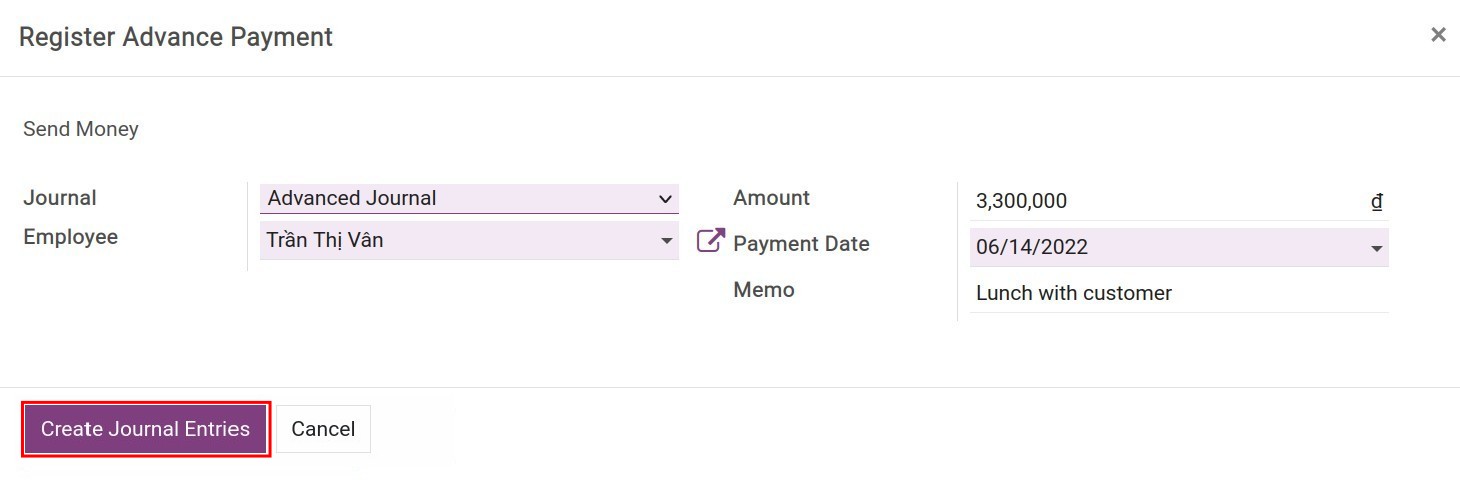
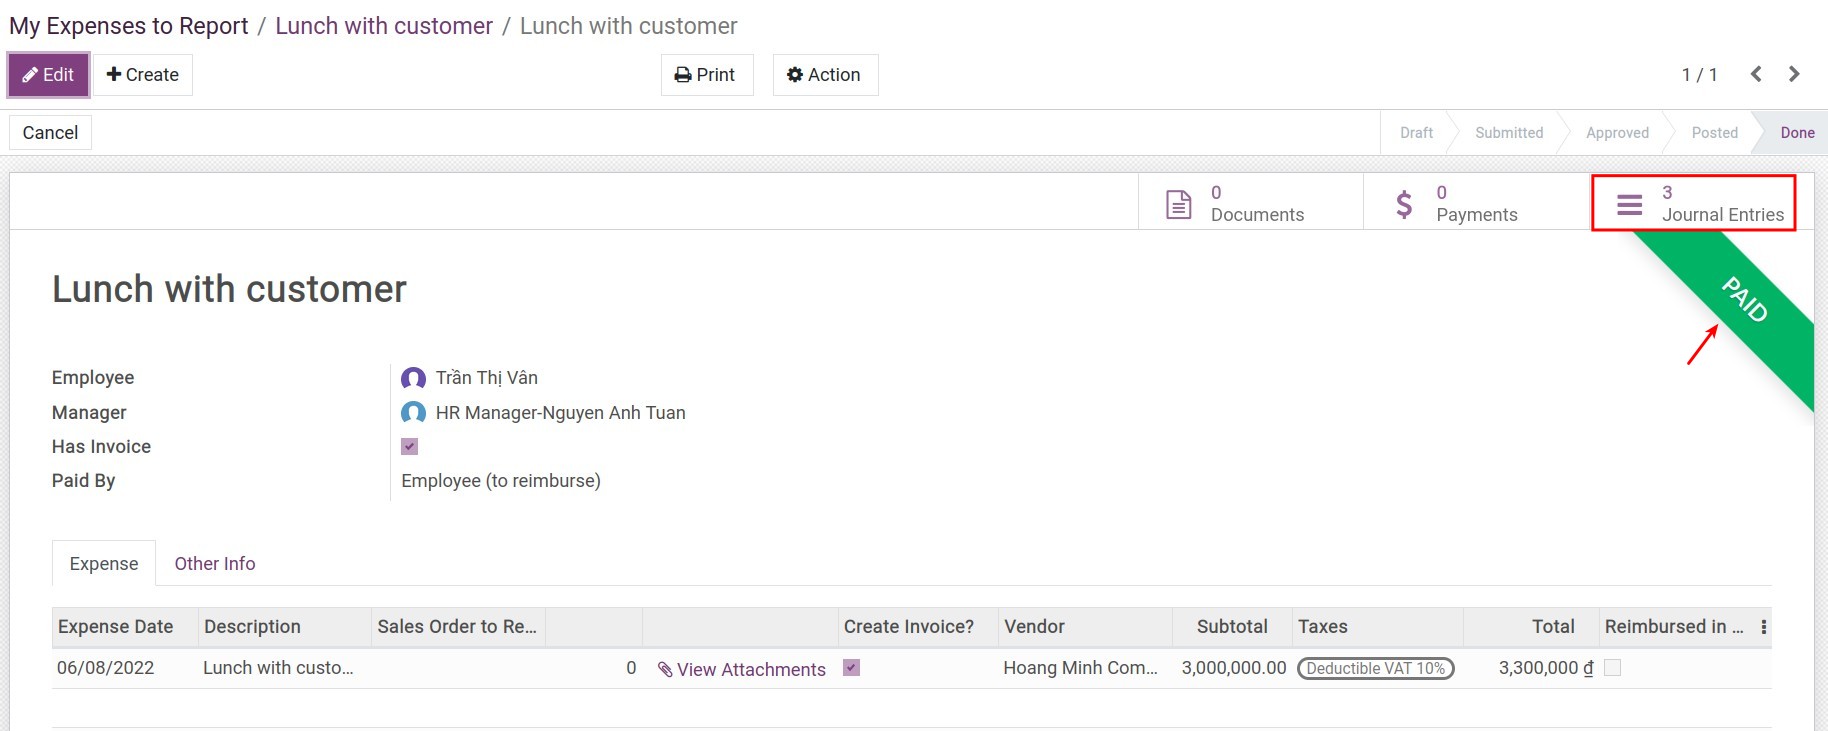
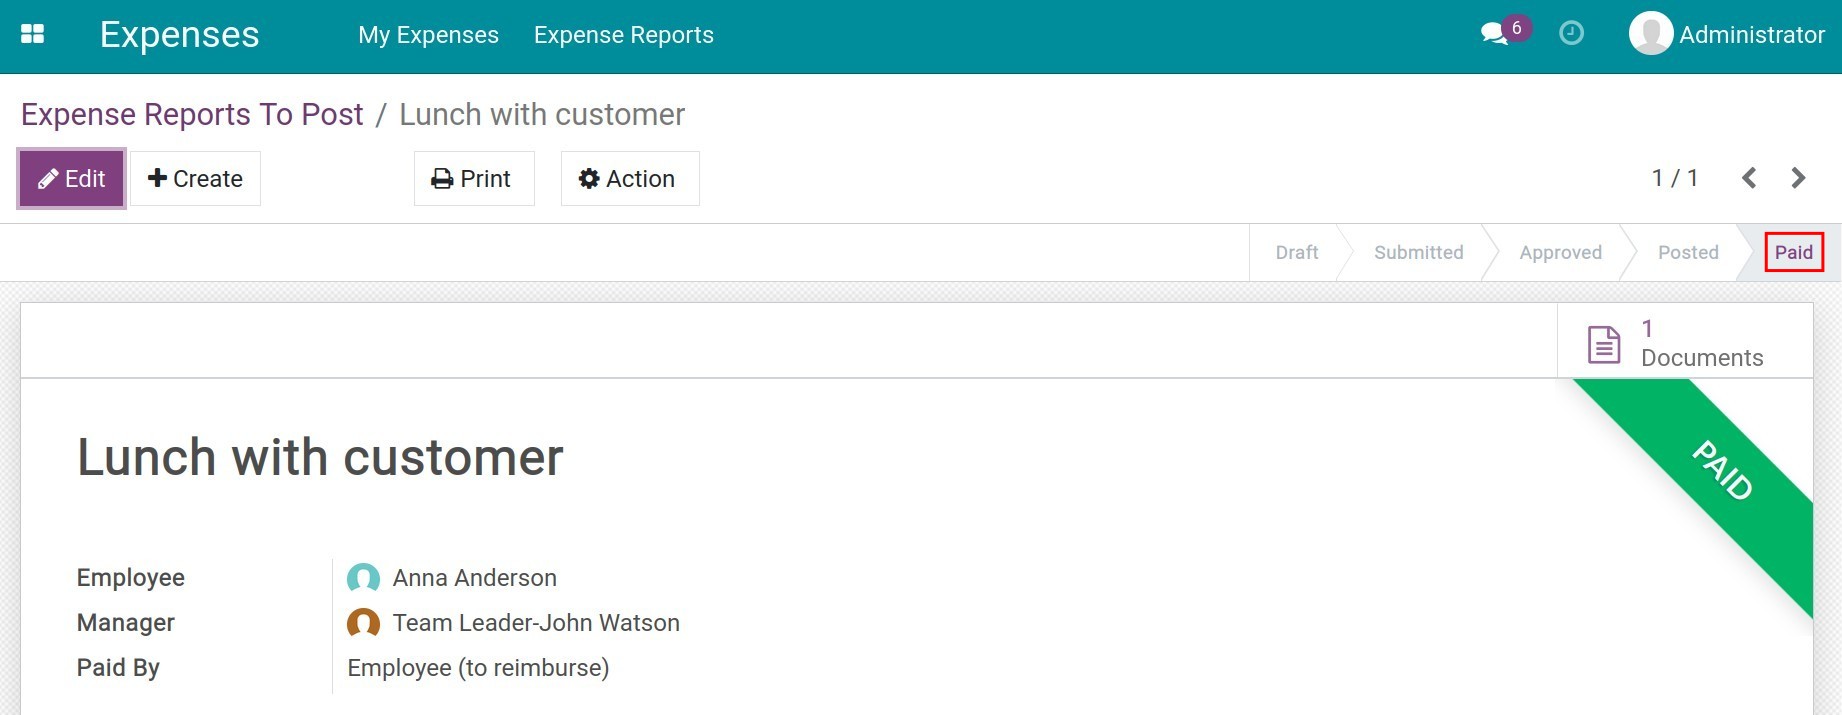
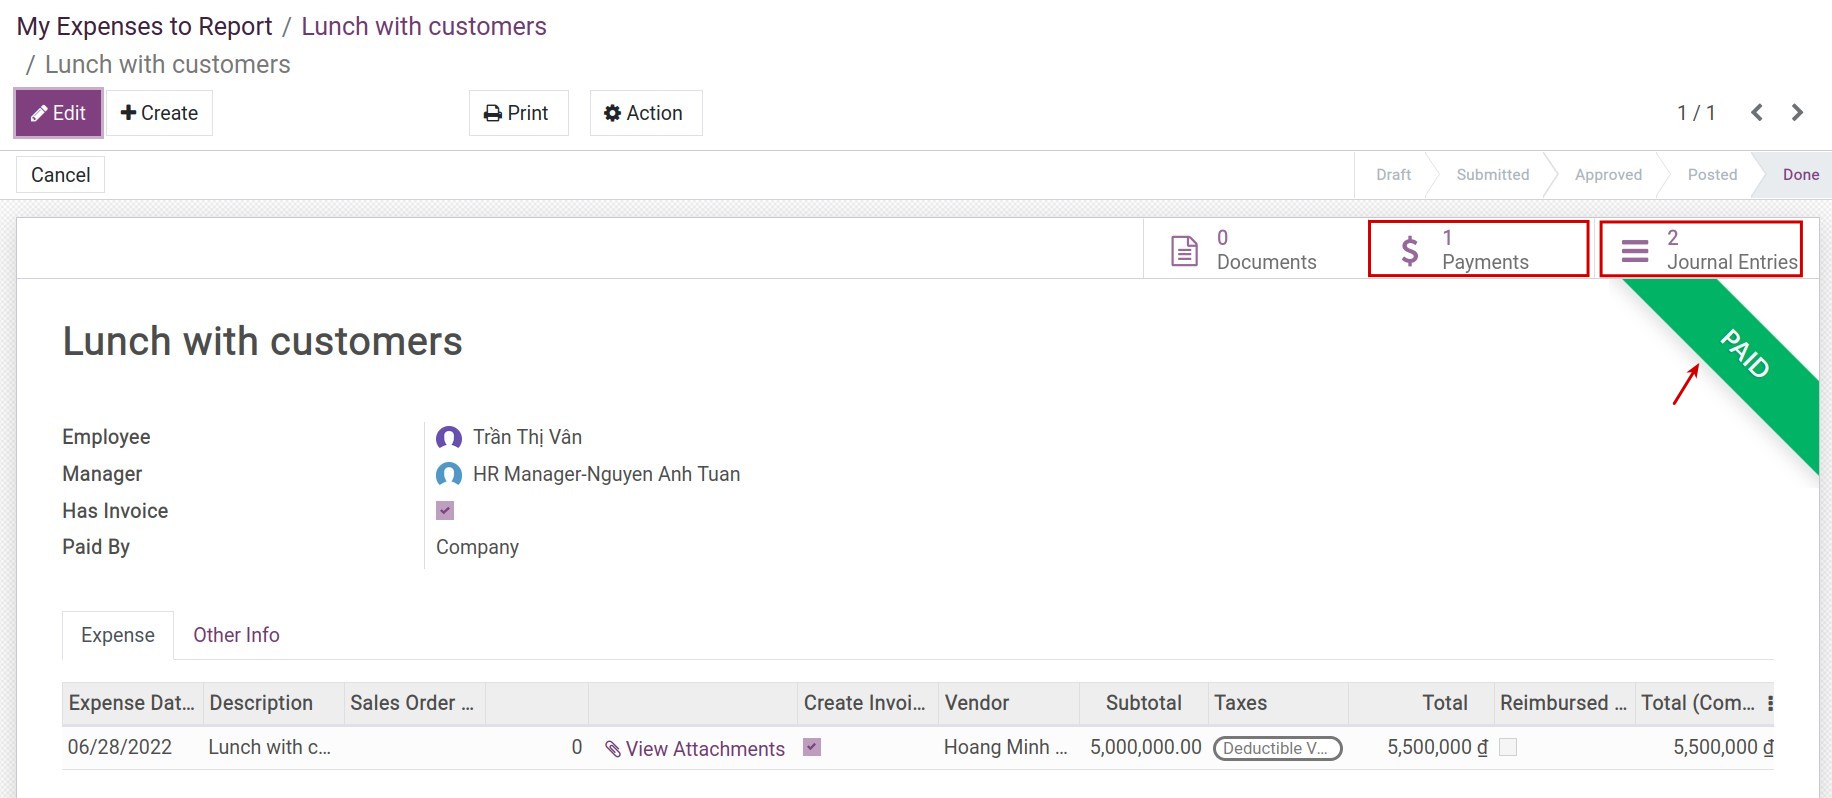
After press Creat Journal Entries, you can see the status of expense reports will be changed to PAID, and have a payment entry to finish this process.
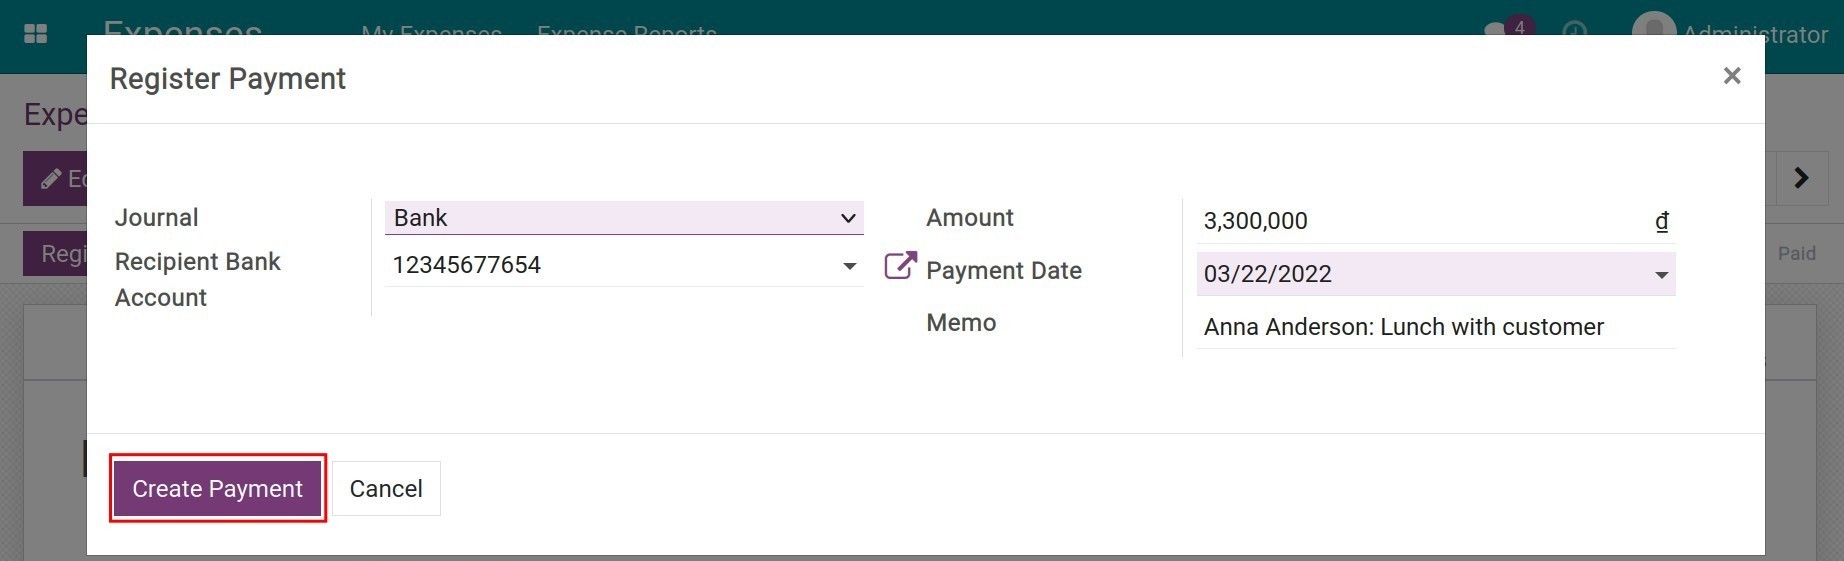
In case of not have an advanced amount, click on the Register Payment.

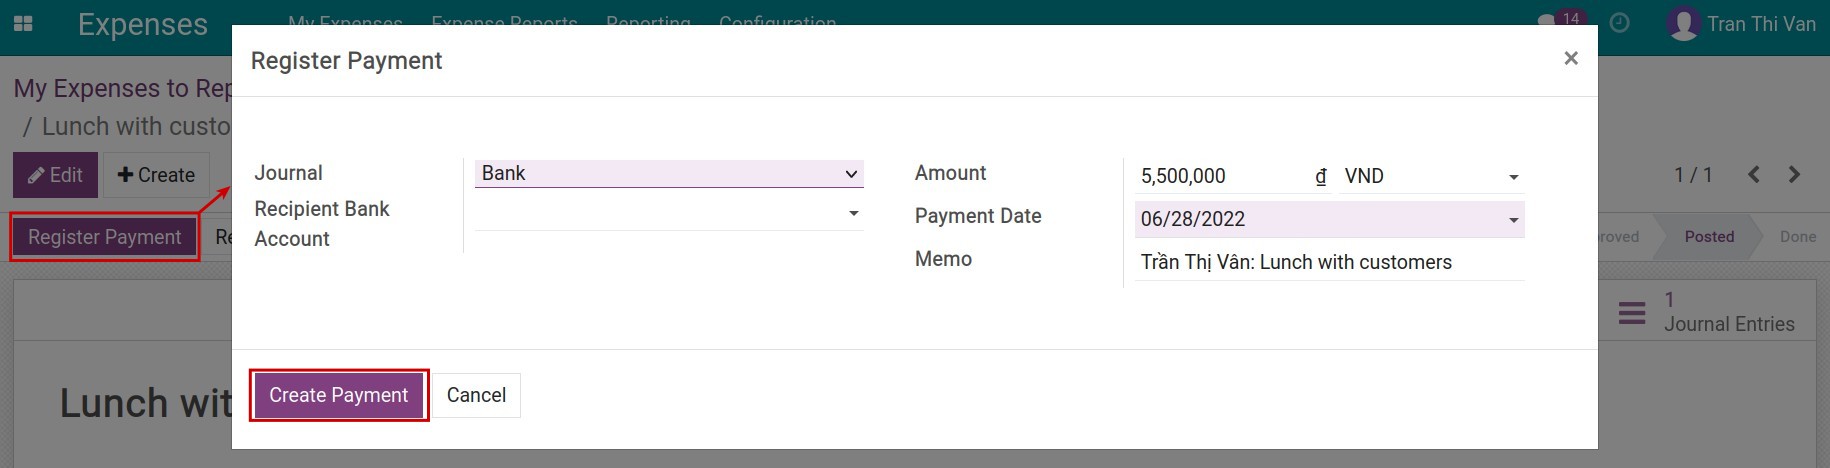
Select the Bank/Cash journal to record the payment method, enter the sum of money and the date of payment recording. With the Bank journal, the employee’s account will be auto-fulfilled in the Account field. The details of the bank account settings in the employee’s profile can be found in Create new employee.
The status of the expense report will be changed to PAID.
Expenses paid by company
The accountant needs to navigate to and select the reports that need to be posted.
Expense with invoice
Click on the Post Journal Entries to post the entries.
After posting, you can see a journal entry of the generated vendor bill when click on Journal Entries:
To register payment for this expense report, press on Register payment, a payment view will be opened:
After that, you can press on Payments to see the payments and on Journal Entries to see the list of related journal entries.
Expense without invoice
In the expense report, at tab Other info, you can choose another journal at Bank Journal field, and click on the Post Journal Entries to post the entries:
After posting journal entry, the expense report will be finished. To see the journal entry, click on the Journal Entries field. The status of expense report also change to PAID at the same time.