Create labour contract
Viindoo software with the employee contracts management feature will help you to:
Keep track of contracts history.
Manage payroll contributions and salary information.
Manage the contract throughout the whole process from when it is signed until it’s expired, extended.
How to create a contract
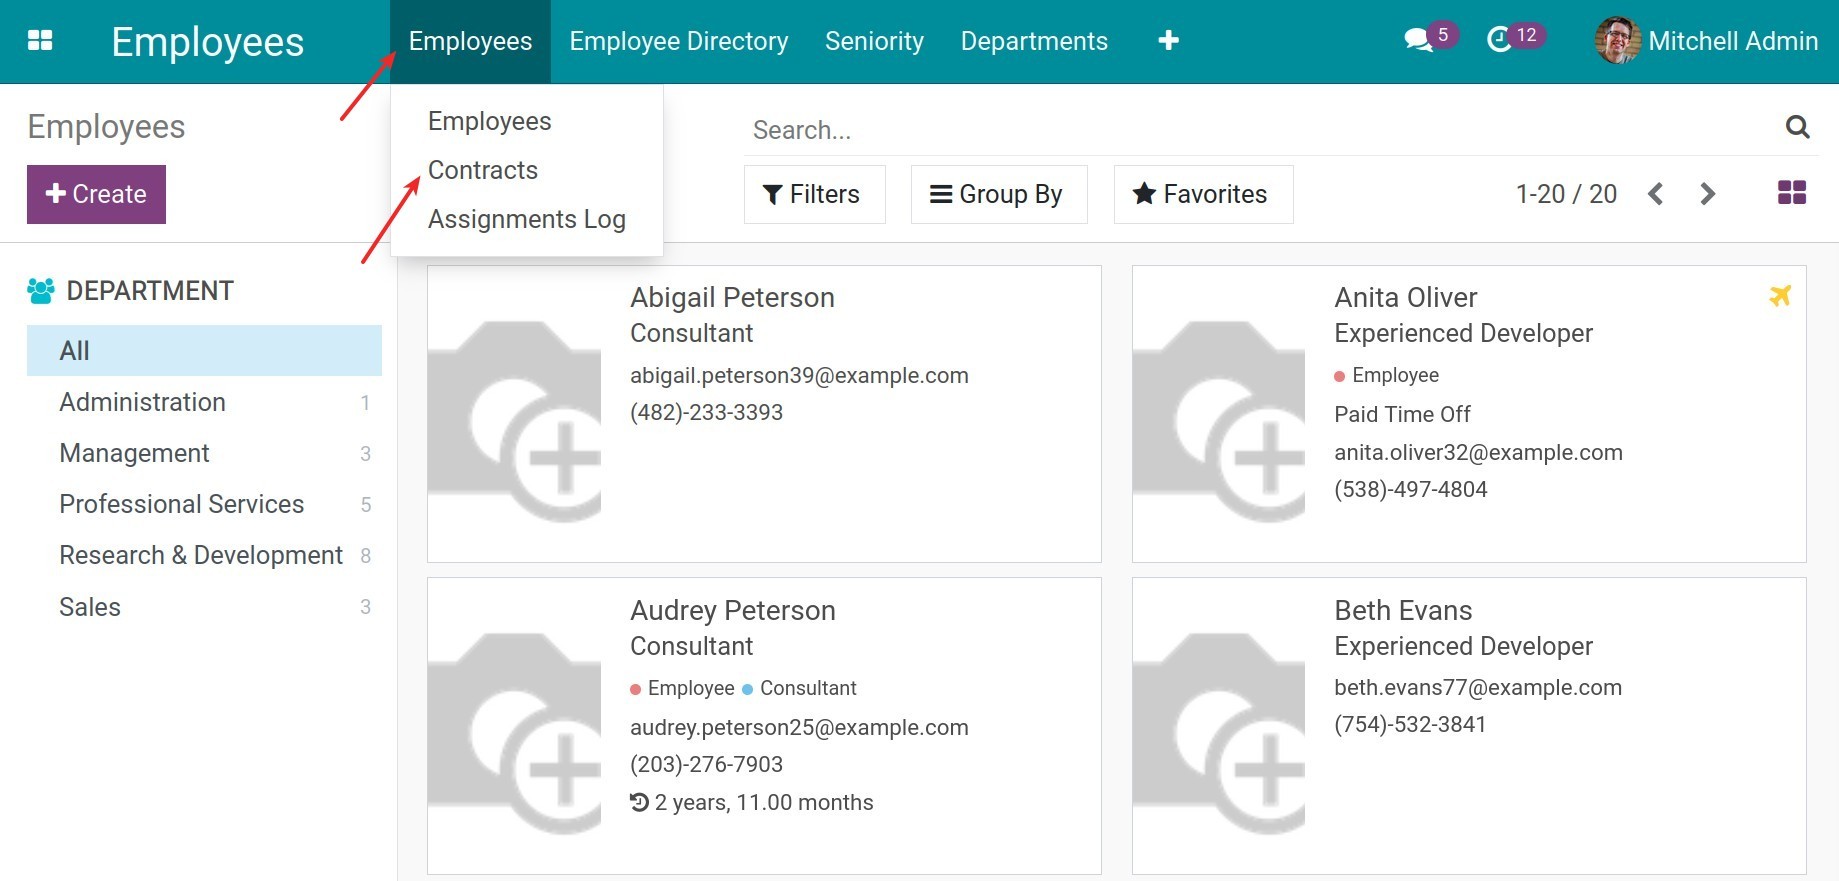
To create a Labor contract (or Contract), access Employees > Employees > Contracts.
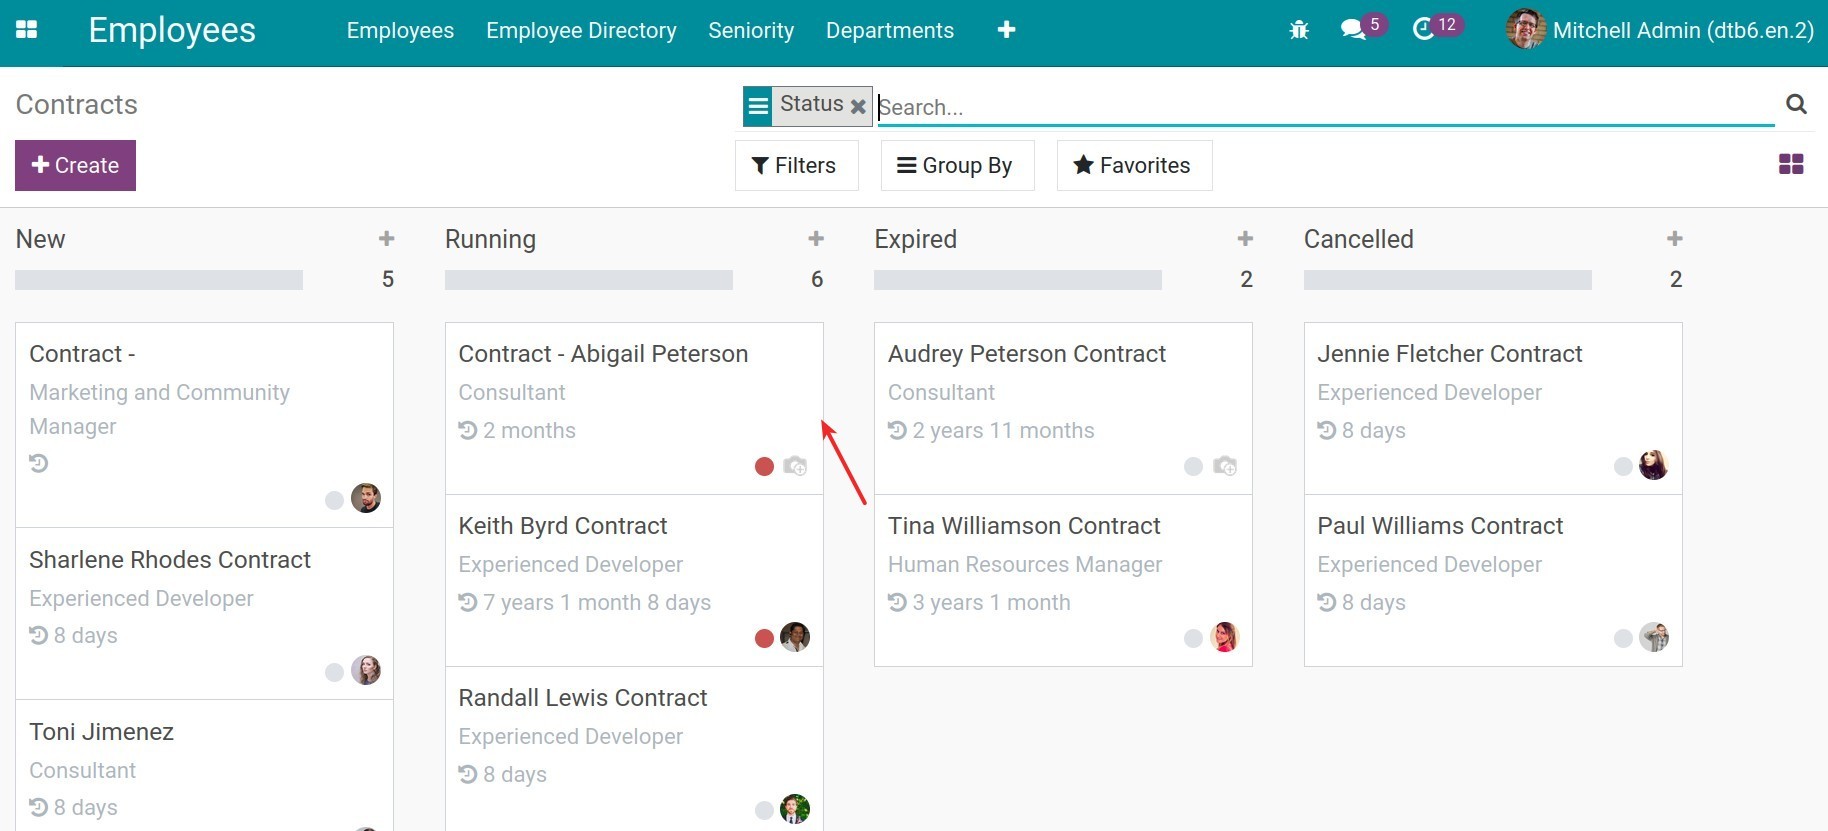
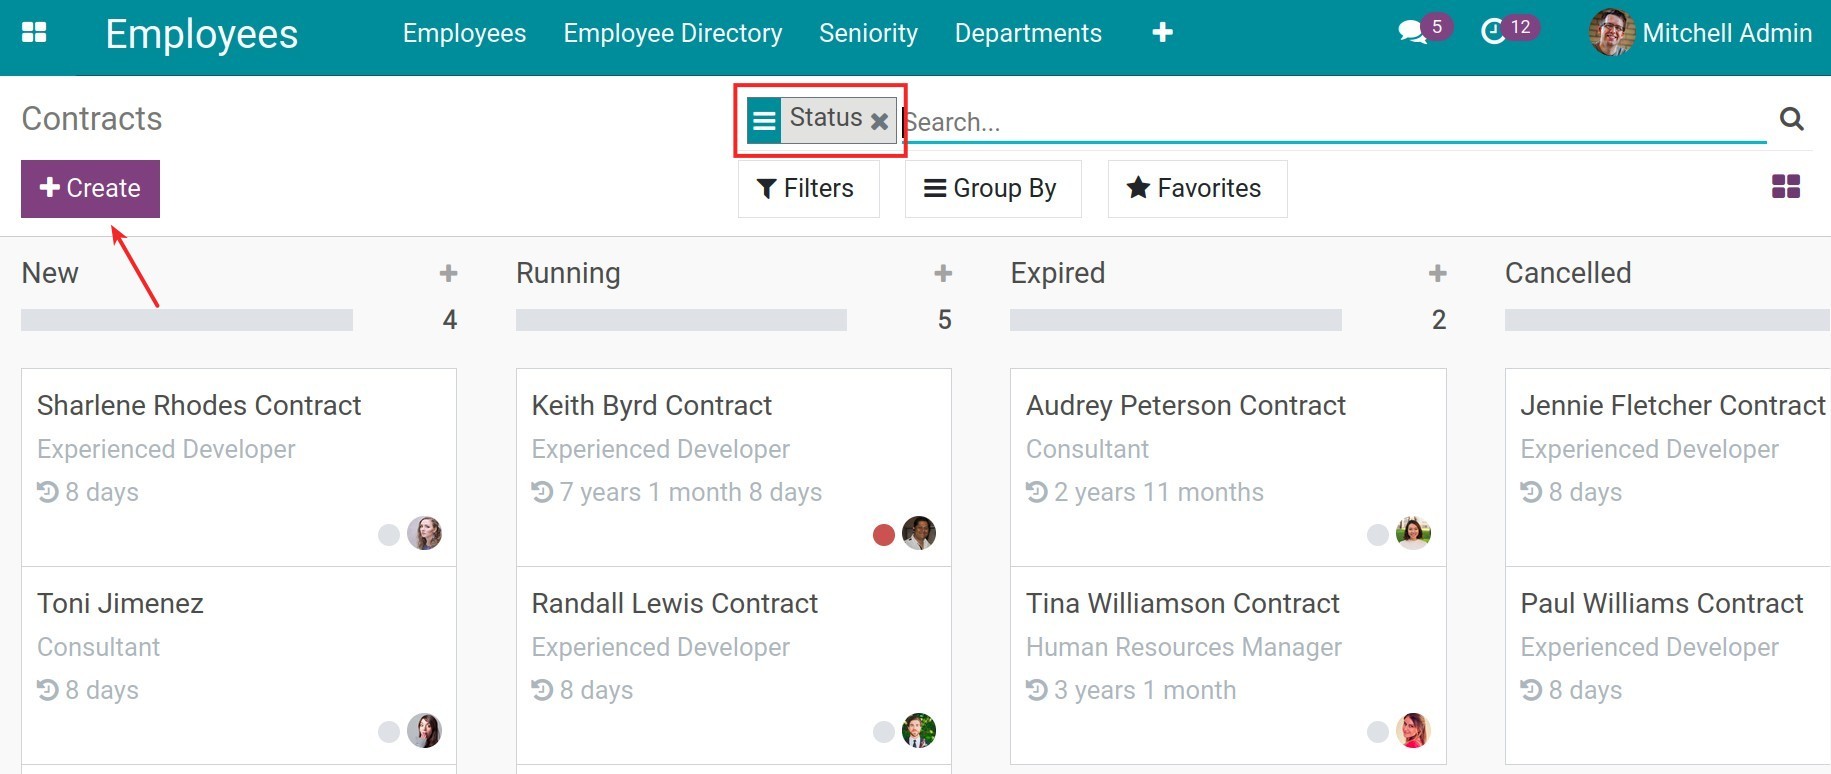
You will see a list of Contracts that are grouped by Status, click Create.
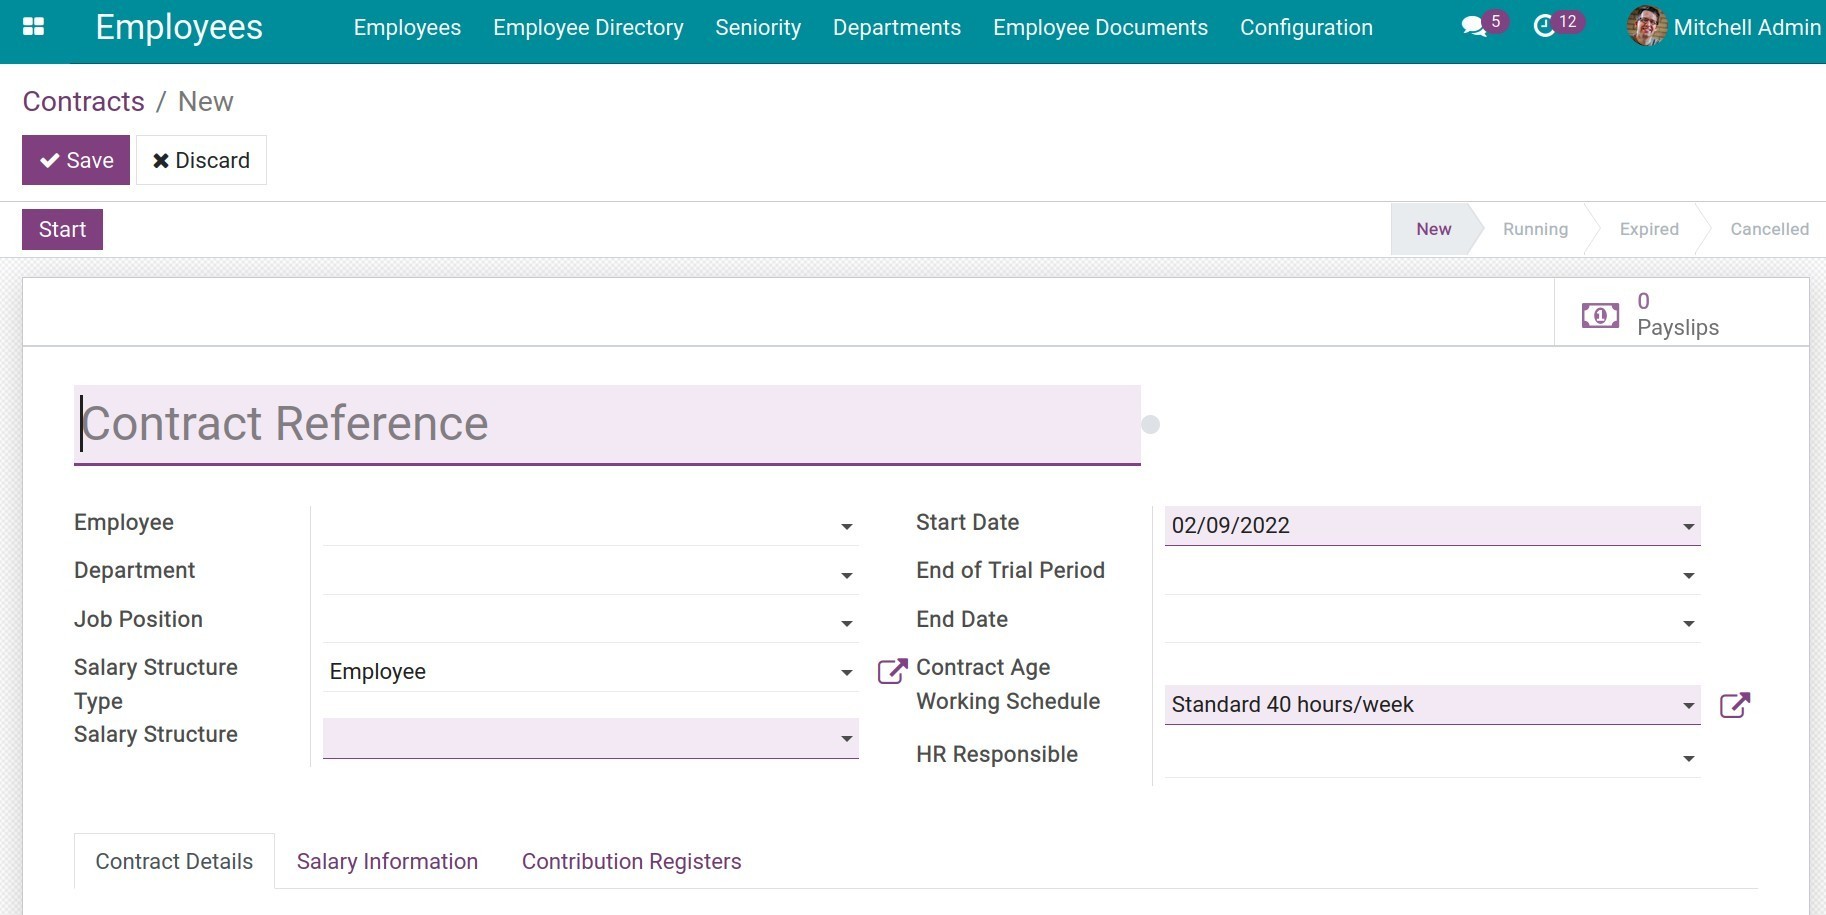
Your screen will show the following Contract view:
General information and details of the contract
This is where you fill in the basic information of the Contract. Insert the following information:
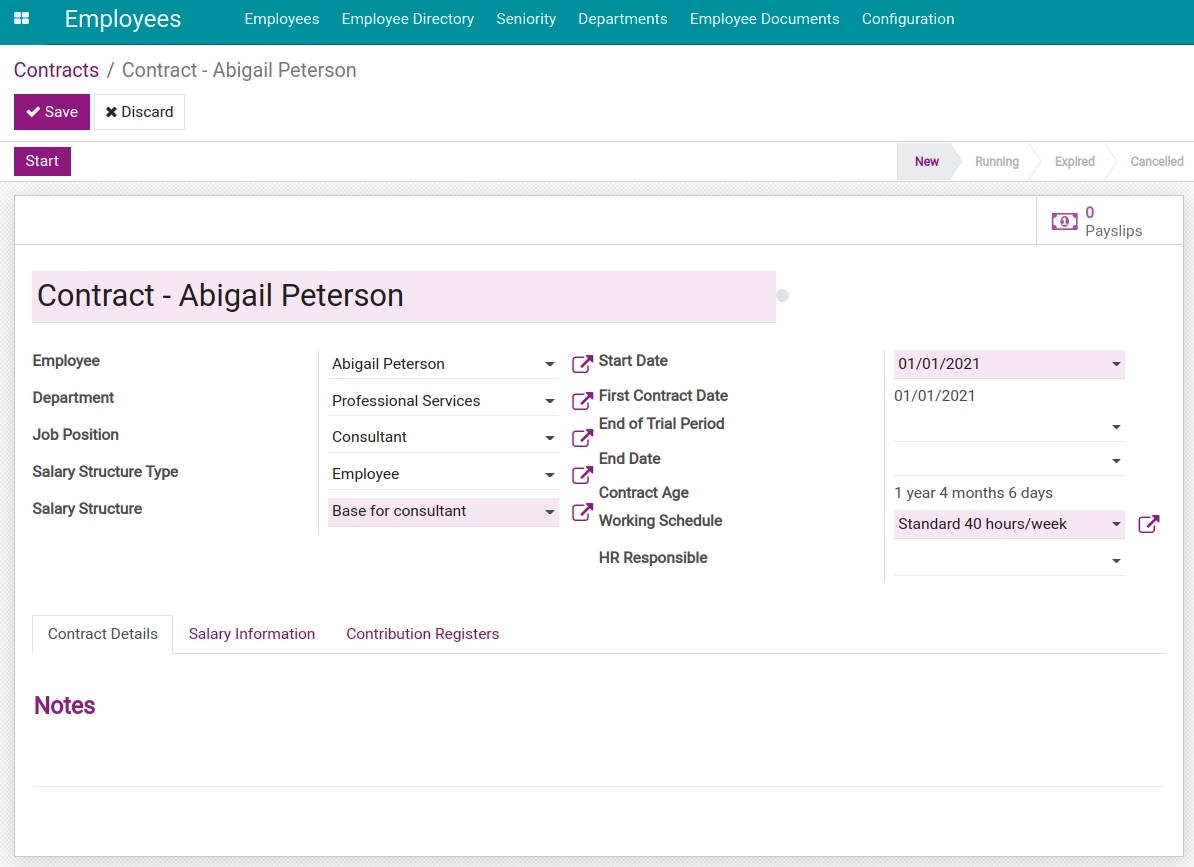
General information:
Contract Referral: contract name. Add a number/name of the contract according to your company’s regulations.
Employee: The employee attached to this contract.
Department: The department where this employee belonged. This field will be auto-filled if you have already set up the Department info on the Employee view.
Job Position: The employee’s position. This field will be auto-filled if you have already set up the Job position info on the Employee view.
Salary Structure Type: the salary structure type corresponding to the employee’s position.
Start Date: The date the labor contract start.
End of Trial Period: The date the trial period end.
End date: The date the labor contract end. If the contract doesn’t limit the working time then you can leave it blank. If this is a contract for the trial period then you need to select the same date for the End Date and End of Trial Period fields so that the software can recognize this contract as trial period contract.
Contract Age: The age of the contract that is calculated automatically by the software from the start date of the contract until the present date. For example 1 year 3 months 14 days.
Working Schedule: The employee working schedule, suggested from the Working schedule field on the Salary structure type’s setting. You can also choose another Working schedule but this field needs to make sure that it is the same as the Working schedule on the Employee view.
See also
HR Responsible: the one who takes responsibility for this contract, usually is the employee who is in charge of salary.
Contract Details - Notes: the notes for this contract.
Salary information
This is where you inform the salary-related information. You have to install the to_hr_payroll module to get more information before setting salary in labour contract.
Monthly Advantage in Cash:
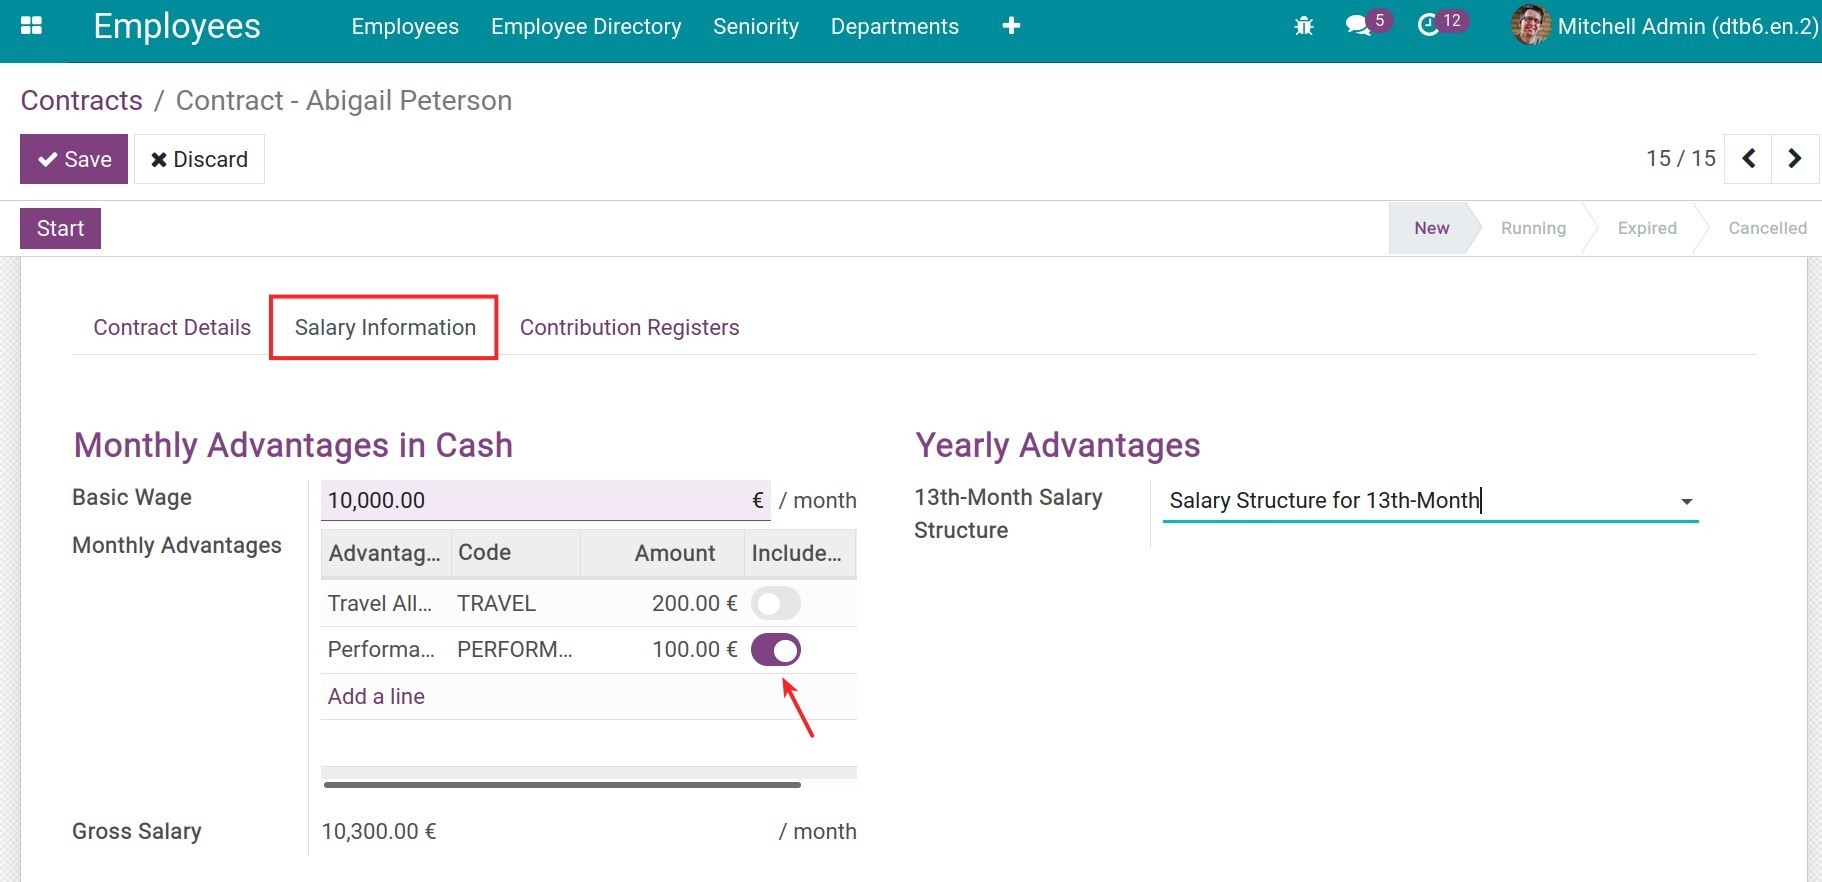
Basic Wage: the employee’s basic salary.
Monthly Advantages: The advantages the employee receives. Click Add a line to add an Advantage, the system will suggest the value at the Amount column based on the Advantage form. Select the Included in Payroll Contribution Register option if you want to register this monthly advantage into the Payroll contribution Register.
See also
Gross Salary: gross salary = basic wage + advantages.
Yearly Advantages:
13th-Month Salary Structure: select a salary structure to calculate the 13th-month salary for this employee.
See also
General Policy:
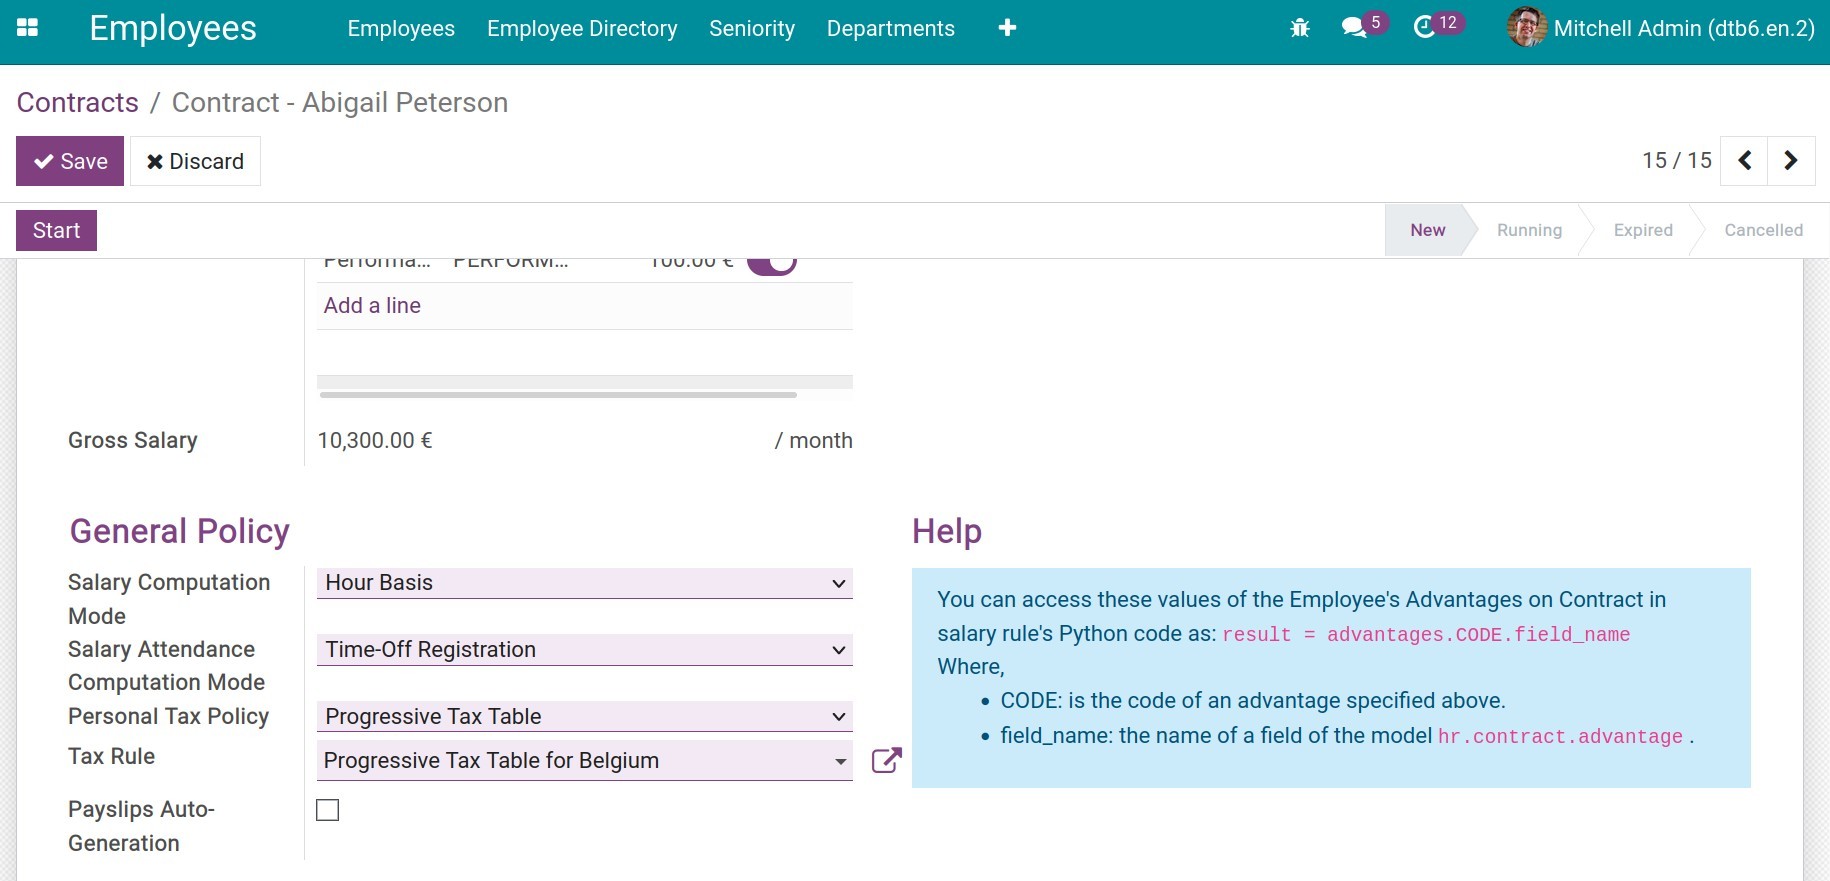
Salary Computation Mode: Employee salary is calculated based on day or hour.
- Hour basis: the employee’s salary is calculated after their working hours.
- Day basis: the employee’s salary is calculated after their working days.
Salary Attendance Computation Mode: how the actual working hour of the employee is calculated.
- Time-Off Registration: The Actual working days(hours) salary = The days(hours) that the employee has to work - Time-off.
- Attendance Entries: The salary is calculated based on the attendance data of the employee.
Note
To have the Attendance Entries option, you need to install the to_hr_payroll_attendance module.
Personal Tax Policy and Tax Rule: Personal Tax Policy and Tax Rule applied for this employee. You need to select the most suitable regime for the contract (probationary or officially).
See also
Payslips Auto-Generation: the software will auto-create payslips periodically according to the setting on the Employee’s contract. (Refer to document Create Payslips Automation for more information).
How to register contribution
This is where to register contributions from employees’ salaries.
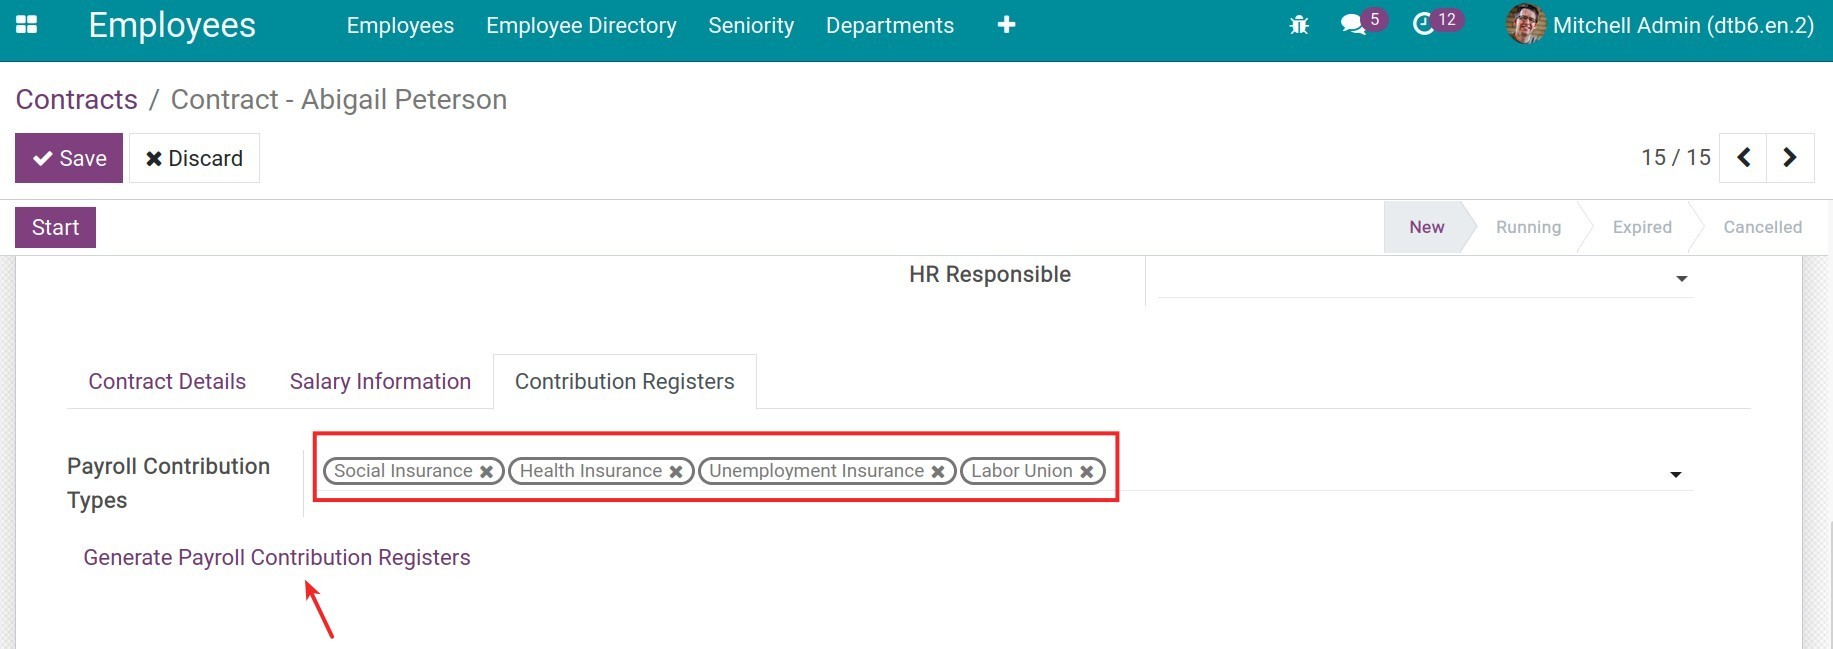
Click on Payroll Contribution Types to select a payroll contribution type you want to create for this employee.
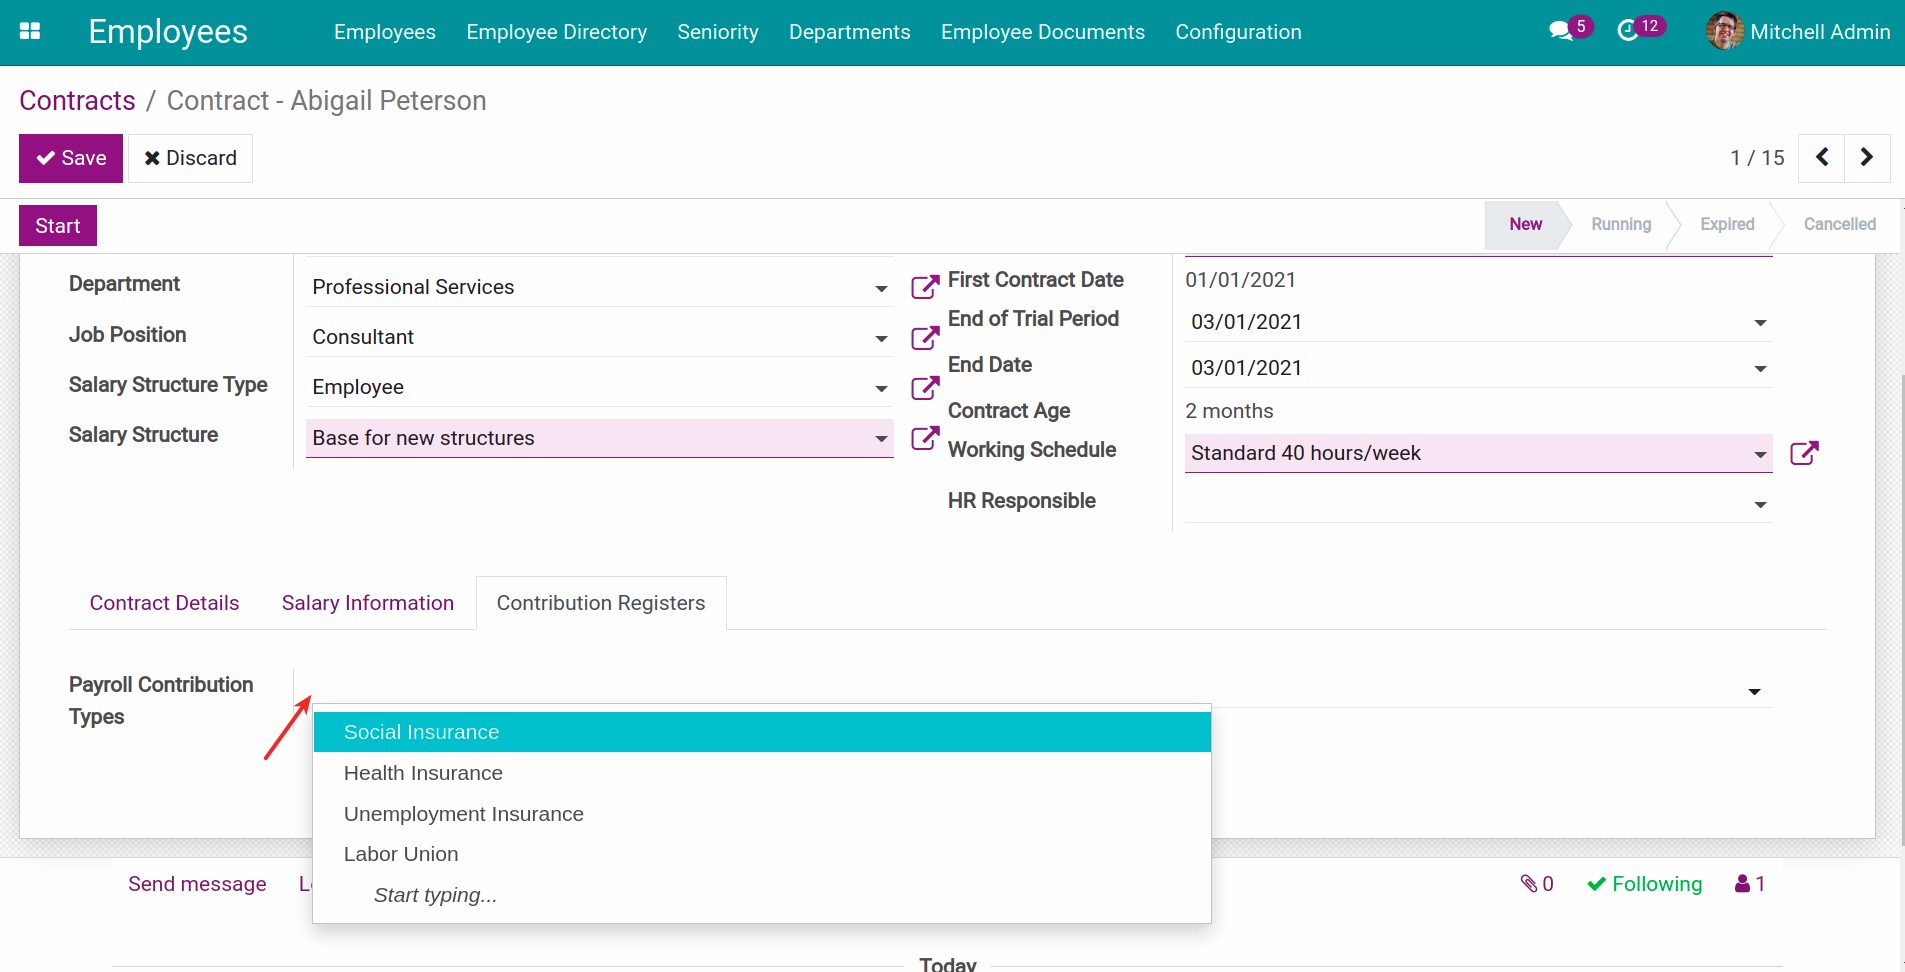
After selecting Payroll contribution types, click Create Payroll Contribution.
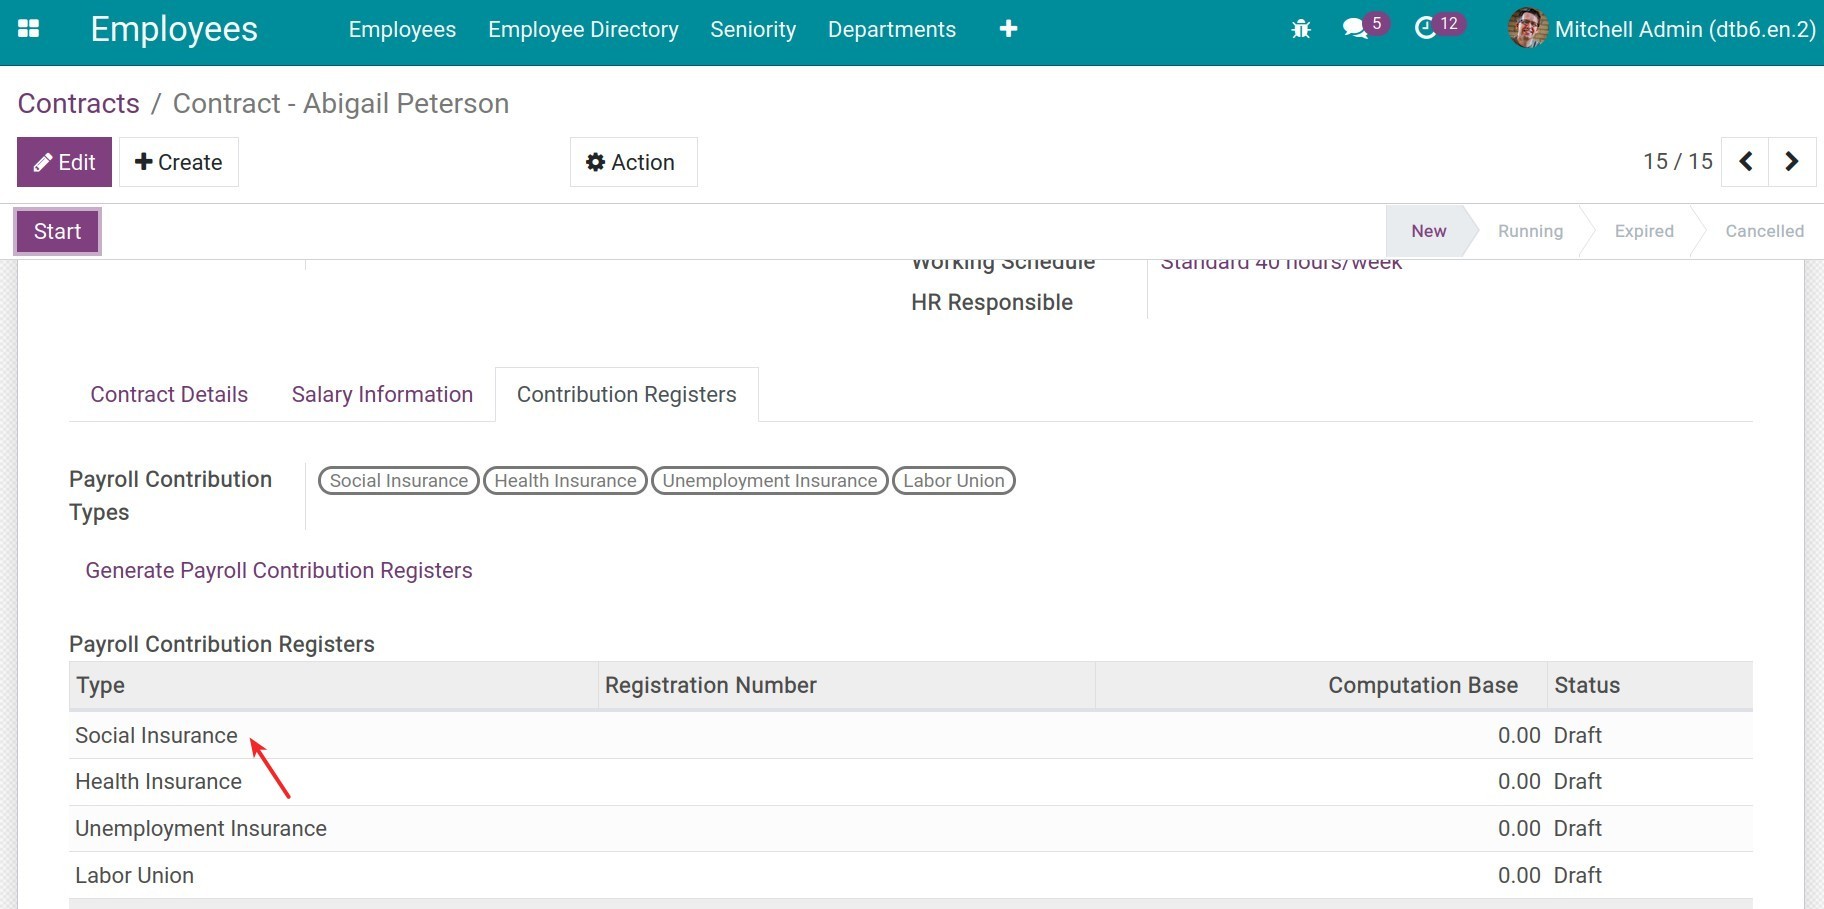
The software will generate a Payroll Contribution Register board and draft payroll contributions. To change the information and confirm the Payroll contribution, click on the corresponding line.
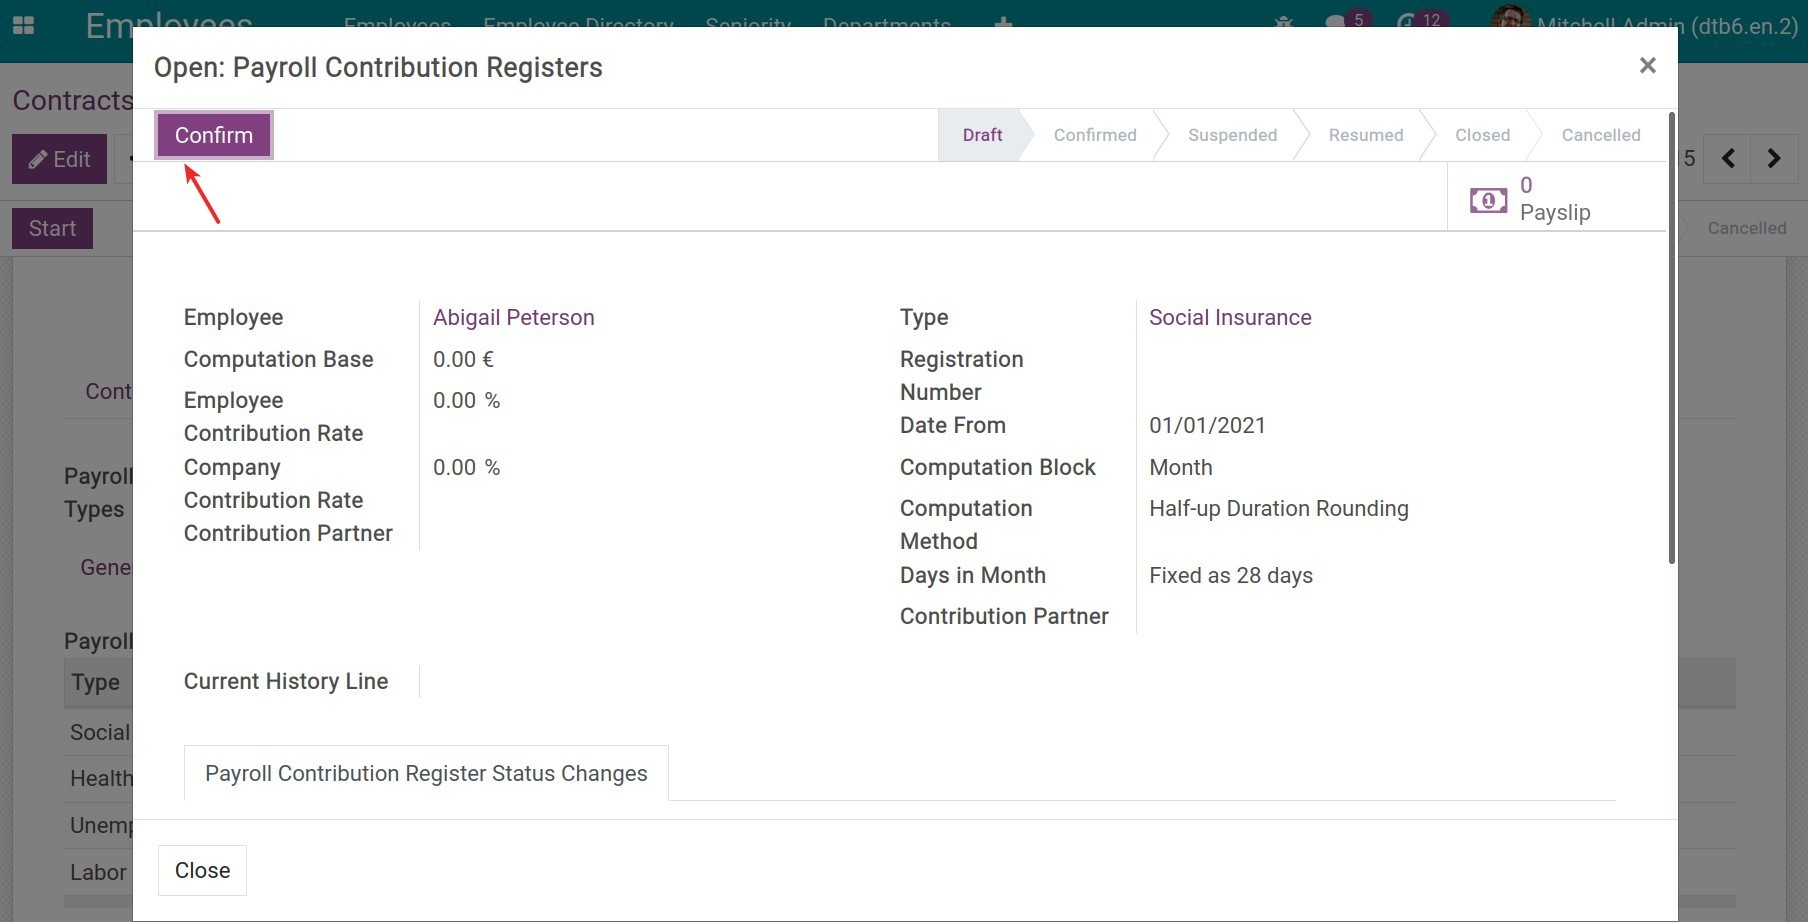
A Payroll Contribution Register window will open on your screen, you can adjust the needed information, and then click Confirm to register the contributions into the payroll.
Change the Contract stage
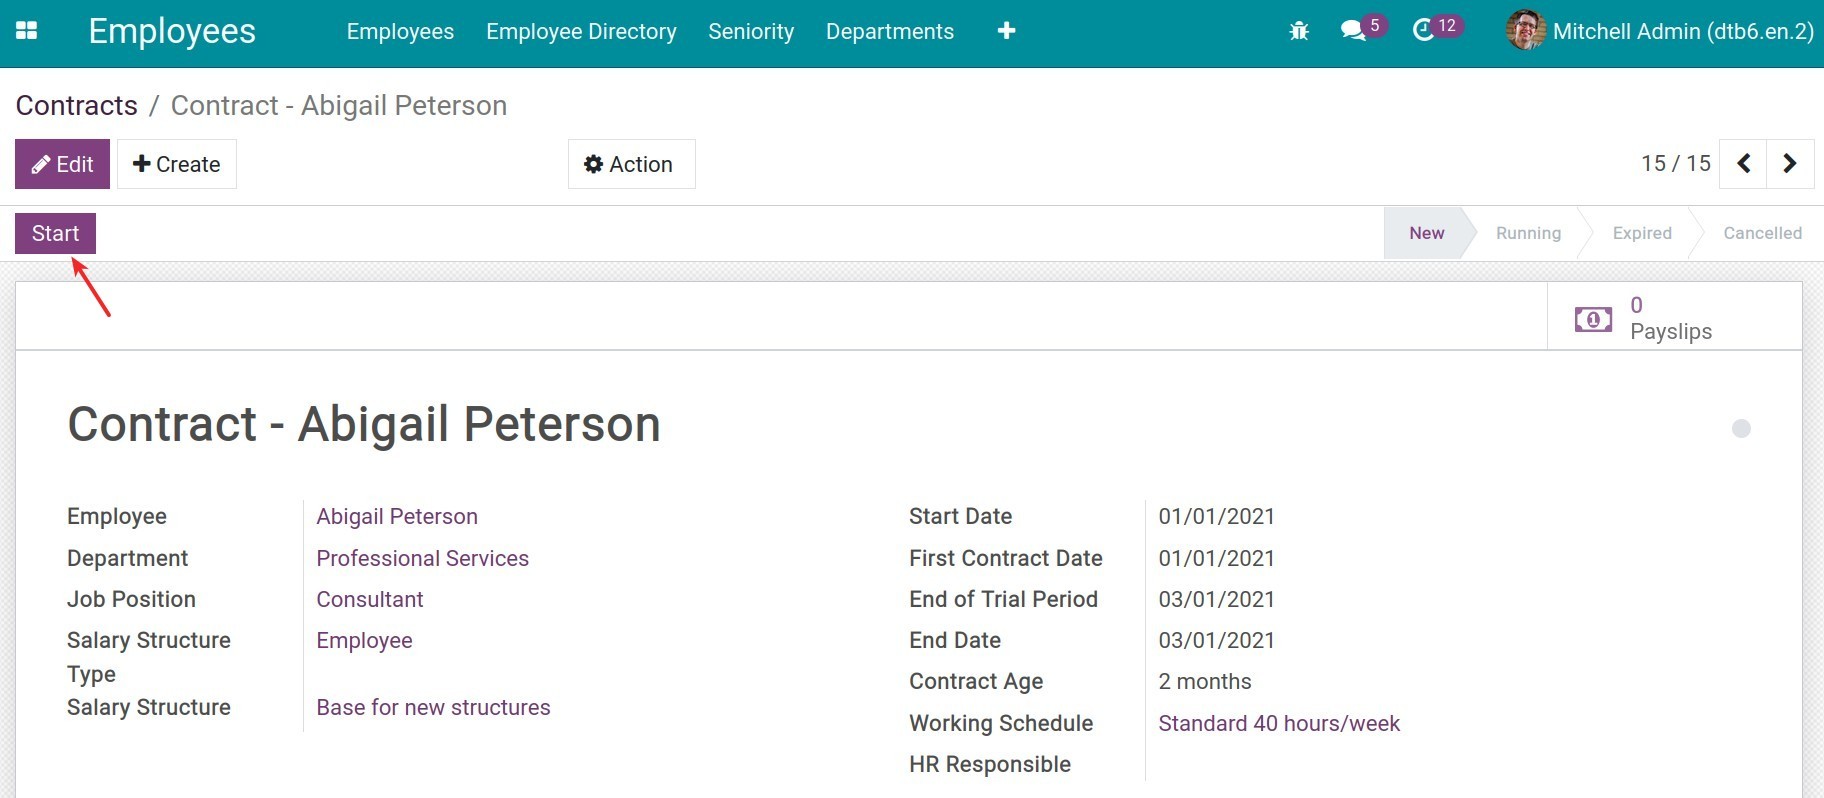
After finishing setting up the needed information on the contract, click Start to run the contract.
If the contract’s end date is within the next 7 days, the contract’s stage will automatically turn red (Set as to renew), you can also mark a contract about to expire by clicking on Set as To Renew.
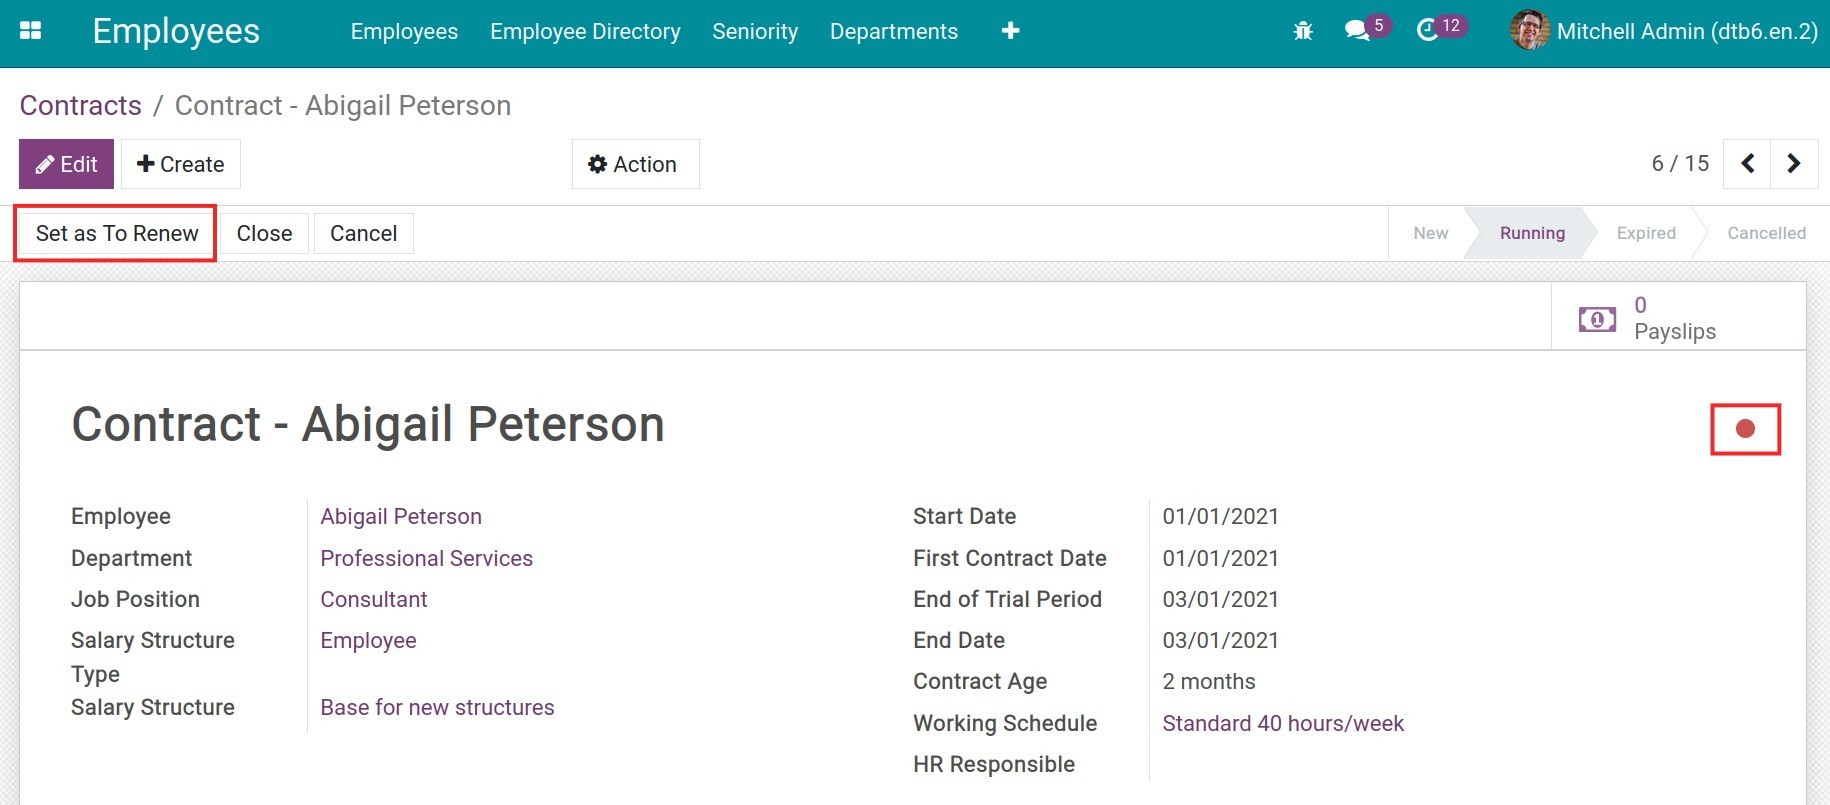
Note
To see the Set as To Renew button, you need to activate developer mode.
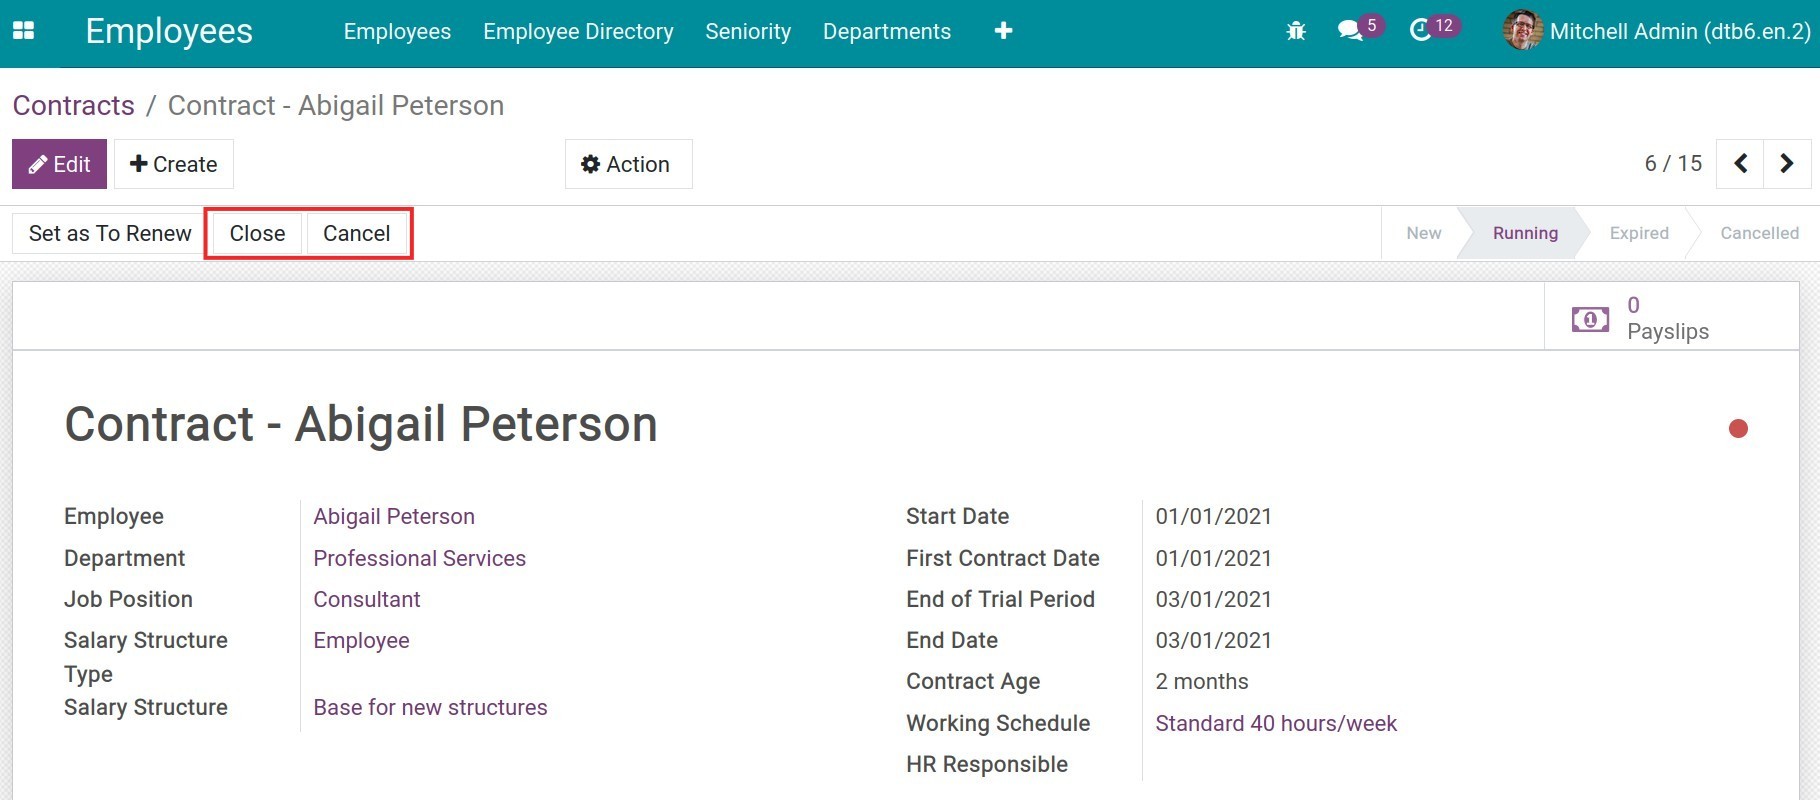
If the contract is expired, you can click Close to change the contract to the Expired stage. In case contract is not used anymore, Click Cancel to change it to the Cancel stage, the payroll won’t generate base on contract in next month.
See also
Moreover, you can change the stage for a contract at the Kanban contract view by dragging it to a different stage.