Set up and manage the warranty information of the products
Viindoo Warranty app not only assists you in managing warranty information of vendors or customers but also supports you in searching for warranty information.
Vendor warranty information
To configure vendor warranty milestone, navigate to and select the product that needs to be configured.

In the Warranty tab, add the following information:
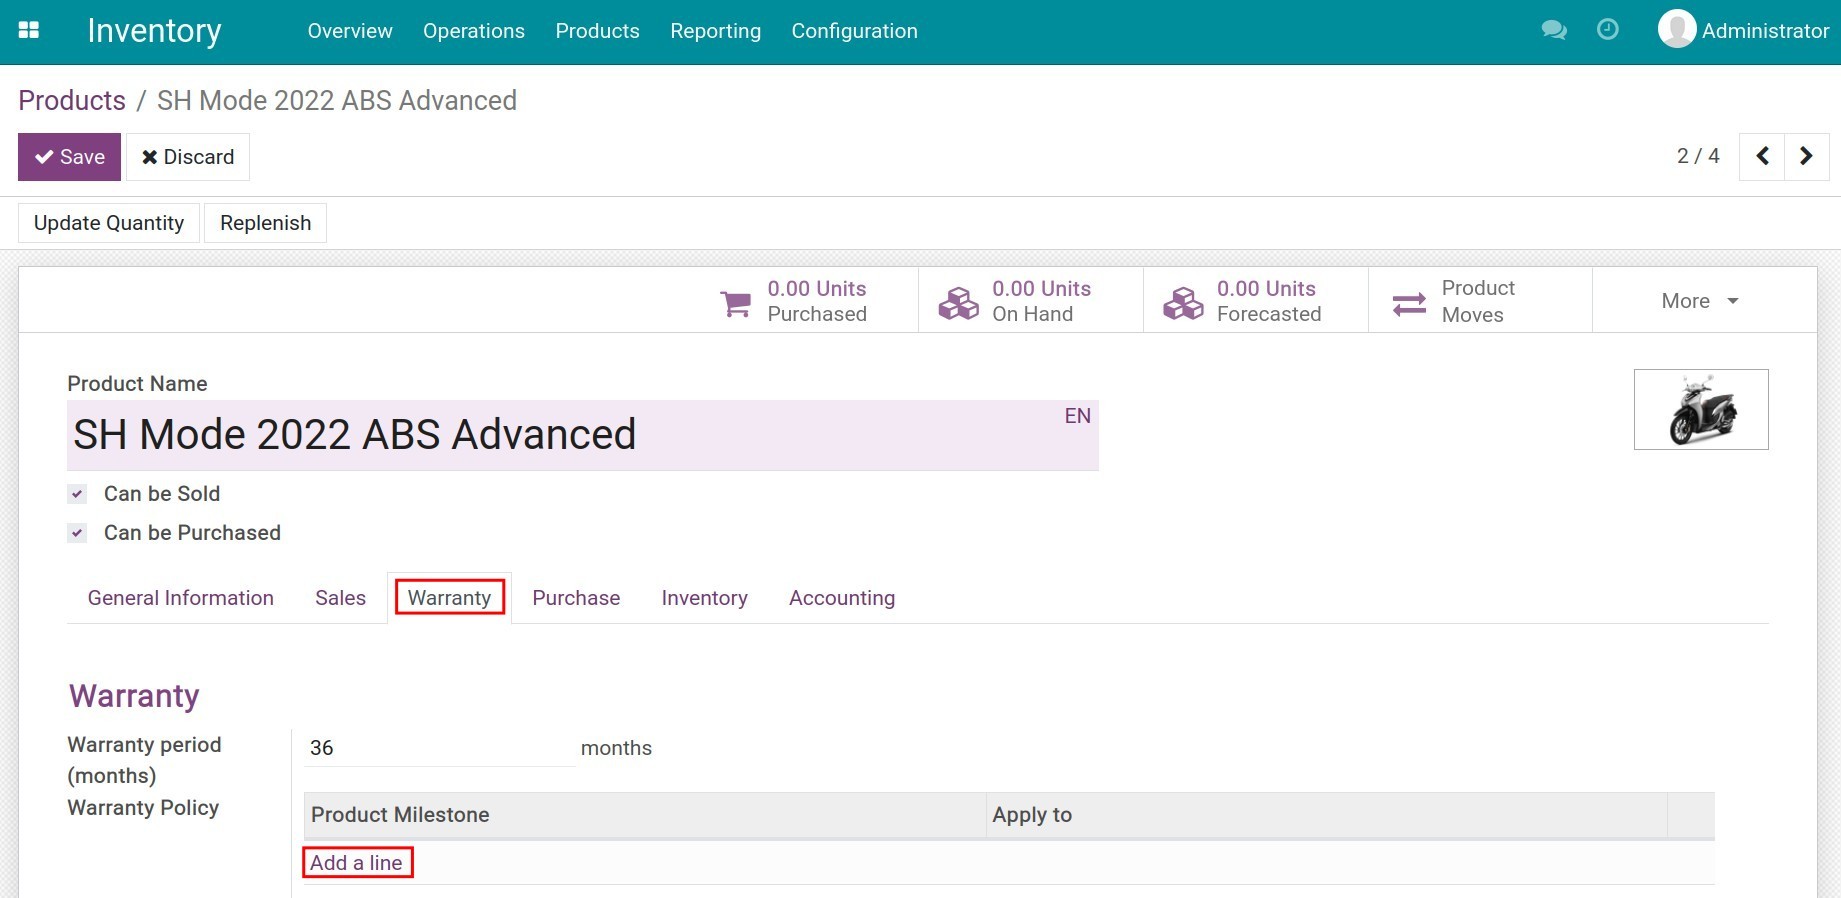
Warranty period: Total warranty time for this product. Once configured, the warranty expiration date will be calculated automatically from the moment the product is received at the warehouse or sent to a customer.
Warranty Policy: The specific milestones of the product during the warranty period. Press Add a line to add a new milestone. At the Product Milestone field, add product milestones then select Create and edit.
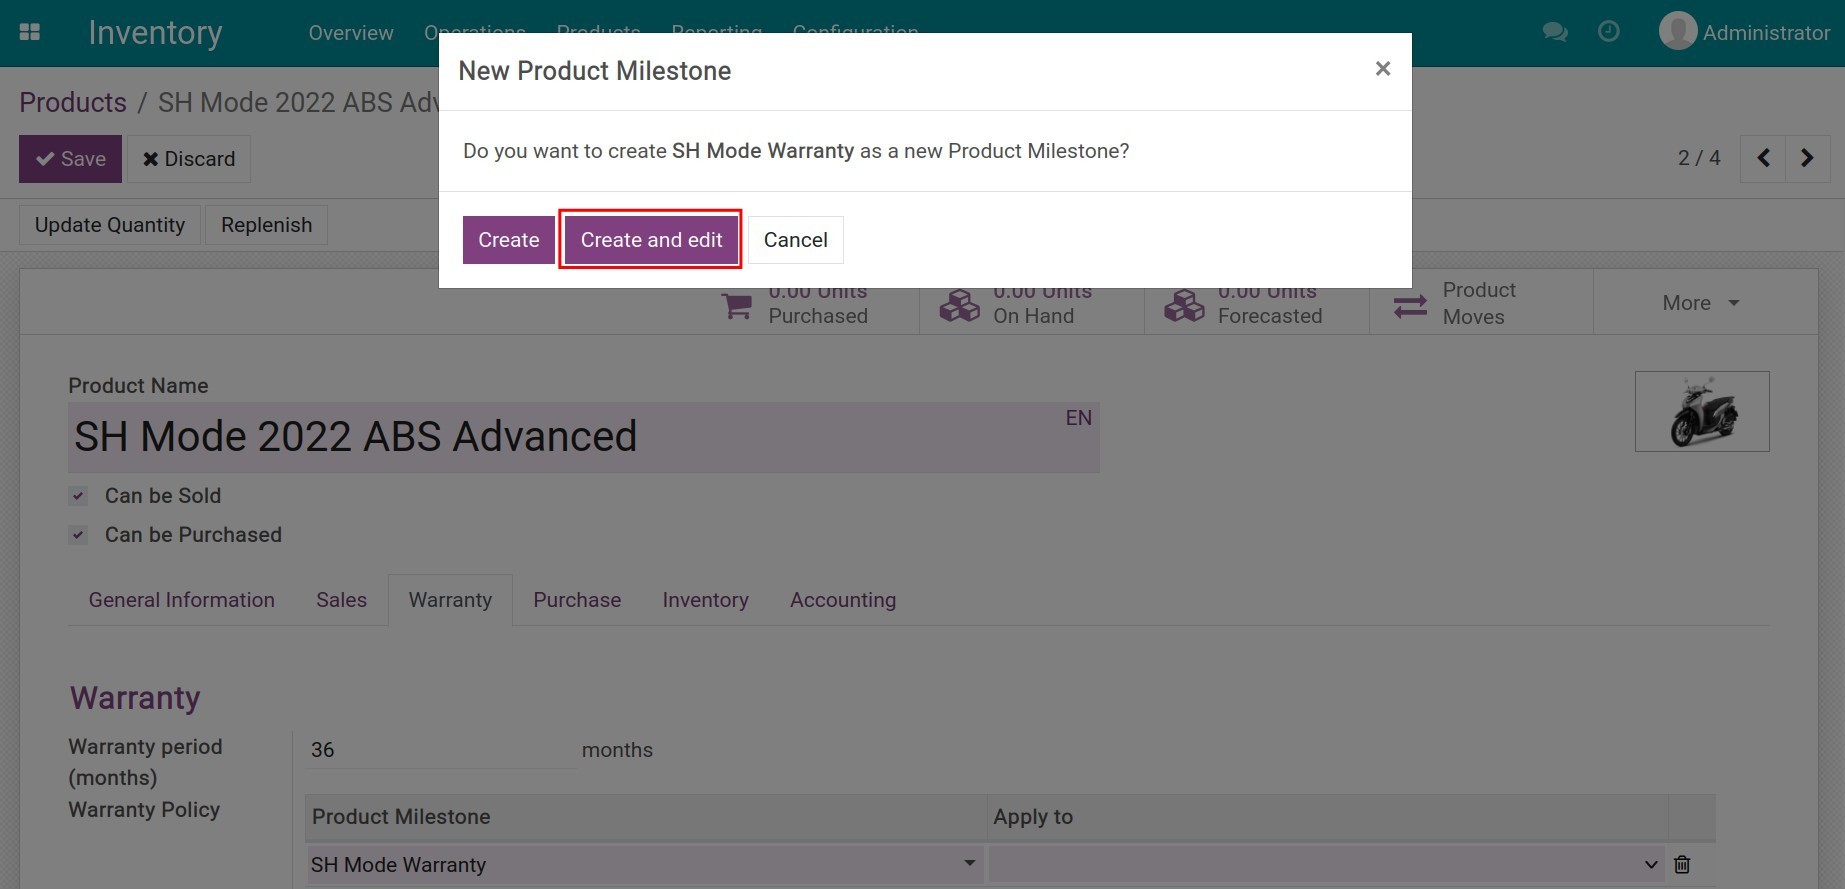
You need to add the following information:

Name: Name of the product milestone. For example: 2 years warranty;
Milestone: The product’s warranty milestone, recording the value/time that the product has been in use or operation. Warranty service providers will often rely on this milestone as a basis to be able to perform free warranty/maintenance for the product.
Milestone UoM: Select the suitable unit of measure for milestones, e.g: the milestone UoM for cars is km, the milestone UoM is days for electrical devices, etc.
Working Hour Milestone: Enable if product warranty milestone is calculated based on the product’s operating hours, such as for machinery, it’s necessary to change the oil after 1000 working hours.
An example of specific product milestones is as follows:
Product milestone of 30000km for a Hyundai Santafe car.
![Product milestone for a car]()
Product milestone for industrial machines such as a cutting machine in 10000 working hours.
![Product milestone for a cutting machine]()
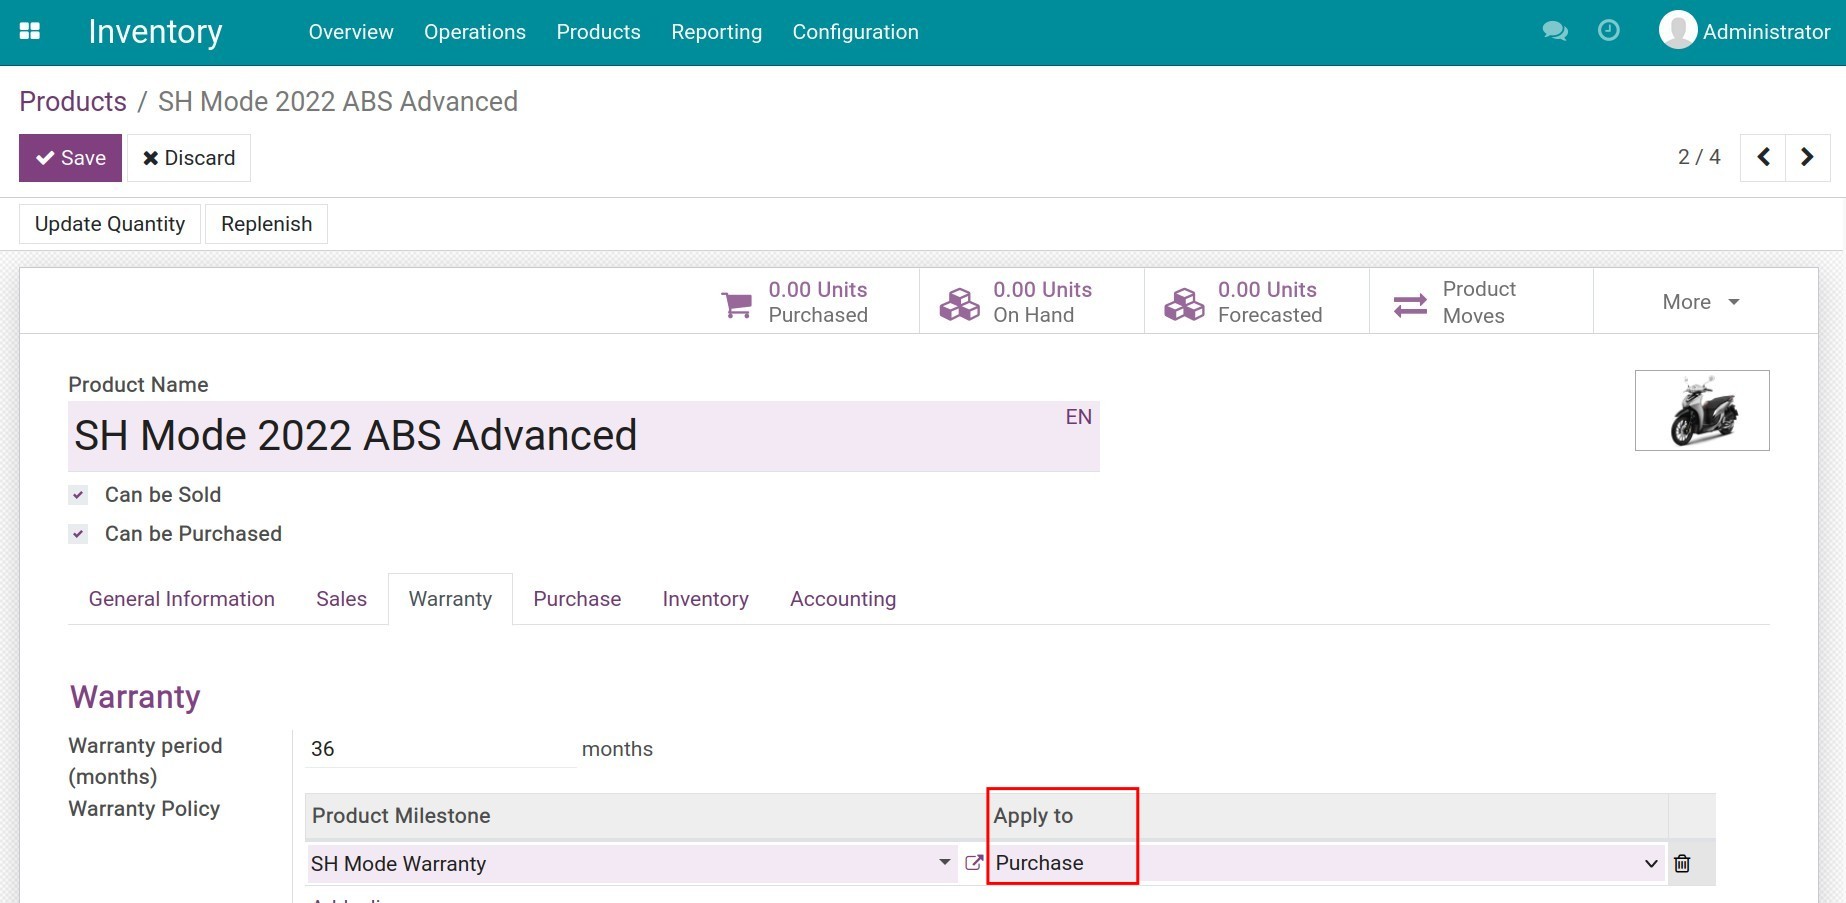
Press Save to record the newly added product milestone information. Then choose the scope of application for the product milestone for the Purchase app.
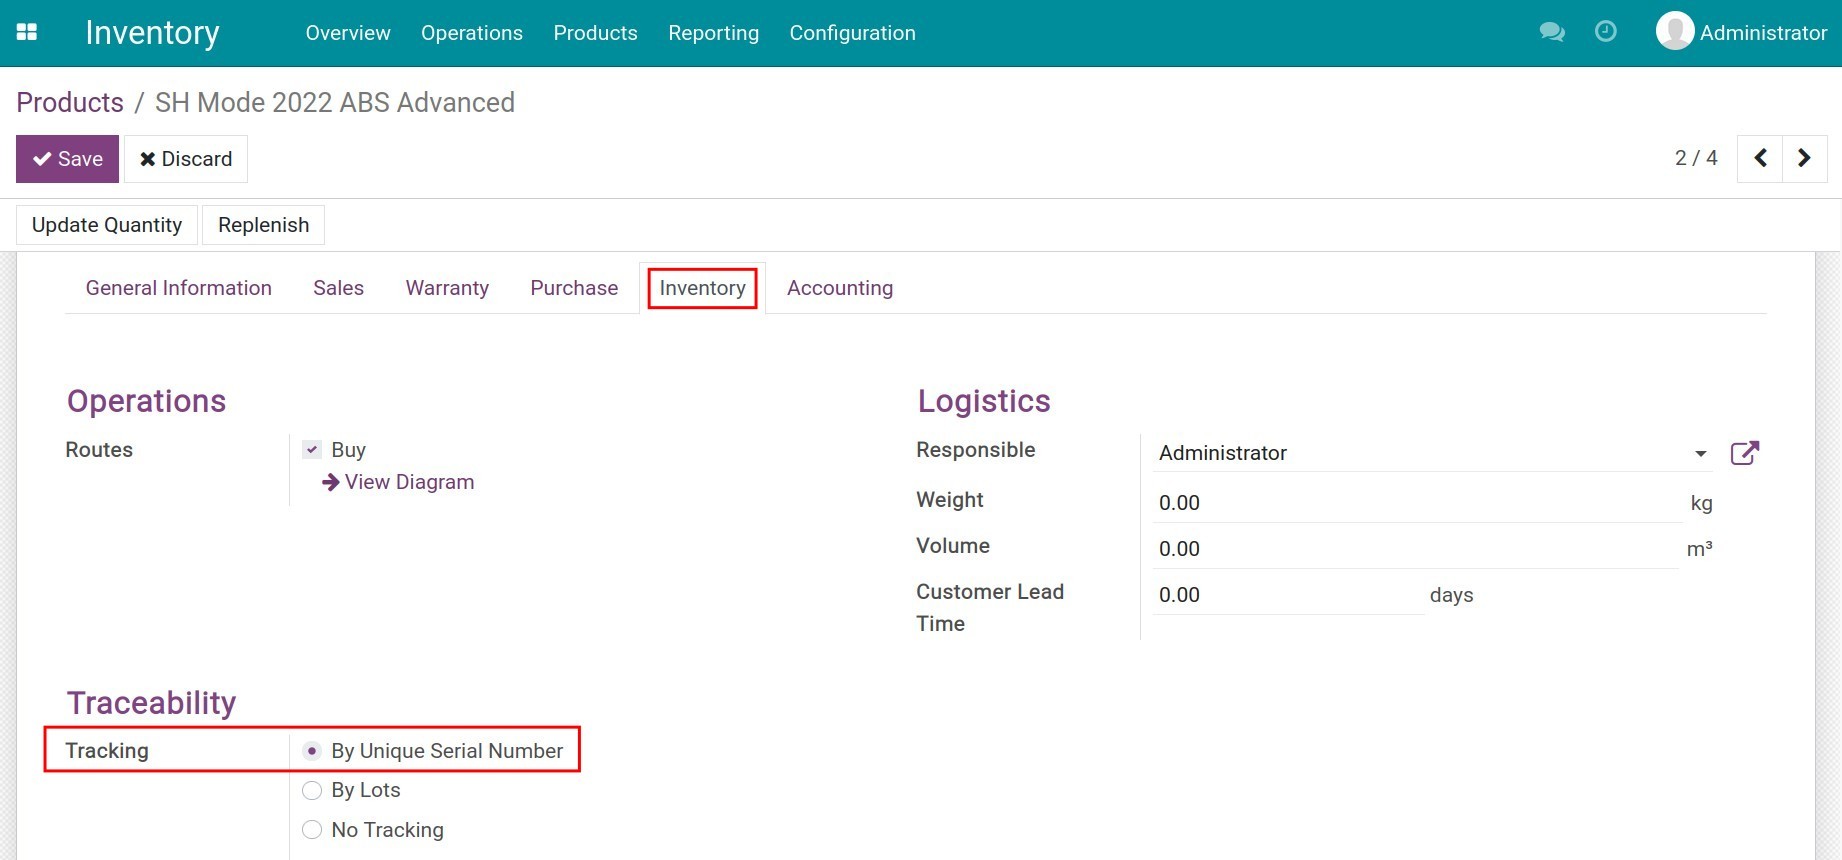
Go to the Inventory tab to activate the Tracking By Unique Serial Number feature.
Press Save to record the changes.
After completing the products receiving process, navigate to . The lots/serial numbers are grouped by Product criteria. In the search bar, you can type and search for a certain lot/serial number.

Sales, Purchase, and Warranty information as well as the warranty policy of each product are displayed for each lot/serial number. Including:
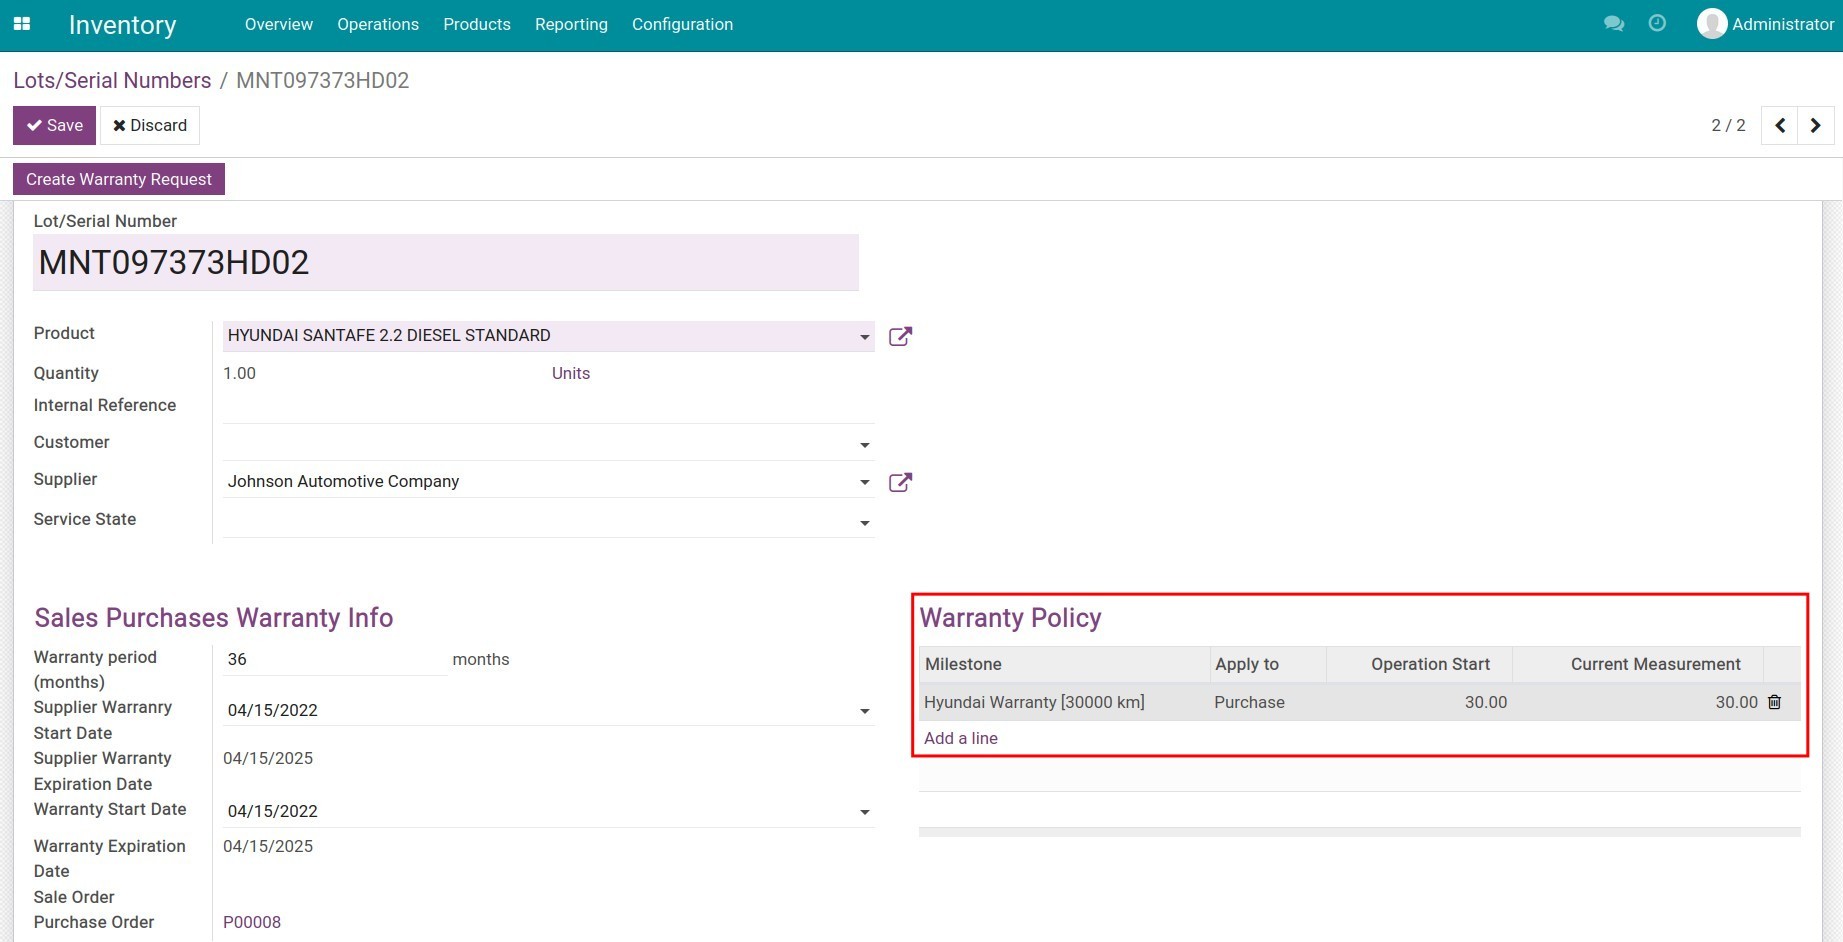
Warranty period: Total warranty time configured on the product.
Supplier Warranty Start Date/Expiration Date: The specific period that the product vendor provides a warranty, starting from the moment the product is received at your warehouse.
Customer Warranty Start/Expiration Date: The specific warranty period that you, as a vendor, provide warranty to your customers, starting from the moment the product is sent to the customer from your warehouse.
Sale/Purchase Order: The sales/purchase order information of the outgoing/incoming product that has this lot/serial number assigned to it.
Warranty Policy: Display warranty milestones and the scope of the application configured on the product. The Operation Start field is the initial value of the product at your warehouse. The Current Measurement field is the real value measured in the UoM of the product milestone when the product arrives at your warehouse. However, in case the product is already in use before arriving your warehouse, you need to put the same data for both fields. For example, when you receive a Hyundai Santafe car from the vendor, at the product receipt moment, the car odometer indicates 30 km. In this case, you need to add 30 to both the operation start and the current measurement field.
Press Save to record the information.
Customer warranty information
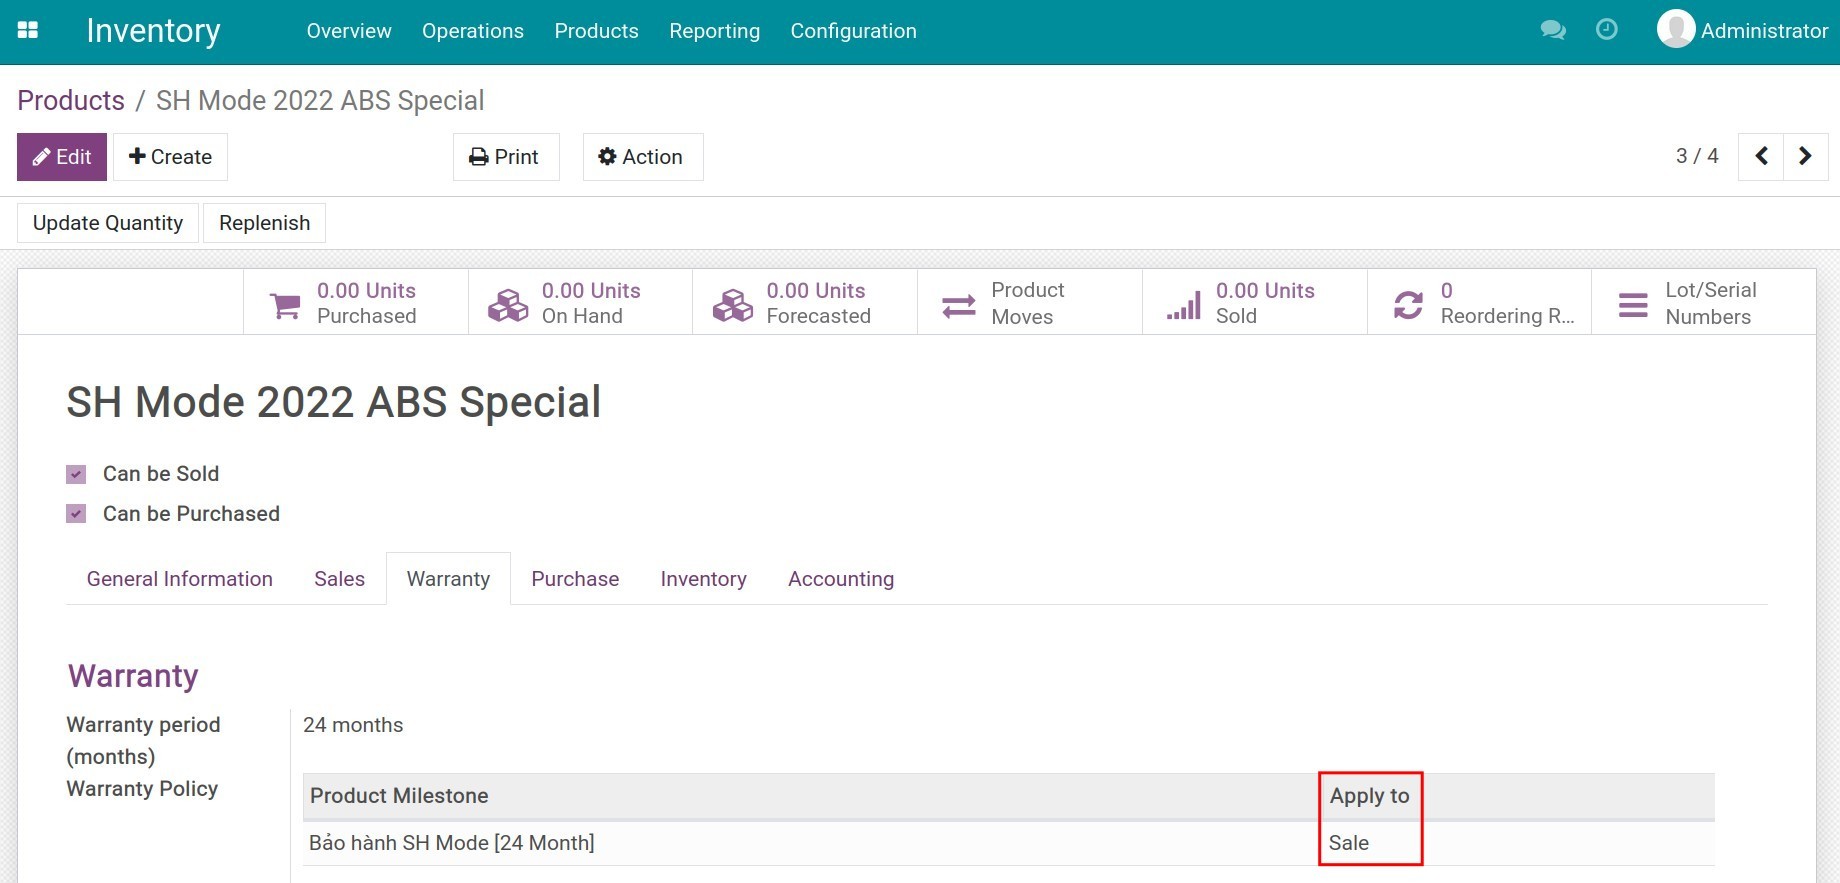
Navigate to and select the product that needs to be configured. In the Inventory tab, activate the Tracking By Unique Serial Number feature. In the Warranty tab, create product milestones, select Sales for the scope of application, and add operation start information for the lot/serial number attached to the product, following the instruction here.
Searching warranty information
Once the receipt/delivery orders are confirmed, you can search for the warranty information based on the lot/serial number of the product. To find the serial number, navigate to . Lots/serial numbers will be grouped by product by default. In the search bar, type the lot/serial number to search.


In this lot/serial number detail, you can find the warranty period and warranty policy of the product.
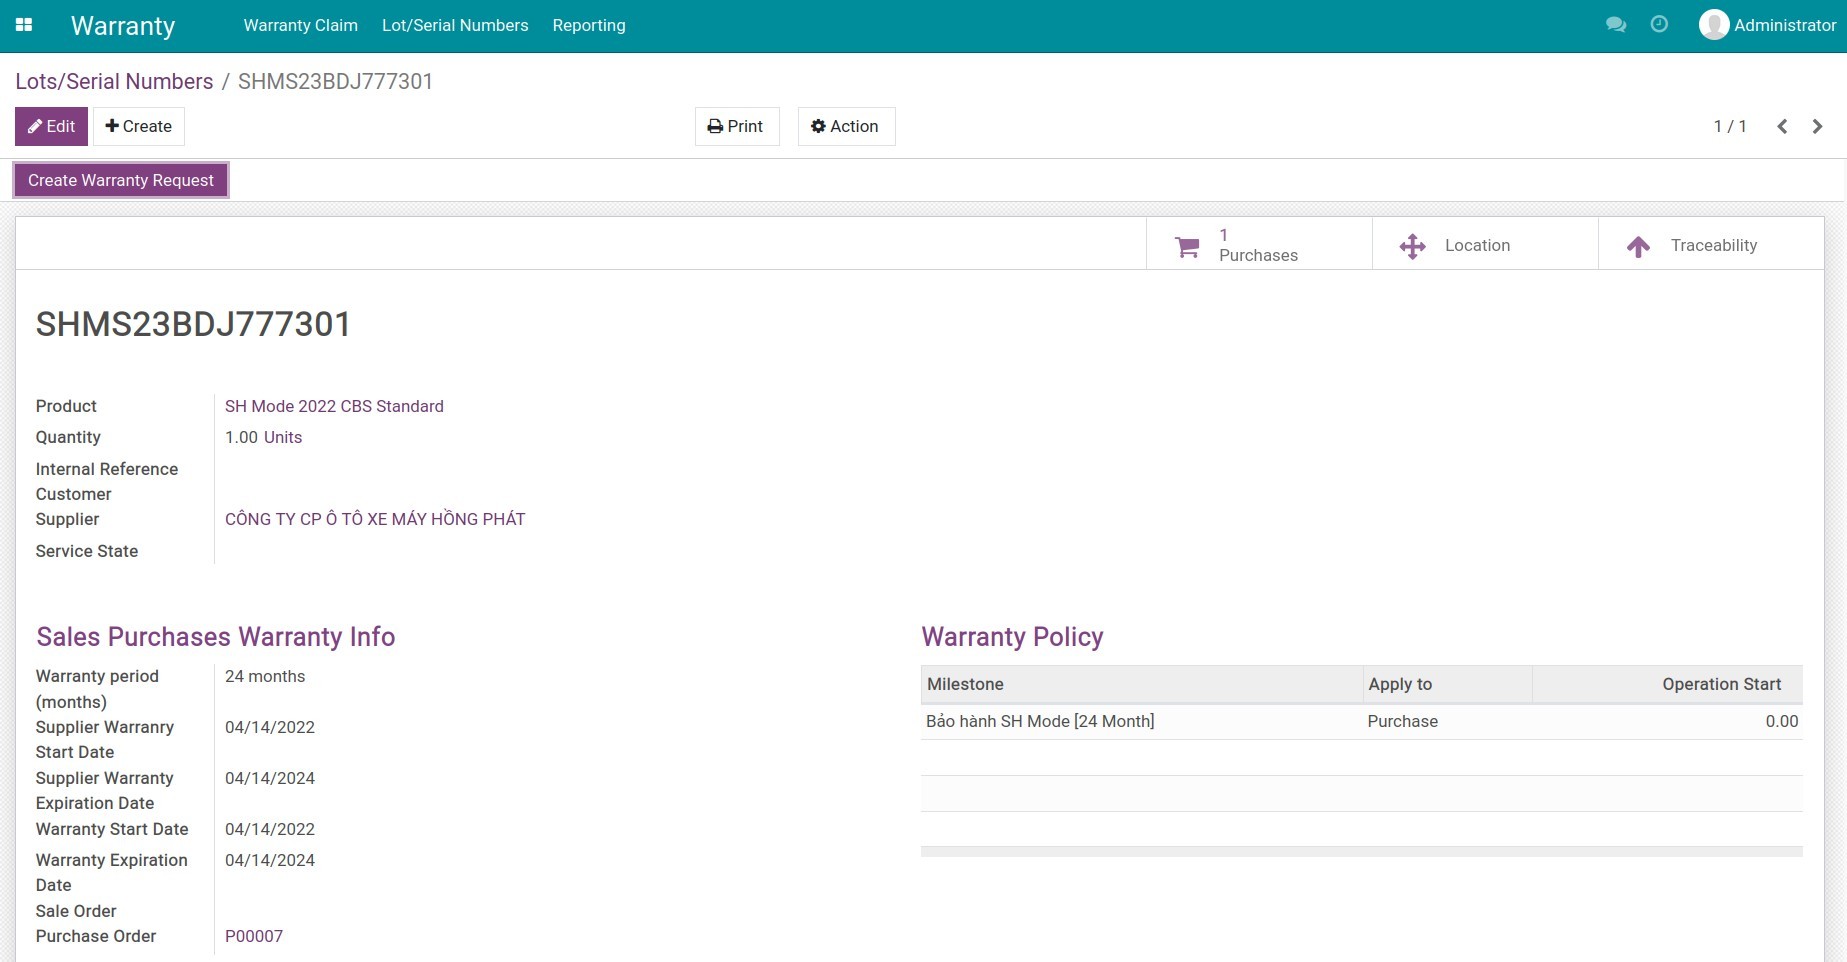
From this interface, you can create a warranty request by pressing Create Warranty Request. See steps to create a new warranty request in Warranty management.

