Overview and Configuration of Viindoo Overtime
Overtime app in Viindoo All-in-one Enterprise Management Solution helps companies implement overtime request, approval processes and also manage overtime activities.
Module Installation
To utilize, you need to install the Overtime app. You access Viindoo Apps and search for Overtime then click Install.

Access right configuration
After installing the app, you need to grant the user to the Overtime access group by navigating to .

Click on the user that you want to edit access, then press Edit.

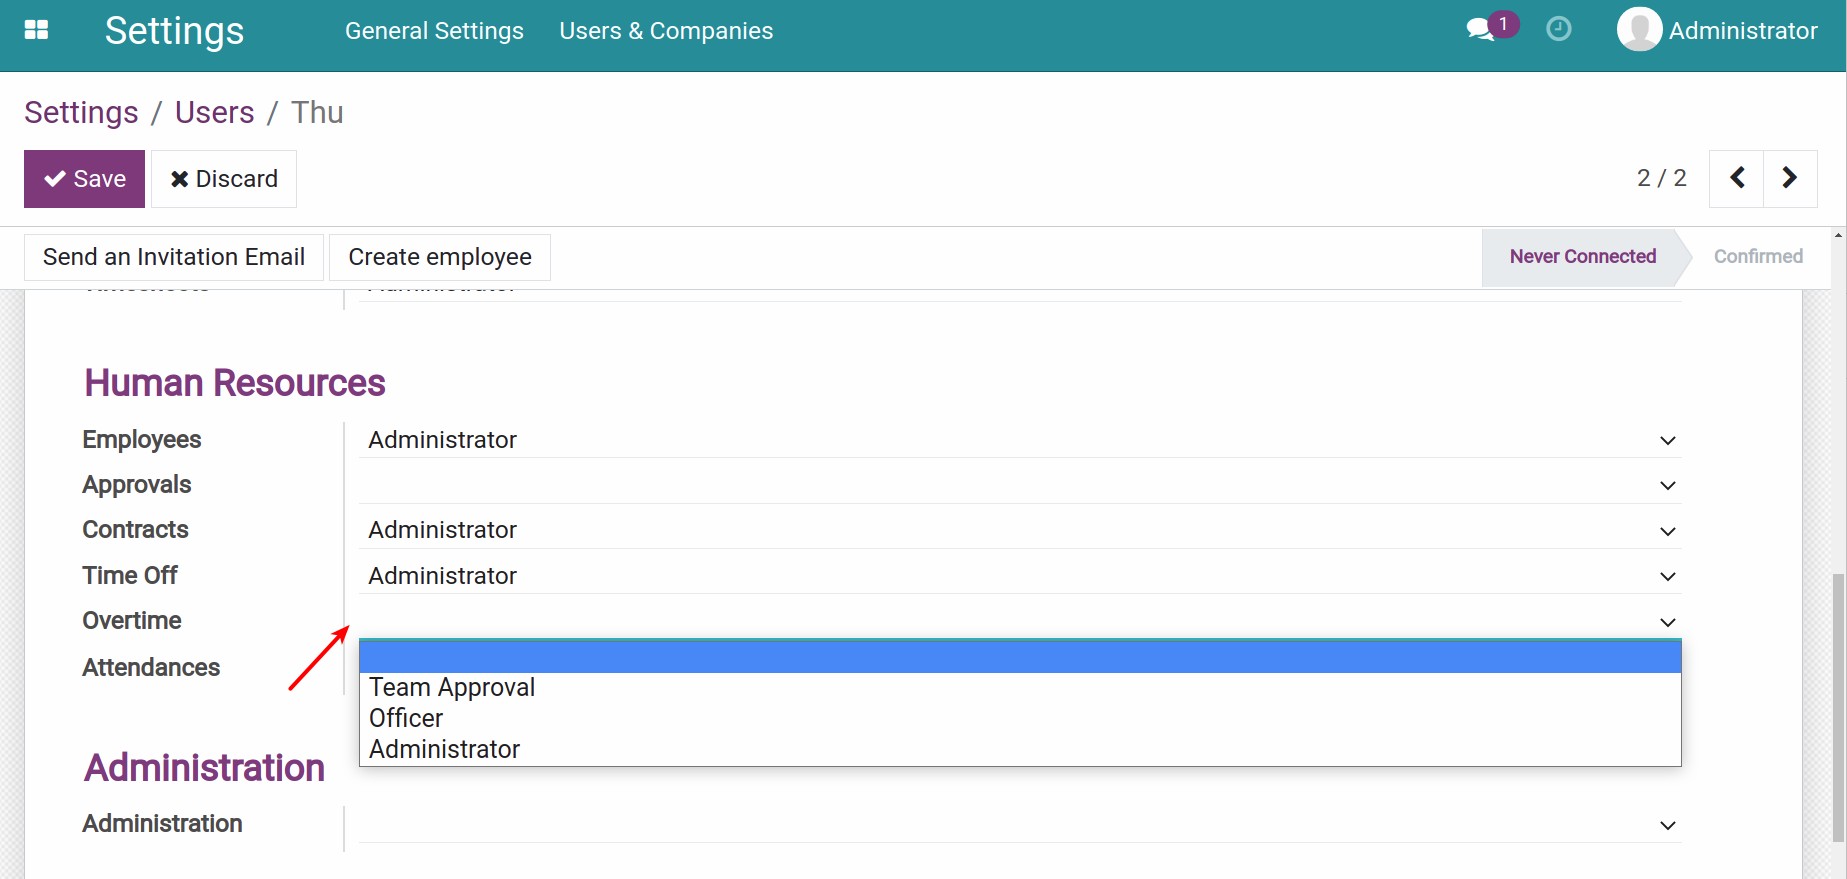
Click access group of Overtime to edit the user’s access right in overtime.
Access rights configuration without using Approval module
In case you do not use Approval on the system, the users access right is shown as follows:
- Leave the Overtime access right blank: the users do not have the right to see/access the Overtime app.
Team Approval: the users do not have the right to see/access the Overtime app.
Officer: the users can make overtime plans and view overtime analysis reports.
![Officer's access right]()
Administrator: the users have the same access right as the Officer plus configuration rights.
![Administrator access right]()
Access rights configuration using Approval module
In case you use Approval on the system, the access right configuration will provide you more additional details:
- Leave the Overtime access right blank: the users can create overtime plans by themselves.
![The users' access right with approval]()
Team Approval: the users can create the overtime plan for themselves and other employees in their team. If you configure the Employee’s Manager Required in the Approval Request Types as required, or you add the users to the Approvers list, that users can approve the overtime plan for the first time when 2 following conditions are met:
- The users are the manager of employees creating overtime plans.
The users who at least have the access right as Team Approval in the Approval app.
- Officer: the users can approve overtime requests without being the manager of the employee who created the overtime approval request or the user granted the Approval access right. In addition, users can view the Overtime Analysis Report.
Administrator: the users have the same access right as the Officer plus configuration rights.
Setting up the app
General Settings
After the application is installed, you go to :
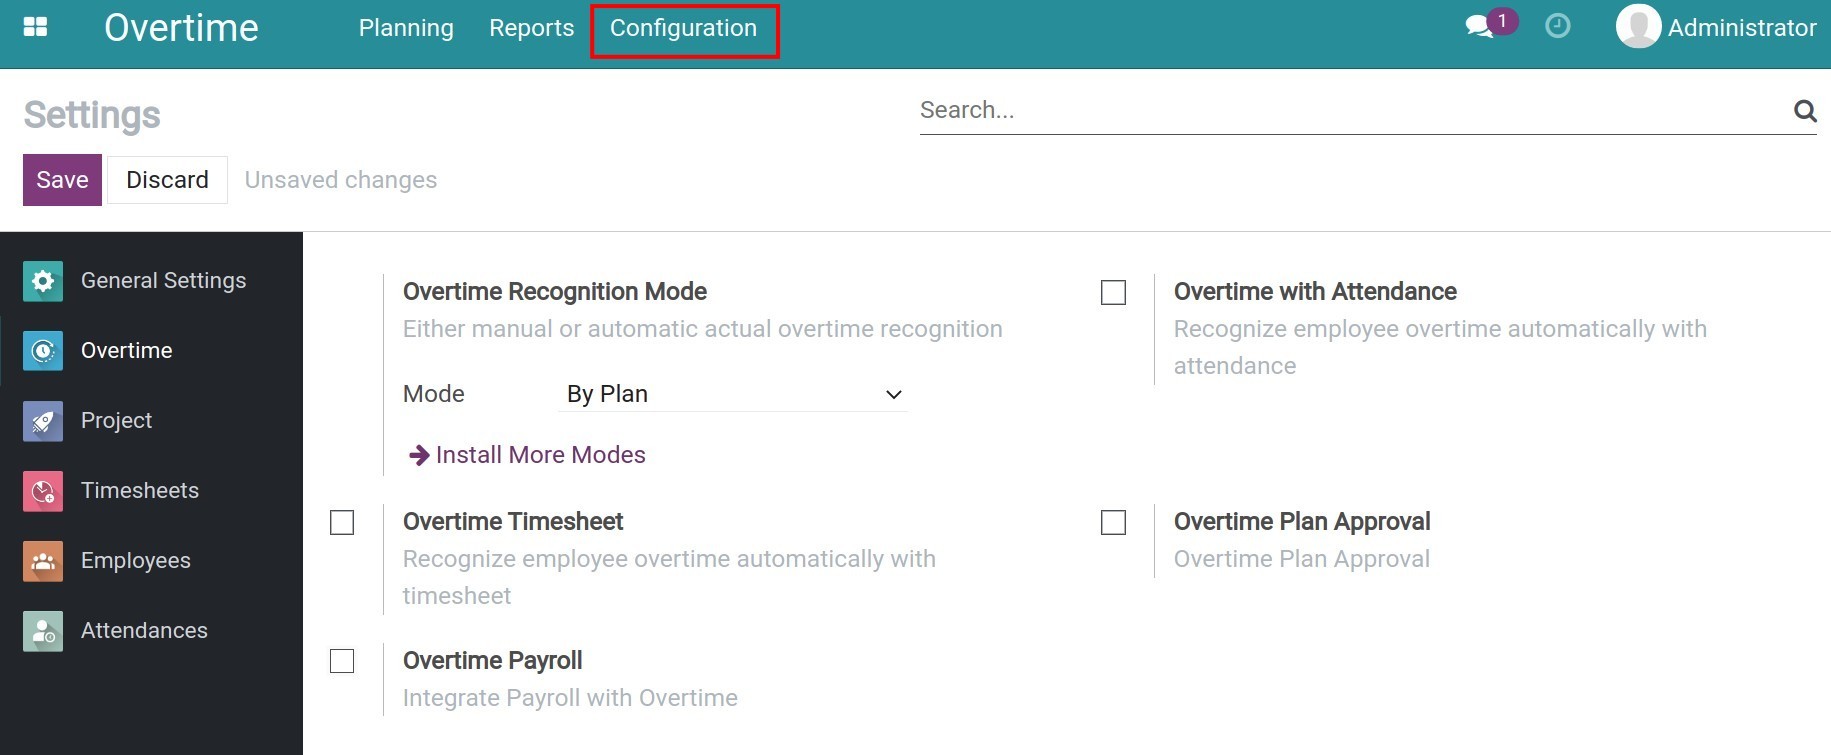
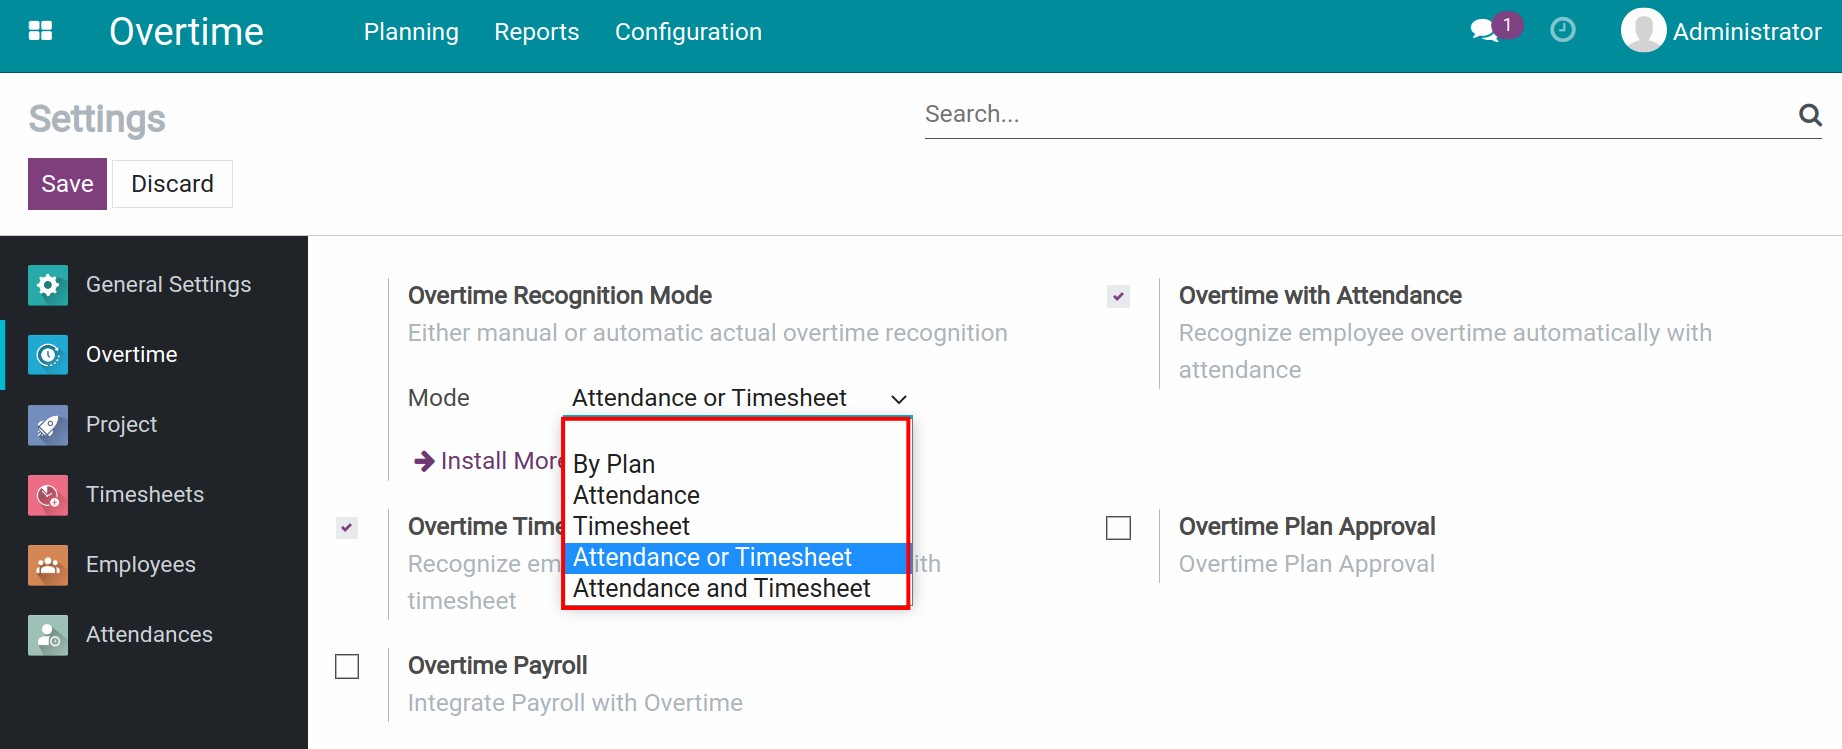
Overtime Recognition Mode - Mode: you can choose one of the modes below:
By Plan: the actual overtime will be counted based on the approved and planned overtime. By default, the system suggest you choosing this mode.
![Overtime recognition mode]()
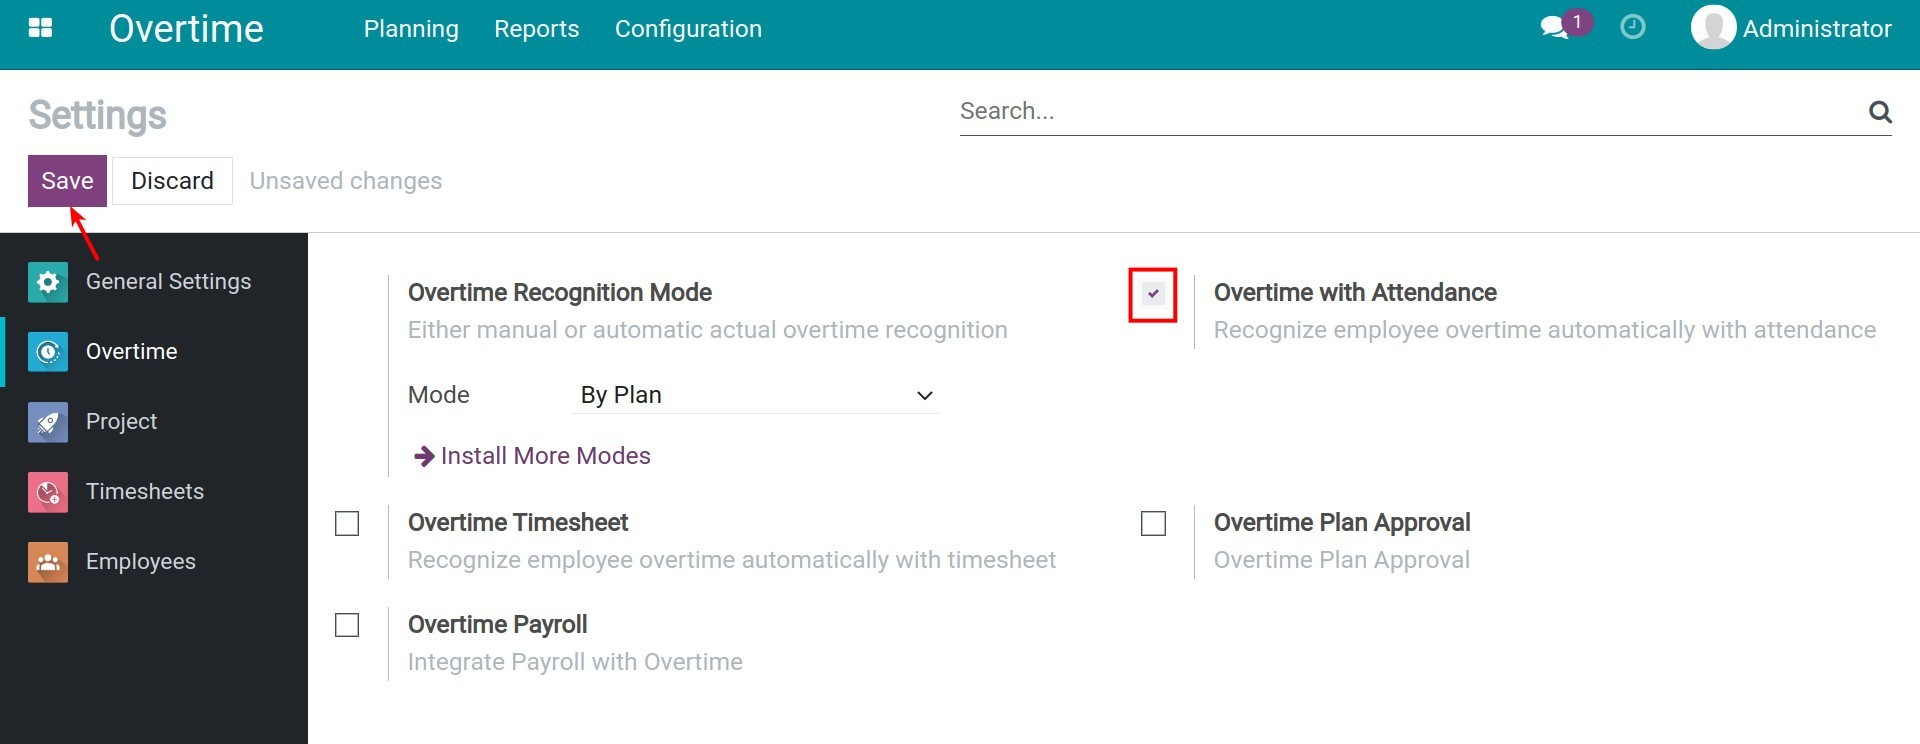
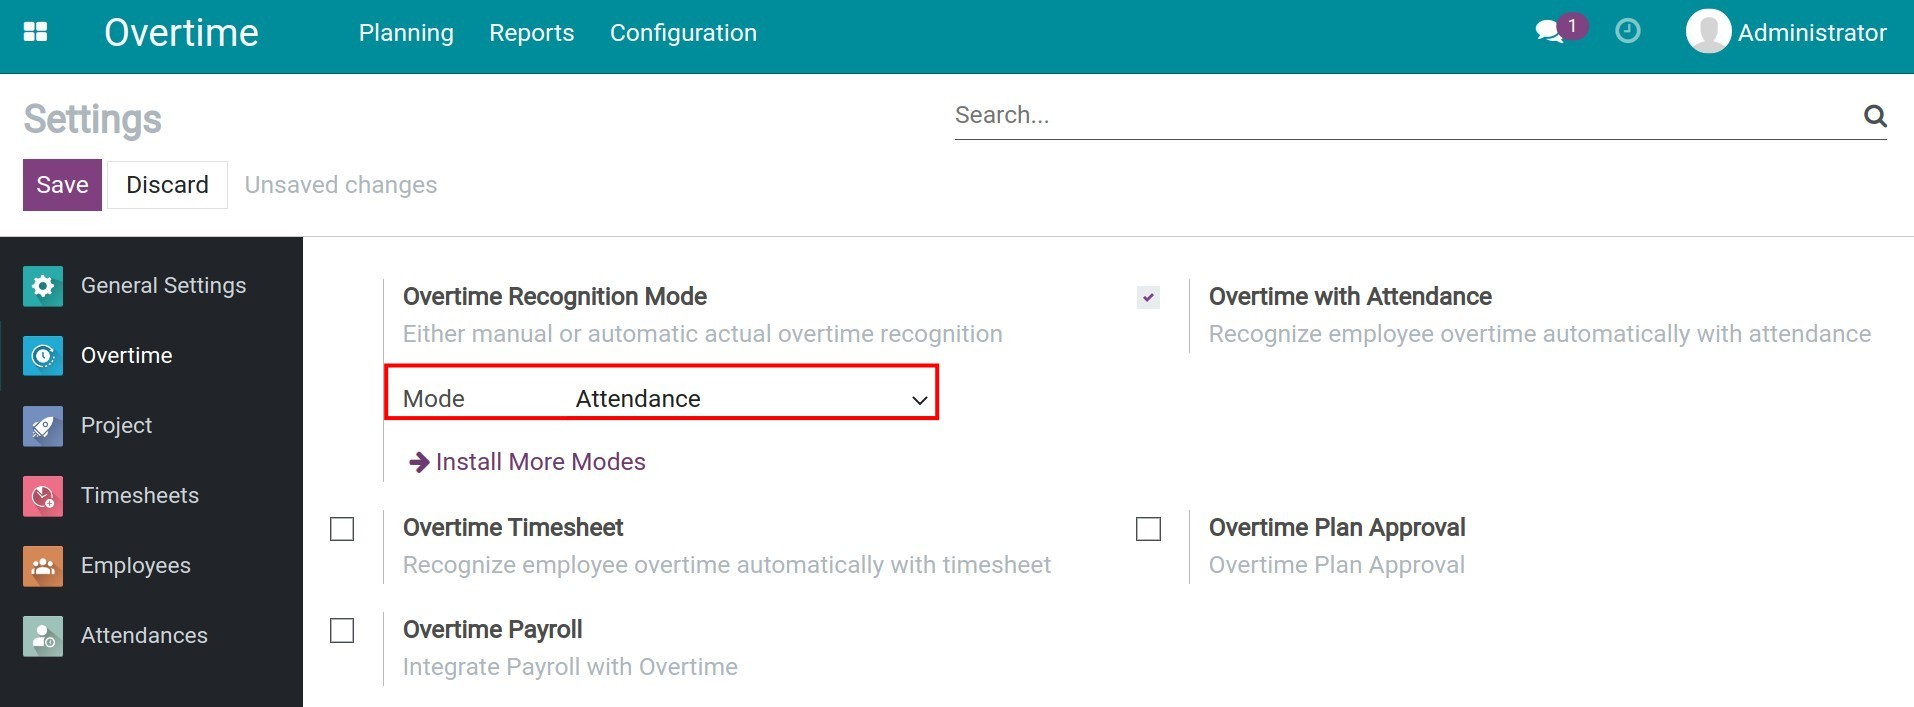
Attendance: the actual overtime work will be recognized by matching planned overtime (by registration and approval) with the actual attendance log (fingerprint, face,…). To enable this mode, you need to:
Click on Overtime with Attendance, then press Save.
![Overtime with Attendance]()
After saving, you choose the mode Attendance.
![Overtime attendance]()
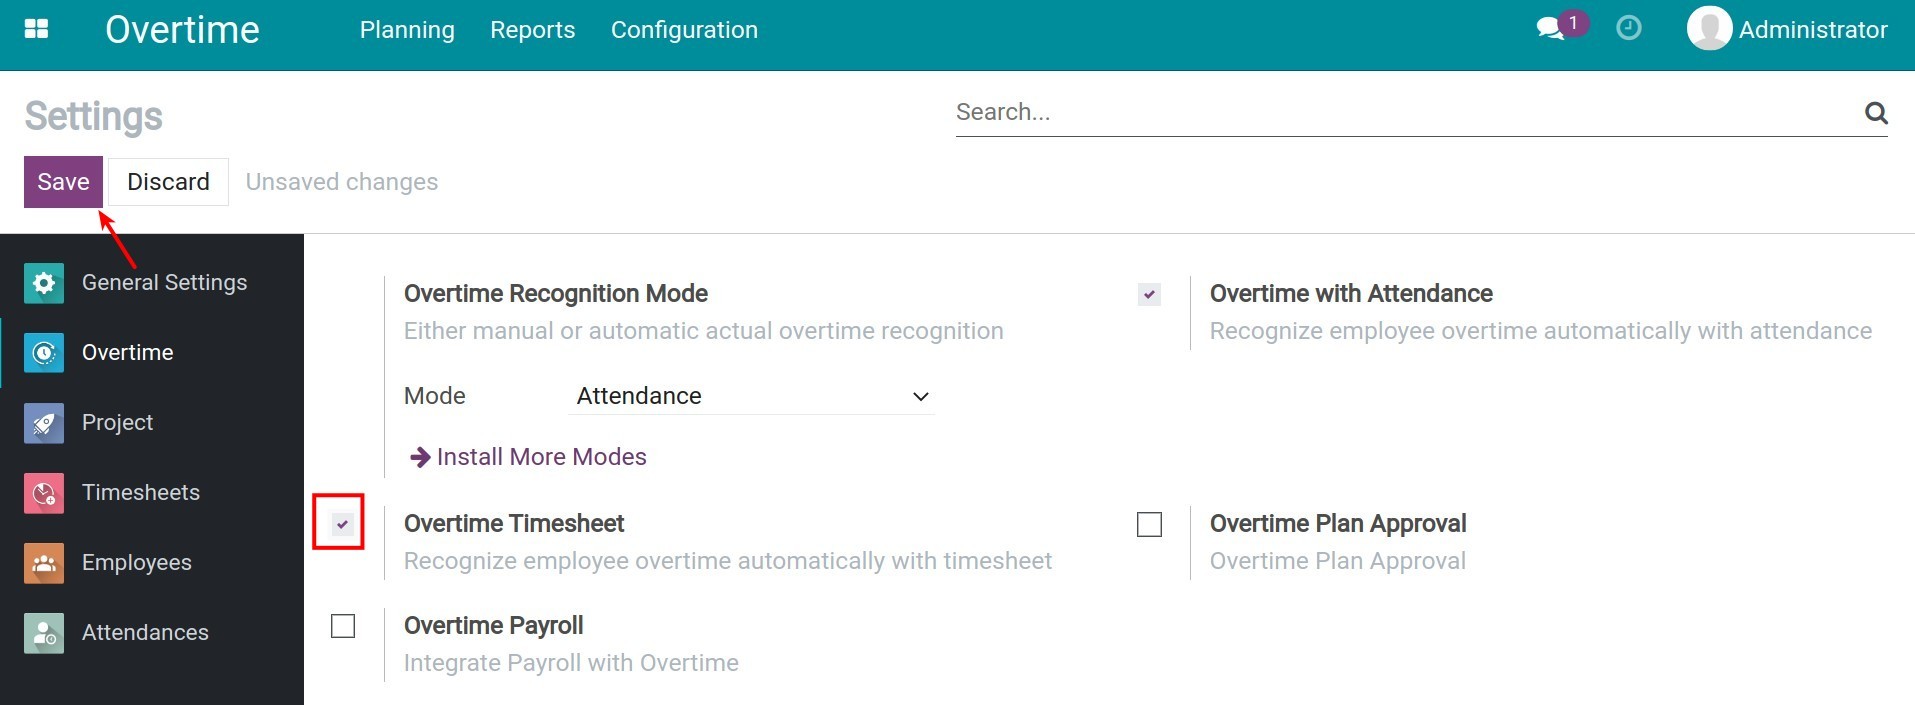
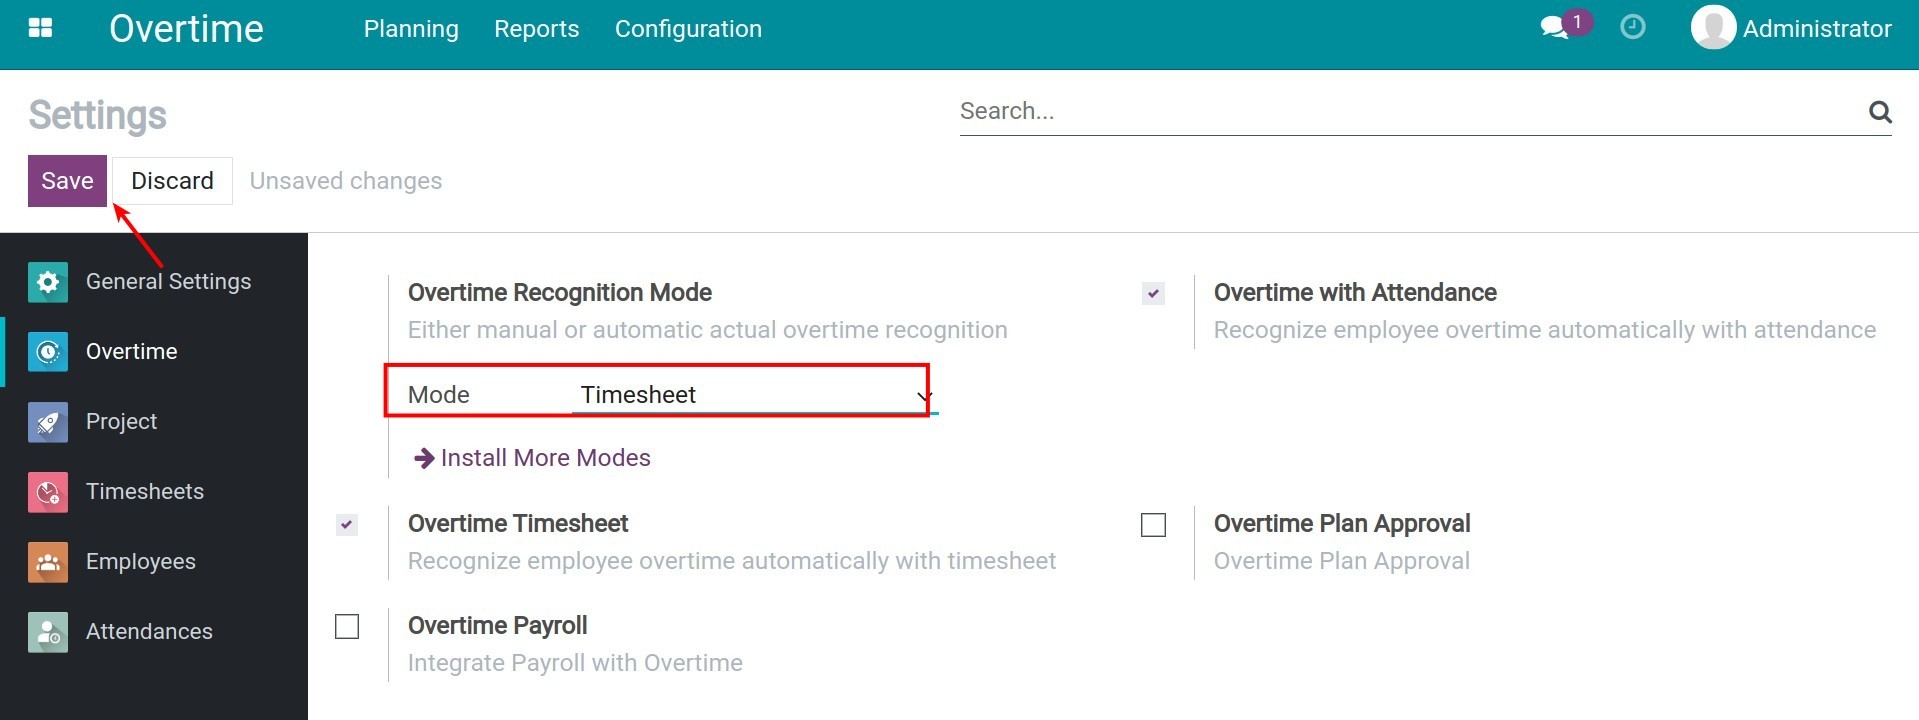
Timesheet: similarly, the actual overtime work will be recognized by matching planned overtime (by registration and approval) with the actual timesheet log registered in assigned tasks. To enable this mode, you need to:
Click on Overtime Timesheet and then press Save.
![Overtime Timesheet]()
After saving, you choose the mode Timesheet.
![Enable overtime timesheet]()
You can choose Attendance and Timesheet simultaneously or one of those, the system will display the corresponding mode for you to choose:
![Enable Overtime Timesheet and Overtime Attendance]()
- Attendance or Timesheet: the planned overtime will be matched with either attendance or timesheet.
Attendance and Timesheet: the planned overtime will be matched with both attendance and timesheet.
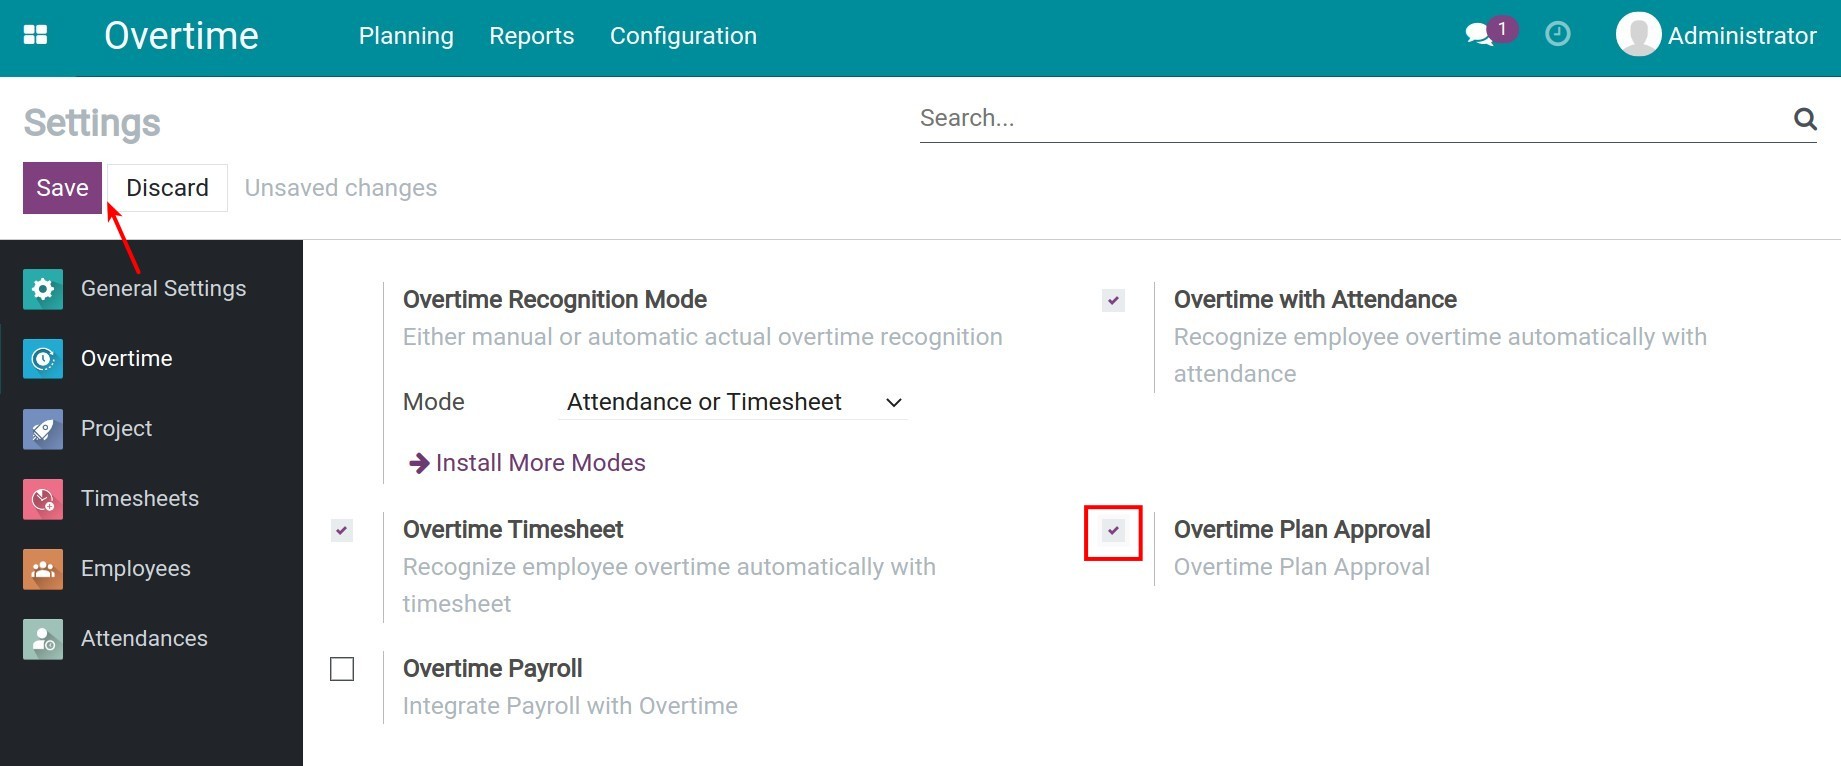
Overtime Plan Approval: this feature allows employees to make approval requests by themselves or Managers can register overtime plans for their department. This registered overtime approval request is approved by managers.
![Overtime plan approval]()
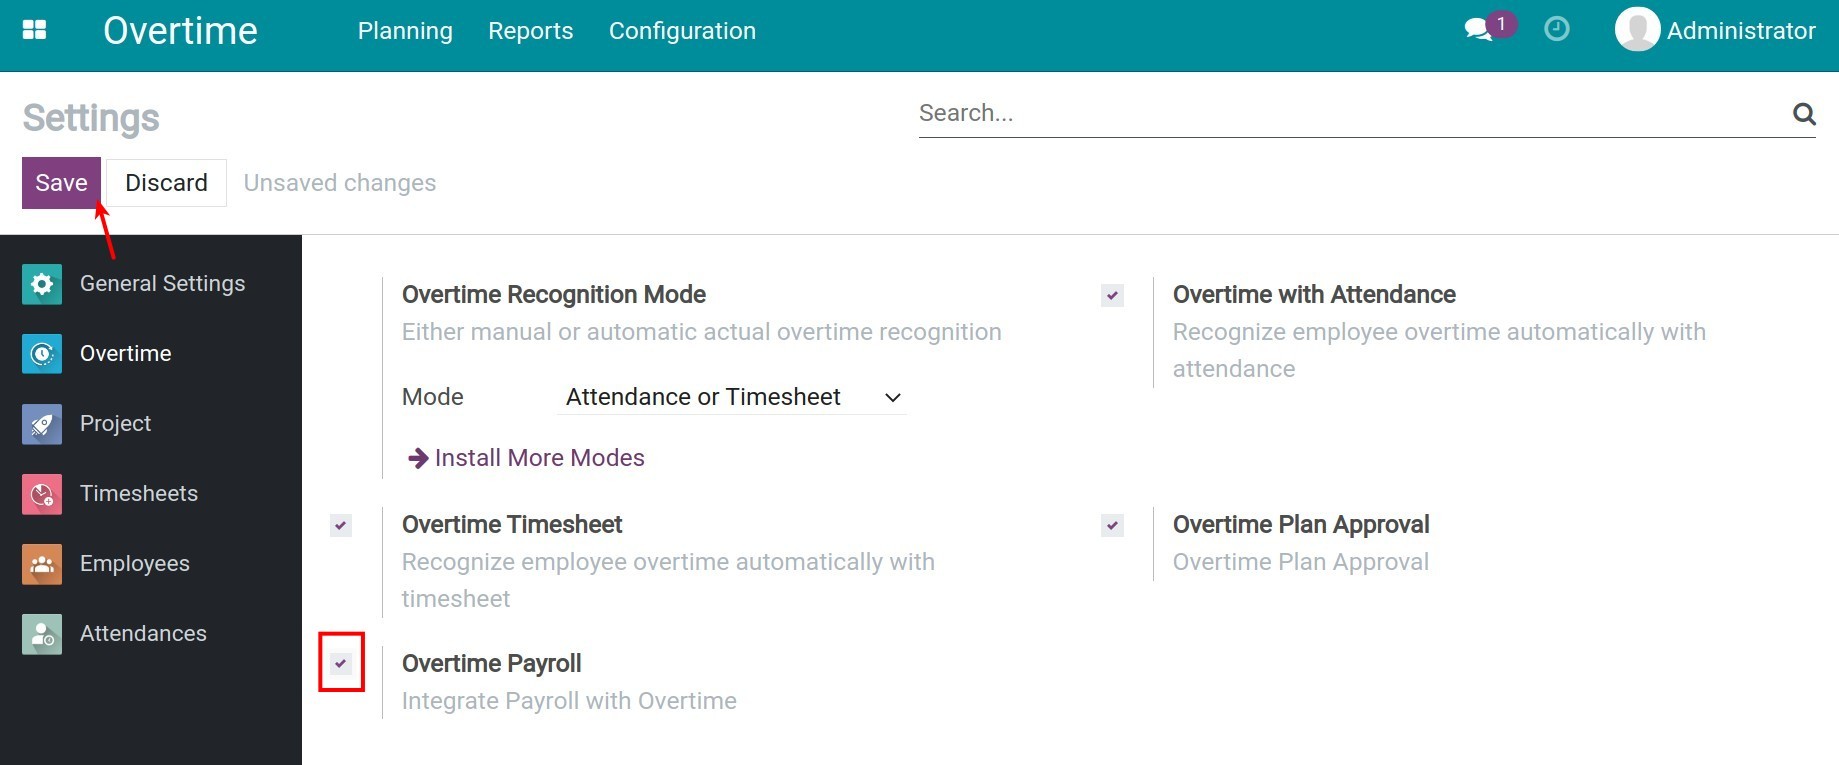
Overtime Payroll: chooose if you want to use overtime data in payroll.
![Overtime Payroll]()
Overtime Codes
The overtime codes are used in the auto-calculated formula for the overtime salary.
Note
See more about how to integrate overtime rules and payroll in Calculating overtime salary.
You navigate to app . Here, the system pre-sets the overtime codes. Each of these codes will be tied to only one Overtime Rule. Click Create to create a new code.
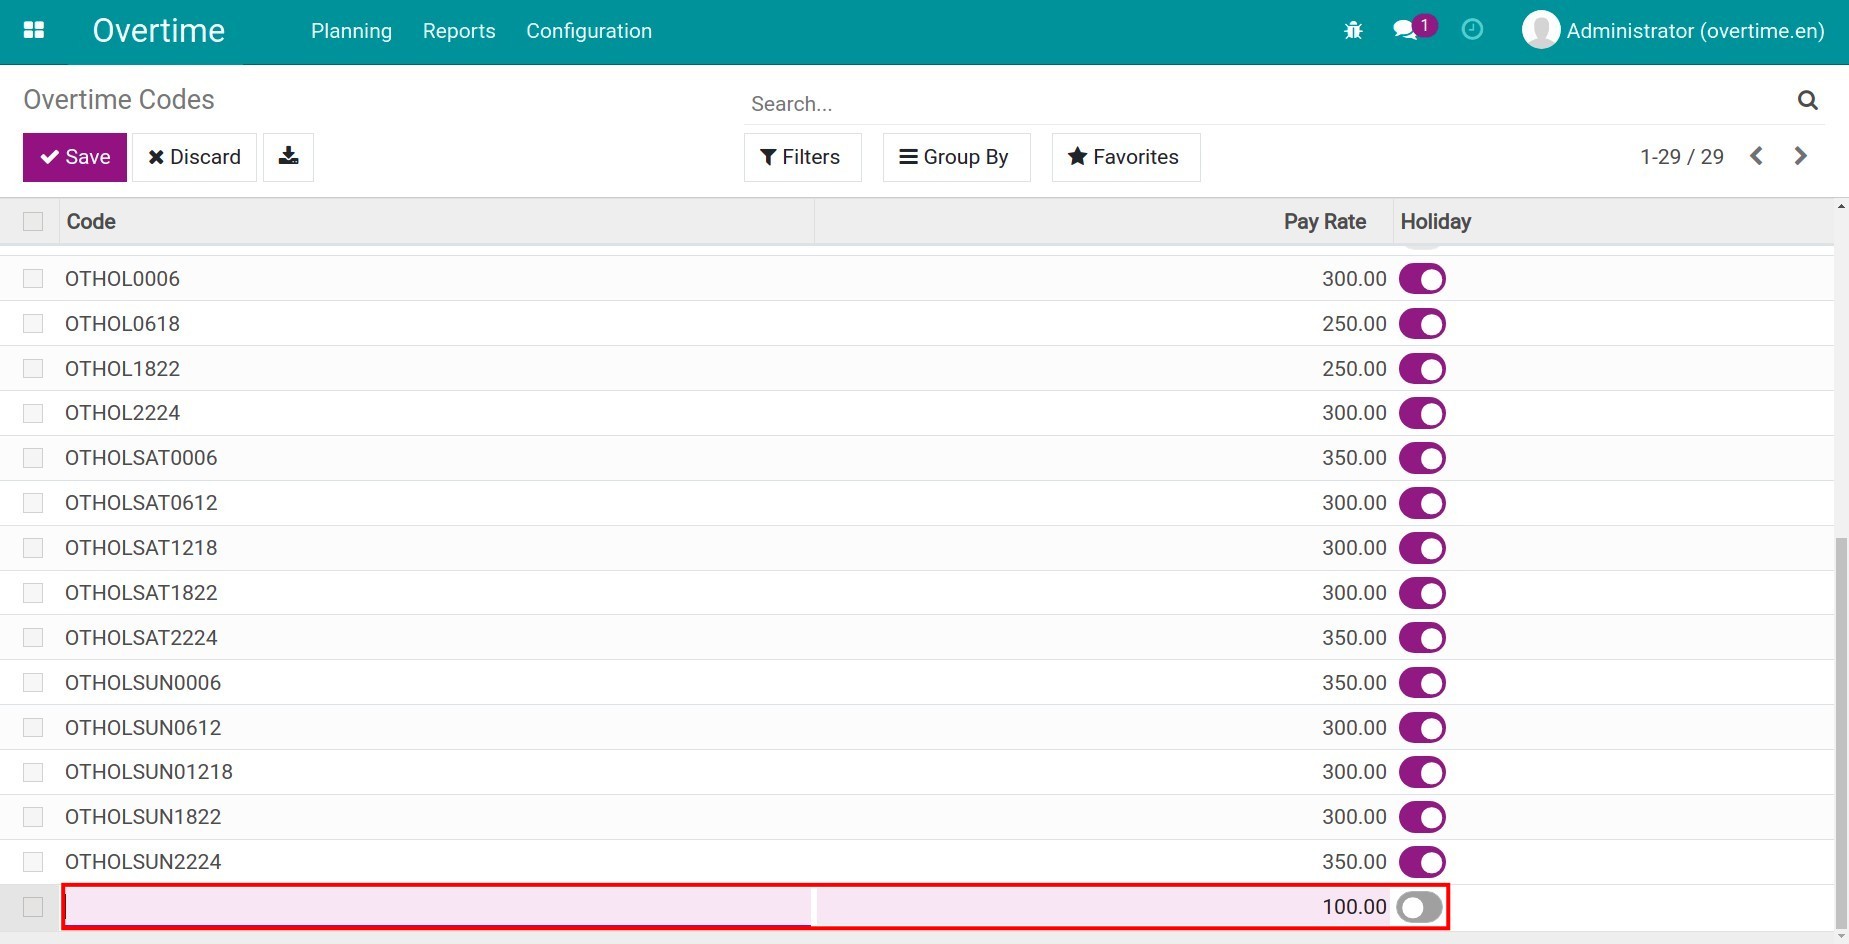
- Code: when naming the code, it should be short, including overtime/date information to easy-to-distinguish.
Pay Rate: the pay rate for overtime registration applied to the above code. This pay rate is set up in accordance with the Labor Code of applied country. For example, in Vietnam:
The rate of pay for overtime on a weekday is 150% of the actual hourly wage paid on a normal working day.
The rate of pay for overtime on a weekend is 200% of the actual hourly wage paid on a normal working day.
The rate of pay for overtime on holiday is 300% of the actual hourly wage paid on a normal working day.
Holiday: check if this is for overtime in holiday. Noted that you should fill the corresponding pay rate.
Overtime Rules
You go to . Here, the system pre-sets the overtime rules with the pay rate in accordance with the Labor Code of the applied country. You can click Create to create a similar rule.
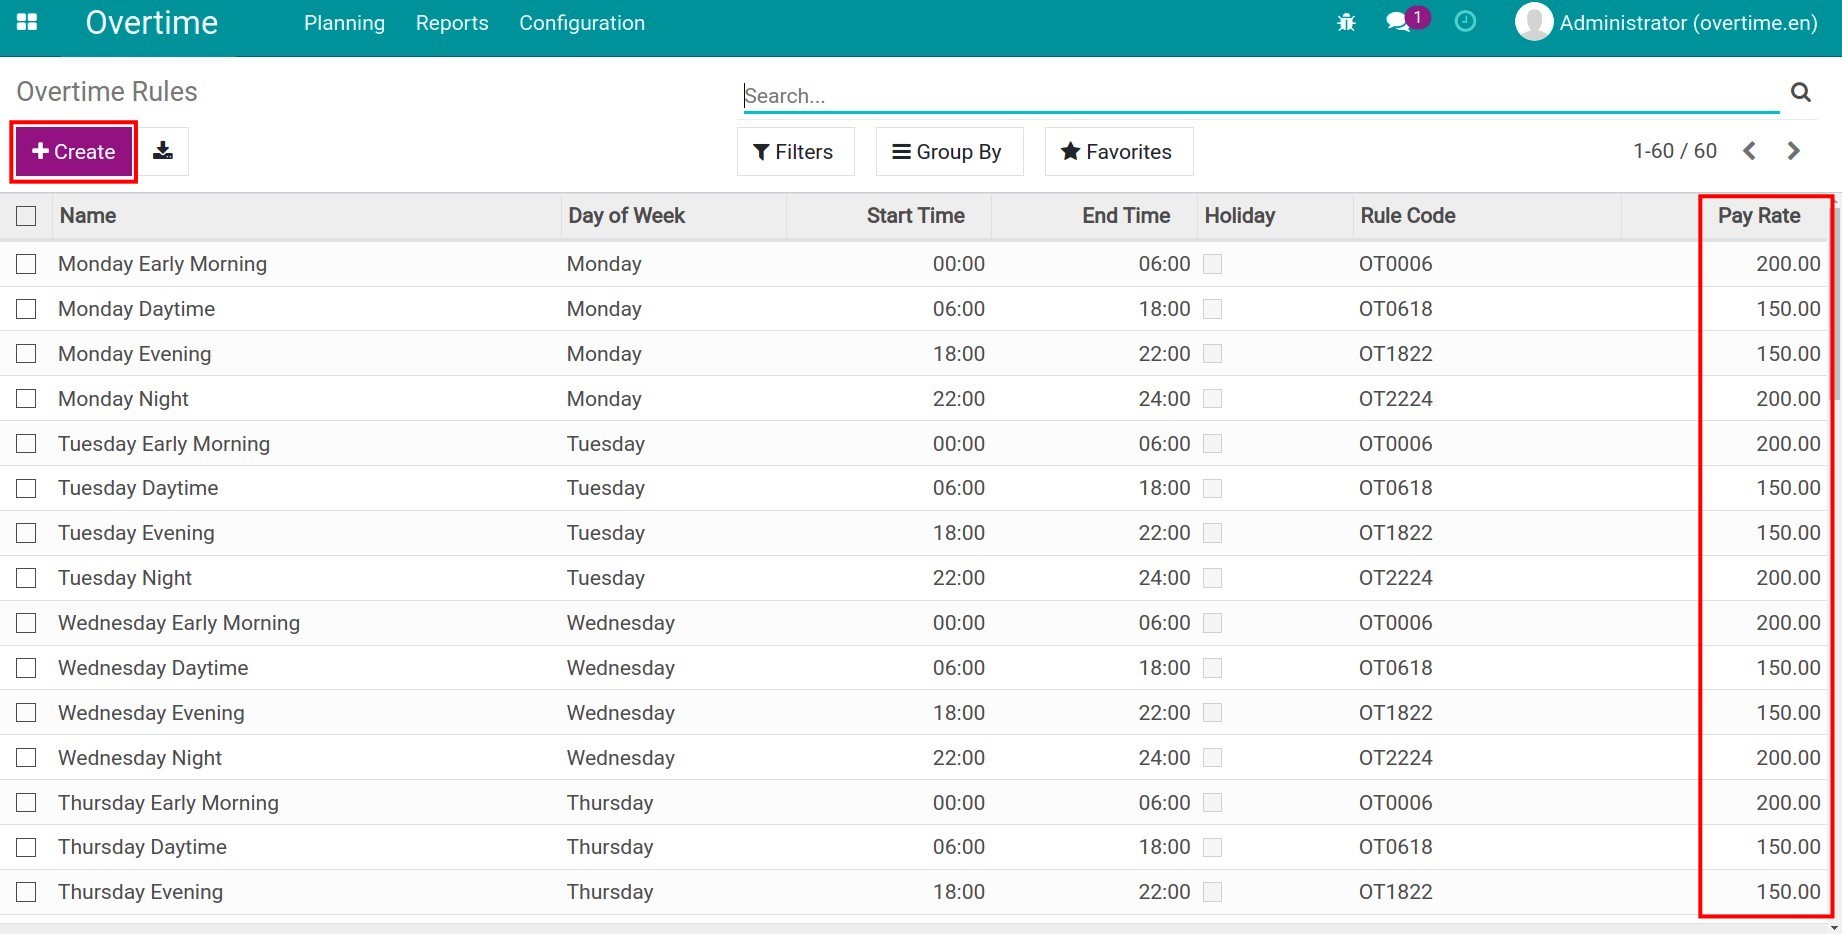
After creating, on the view of Overtime Rules:

- Name: you can name the rule, noted that it should be short, including information about dates, holidays, time,…
Day of Week: select the overtime day
Hours: add the overtime start and end time
Rule Code: choose the configured rule code. After that, the system will automatically fill the Code, Pay rate and Holiday as the chosen Rule code.
Overtime Reason
You navigate to . Here, the system pre-sets the overtime reasons that companies often use. Moreover, you can create other reasons by clicking the Create button.

On the view of Overtime Reason:

- Title: the title of reason, which is shown on the Overtime Request. The reason title, which is chose by users in making overtime plan, should be easy-to-understand and related to task-detailed.
Recognition Mode: choose and enable the desired mode by following the instruction in Mode.
Description: more details of overtime reason help you easily distinguish and look up the information when needed.
Project Required: when the Project app is installed, check this field if you want that it is required for the employees to choose the project specified.
See also


