Set up Payment Service Providers in Viindoo
Introduction
In the current context, most economic transactions can be processed online. Viindoo provides many online payment methods to help you close orders faster, providing more efficient and convenient tools for customers. There are two main types of payment methods: Payment through a third party service (the payment will be kept at the intermediary’s account, then transferred back to your bank account) and the bank transfer (the payment will be transferred directly to your bank account).
Bank transfer
This is the default method when you use online payments. With this method, you will need to provide detailed information on bank accounts on the website and the payment gateway. Then, customers will transfer money directly to your account via internet banking.
Payment via Payment acquirers
Using this payment method, your customers will be navigated to the payment acquirer interface and proceed to pay. Viindoo has integration with many payment acquirers such as:
|
|
|
|
|
|
|
|
|
|
|
|
|
|
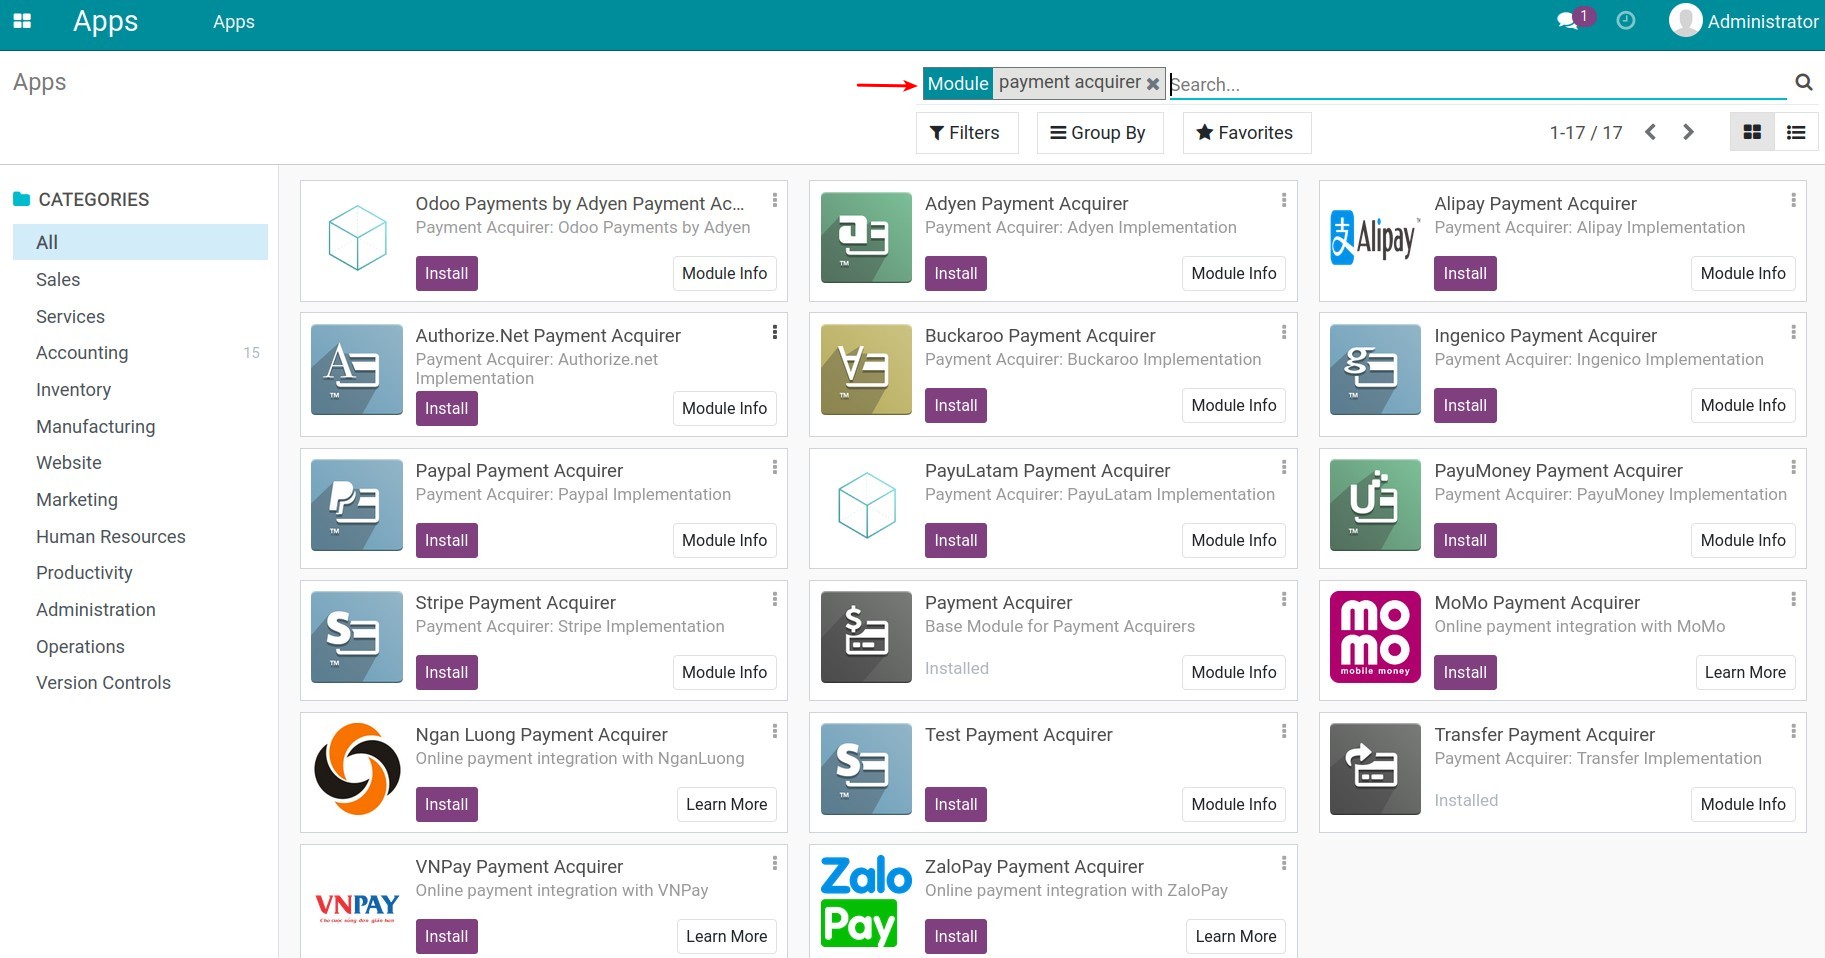
To use these payment services above, you go to the Viindoo Apps, turn off the Apps filter, and then use the filter tool to search for the suitable payment apps and install:
Payment acquirer configuration
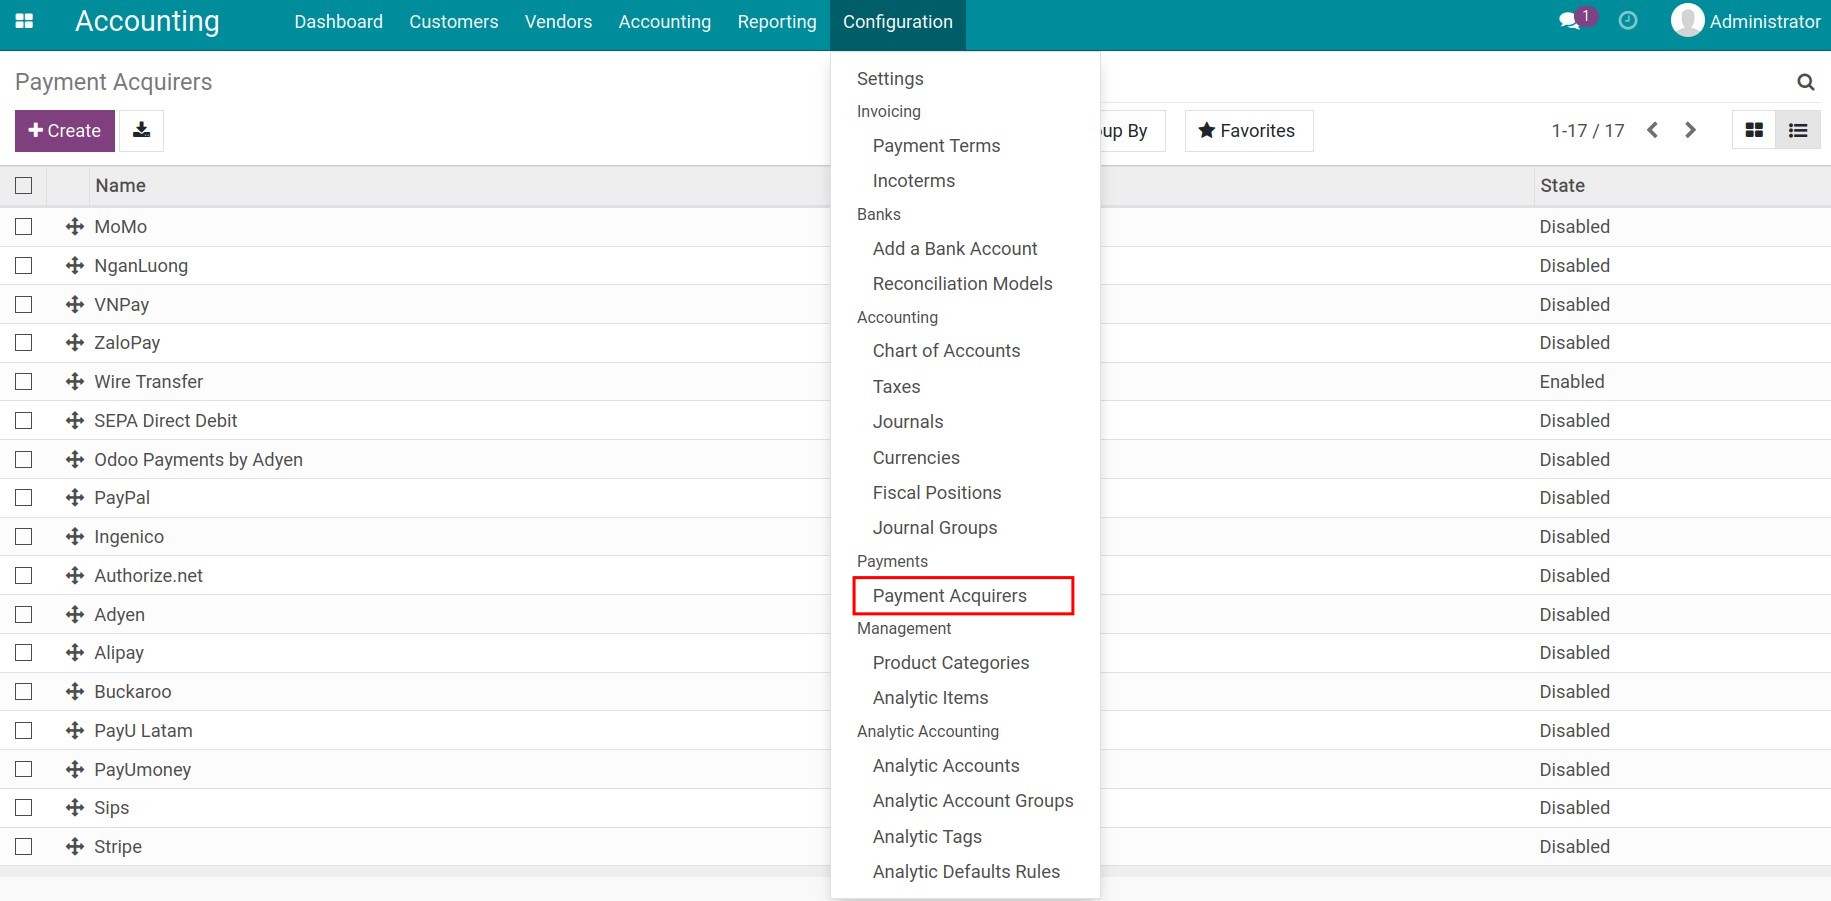
To configure a payment acquirer, navigate to Accounting ‣ Configuration ‣ Payment Acquirers:
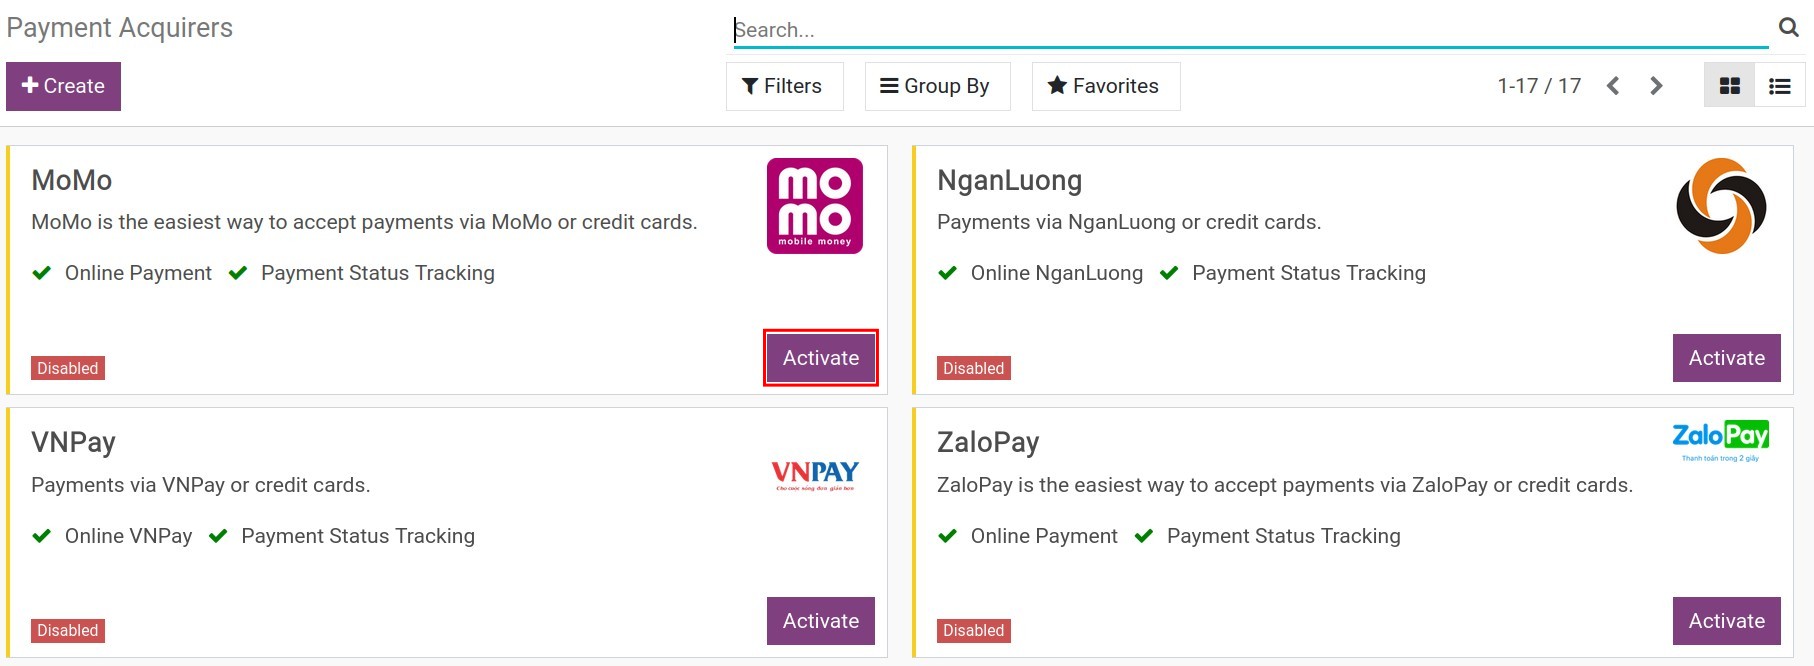
Head to the needed payment acquirer to use, then click on the Activate button.
Now the payment acquirer view is opened for you to configure the information:
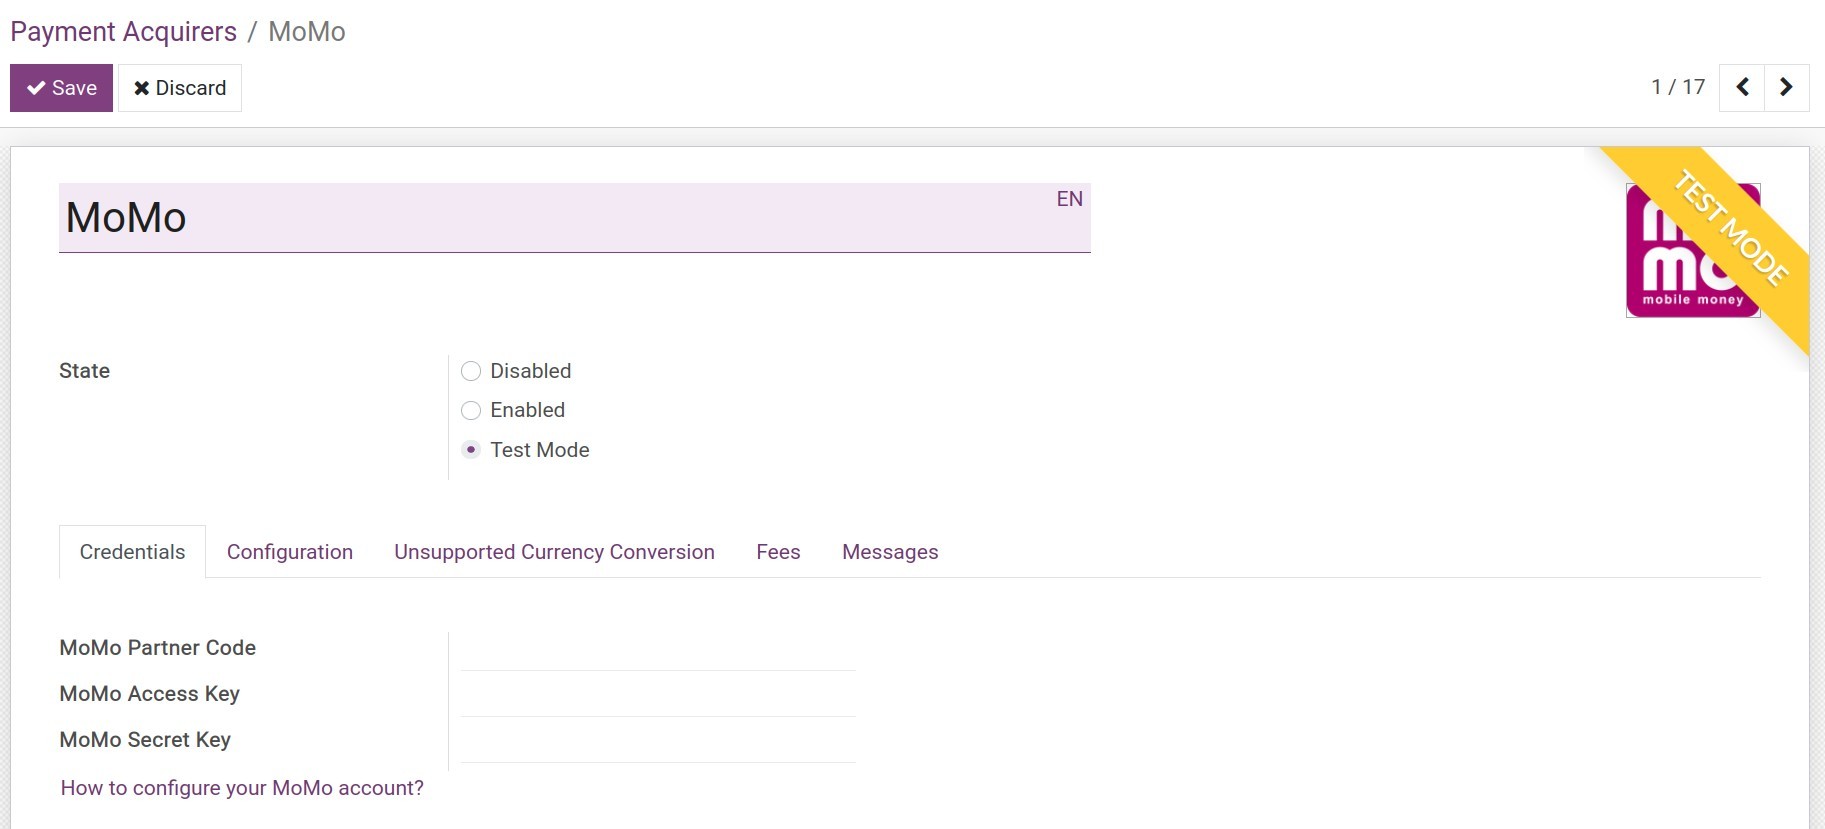
State: Select the options below to change the payment service provider’s status:
Disabled: This payment acquirer cannot be used;
Enabled: When you want to use this payment acquirer;
Test Mode: Choose when you want to test this payment acquirer.
Credentials tab:
A place for declaring the affiliate information that the payment acquirer provides to you;
Click on the link for navigating to the payment acquirer’s instruction page.
Configuration tab:
![Payment service provider configuration tab - Viindoo Accounting]()
Payment Form:
Displayed as: Declare the display name of the payment method. If not, the system will use the name of the payment acquirer;
Supported Payment Icons: Choose from the list of the payment symbols so that customers can see what payment types this acquirer supports.
Payment Followup:
Payment Journal: Select a journal to record the payments from this acquirer.
Availability:
Country: Select the countries in which you want this acquirer to apply.
Unsupported Currency Conversion tab:
![Unsupported currency conversion tab - Viindoo Accounting]()
To add a currency that is supported to payment with this acquirer, click on Add a line and choose from the list of supported currencies (Note: you need to enable the Multi-currencies system to apply multiple currencies to payments).
Default Converted Currency: When occurring the currencies which differ from those supported by the acquirer, the system will convert them to the default currency that is being configured here.
For instance: Your bill is calculated in VND (Vietnamese Dong) while it is not supported by the acquirer. During the online payment process, this currency will be converted to the default currency.
Fees tab:
![Fees tab - Viindoo Accounting]() When enabling the Add Extra Fees feature, the system will allow you to declare the money exchange fees from the payment acquirer to your company’s account.
When enabling the Add Extra Fees feature, the system will allow you to declare the money exchange fees from the payment acquirer to your company’s account.Message tab:
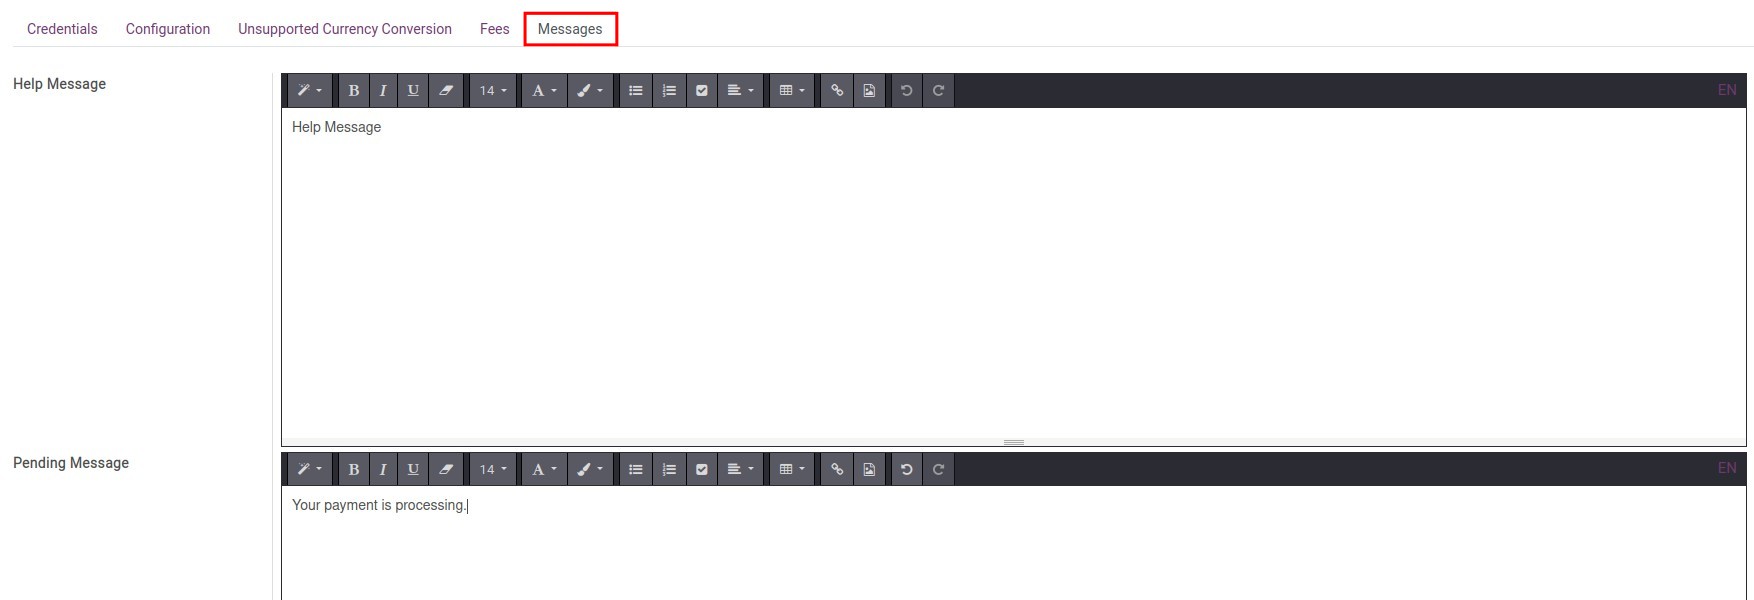
![Message tab - Viindoo Accounting]() A place to declare the messages which are:
A place to declare the messages which are:Help Message;
Pending Message;
Complete Message;
Cancel Message.


