Pay various distinctive bills at the same time
In reality, with payments, we don’t always pay one bill at a time. There are many situations where accountants need to make one payment for multiple bills to save time and the transaction fees. To simplify your work, Viindoo Accounting Software supports paying multiple bills all together in one payment while still being able to track the receivables and payables of each bill.
To make payment for various bills in one operation, navigate to module Accounting ‣ Customers ‣ Invoices for customer payments, or Accounting ‣ Vendors ‣ Bills for vendor payments:

In the bills list, choose the bills of the same vendor that you need to register payment:

In case you want to choose all the unpaid bills of the same vendor, you can use the filter and group feature to search, then choose all bills by checking the square box on the header:

Warning
You can register payment for bills that are in the Posted Status and the Payment Status is Not Paid or Partially Paid.
Once done selecting bills, press on Register Payment button on the view. A pop-up window will appear, asking for the following information:

Journal: Select the journal of the receiving or paying account.
Payment Date: Enter the date of the payment.
Group Payments: If not checked, one payment with a total value equal to the sum of all the chosen bills is created. If checked, each bill will create a payment respectively. On the other hand, you can also register the following information:
Recipient Bank Account;
Amount: The registered payment amount;
Currencies: You can select the respective currencies for the payments if the Multi-currencies feature is activated.
![Activate the Group payments feature in the Viindoo Accounting app]()
In case your chosen bills have different due dates, then when you Register Payments, the Group Payments will also be available. If the registered payment amount is smaller than the total value of all bills and the payment difference will be kept open, the bills which have the oldest due date will be paid first. The Partially paid bills will also be flagged to recognize and the rest of the bills are fully Paid.
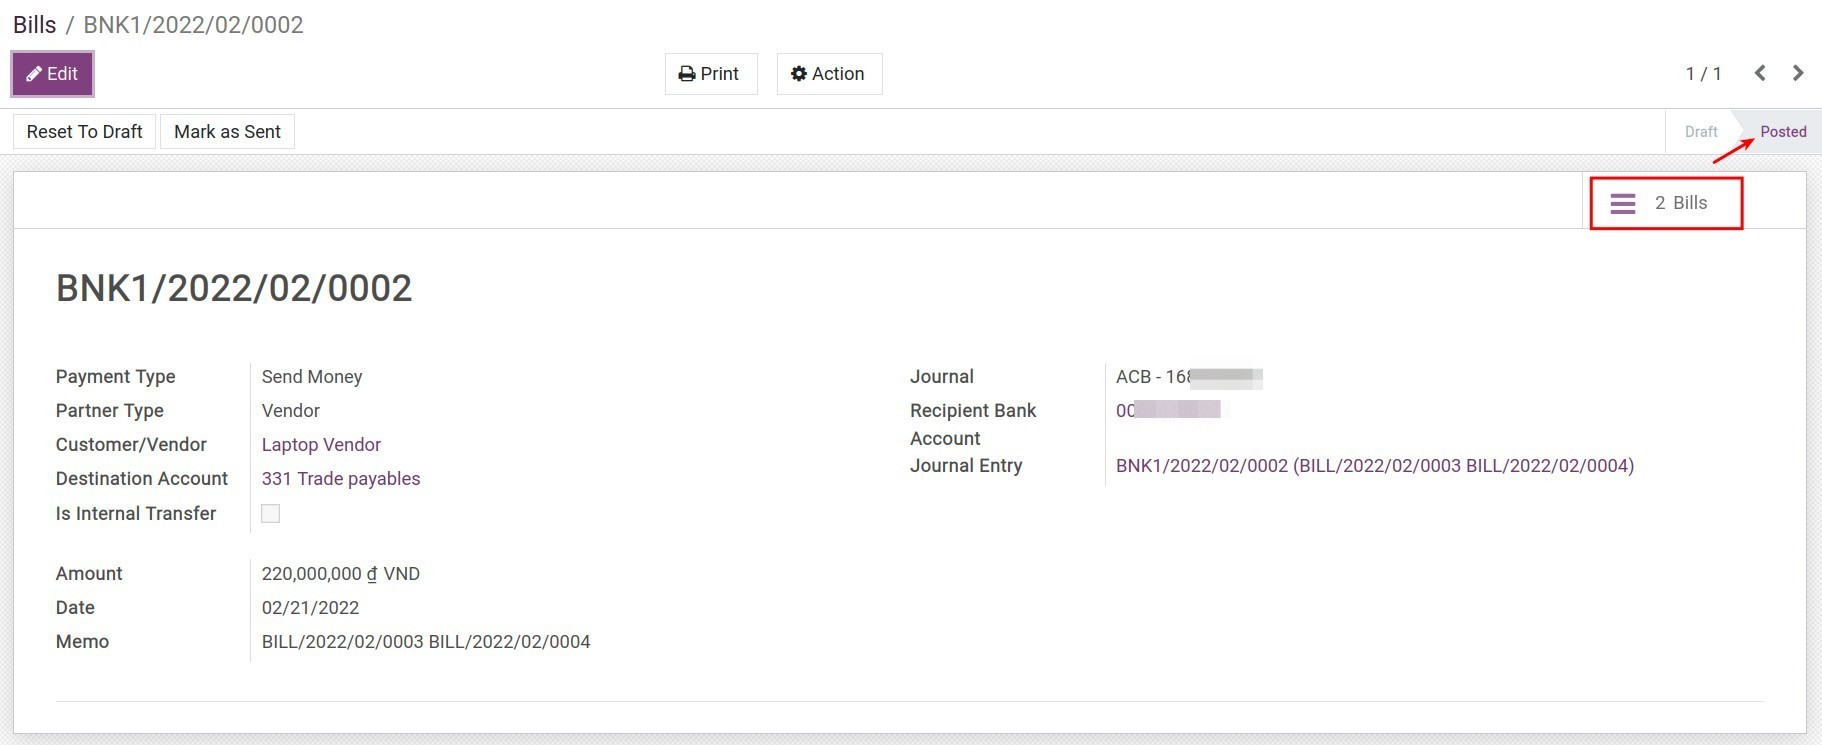
After filling in all the required information, press on Create Payment and you will be redirected to the payment view:

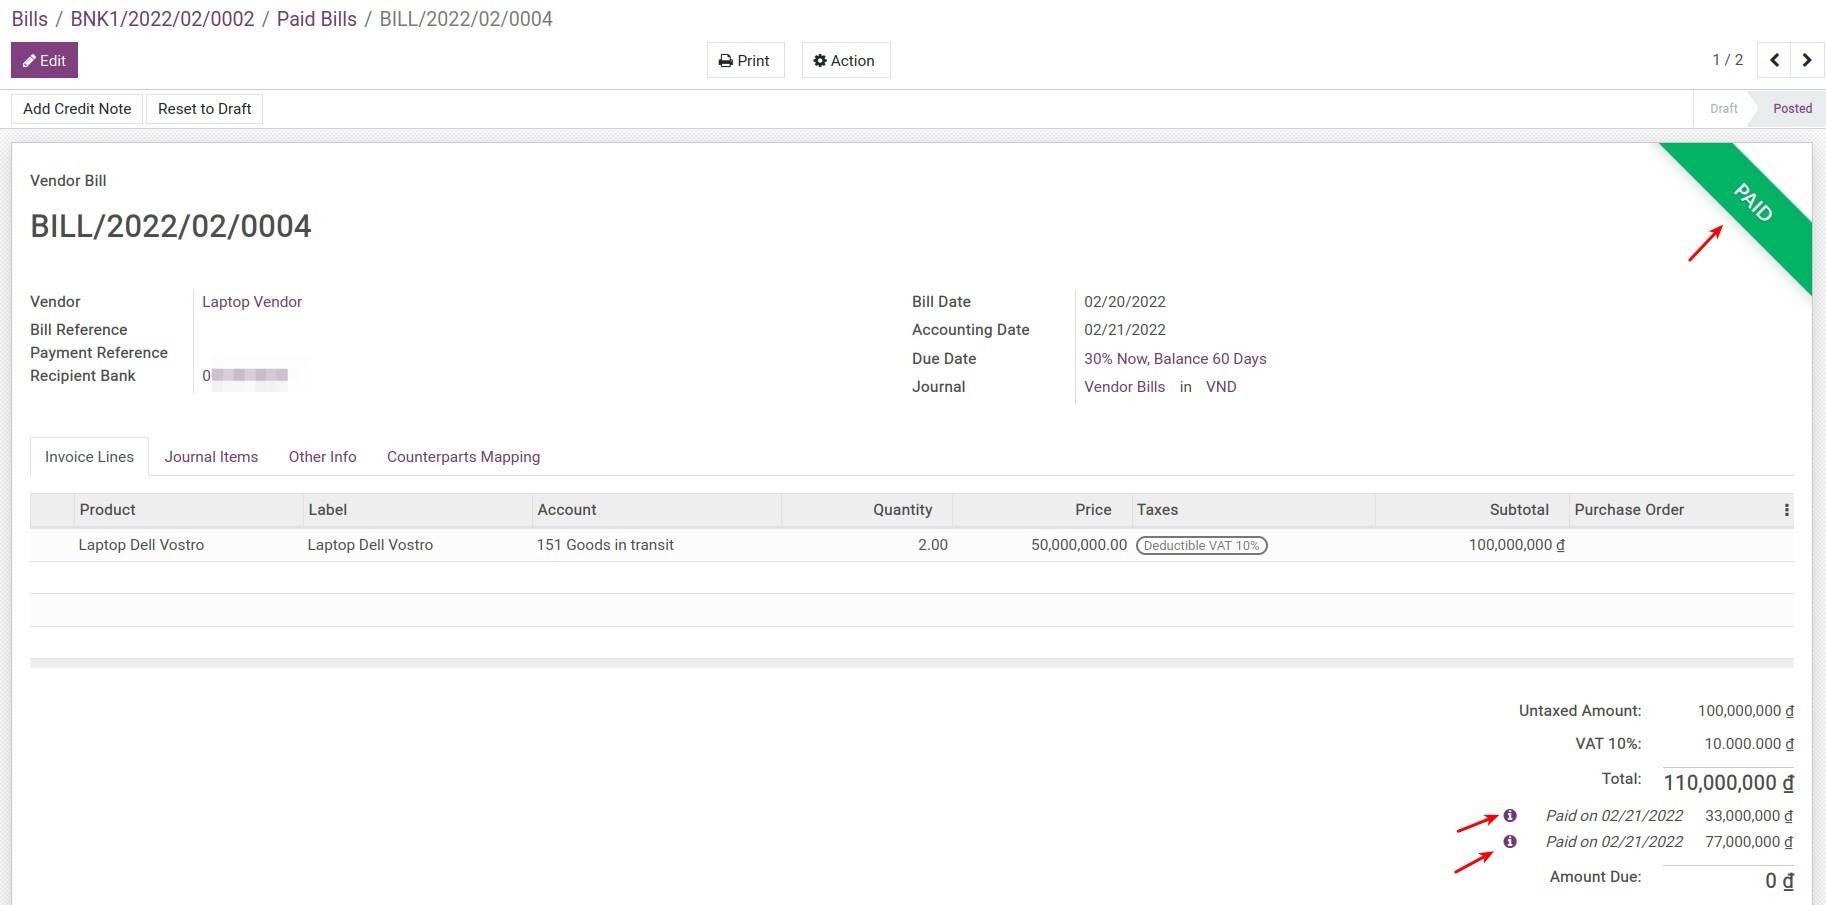
You can see all the bills linked to a payment by going to the Bills button on the top right corner of the screen. When payments are registered by this method, the bills will be automatic Confirmed. Besides, each bill is automatically reconciled with this payment:

