How to book a meeting in Viindoo
Vindoo software brings you the Calendar feature which allows you to create, manage, and track meetings. You can create the meeting directly from the Calendar app or right on the applicant records (to schedule an interview with the applicant), and also on the Purchase Order (to book a meeting with the vendor), etc.
Module Installation
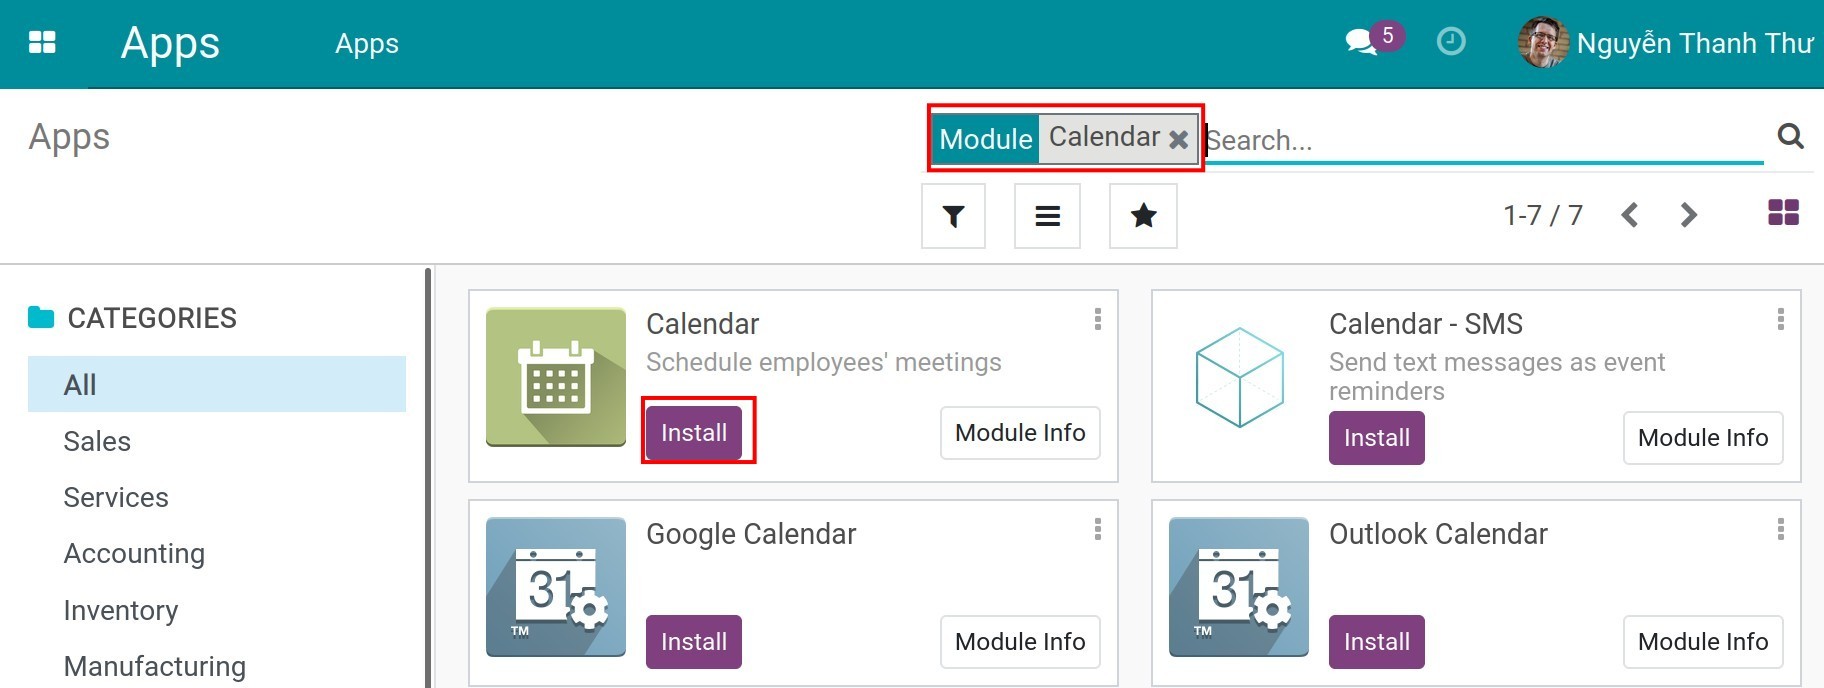
To use this feature, you need to install the Calendar module. Navigating to the Apps module, you type the keyword “Calendar” on the search bar. Next, hit the Install to install the module.
Create meetings from the Calendar app
Create meetings from the Calendar view
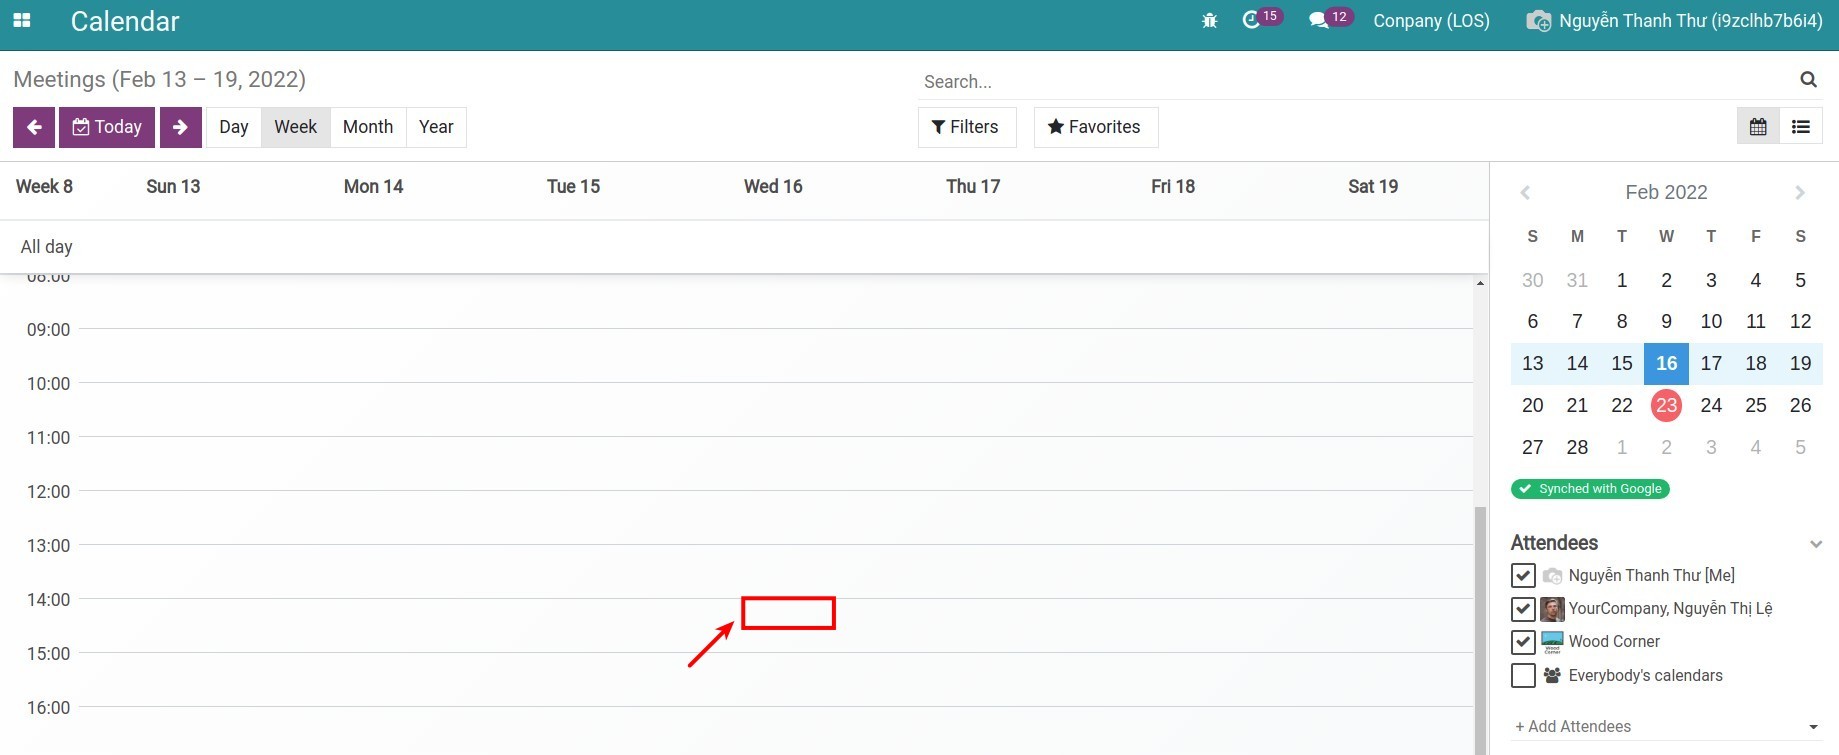
To create a meeting, you enter the Calendar app. On the default calendar view, select the position corresponding to the date and time you want to create the meeting. For instance, the date and time to create a meeting are on Wednesday, 16th at 14:00, you click on the position as below.
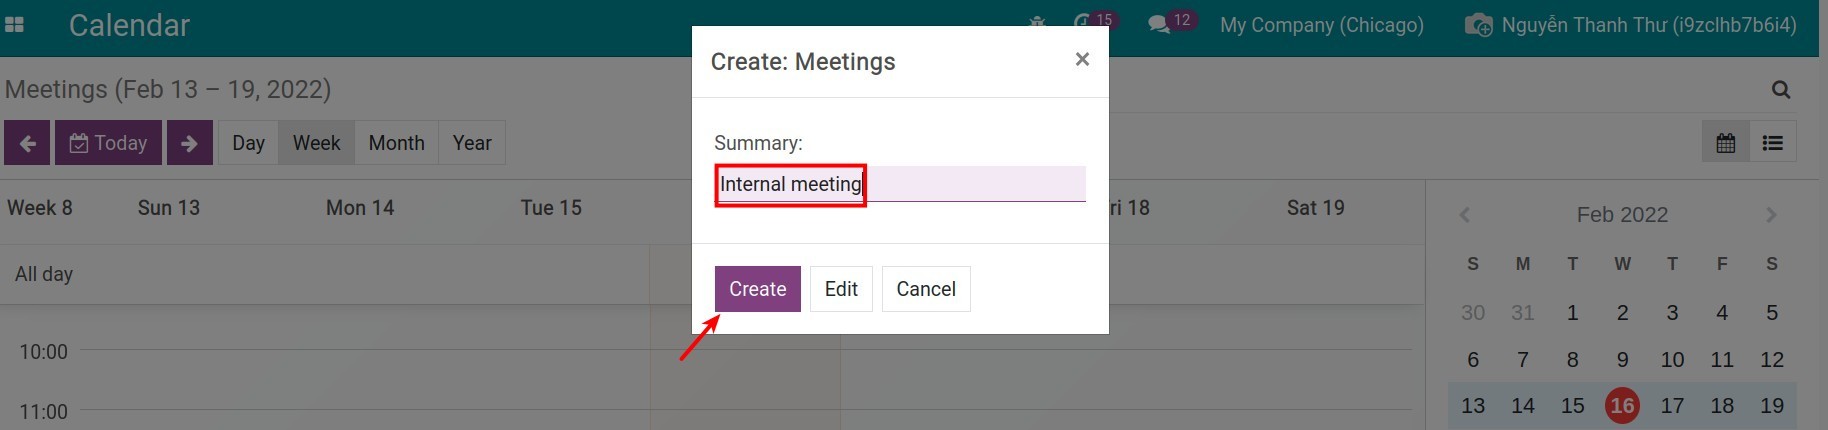
The system will display a wizard to create a meeting. You need to enter a brief description and then hit the Create button.
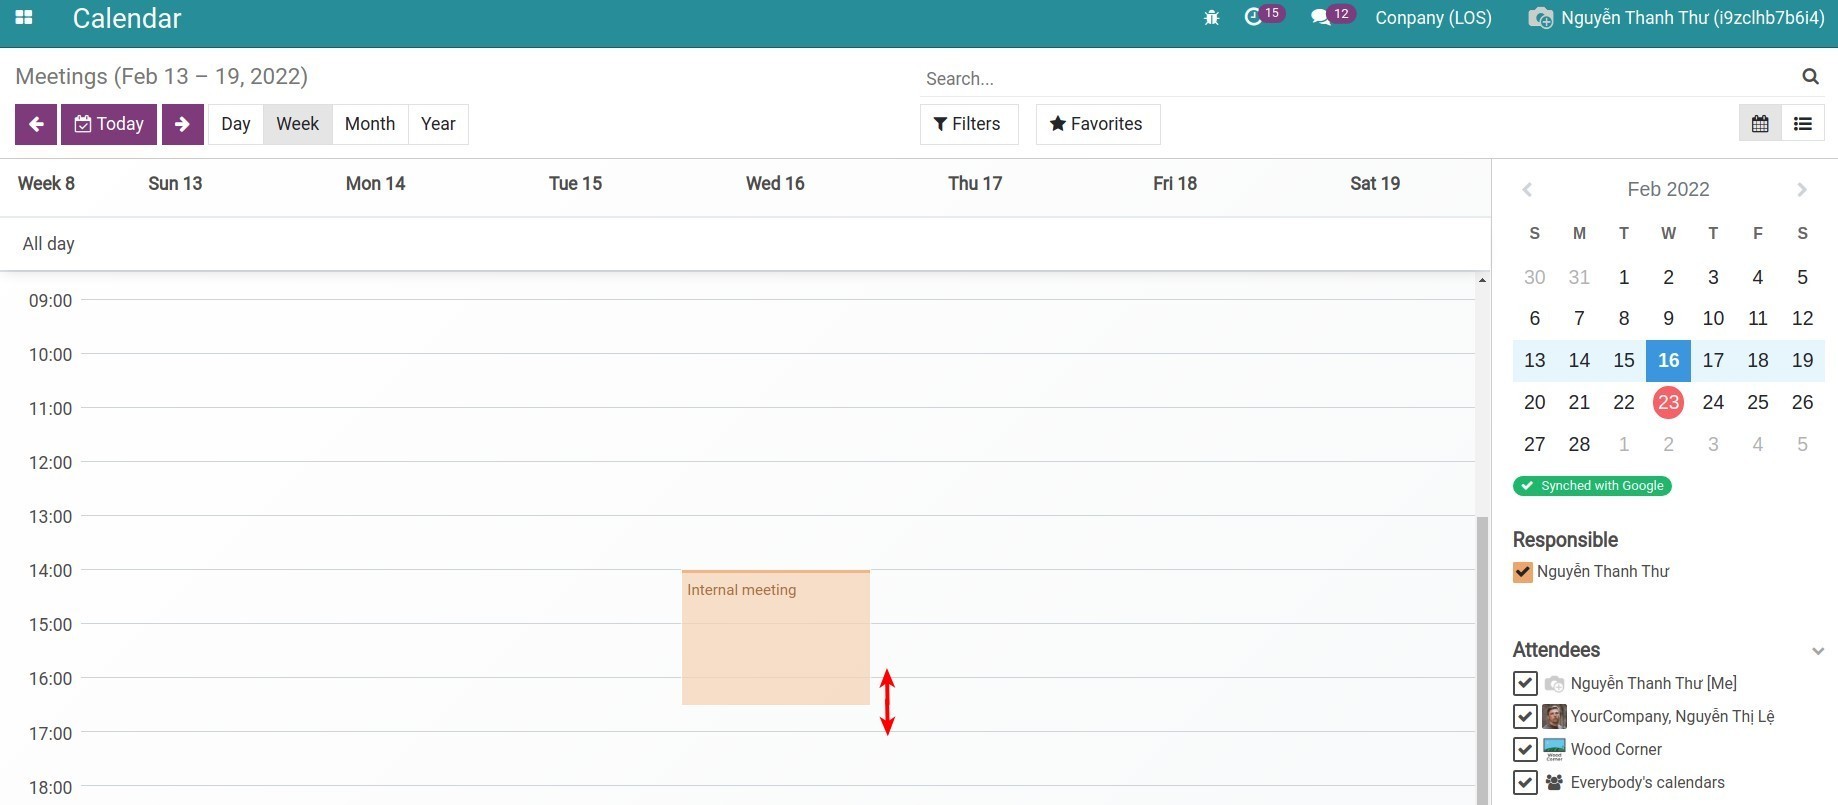
After clicking on Create, the meeting is created with a duration of 30 minutes. On the view, it is displayed as a card. For the time adjustment, you can drag the card up and down or expand it for a longer duration. Each move is recorded for a minimum of 30 minutes.
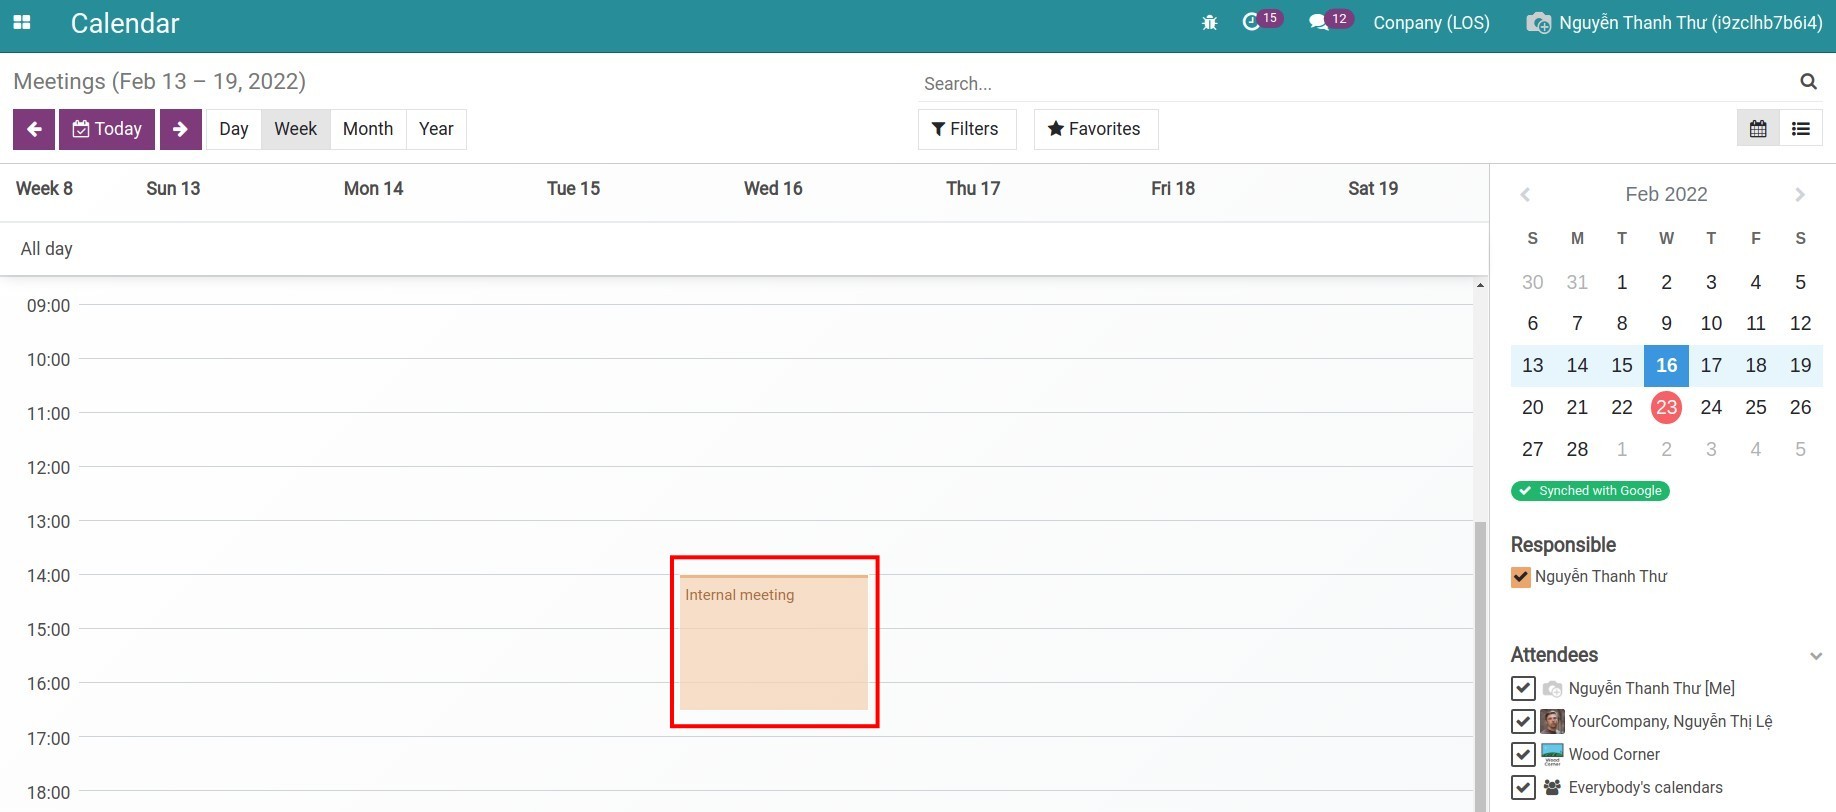
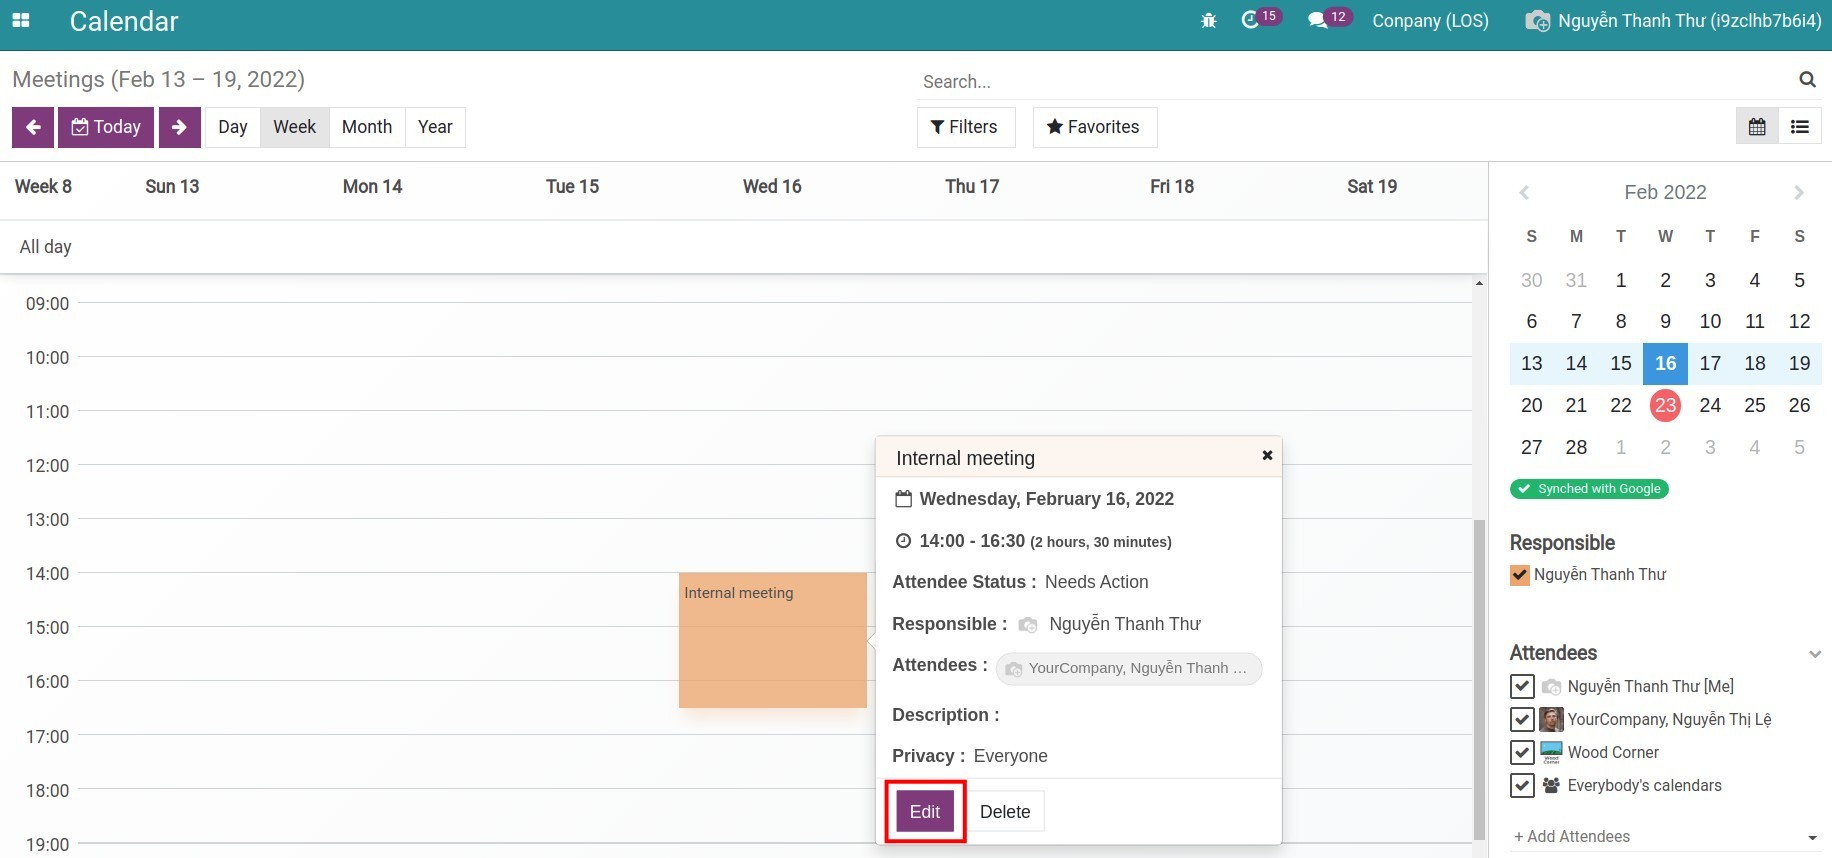
In case you want to adjust the meeting time under 30 minutes or the other information, you can click on the meeting and choose Edit, entering the information as the instruction of the meeting creation from the List view below.
Create meetings from the List view
Creating the meeting from the List view brings you a more detailed and comprehensive view of the meeting list.
To create meetings from this view, you access the Calendar app, hit the List view symbol, and then click on the Create button.

The system will display the meeting record, you need to fulfill the information:
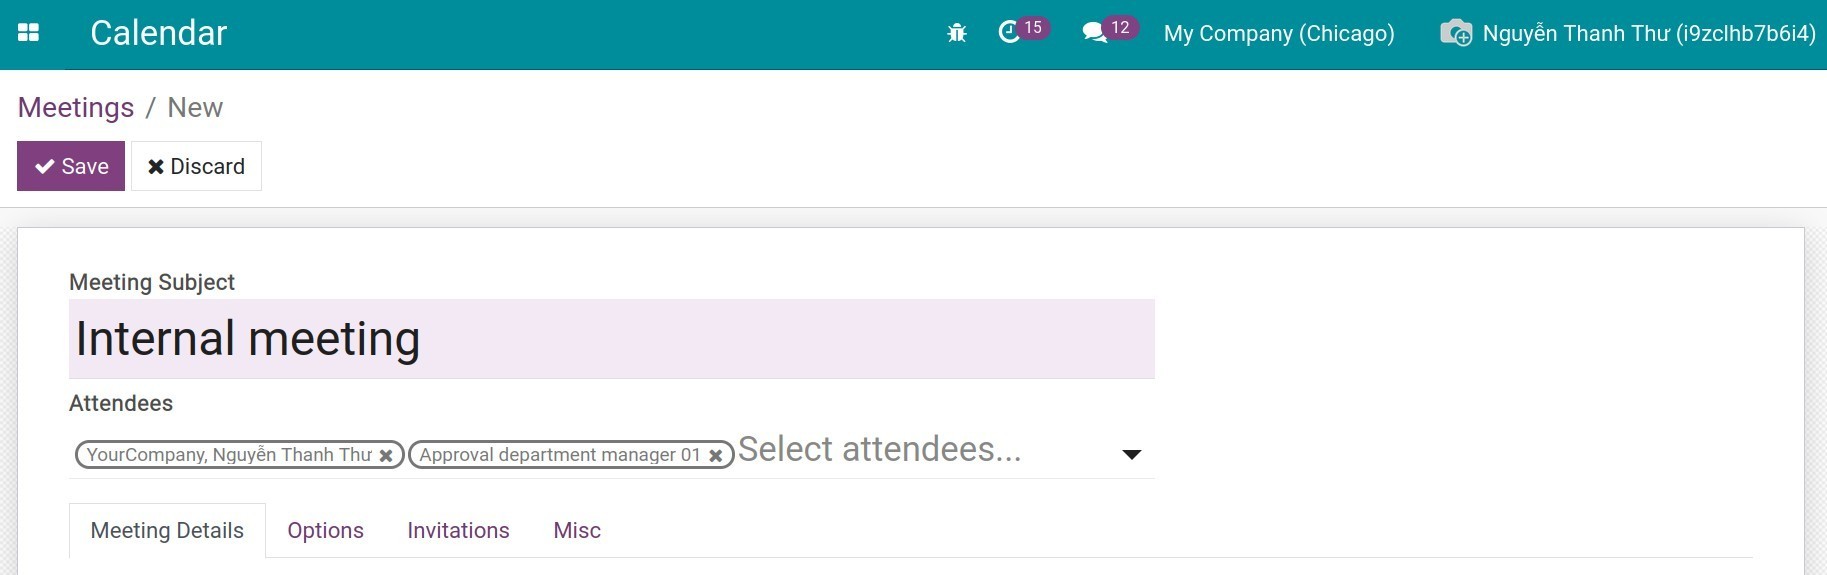
General information:
- Meeting Subject: the brief description or the title of the meeting.
Attendees: the place to choose the meeting attendee by name, including the members of your company or the partners. Note that you have to check the email address/phone number, etc. of the attendees to ensure you invite the right person.
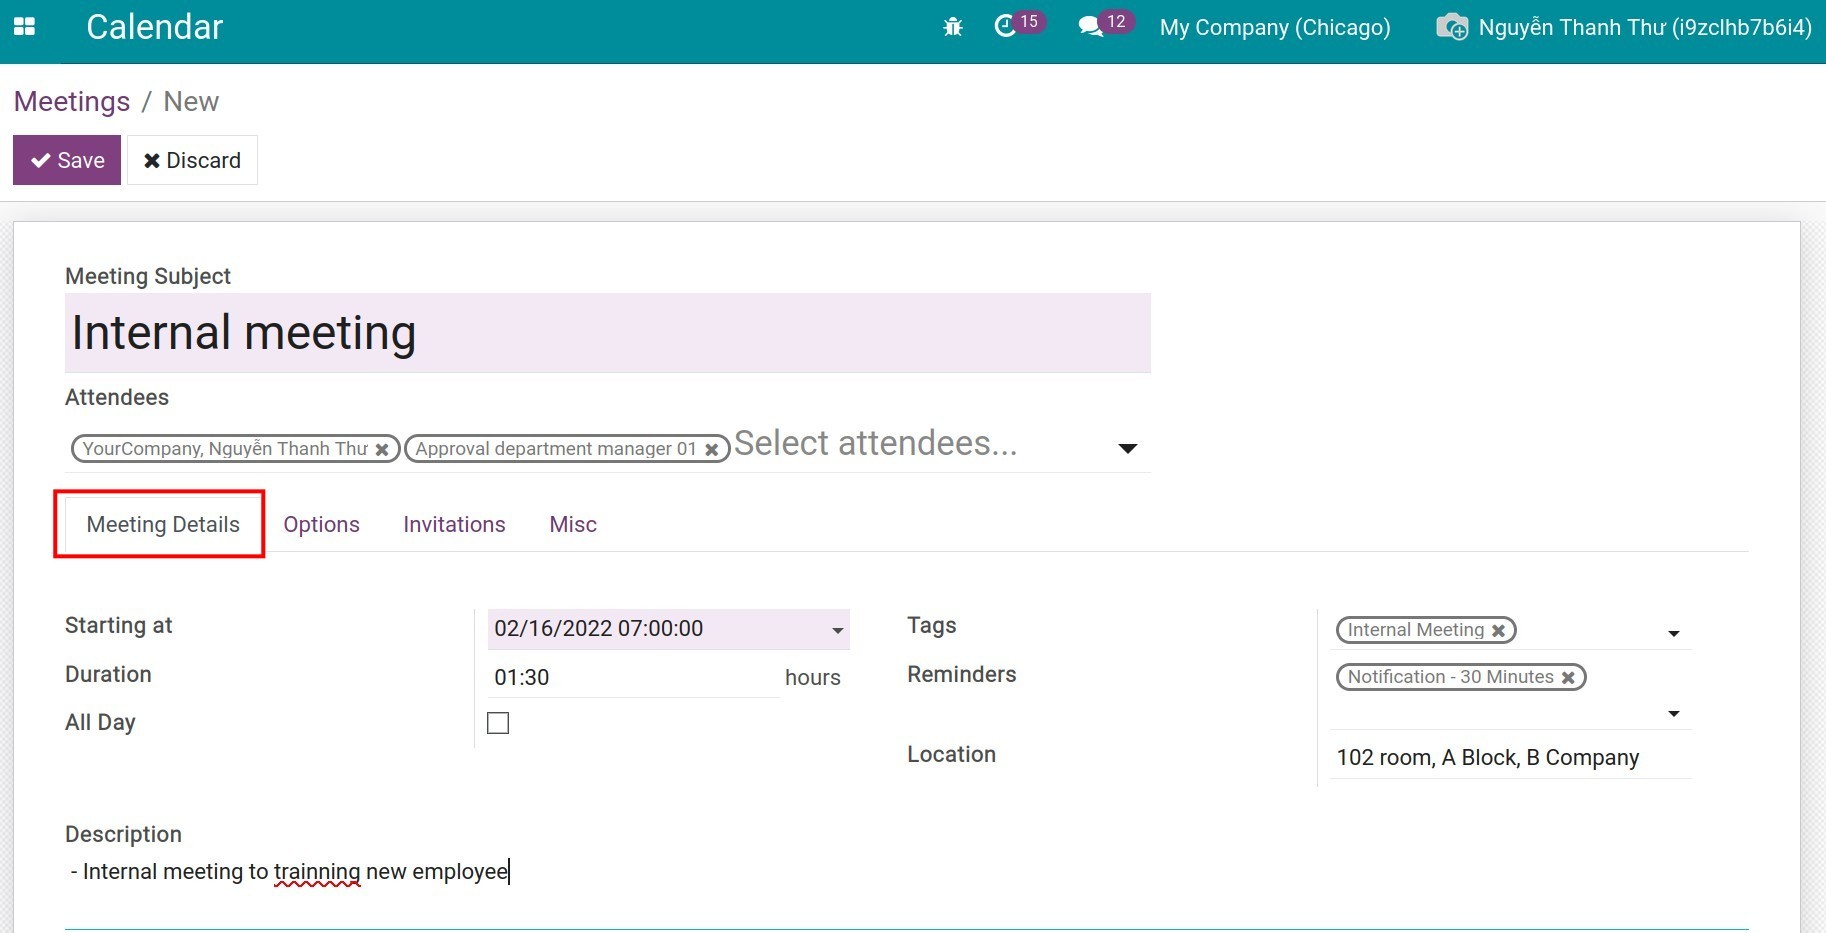
The Meeting details tab:
![The Meeting details tab]()
- Starting at: the date and time to start the meeting.
Duration: how long will the meeting take.
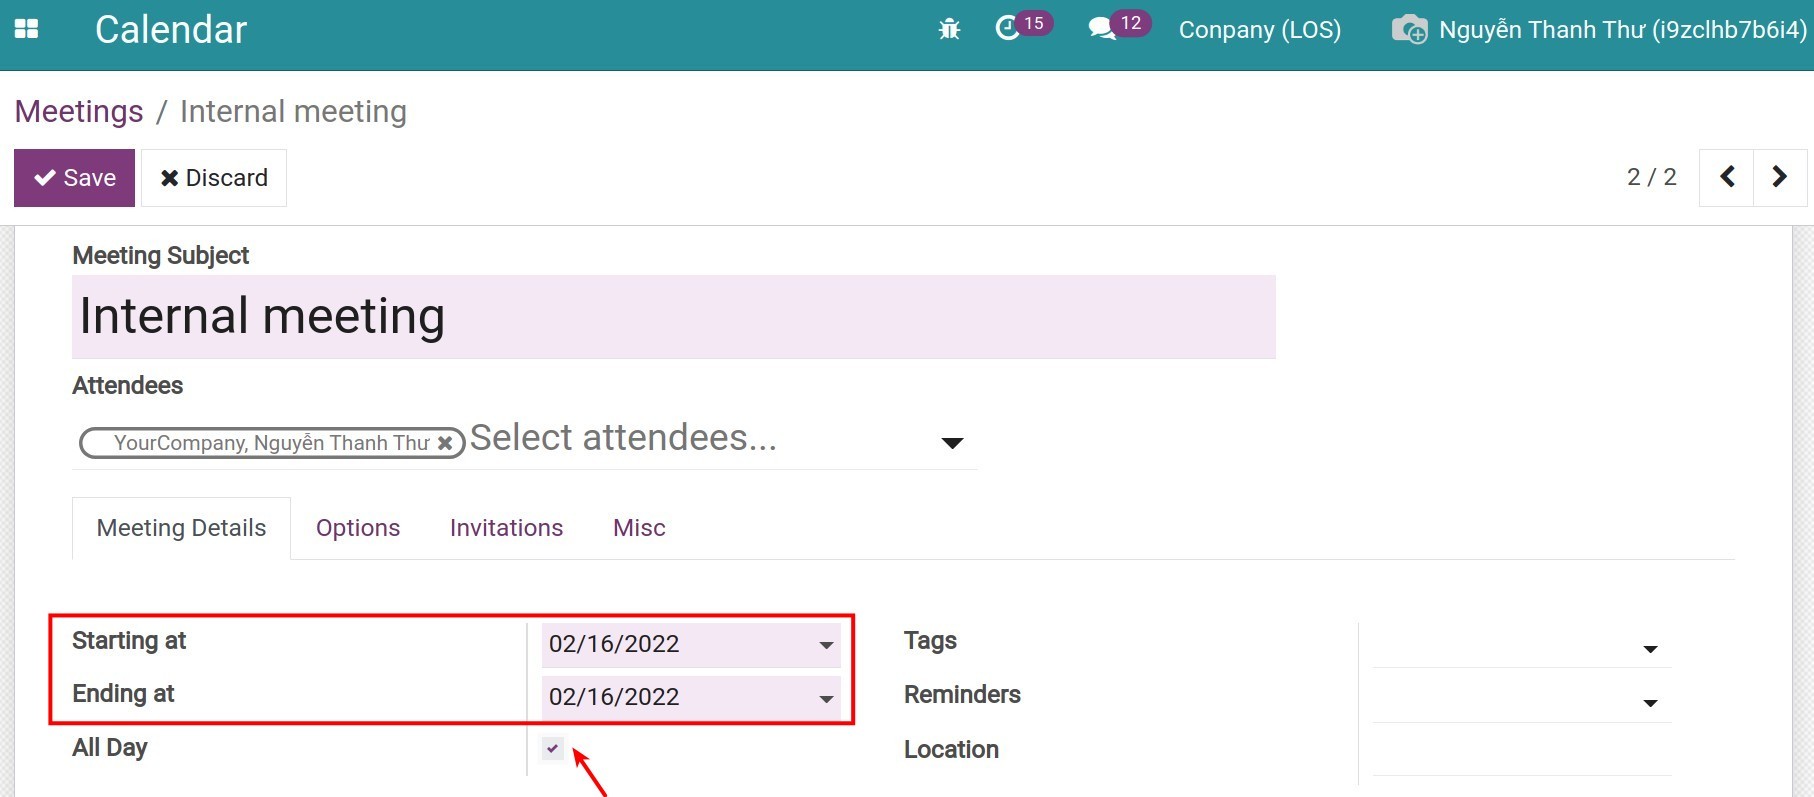
All day: checking this option in case the meeting takes all day, the system will display the Ending at field with the suggestion date according to the Starting at field. You also can choose more than one day by changing these fields’ information.
![the All day option for the long meeting]()
- Tags: the field for choosing the keywords, which help you search and classify the meeting efficiently.
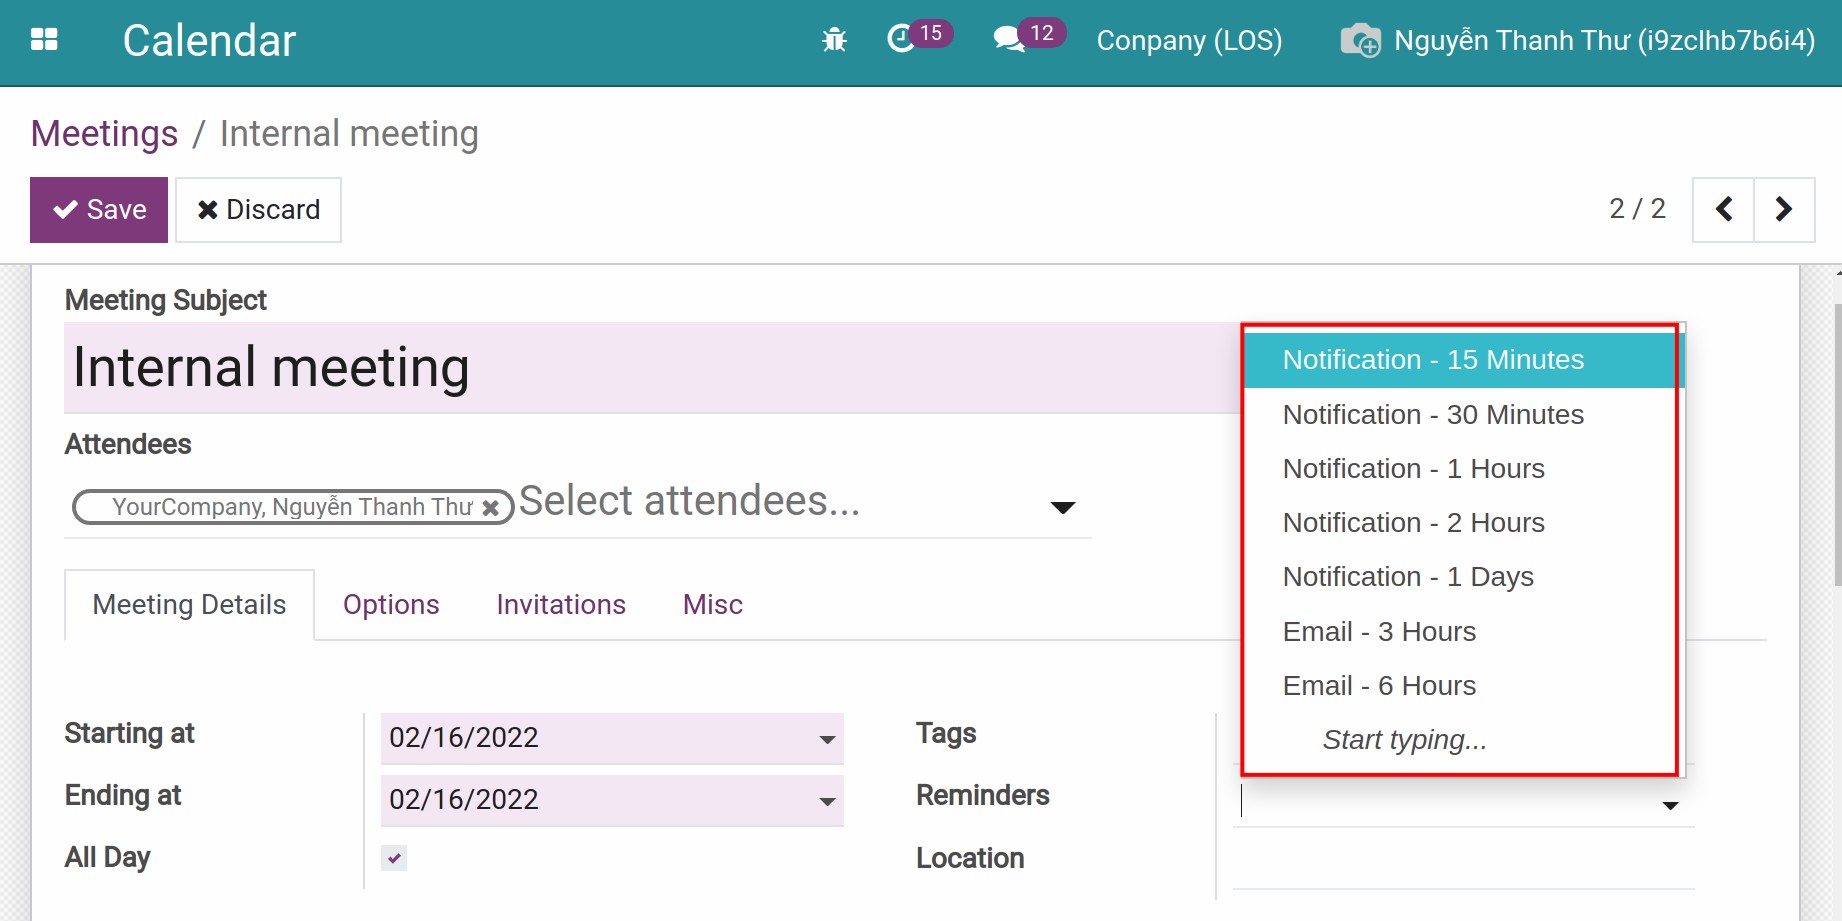
Reminders: the field to set up the time for the system to notify the attendees to participate in the meeting before it starts so that they can take the initiative and have enough time to prepare for the meeting, depending on the importance of it. There are two types of reminders:
![Reminding the meeting by Viindoo notification or email]()
- Notification: reminding by the notification feature of Viindoo software. To illustrate, when you choose the reminder as Notification - 15 minutes, then before the meeting 15 minutes, the system will send a notification to you in Viindoo system.
Email: reminding by sending the notification through the email address. For example: When choosing the reminder option “Email - 3 hours”, then 3 hours before the meeting, you will receive the notification email.
Location: where the meeting takes place. E.g: room 102 of Company A. If it is an online meeting, you can attach the link for the attendees so that they can find the information and attend the meeting actively.
Description: describe in detail the content presented in the meeting, the reason for the meeting, etc.
The Options tab:
![The Options tab]()
- Recurrent: check on this option if you want this meeting to be repeated. For example, your company has a meeting every Monday morning, instead of creating each meeting, this feature allows you to create a set of meetings. The Recurrent Rule is set up as follows:
- Repeat Every: choose to repeat once every days/weeks/months/years. With each week and month selection, the software will display the corresponding lists: days of the week, days of the month that allows you to select the date of the repeated meeting. For example, if you enter the number of the week as 2, then every 2 weeks, on a specific date configured by you, the software will create a meeting.
Until: the iteration will be performed until when.
- Number of repetitions: how many times this meeting will be repeated, you need to enter the number of repetitions.
End Date: The meeting will always be repeated until the end date, you need to enter the expected end date of the iteration. For instance: The development meeting plan for product A in 2021 will be performed periodically in 2021, the end date is 31/12/2021, the system will create the meeting according to the rules until 31/12/2021.
Forever: The meeting will be repeated forever, with no end date. When selecting this option, the software generates a lot of records and will automatically generate them periodically to make sure the loop lasts forever.
Privacy: configuring who can see this meeting.
Everyone: all the members of the company can view and edit the meeting information.
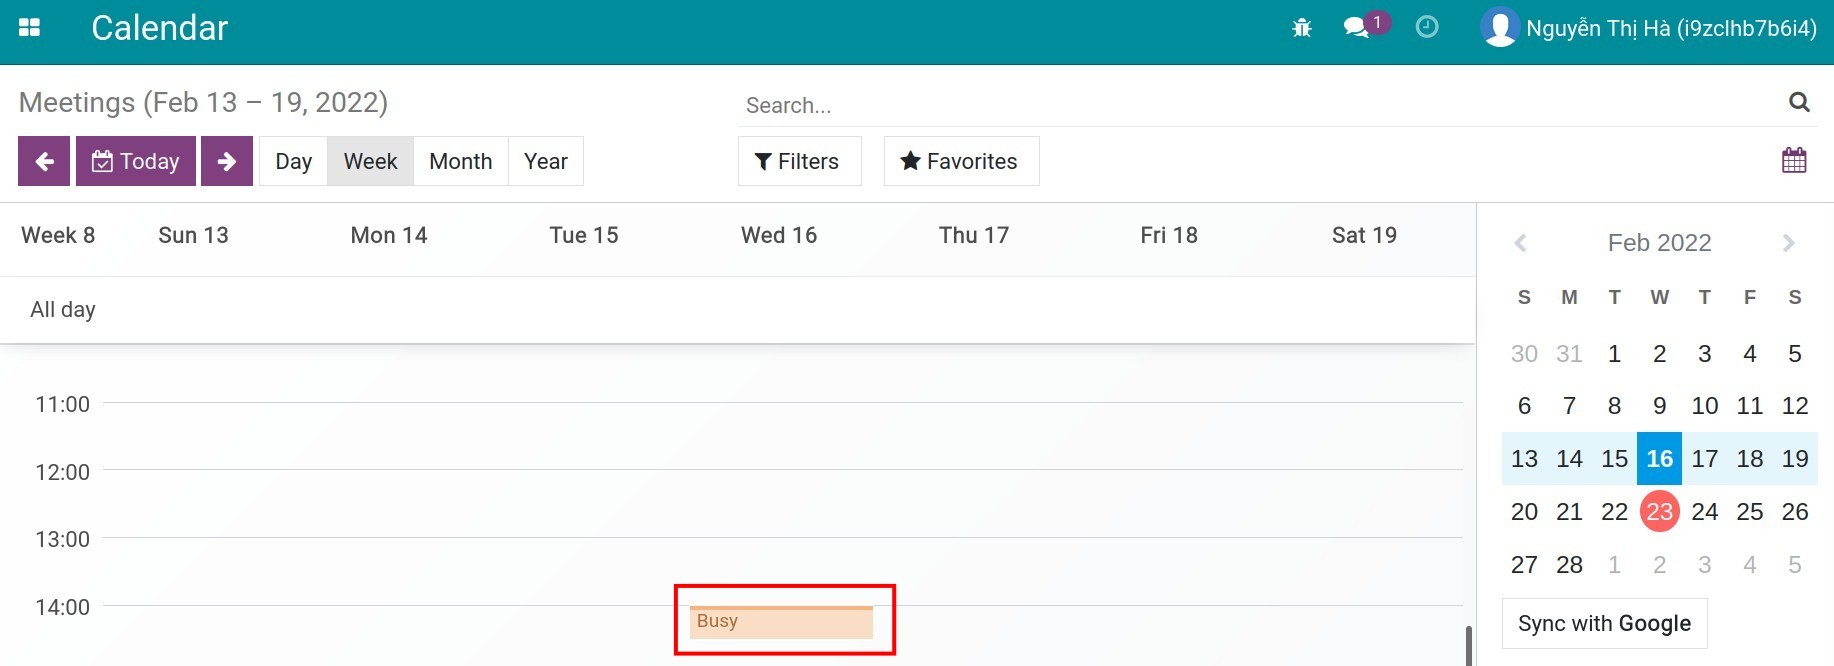
Only Me: only you can view and edit the meeting. Other employees in the company will only see your meeting with the status Busy, Starting In, and Duration fields, they cannot edit the information on it.
![Only me meeting]()
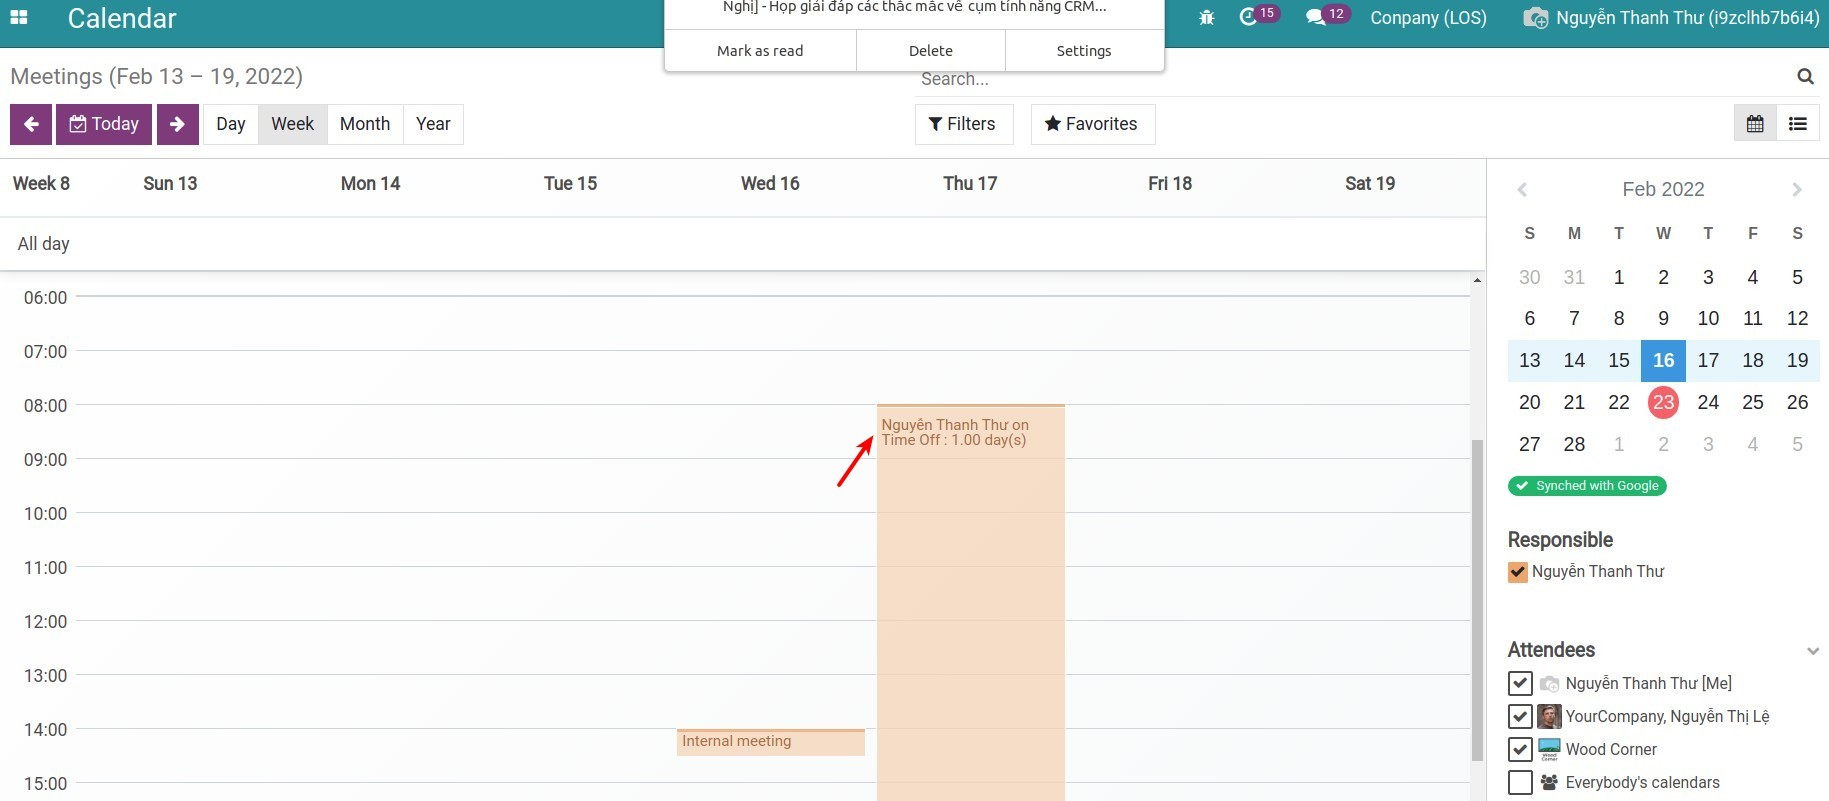
Only Internal Users: These meetings can only be viewed by internal users.
![Employee time-off schedule]()
Show Time as: you can select Free or Busy depending on the participant’s characteristics and the task priority levels of the meeting attendees. E.g. For the Self-study meeting of employees with the Show Time as is Free, the manager can assign other tasks for them to do at the same time and vice versa.
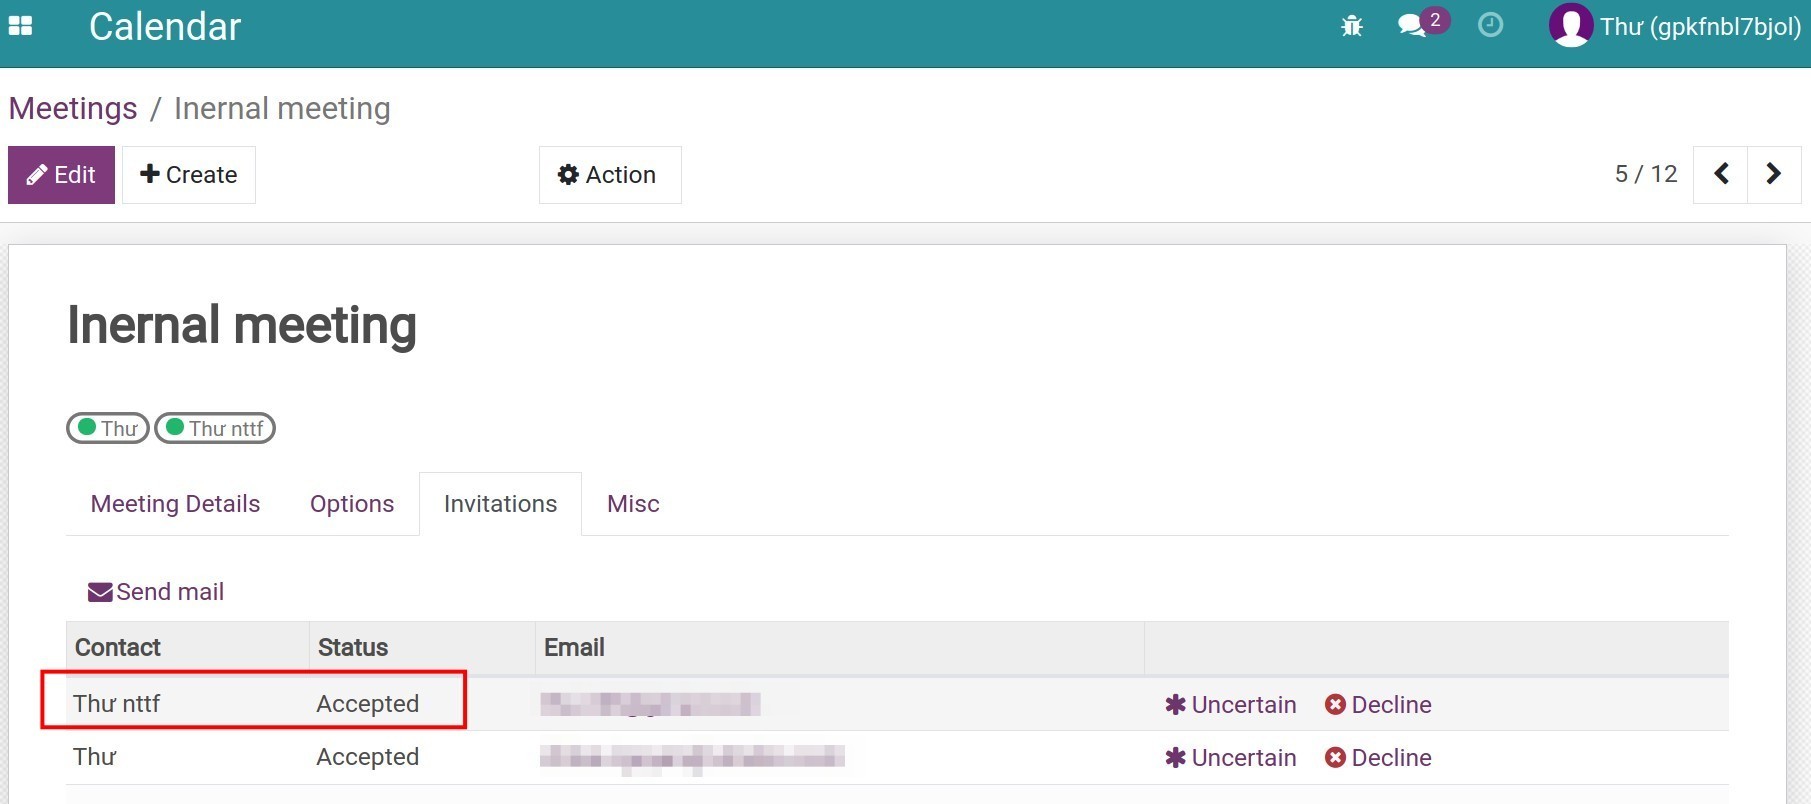
The Invitations tab: after you click on save the meeting, the software will automatically send the invitations to the members attending the meeting. If you are not sure whether the recipient has received or wants to resend the invitation, just click on Send Mail.
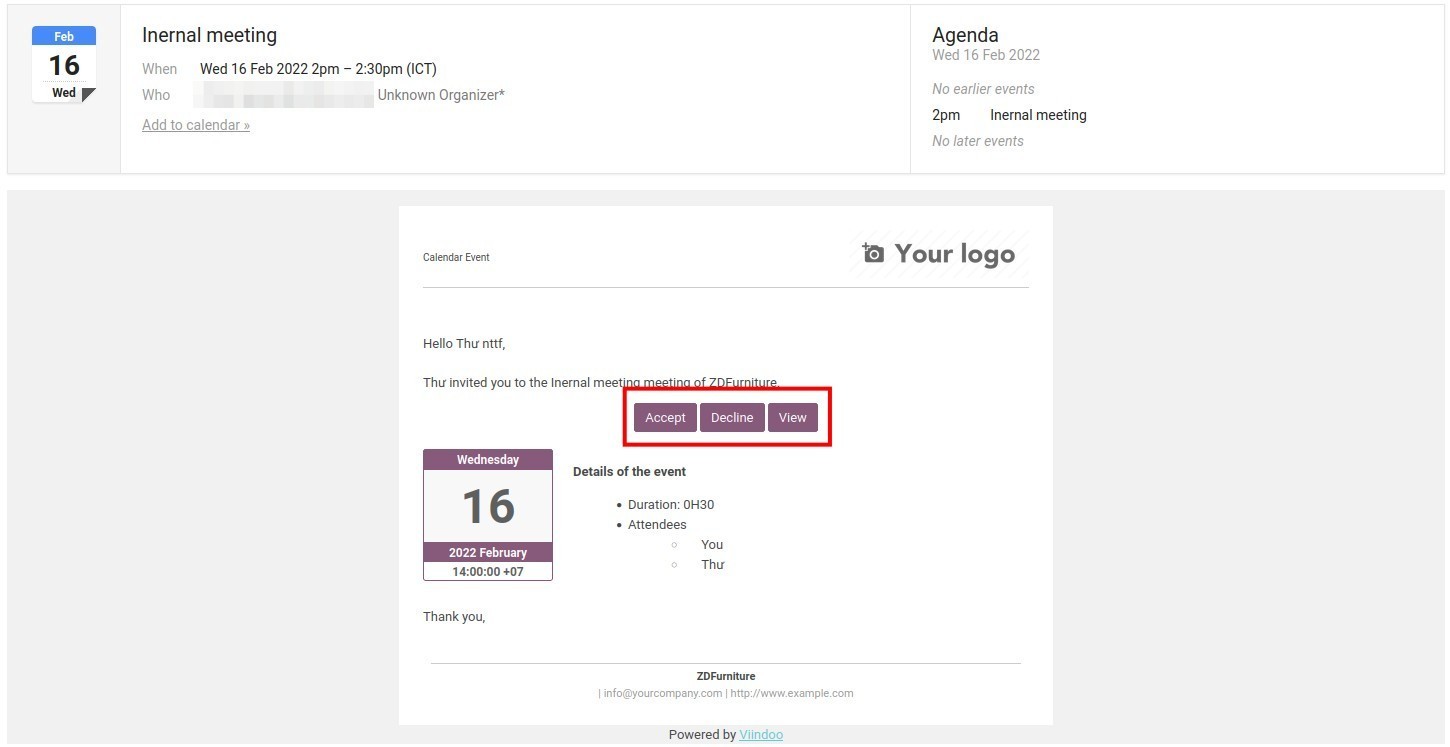
When the invitee receives the message, they will hit the Accept or Decline button, the system will update the Approved/Rejected status according to their answer to the invitation. The invitation status can be entered manually on the Invitations tab. This will help the person in charge of the meeting to grasp the number of members participating in the meeting and adjust the time if necessary.
![The attendee receives the invitation]()
![The Invitations tab]()
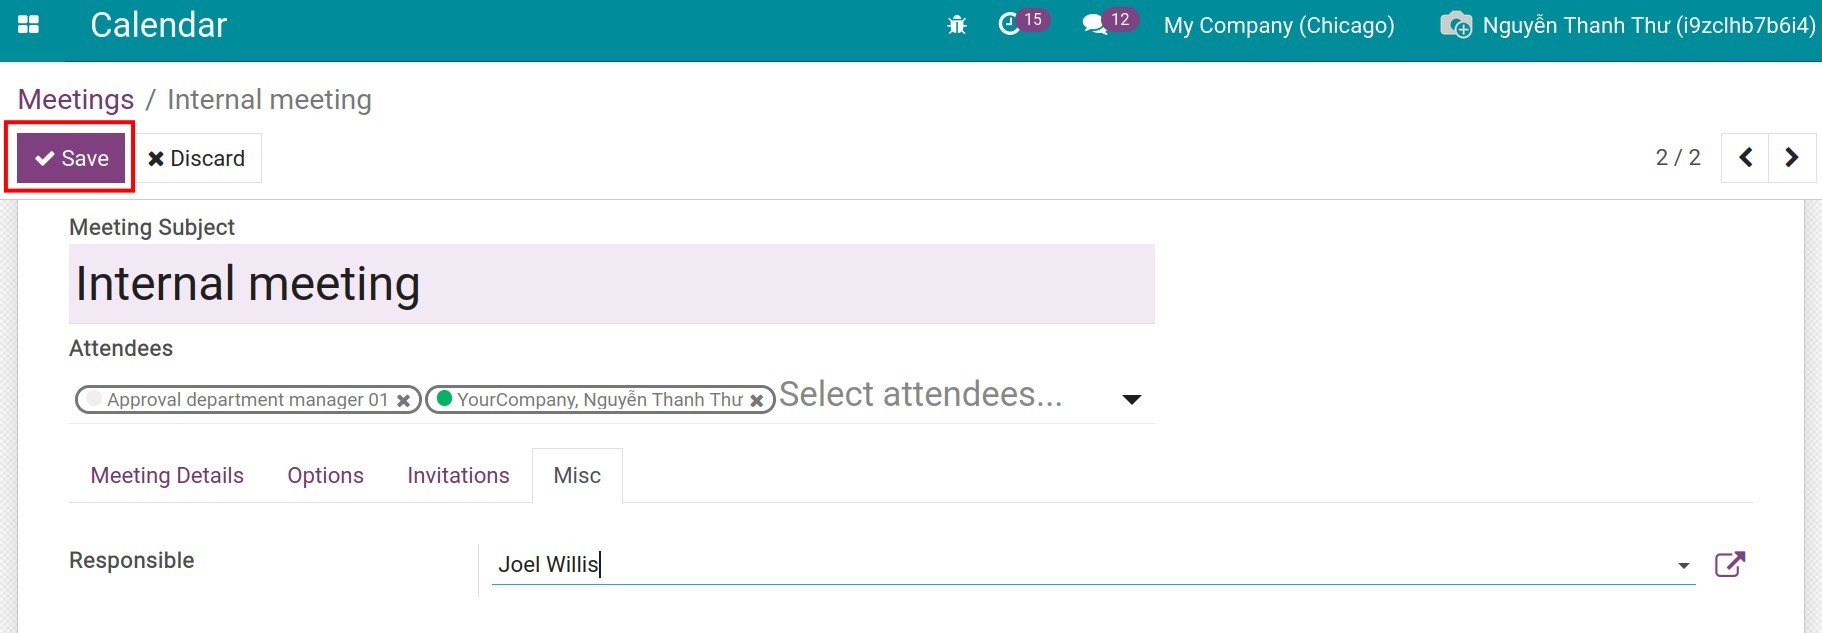
The Misc tab - Responsible: the person booking this meeting.

Note
To see the Invitations tab and the Misc tab , you need to Activating Developer Mode (debug mode).
After completing the configuration, you click on Save button.
Create meetings on different records
You can create the meeting while communicating with Customers, Suppliers, Applicants, etc. without accessing the Calendar App.
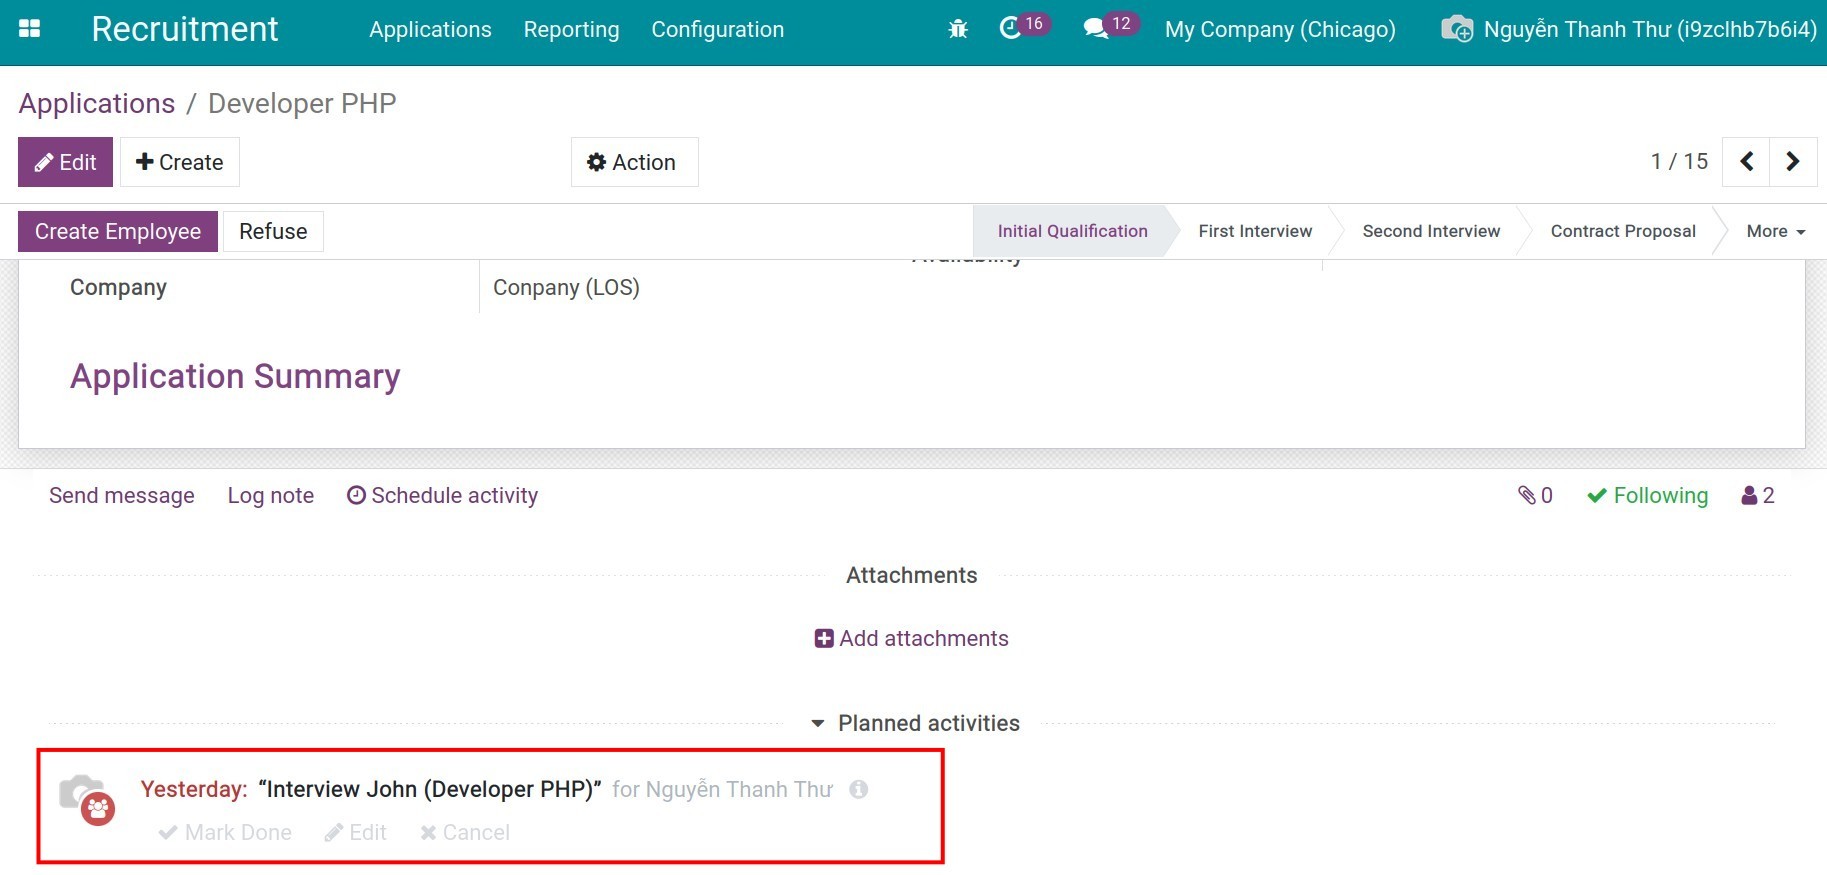
All you need to do is on the current interface such as Quotations, Applicants, etc. go to the Open Chatter area and hit on Schedule Activity.
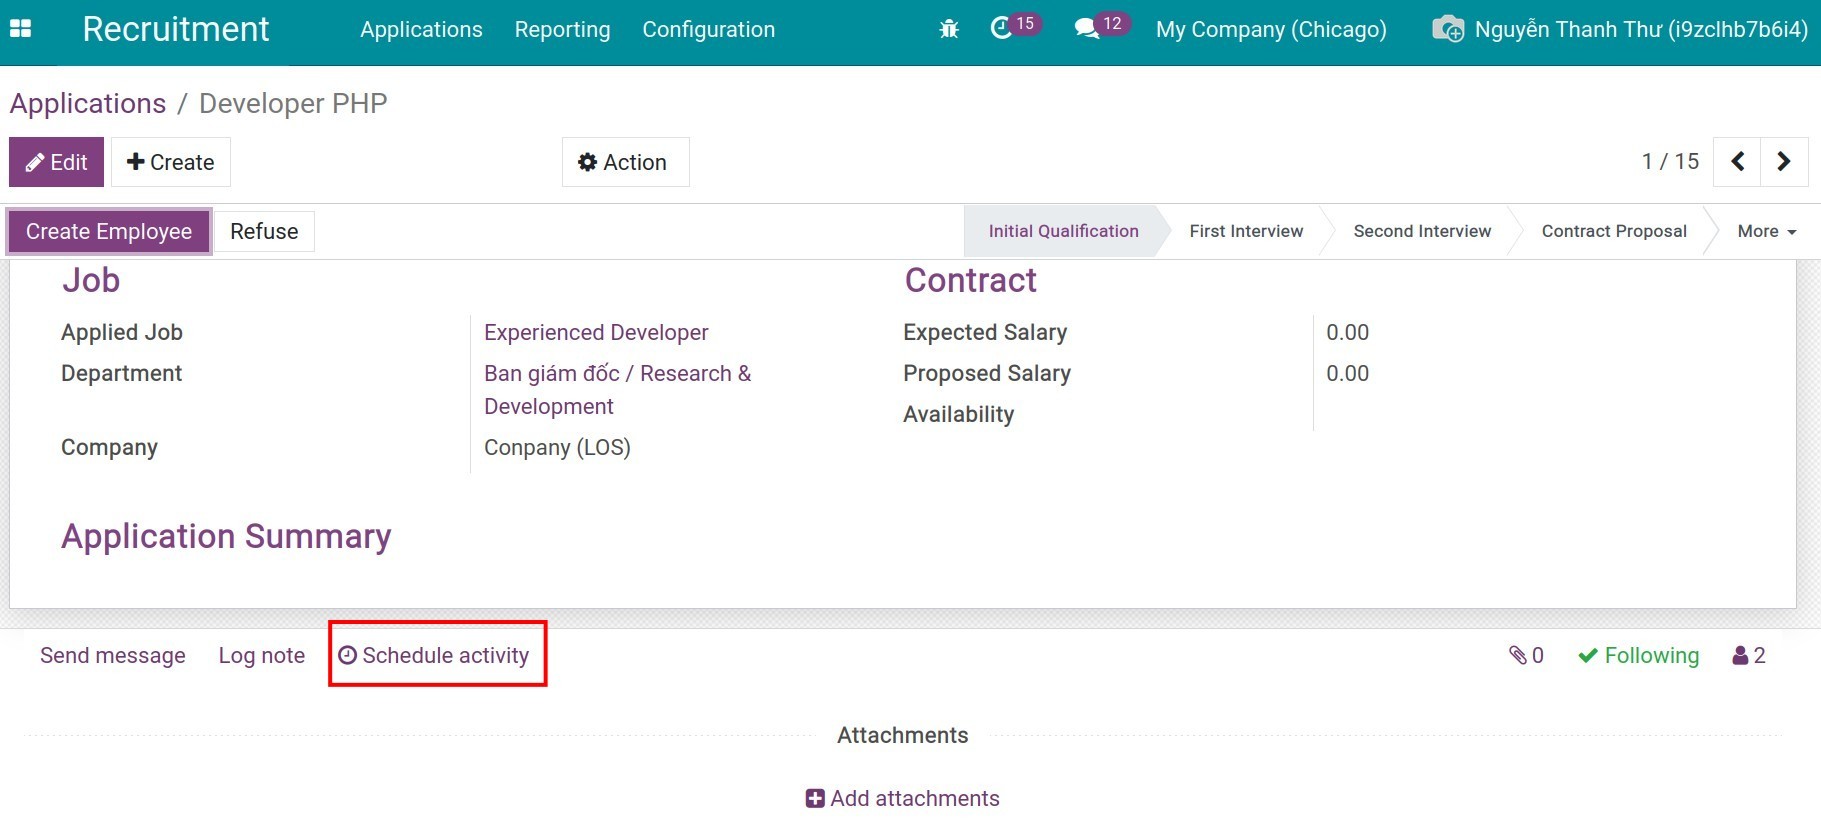
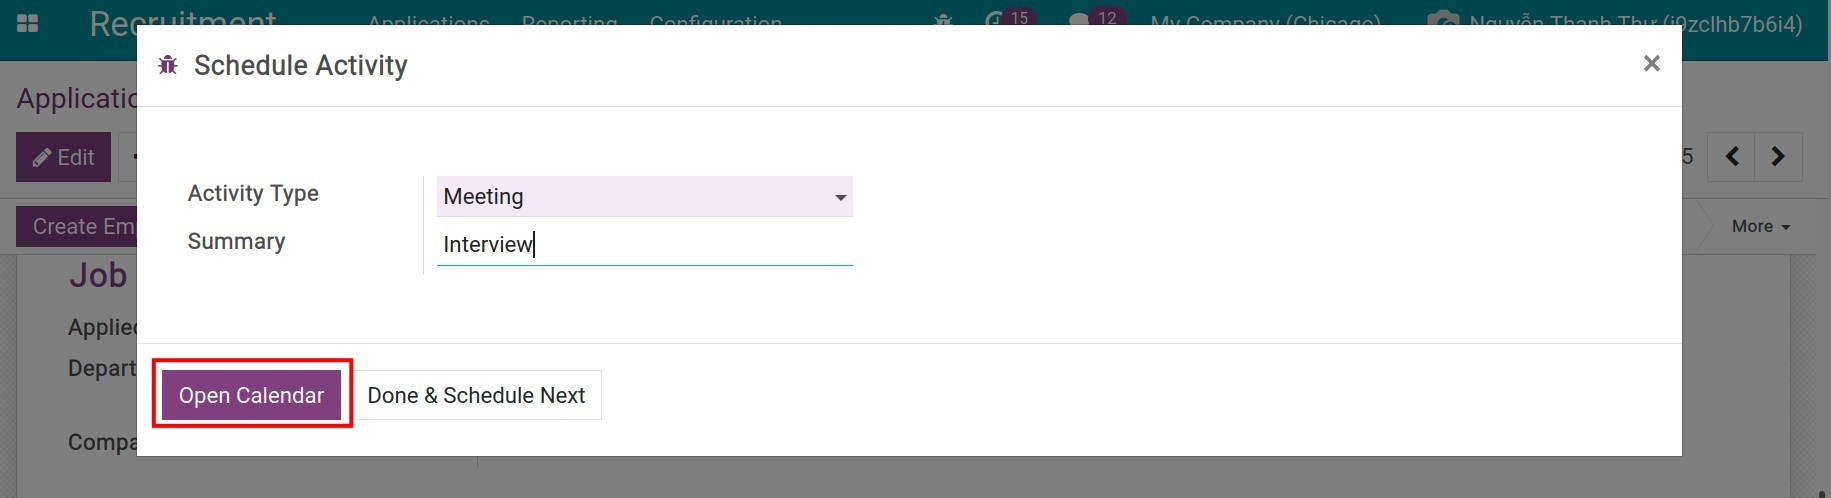
The system will display the Schedule Activity window. You select the type of activity as Meeting and then click Open Calendar, it will open the Calendar interface which allows you to create a meeting according to the instructions above.
In the Quotations or Applicant records, the system will display the scheduled activity as the meeting you have already created.
If the meeting went well, you choose Finish.
If you need to edit the information, choose Edit.
If you no longer need to meet, choose Cancel, then access the meeting on the Calendar interface to cancel it.