Steps to integrate other applications with Helpdesk
Viindoo Helpdesk app helps you to record and manage helpdesk tickets created not only by customers but also by all the users in your company. Therefore, by integrating with other apps, the Helpdesk app will give all employees the ability to actively log tickets for customers or themselves during the working process. From there, speeds up the transfer, receipt and resolution process of tickets, and generally increases the user experience of customers and employees.
You can read more information on how to create, manage, and resolve helpdesk tickets in the following tutorials:
See also
Apps that can be integrated with the Helpdesk include:
Website;
Livechat;
CRM;
Sales;
Project & Timesheets.
Apps installation
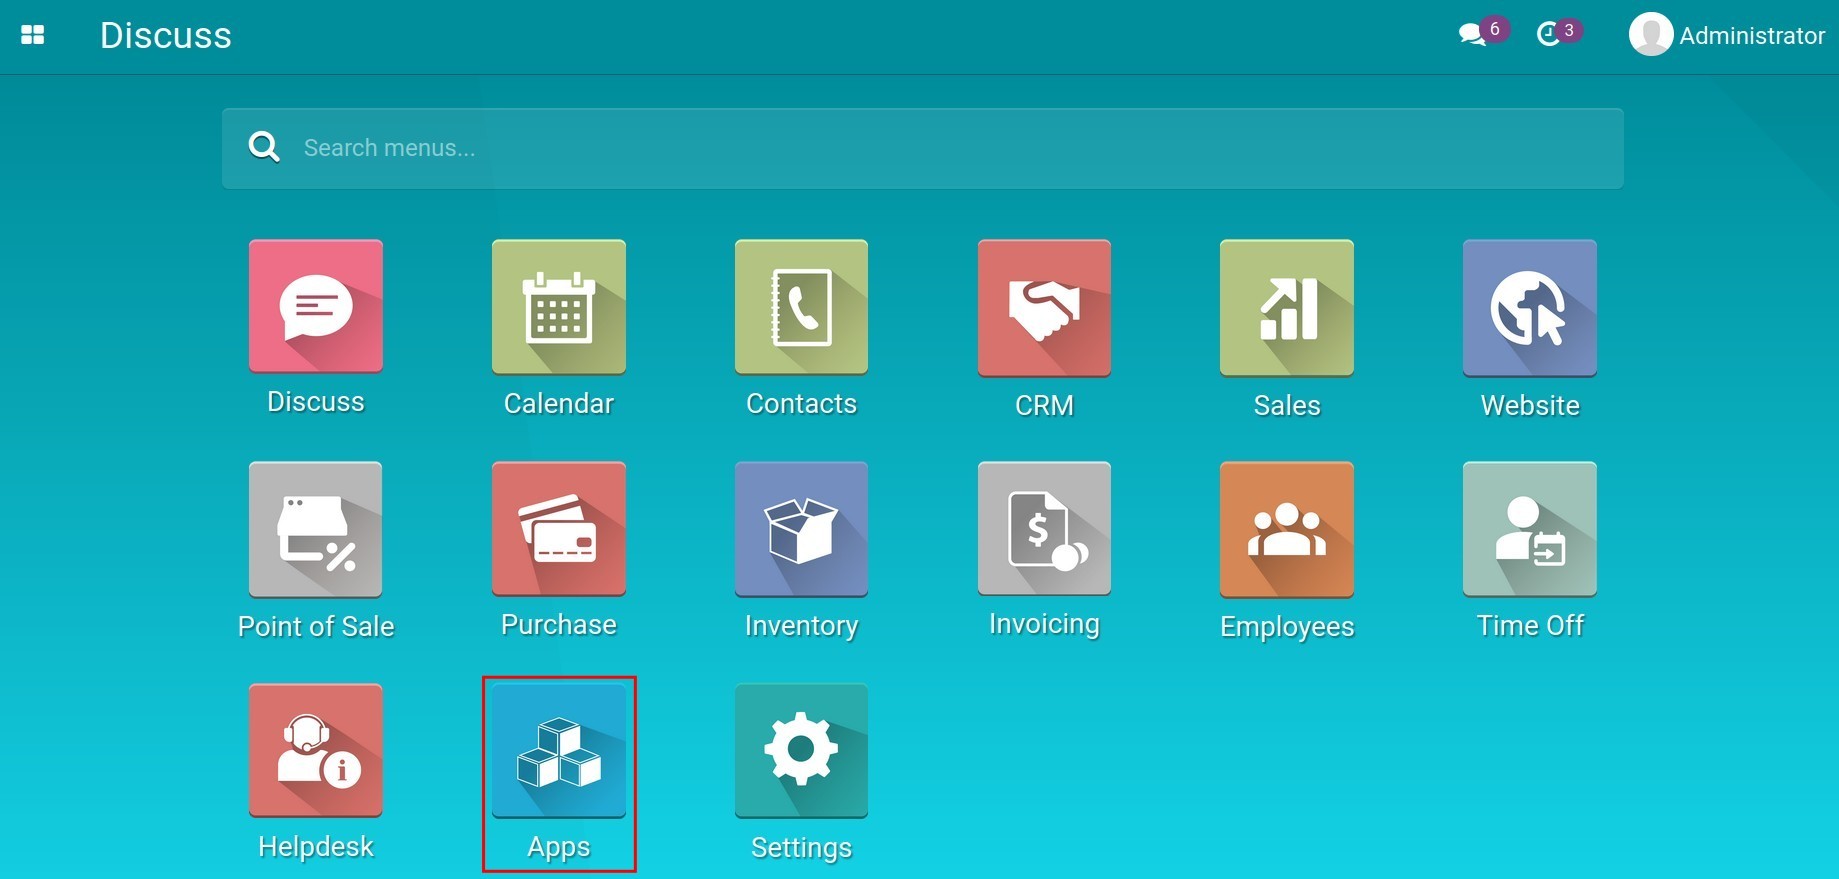
To install the modules that help integrate the Helpdesk app with the apps mentioned above, go to Viindoo Apps, remove the default filter and search by using the keyword Helpdesk.

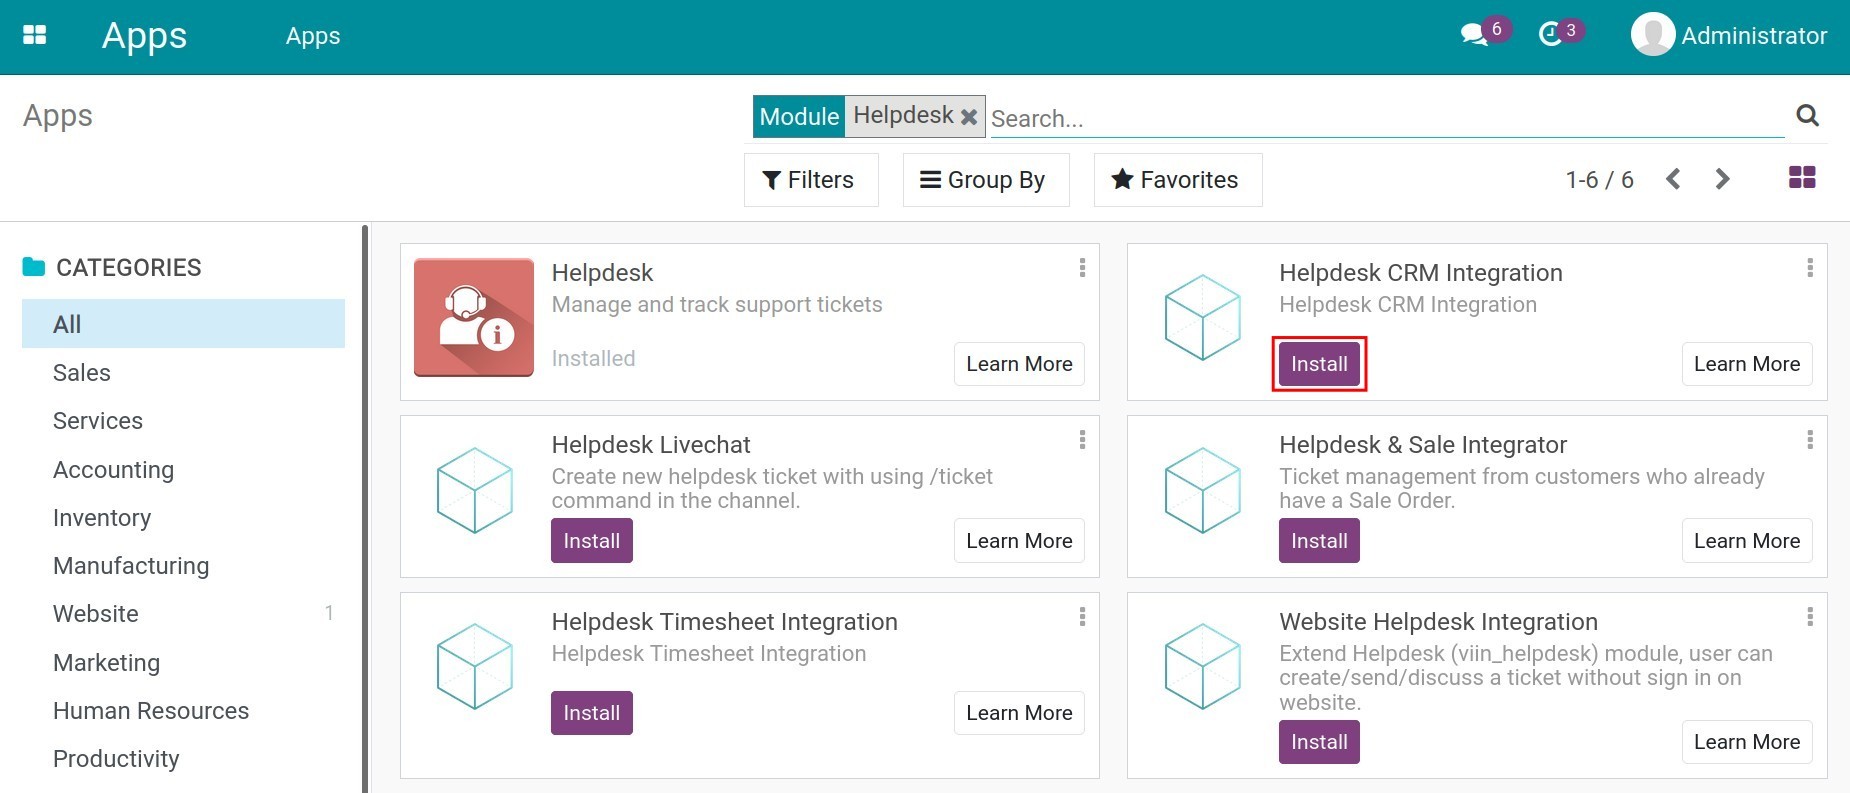
The system will display a list of integration apps related to the Helpdesk app. Click Install to install the chosen app:
Integration with the Website app
Accessing the website while signing in as a Portal User, on the portal view, users can create tickets at the Helpdesk to immediately send their requests to the right team in charge. This feature both helps customers to have a better user experience in a way that they don’t have to go through many steps to get to the right place to communicate, and also helps businesses to stream right away without one person coordinating all tickets, helping to reduce workload and speed up information processing.
On the website, select Create Ticket Now and fill in the following information:

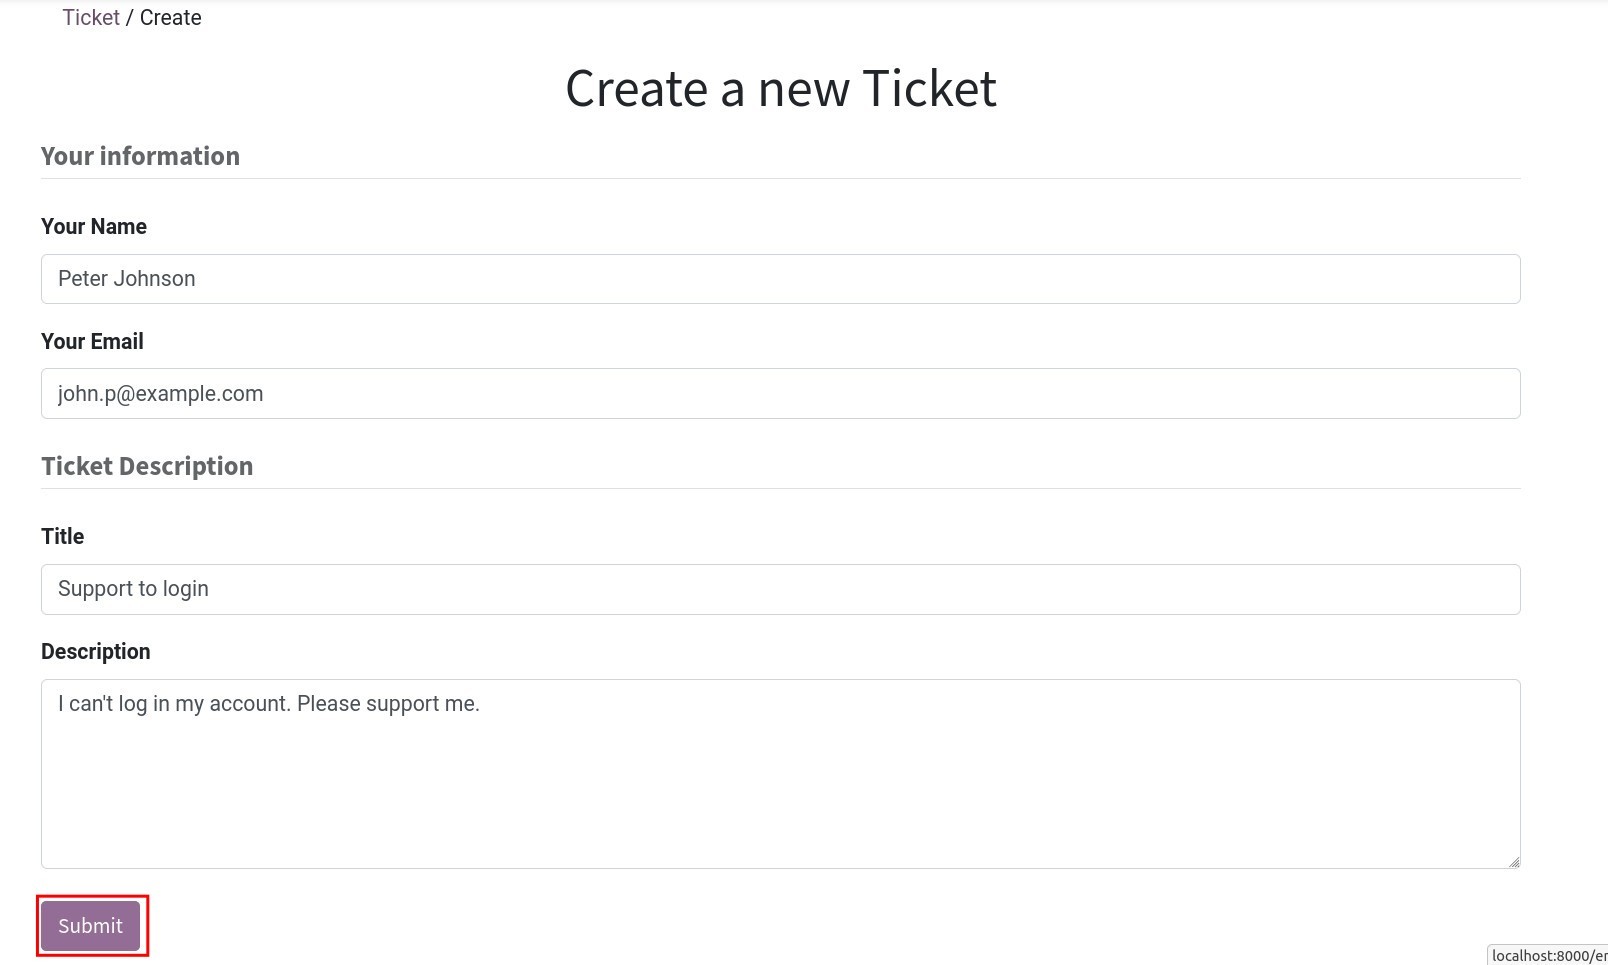

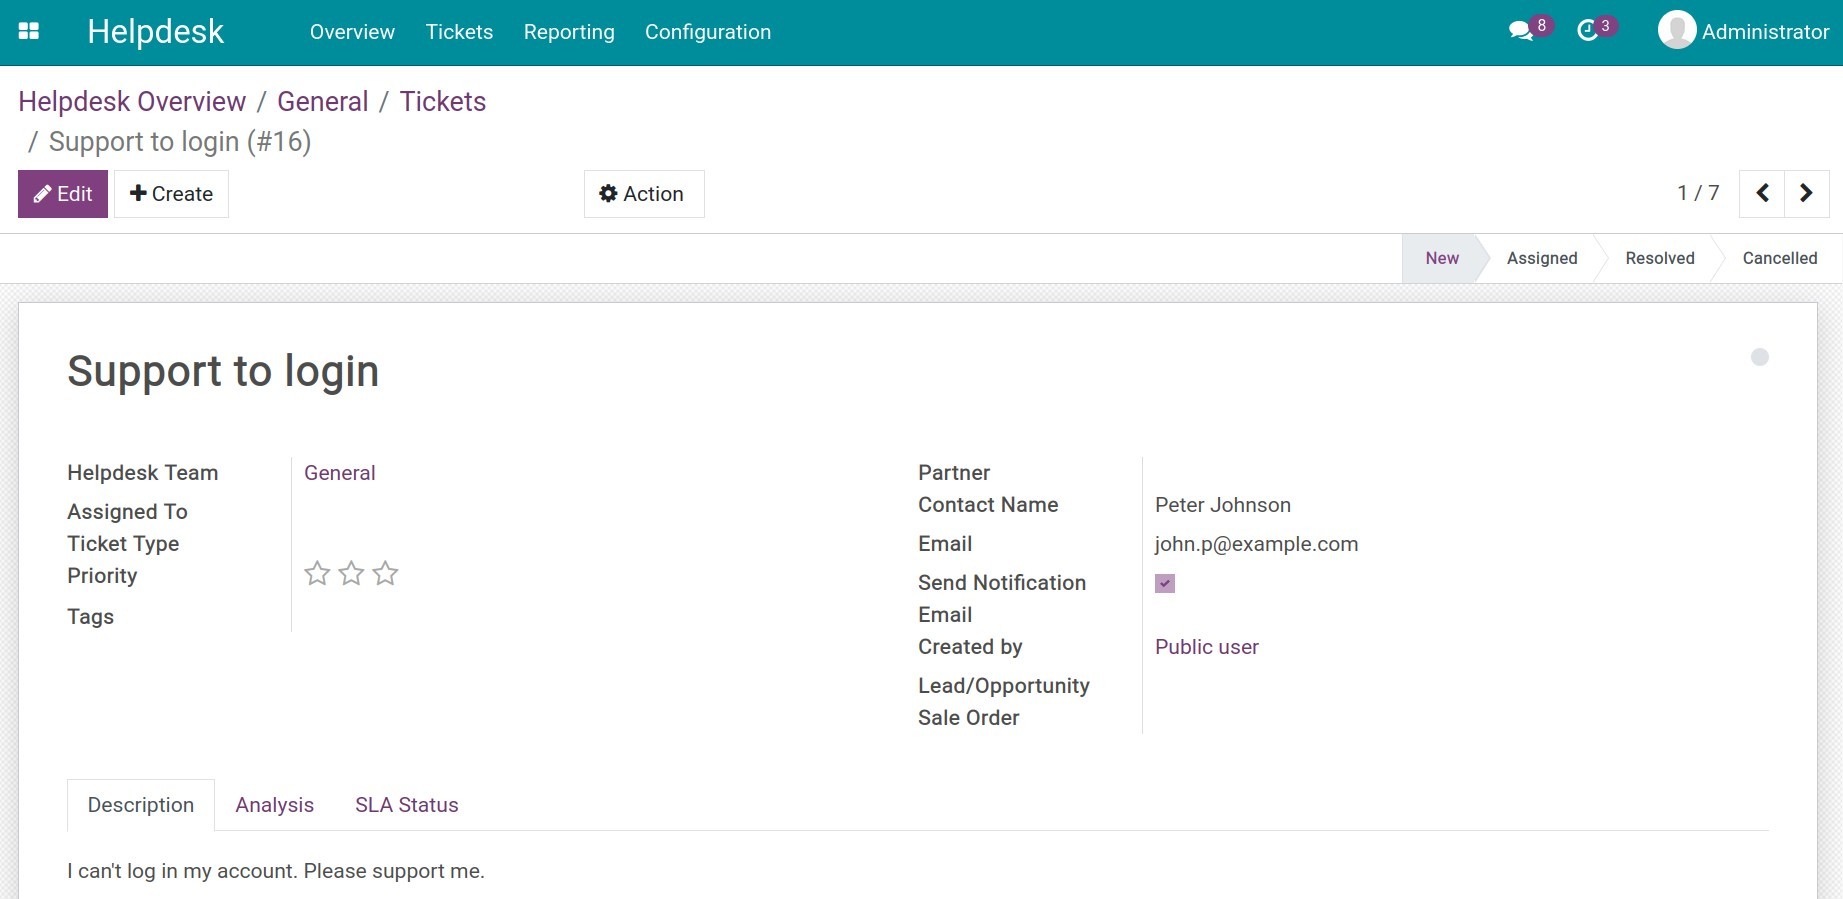
After clicking Submit, the system will automatically generate a ticket with the same contents as the customer has entered.
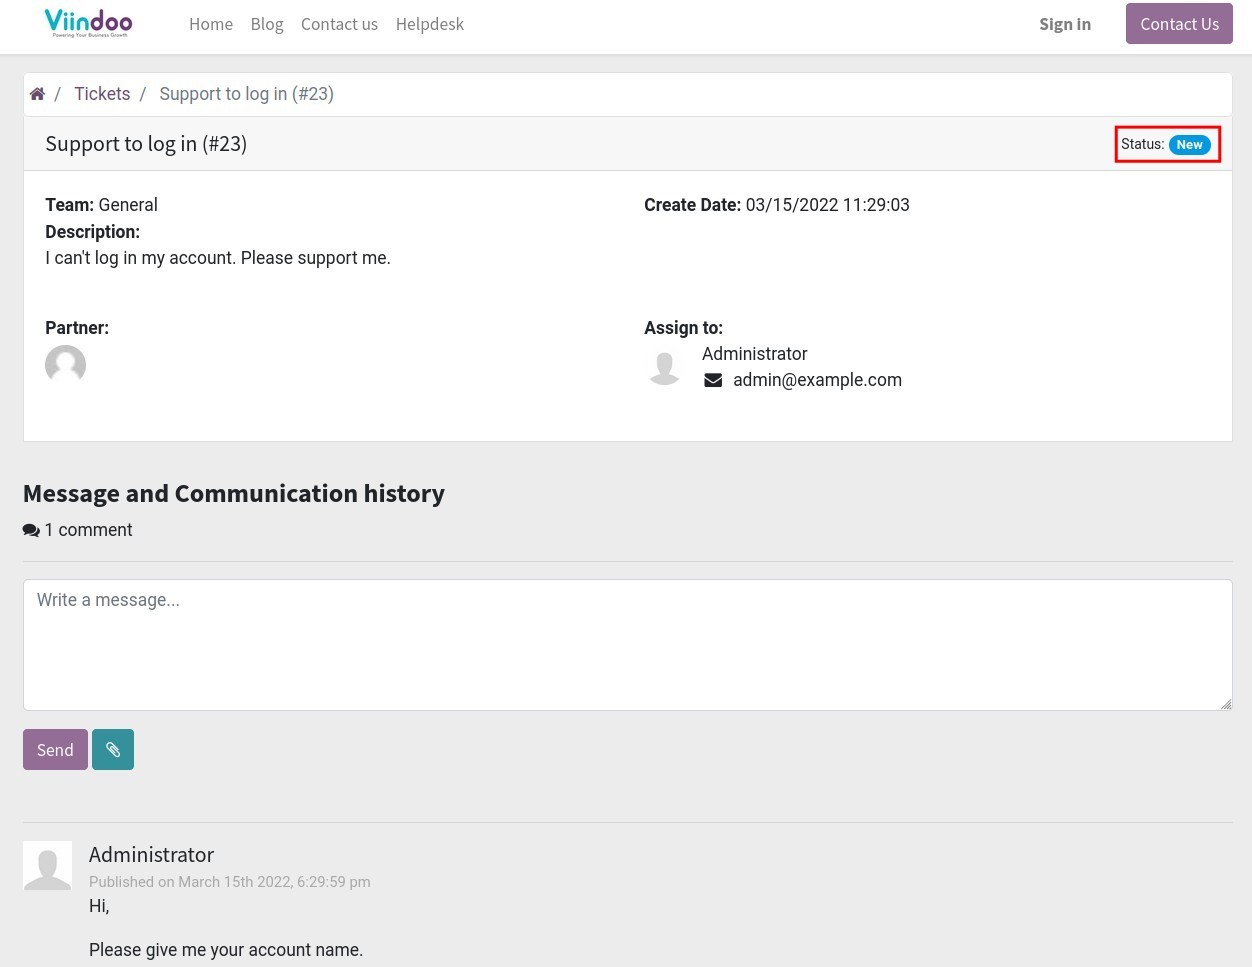
In addition, customers can monitor the status of ticket processing as well as their communication with the employees, who support him/her on the website.
Note
Customers need a Portal user account to be able to track progress and communications on their tickets. How to create an account, you can see more at Granting Portal access to customers.
Integration with the Livechat app
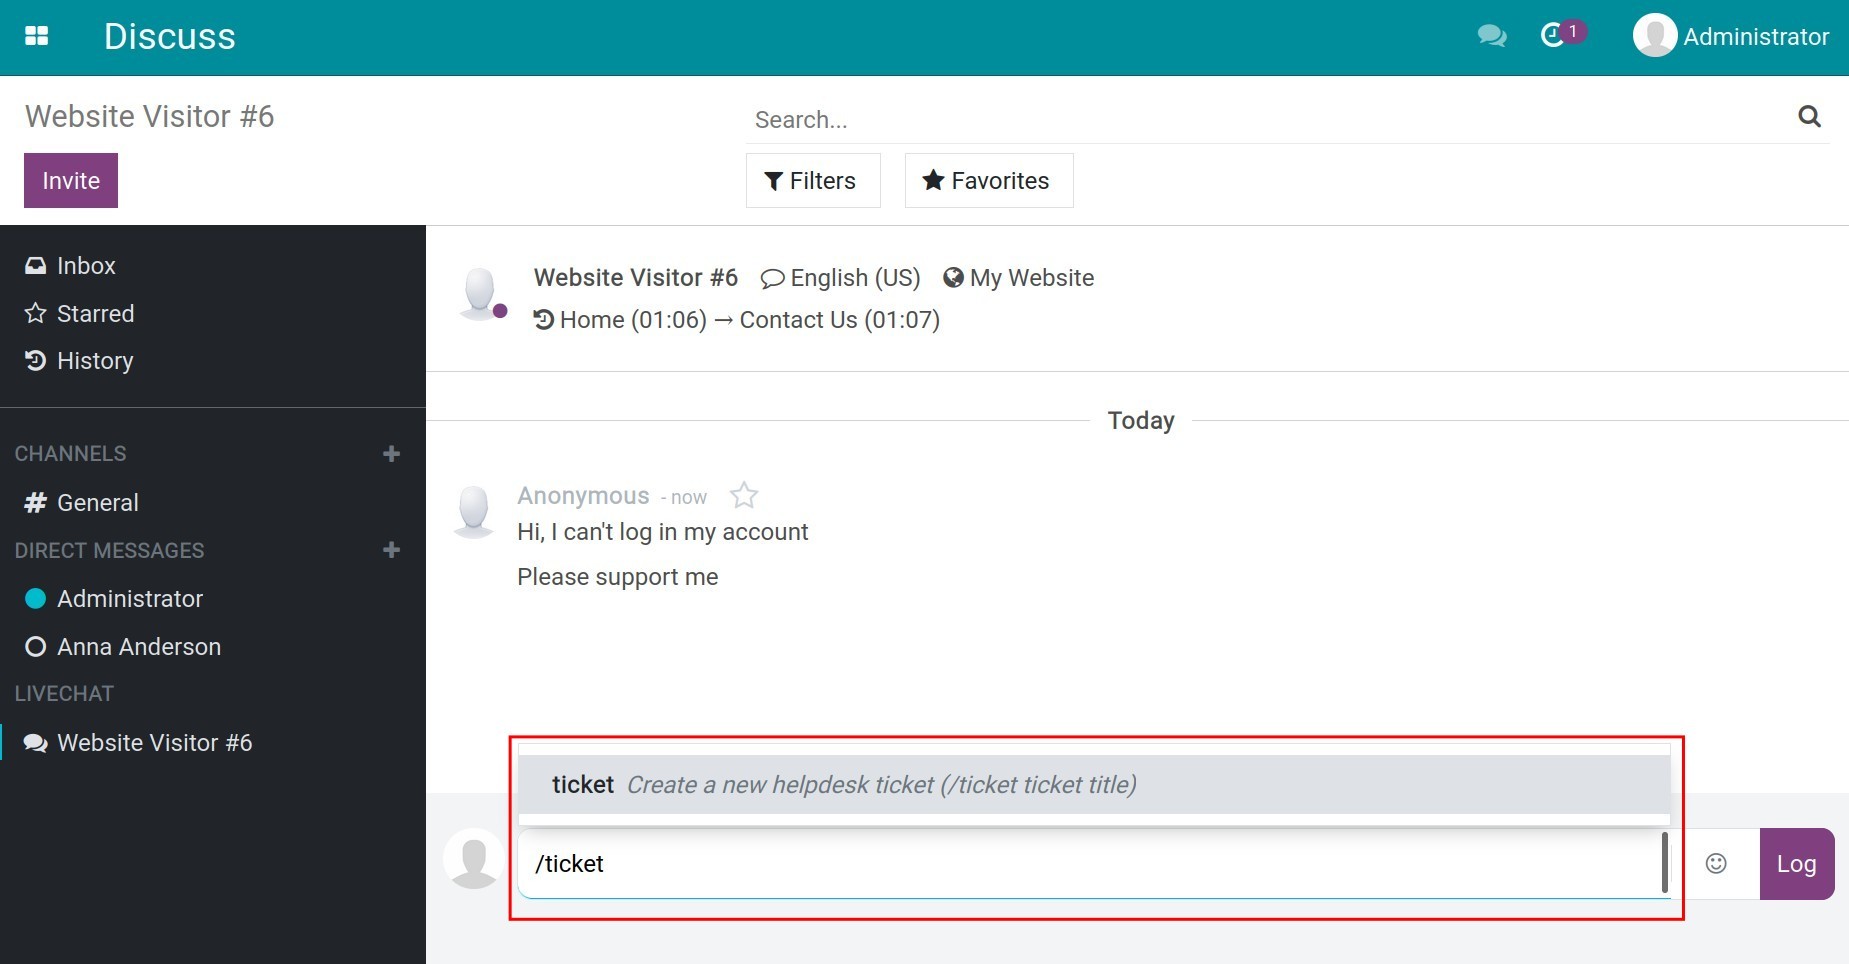
In case of using the Livechat feature to communicate/support the customer directly on the website, after having clarified the needs of the customer, the supporter can use the /ticket command and type the title to create a ticket directly in the chat window, e.g. /ticket Example Lead.
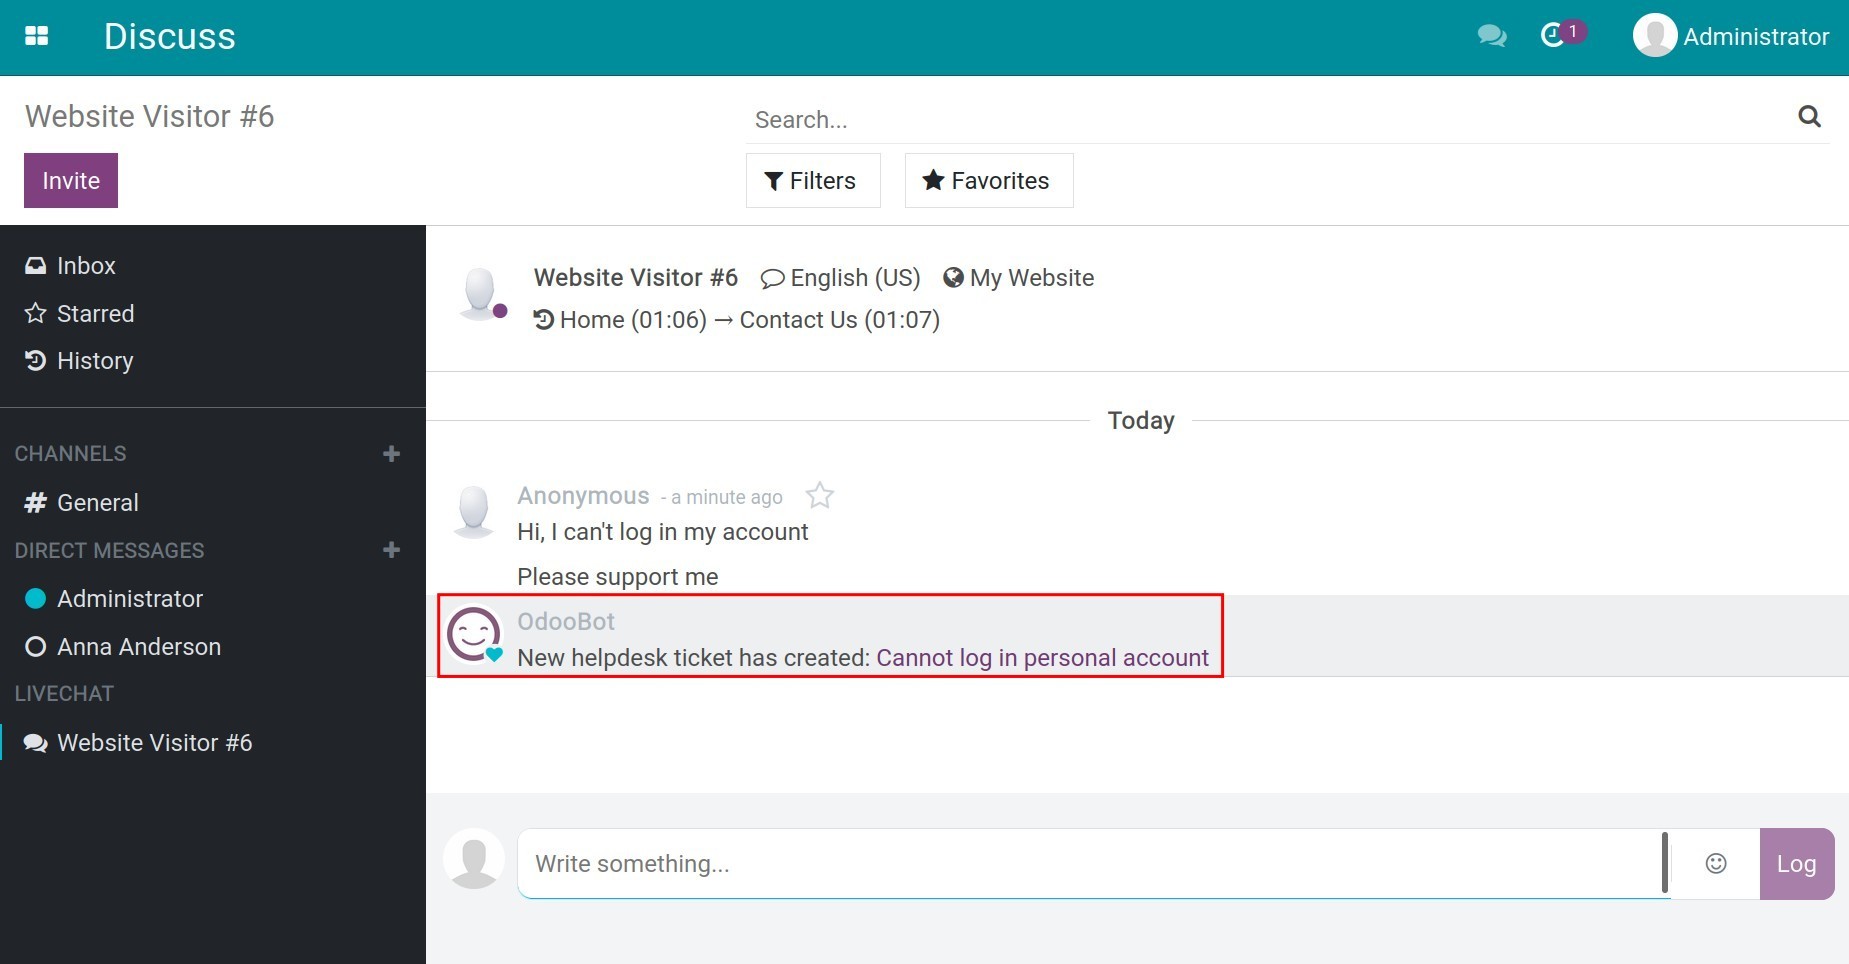
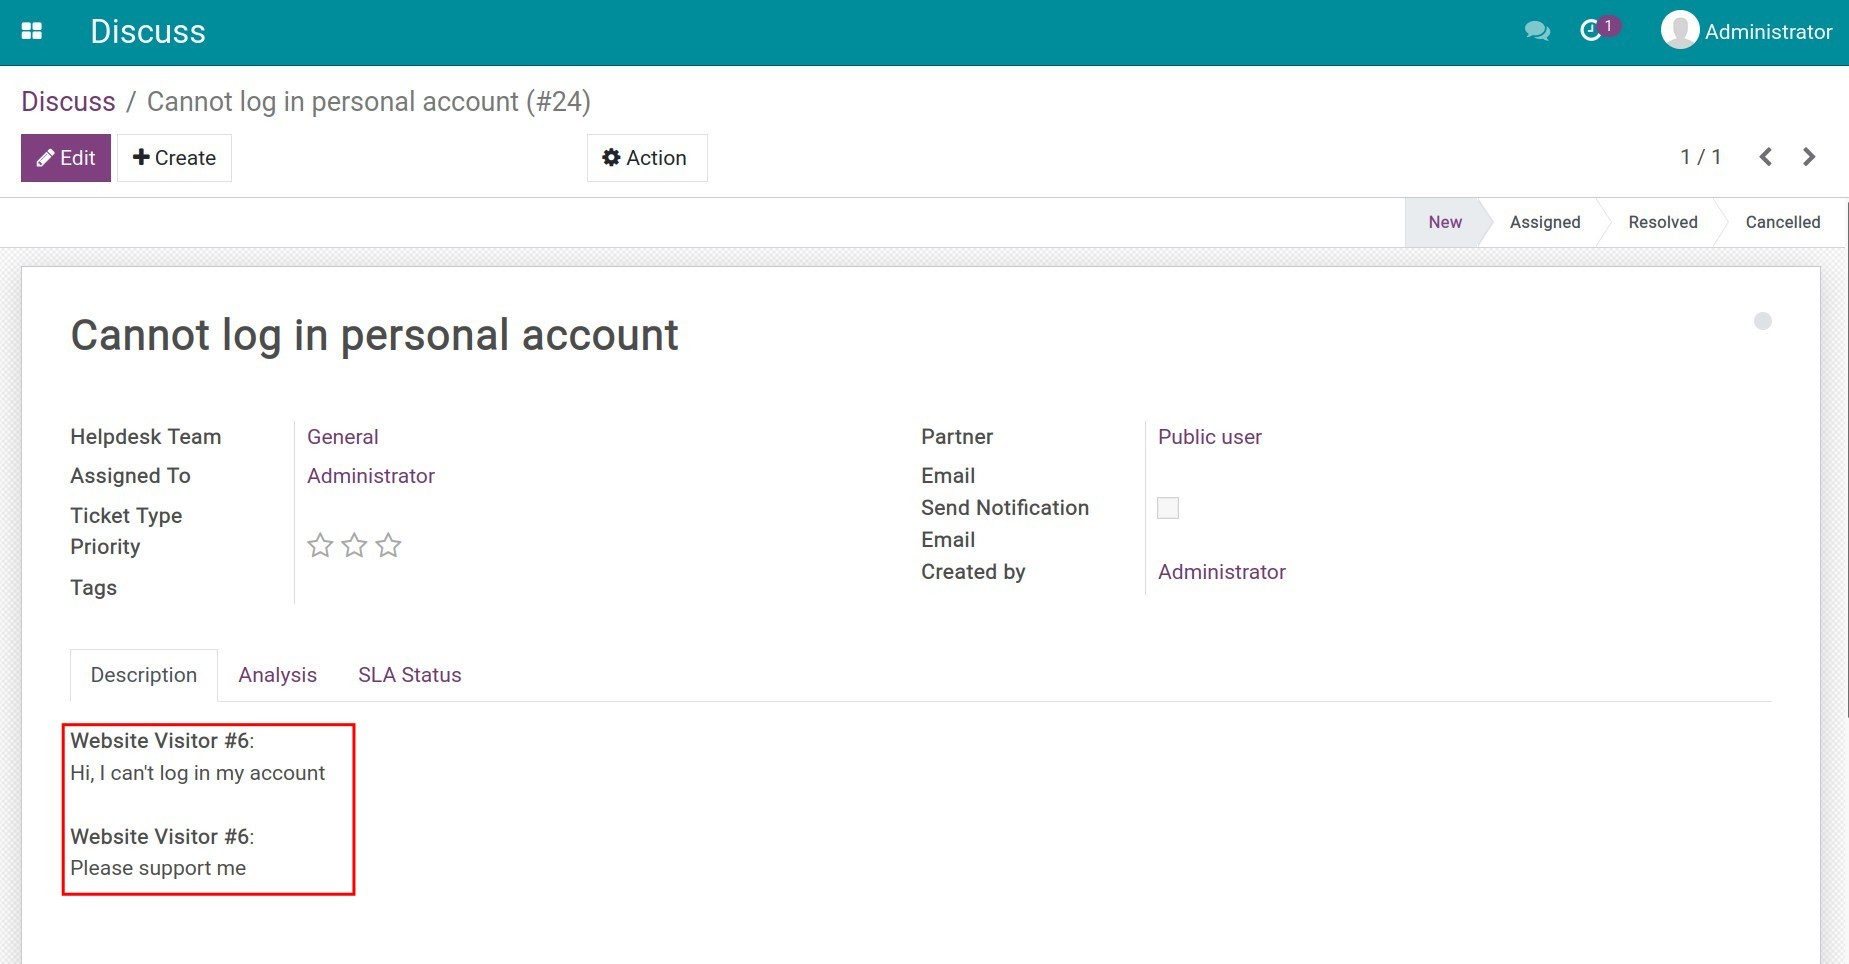
A new ticket is now logged into the system. The ticket has the same title as the one you have entered in the above command. Click on the title to access the detailed view.
The conversation between you and the customer is saved in the Description tab. Hence, each employee that is assigned to handle the ticket will also have enough information for immediate support.
Integration with CRM
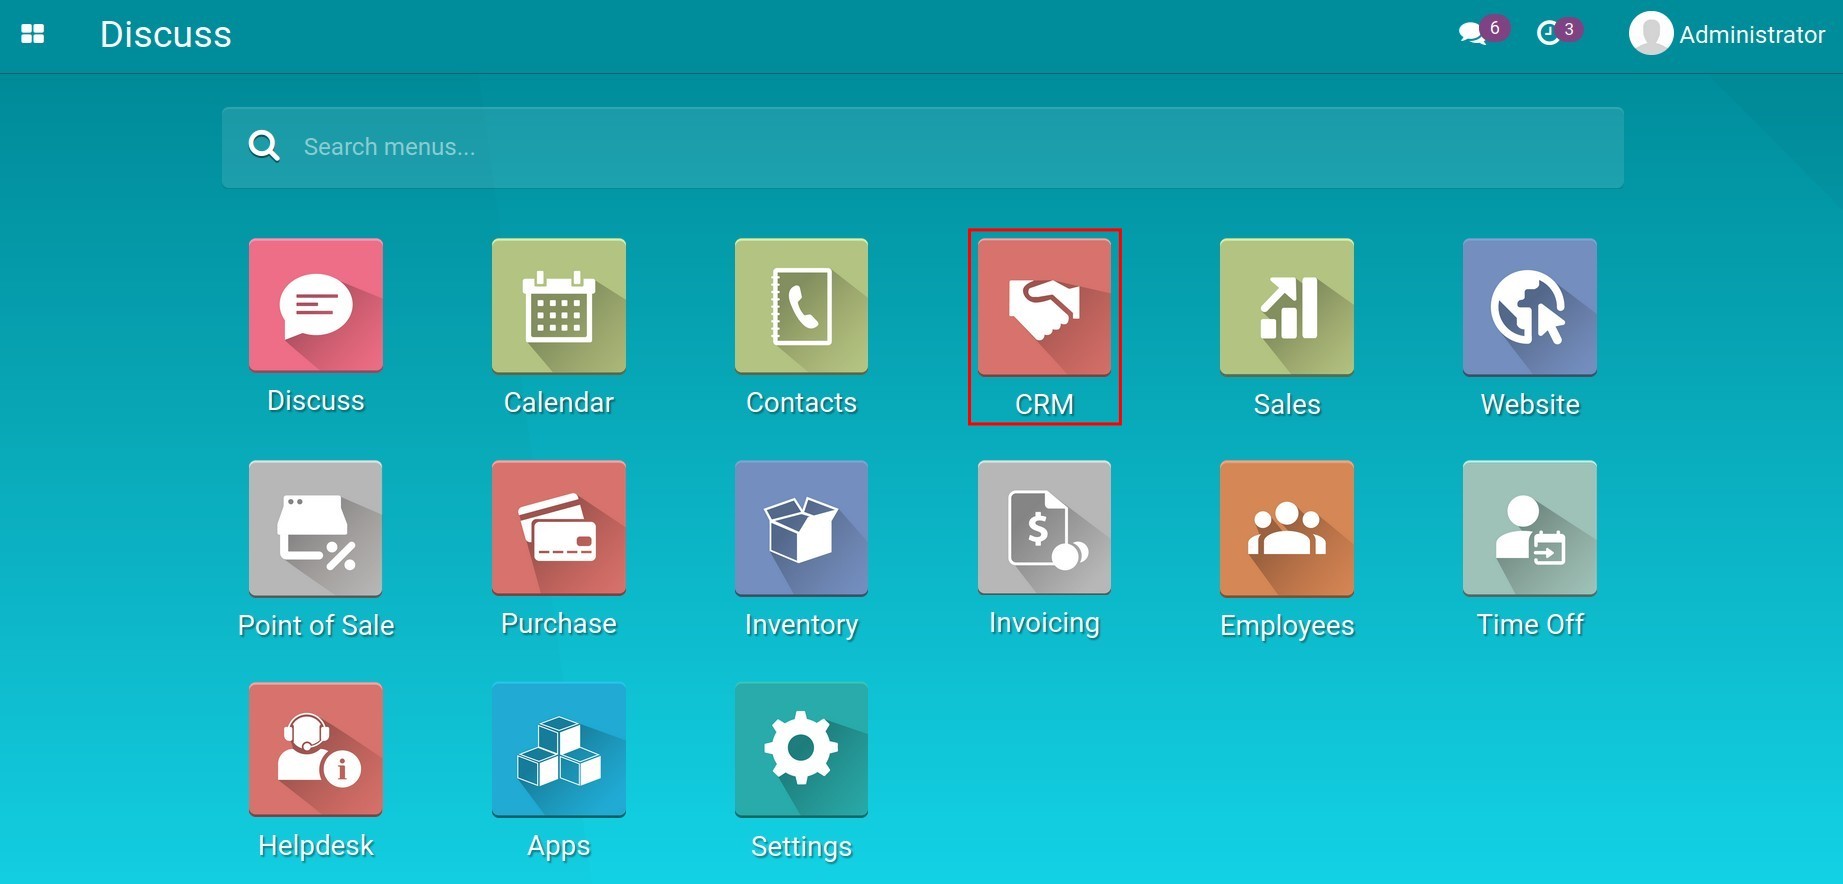
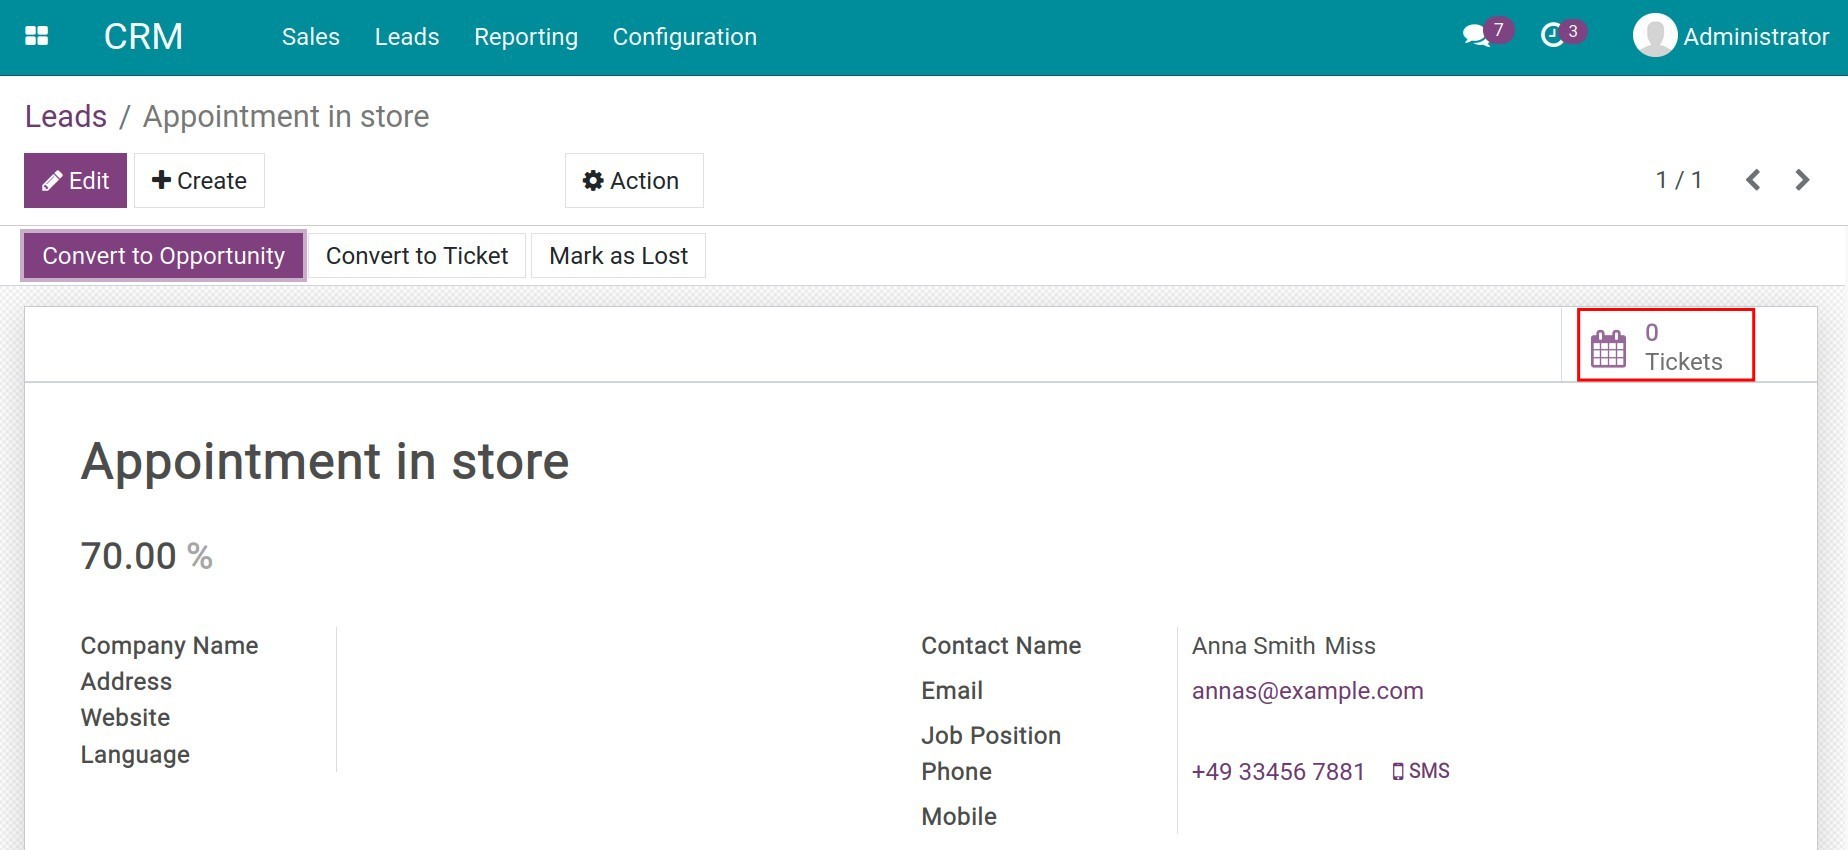
Navigate to . Select the Lead that you want to create a ticket for. Access the Tickets statistics section and then press Create.


Note
The title of the ticket should be clear and easy to understand so that the assigned and related employees can quickly identify the content, assign/forward and handle it.
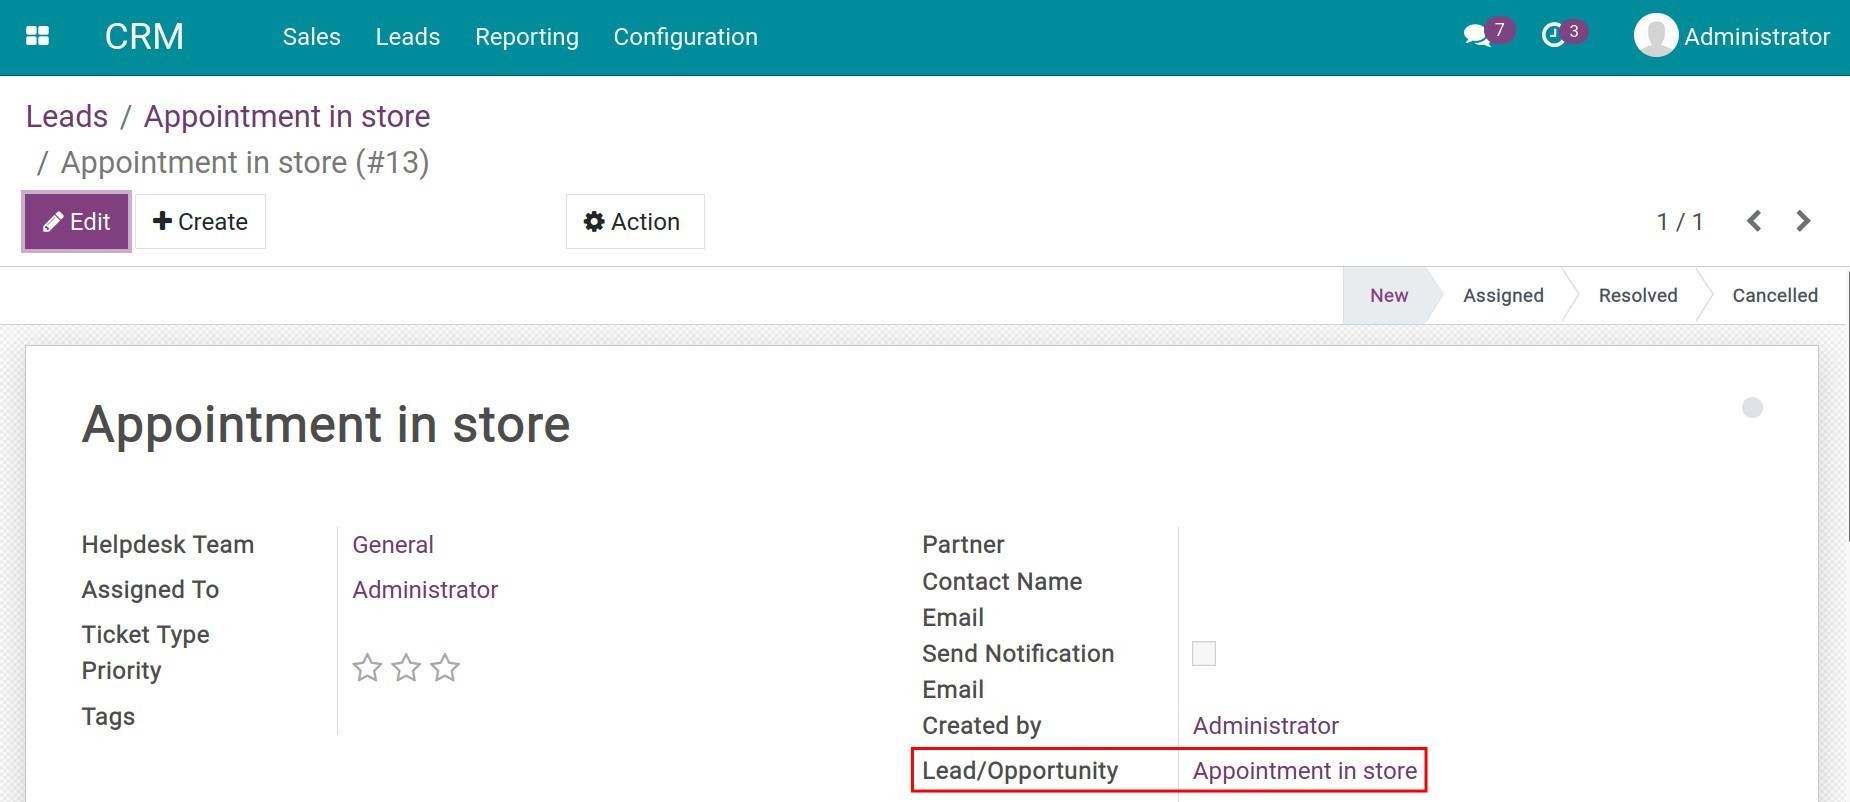
On the detailed view of the ticket, the system will automatically link this ticket to the selected lead on the Lead/Opportunity field. This information makes it possible for the administrator/manager to trace the origin of the ticket and find the information so that the ticket can be properly, adequately, and quickly processed.
On the Lead view, you can also see the number of tickets linked to this lead.

In case the customer sends a request through CRM, the system will automatically generate a lead (refer to Acquire leads). Once you’ve evaluated that the lead information only relates to a ticket and will not generate a new opportunity, click Convert To Ticket. The lead will be converted into a ticket to continue serving the customer without further management in the CRM app.

Similar to leads, you can also create a ticket on the view of an opportunity. The opportunity will now be automatically linked to the generated ticket.
Integration with the Sales app
Go to and select a quotation you want to create a ticket for and send the ticket to the desired channels. For example Procurement channel, Maintenance channel, Delivery channel, Leadership channel, Legal channel, etc. depending on how the business’s support center is organized.

The Tickets statistics menu bar is now available and displayed on the view of the quotation. Access here and then press Create to create a new ticket.
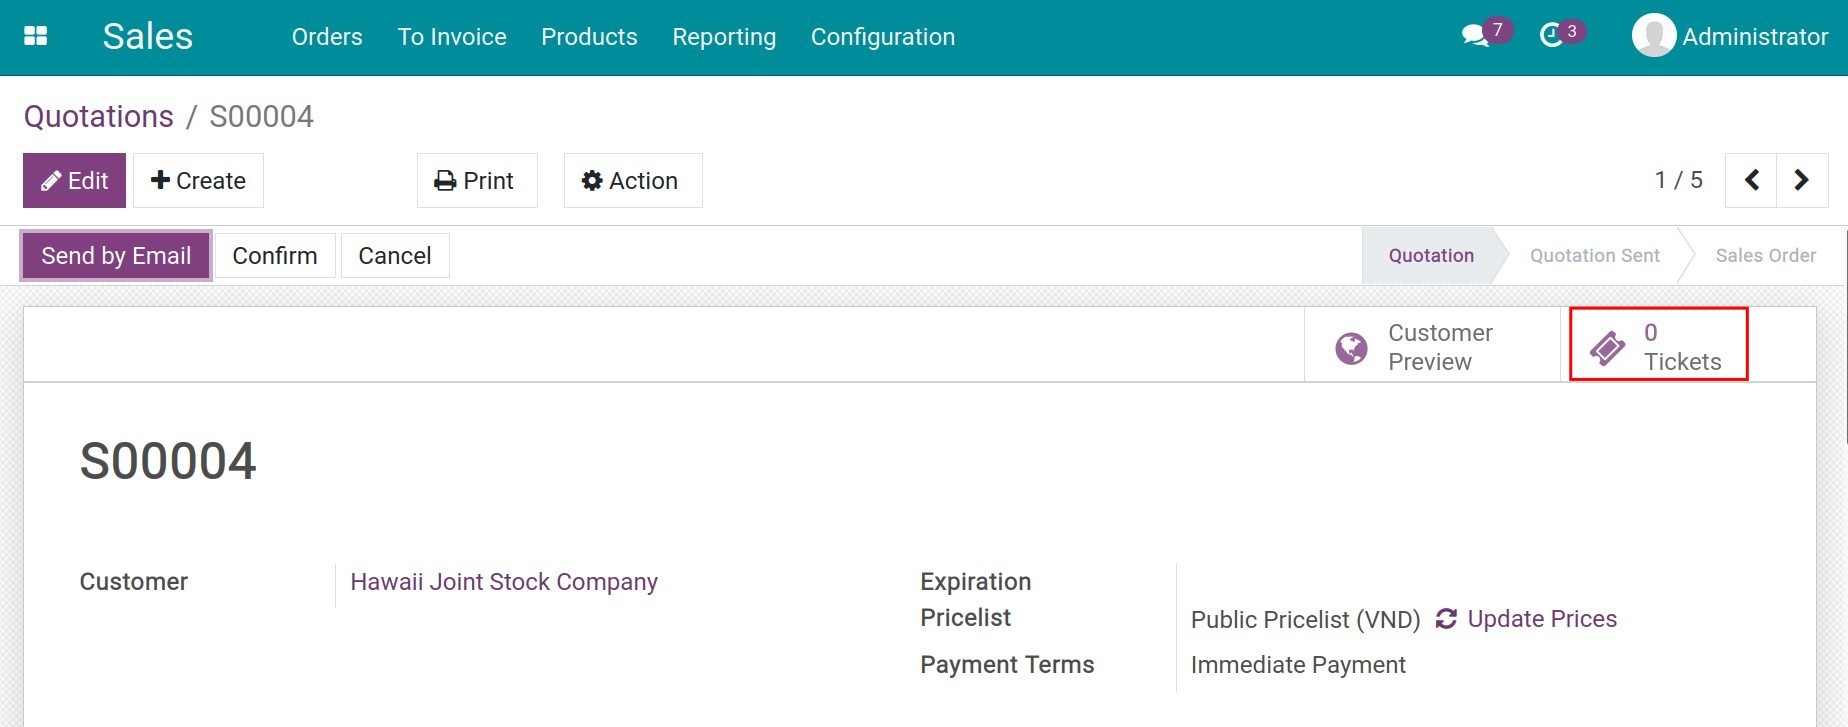

At this time, the quotation will be linked to the newly created ticket. You enter the title and click Edit to add more information on the ticket. More details can be found at Guidance for Ticket management.
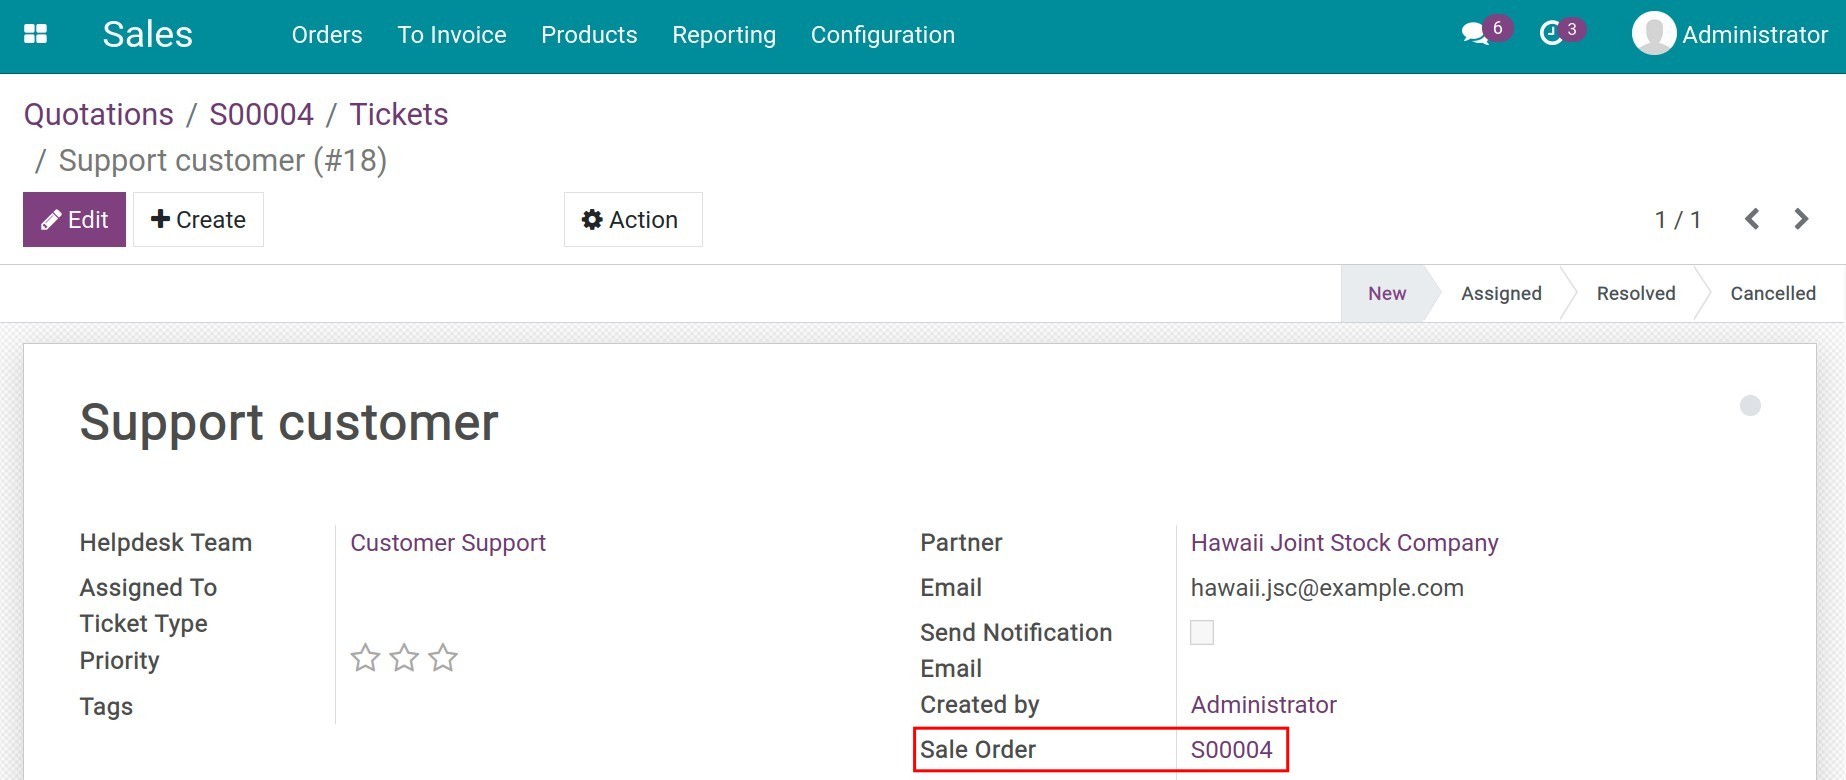
Similar to quotations, you can also create a ticket directly on the view of a sales order. The sale order will also be automatically linked to the generated ticket.
Integration with Timesheets app
After installing the Helpdesk Timesheets Integration module, navigate to Helpdesk > Configuration > Helpdesk Teams and select a helpdesk team. You will see an additional tab, the Project & Timesheets tab, press Edit and select a project on the Project field to link this team to a specified project to track the timesheet hours for customer support of all the members of the helpdesk team.
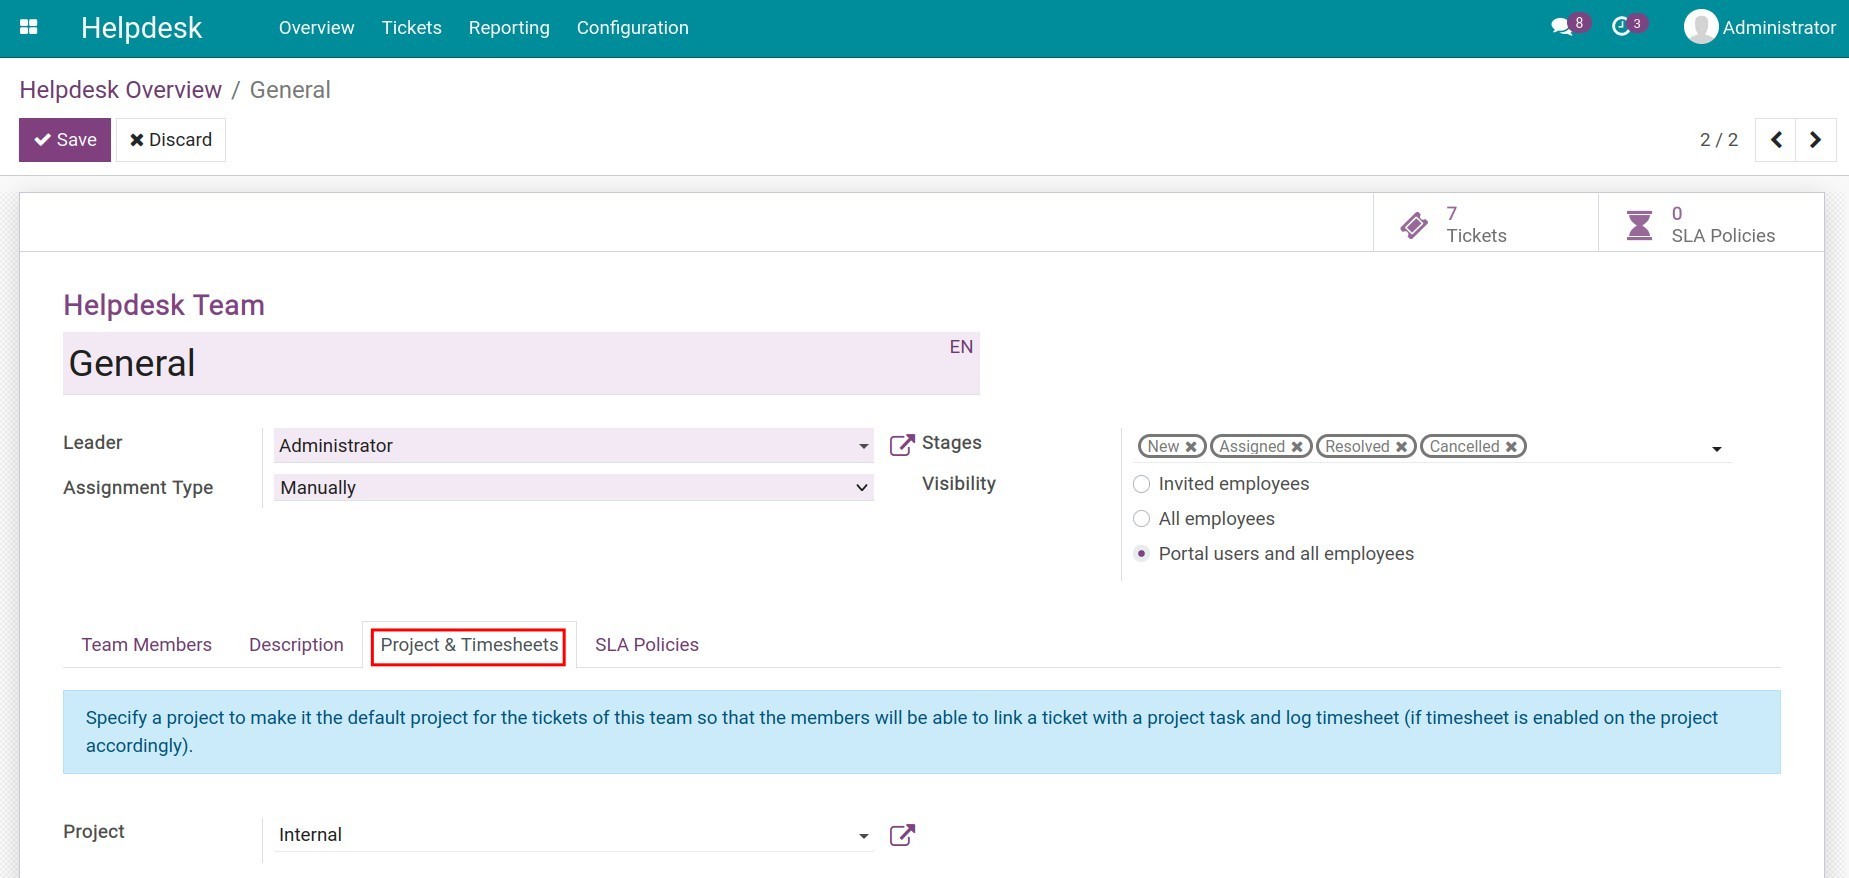
On the ticket that relates to the project, the Timesheets tab is also visible and the corresponding feature is available for employees to record time support. This helps the managers to track how many logged timesheets that their team has worked on the ticket and understand more the workload of their employees. From here, the companies will have data to calculate the cost of processing the ticket.
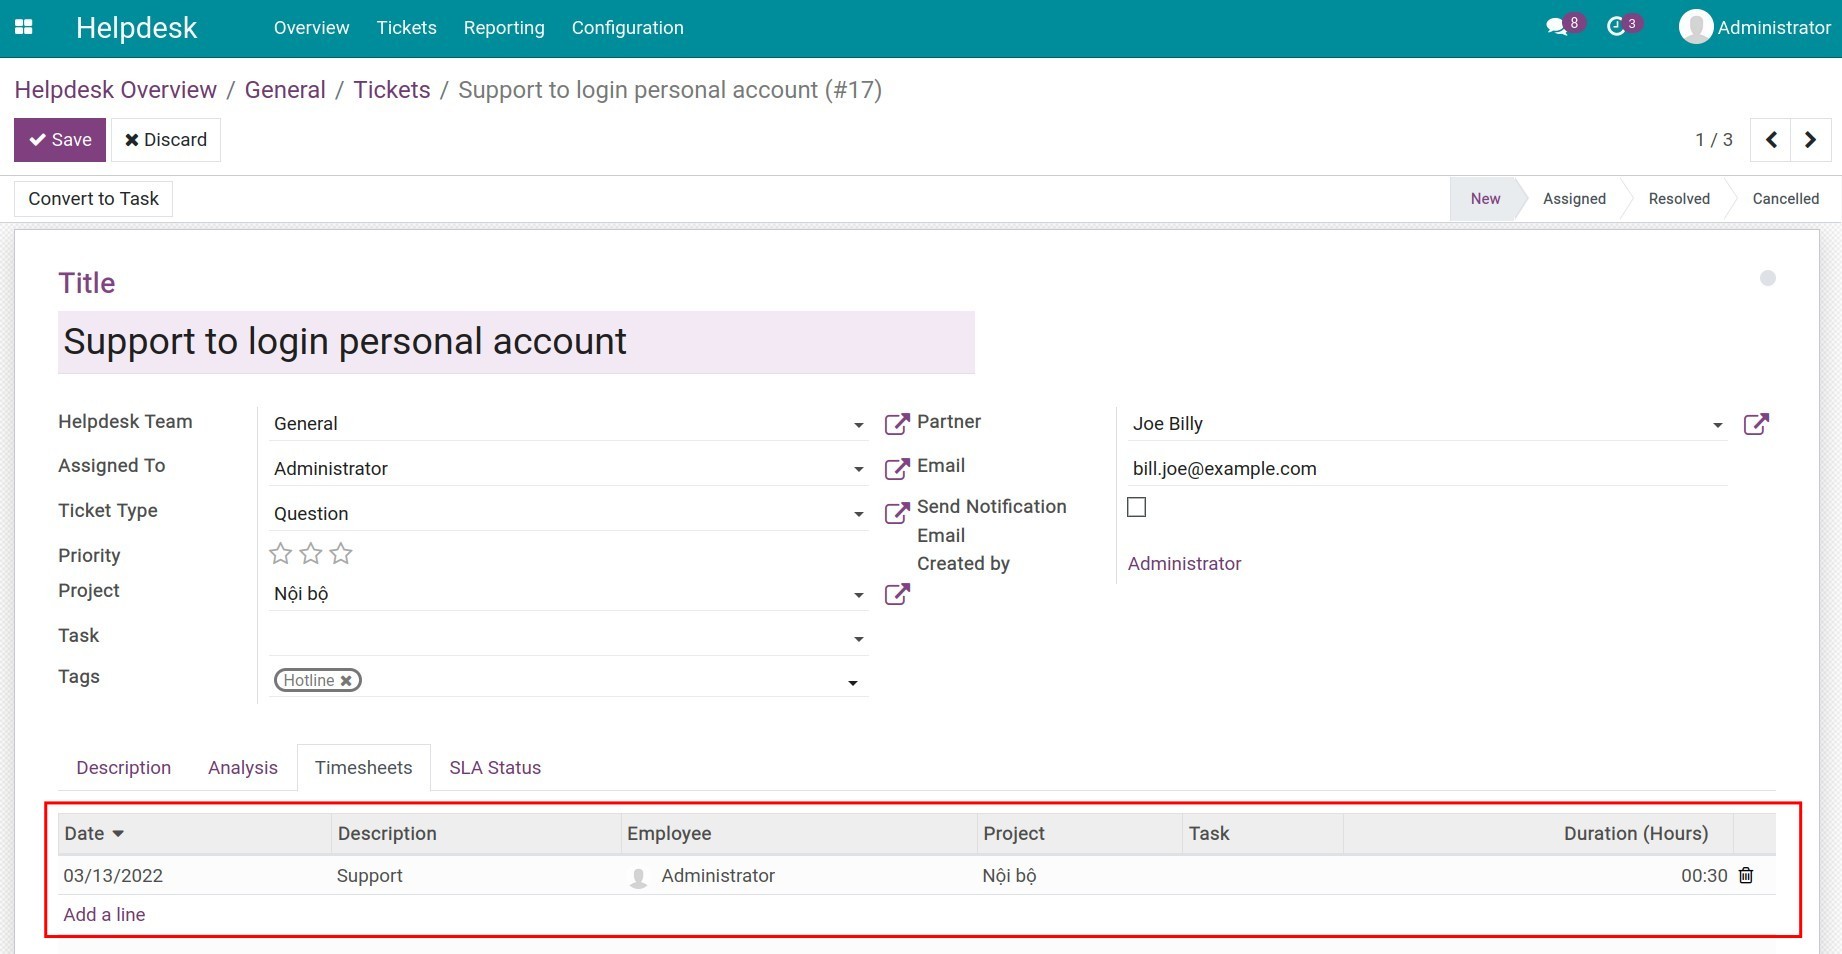
In addition, here, you can create a task for the project if the ticket is related to ongoing projects, or turn the ticket into a project task by pressing the corresponding buttons.

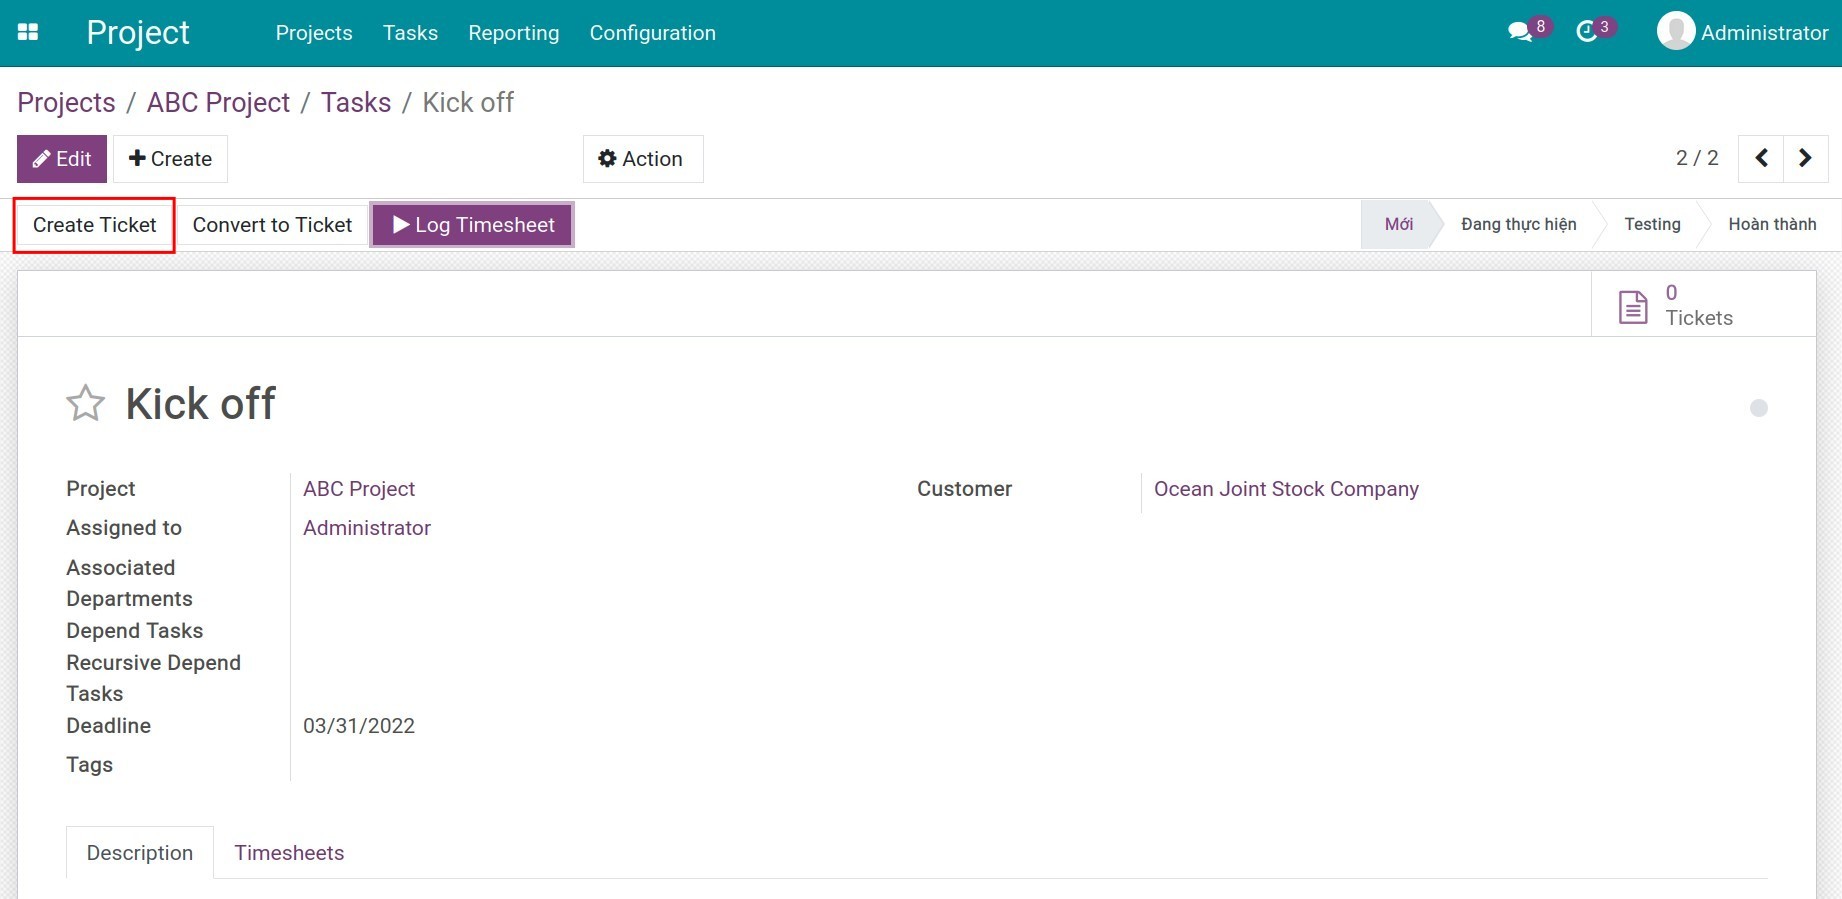
While the project is still ongoing, you may also need support from the other departments. Right on the task view of the project, you can create a ticket linked to the project by pressing Create Ticket. On the upper-right corner of the task, there is also a statistic of the number of tickets linked to the task.
