Repairing at an internal location
To have a better understanding of this feature, let’s take a look at the examples below.
Situation 1: Repairs at an internal company location
When a repair order is created and confirmed, the product that needs to be repaired is moved from the company’s warehouse location (WH/Stock) to the repair service location (RP/Stock). Once the repair is done, the product is transferred back to the company’s warehouse location. You need to perform the followings:
Create a repair order
Create a repair order at the repair service location (RP/Stock). For more details on how to do it, check out the Create repair orders article.
Read more on Difference between Warehouses and Locations.
Confirm the repair order
Do the following steps:
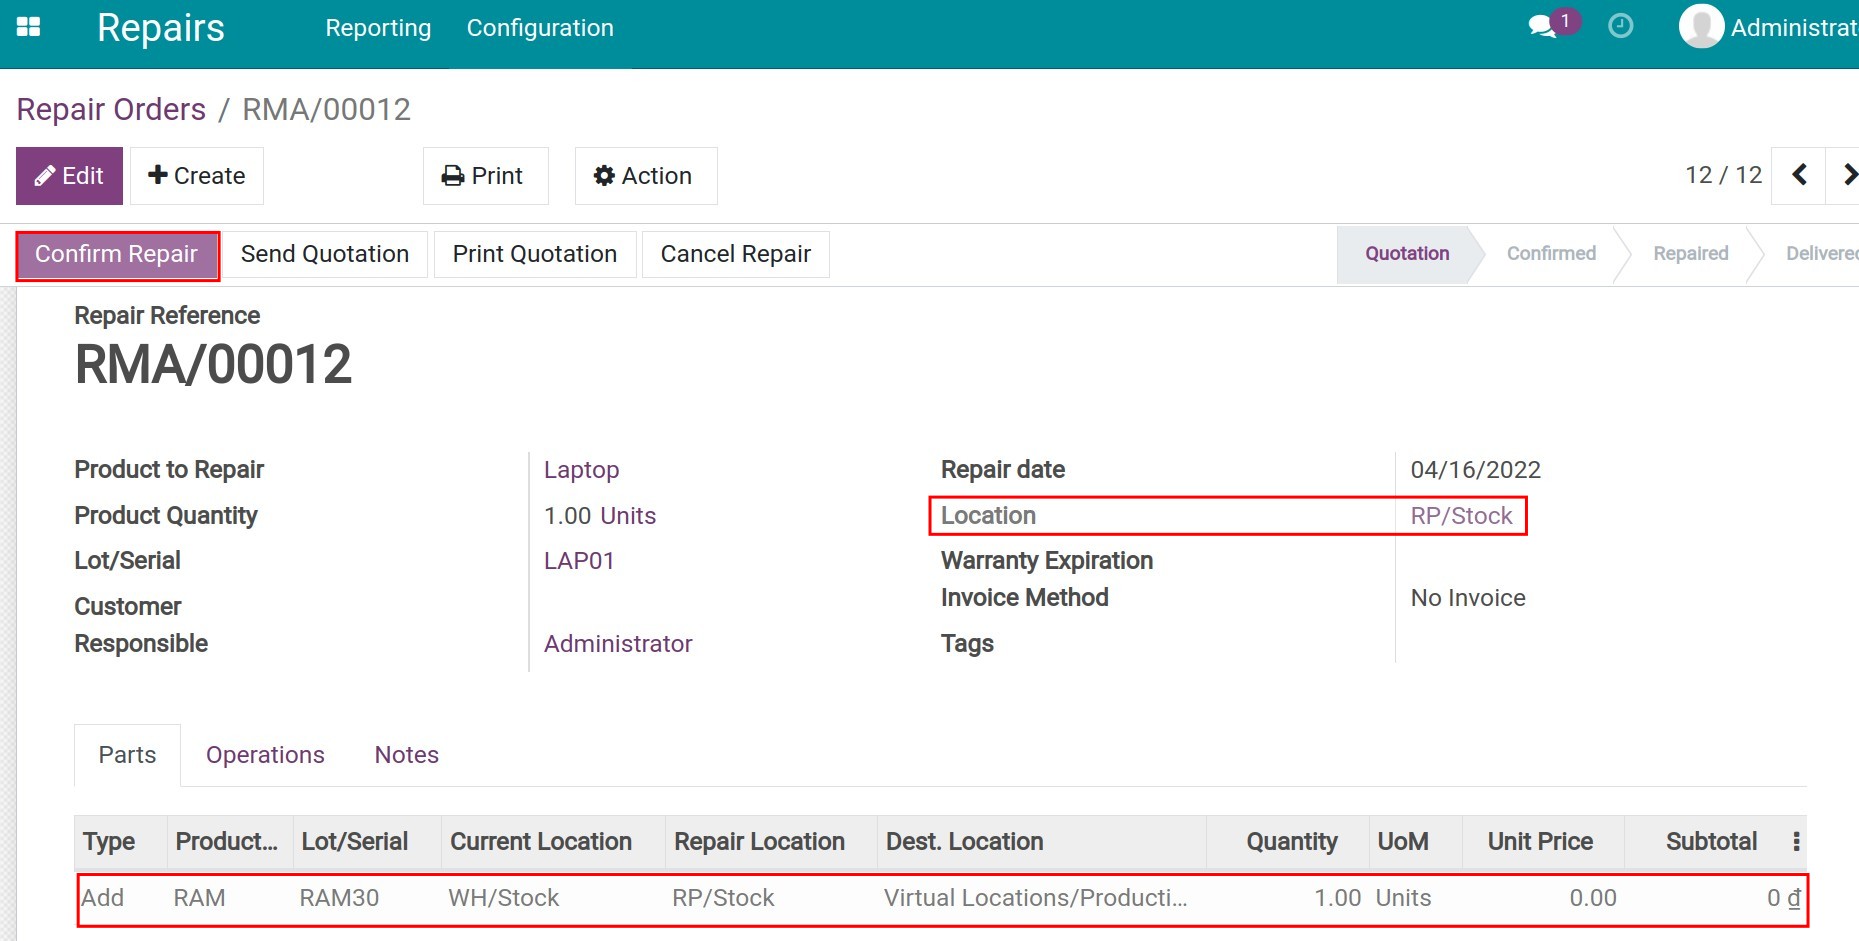
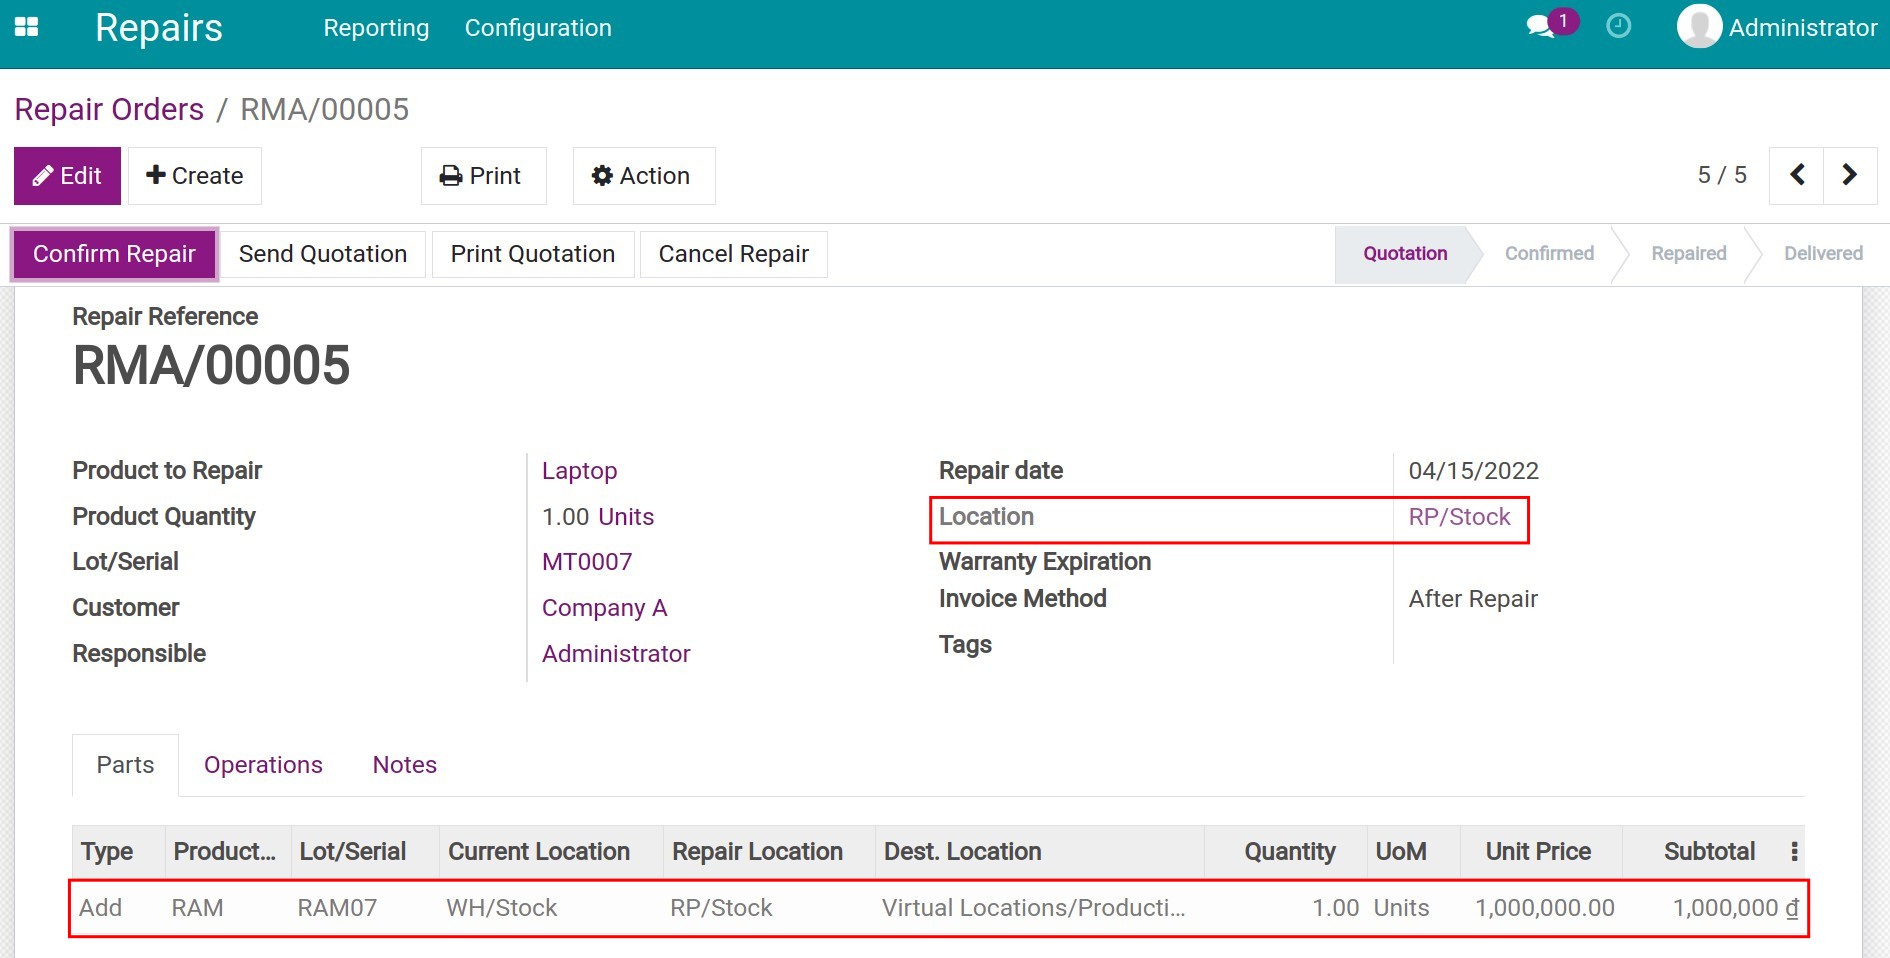
Step 1: Confirm the repair order
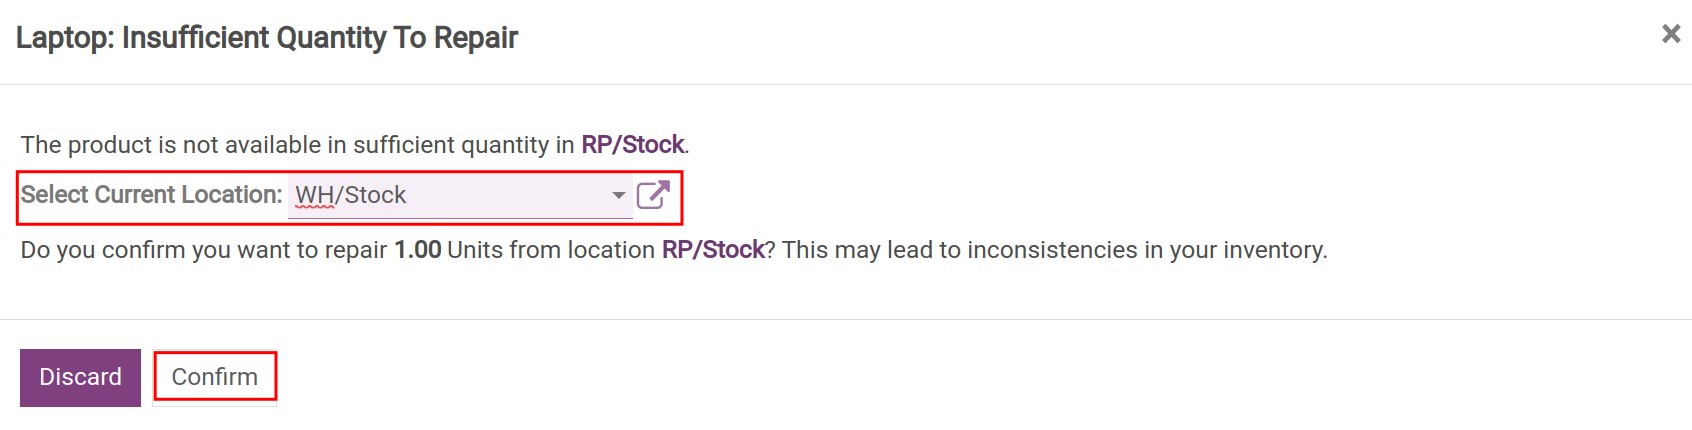
Select Confirm Repair > Select Current Location > Confirm.
Note
Current Location: The location contains the product needs to be repaired.
The repair order status is changed to Confirmed.
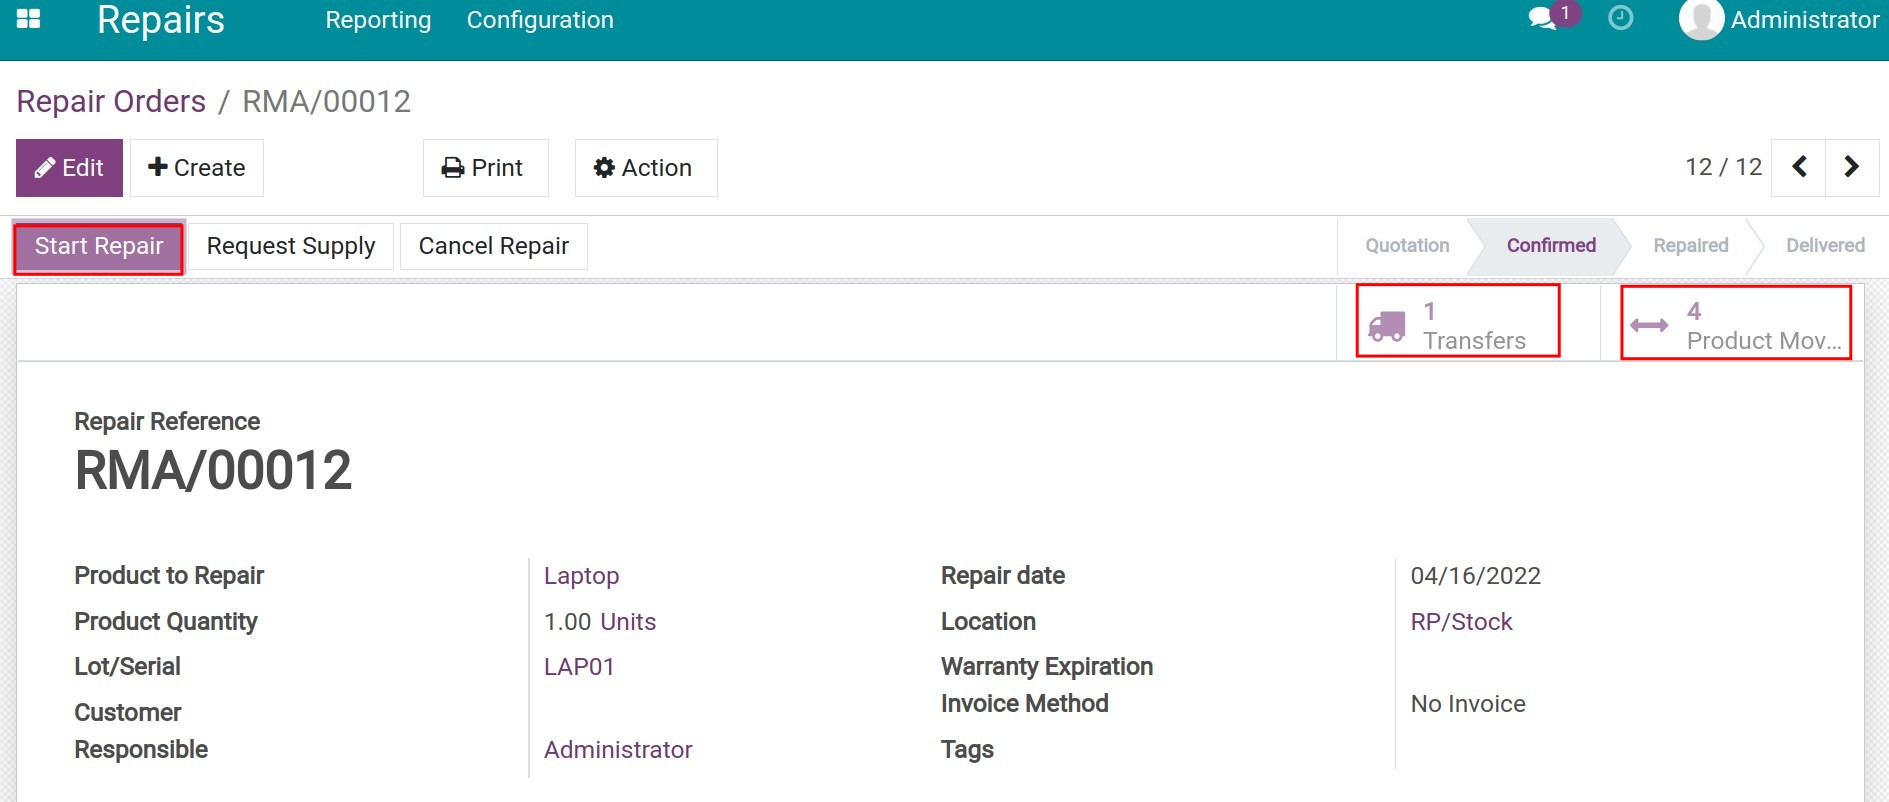
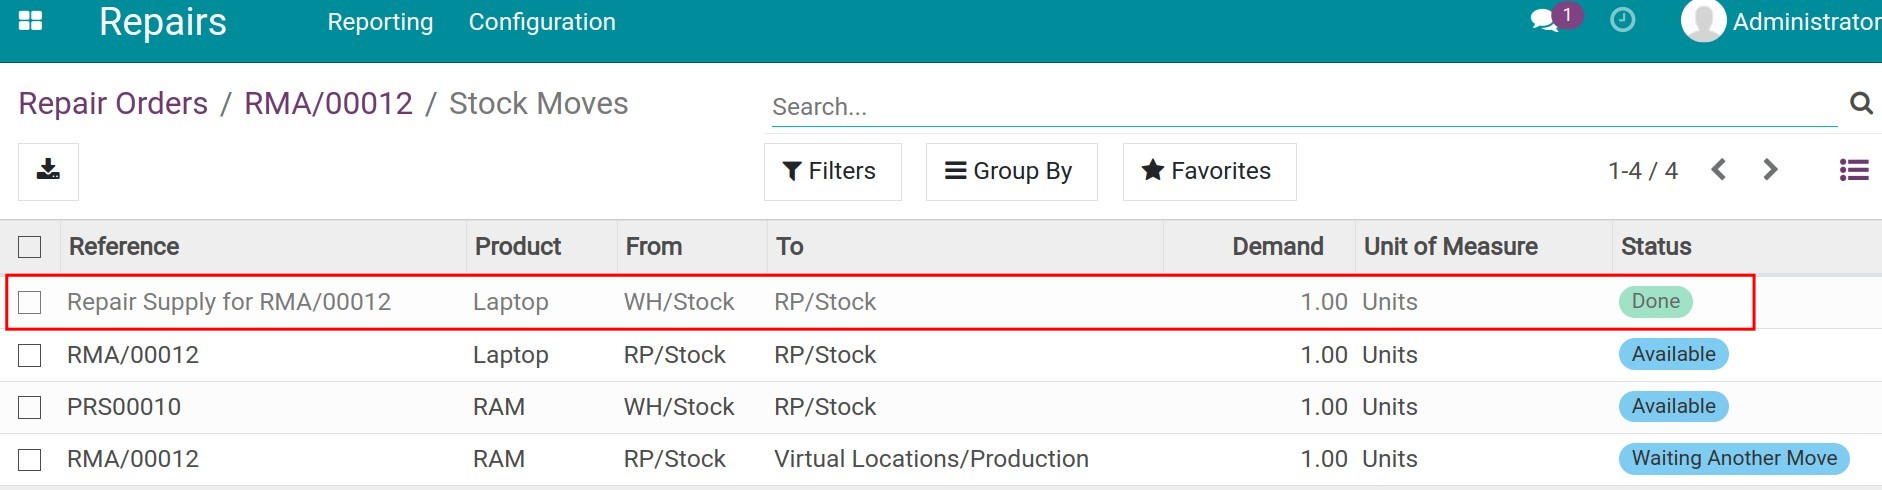
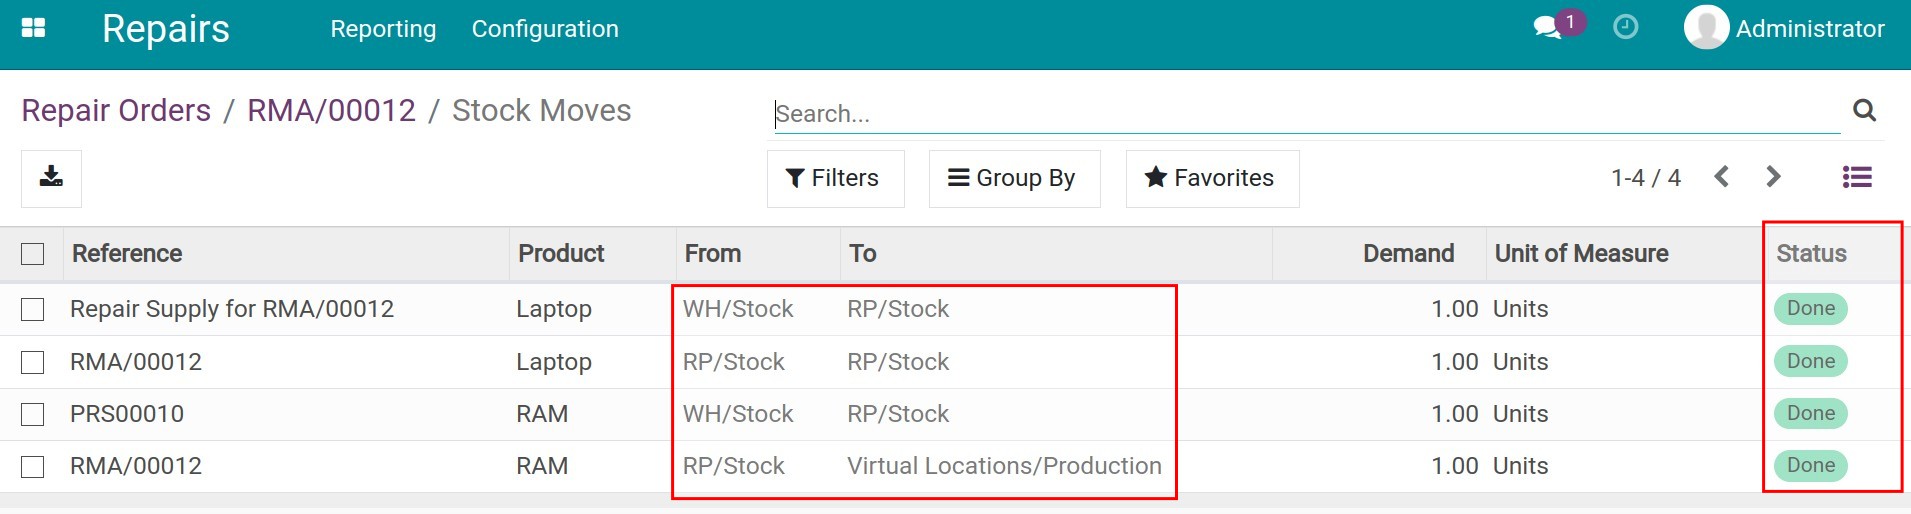
Transfer slips are created automatically. Press on Product Moves to see more details.

Product to be repaired is moved from the company’s stock warehouse to the repair service location for the repairing process. You can see this transfer in the Done status on the Stock Moves interface.
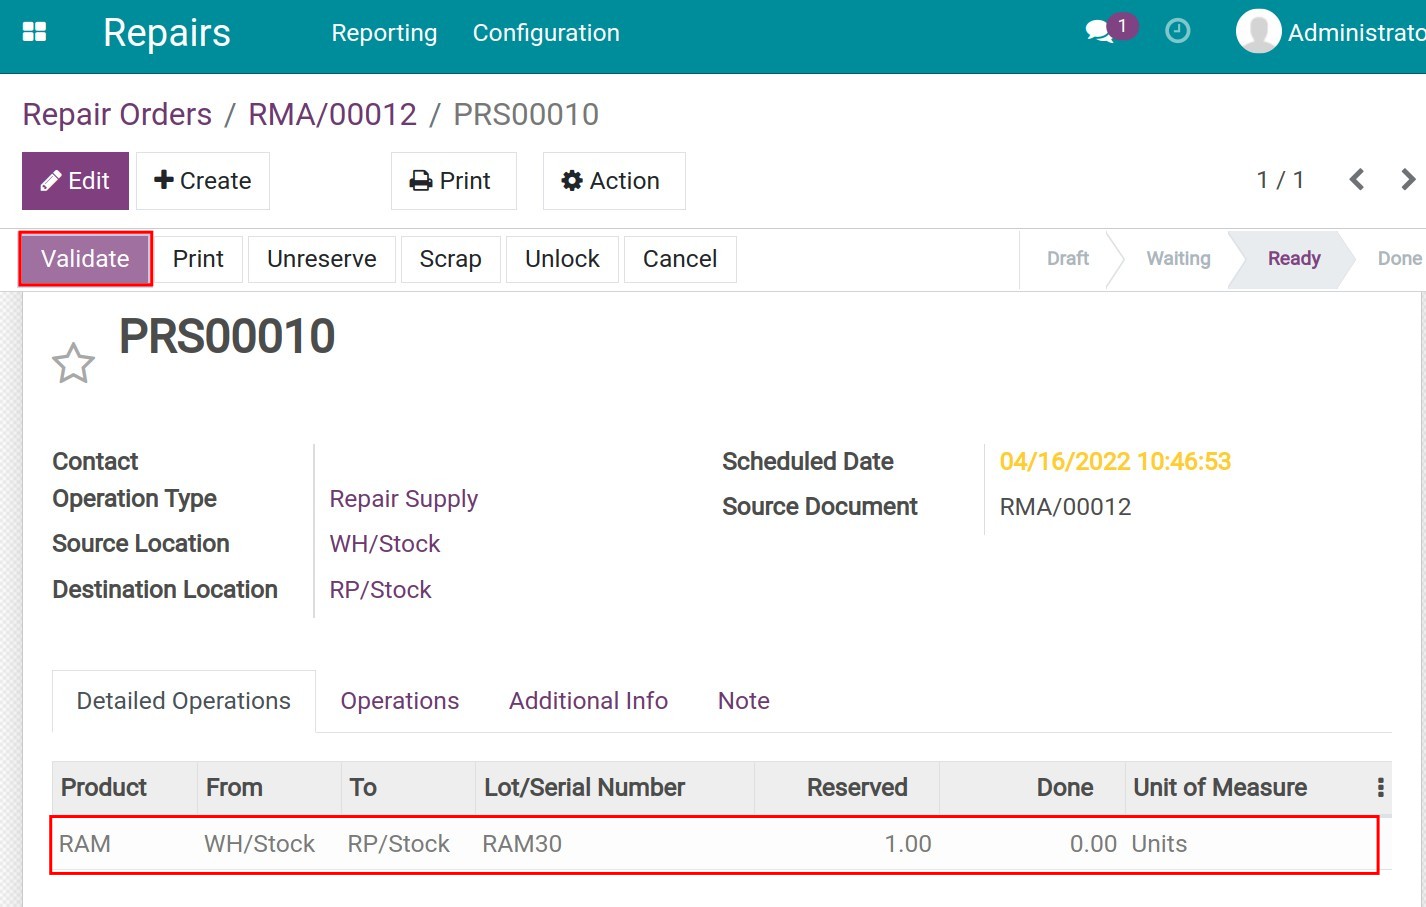
Step 2: Outgoing accessories and supplies as requested on repair orders
On the repair order view, select Transfers > Validate.
Read more on Manage inter-warehouses transfers.
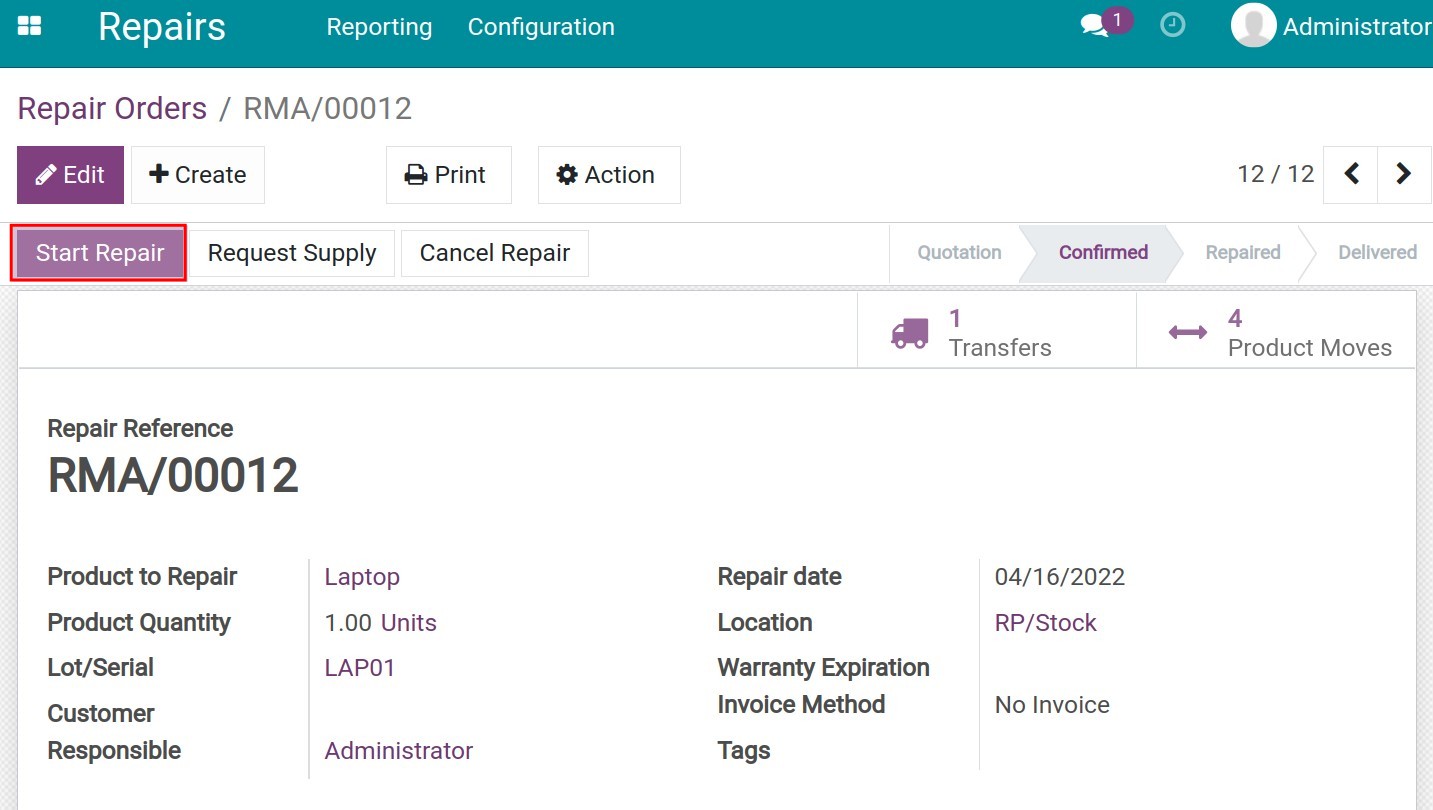
Start the repair
Press on Start Repair to change the repair order status to Under Repair.
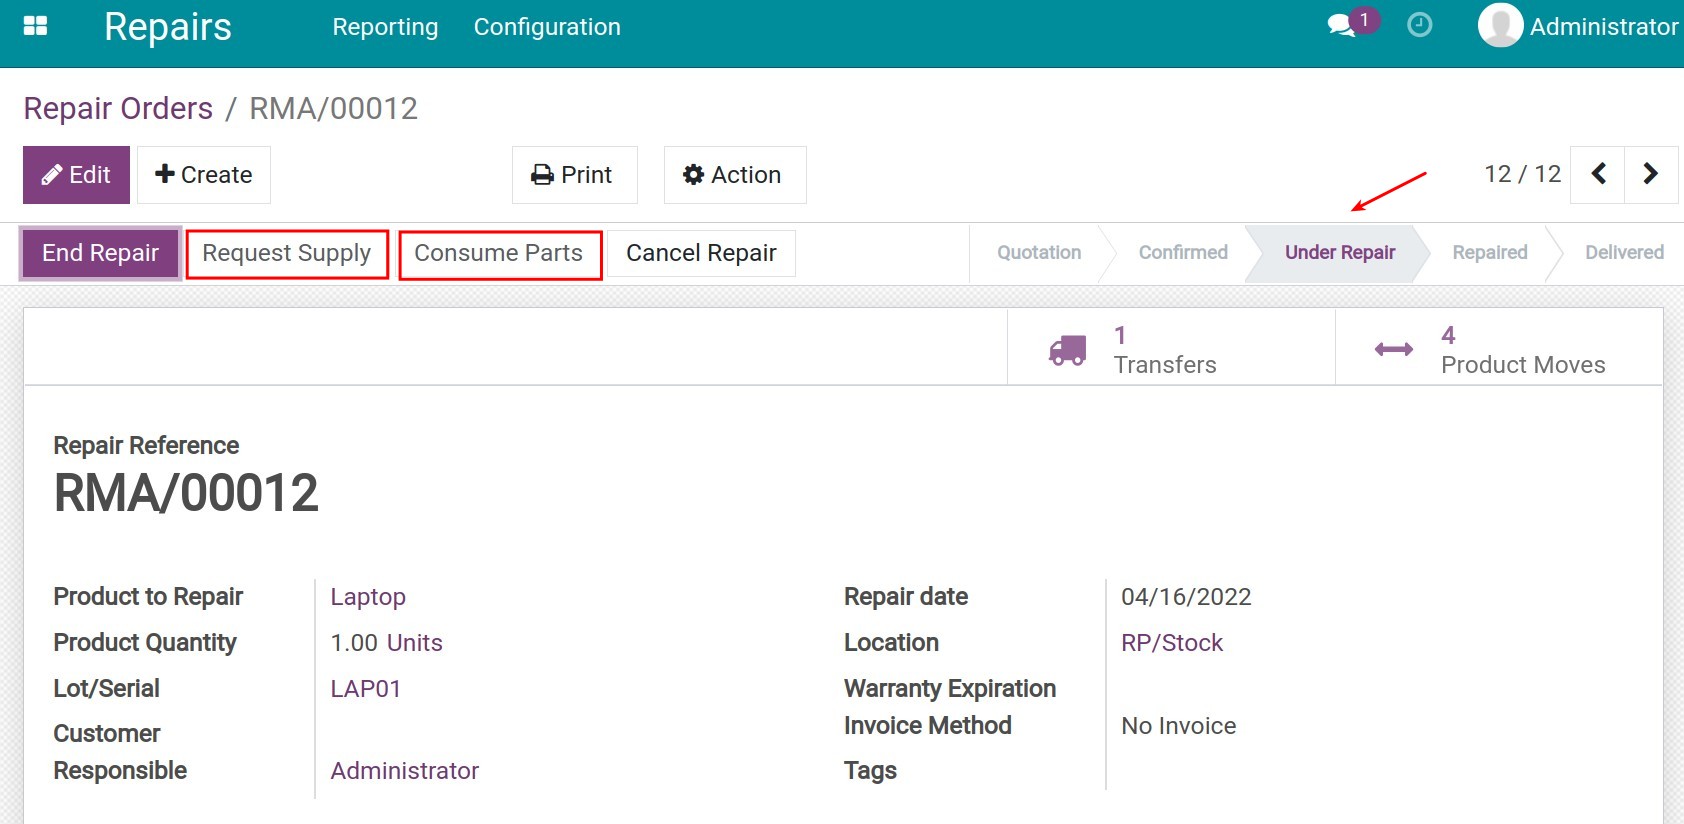
Request supplies
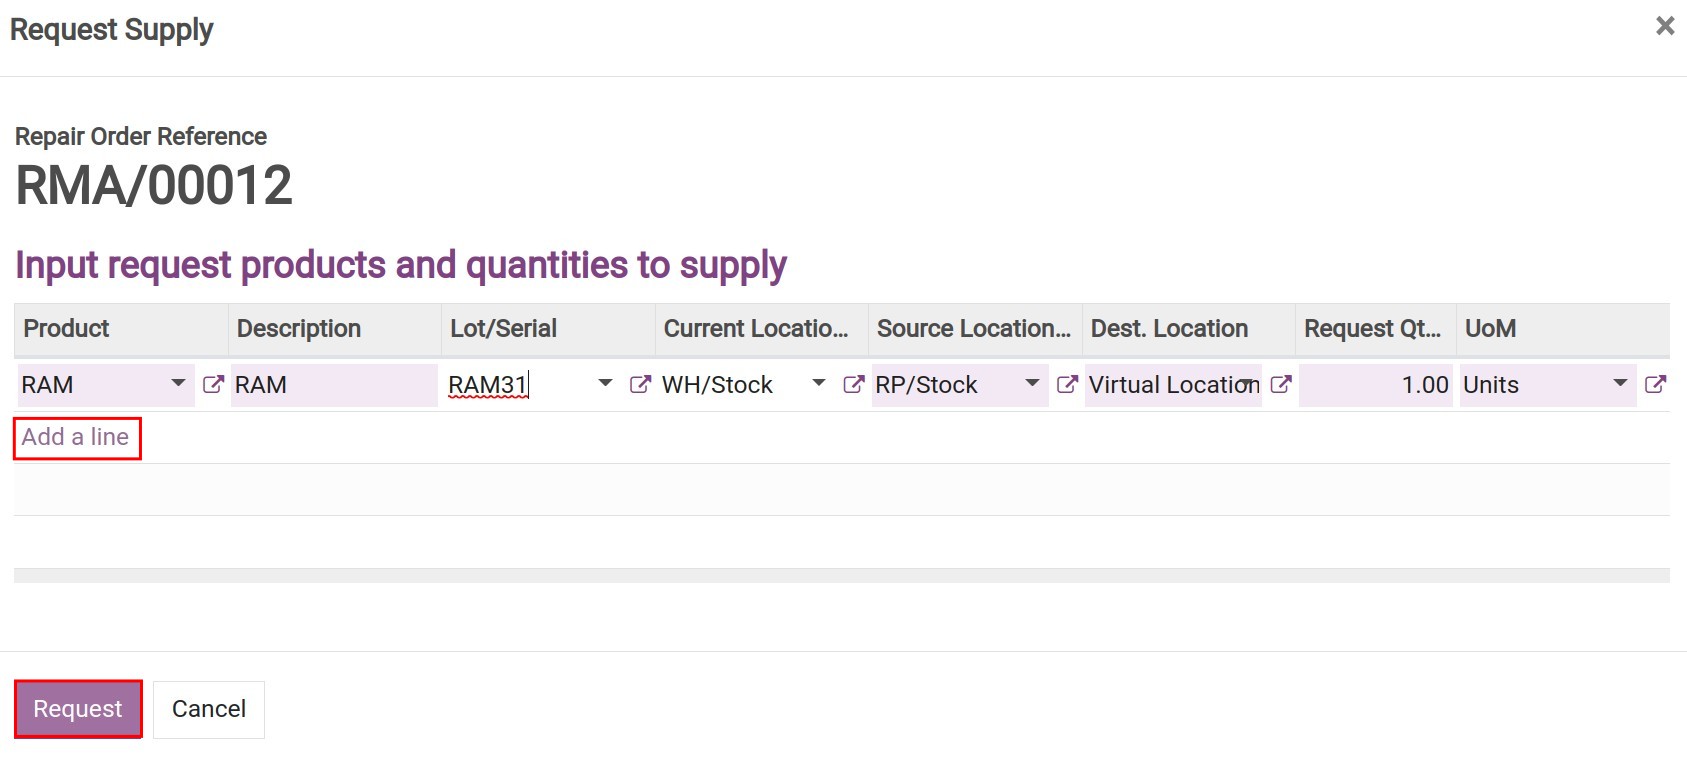
During the repairing process, in case any consume part or supply is missing, you can press Request Supply to restock.
On the request supply view, you need to Add a line to insert a product supply then press Request. The corresponding transfer order is created automatically.
Similar to step 2, validate to complete this transfer order.
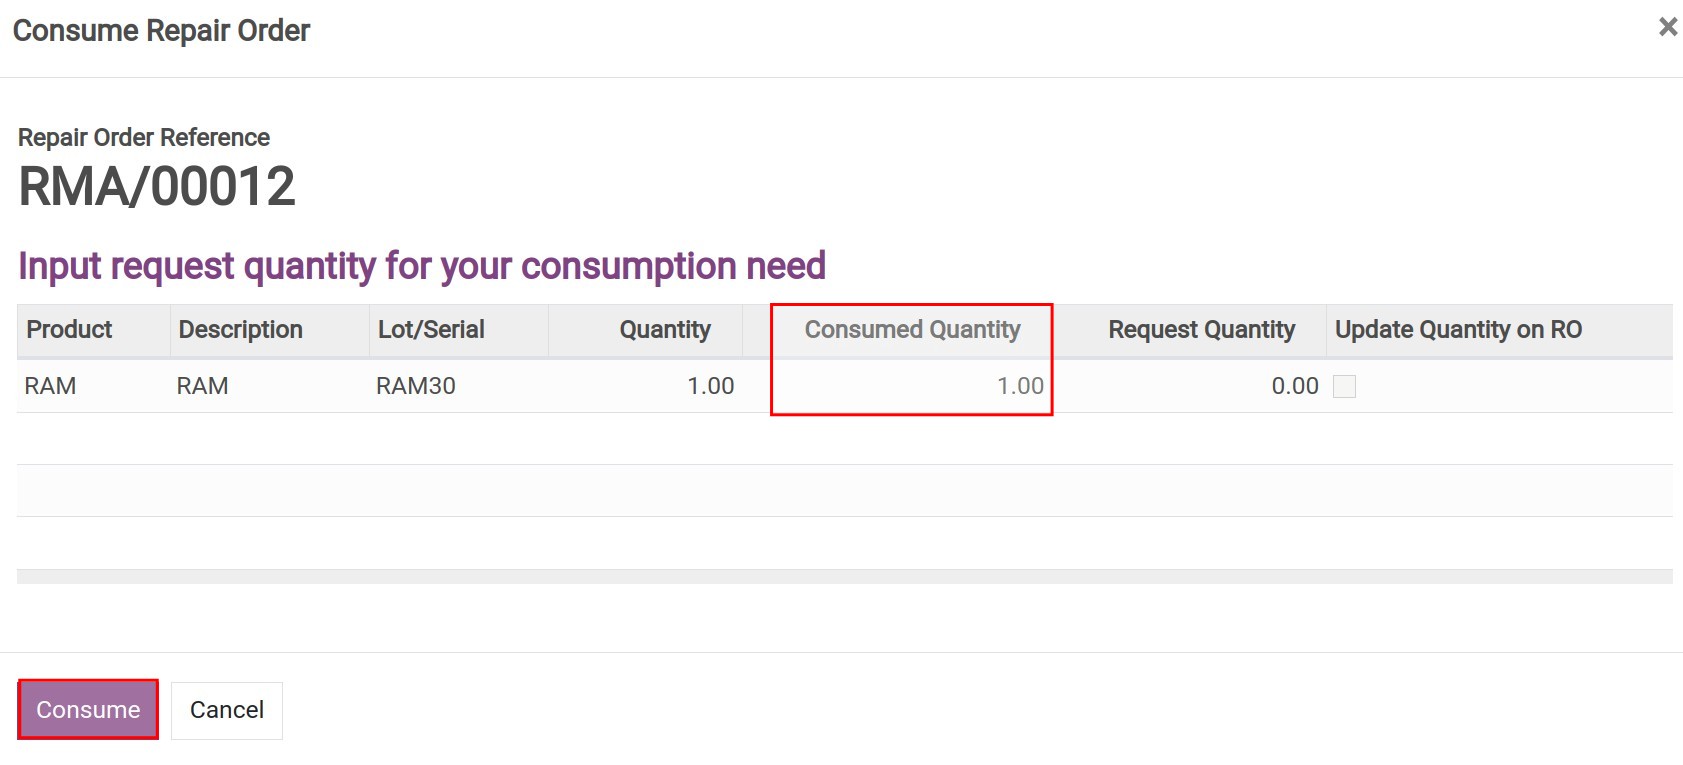
Consume components (supplies, accessories)
In this step, you need to confirm the consume parts order. On the repair order, press Consume Parts > Consume to have the Consumed Quantity updated accordingly.
Finishing the repair
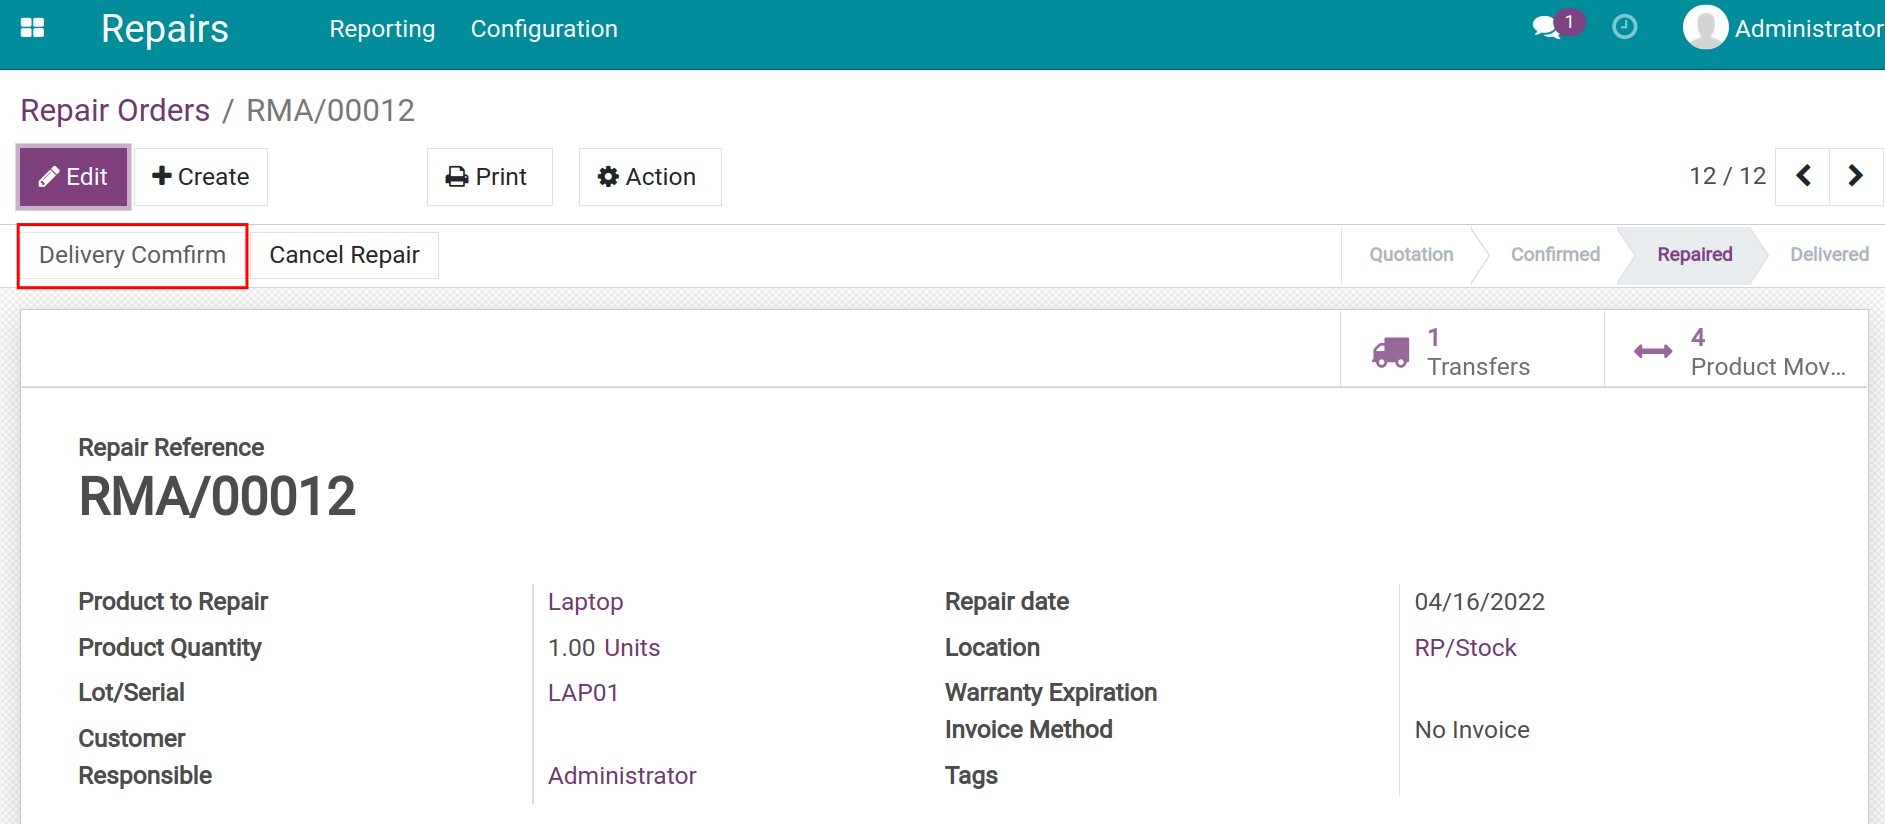
Once the repair is done, press End Repair. The repair order status is now changed to Repaired.
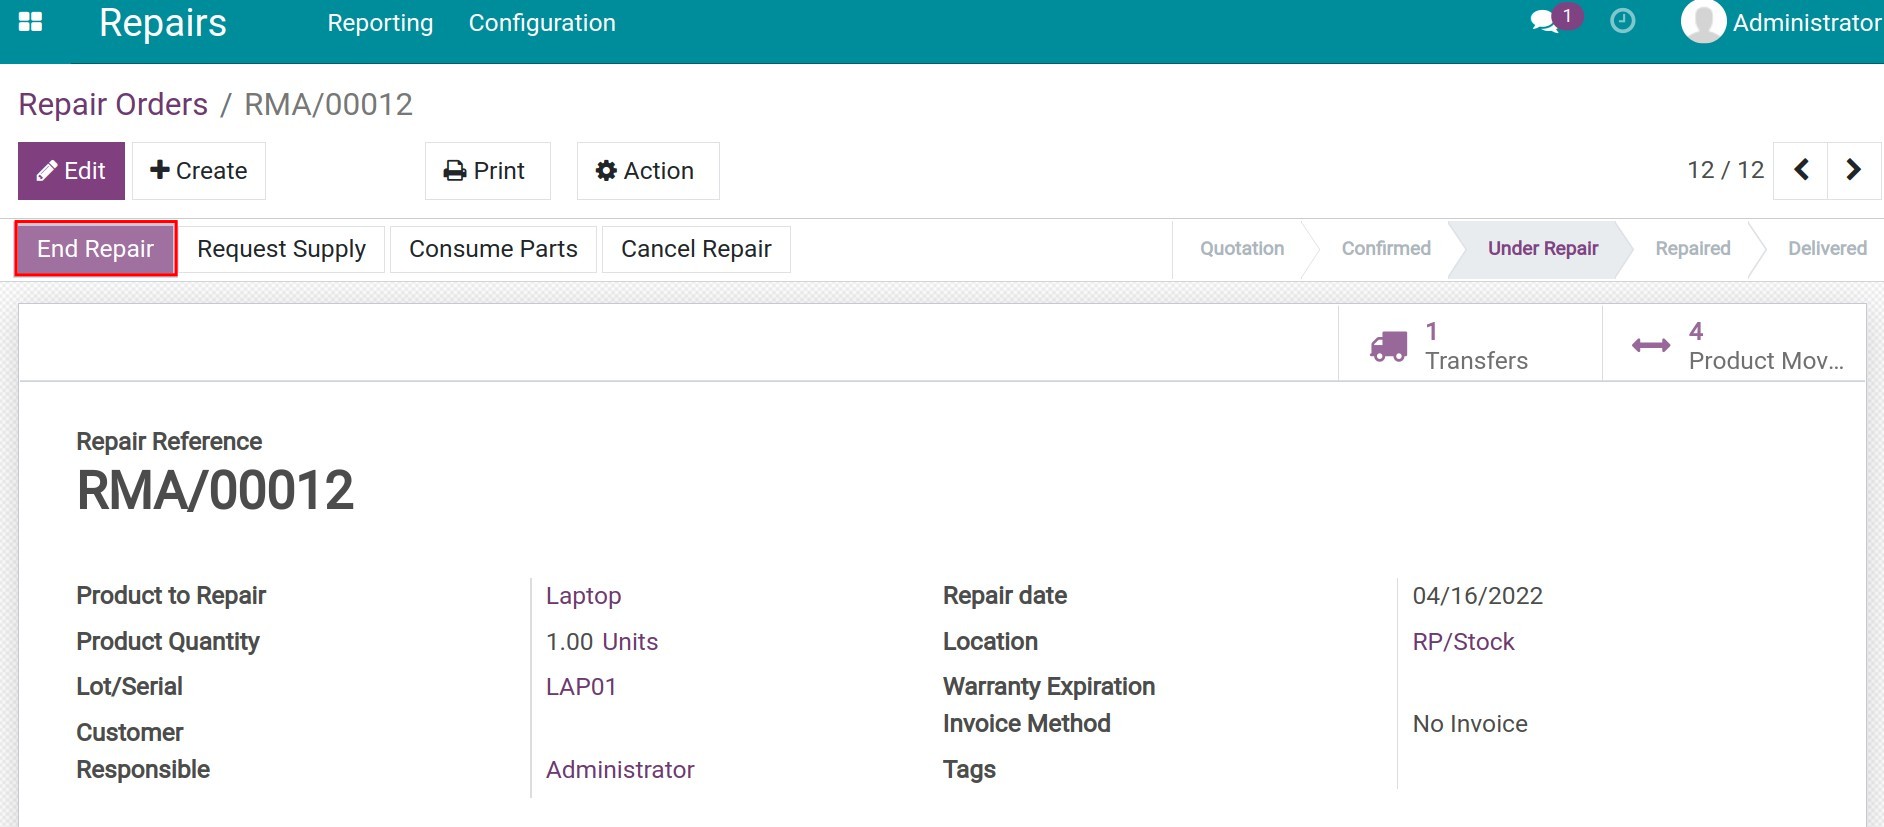
Select Product Moves on the repair order to see the current status of all the transfer orders.
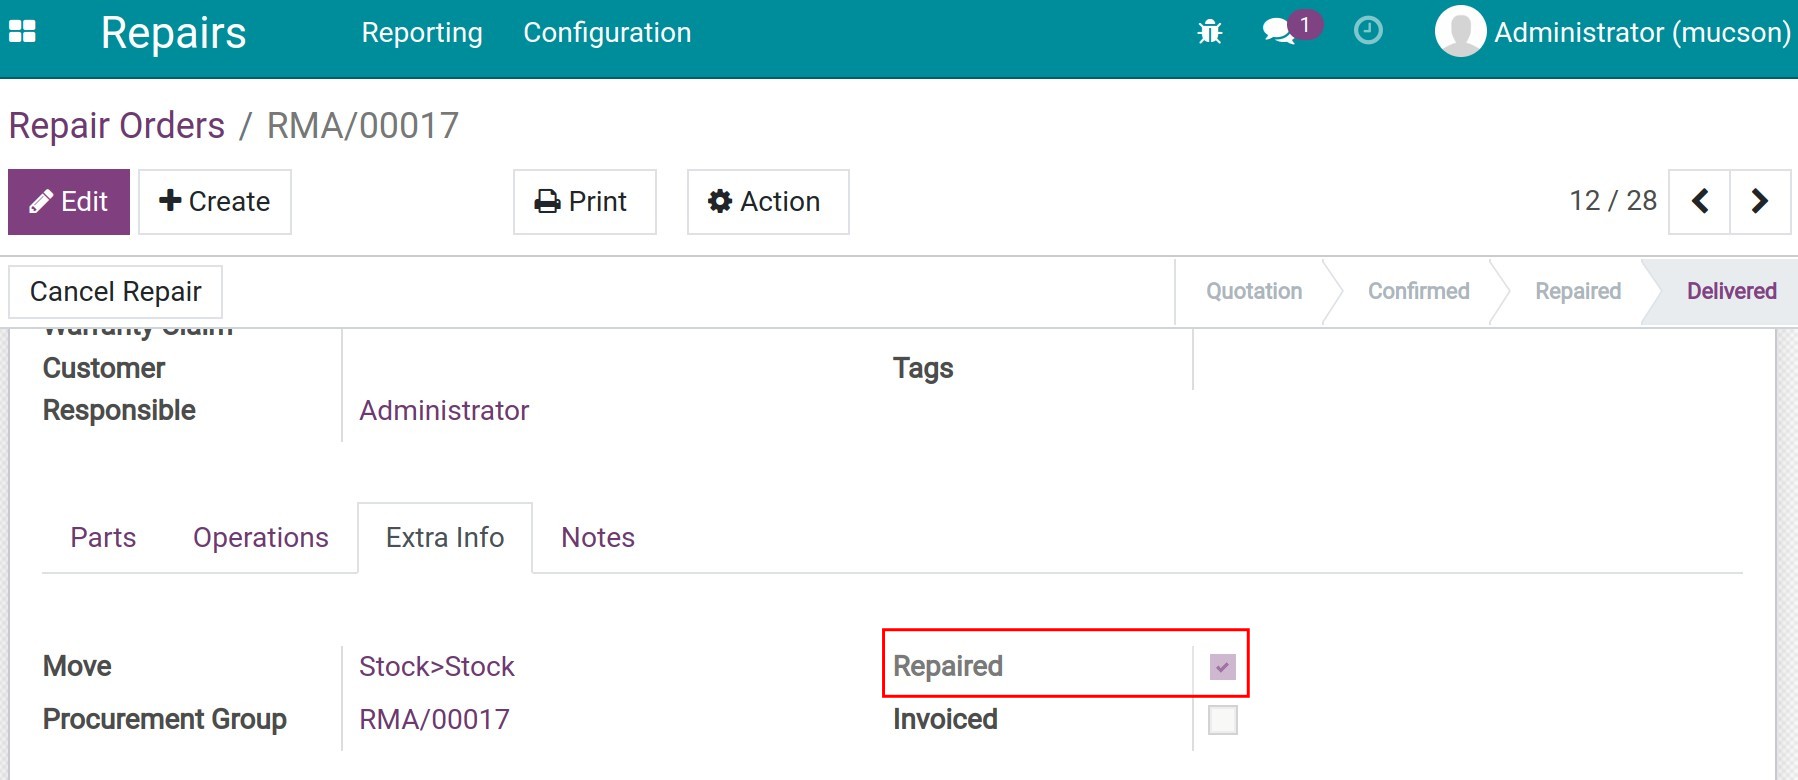
From the repair order, go to the Extra Info tab, the Repaired field is now enabled.
Confirm delivery
Press Delivery Confirm, the repair order status is changed to Delivered.
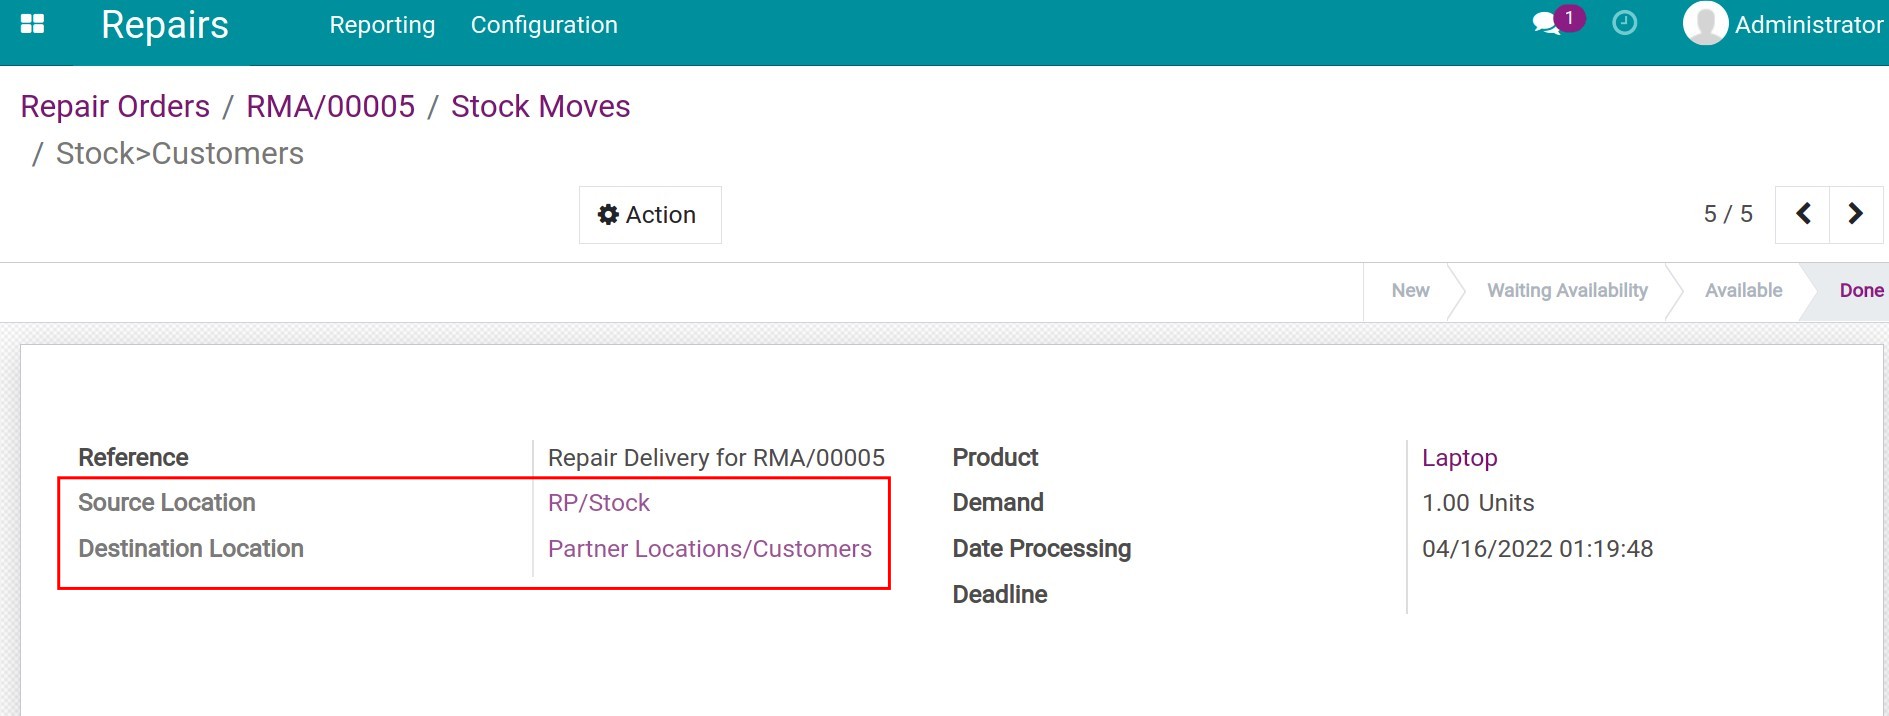
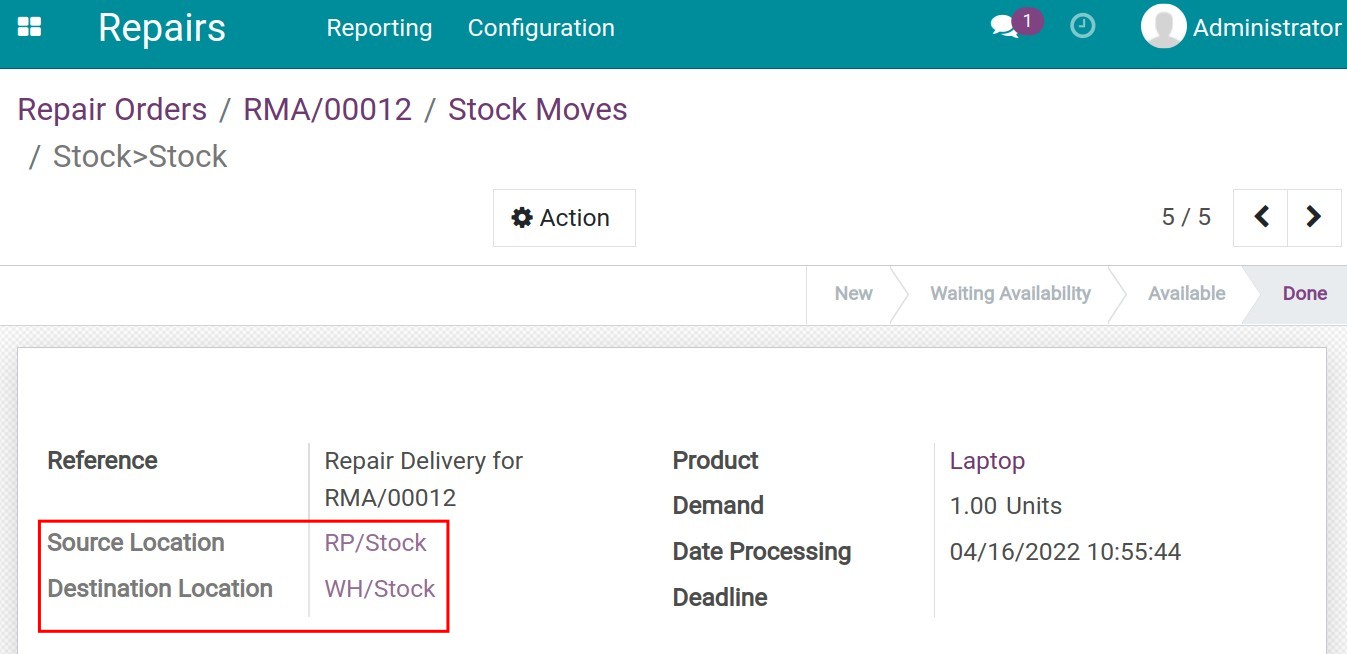
Once the delivery is confirmed, a transfer order is created to record the product delivery back to the original stock location. Press Product Moves to view this transfer order.
Situation 2: Repair customer’s product at a company internal location
In this situation, your customer sends you a broken product to be repaired. Similar to the previous situation, you need to do the following steps:
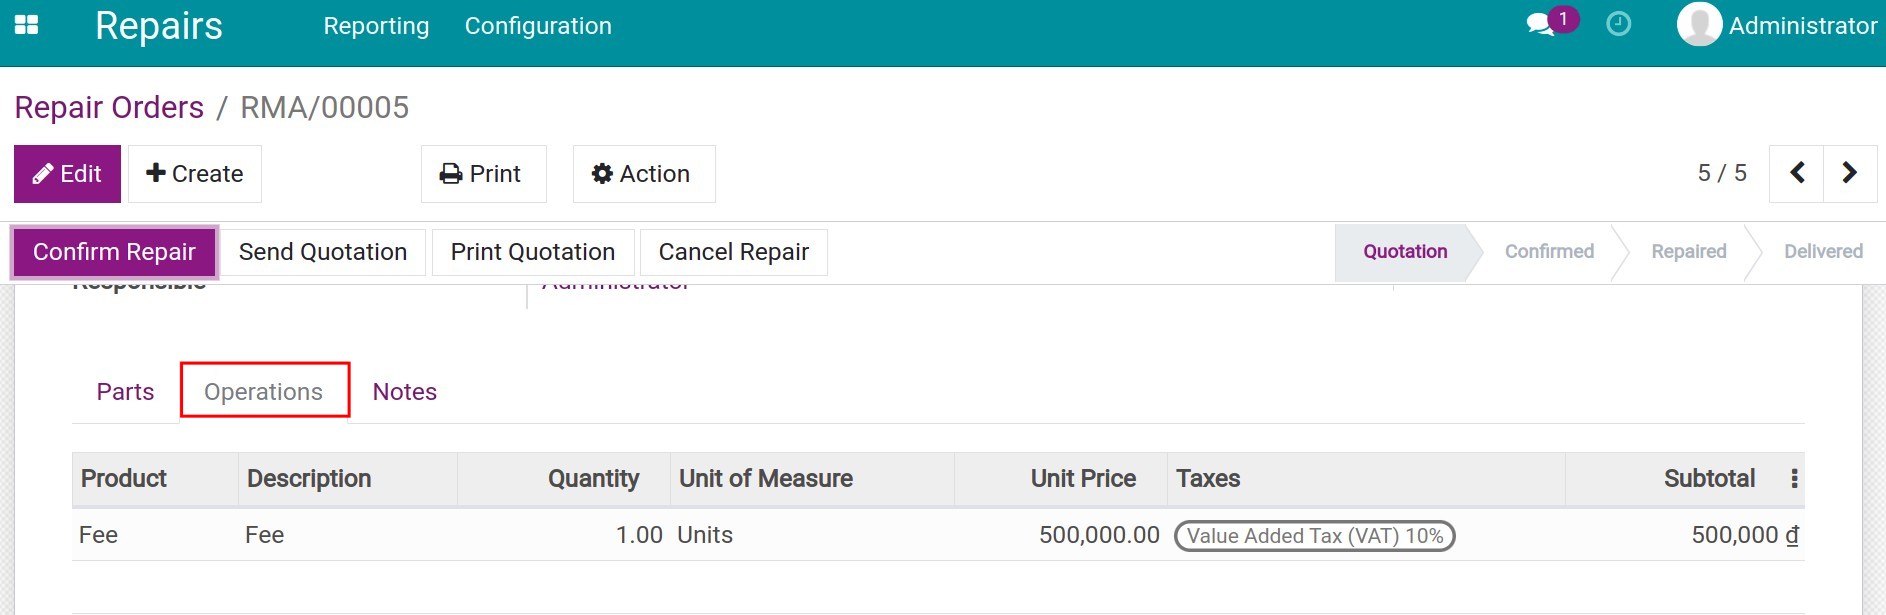
Create a repair order
Navigate to the Operations tab, add all the information related to the repair services fee.
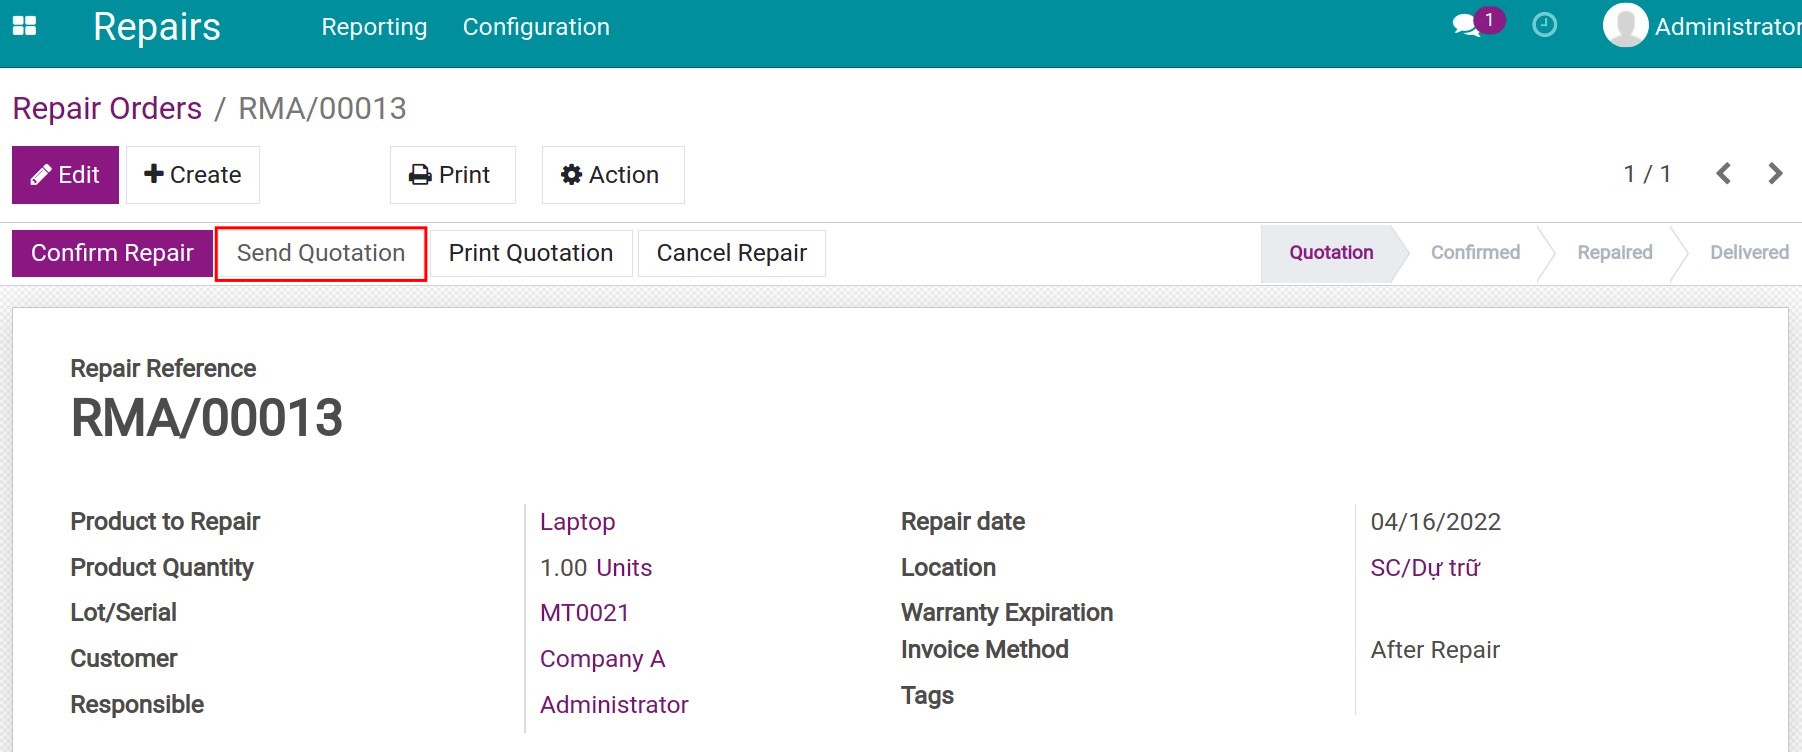
Print or send a quotation to customer
Next, you can send the quotation of the repair service to your customer.
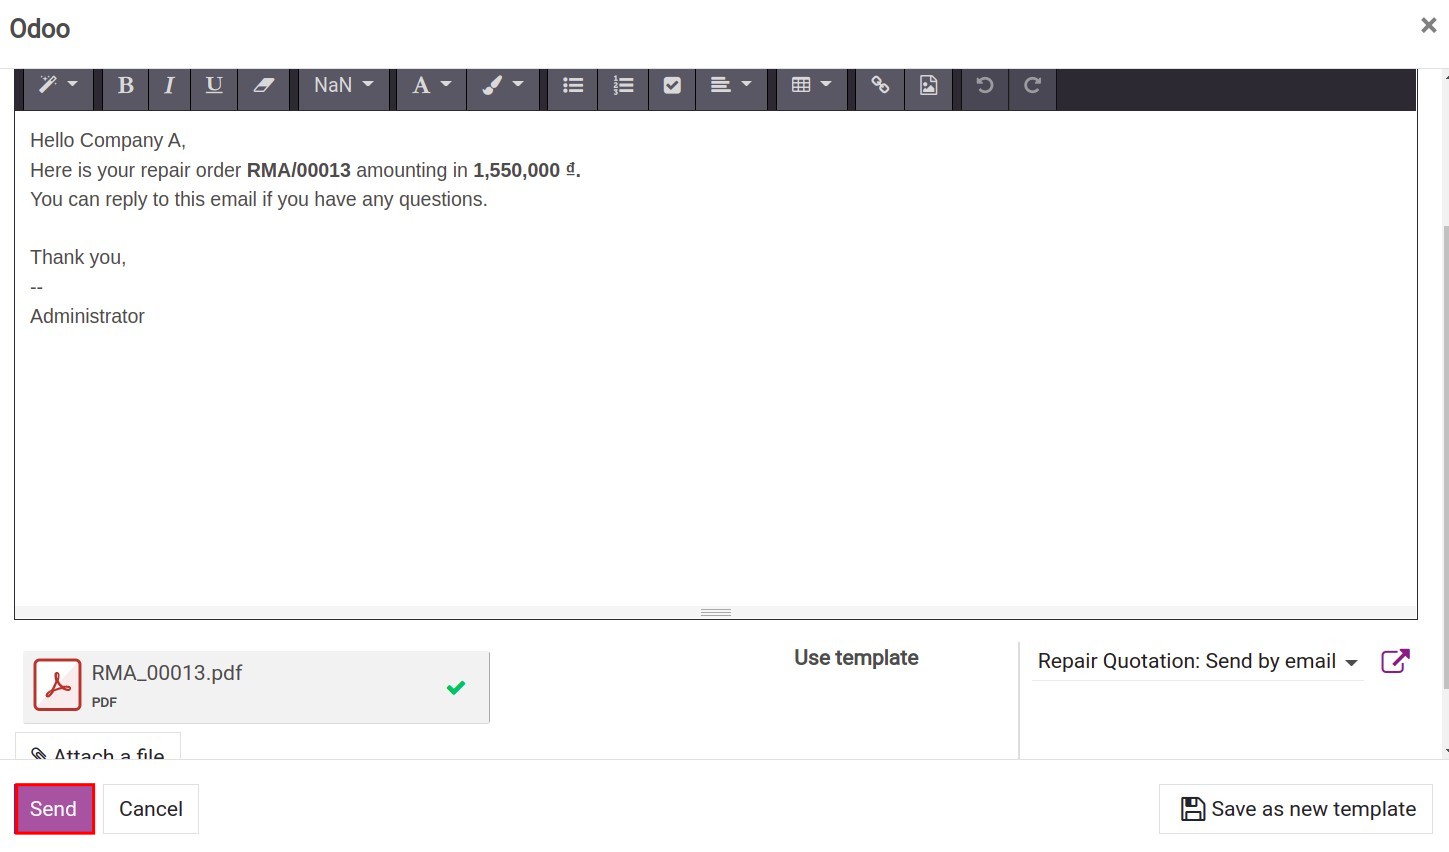
Compose an email to send the quotation to customer.
Start the repairing process
After receiving customer’s replies, add information to the Select Current Location field.
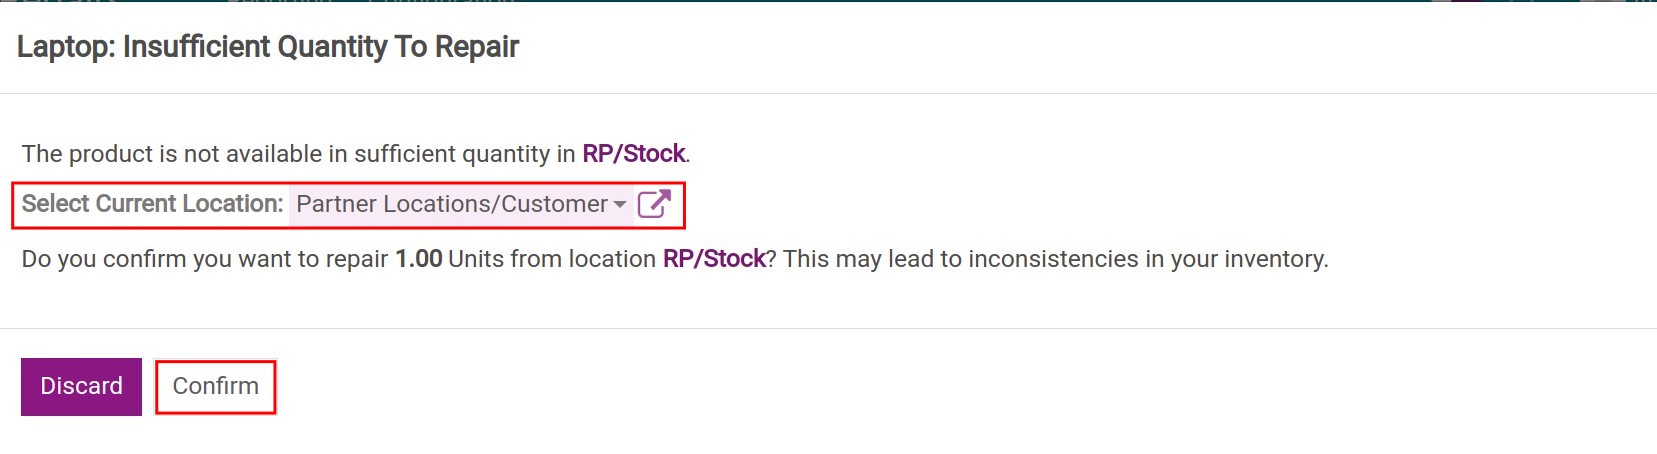
Note
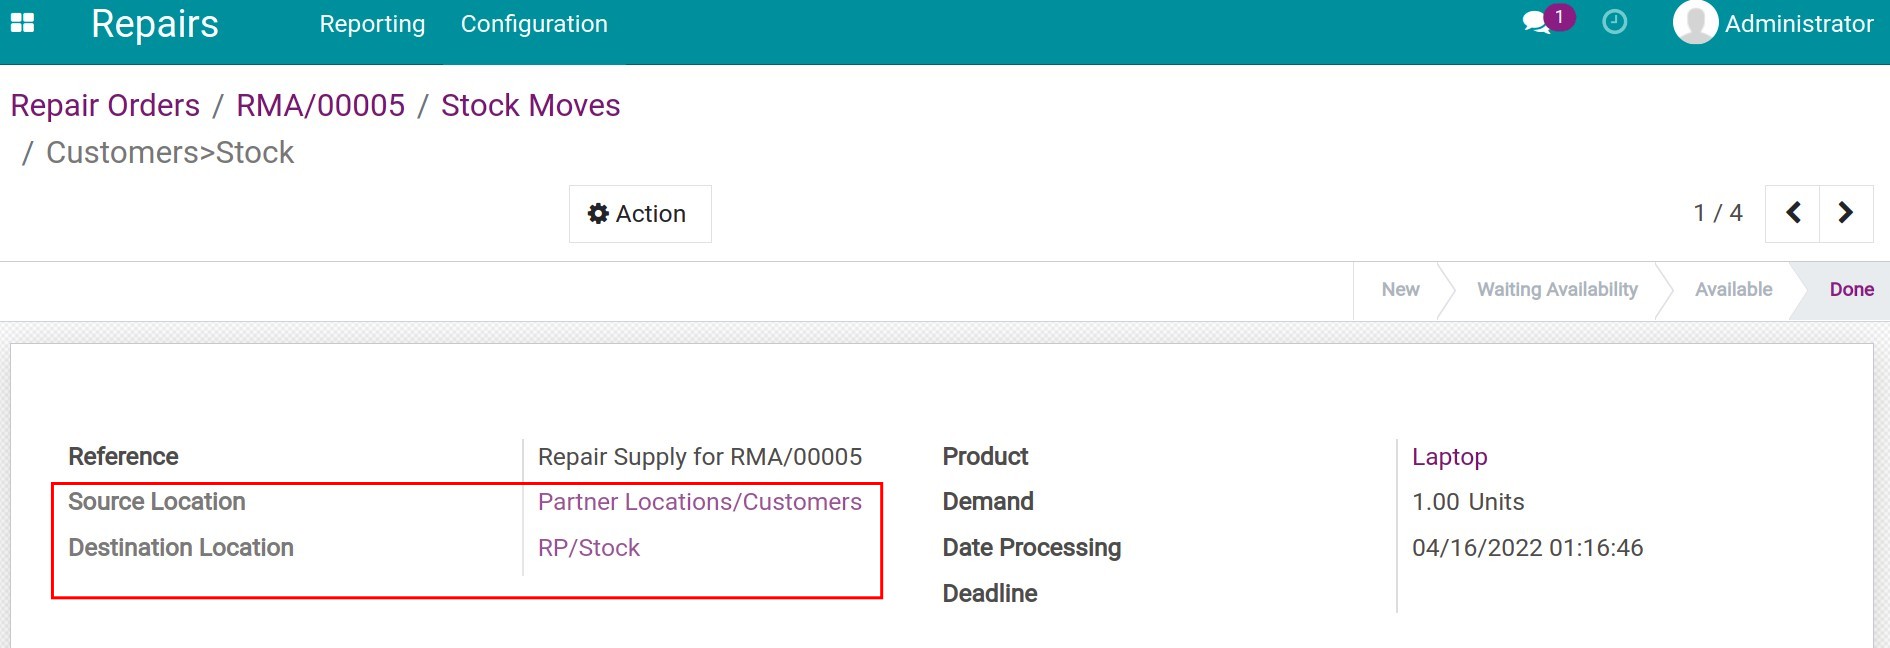
Choose the partner locations for when customers bring products in for repair.
Transfer orders between locations are created when the Confirm button is pressed. From here, follow step 1, 2 and 3 similar to the situation 1. You can see details of the product moves in the transfer orders of the product that needs to be repaired.
Finish repair and create an invoice
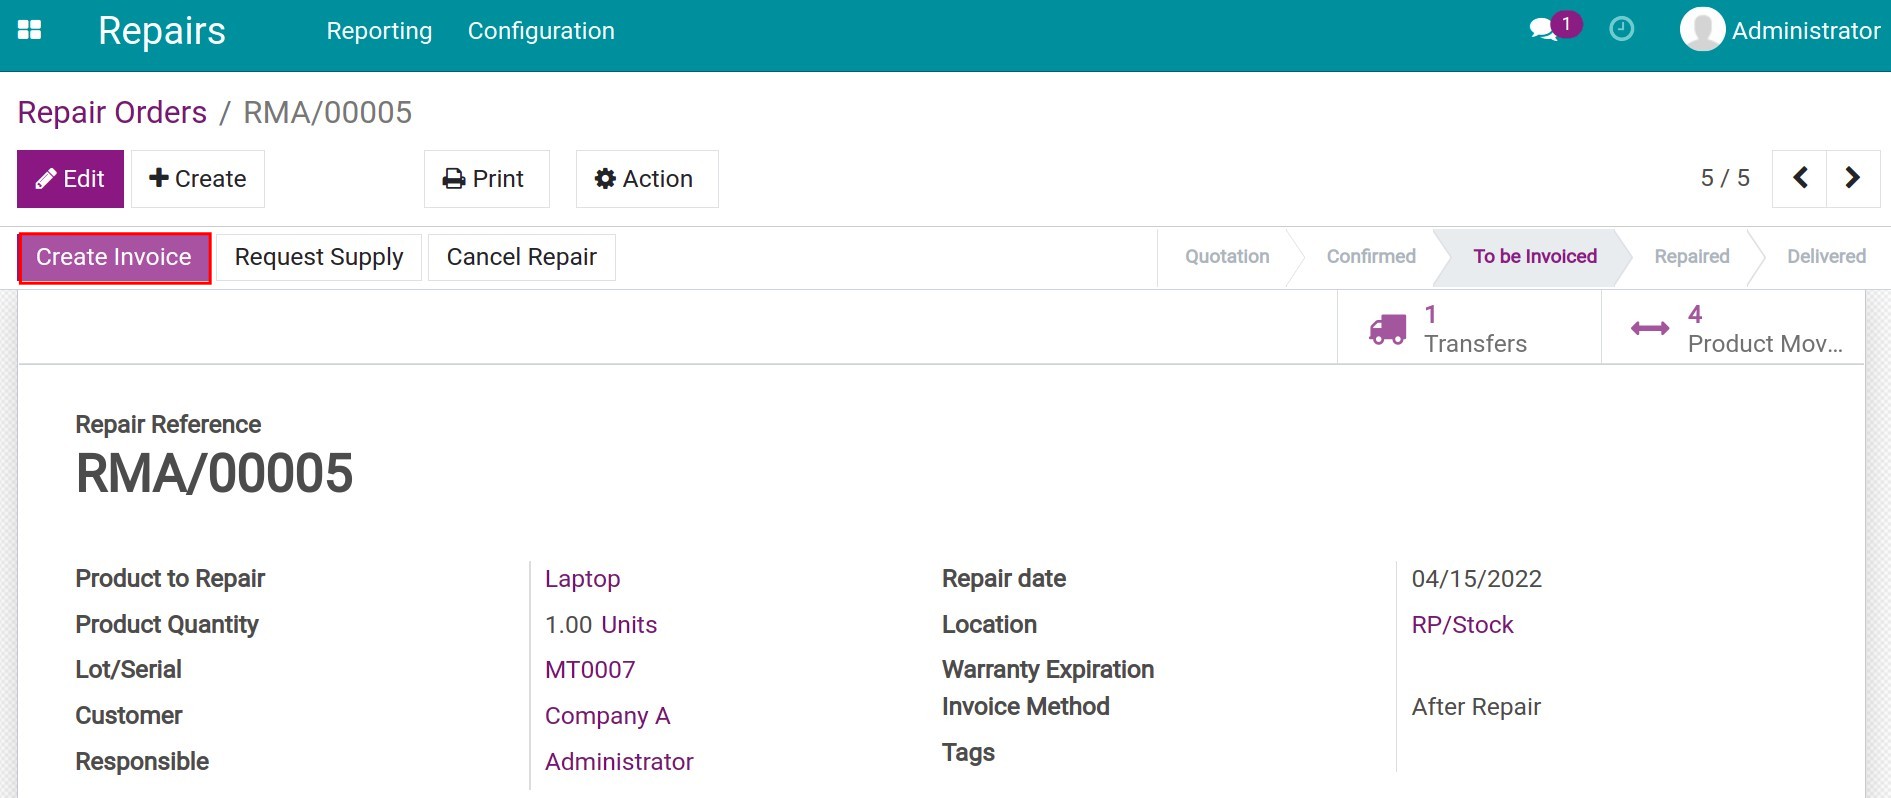
When the repair is done, press Create Invoice for this repair order.
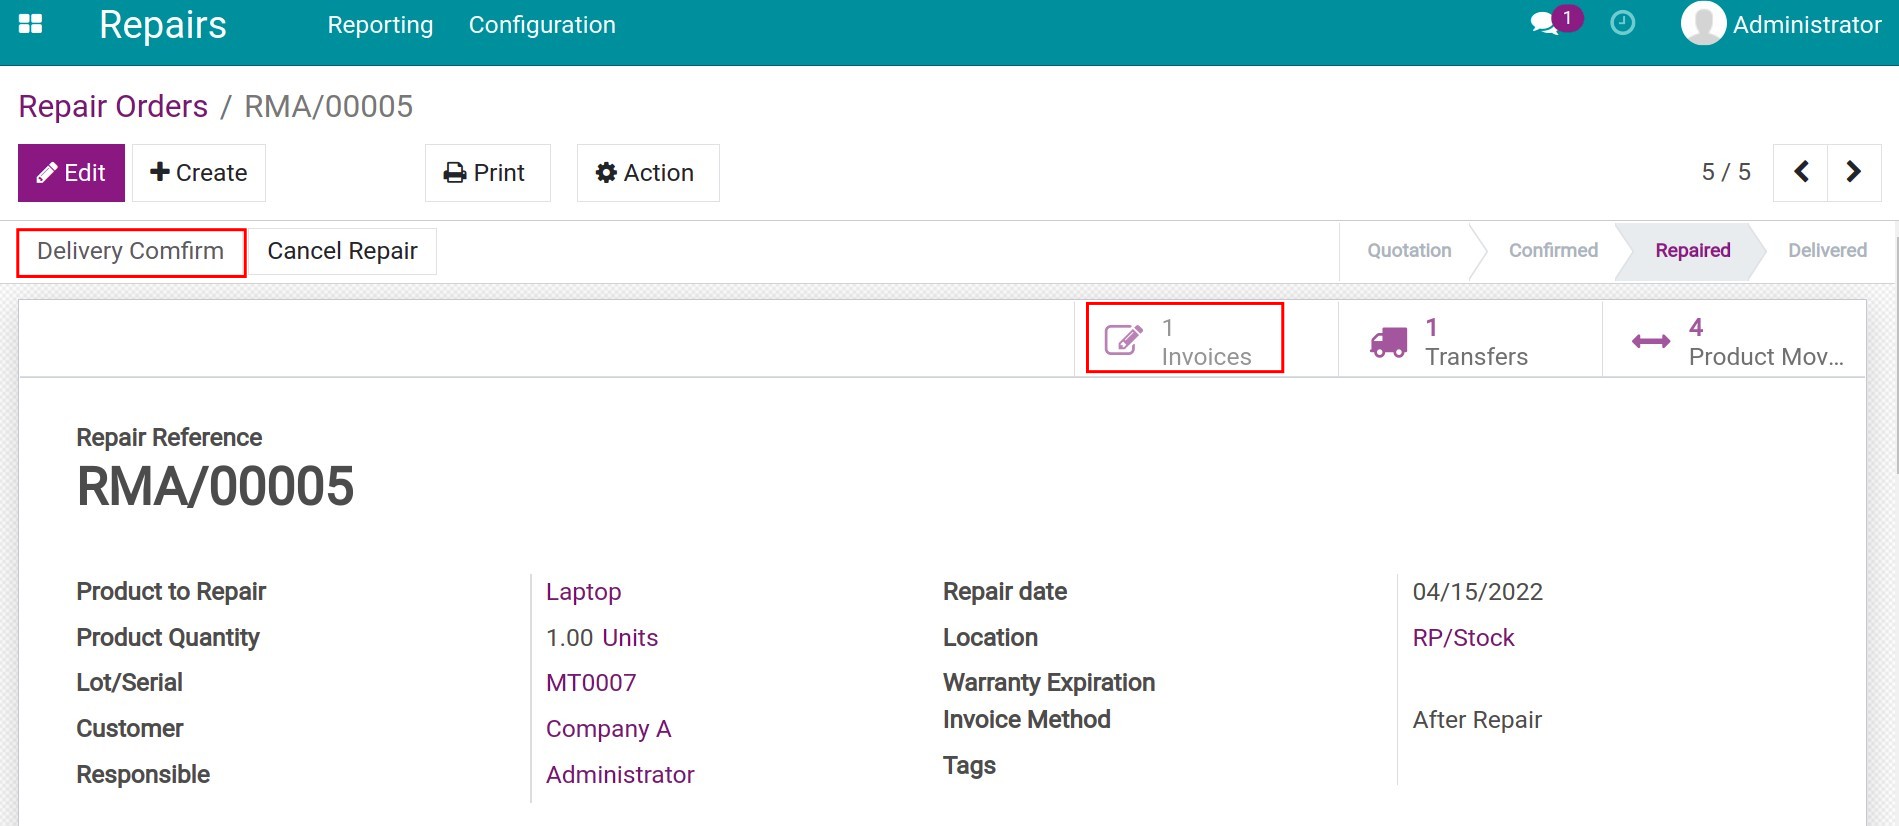
Select Invoices to see details of the invoice sent to the customer.
Note
With the Before Repair invoice method, you will see the Create Invoice button right after pressing Confirm Repair.
Confirm product return
Press Delivery Confirm, the repair order status is changed to Delivered. A transfer order is automatically created, recording the product returned back to the customer.