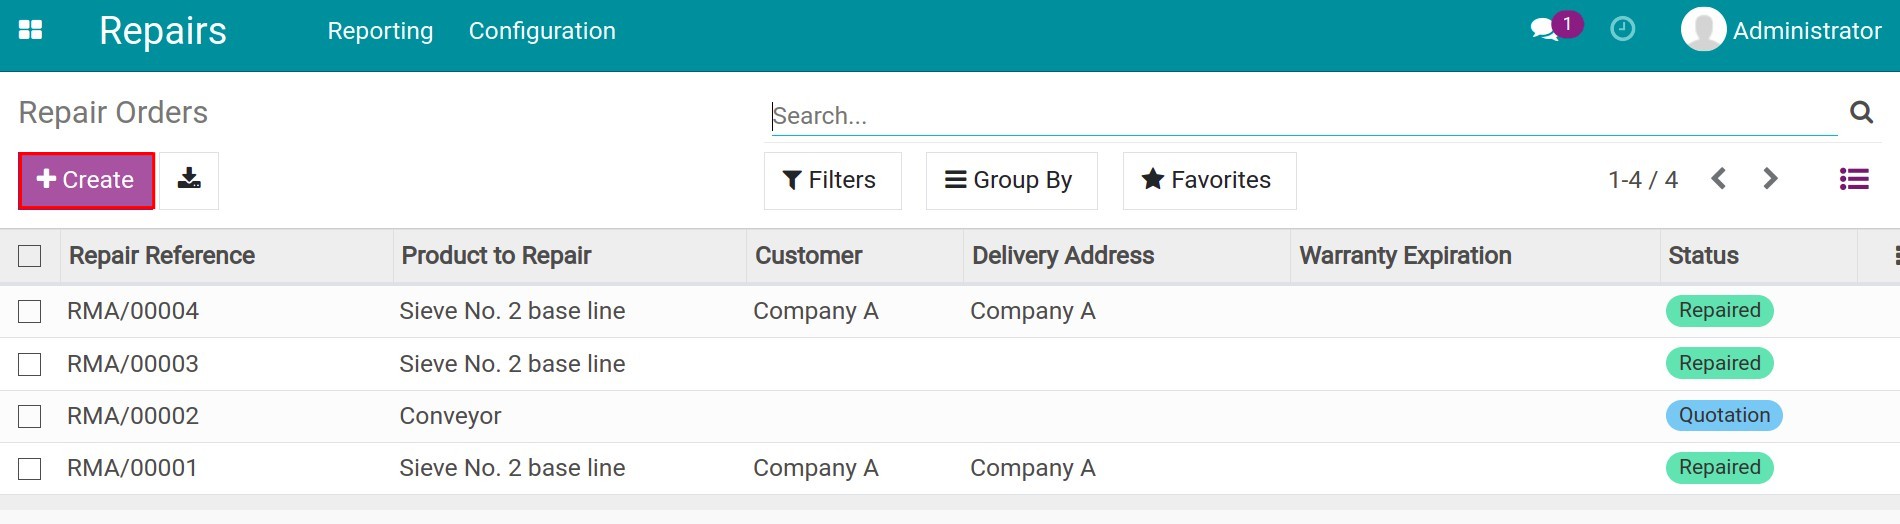
Create repair order
To create a repair order, from the main menu, navigate to Repairs > Create.
Fill in the information of the repair order:
Repair order general information
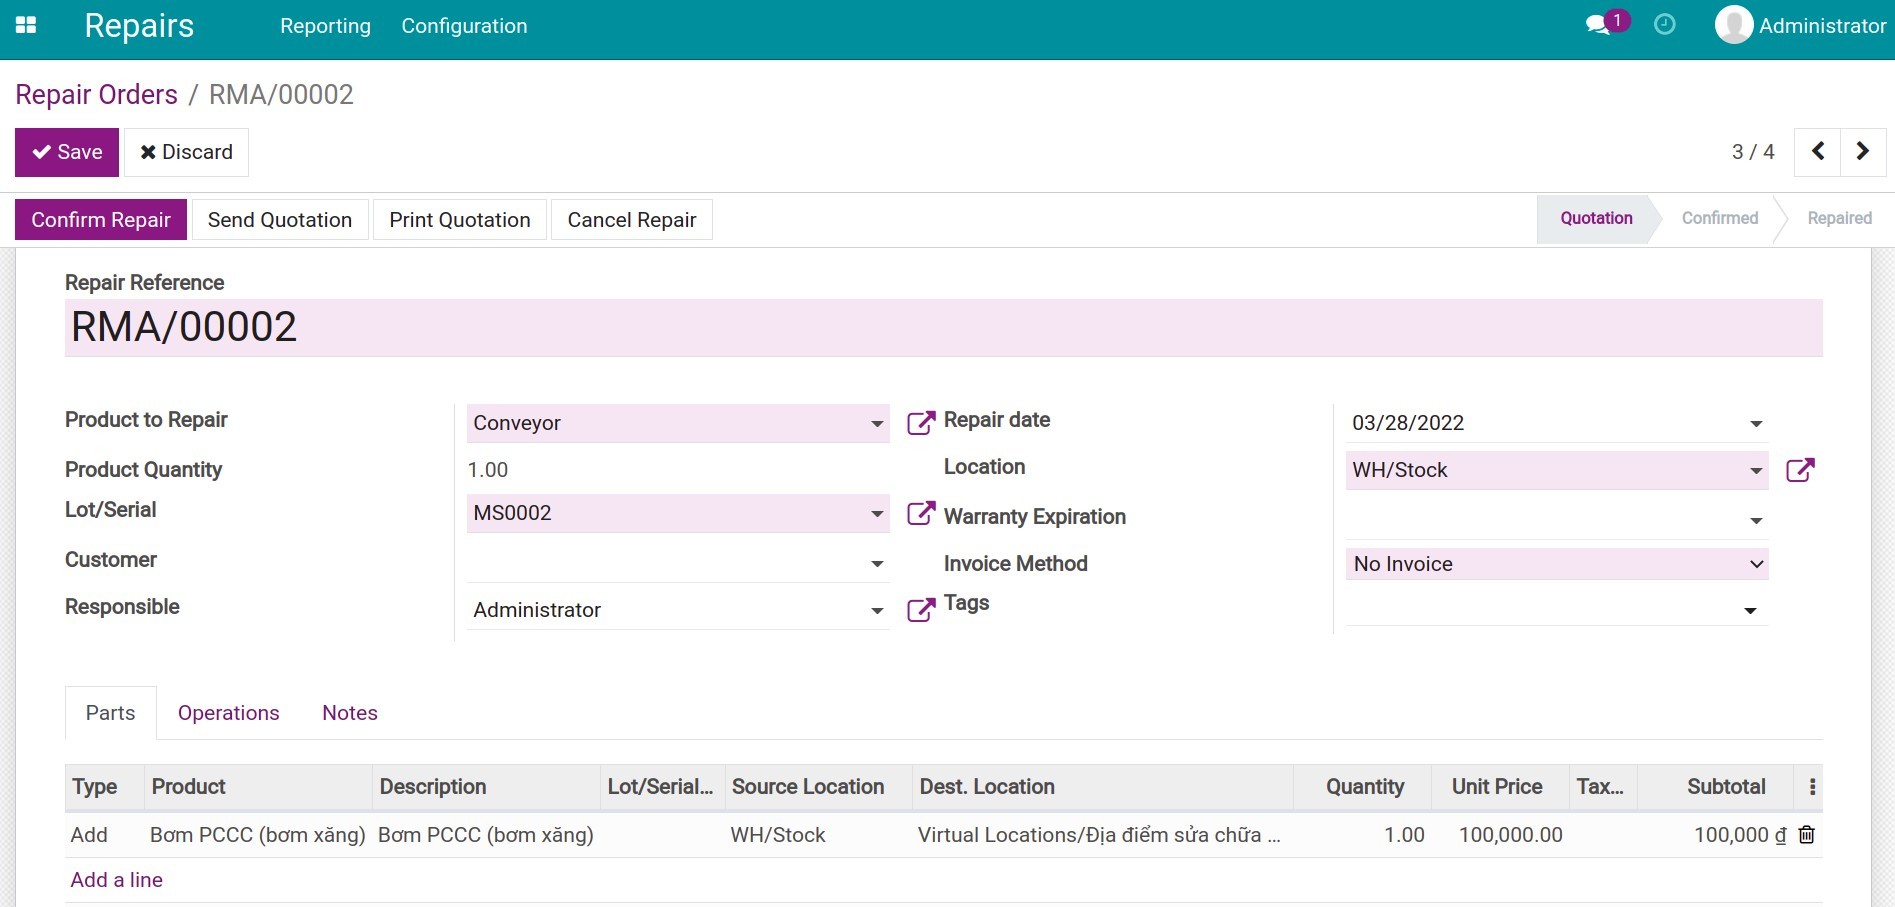
Repair Reference: the repair order’s code. This code will be auto-generated after you press Save on the repair order. If you type other code to this field, that code will be added next to the code generated by the system.
Product to Repair: select the product that needs to be repaired.
Product Quantity: quantity of the product to repair, the default number will be 1 because one repair order can only be applied to one product managed by one serial number. Refer to Steps to create a new product in Viindoo.
Lot/Serial: select the serial number of the product to repair.
Customer: this information is required in case your enterprise offers repair service.
Responsible: select the person in charge of repairing this product.
Repair date: the day the repair start, if you don’t select a date, the system will select the current date.
Location: select a location where this product is repaired.
Warranty Expiration: the warranty expiration date of the product to repair, this field will be auto-filled if you create the repair order from the Warranty module.
Note
Refer to: Create repair orders from warranty claim.
Invoice Method: allows creating an invoice from this repair order, with 3 options:
No Invoice: applied in case the product is still under warranty or has free support service.
Before Repair: applied when you want to create the invoice before repairing. The Create Invoice button will appear after you press Confirm Repair.
After Repair: applied when you want to create the invoice after repairing. The Create Invoice button will appear after you press End Repair.
Note
If you select the “Before Repair” or “After Repair” option, on the repair order, the Customer field will be compulsory.
Tags: add tags for the repair orders to help categorize, search and manage.
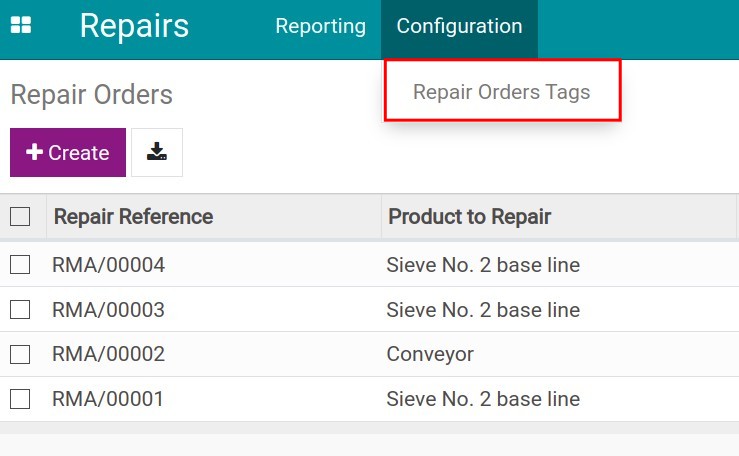
To set up tags for repair orders, navigate to Configuration > Repair Order Tags > Create to create the tags as your requests.
Information tabs on repair orders
Parts
Add or remove the product’s part for repair.
Case 1: Add parts (part products, supplies) for the repairing process.
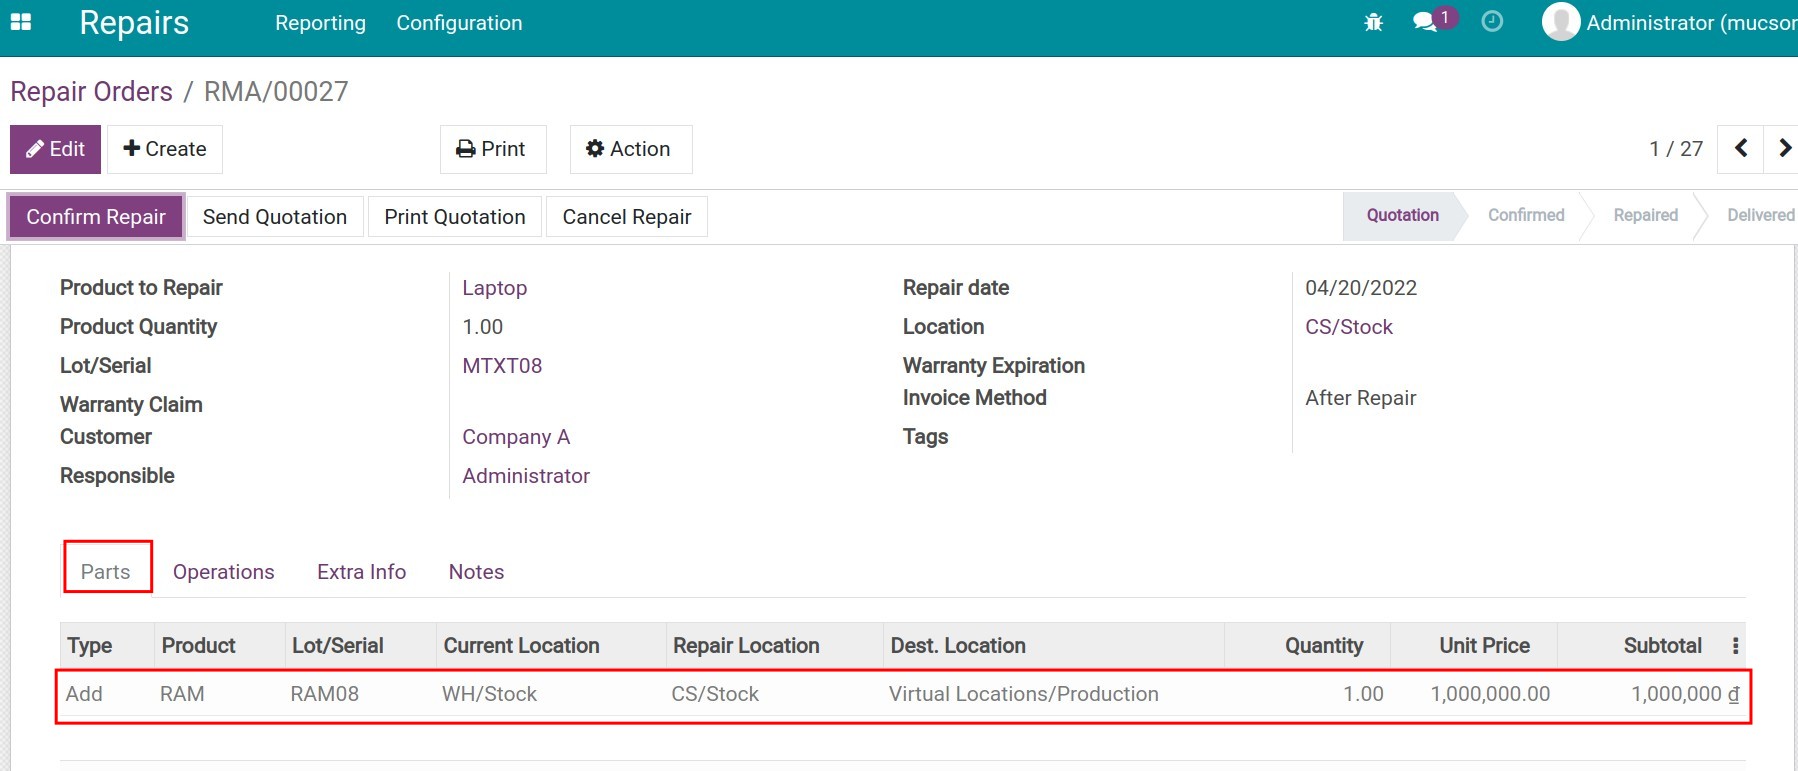
Type: select Add
Product: select the required part (part product, supply) for the repairing process.
Description: describe the selected part or the reason that part is needed.
Lot/Serial: the part’s lot/serial
Current Location: the location where the part is currently at.
Repair Location: is the location to receive the part from its current location.
Dest.Location: is the location where the part is consumed for the repairing process.
Unit Price: the price of each part unit that is consumed for the repairing process.
Quantity: enter the needed quantity for this part.
UoM: The unit of the selected part.
Taxed and Subtotal: to create an invoice (if needed) for the repair order.
Case 2: Remove the parts of the repairing product.
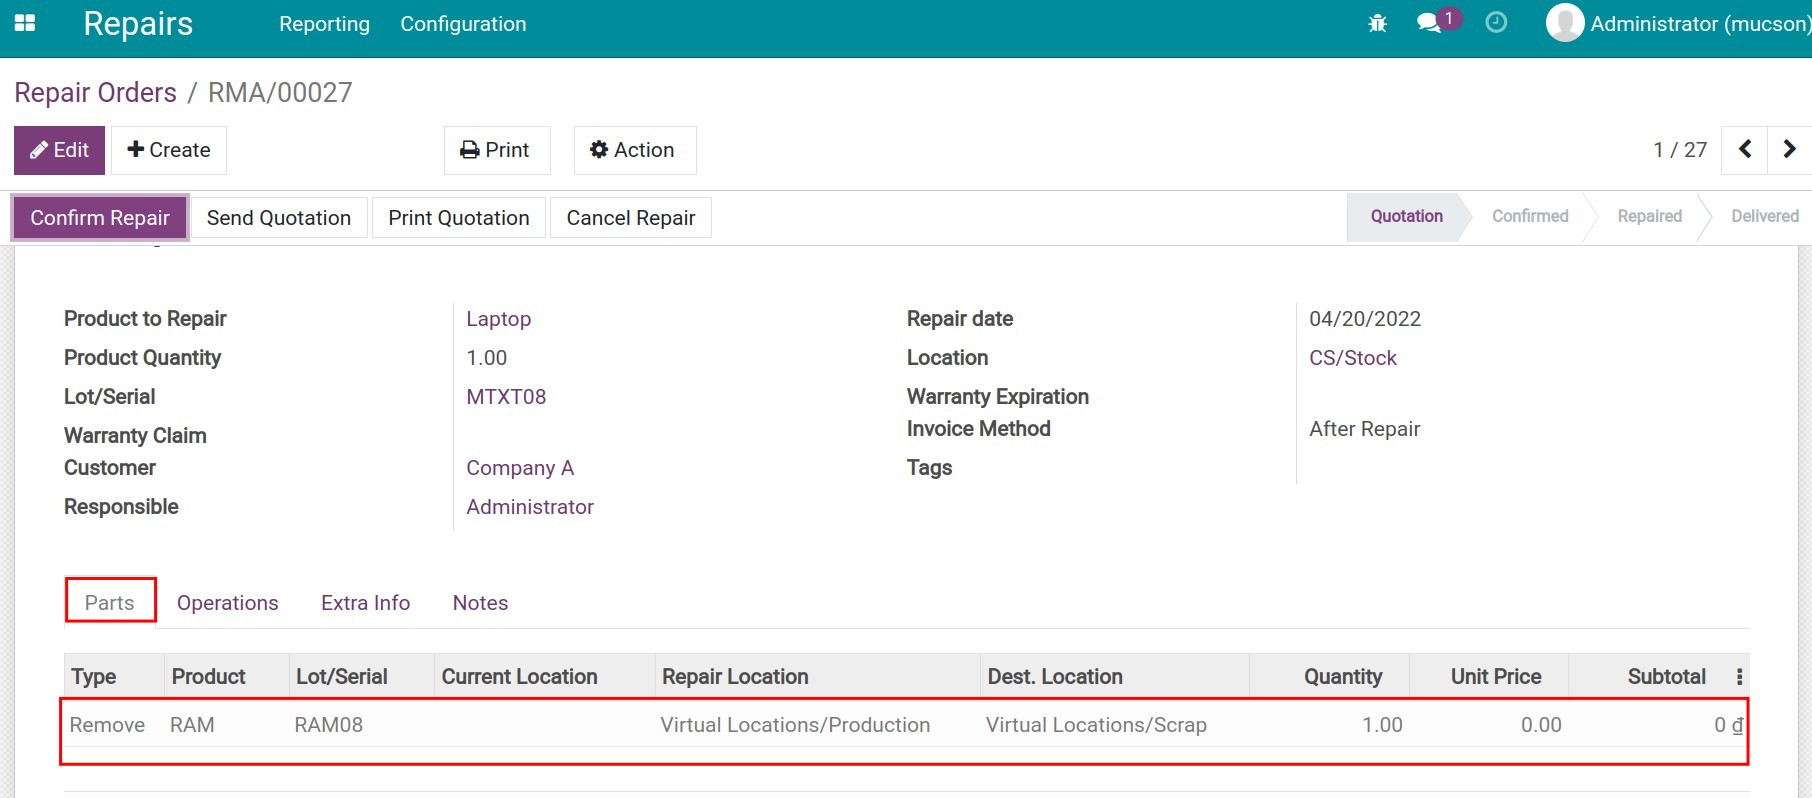
Type: select Remove.
Product: select the parts that need to be removed from the repairing product.
Description: describe the product or add the reason to remove the part.
Lot/Serial: the part’s lot/serial.
Current Location: is the location of the part that will join the repairing process. With the Remove type of the repair order, this location will be blank because, in reality, this part is at the repair location.
Repair Location: is the location where the part is removed from the product to repair.
Dest. Location: is the scrap location, which is where the part will be moved to after repairing.
Unit price: the price of each part unit. With the Remove type, this field will be blank because it won’t be included in calculating cost or listed in the invoice.
Quantity: enter the removed quantity of the part.
UoM: The unit of the removed part.
Taxes and Subtotal: to create an invoice (if needed) for the repair order.
Operations
Enter the repair-related cost (e.g. Employee cost).
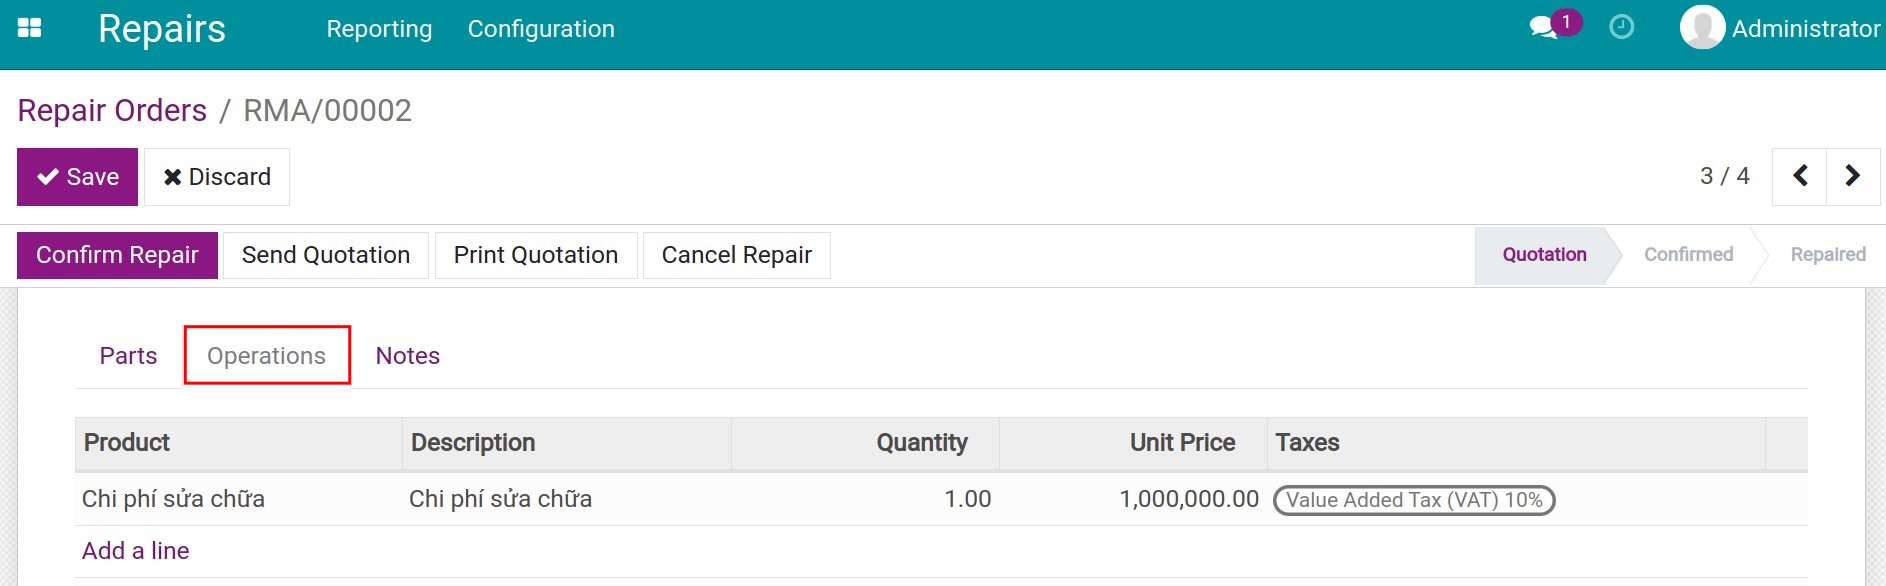
Note
The parts-related cost of the Parts tab and other costs on the Operation tab will be added to the quotation and invoice to send to the customer.
Extra Info

Here, you can follow the information related to:
Move: after pressing End Repair, you can view the repaired product move here.
Repaired: the system will auto-select this field after pressing End Repair.
Invoiced: The system will auto-select after you press Create Invoice on the repair order.
Note
Activate developer mode to view more information.
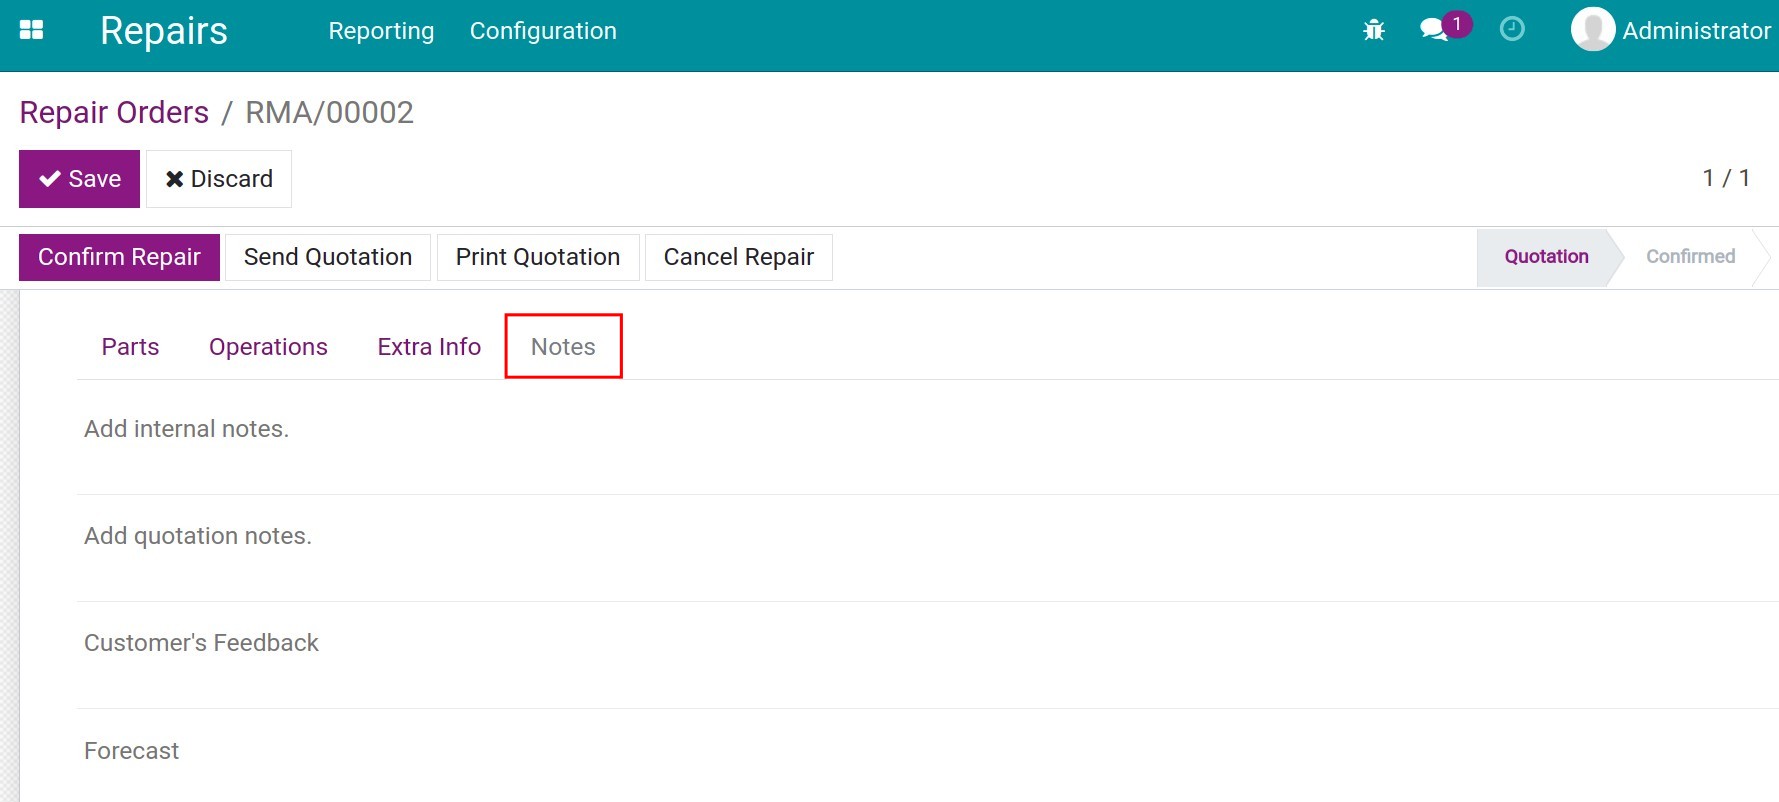
Notes
Add repair-relating notes so other people can follow.