Filter, Groups and Search use cases
When interacting with the data, the user always wants to see and get exactly the required data. To serve this demand, Viindoo software provides the features for searching, filtering, and grouping the data, supporting users to find and classify data quickly by many criteria. Besides, these features also allow users to collaborate and share information among others with just a few simple steps.
This article will help you to understand the way these features work as well as how they are applied with the Viindoo software.
Search, Groups and Filter features in Viindoo software
Searching and Filtering the record
Similar to the searching menu, you can also use search and filter features for data records. The search bar is always located in the upper right corner of each view or report (as shown). When you type a keyword, depending on the view and the application, the software will automatically suggest which keyword belongs to which field in the record.
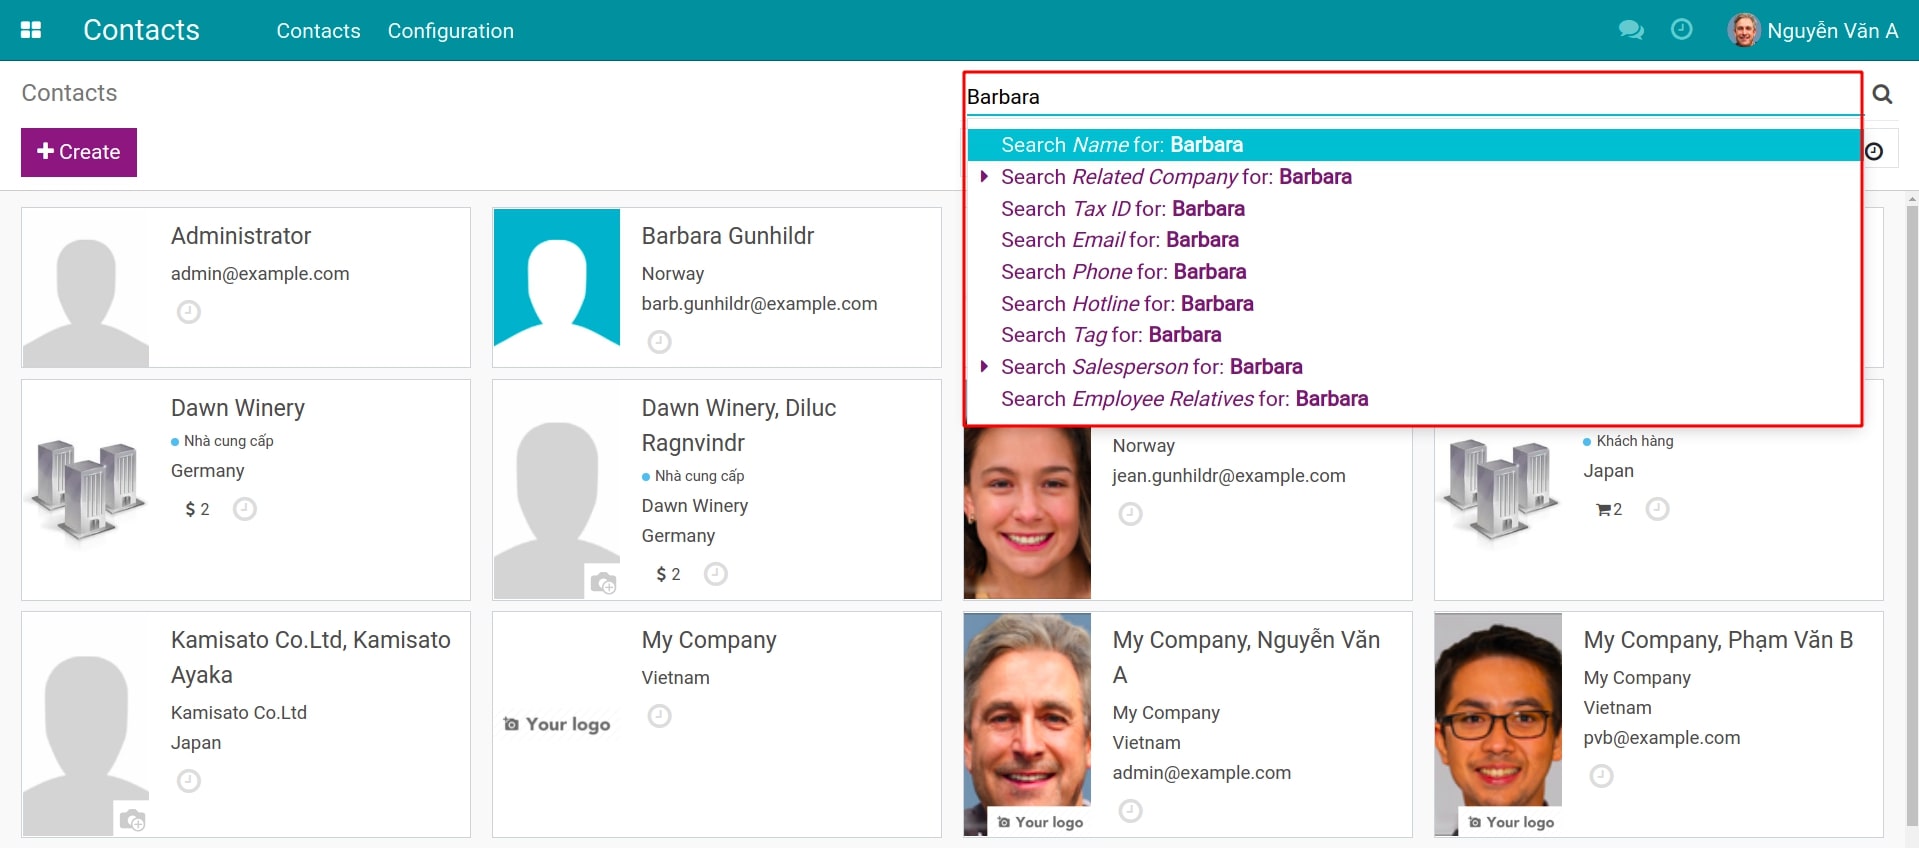
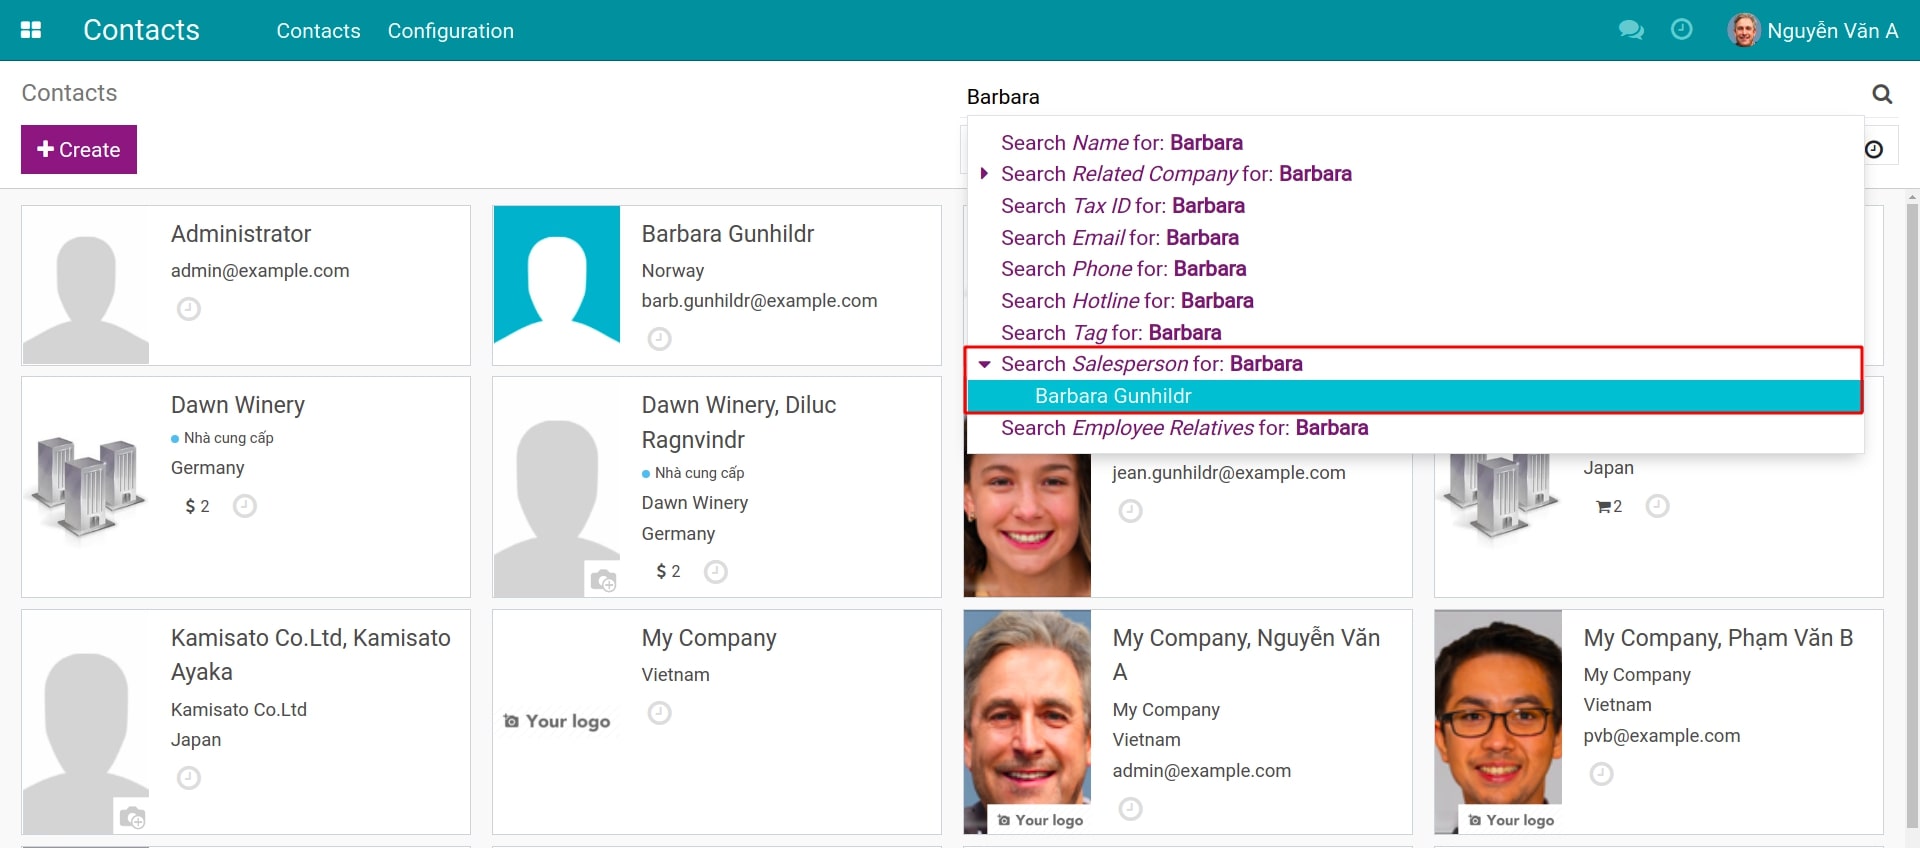
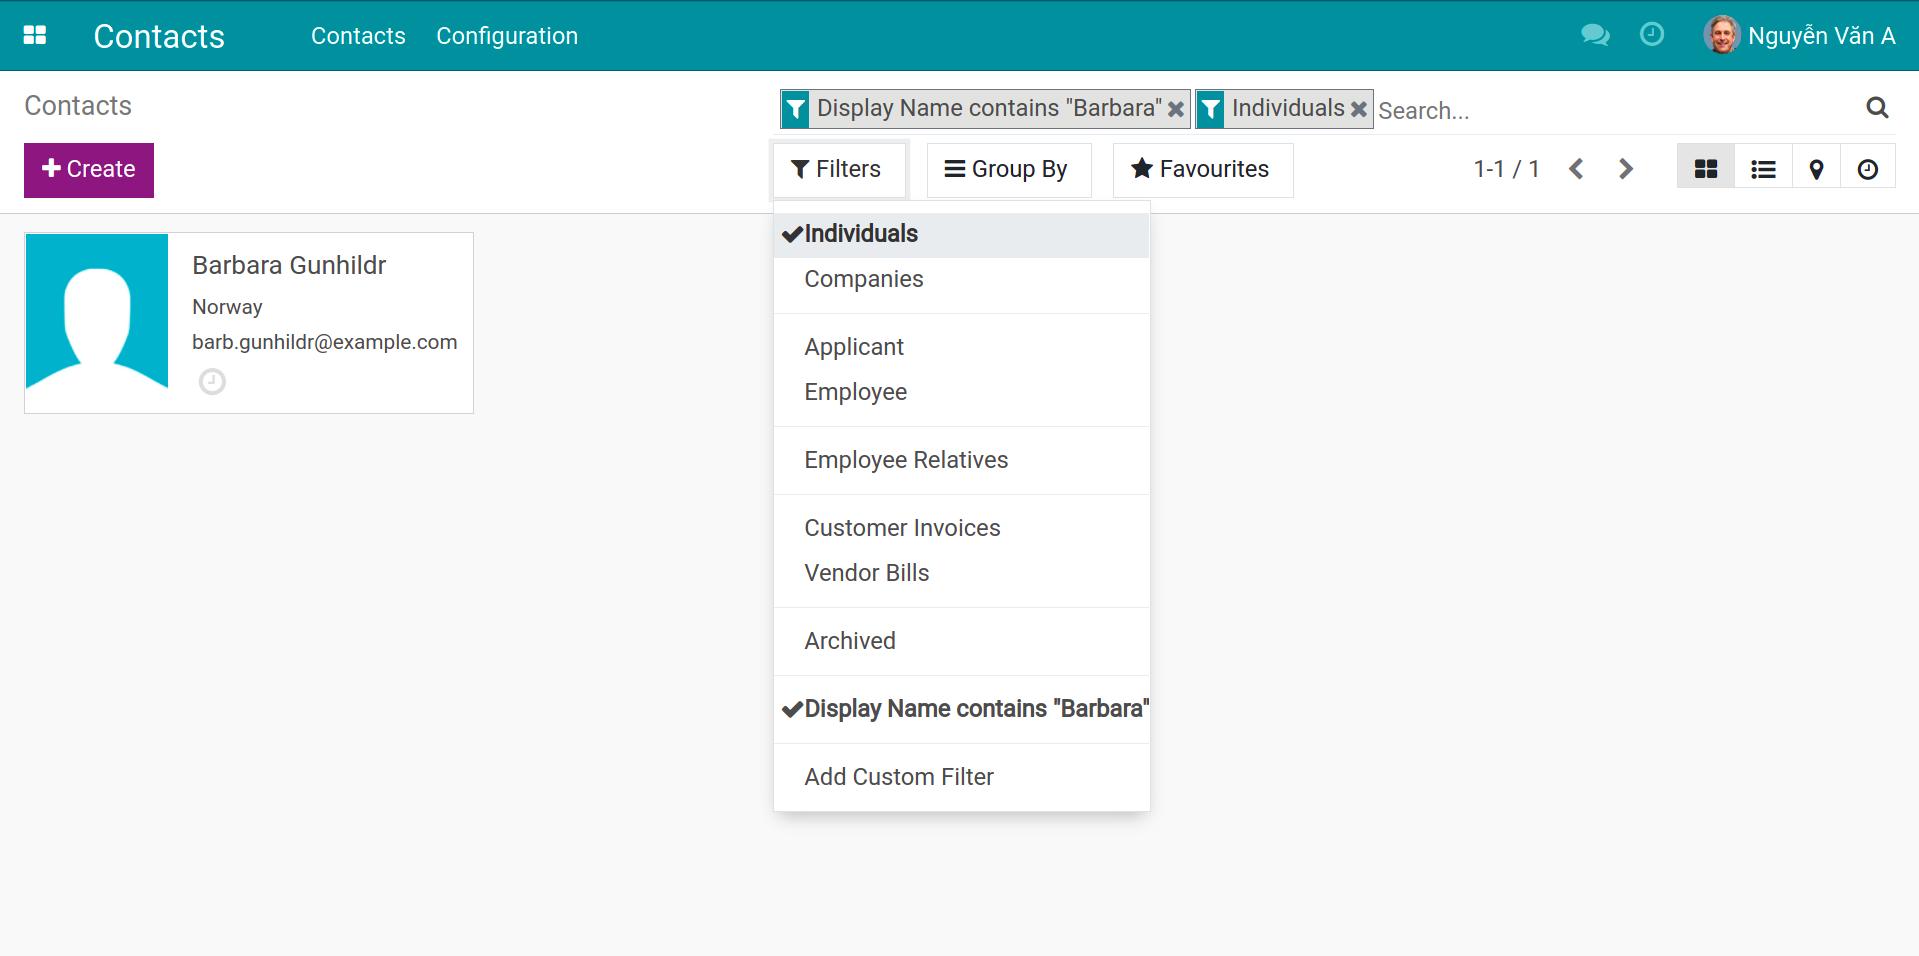
For instance: At the Contact View (), when you type “Barbara” on the search bar, the system will automatically suggest the related fields which may contain this phase such as Name, Related Company, Email, etc. You can choose one of the suggested fields to quickly search for the entered keyword. For some suggested fields, you will see an arrow button next to them. Click on that to display the list of hints which can be found.
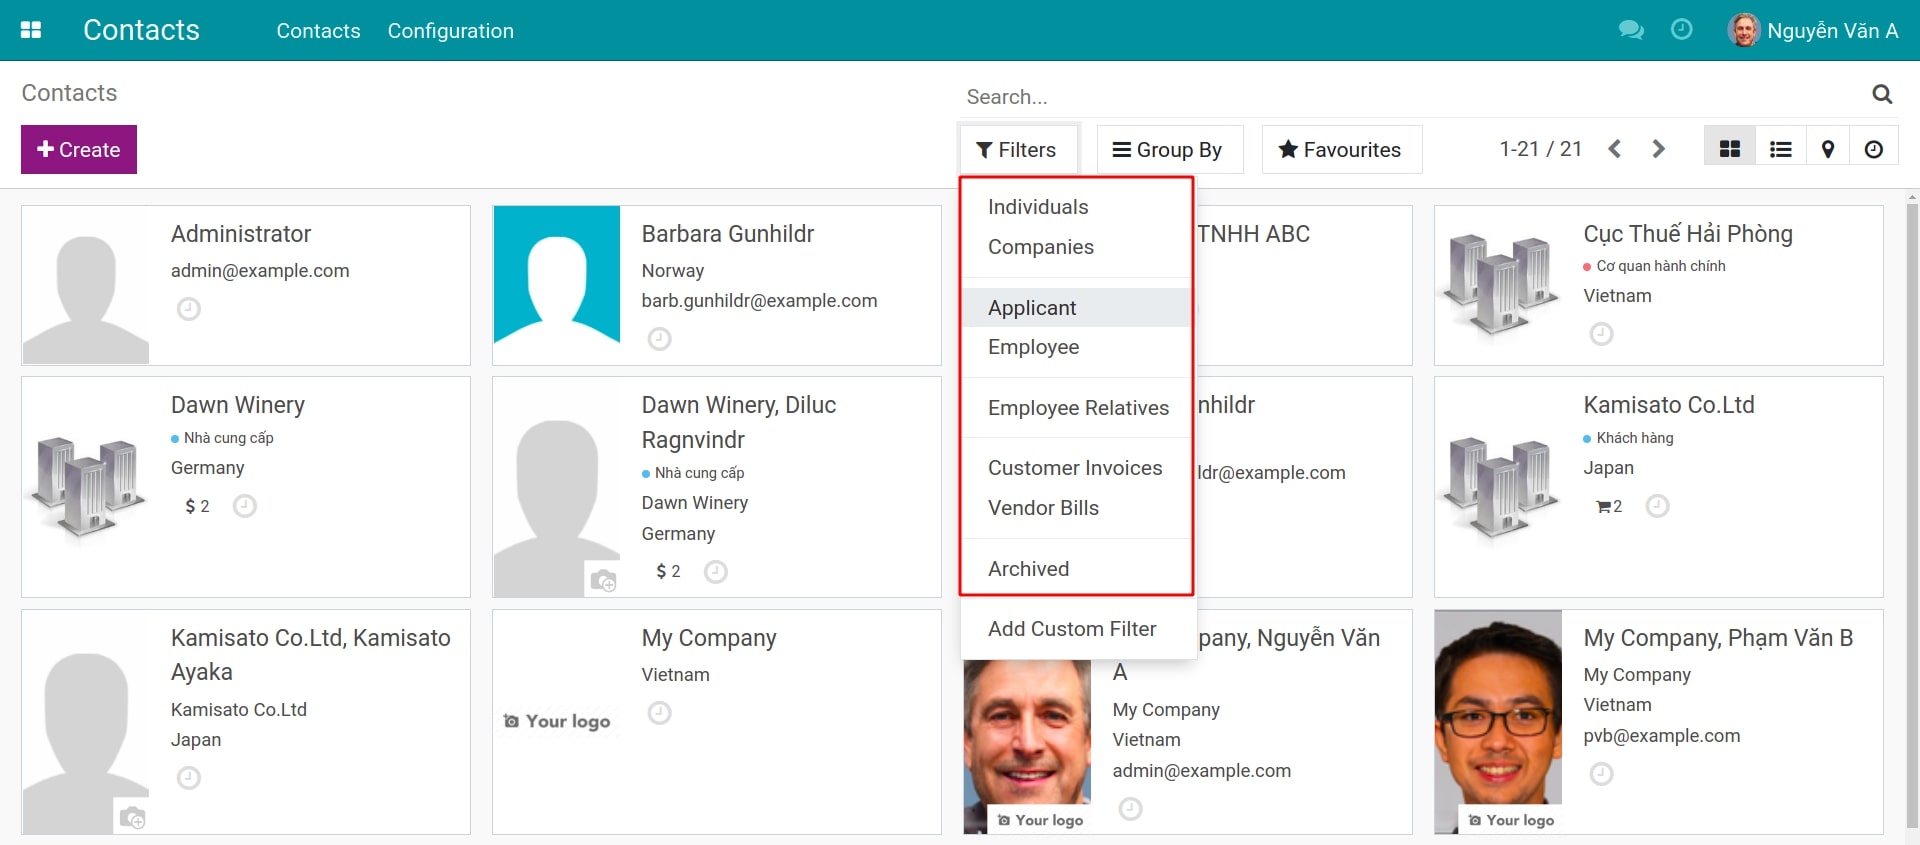
If your search field is not among the suggestions above, you can still filter your search results by using another method. Below the search bar, you will find a Filters button - click here to open the menu for custom filters. You can find some existing filters or create a new one of your own.
For Example: When you hit on the Filters button in the Contacts view, you will get the existed filters like Personal to filter the Personal contacts, Employee to filter the Company employees’ contacts, etc. If there is no suitable filter among the available filters, click on the Add Custom Filter button to open a menu with more filters.
You will see the required fields to enter for filtering:
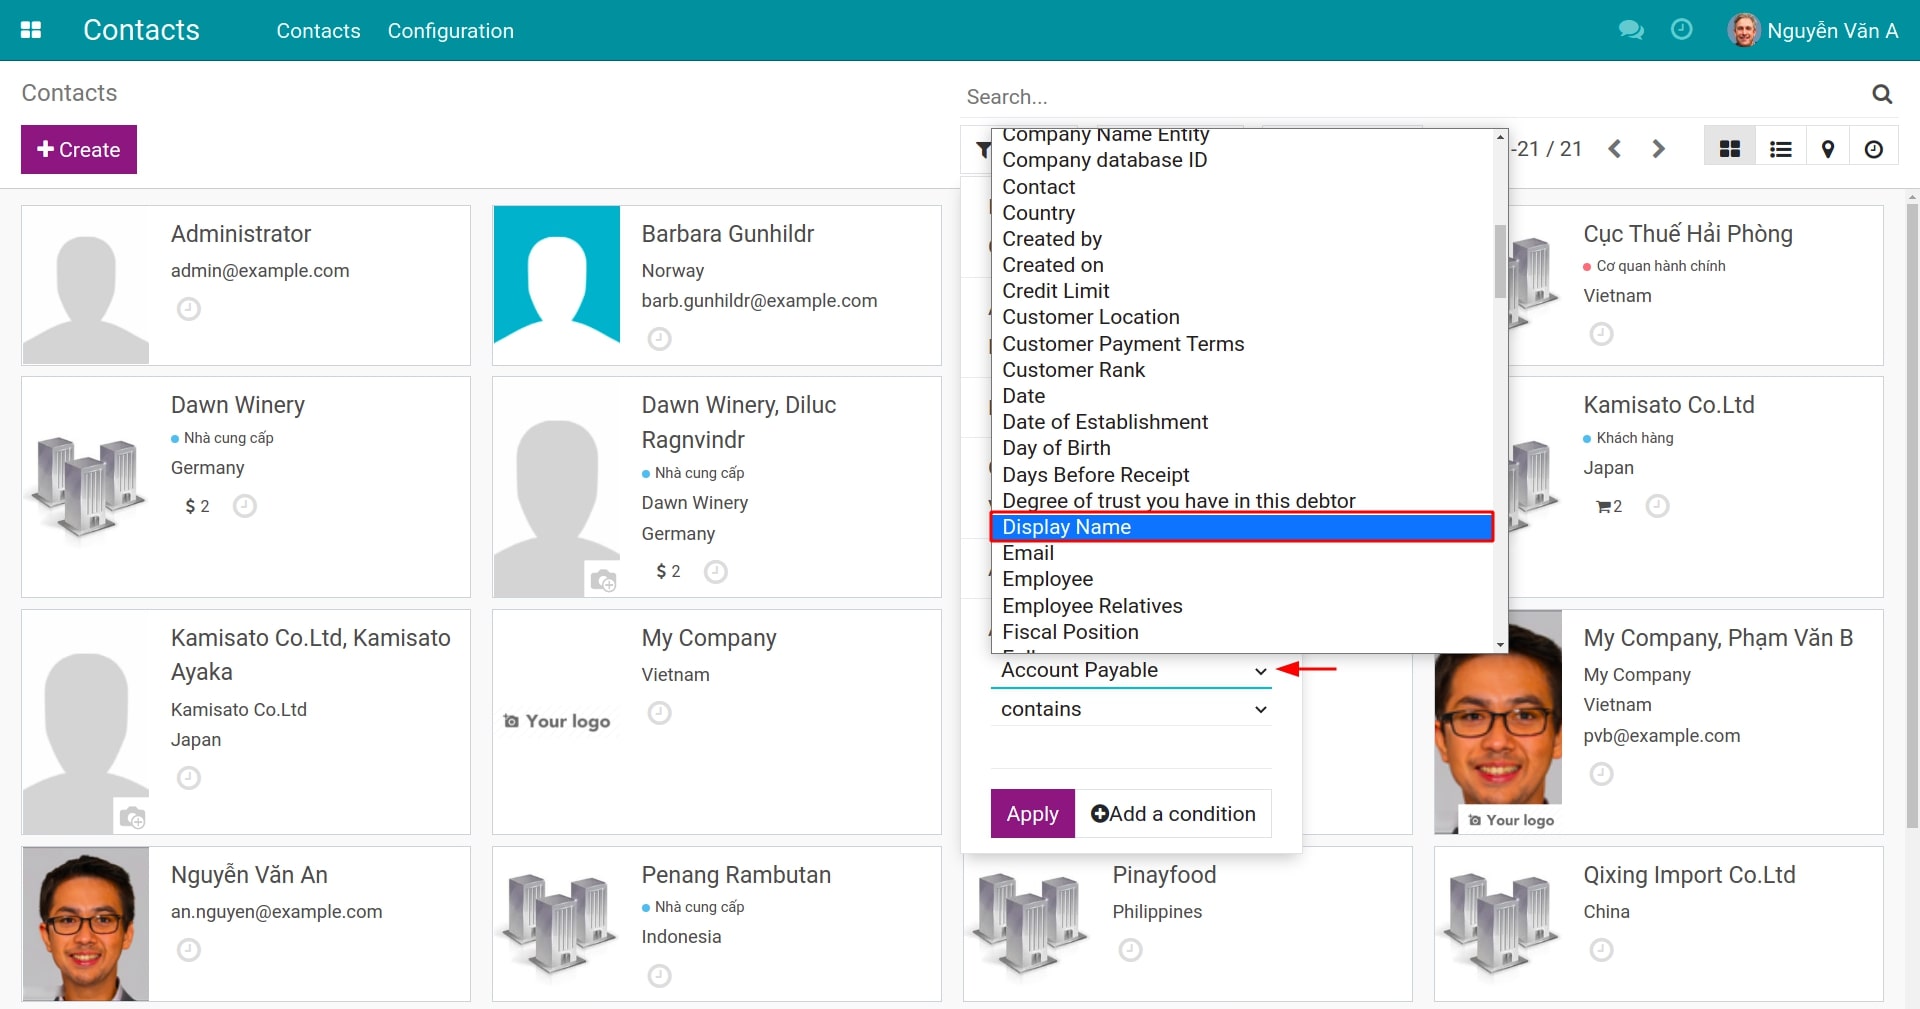
- Select a field to search from among the filterable fields contained in that record.
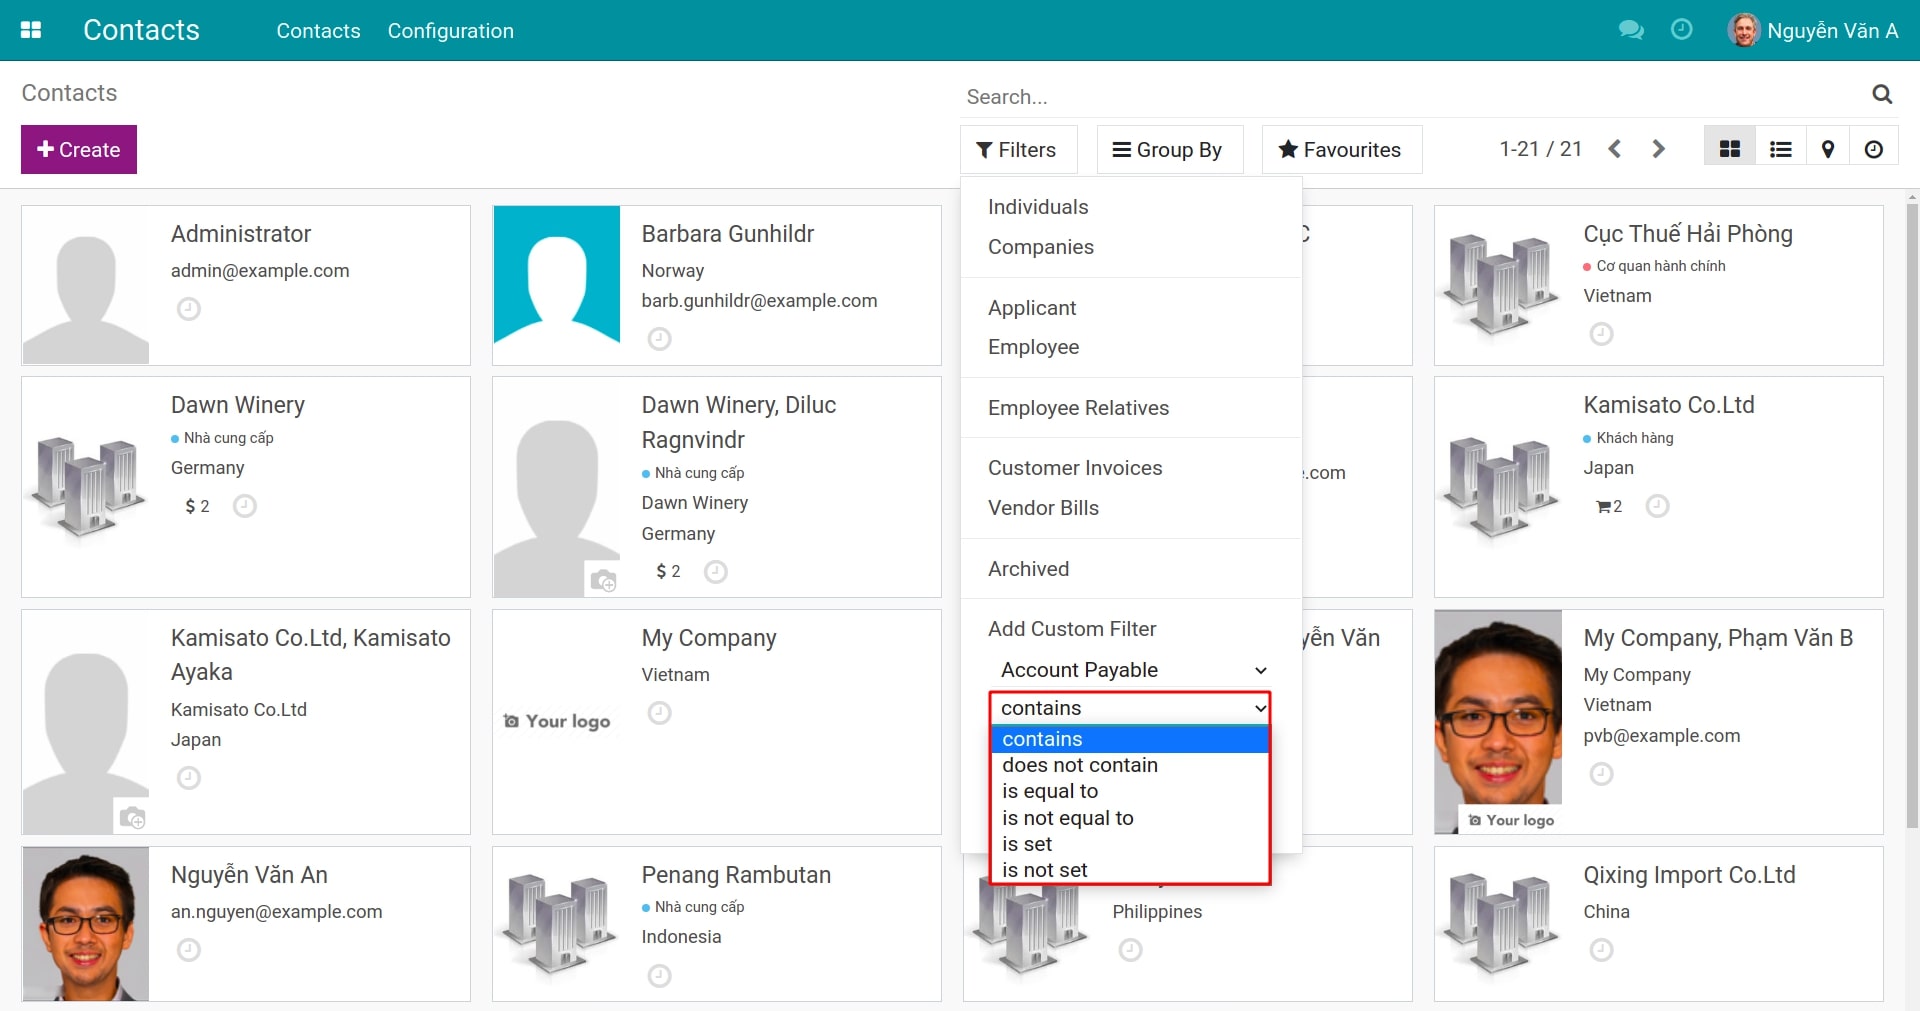
- Select the right one among the search conditions:
- Contains - Doesn’t contain:These conditions will search for results that may or may not contain the keyword phrase you are looking for.
- Is equal to - Is not equal to:These conditions only filter the results that completely match or completely don’t match with the keyword you entered.
- Is set - Is not set:These conditions will check if the field you searched for on the record contains a certain result. If that field is entered, the record will be counted as is set; otherwise, the record will be counted as is not set.
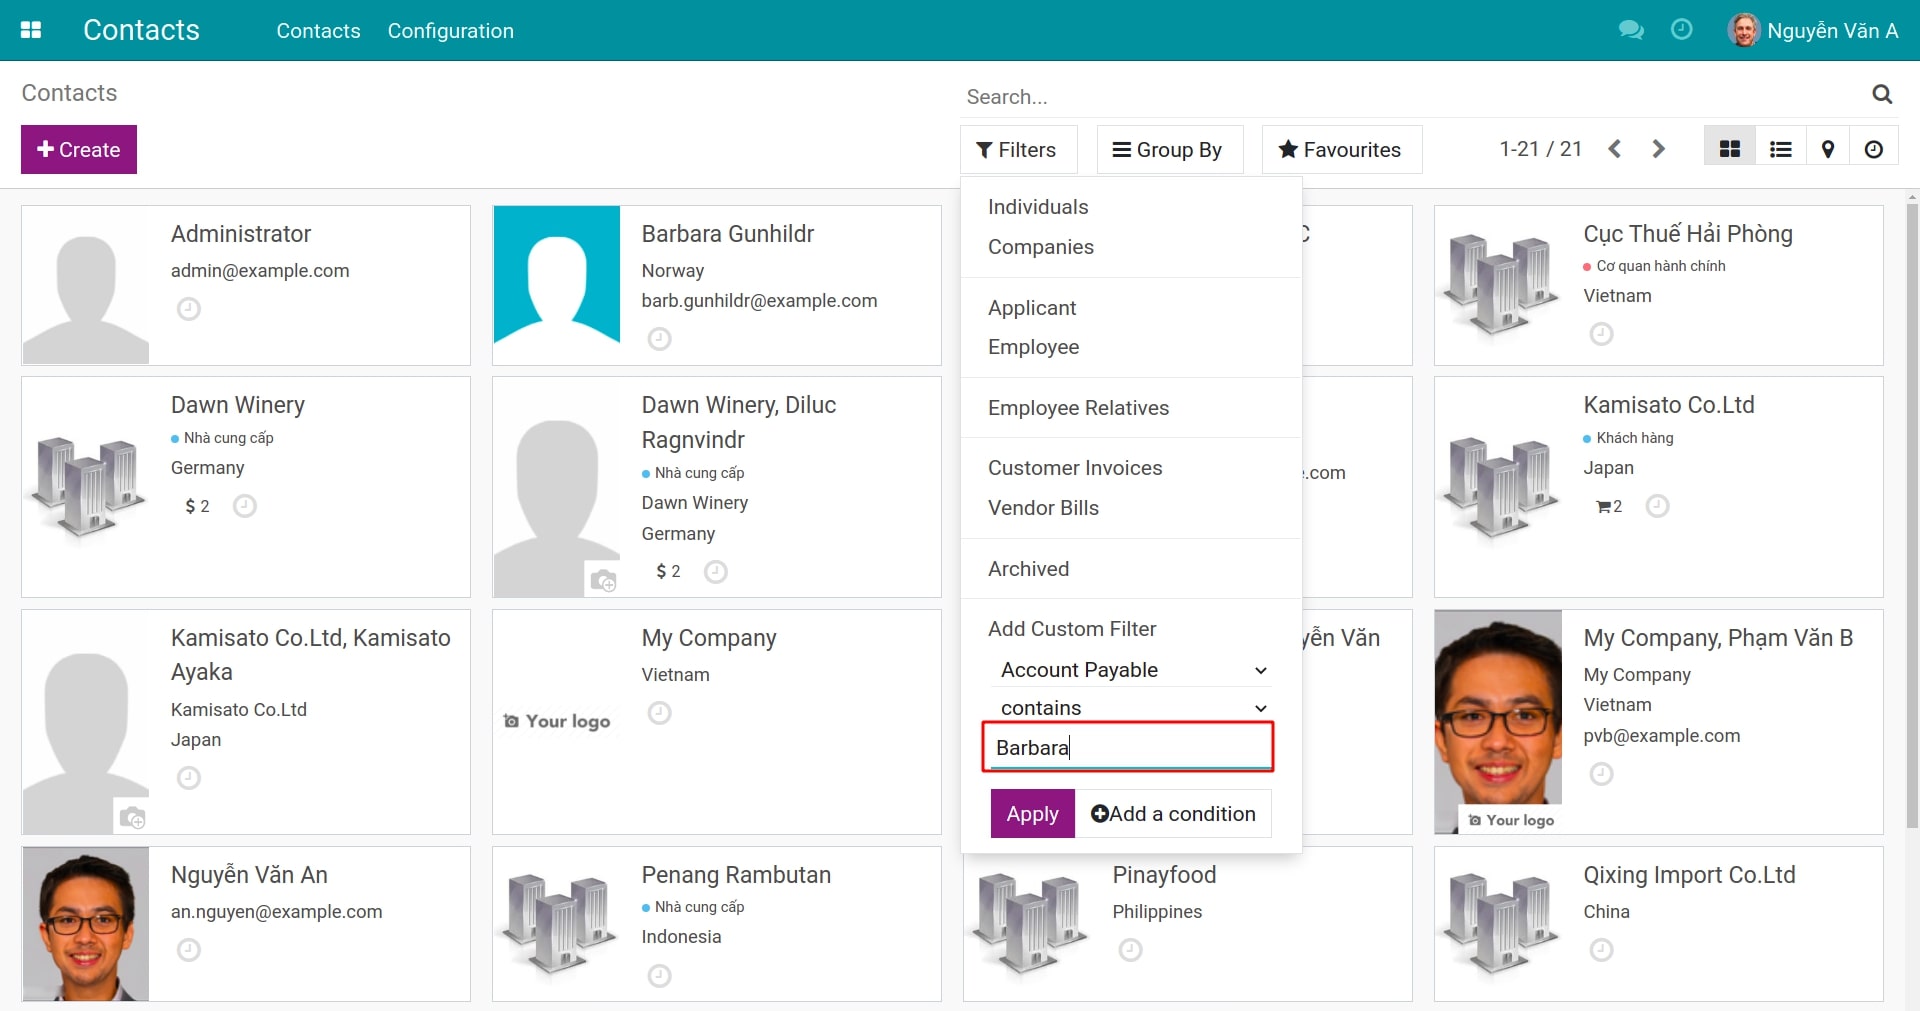
- Enter a keyword phrase for searching. This field will not appear if you select the search condition as is set or is not set.
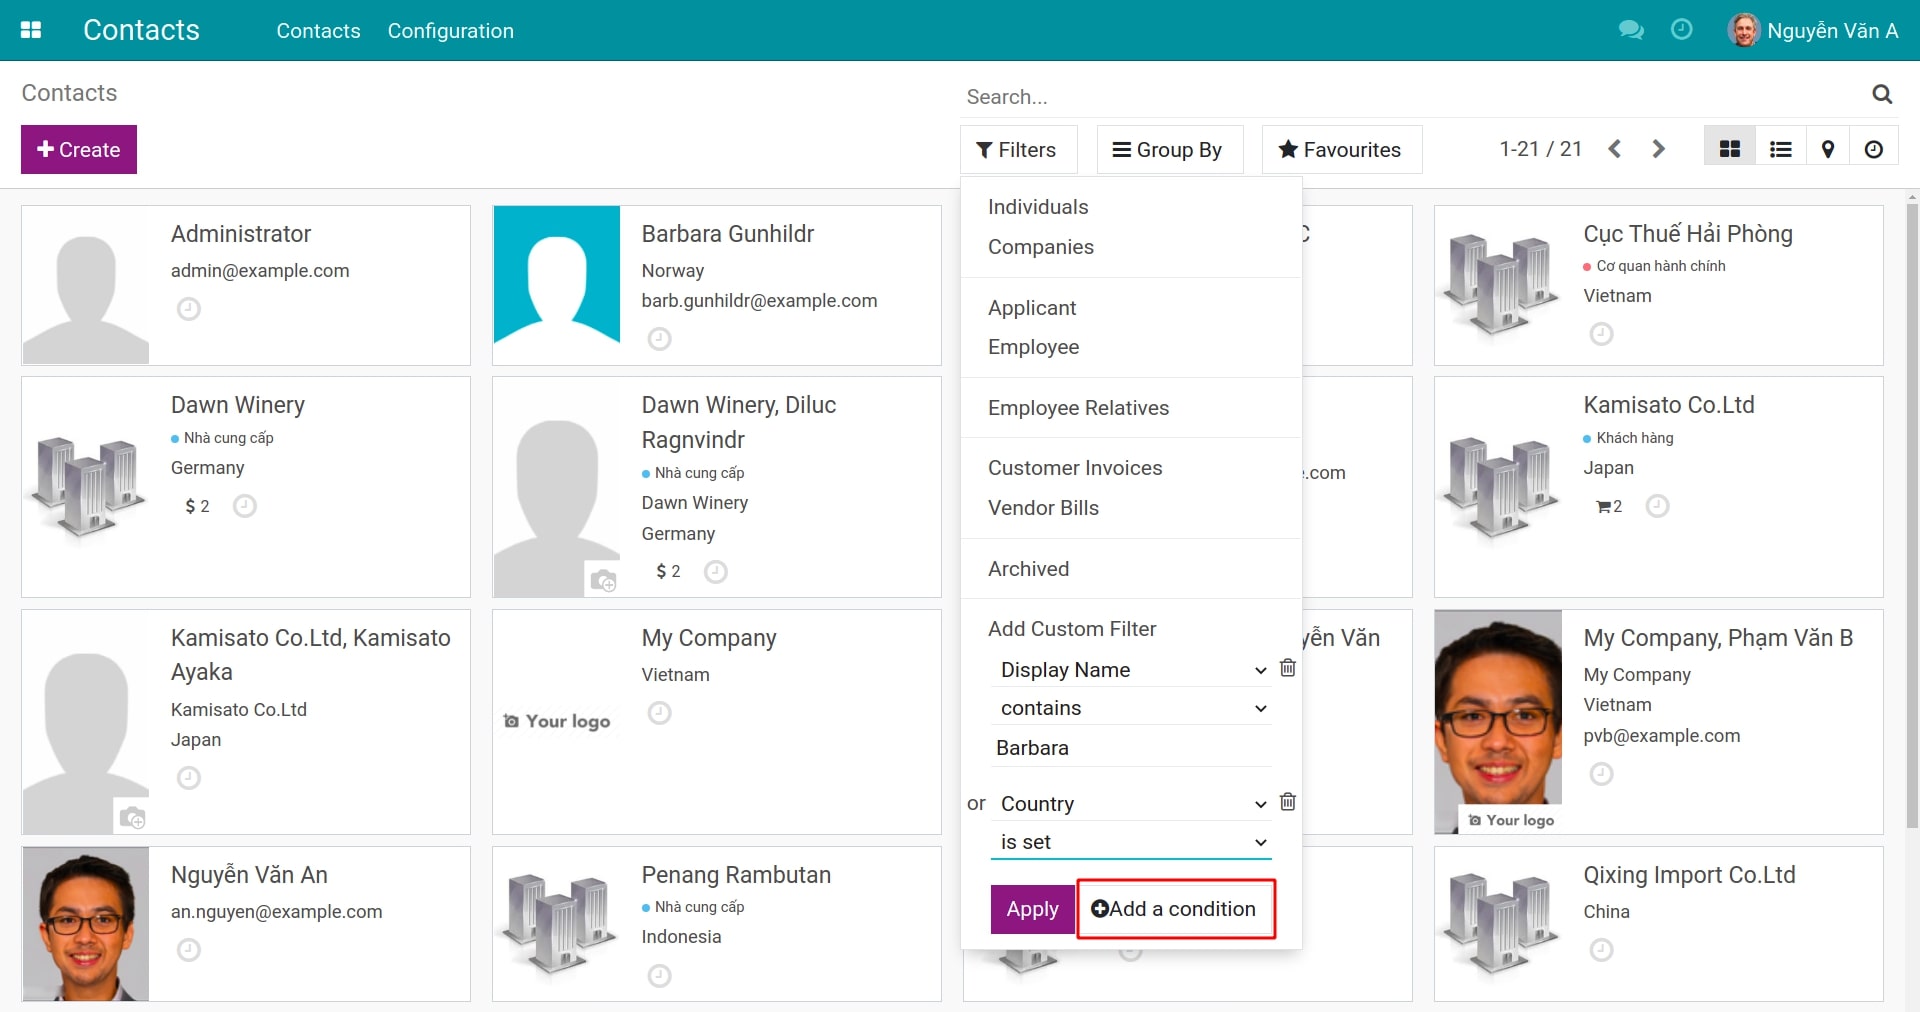
In addition, you can add more conditions parallel to the existed conditions by clicking on the Add a condition button. The records after filtering will need to satisfy one of the conditions that you have set with this method.
After adding all the necessary conditions, hit on the Apply button to allow the system to use these filters. For the entered filters after applying the previous one, the system will filter the results that satisfy all the selected conditions.
Groups feature in Viindoo
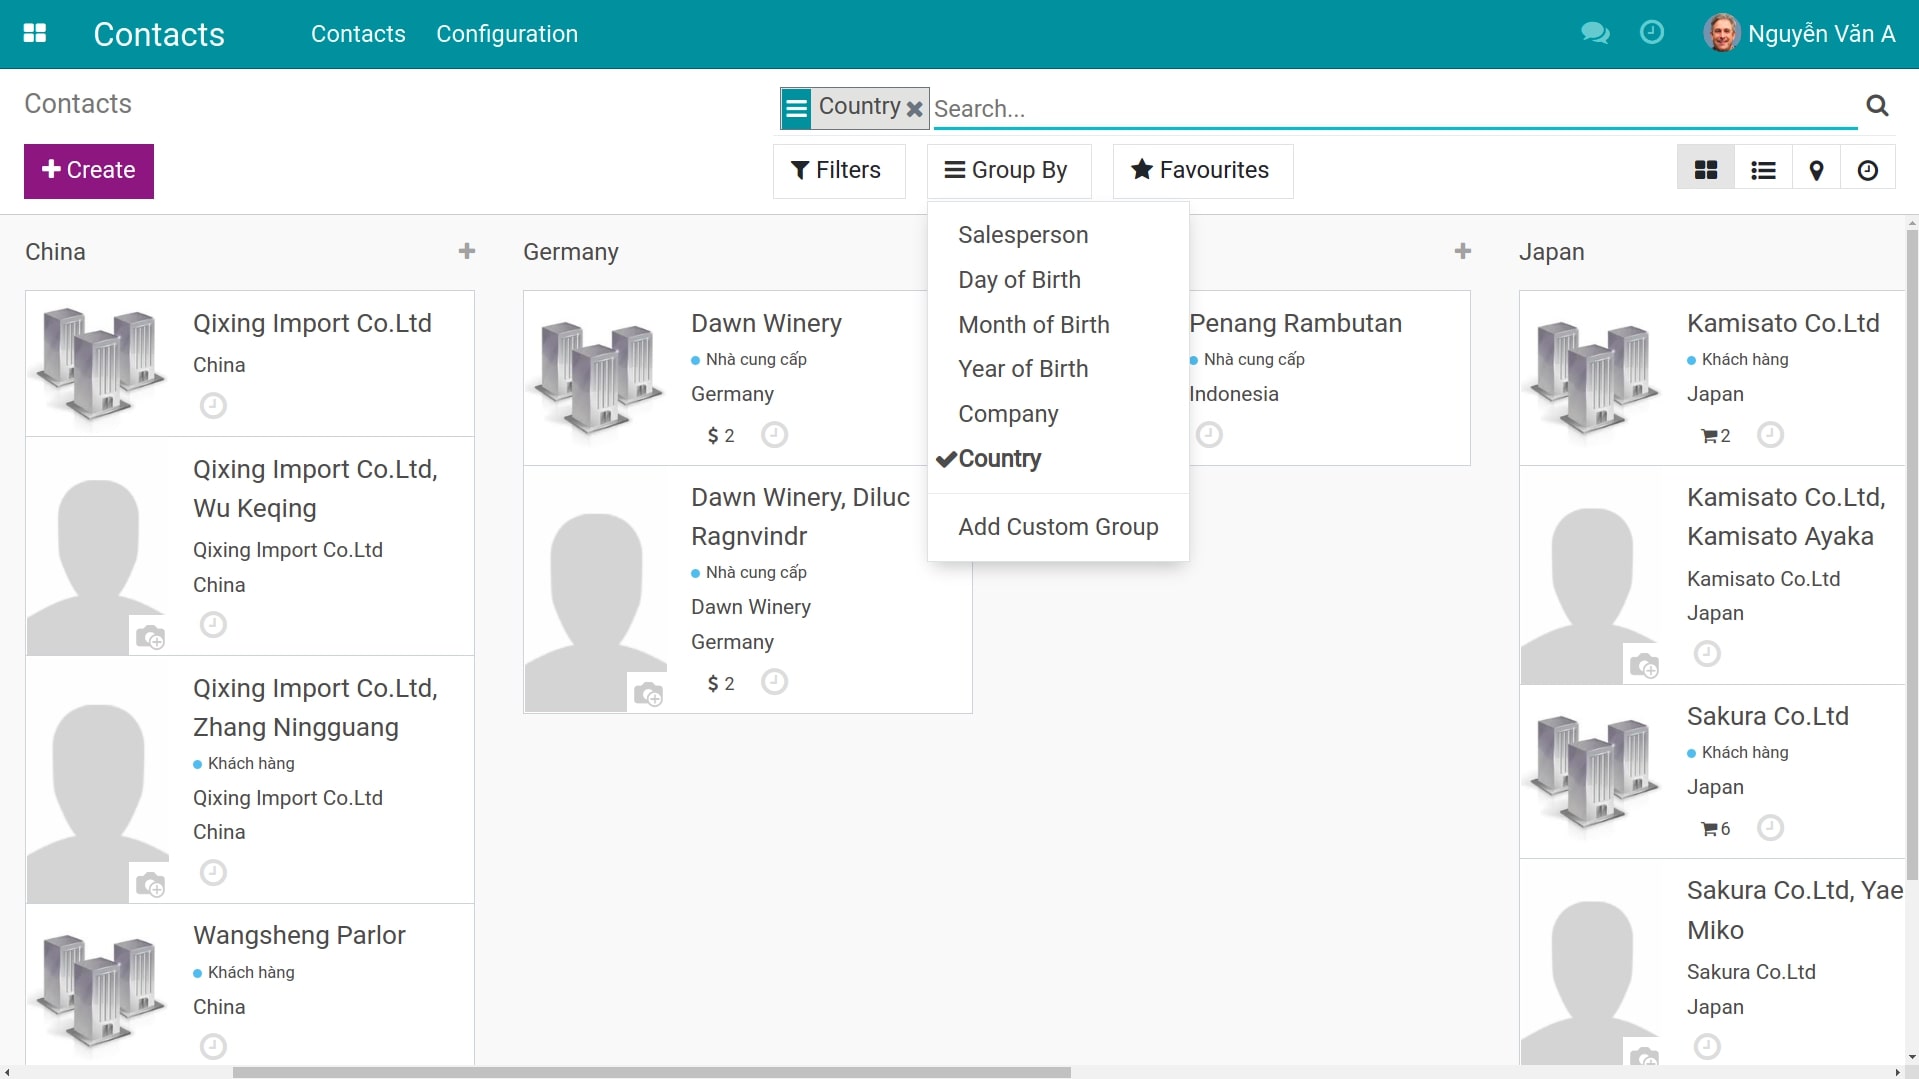
Besides filtering the data, you can group the records by more than one criteria. Just look for the Group by button below the search bar (depending on the view of Viindoo you may find this button).
For instance: At the Contacts app, when clicking on the button , the records will be grouped by the field Country on those contacts. If you continue to select the Year of Birth criterion, each group of records grouped by Country will be classified into smaller groups by Year of Birth.
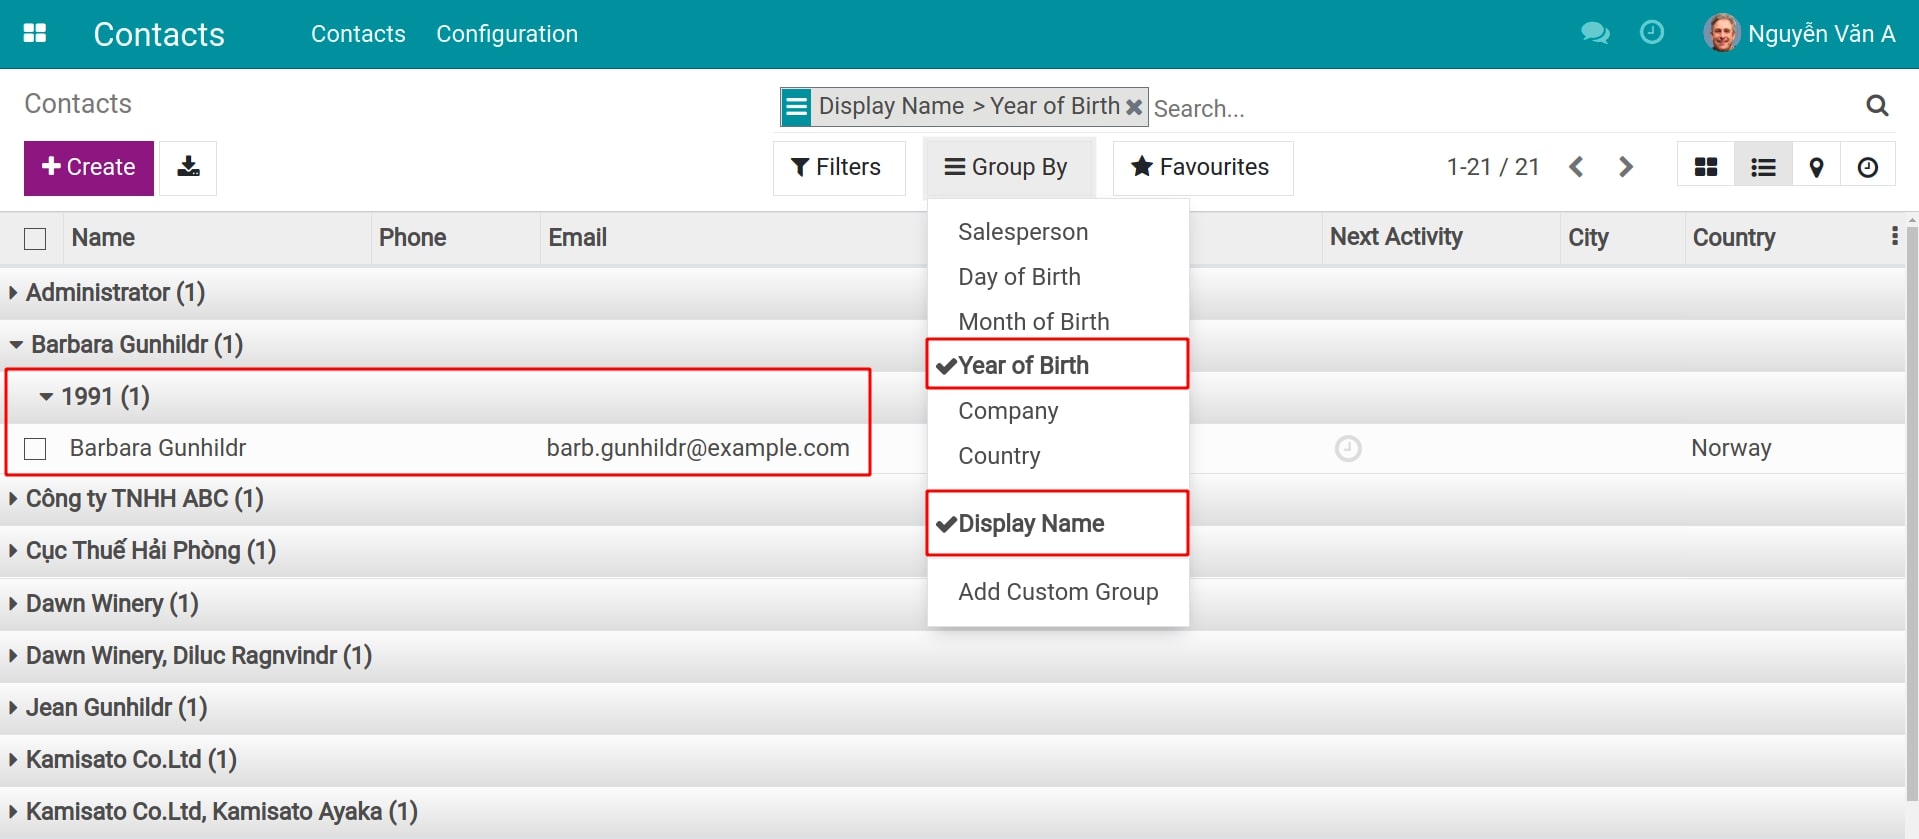
Alternatively, you can also select a custom group by clicking on Add Custom Group and selecting the field corresponding to the filter customization feature above.
Save Filters and Groups in Viindoo
The Viindoo software allows users to save the created searches, filters, and groups for future uses. After entering all the matching criteria, hit on . You need to enter the name of the filter you want to save and can choose only one of two options including:

- Use by default:This filter will be applied as soon as you access the view.
- Share with all users:When this option is selected, all users on the system will see and can use the created filter by you. Otherwise, this filter will only be seen and used by you.

After completing the editing, you click the Save button. You will find your saved filters in the Favorites menu. In case you want to delete a saved filter, hit on the trash bin icon on the right of the filter’s name.

