Make Overtime Plans
Making overtime plans helps the enterprises take the initiative in coordinating resources to complete, arrange, assign tasks as well as preparing all conditions to support employees during overtime. In the Viindoo system, overtime plan records the number of overtime hours of employees (planned and actual) and is the basis for calculating the paid amount to employees.
Depending on the organizing way, enterprises can flexibly use this feature:
Automatic: The overtime plans are gathered from approved Overtime requests. See details about access right at Access rights configuration using Approval module.
Manual: If you want to apply overtime plans without employees’ requests, you can make plans at this step without making Overtime requests.
Make Overtime Plans
Navigate to , click Create to create overtime plans.
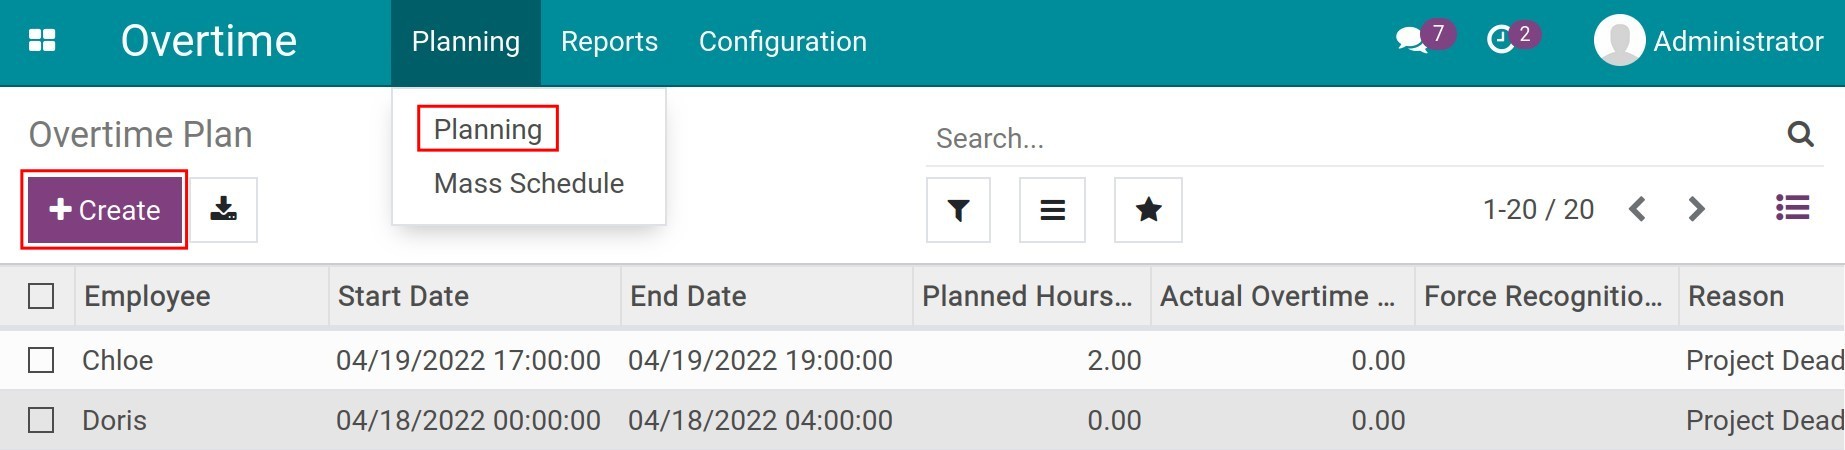
At the Overtime Plan view, you need to enter the following information:

Employee: The employee for overtime registration. Applicable only if the labour contract of employee is in the running state. More details at Create labour contract.
- Reason: enter the reason for the overtime.
Force Recognition Mode: The mode to recognize actual overtime hours compare to the plan.
- Date: the date which the overtime happen. The software automatically suggests the current date.
Period: enter the start time and end time of overtime. The smallest unit is minute.
Planned: total hours of the overtime plan, which is automatically calculated by the software based on the Period that you set.
Actual: the actual overtime hours, recorded based on the selected Force Recognition Mode (e.g., Plan, Attendance,…). If you choose Plan Mode, overtime is actually planned overtime.
Planned Pay: the planned overtime cost, calculated automatically based on the planned overtime hours.
Actual Pay: the actual overtime cost, calculated automatically based on the actual recognized overtime hours.
Contracts: The contract of the employee registering for overtime, make sure that the overtime registration date is between the start date and the end date of the contract.
Included in Payslips: the software automatically marks when there is a payslip that isn’t in the Draft state linked to this overtime plan.
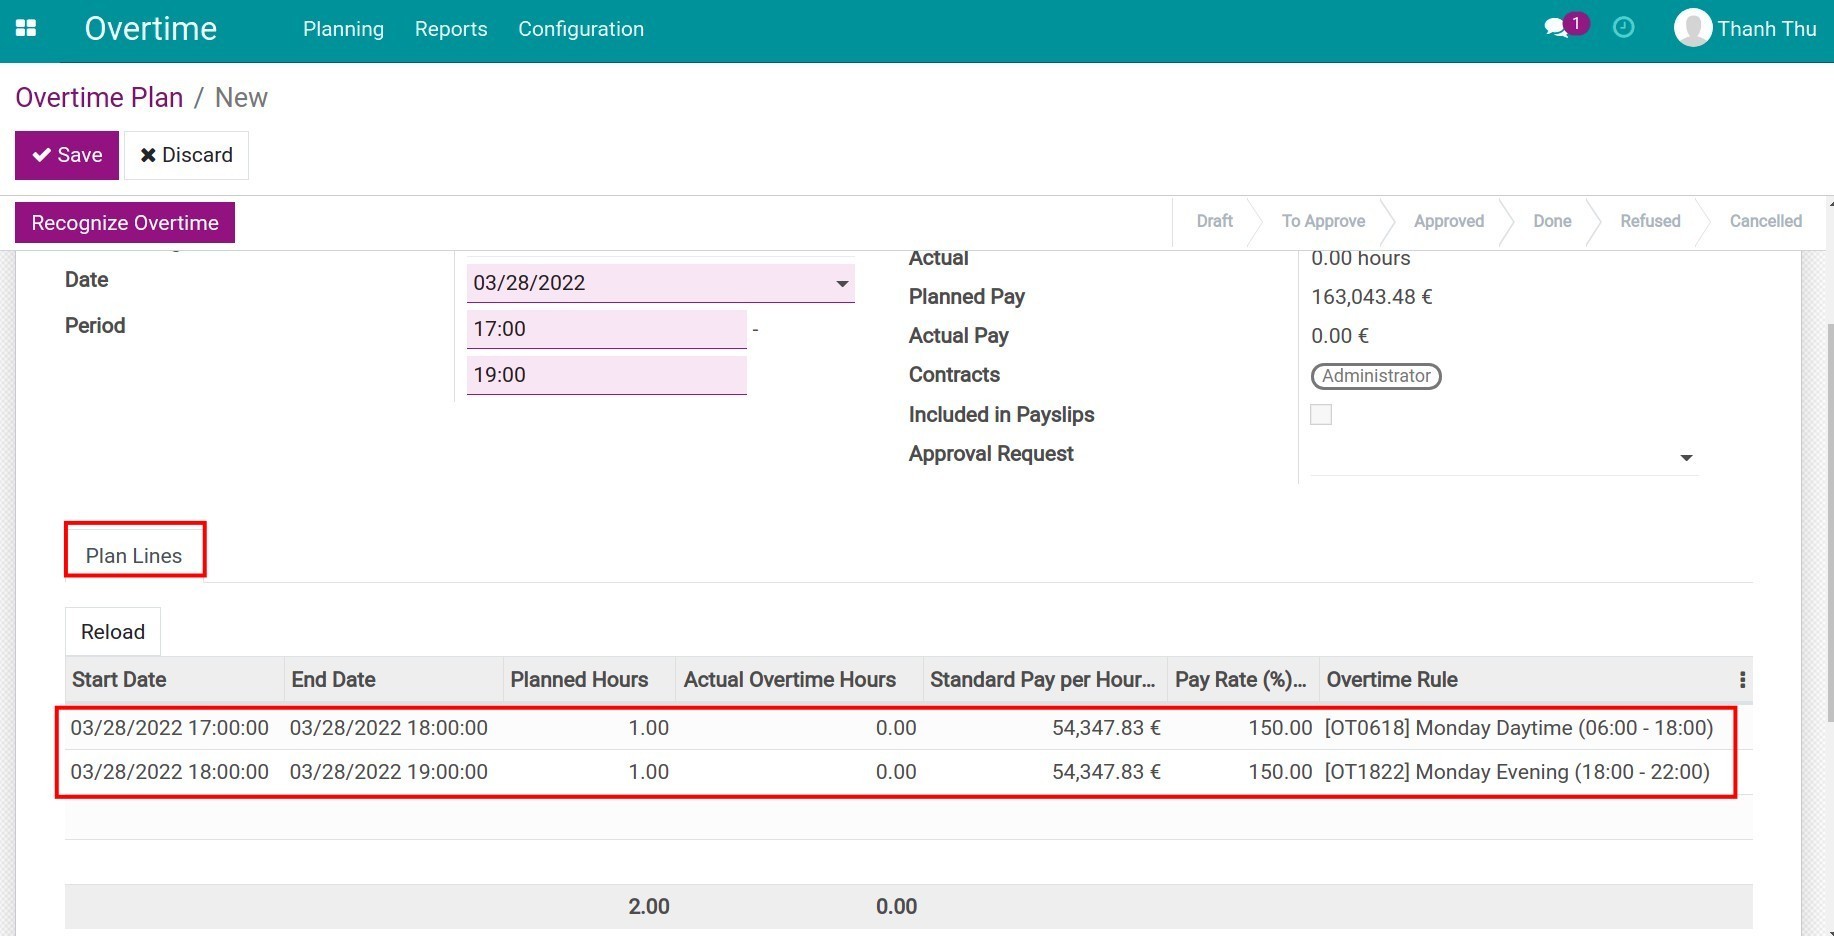
Plans Lines tab: the overtime registration details are generated according to the contract and the predefined overtime rules.
![Plan Lines]()
- Start Date/End Date: the start/end date and time of the overtime registration.
Planned Hours: the planned overtime hours registered at the Period. Depending on the time on overtime rules, the software will automatically separate your plans into multiple lines to make sure that each line is linked with only one rules. See more instructions on Overtime Rules.
Actual Overtime Hours: the actual overtime hours recorded according to the selected Recognition Mode.
Standard Pay per Hour: the standard amount paid per hour depending on the Overtime base amuont mode specified on the employee’s running labour contract.
Pay Rate, Overtime Rule: pay rate and overtime rules are automatically calculated and recorded based on the time that you register for overtime.
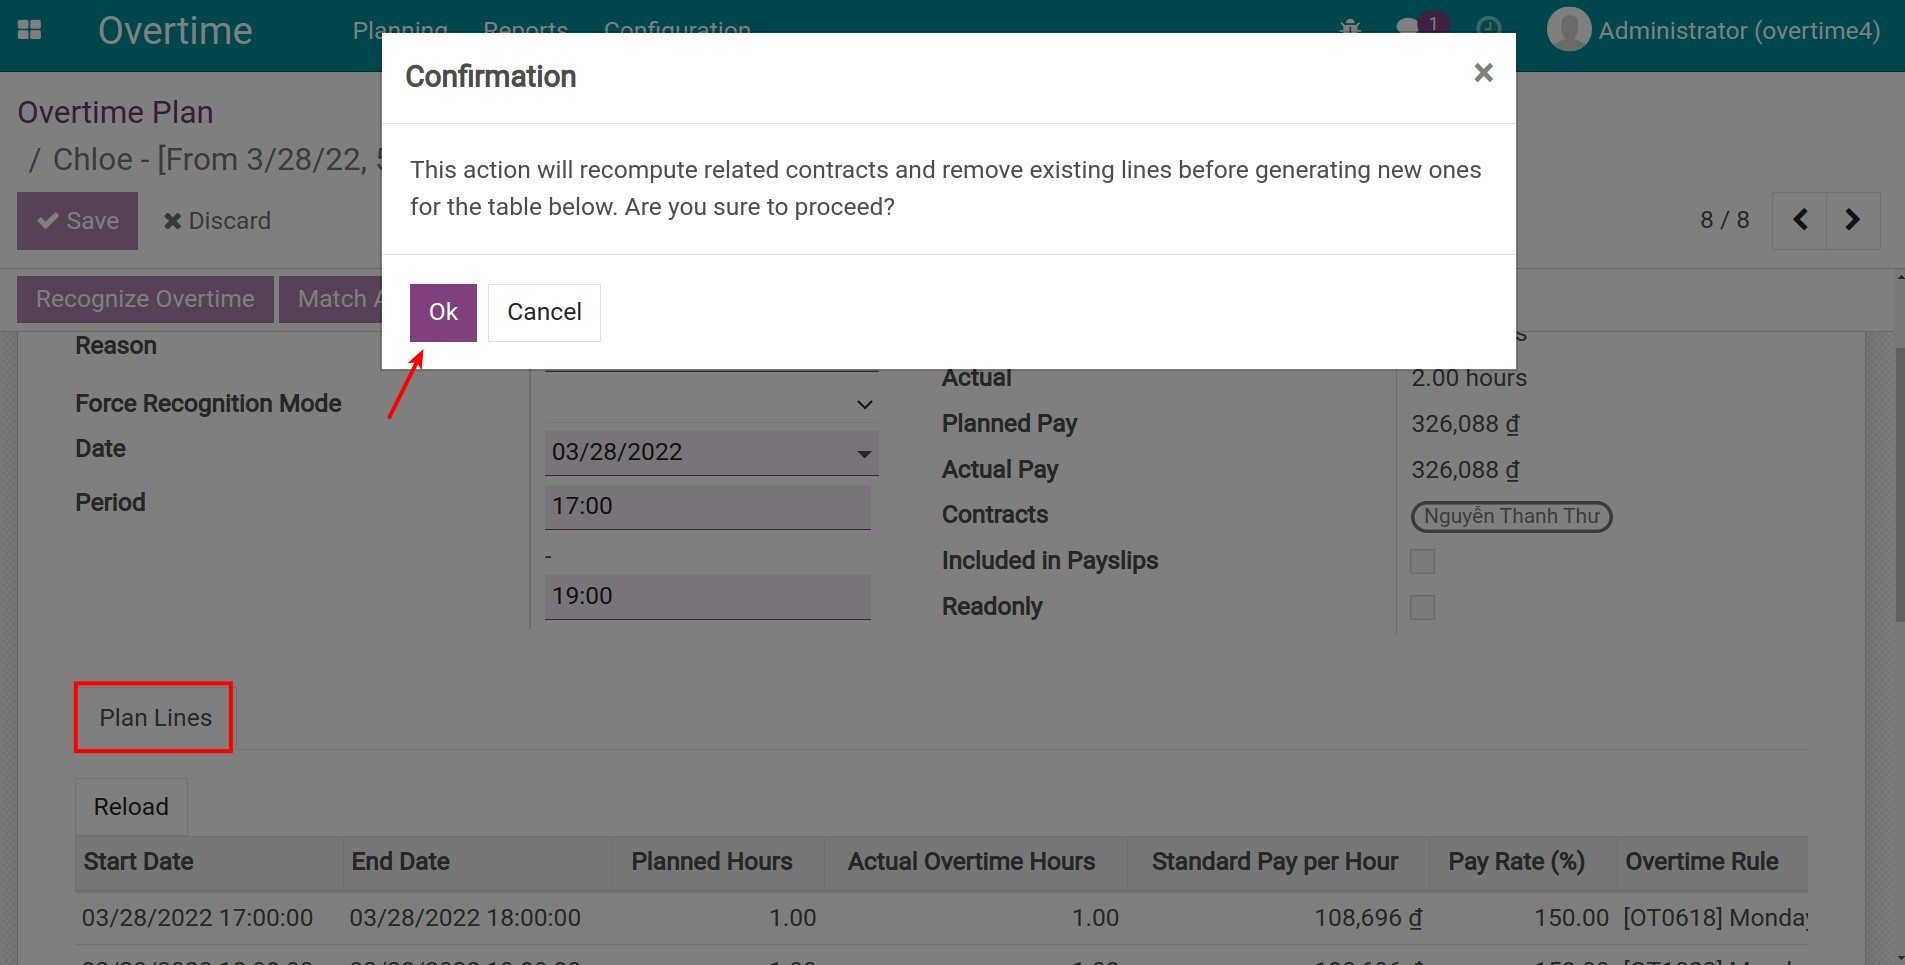
After entering the full information, you click the Reload button to get the latest data from the labour contract. This action will recompute the Contracts field, deleting existing plan lines (if any) before creating new lines. When the confirmation window appears, click OK to accept action.
After checking the information, click Save. Back to the Overtime Plan view, the software will show the record you just created.

Make a Mass Schedule
You can make overtime plan for a team. Navigate to .

The screen appears a window that allows you to make a Mass Schedule.
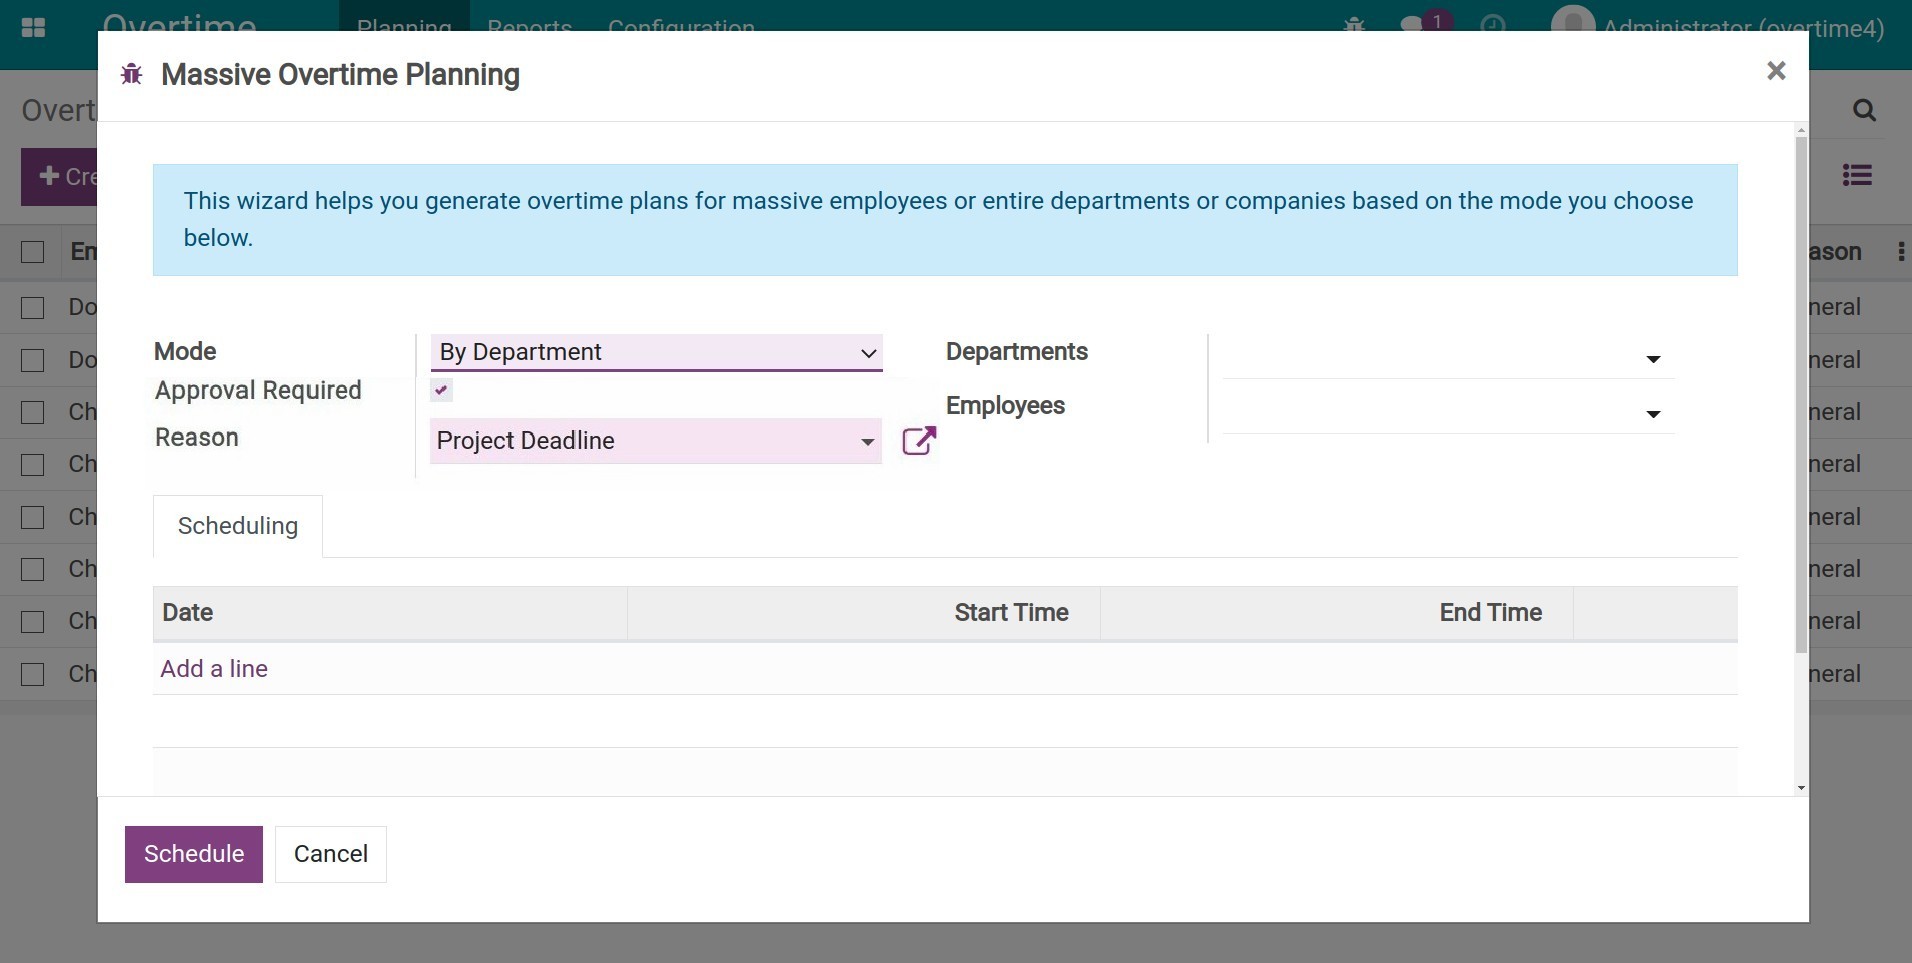
The information should be filled as follow:
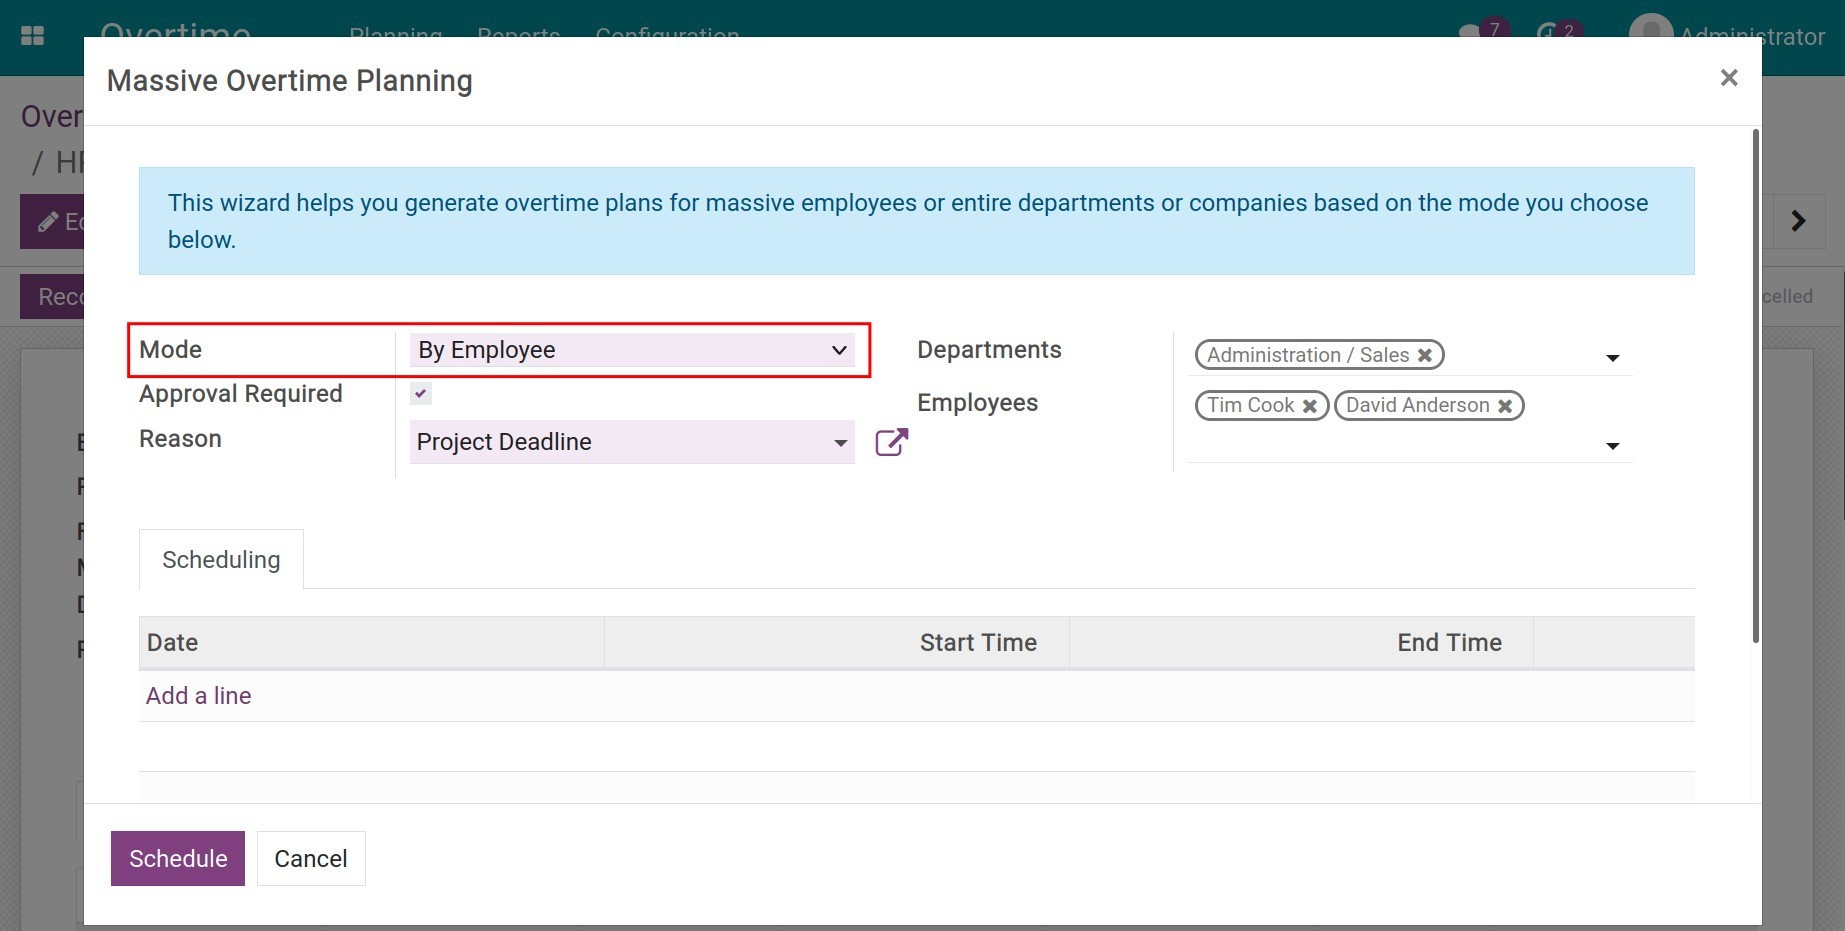
Mode: overtime registration for individual, department or company.
By Employee: select the employee (under your management) who wants to register for overtime.
![By Employee Mode]()
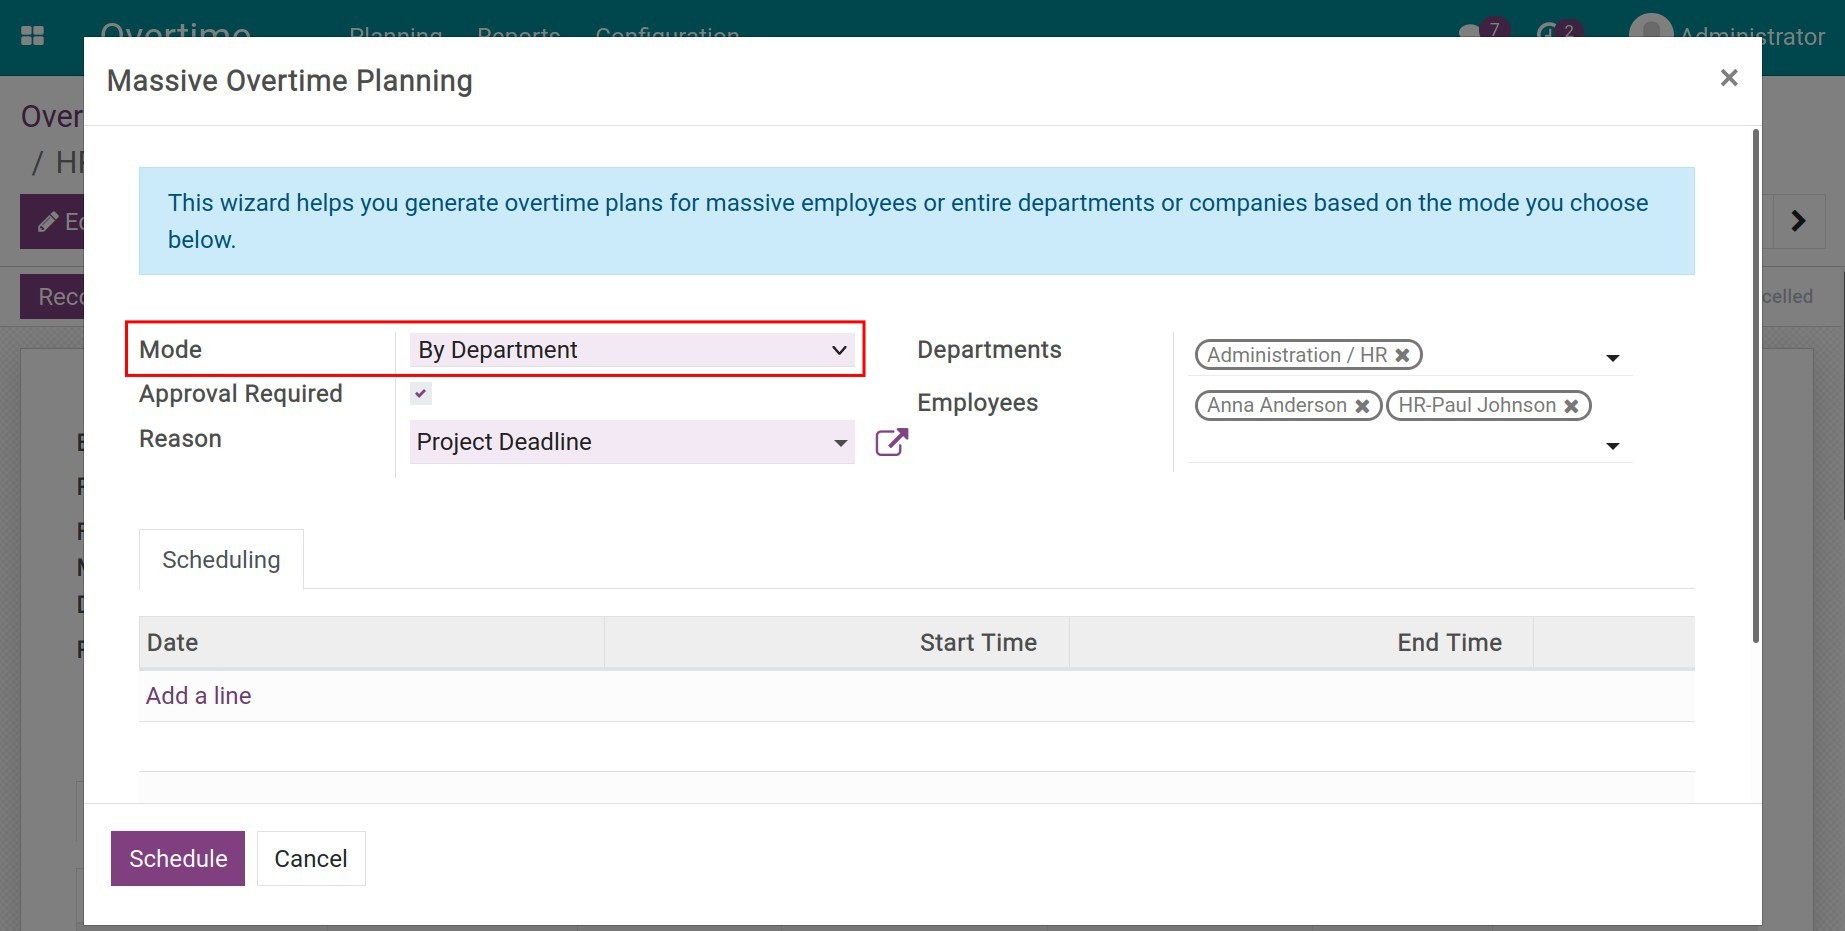
By Department: choose a specified department at the Departments field, at the Employees field you will see all employees in the chosen department. You can remove employees that don’t want to do overtime.
![By Department Mode]()
By Company: In case you manage multi company on Viindoo system, you select By Company Mode option. This option allows you to select the company you want to register for overtime.
Approval Required: select if this Mass schedule need to be approved.
Note
You need to configure Overtime Plan Approval feature to see Approval Required field.
Reason: enter a reason for overtime.
Scheduling Tab: click Add a line to register for overtime: Date, Start Time, and End Time for selected employees.
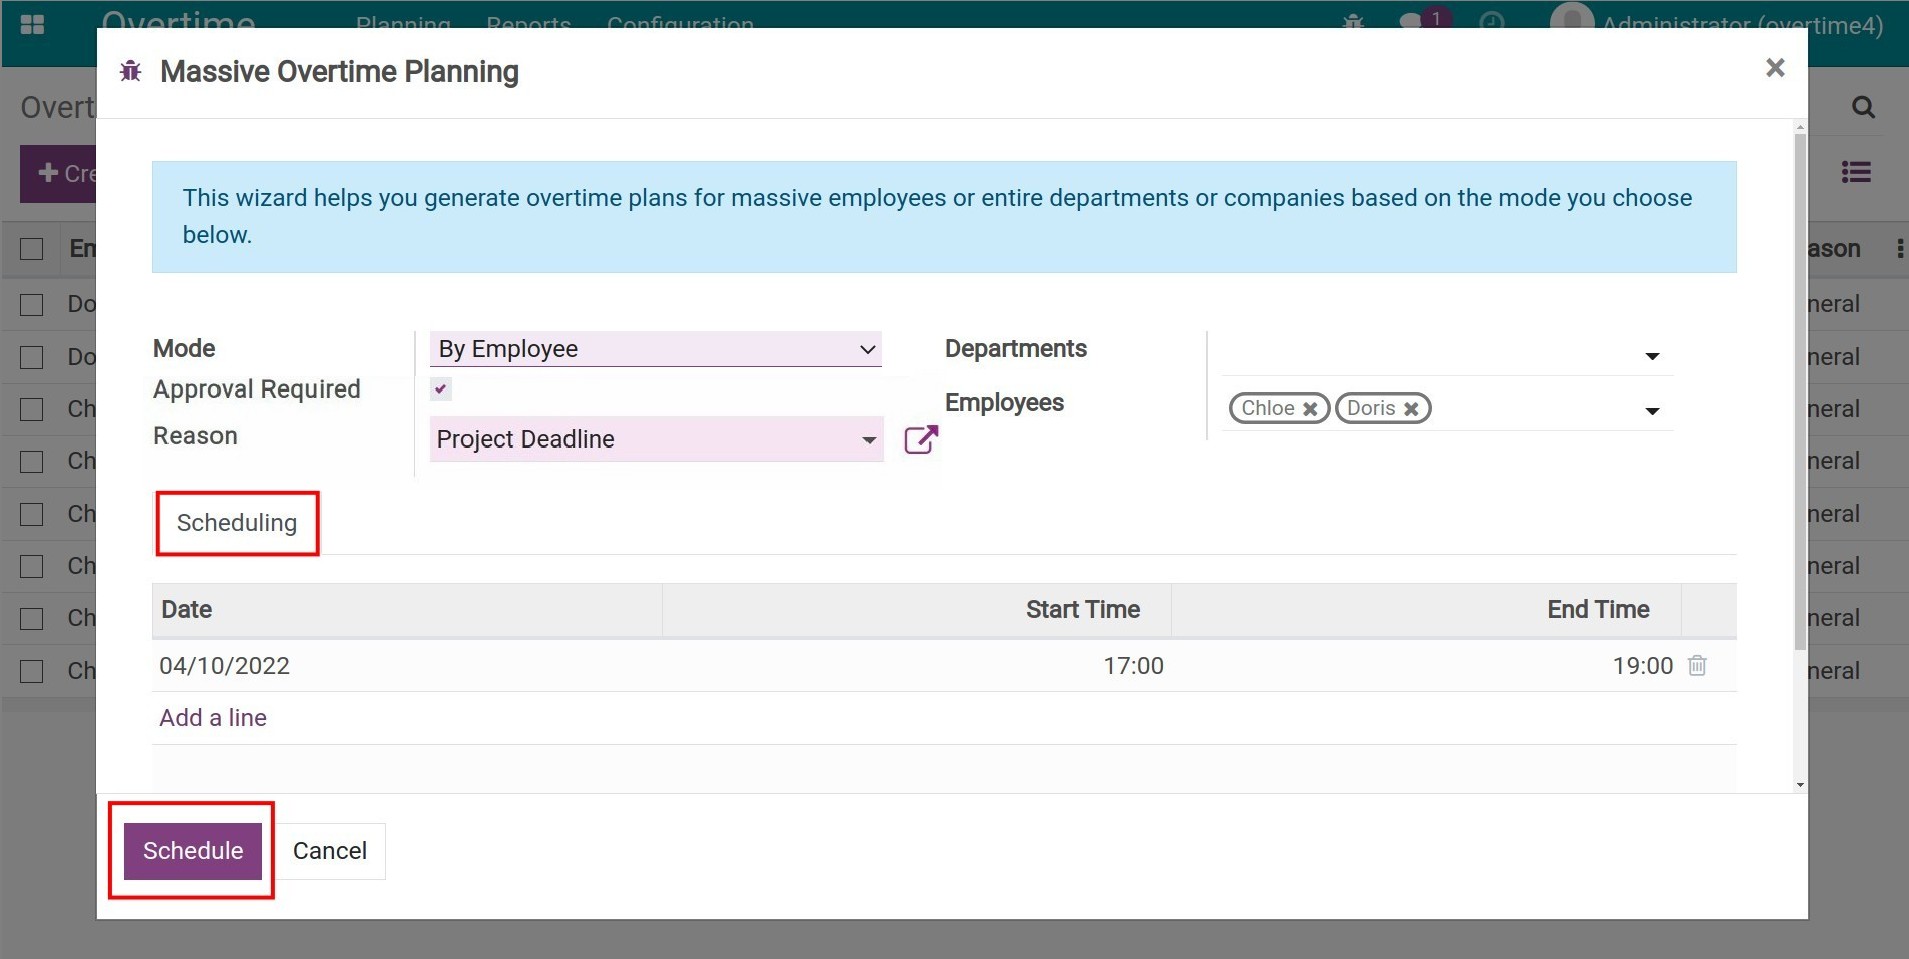
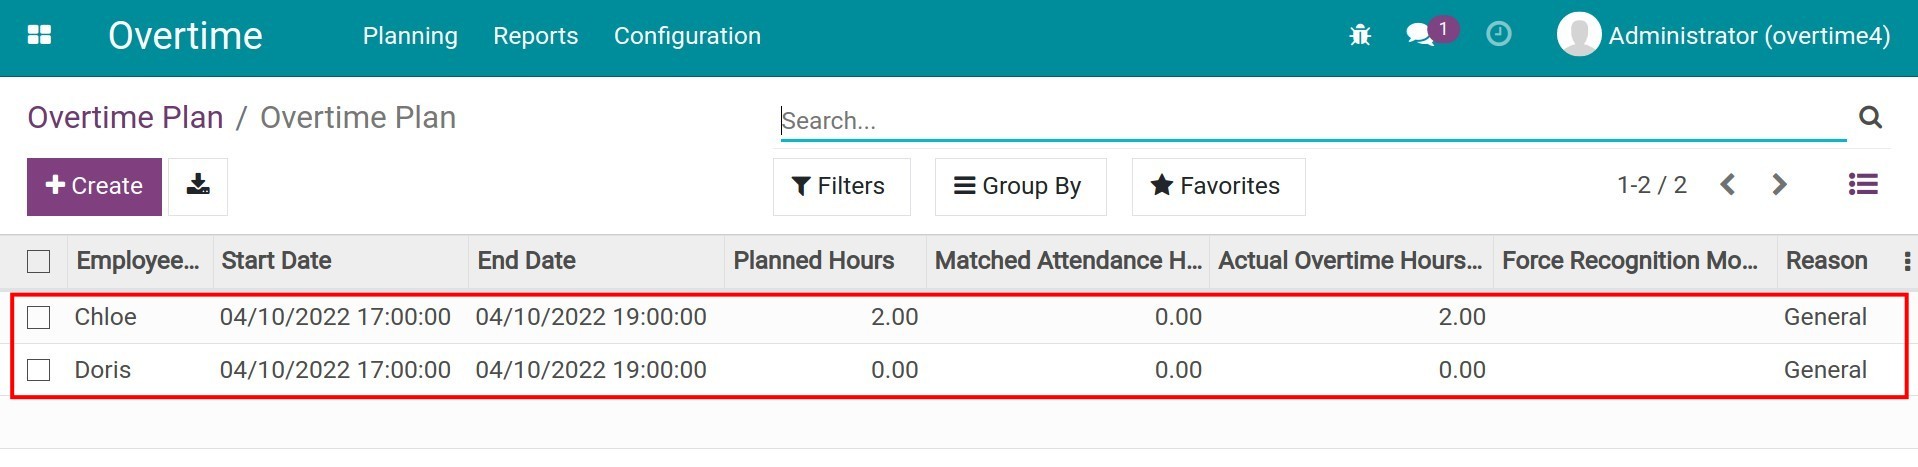
Click Schedule to confirm Overtime Mass Schedule registration. Then the system will automatically create the Overtime Plan according to your mass scheduled registration.
Note
If you have the approval right for your team in the Overtime, you can register an overtime mass schedule plan for yourself and your team members at overtime request view.
See also
Related article
Optional modules