Create new employee
Viindoo software provides the human resources management feature, allowing you to create employee profiles and manage related information.
How to create an employee in Viindoo system?
You can create an employee in Viindoo system by using one of these ways:
- Create an employee in Employees Module;
Create an employee from an application in Recruitment Module;
Create an employee from a user account.
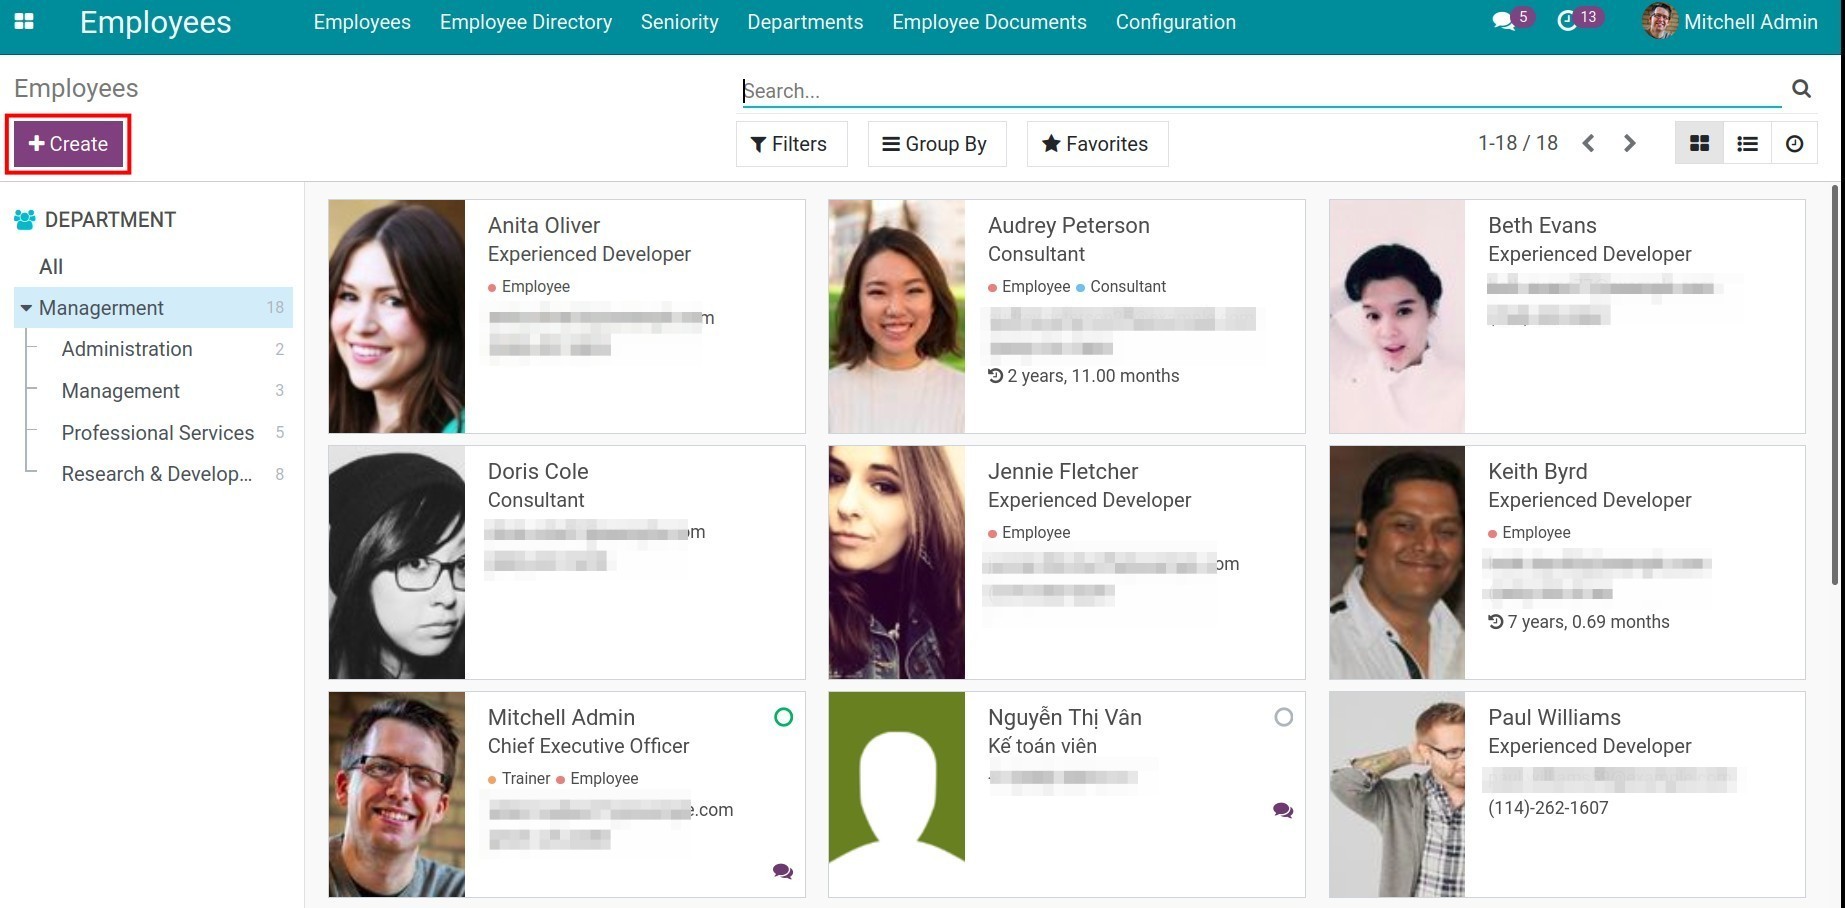
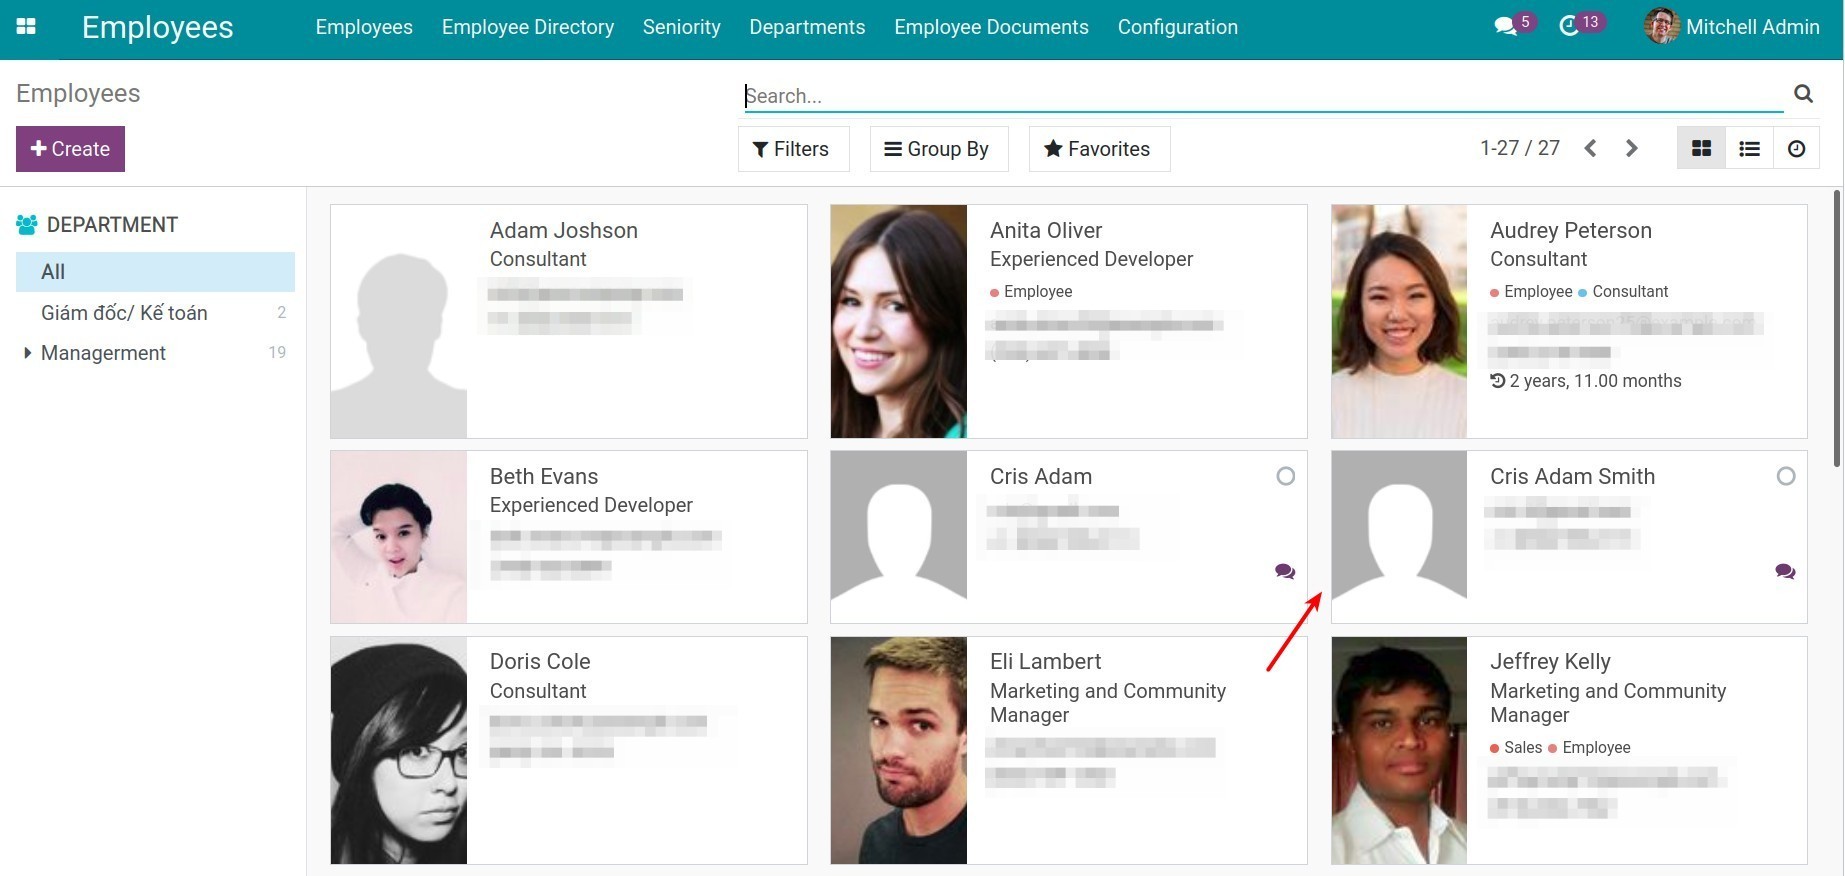
Create an employee in Employees Module
Enter Employees Module. Navigate to Employees > Employees > Create.
Create an employee from an application in Recruitment Module
During the recruitment process, archiving applicants’ profiles is very necessary. By using the auto-copy feature on Viindoo system, the companies will reduce the works and avoid mistakes on the data importing process after the applicants go successfully for rounds of interviews.
To convert an applicant into an employee, click on Create Employee on Applications view.
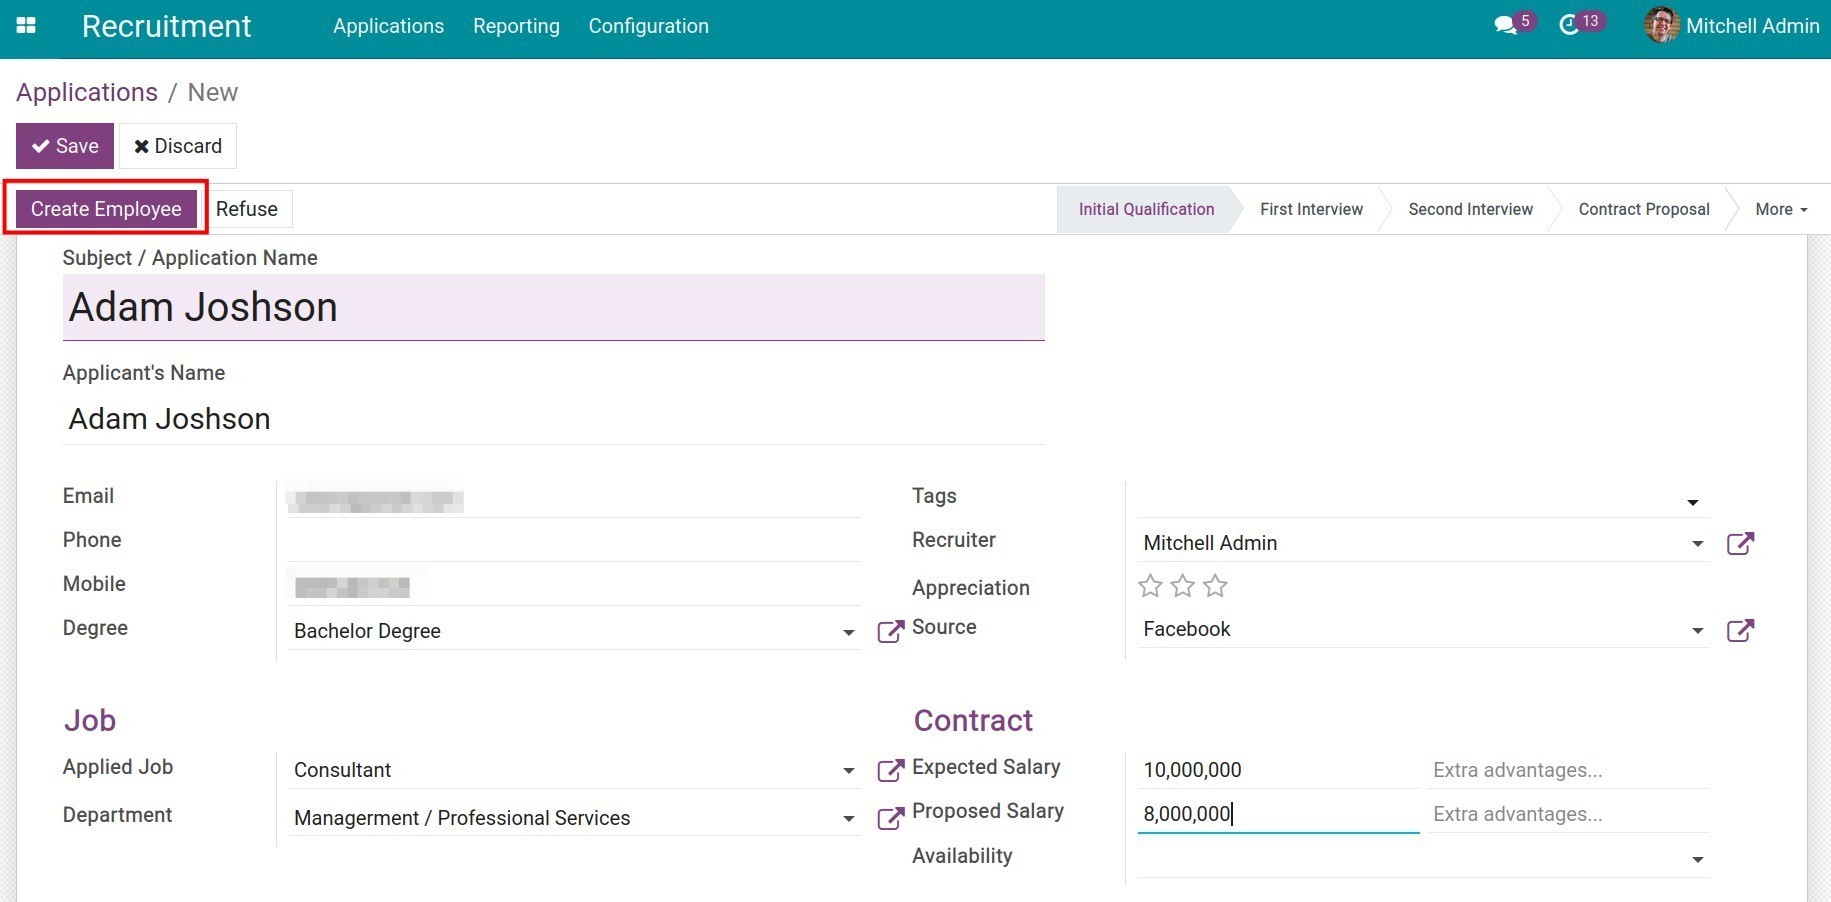
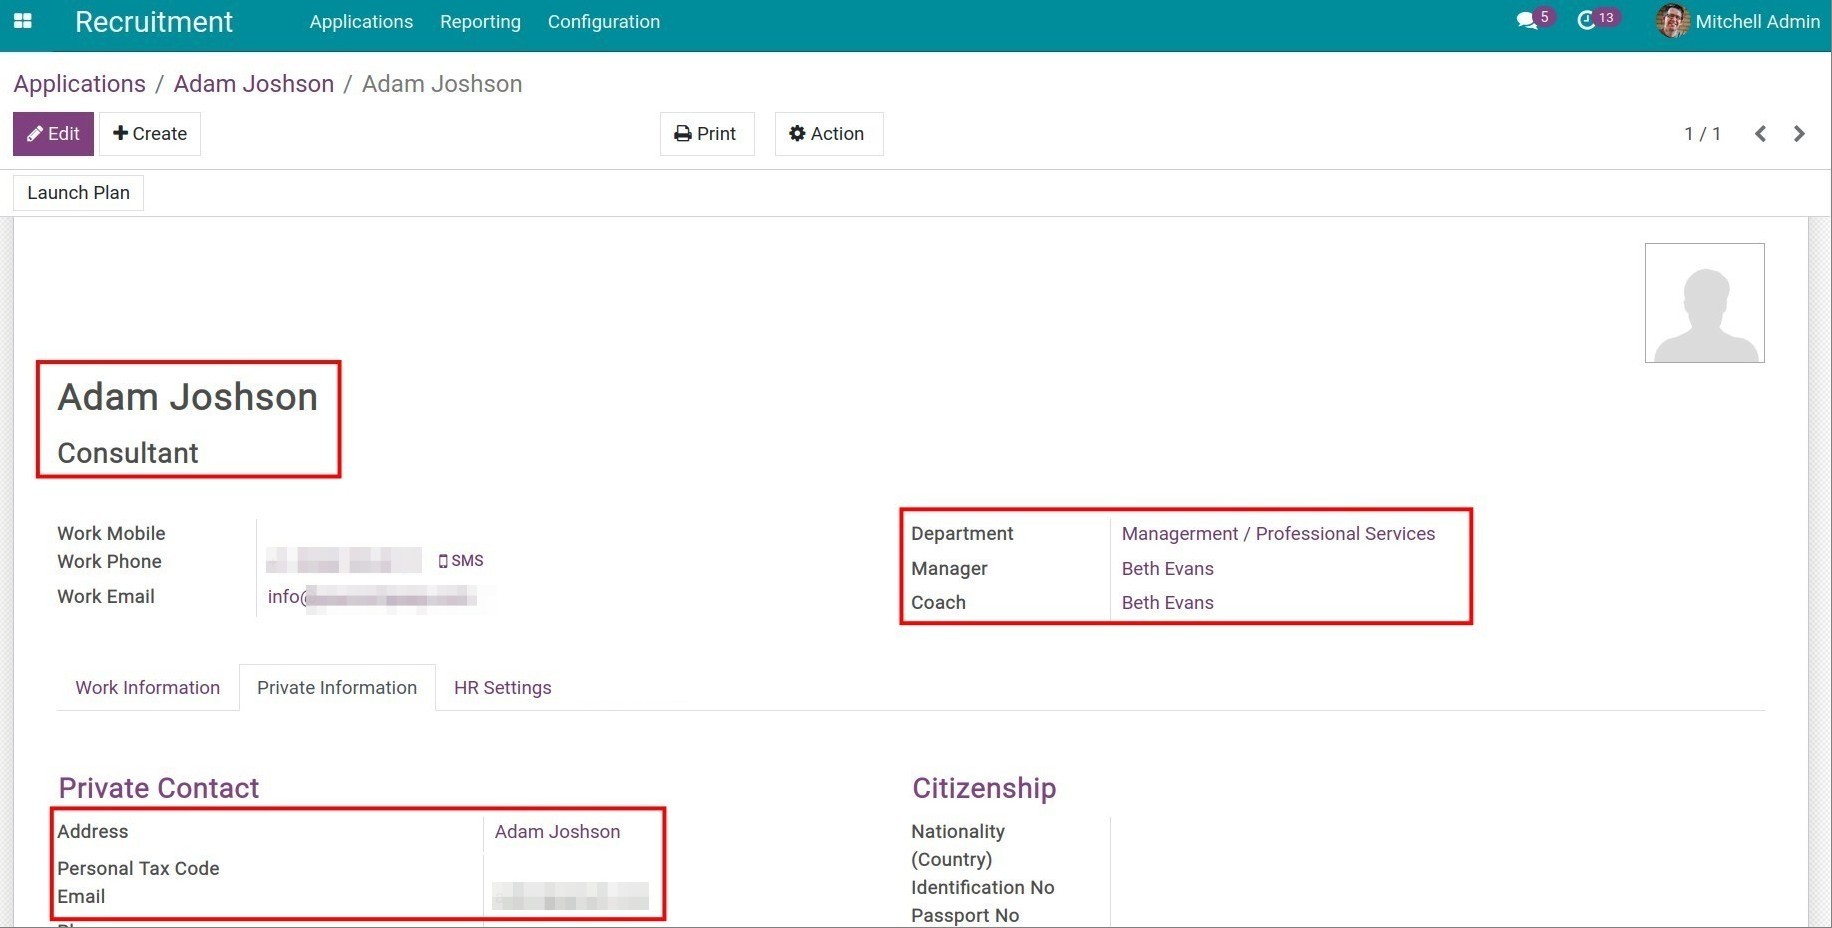
The employee view will pop up after clicking on Create Employee and you can enter more information according to the configuration on the application view.
Create an employee from a user account
You also create an employee from a user account.
In case an employee has been granted a user account, you need to navigate to Settings > Users & Companies > Users, select the user and press Create employee to create the employee for this user.
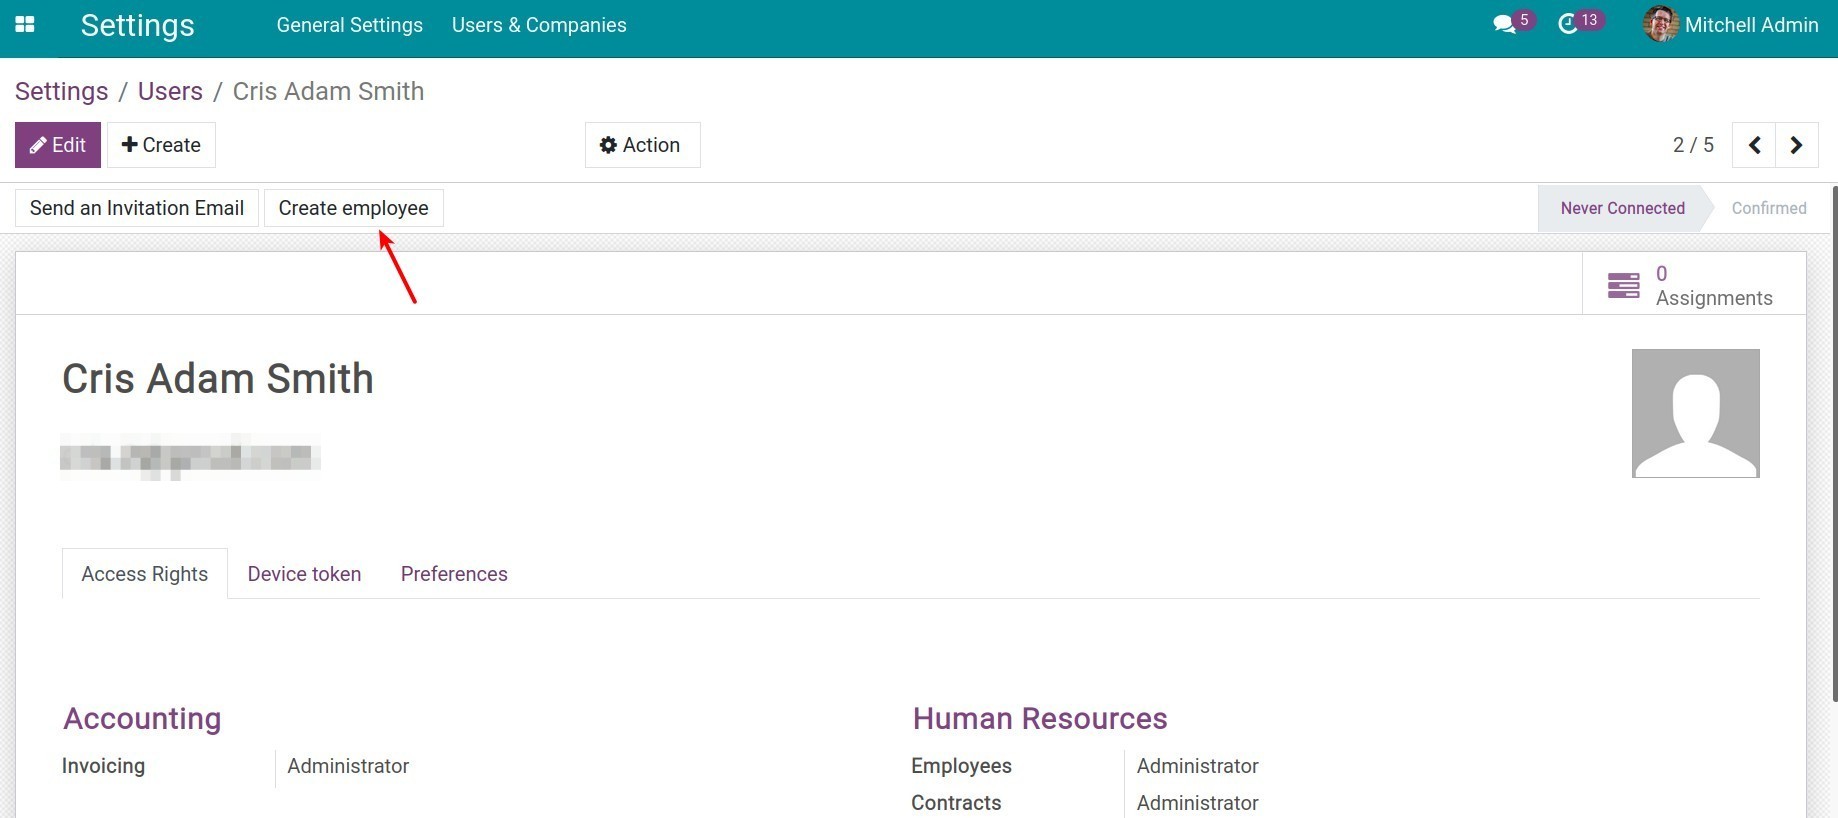
The corresponding employee user will be created automatically in the Employees Module.
See also
Employee information management
You should import or enter fully in detail the information of each employee to refer easily and conveniently afterwards.
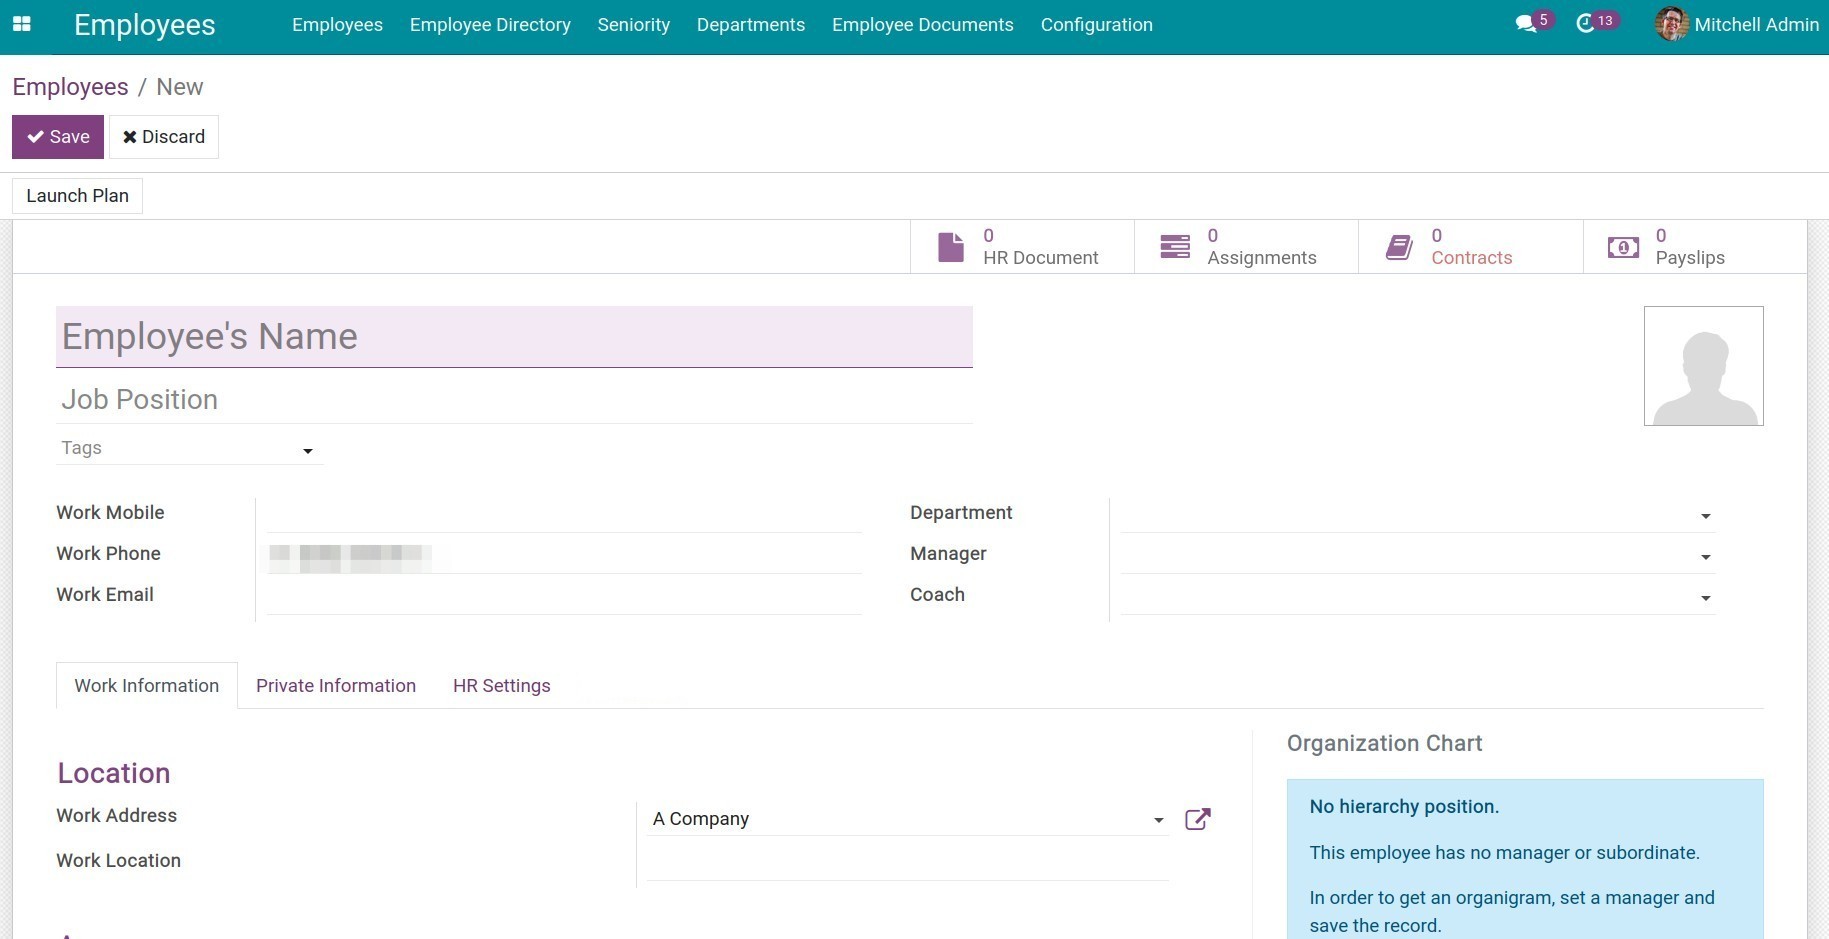
When you navigate to Employees Module to enter data, a view-screen will be shown as:
General Information
You now have to enter the following information:
See also
- Employee’s Name: Employee’s full name.
- Job position: Leave this field blank, choose job position at HR Setting tab.
- Photo: Click to upload the employee’s photo. This will help you to recognize the employee when exchanging information in Viindoo system.
- Tags: You can create new tags or choose the existing tags to classify according to your expected criteria.
- Department: You have to choose the exact department to link to the corresponding expenses of each department and also make it more convenient for management and assignment.
- Manager: This field will automatically suggest a manager if the manager field has been configured on the department view.
- Coach: The person who is assigned to train and support the employee. You can choose another person instead of the system’s suggestion.
Work Information
You need to enter the information as:
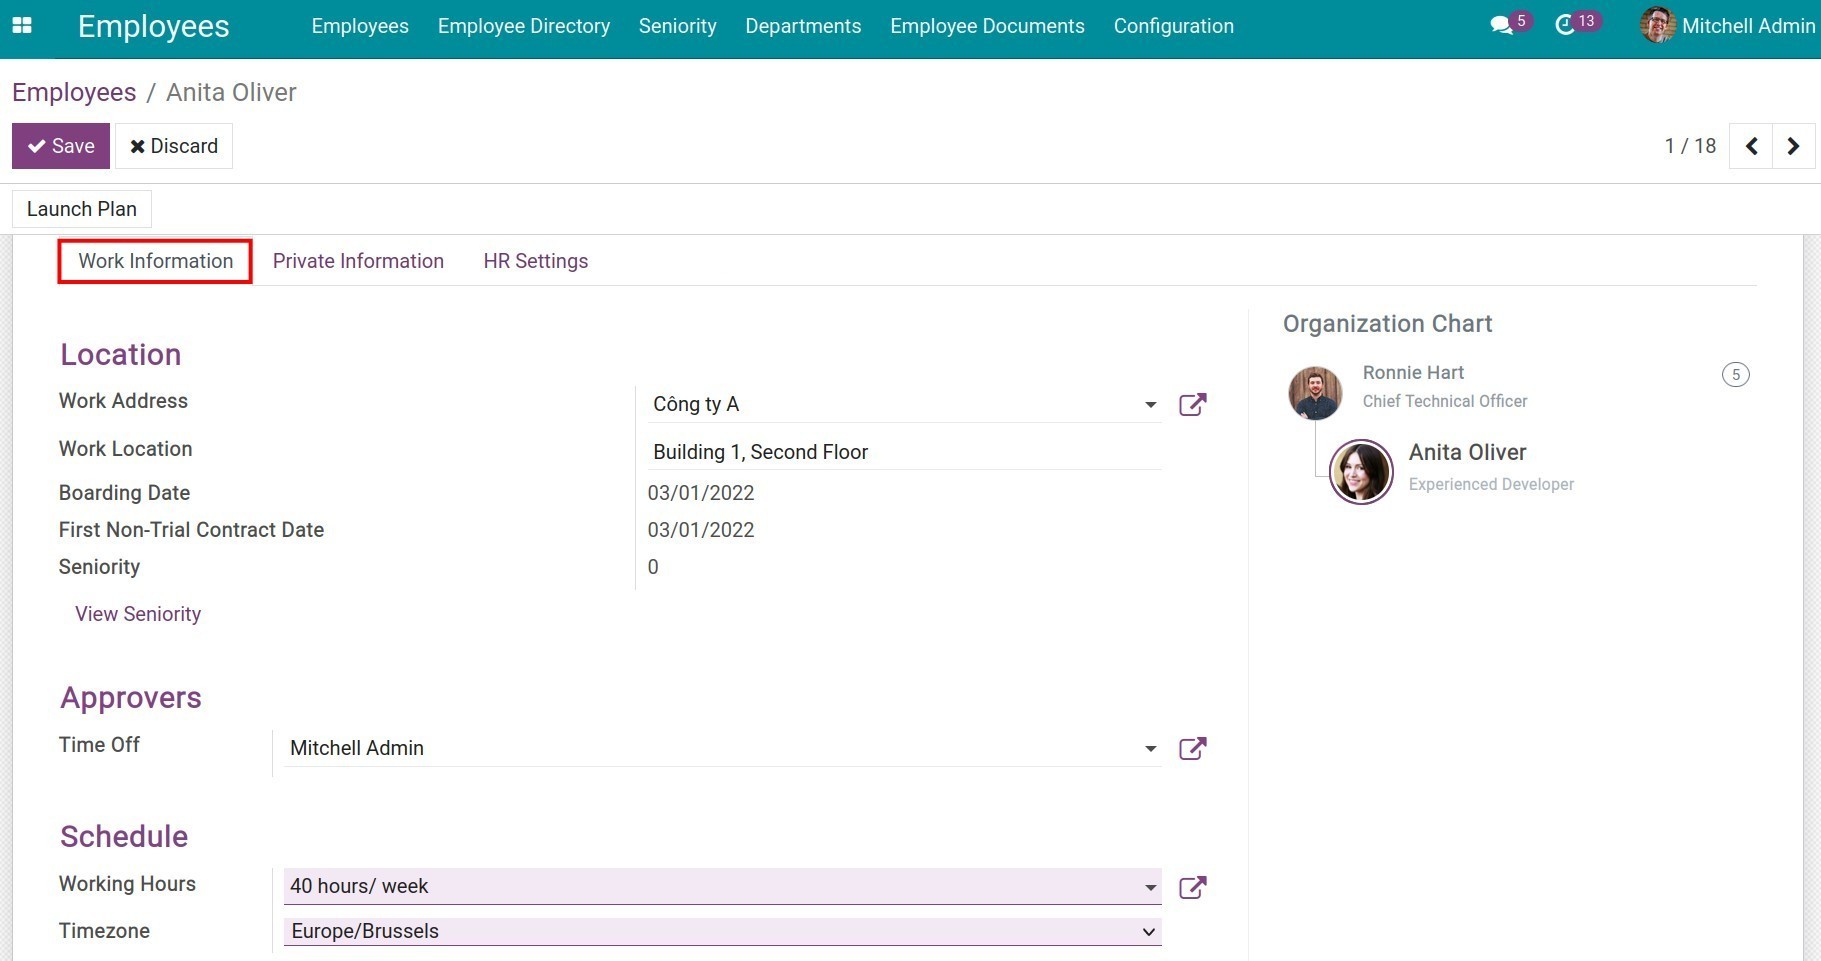
- Location:
- Work Address: is the address of the company, branch or working office of the employee.
- Work Location: is the working place where the employee work, i.g: Room No. 205, A Building.
- Approver:
- Time Off: The person in charge of this employee for his time off approval.
- Schedule (Times):
- Working Hours: is auto-suggested based on the default working hours but you can choose another one.
- Timezone: You should select the suitable time zone depending on the work location.
- Organization Chart: This chart shows the employee’s position on the company’s hierarchy which follows the generation structure.
See also
Private Information
At this tab, you can enter the private informations of the employee as following:
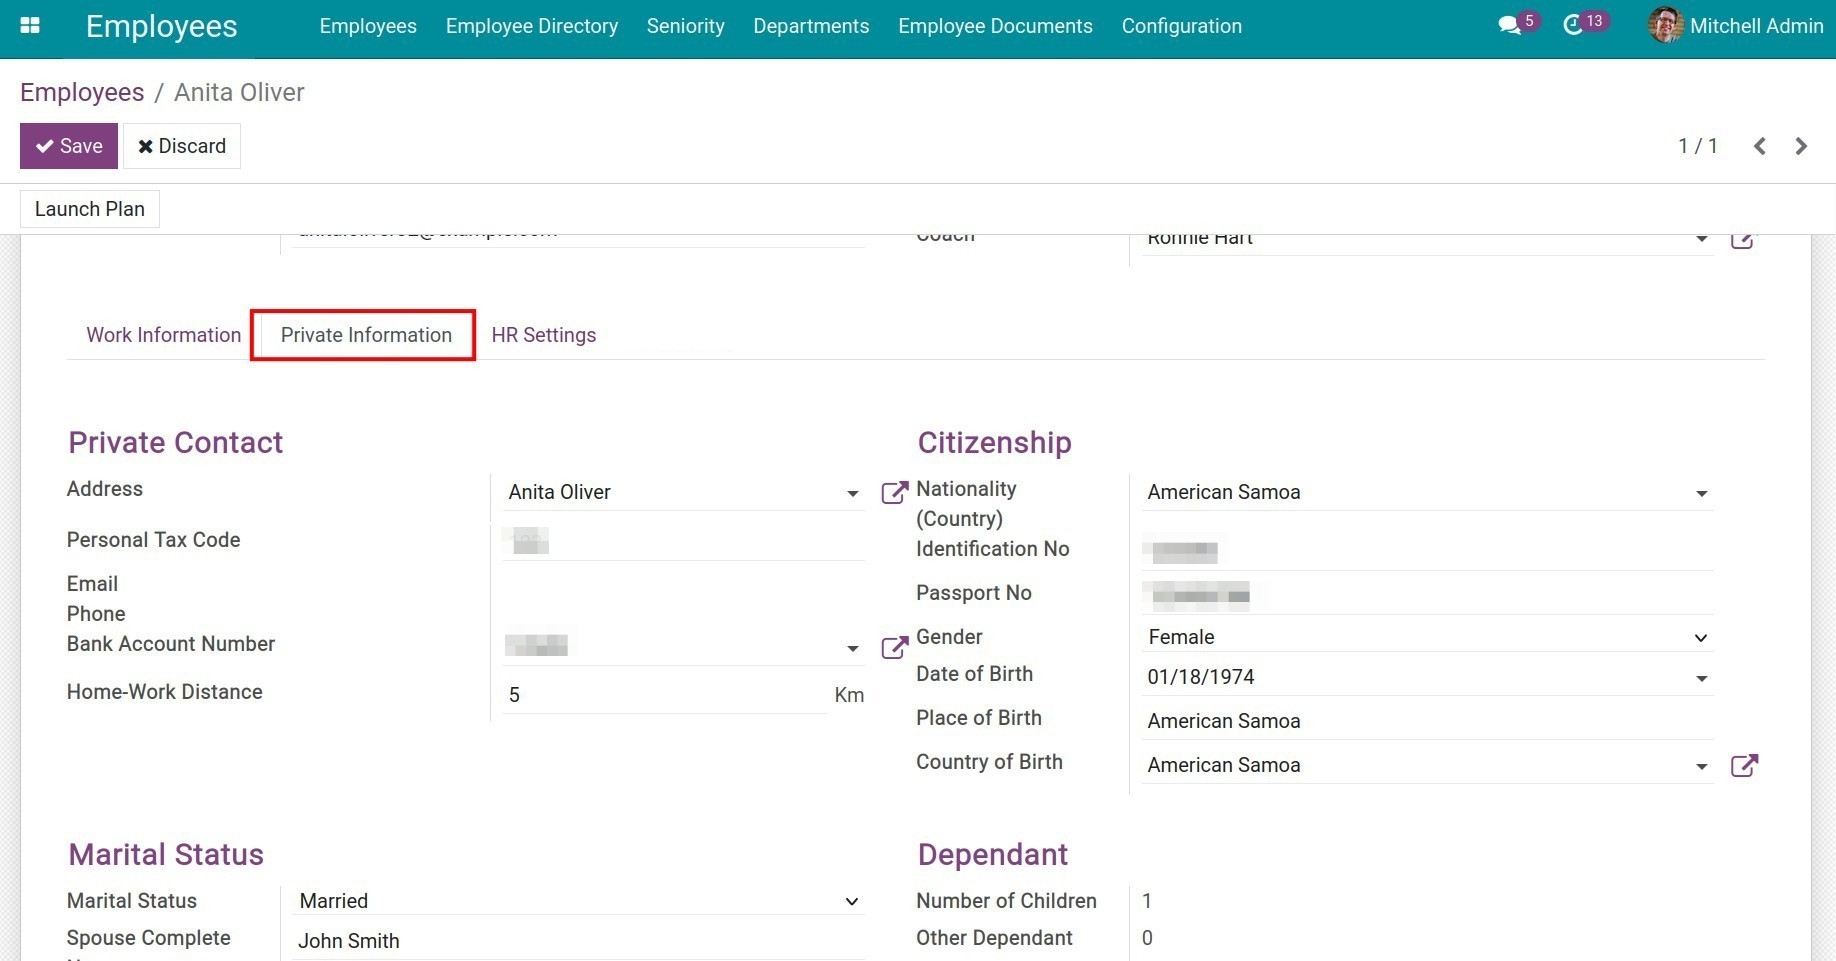
- Private Contact:
- Address: The contact that is linked to this employee. You can select an existing contact from the contact list of the Contact module or create a new one by typing the contact’s name and pressing Create and Edit.
- Personal Tax Code, Email, Phone, Bank Account Number: System will give you some suggestions from the above Address or you can add more if needed.
- Km Home-Work: This is the distance from the employee’s home to the work address by kilometers. The wage staff in charge can base on the distance to calculate the allowances on his/her payslip.
- Citizenship: Enter the Nationality, Identification and Passport No., Gender, Date of birth, etc of this employee.
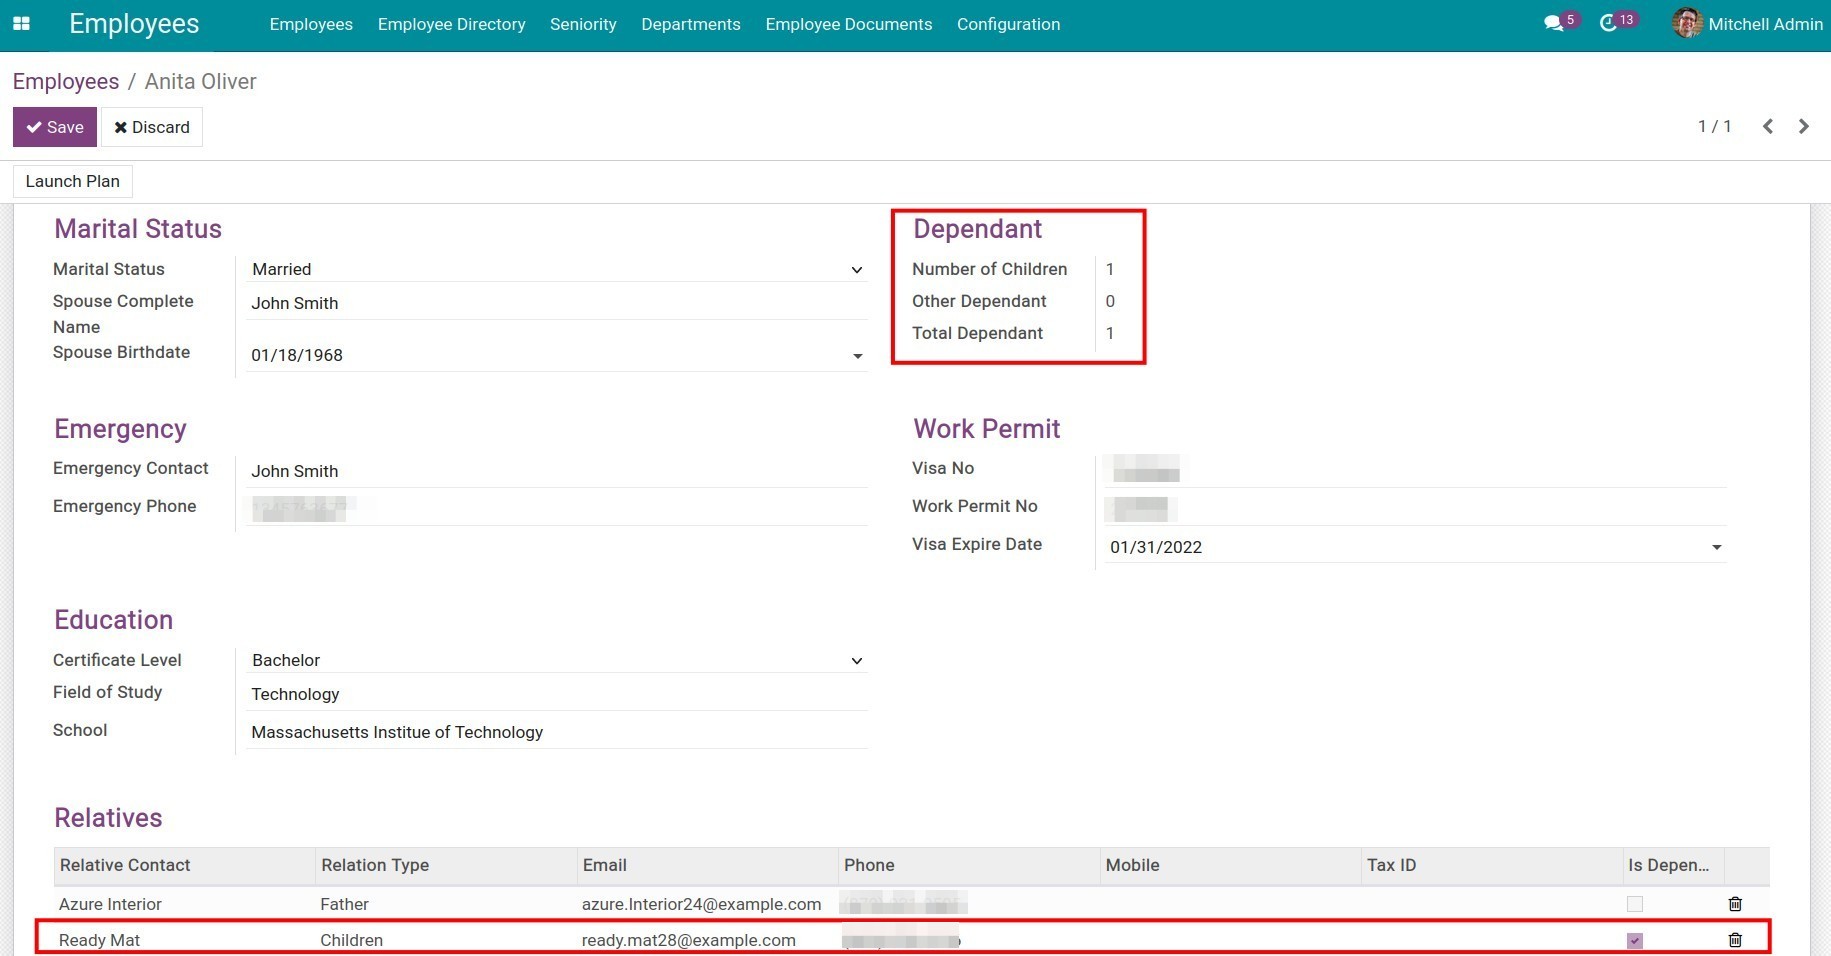
- Marital Status: Select one option of marital status. If you select Married, the information field of wife/husband will pop out.
- Dependant - Number of Children: Input the children number of this employee to use a baseline for the deduction on the payslip.
- Emergency: Enter a contact for urgent cases.
- Work Permit: Enter Visa No, Visa Permit No, Visa expiration date.
- Education: Enter Certificate Level, Field of Study, School.
- Relatives: Input data of the employee’s relatives.
Note
If the Payroll Module (to_hr_payroll) is installed, the Is Dependant field will be displayed on the relatives’ list. Check on this item, the system will auto calculate and record the information into the above Dependant.
HR Settings
The companies control all the related personnel information here, therefore, you have to fulfill the followings:
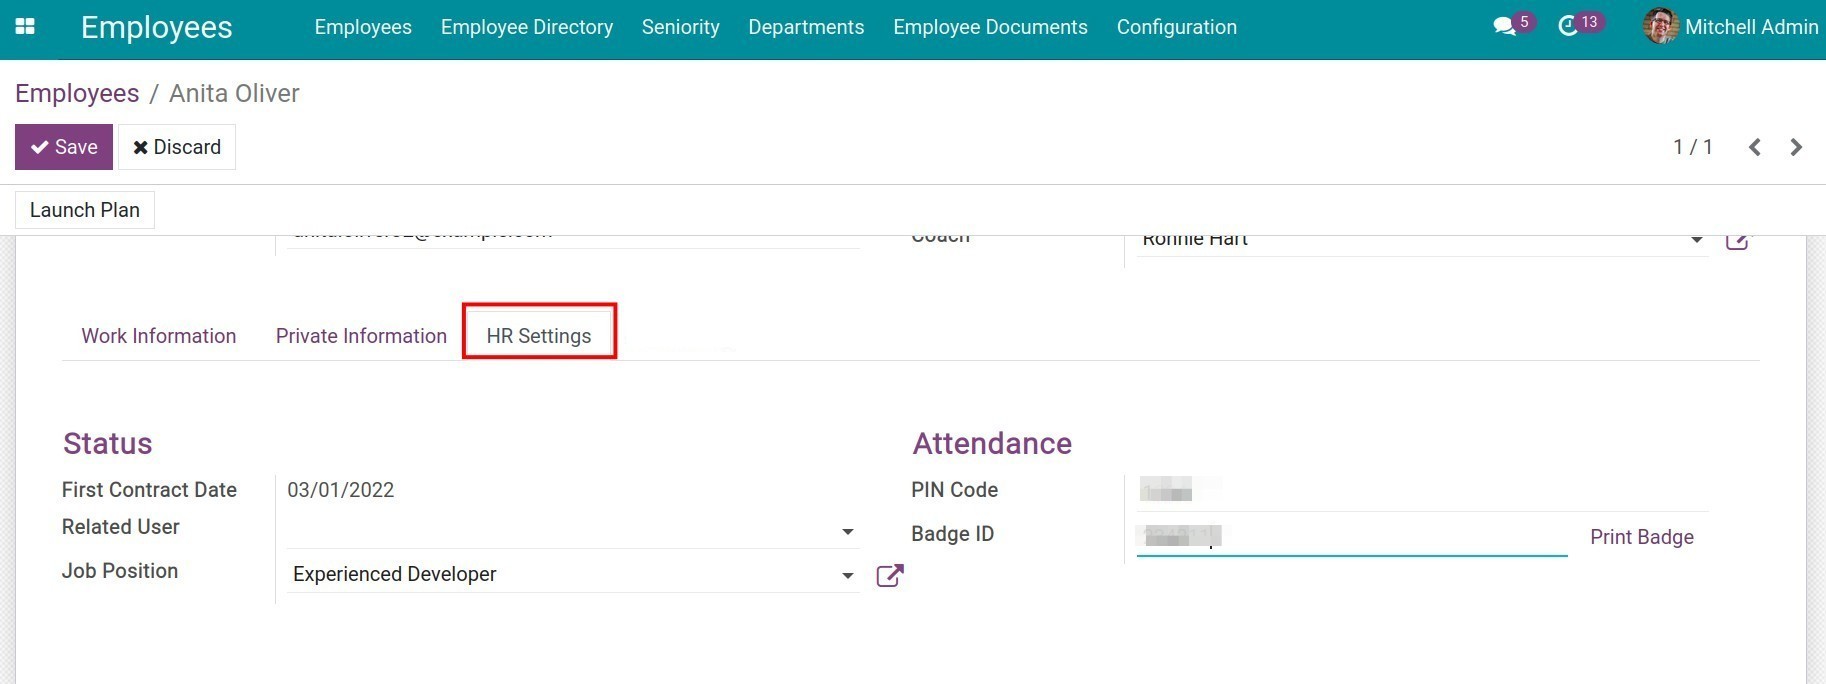
Related User: the linked user account of the employee that was configured on Settings App > Users.
See also
Job Position: System auto updates this field in accordance with the General Information.
Attendance:
- PIN Code: Enter a passcode that is used for the kiosk mode in Attendance Module.
- Badge ID: This is the identity code of the employee (the company internal code might be printed on the employee card).
Buttons on the employee view
Besides the above information, you can see the Launch Plan button and other statistical buttons on the Employees view.
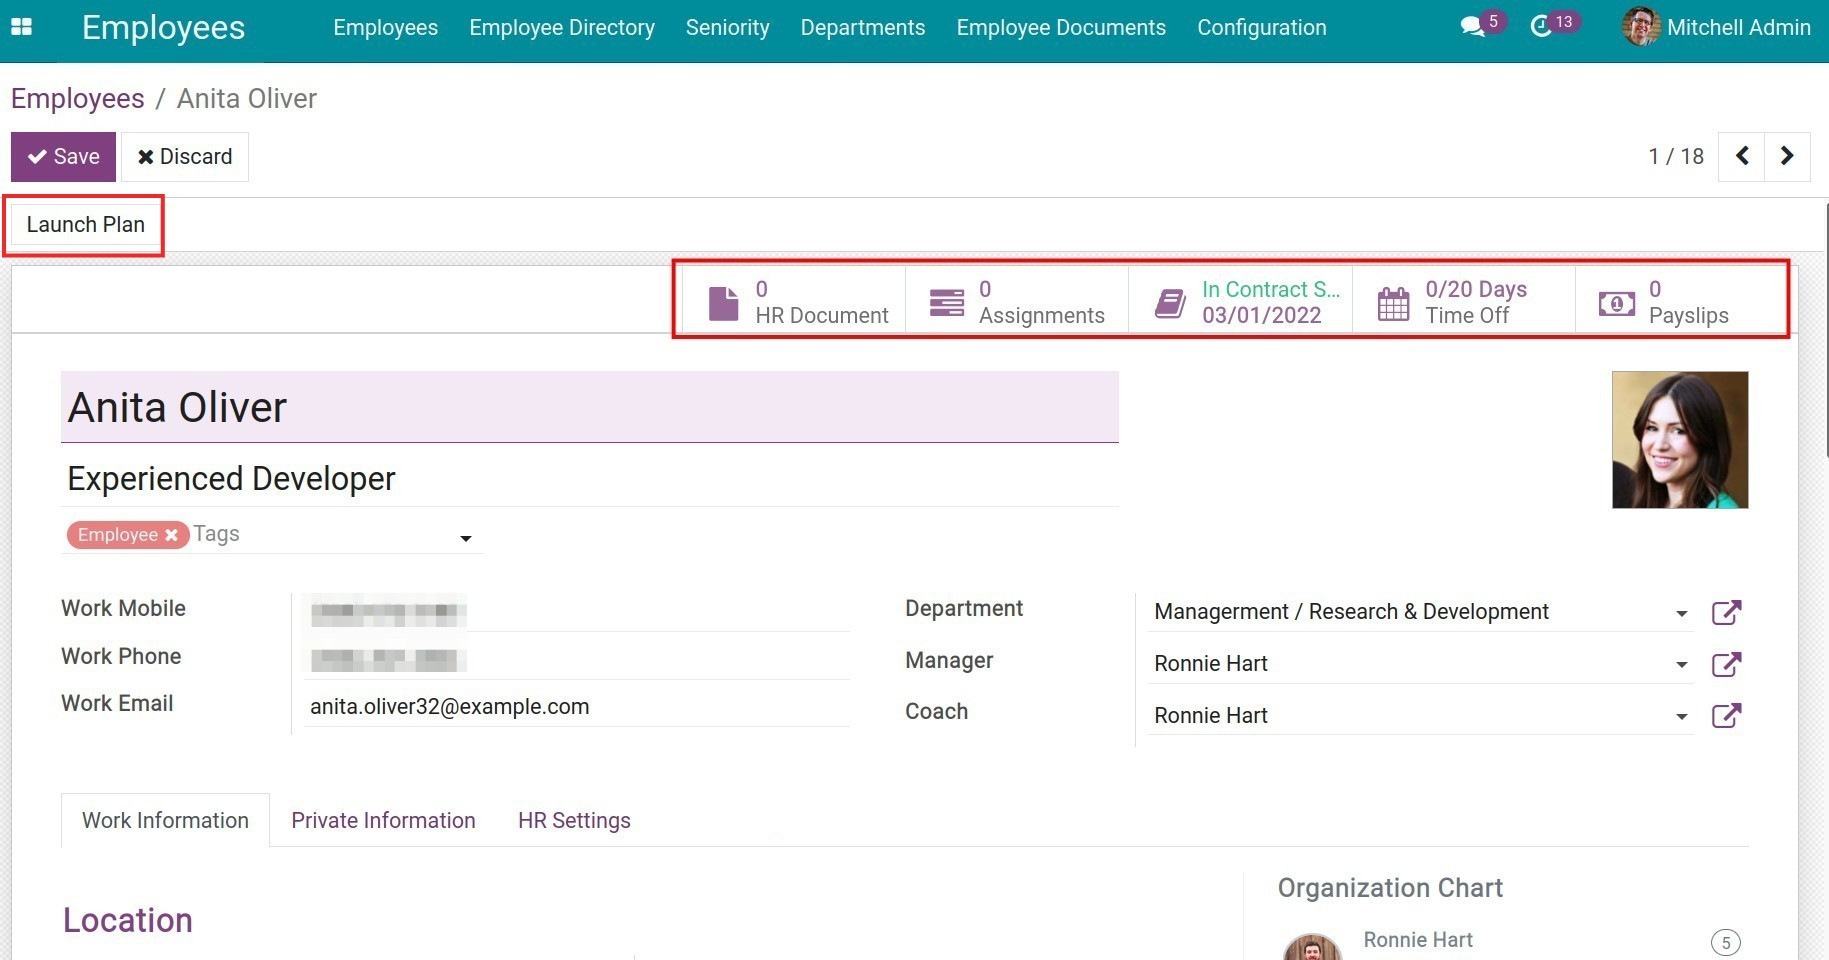
To schedule the actions needed for an employee, you need to click on Launch Plan.
See also
“Smart buttons” on the employee view including: Contracts, HR Documents, Payslips, etc. You can see the statistics of related documents when you click on each button.