Steps to export goods
To perform the export process, follow these steps:
Export Pricelist configuration
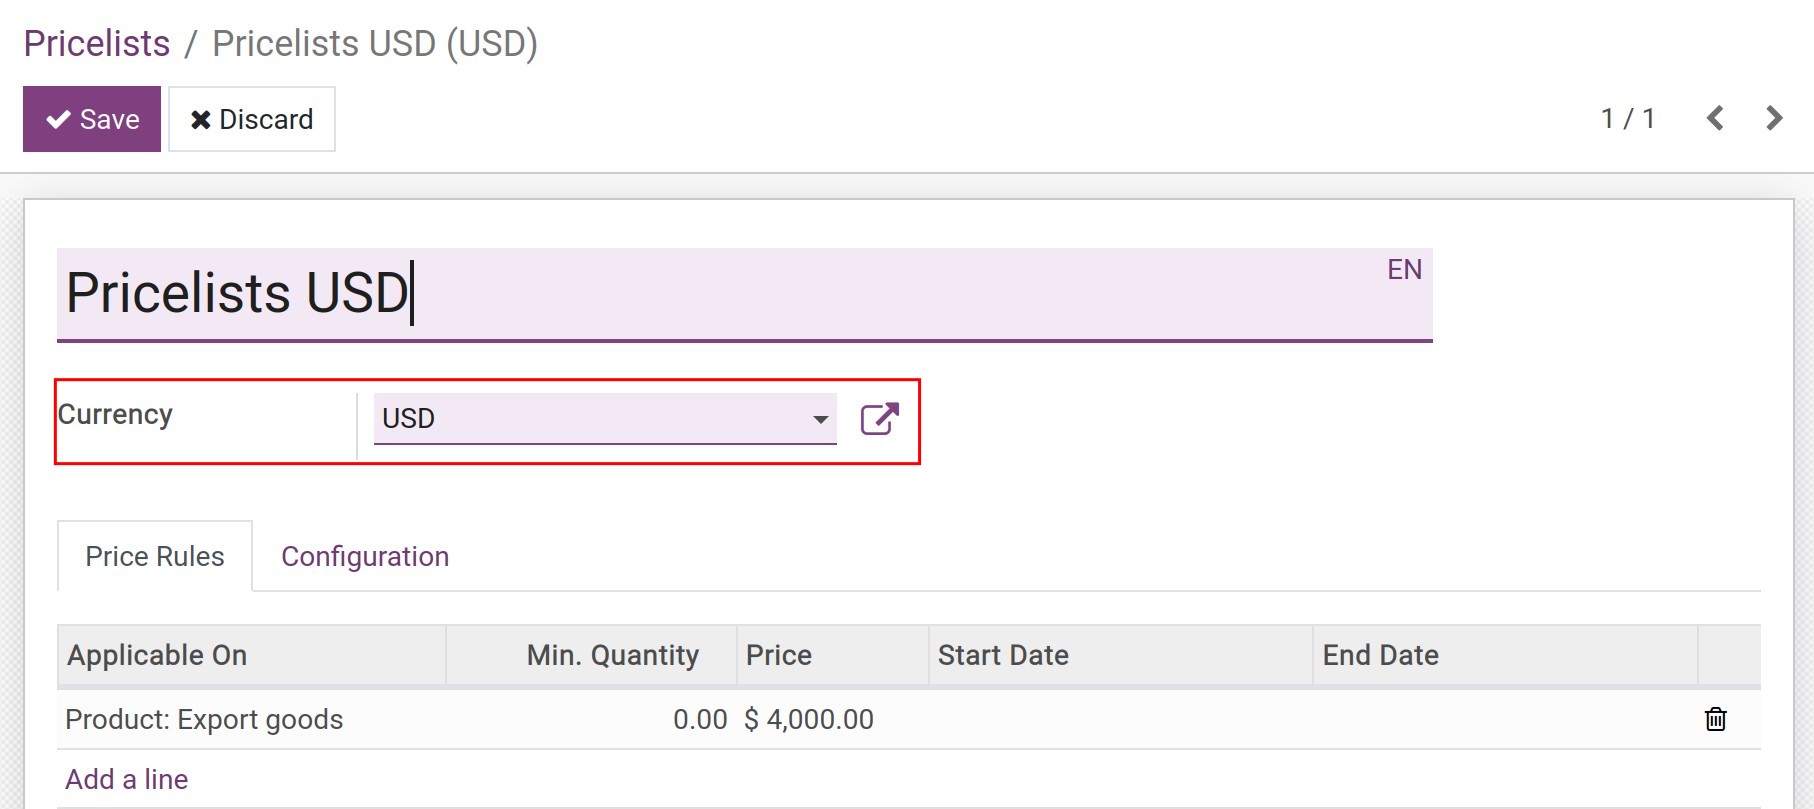
To set up a price list for exports, you need to first enable the Multi-currency function. Then you navigate to Sales ‣ Products ‣ Price List ‣ Create:

Then you do the same steps as creating a Sales pricelist but need to change the information in the currency field to the export currency:
Export Partner configuration
To create an export partner, you do the same as the steps to Create Contact, on the Buy & Sell tab you need to set the following information:
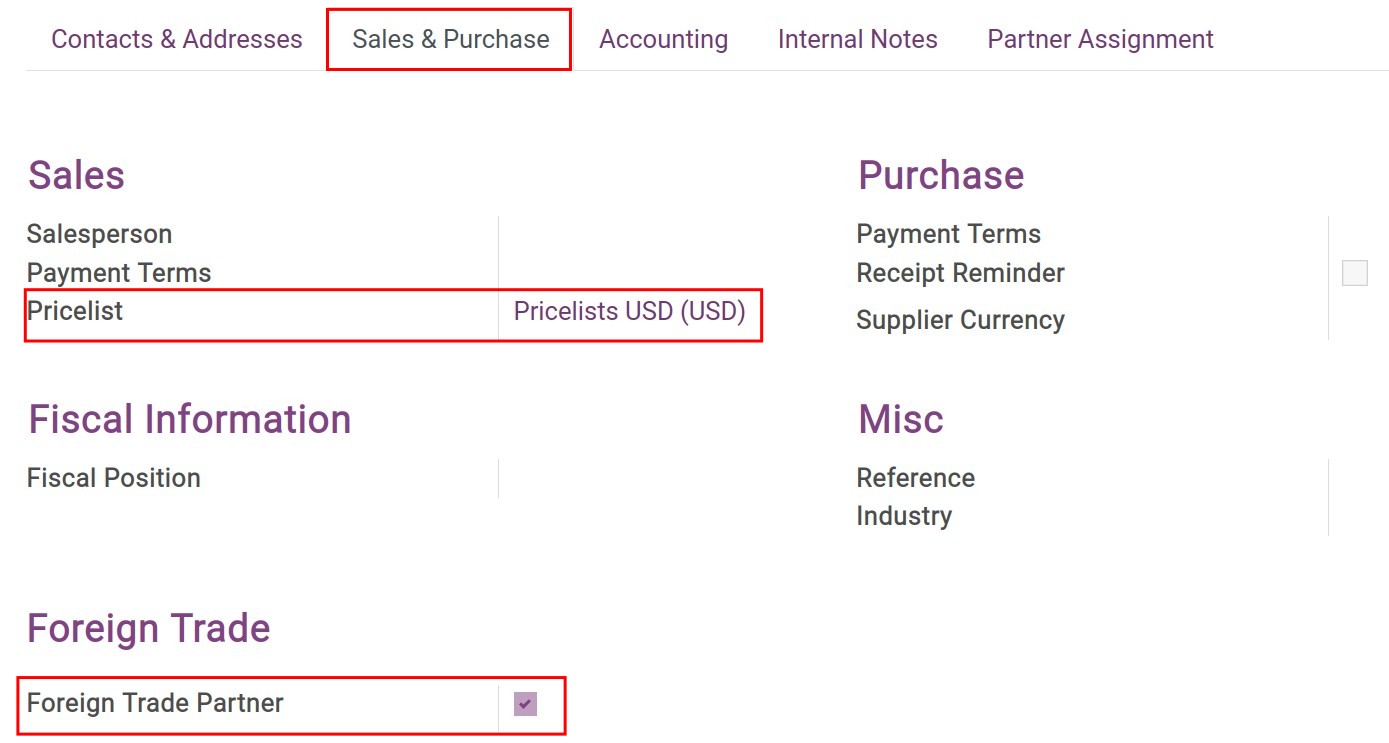
Enable Foreign Trade Partner. This feature will also be automatically enabled when the country on the partner profile is different from the country of the company.
Set the default price list for this export partner.
See also
Export tax configuration on Products
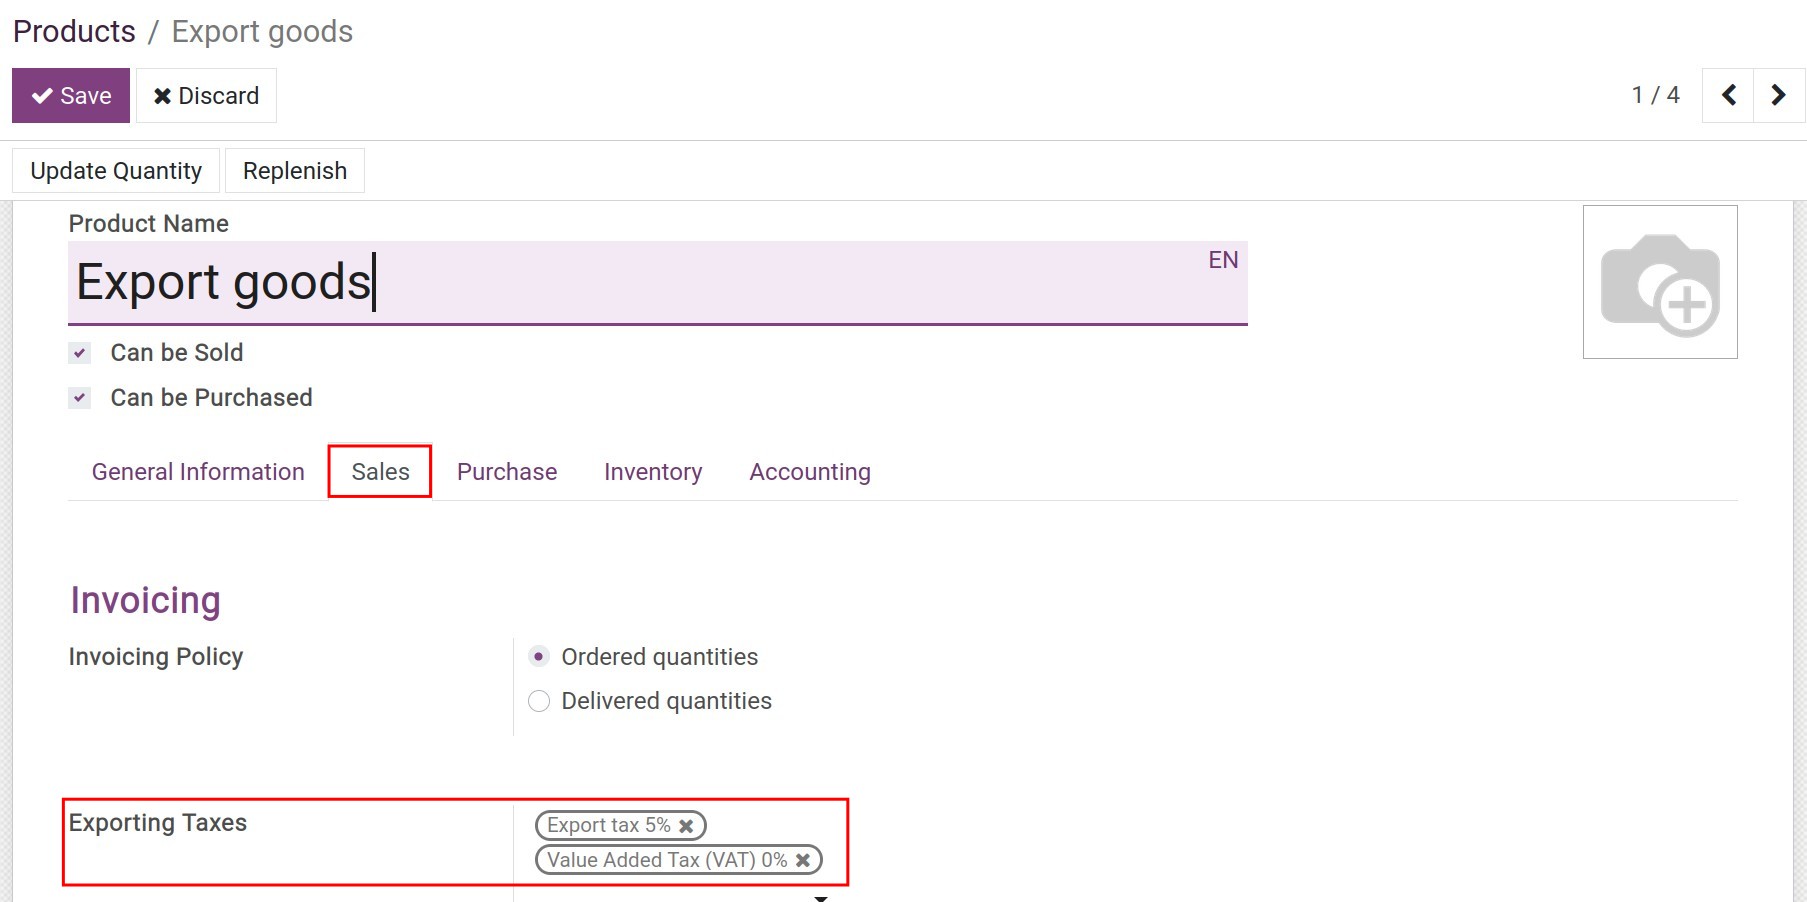
After creating new product, you move to the Sales tab to declare the default taxes on the customs declaration with this product export process:
Sales order for export
The operation is similar to creating a Sales order, but you need to note some of the following fields:
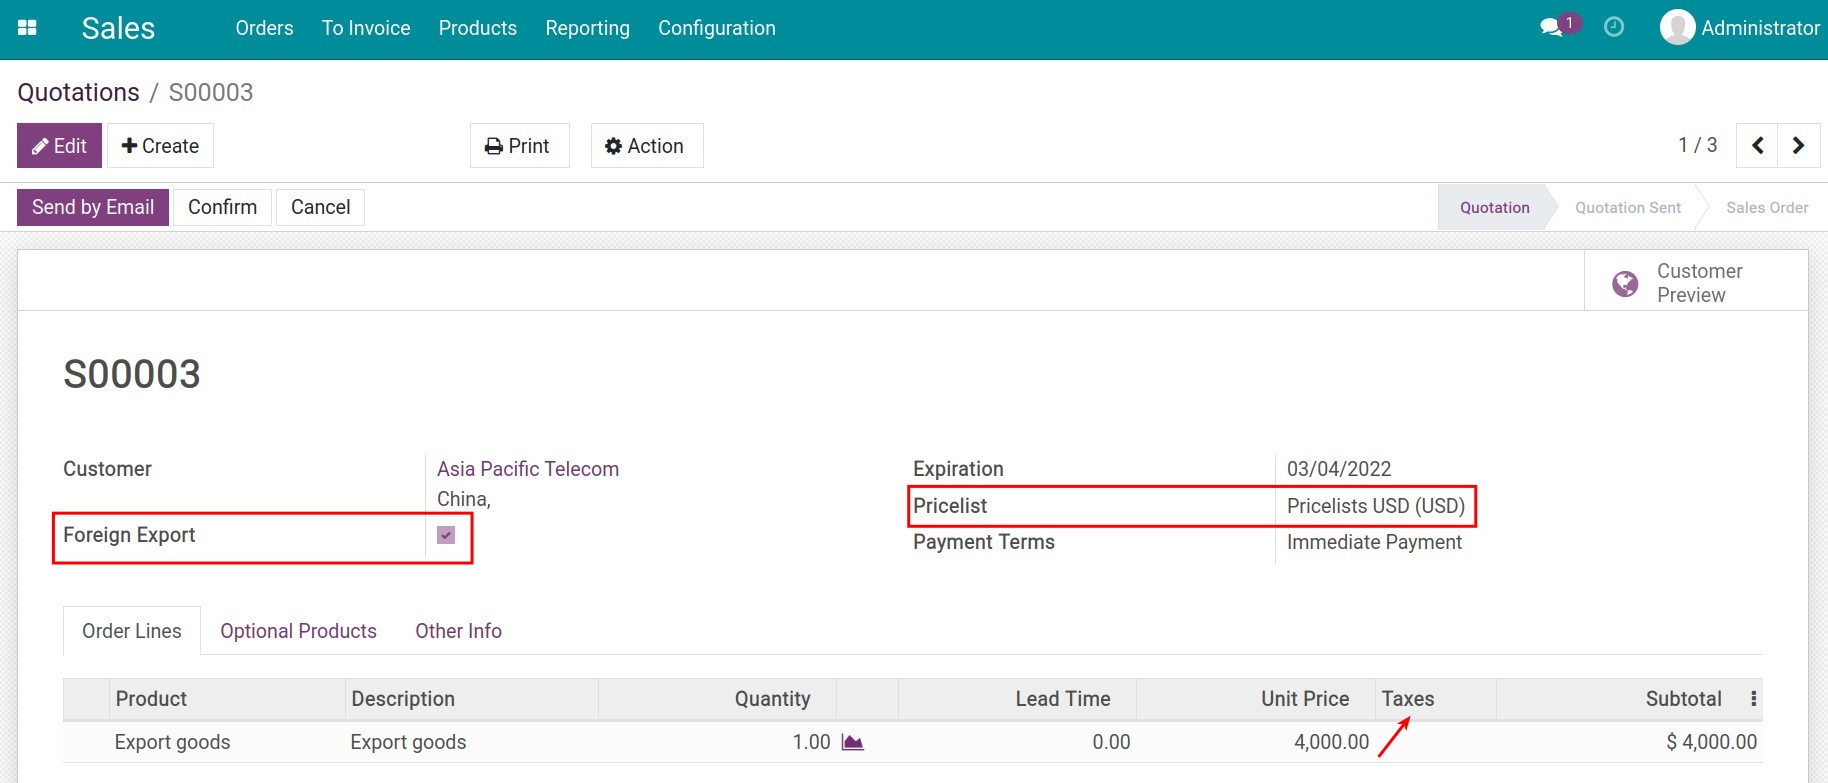
Foreign Export: Automatically checked if the customer is a Foreign Trade Partner.
Pricelist: Is automatically set corresponding to the price list configuration for the Export Partner. You can choose again in the list of the company’s price list.
Taxes: Do not apply taxes to the sales order.
Invoice and Delivery
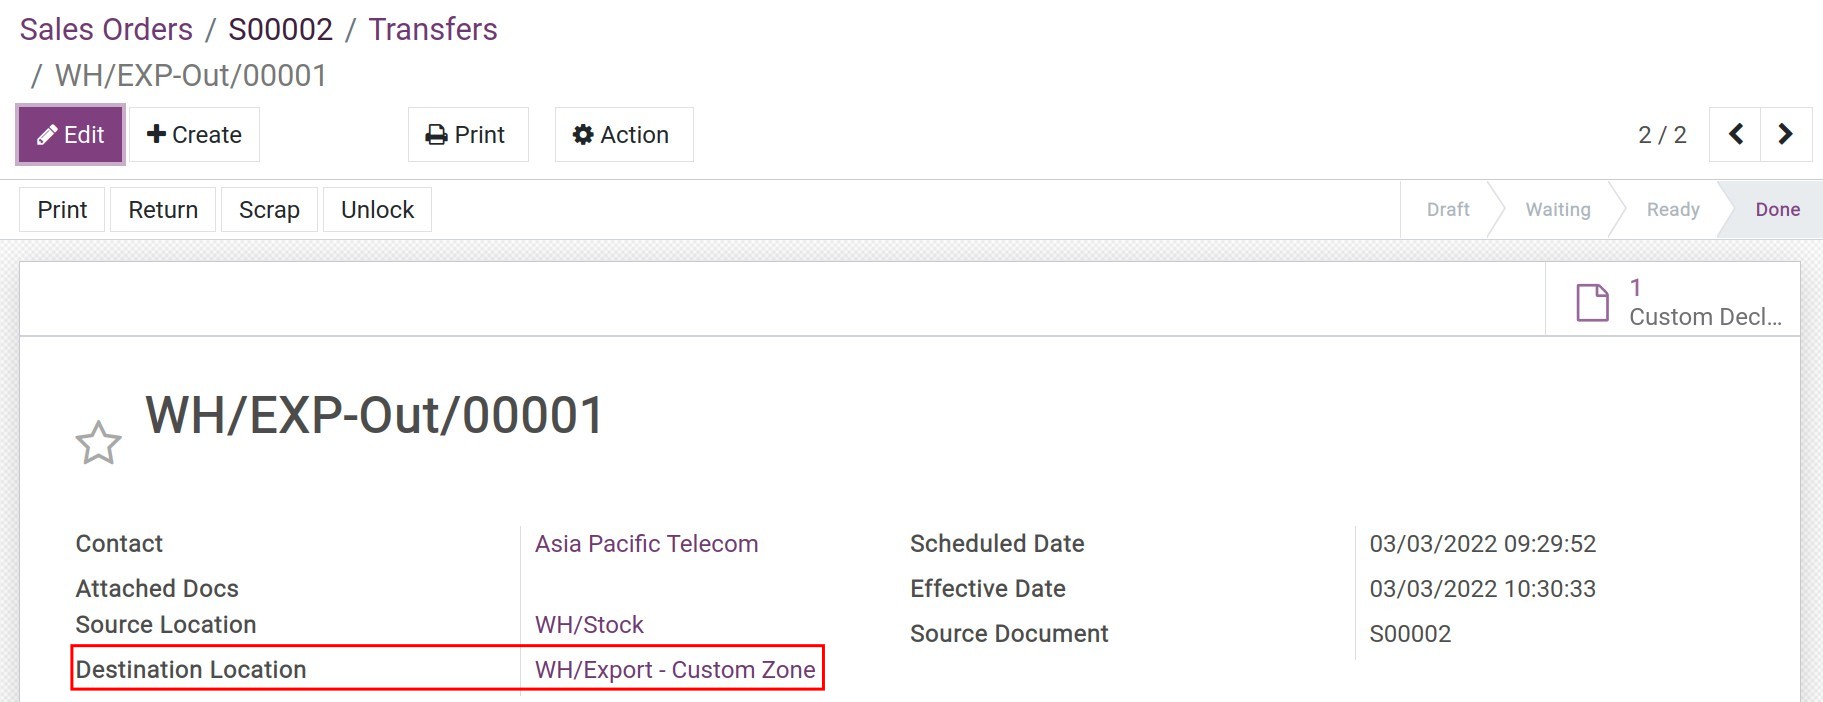
After confirming the Sales Order, you need to Invoice and Deliver the goods for this export transaction. In the delivery slip, you will see, the destination location is automatically set to the customs clearance:
Export Customs Clearance Request
Go to Foreign Trade ‣ Customs Clearance Document ‣ Export Clearance Request:

Press Create to open the request interface, fill the data as following:
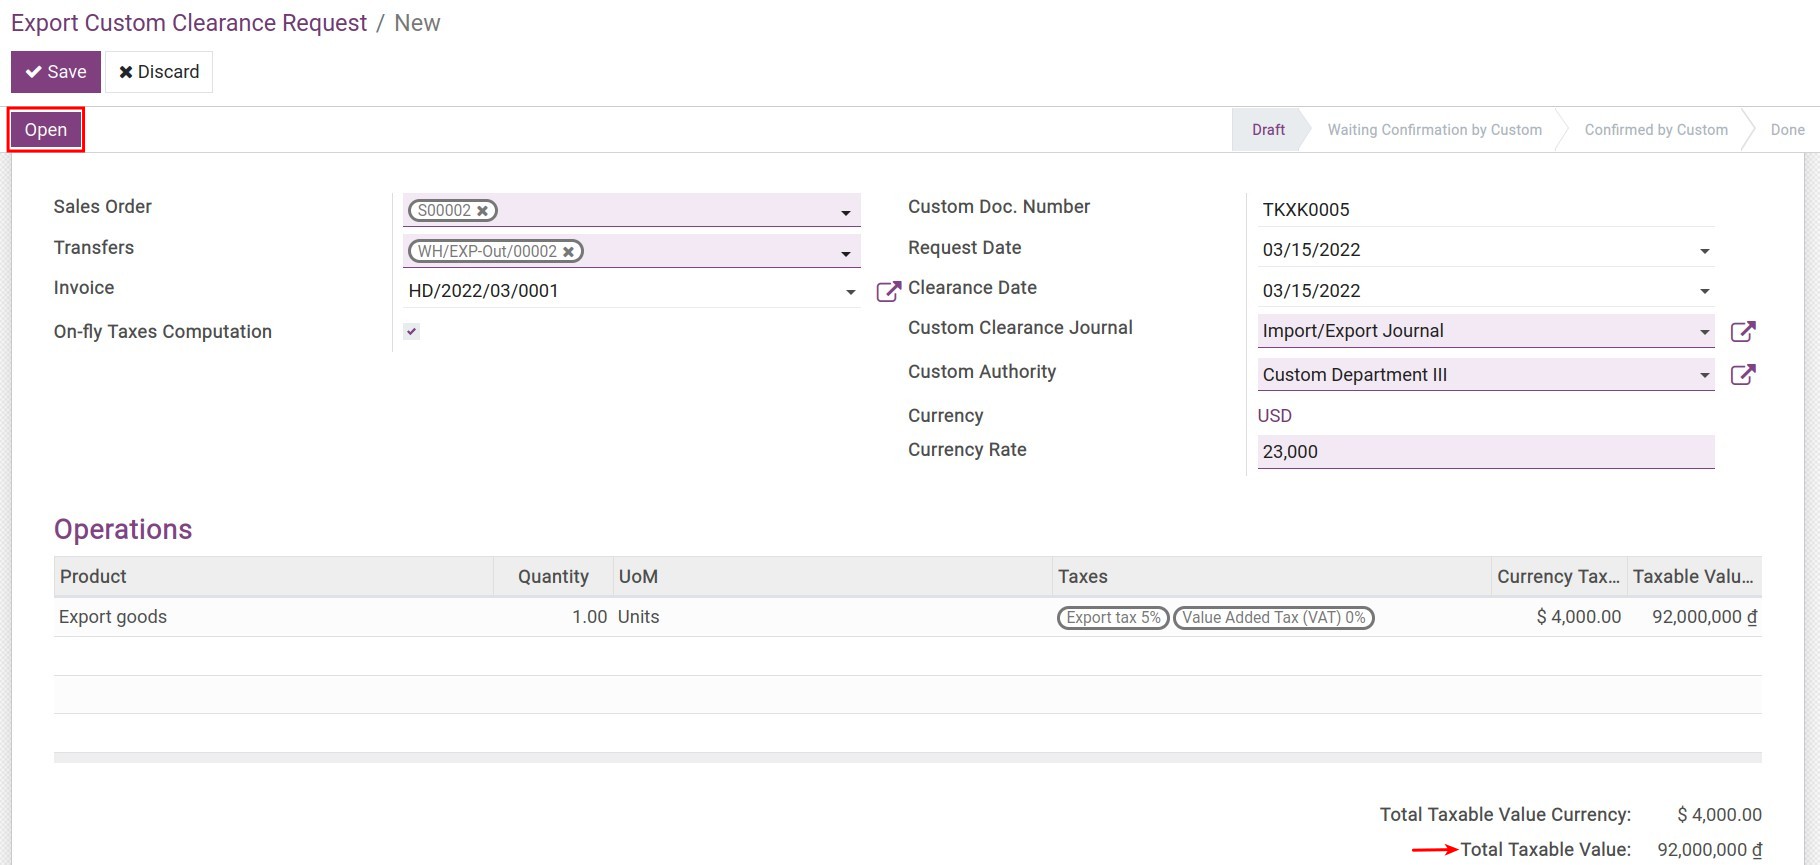
Request information:
Sales Order: Select the export sales order that needs to be cleared for customs clearance.
Transfers: The system automatically recognizes the delivery slip corresponding to the sales order selected above.
Invoice: Select the respective invoice of the sale orders.
On-fly Taxes Computation: If this feature is enabled, the system will automatically recalculate the tax as soon as there is a change in taxable value or tax rate.
Custom Doc. Number: Record the file number on the request to the Customs Authority.
Request Date: Date of creation of request.
Clearance Date: Record the date of opening the request.
Custom Clearance Journal: Select a diary to record all the expenses arising in relation to import and export transactions.
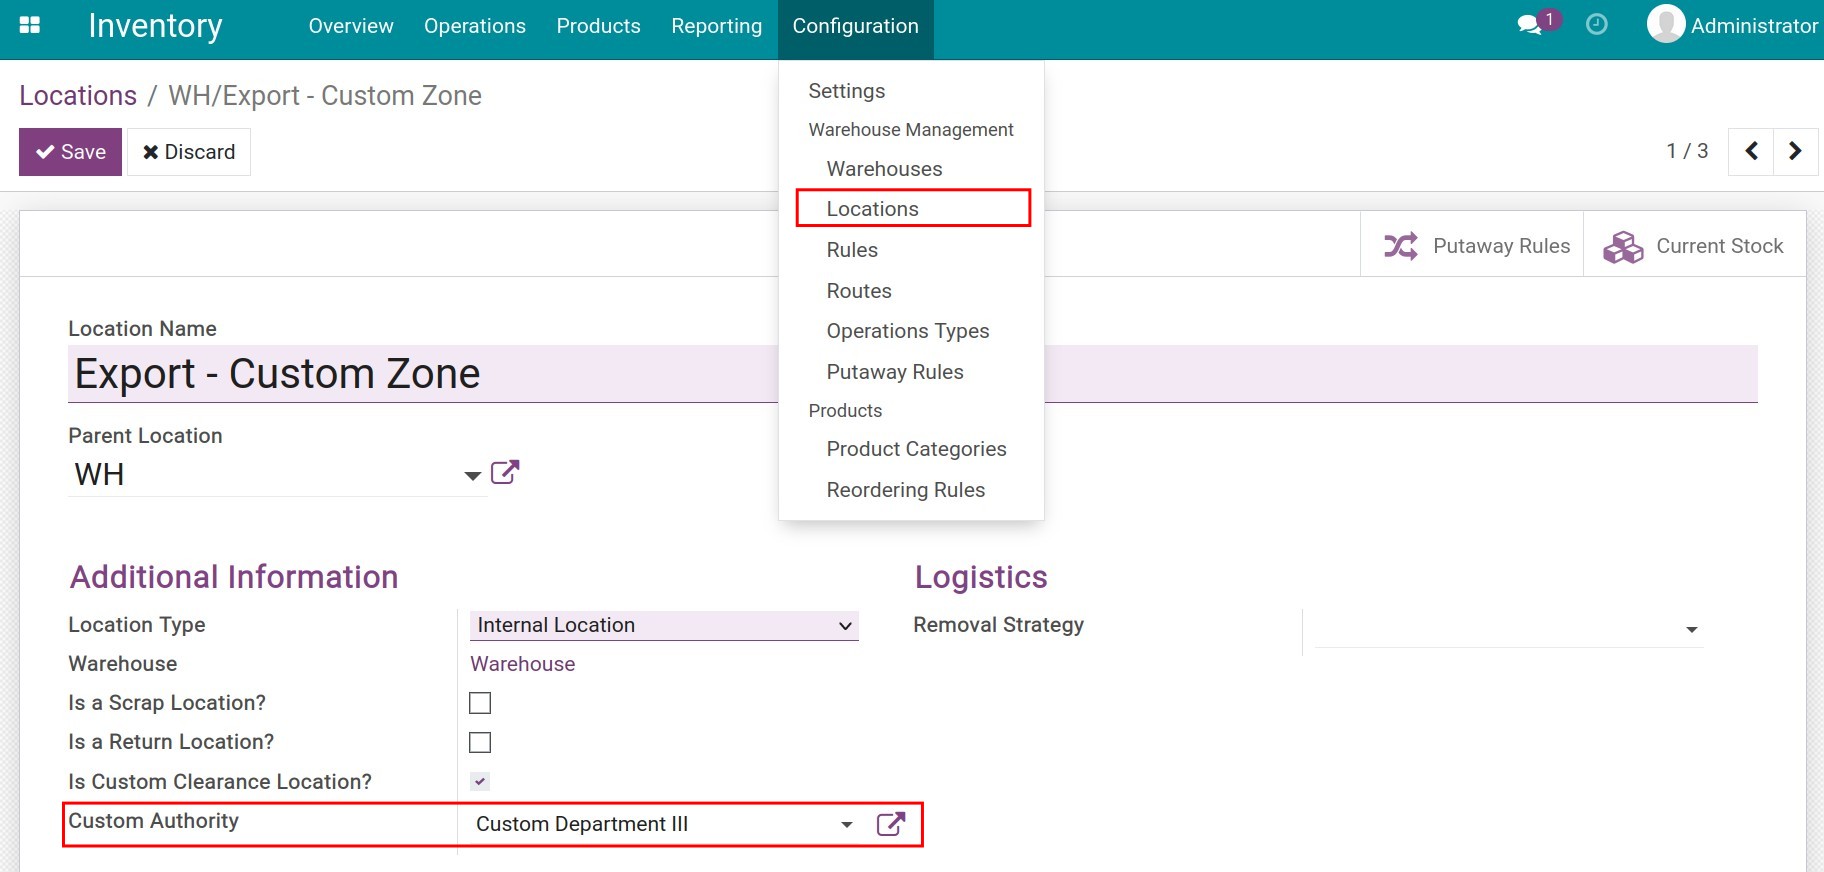
Custom Authority: Select the responsible Customs Authority. You can also configure the default for the Customs Authority on the location of clearance:
![Customs Authority Default Configuration Viindoo]()
Currency: The currency applied in the selected sales order.
Currency rate: Declare the exchange rate on the request.
Operations: Here, the product information and tax rates are inherited from the sales order. You can see the taxable value in the original currency and the taxable value in the company currency.
Taxes Computation:
On the view of the customs request, you will see the details of the tax values applied to this export transaction:
![Taxes computation Export Foreign Trade Viindoo]()
Total Taxes: The total payable tax for export goods is calculated on the declaration.
In case the On-fly Taxes Computation feature is not enabled, you will need to click the Compute Tax Lines button when you want to update the tax value.
After completing the request, click the Open button to open the request. And when you have been approved by Customs for clearance, click the Confirmed Customs button to complete the request opening process.
Tax payment
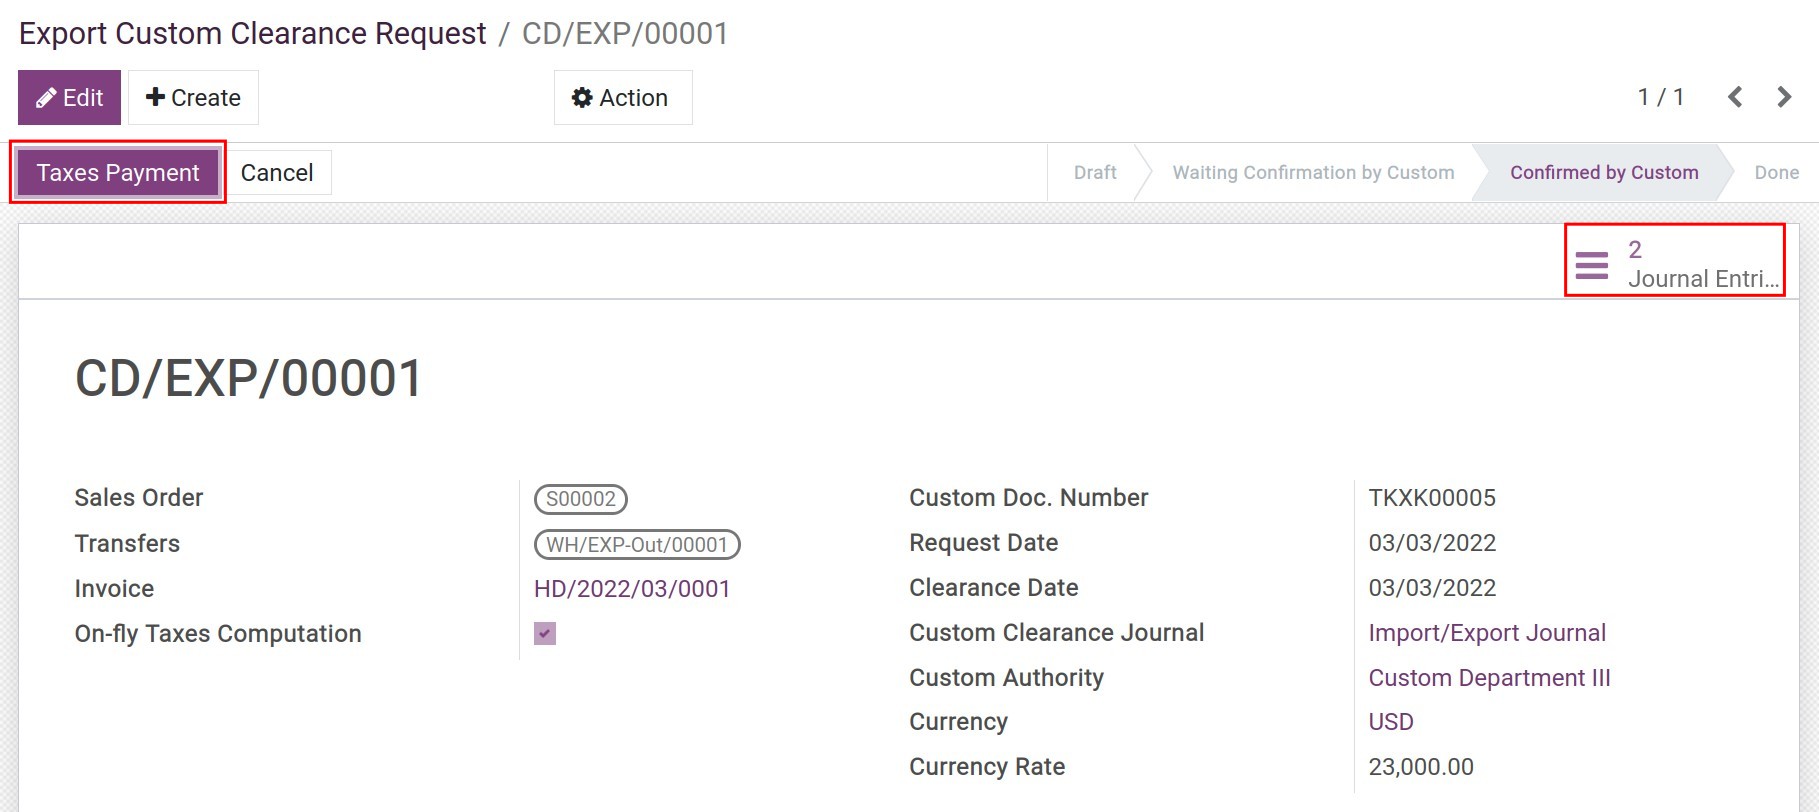
You can pay taxes to the Tax Authority by clicking the Taxes Payment button or review the related entries by clicking on Journal entries:”
See also
