Application goes through recruitment stages
Before becoming an employee of the company, an applicant will have to go through some recruitment rounds: review application, interview, professional exam, etc. Viindoo system provides the feature of recording and managing the recruitment stages corresponding to each round. This feature helps the company and HR department to closely follow each applicant, have an overview of the whole recruitment process and get information on what to do next with the applicant.
Set up stages in the Recruitment module
To set up recruitment stages, you need Activating Developer Mode and have Administrator rights access of the Recruitment module.
Navigate to Recruitment > Configuration > Stages > Create.

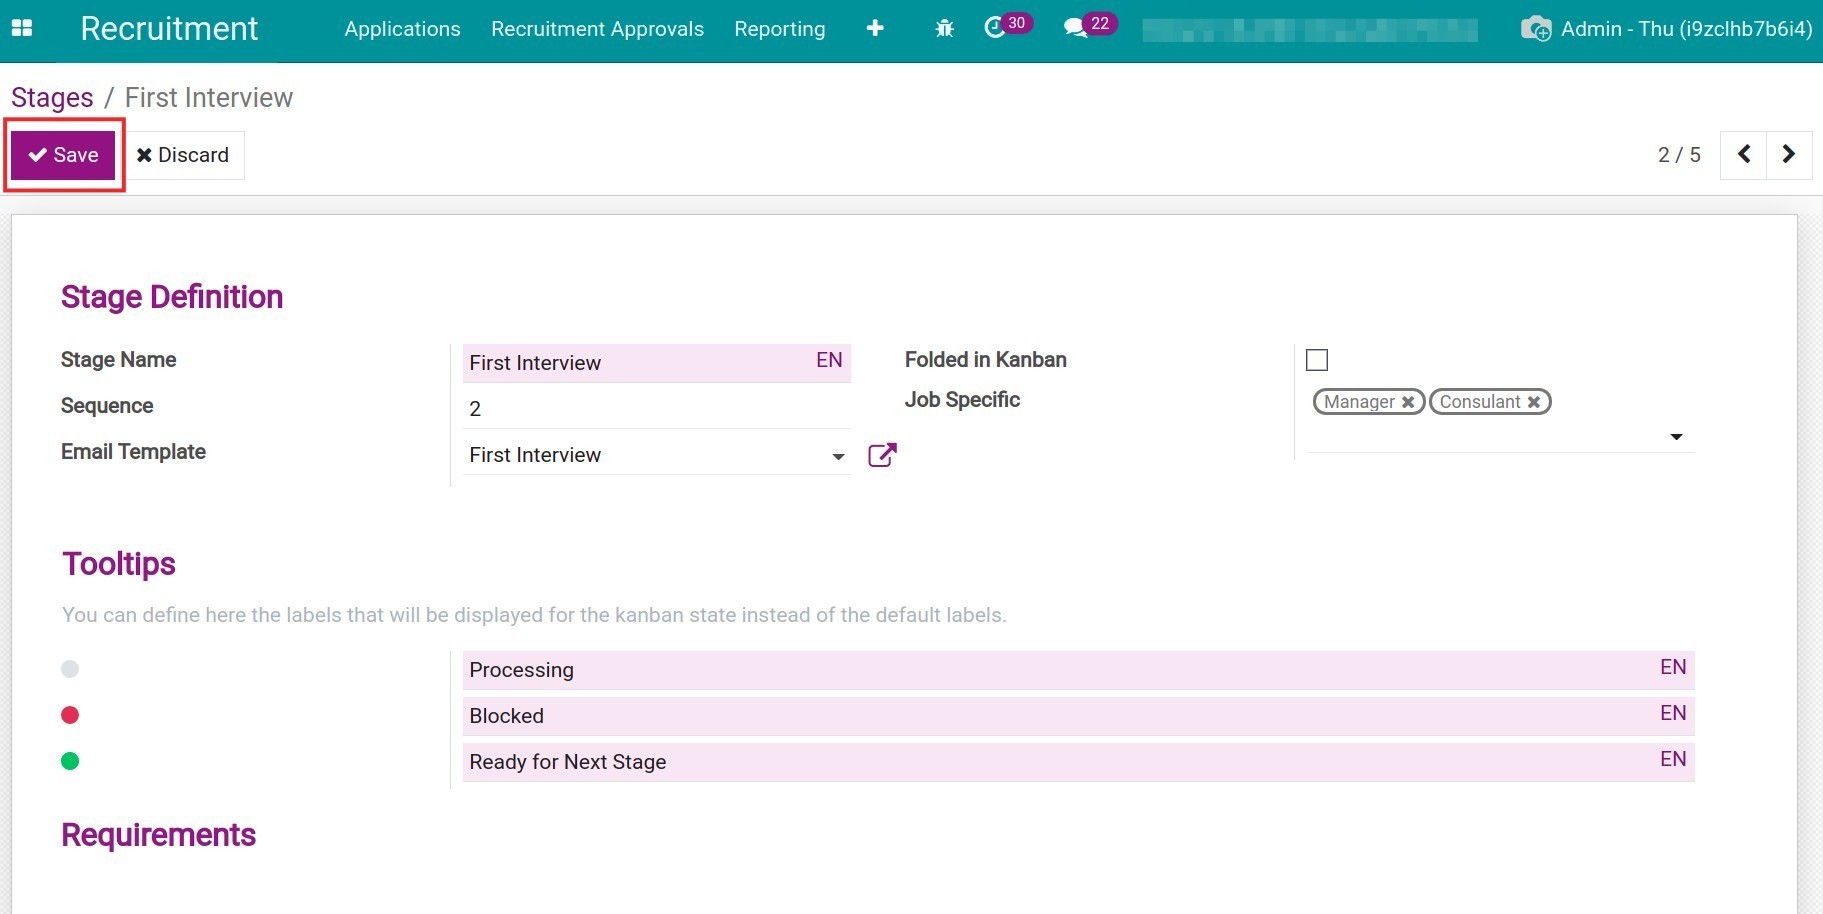
The stages creation will be displayed as the below photo:
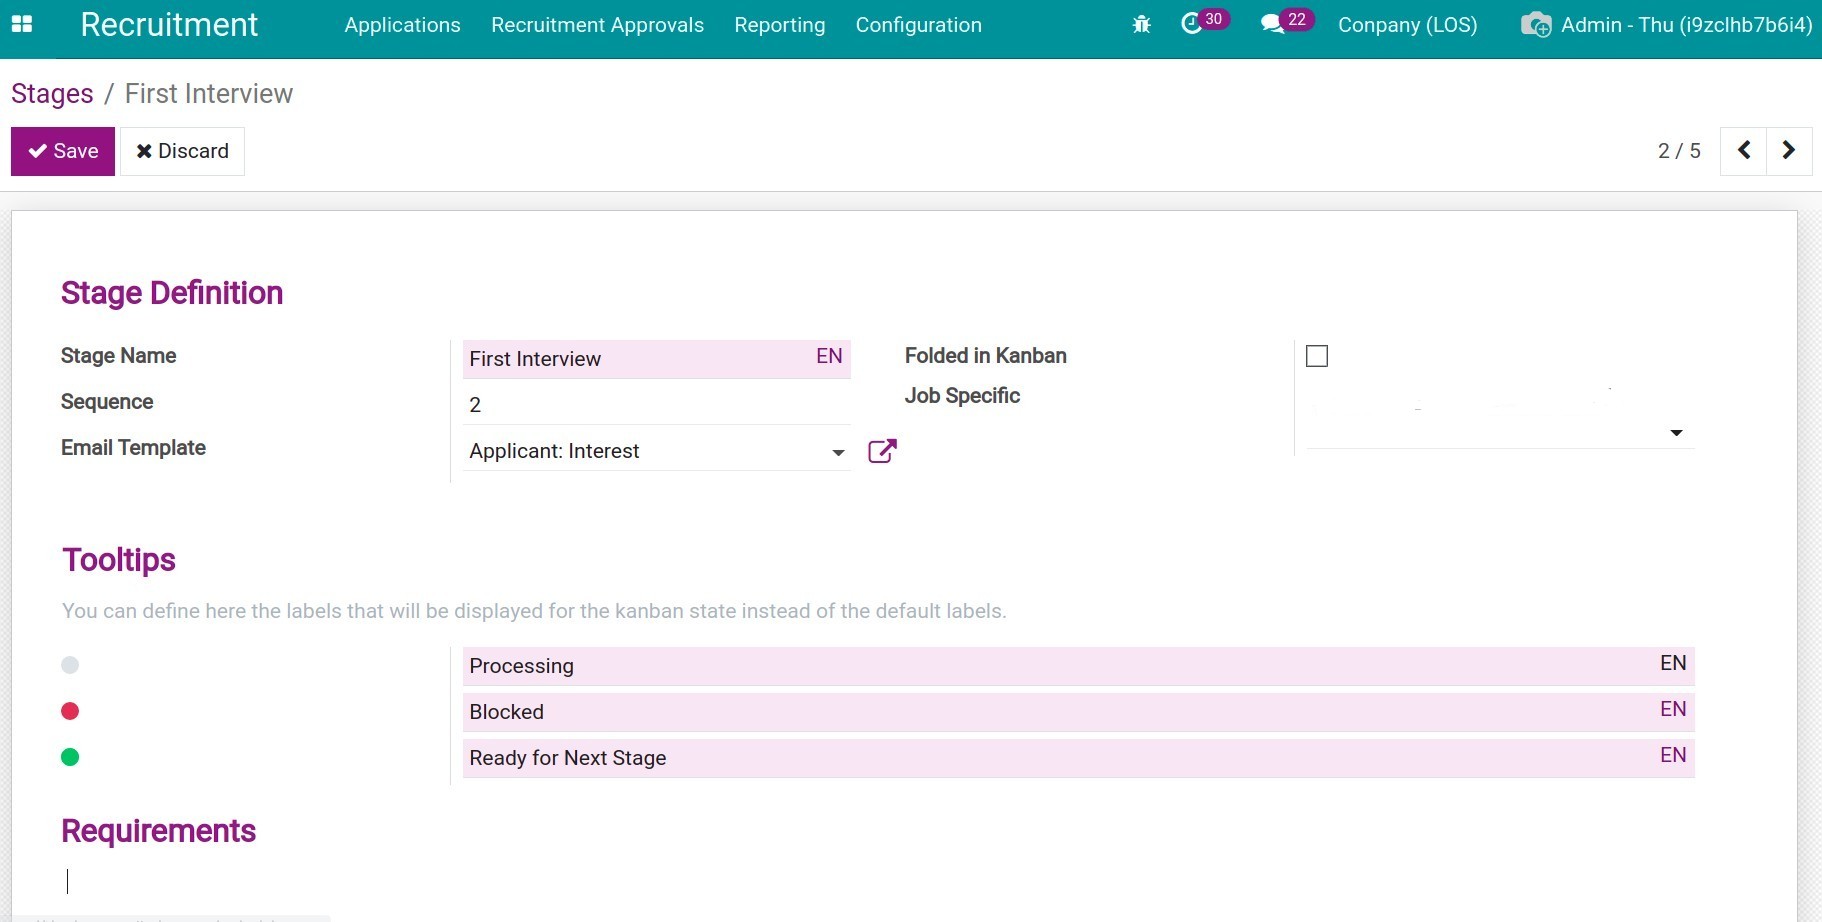
Stage Name: the name of each recruitment stage according to the company’s recruitment process in reality. Keep the stage name relatively short. E.g. Initial assessment, First interview, Professional test.
Sequence: the sequence of the stage. The stage with the lower sequence number will precede the stages with the higher sequence number in the recruitment process. The stages with lower numbers will precede the stages with higher numbers in the hiring process.
Email Template: the email template will be auto-send to the applicants when they come to this stage. Click on Create and Edit to create a new template or click on the purple arrow icon next to the email template to edit. Follow these instructions if you want to create an email template:
In the Email Template section, click on Create and Edit.
![Create email templates]()
You need to enter the following information when an email template creation window pop out:
Name: name of the email template displayed on the system. You need to choose a name that is easy to understand and suitable for email content for each stage, so that colleagues looking at the name can understand the content inside.
Applies to: the model to which this Email Template is applied, in the case of creating an Email Template that applies to the Recruitment model, you select the Recruitment Stages.
In the Content tab: enter the subject, use the word editor tool, click on Attachments button to upload to attach the files. All the information configured here is the email content sent to applicants. You also click on Preview to preview the content before it is sent.
![Create email templates - Content tab]()
![Tạo mẫu email tab nội dung, đính kèm]()
After fulfil the above information, click on Save.
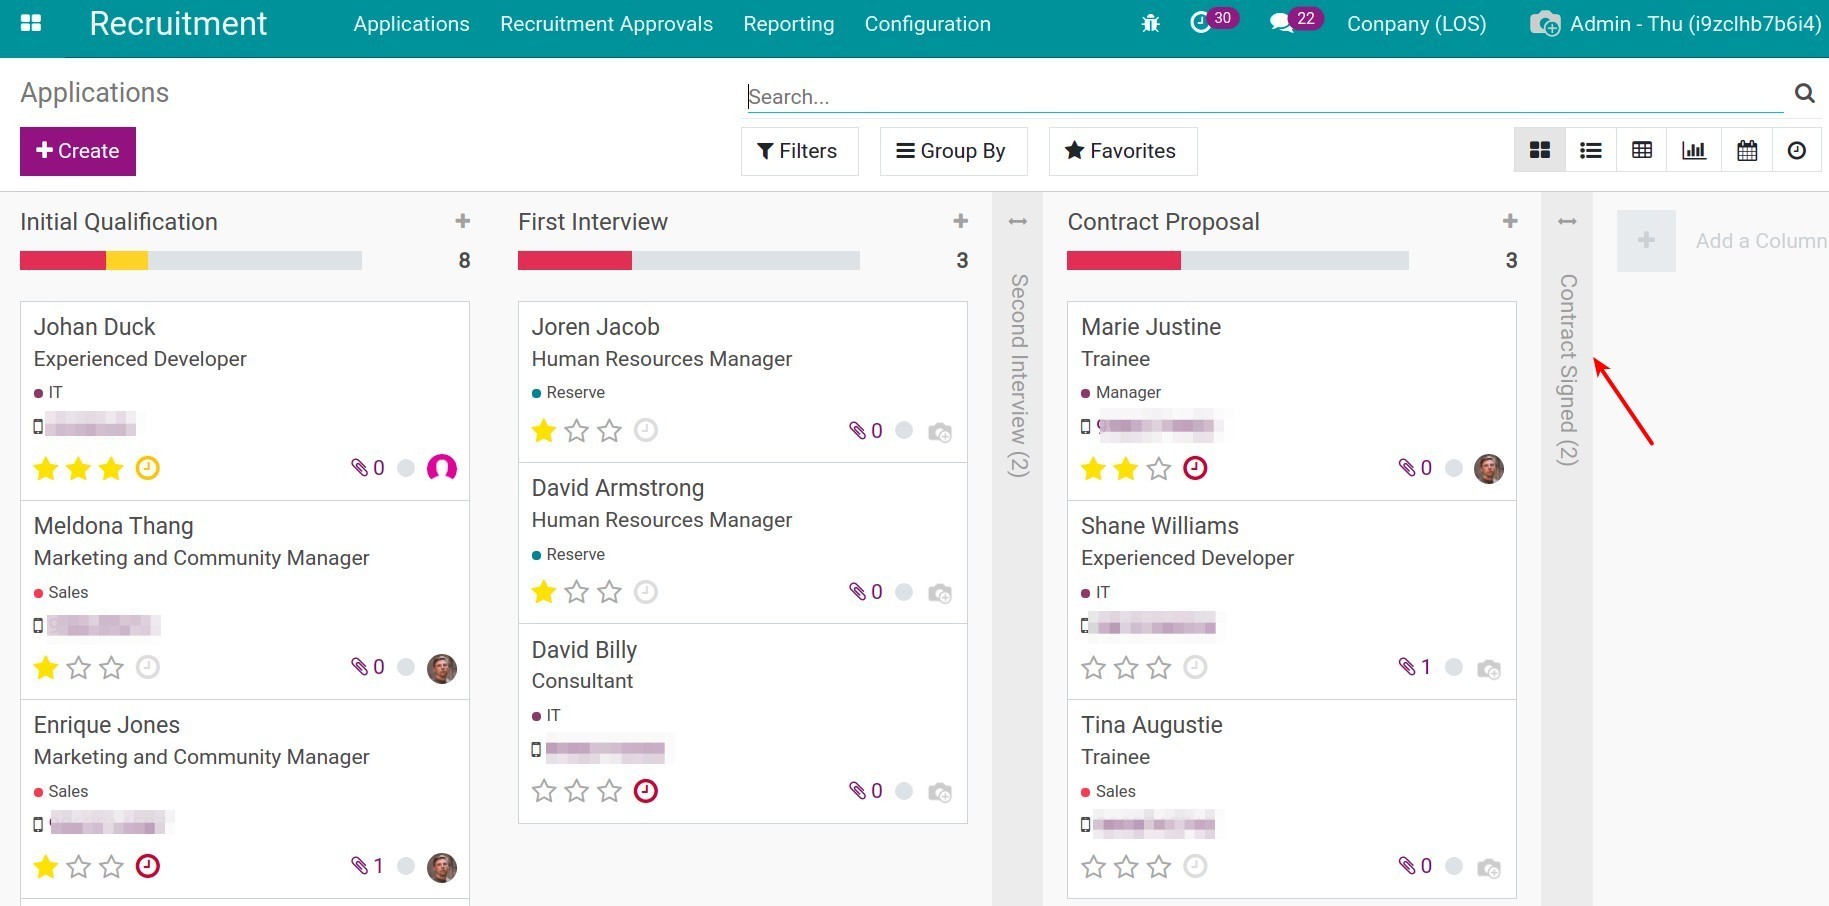
Folded in Kanban: check on this item if you want to fold this stage in the form of Kanban when viewing All Applications. This option is often used for the stages where you rarely review the applications. Examples: Contract Signed Stage, Cancel Stage.
![Folded in Kanban]()
Job Specific: job positions are applied in this stage. You could select multiple job positions applied in this stage, or leave this field information blank if it is applied to all job positions.
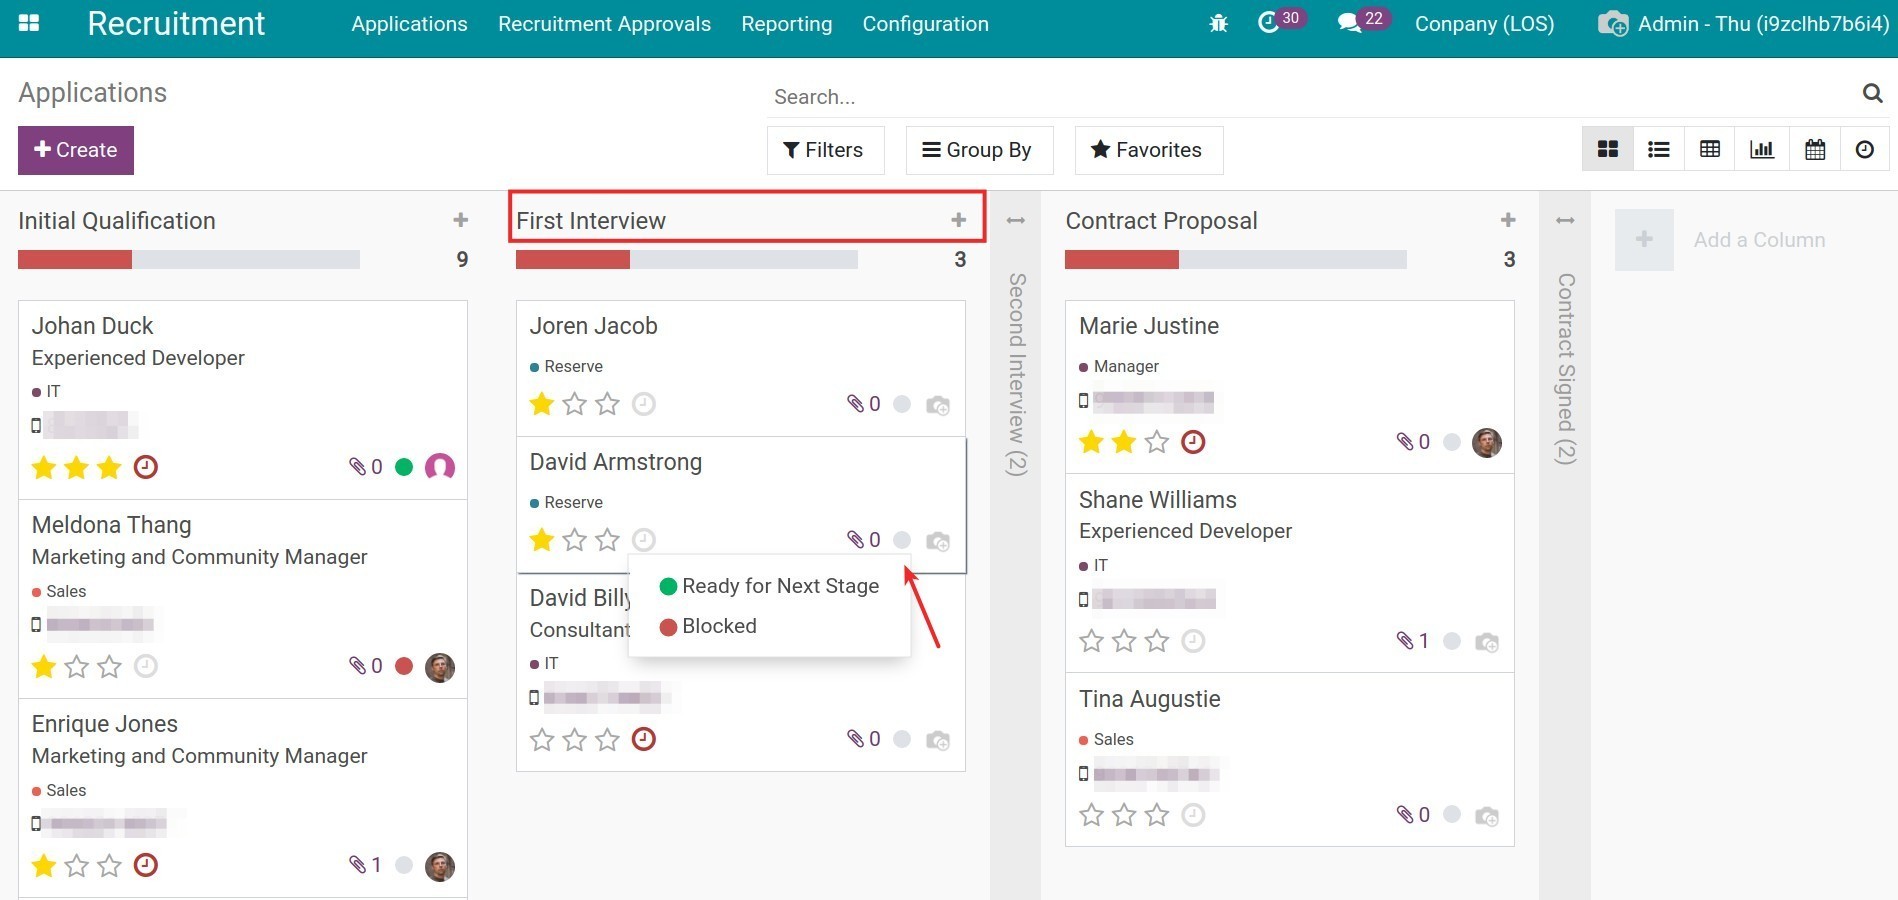
Tooltips: includes annotation and convention on tag colours of this stage in the Kanban view. E.g. The grey tag is in processing, the red tag is blocked and the green tag is already for the next stage. In the Kanban view, you could use these tag colours to mark each applicant and grasp the realities of the recruitment situation right in the view of the applicants list.
![Kanban tags]()
Requirements: enter the requirements for an application to reach this stage. Example requirements of the First Interview stage is the application has passed two approvals.
After fulfil information, click on Save.
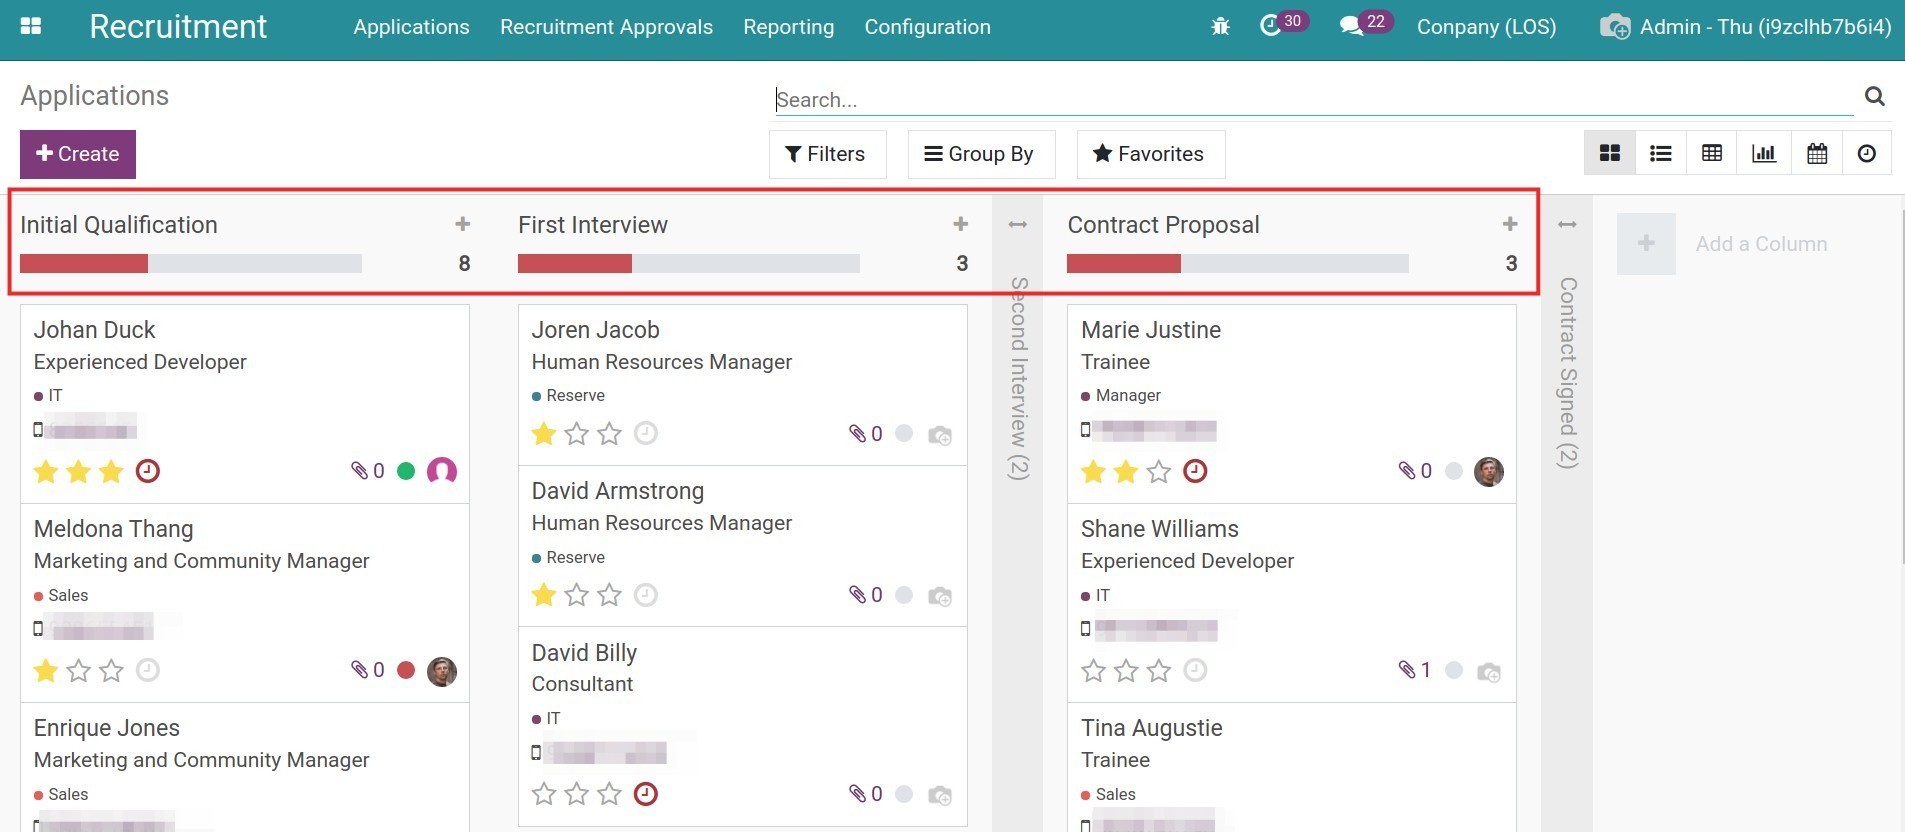
After creating the stages, you could get an overview of which stage an applicant is in by navigating to Recruitment > Applications > All Applications.
Move stages for applications
You have to move application to another stage when the application pass one round. E.g. After successfully going through the Initial Qualification stage, the application will be moved to the next stage, the First Interview.
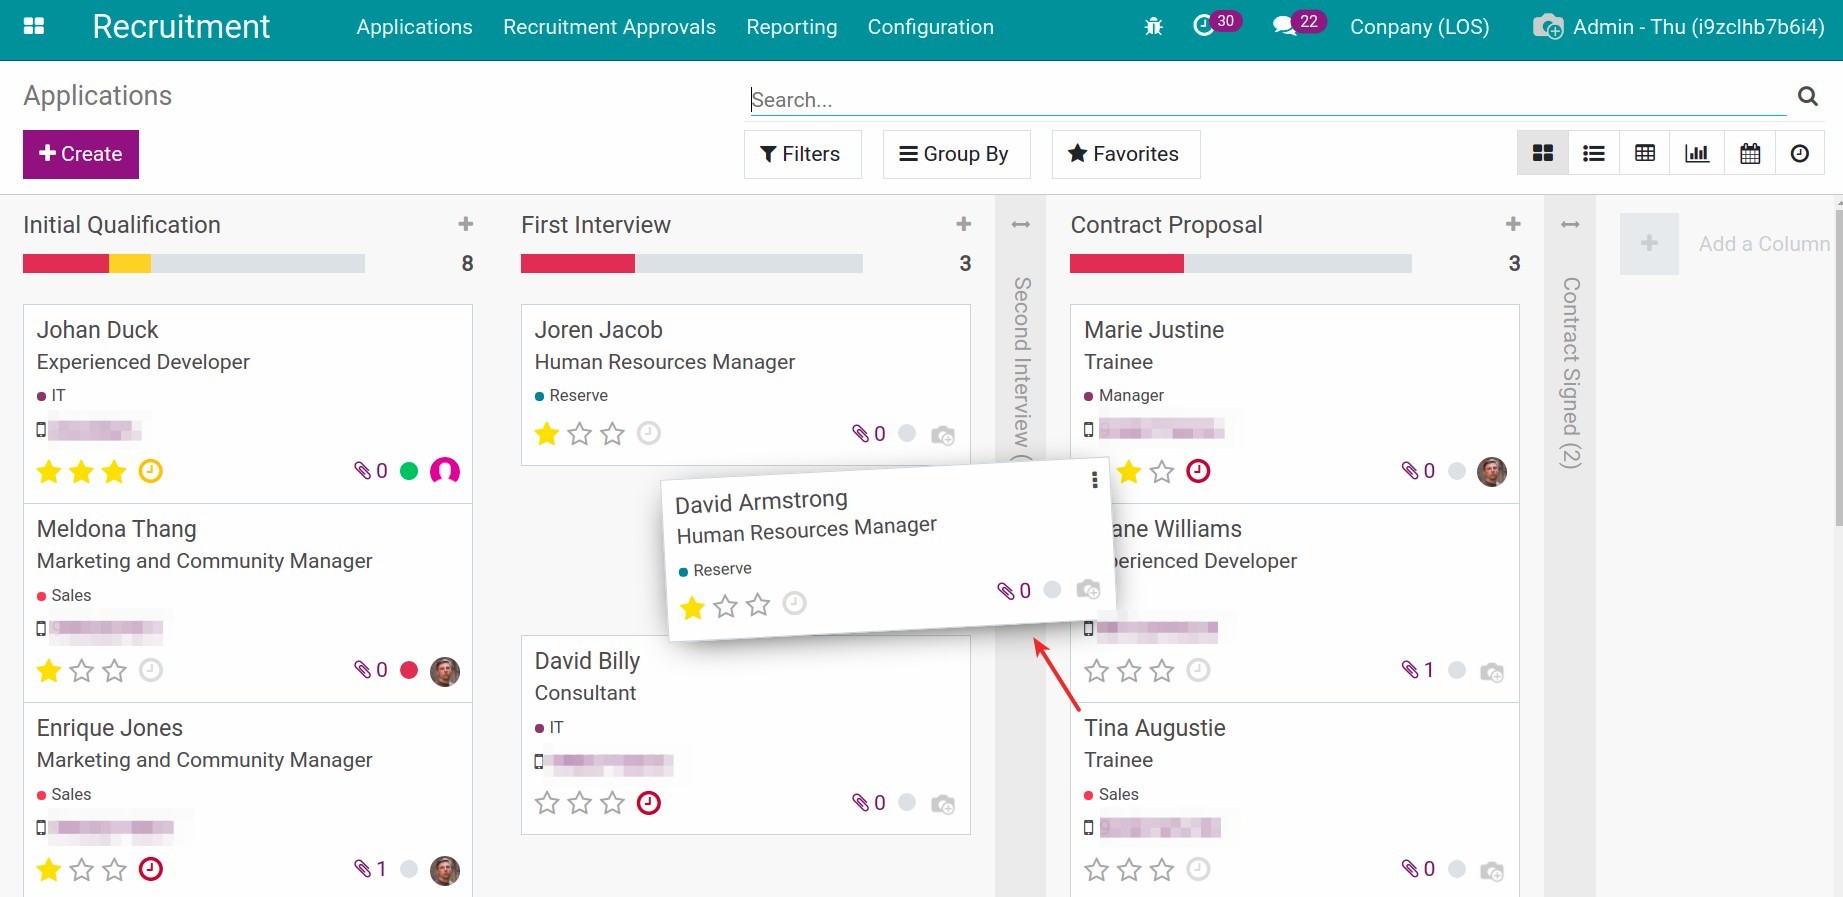
You could move the applications to another stage right in the Kanban view of the applications by dragging and dropping between the stages.
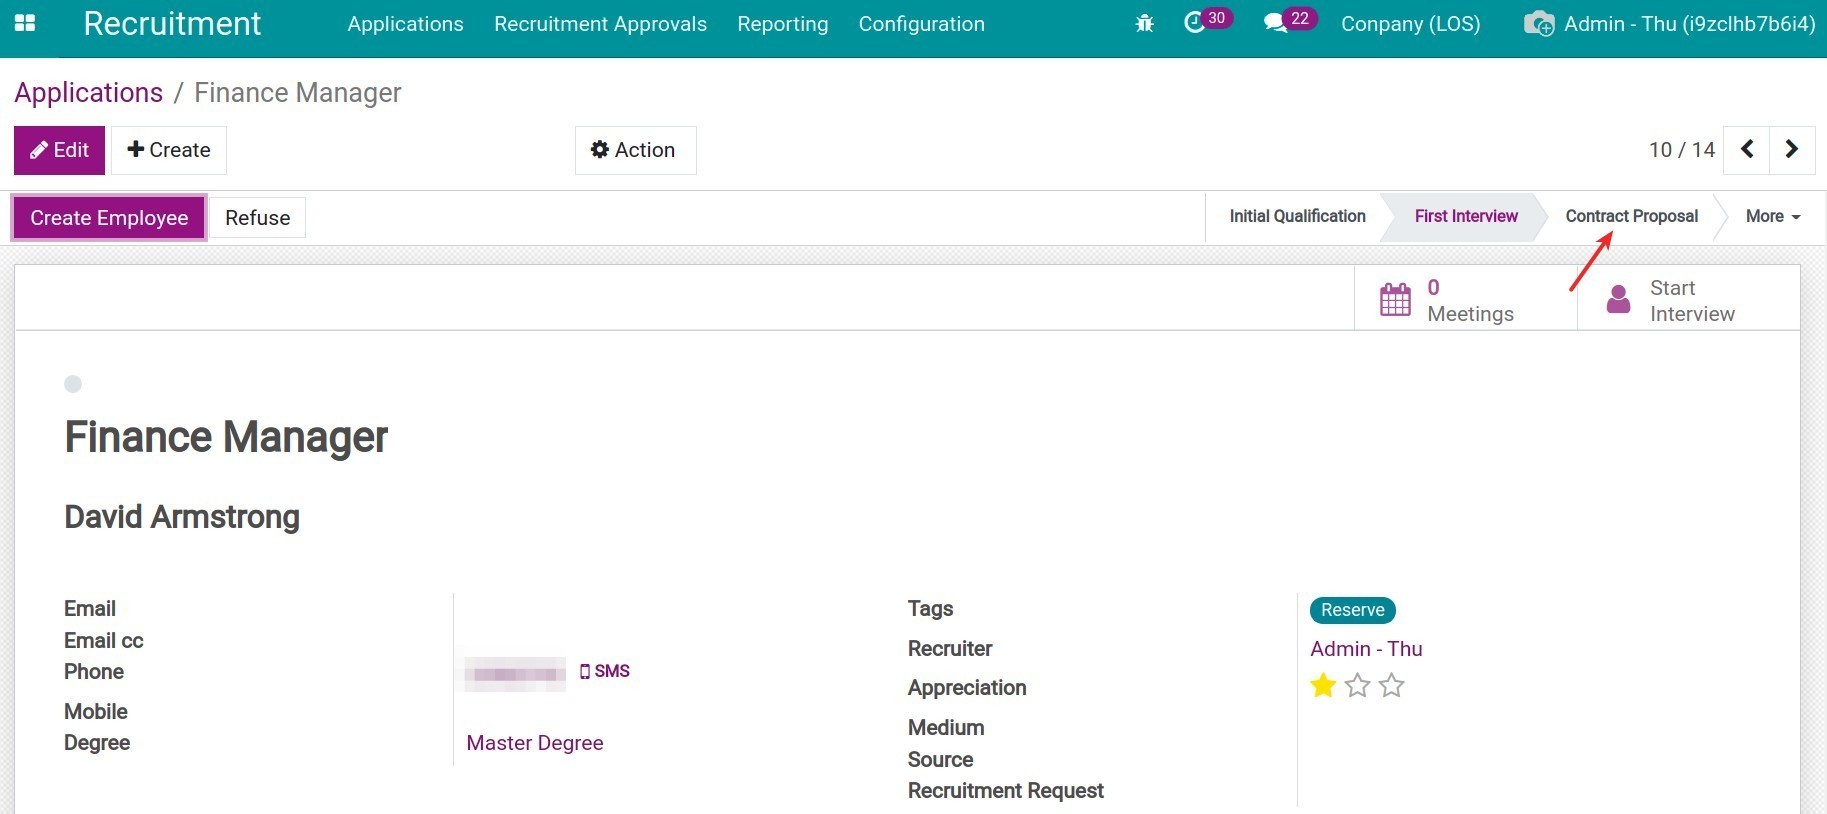
Or you also navigate to the application view, click on the stage that needs to be changed.
