Issue e-invoice by integrating Viindoo with VN-Invoice service
Nowadays, e-invoice has become a trend in digital transformation. E-invoices are integrated into enterprise management systems, accounting software, etc., helping to synchronize data, optimize usage time, and save printing, issuing, and storage costs for enterprises. For authority agencies, e-invoice plays an important role in managing trades transparently. To satisfy enterprises’ needs for managing e-invoices, Viindoo has integrated e-invoices into the Viindoo enterprise management system. Viindoo not only integrates e-invoices for VietNam enterprises but also supports e-invoice formats according to other countries’ standards with localization modules.
In this article, we will learn how to Integrate VN-Invoice with Viindoo.
How to integrate with VN-Invoice
Install the module
Enter Viindoo Apps, search for VN-Invoice on the search bar, and press Install.

Declare the integration information
After installing the VN-Invoice module, to declare the E-invoice information, navigate to Accounting > Configuration > E-invoice.
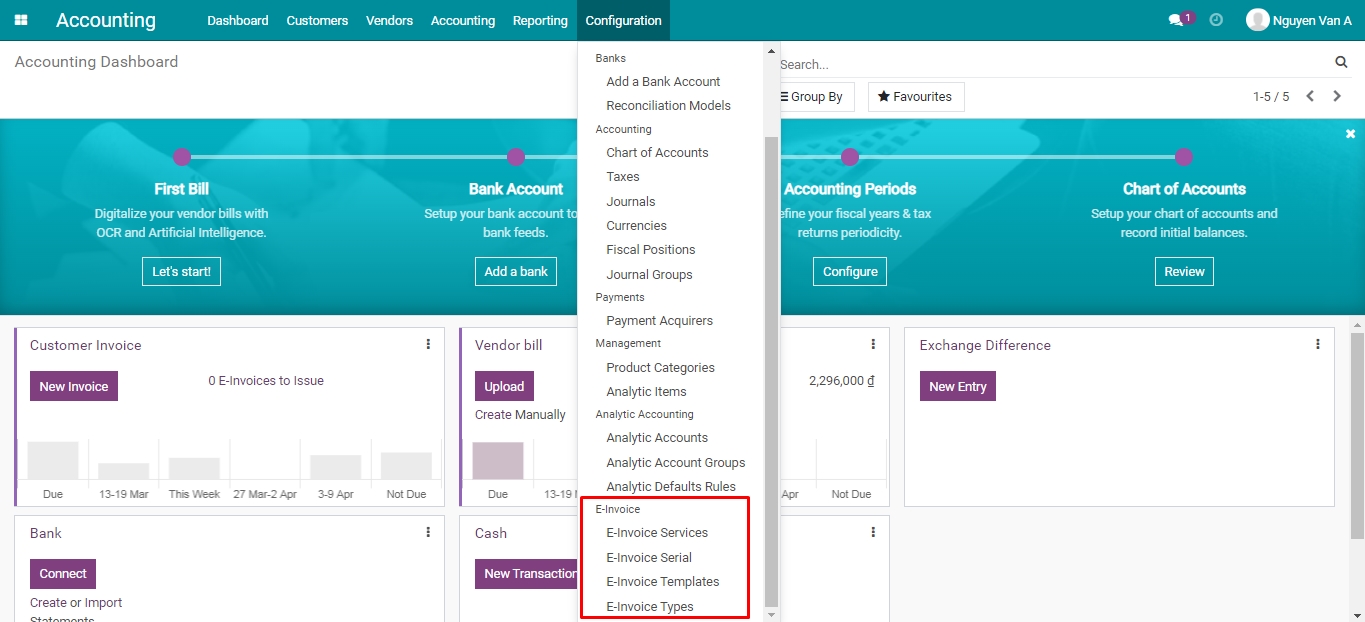
Follow the steps below to declare:
Note
The information you use to declare in the Viindoo system (e.g. user name, password, e-invoice’s serial, template, type, etc.), will be provided by the E-Invoice service provider.
The setting information in this article is only a reference for the test mode.
In the test mode, your enterprise’s Tax code is 0106026495-999.
Step 1: E-Invoice services
Here, you will see the list of the E-Invoice services supported by Viindoo.
VN-Invoice API v1: Support the e-invoice according to Circular No.32/2011/TT-BTC. This version is no longer supported because Circular No.32/2011/TT-BTC has expired;
VN-Invoice API v2: Support the e-invoice according to Circular No.78/2011/TT-BTC.
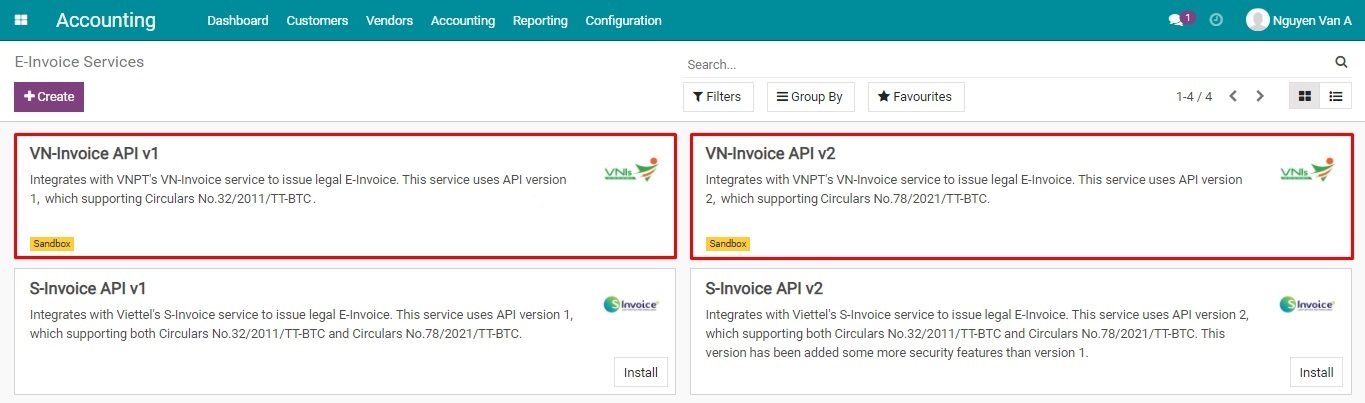
In this article, we will declare for the VN-Invoice API v2 version.
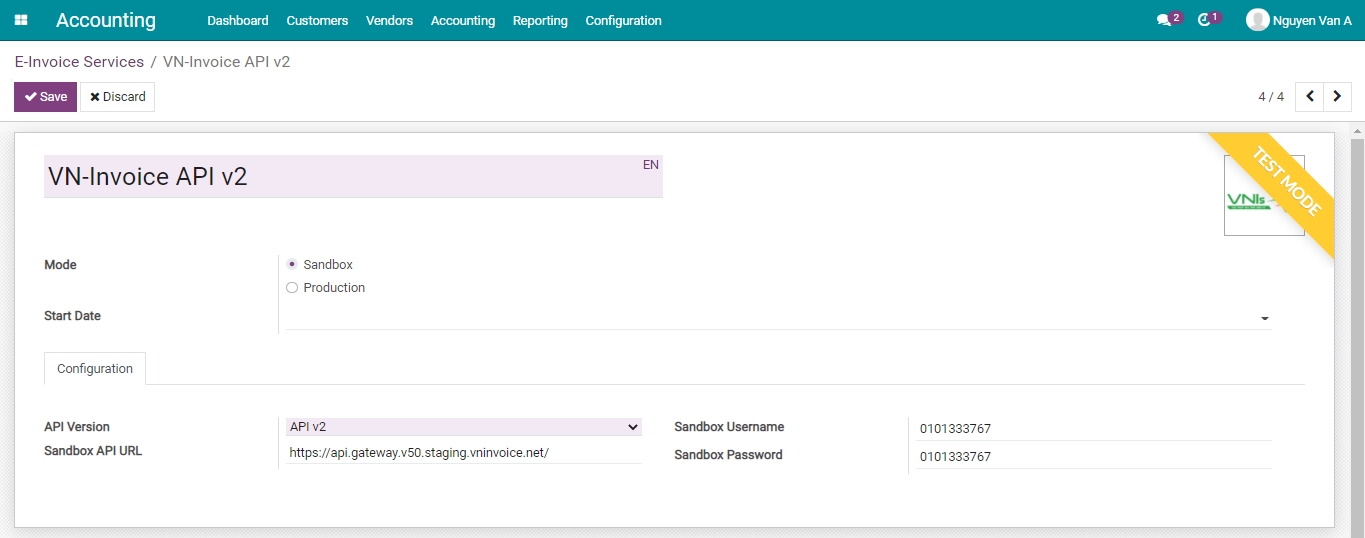
Note
On the Sandbox API URL field, enter the following URL: https://api.gateway.v50.staging.vninvoice.net/.
Step 2: Declare the e-invoice’s Serial/Template/Type
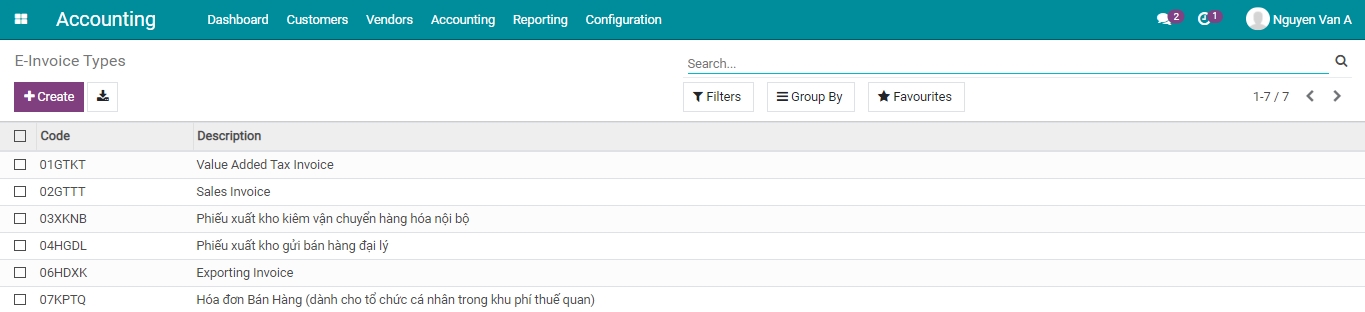
Declare e-invoice types
Viindoo has 6 existing e-invoice types on the list. You can press Create to create new e-invoice types to make them easier to use and declare.
Declare e-invoice templates
Viindoo will have 1 existing e-invoice template 01GTKT0/001. You can press Create to create new e-invoice templates that your enterprise registers with the tax authority.

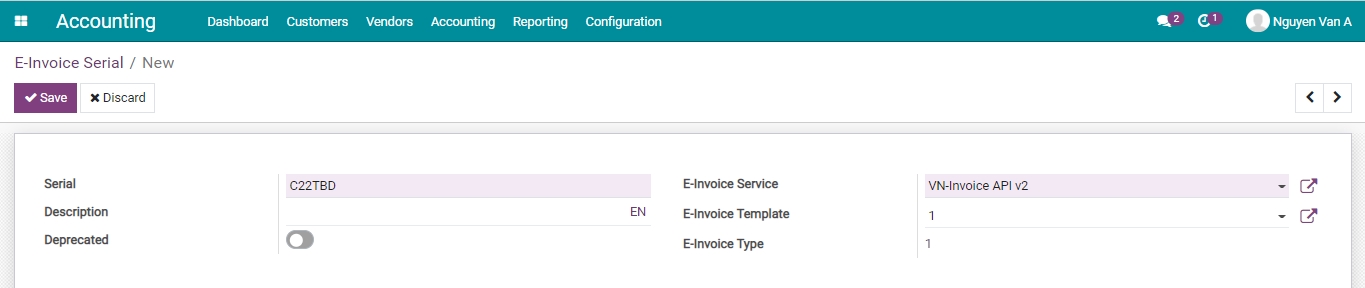
Declare e-invoice’s Serial
Declare the exact serial that your enterprise has registered with the tax authority.
Step 3: Settings on Customer Invoice Journal
Navigate to Accounting > Configuration > Journals, select the Customer Invoice journal. At the E-Invoice Integration tab, enter the needed information for issuing the e-invoice.
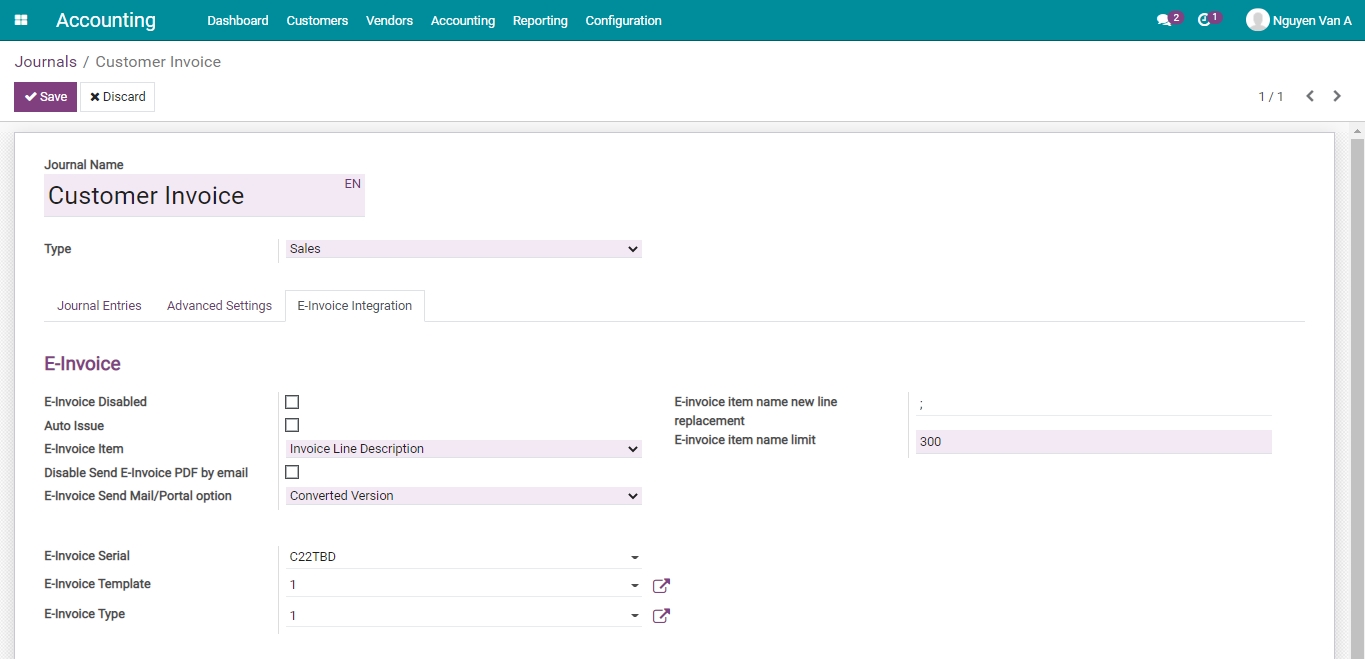
In which:
- E-Invoice Disabled: If checked, the invoices belonging to this journal won’t show the Issue E-Invoice feature.
Auto Issue: If checked, after a specific pre-set time, the confirmed customer invoices will be auto-transferred to the VN-Invoice system to issue the e-invoices.
E-Invoice Item: This field will allow you to select the information to bring to the description field for the Product/service name on the e-invoice:
- Invoice Line Description: The content of the Label field on the customer invoice will be sent to the e-invoice.
Product name: The product name on the Product field of the customer invoice will be sent to the e-invoice.
Disable Send E-Invoice PDF by email: When you click Send and Print on invoice view, the system automatically attaches the default PDF standard invoice to the email that you send to your customer.
If checked: The default PDF standard invoice will always be attached to the email sent to the customer.
If not checked: The PDF will be updated following the downloaded and attached to the email sent to the customer.
E-Invoice Send Mail/Portal option: Select the invoice version to attach to the e-invoice issuing notification email sent to customers:
Displayed Version: The system will attach the Representation e-invoice version to the email.
Converted Version: The system will download and attach the Converted e-invoice version to the email.
E-invoice Item name new line replacement: When issuing the e-invoice, the product’s name and description will be displayed in the same line on the e-invoice. That’s why the character set here will mean “down a line” in the product description.
E-invoice Item name limit: The maximum Unicode characters of an item name.
E-invoice Serial: The serial that your enterprise registered with the tax authority declared in step 2.
E-Invoice Template: The number of invoice templates that your enterprise registered with the tax authority declared in step 2.
E-Invoice Type: This is the invoice type that your enterprise registered and declared in step 2.
Step 4: Declare, and set up the system’s General settings
Navigate to Settings > Accounting > E-Invoice Settings.
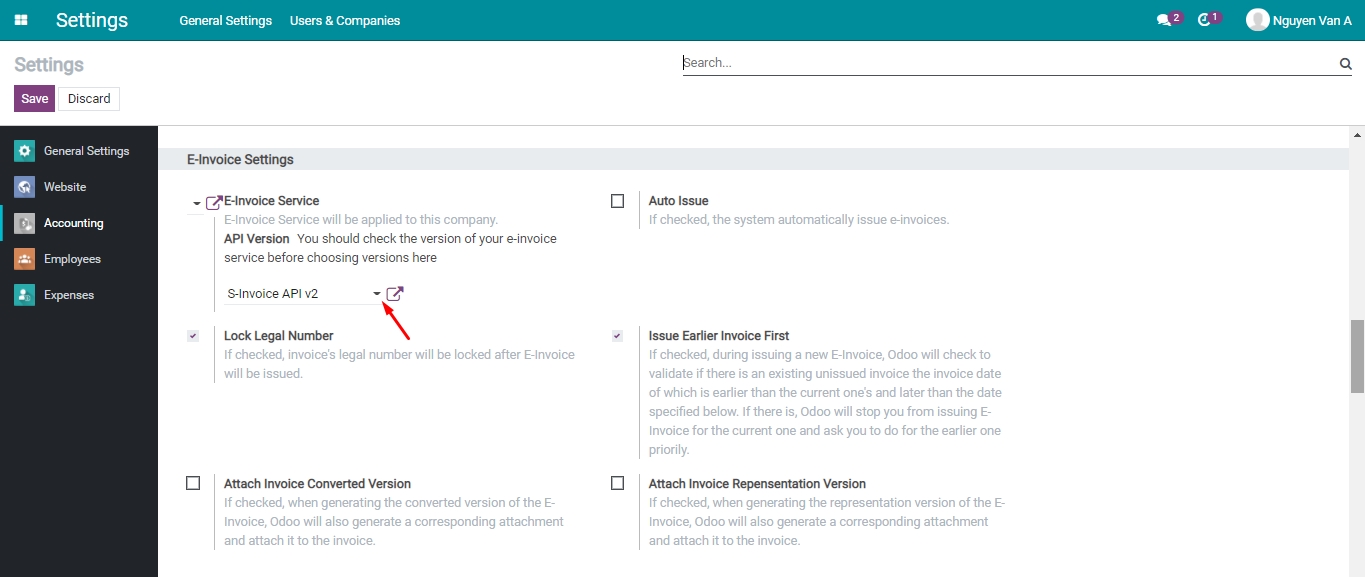
In which:
E-Invoice Service: Select the version that applied for the declared version in step 1.
Selectable fields:
Auto Issue;
Lock Legal Number;
Issue Earlier Invoice First;
Attach Invoice Converted Version;
Attach Invoice Repensentation Version.
Press Save to finish step 4.
Issue E-invoice
Navigate to Accounting > Customers > Invoices, on the invoices list, select an invoice to issue an e-invoice.
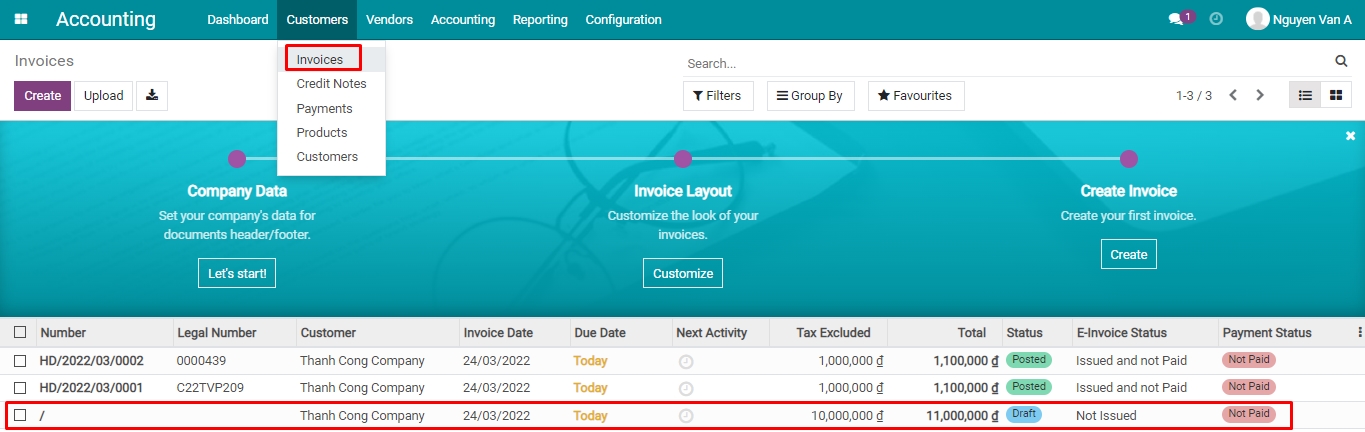
For example, you are issuing an e-invoice for Thanh Cong Company, the invoice date is 24/02/2022 with a total is 11.000.000 VND.
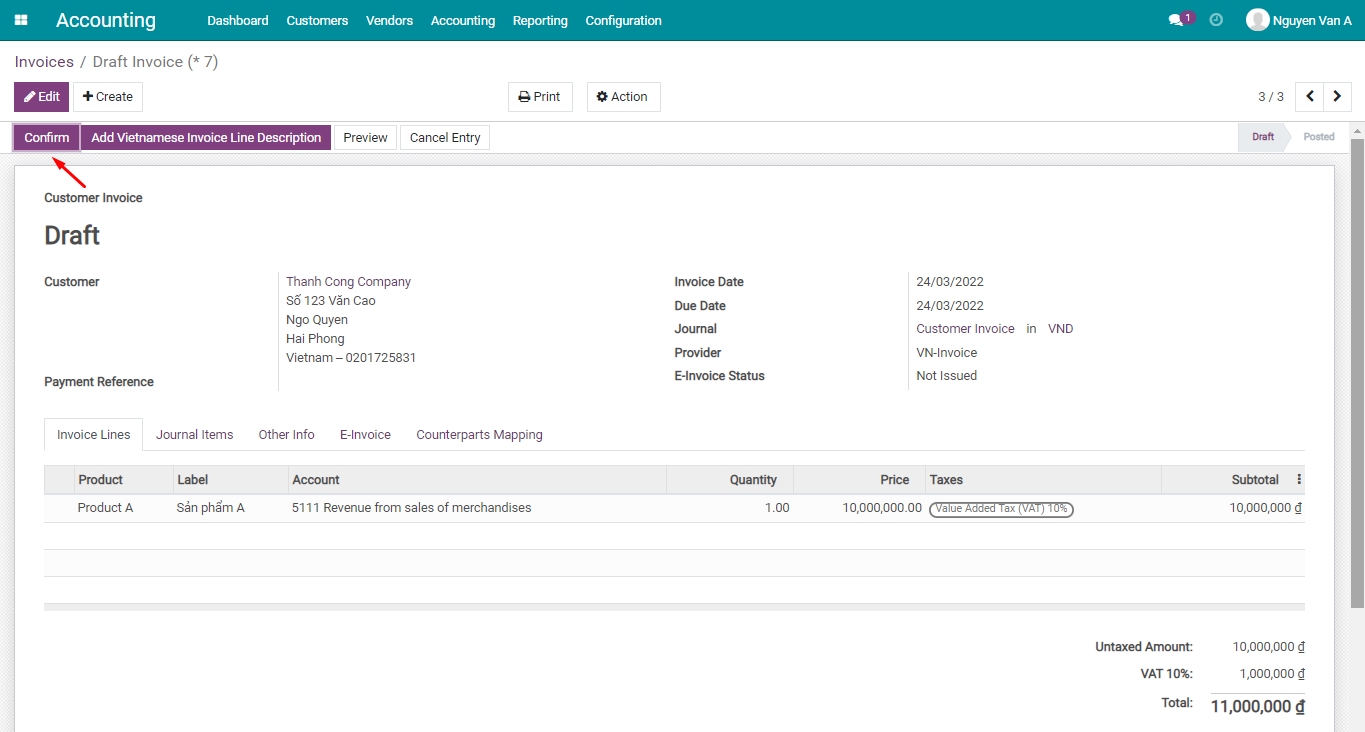
Step 1: Confirm the draft invoice
Review the customer invoice information: Tax code, address, etc. and press Confirm.
Step 2: Issue the e-invoice
On the Posted invoice, the E-Invoice Status is Not Issue, press Issue E-Invoice:
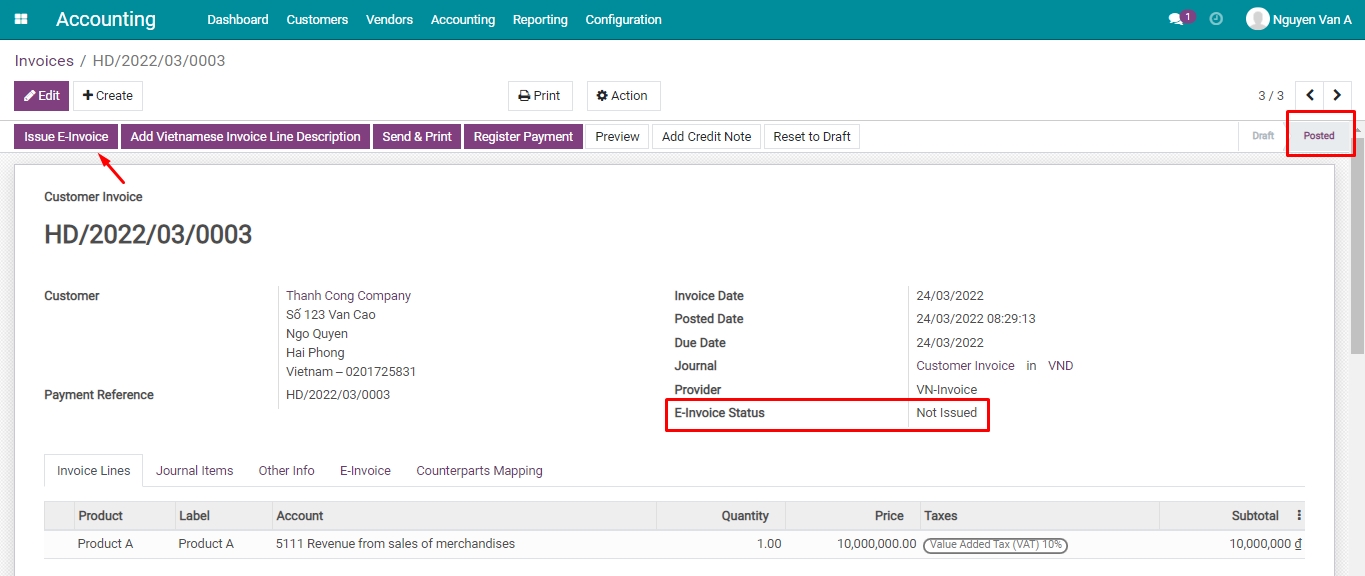
When you see the Confirmation pop-up, press Ok to confirm.

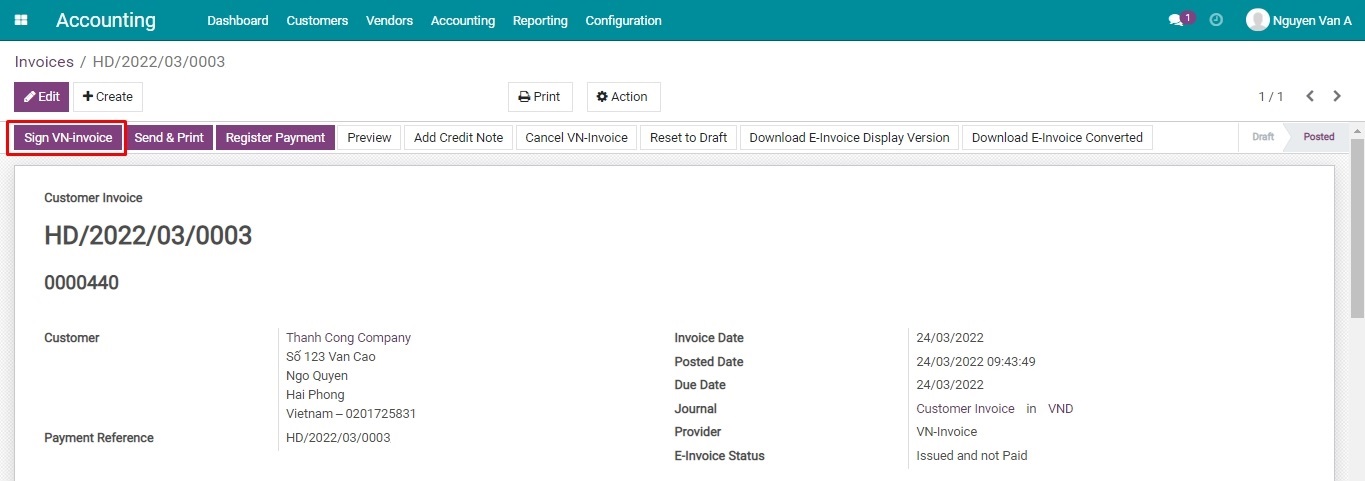
Step 3: Sign VN-Invoice
After the e-invoice is issued, press Sign VN-Invoice to confirm the invoice.
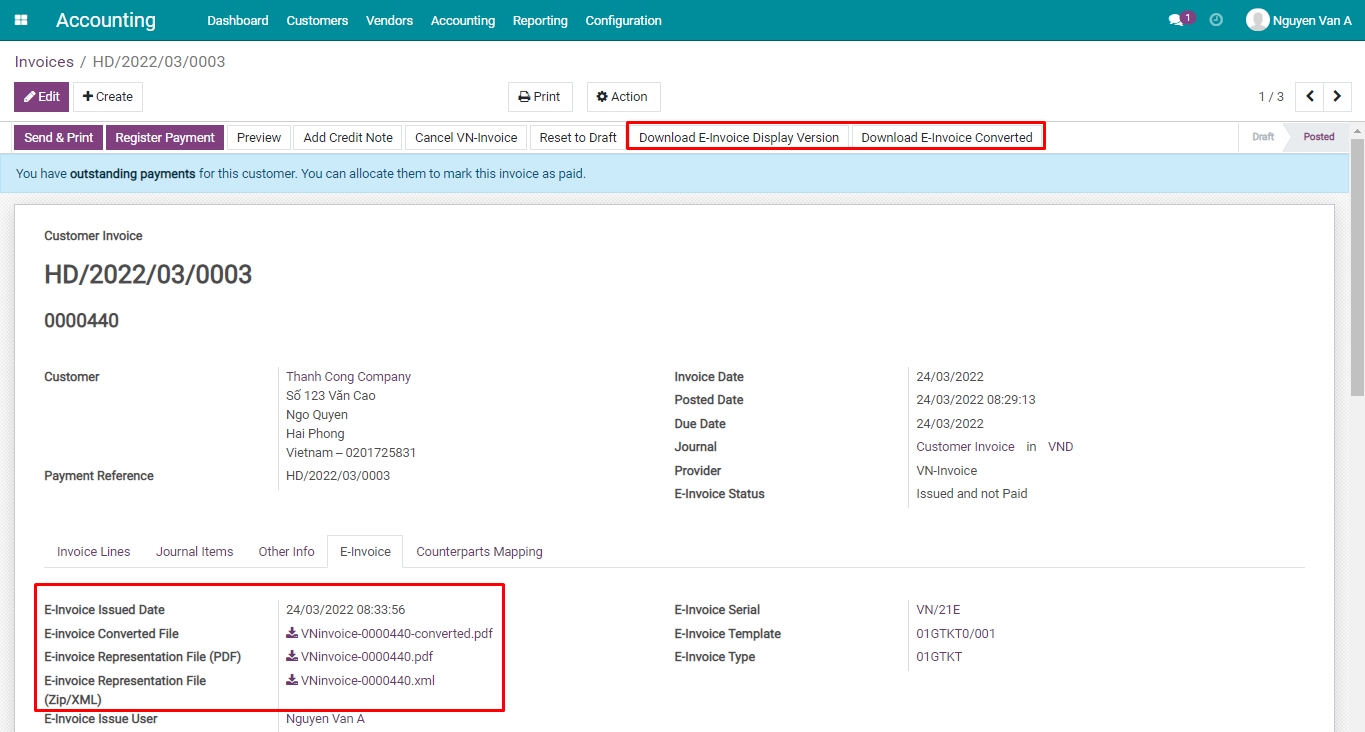
Step 5: Download E-Invoice
Press Download E-Invoice Display Version or Download E-Invoice Converted:
This action will help you save and view the invoice in Viindoo.
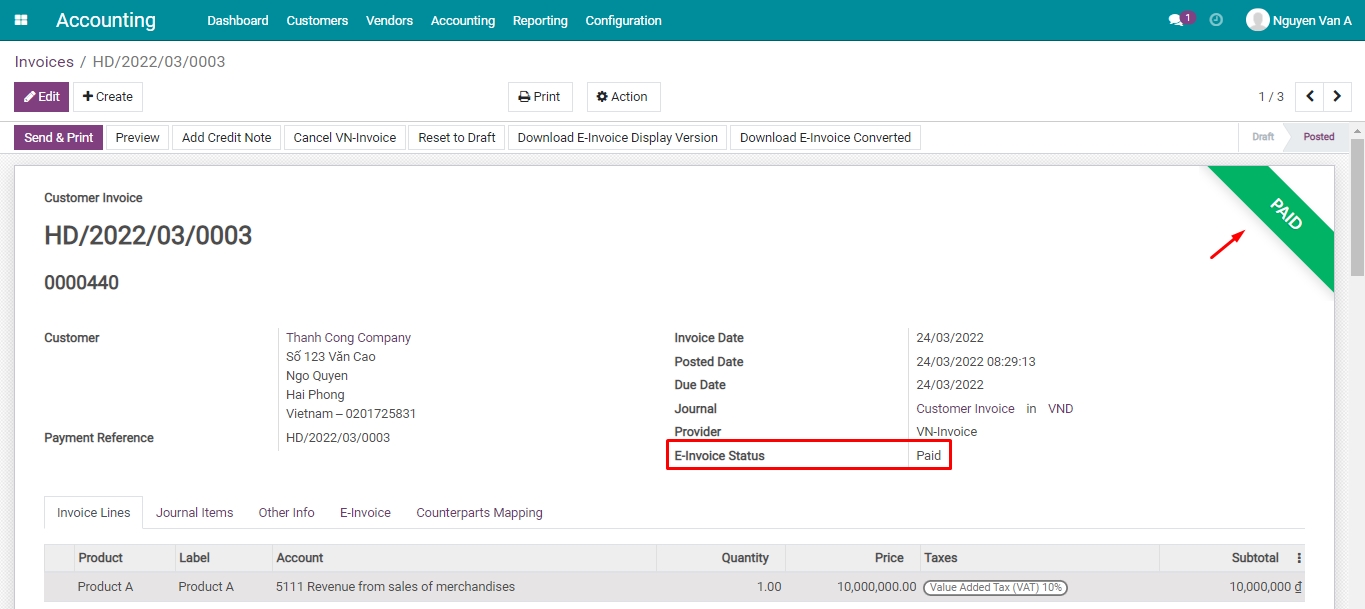
Step 6: Reconciliation after payment
After the invoice is reconciled:
Customer invoice in Viindoo: In the Paid stage.
E-Invoice Status: Is Paid.
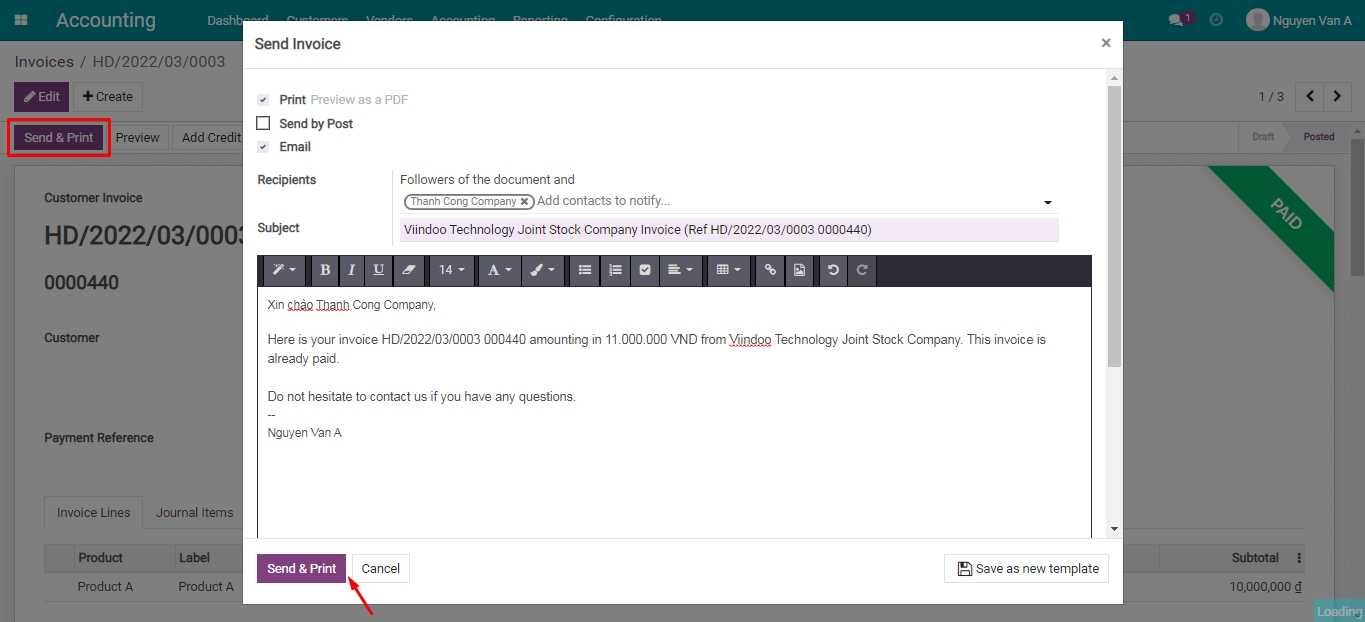
Step 7: Send invoice to customers
Press Send & Print to send the invoice to the customer:
Right after pressing Send & Print, a pre-made invoice show up with the invoice code, and value and attaches the PDF and ZIP file. You can send the default template or edit the email and then press Send & Print to send the issue notification to the customer.
And just like that, you have finished sending the VN-Invoice in Viindoo. In case the e-invoice needs to be edited or canceled:
- Cancel an issued e-invoice: see details as the following.
Cancel an issued e-invoice in Viindoo
In case the e-invoice is issued and you want to edit or cancel it, instead of accessing the e-invoice website, in the Viindoo system, follow the steps below:
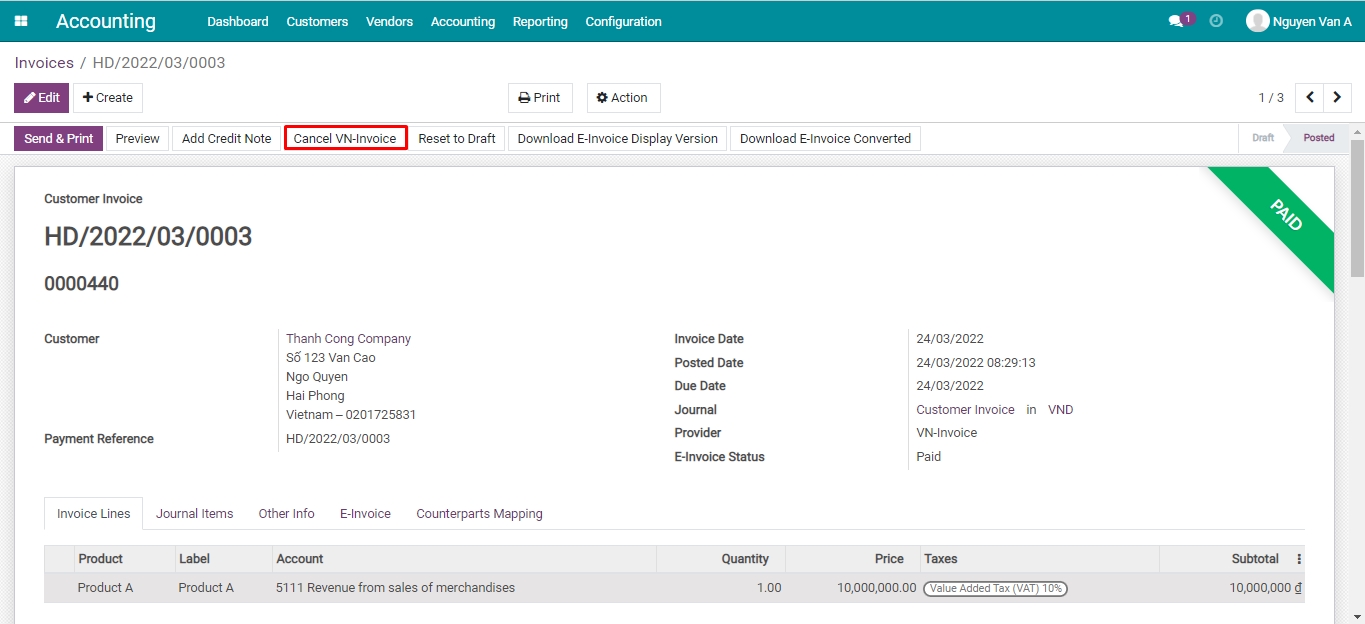
Step 1: Cancel the issued e-invoice
On the issued e-invoice, press Cancel VN-Invoice.
When the pop-up appears, enter the following information:
Reference: The code/name of the canceling agreement between 2 parties.
Reason: Type the reason to cancel the e-invoice.
Cancellation Date: The date the e-invoice is canceled.
The minutes of invoice withdrawal (PDF): You can upload the related document.
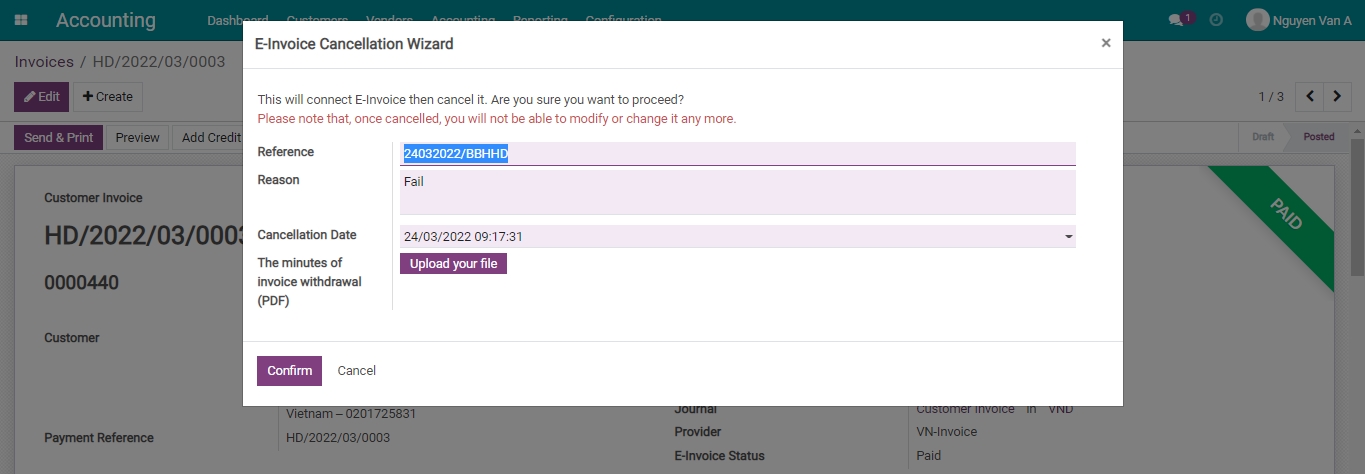
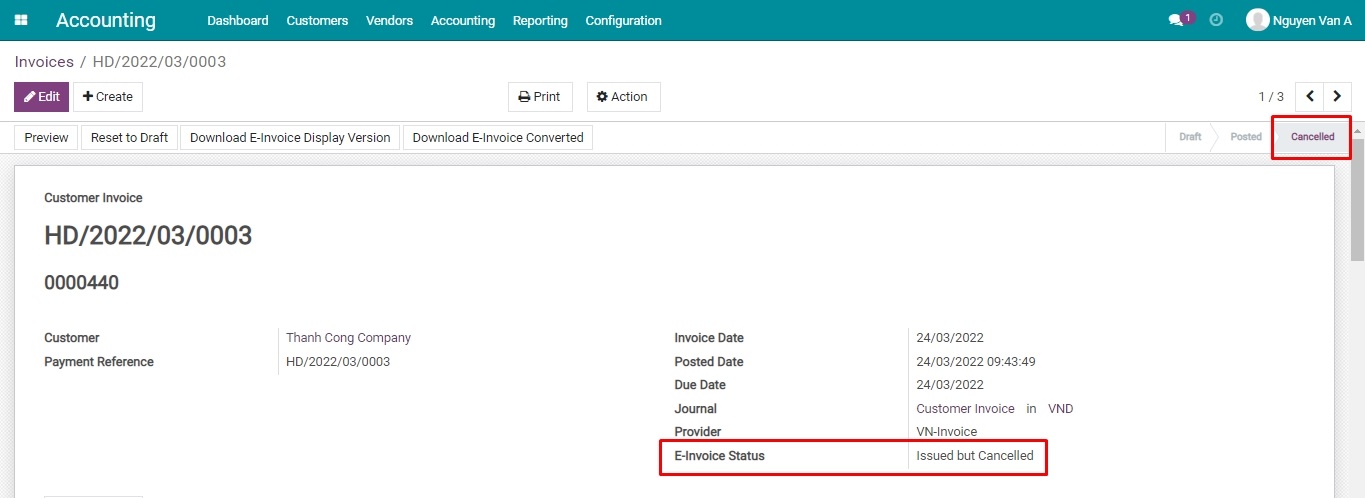
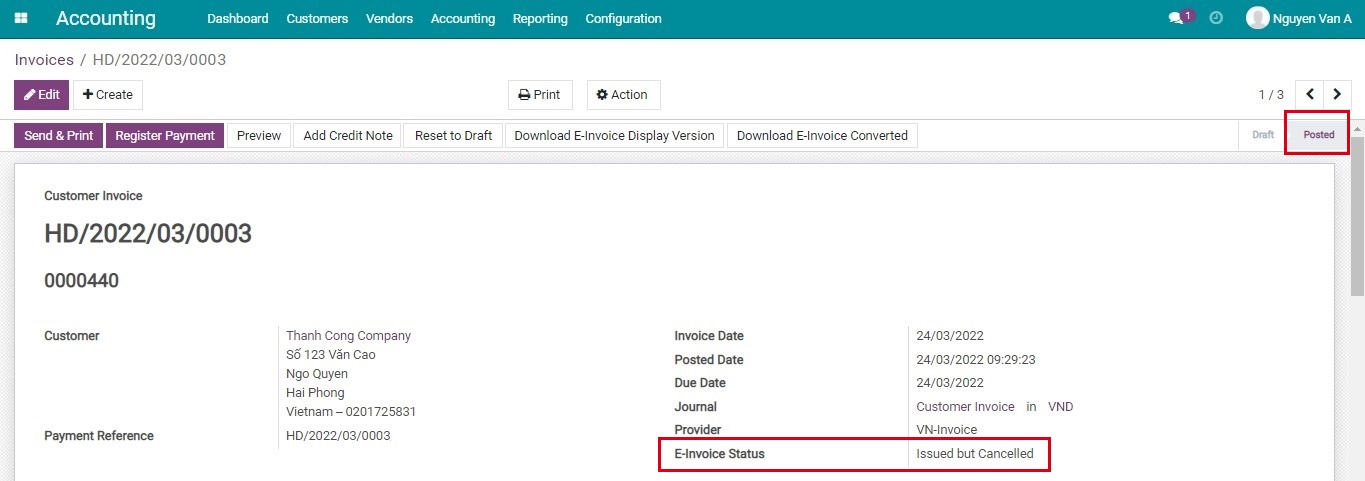
Press Confirm, the e-invoice status will be Issued but Cancelled, and the e-invoice state will be Posted.
To send the error notice to the tax authority, you need to access the VN-Invoice system.
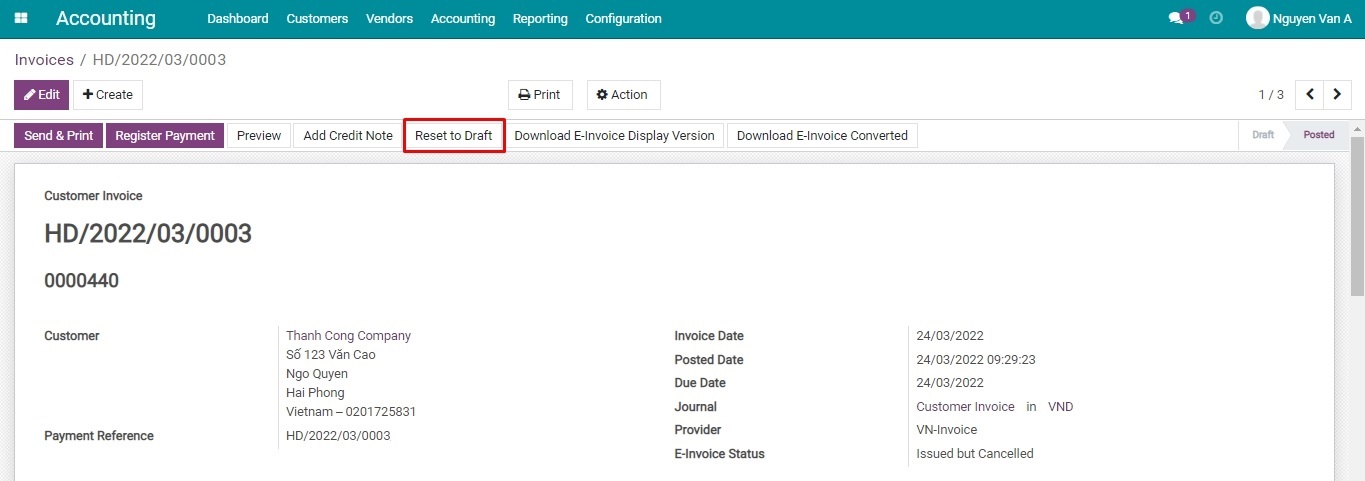
Step 2: Cancel the e-invoice in the Viindoo system
You need to finish step 1 in order to continue and press Reset to Draft.
Now, the invoice will be changed to the Draft stage, press Cancel Entry to cancel.
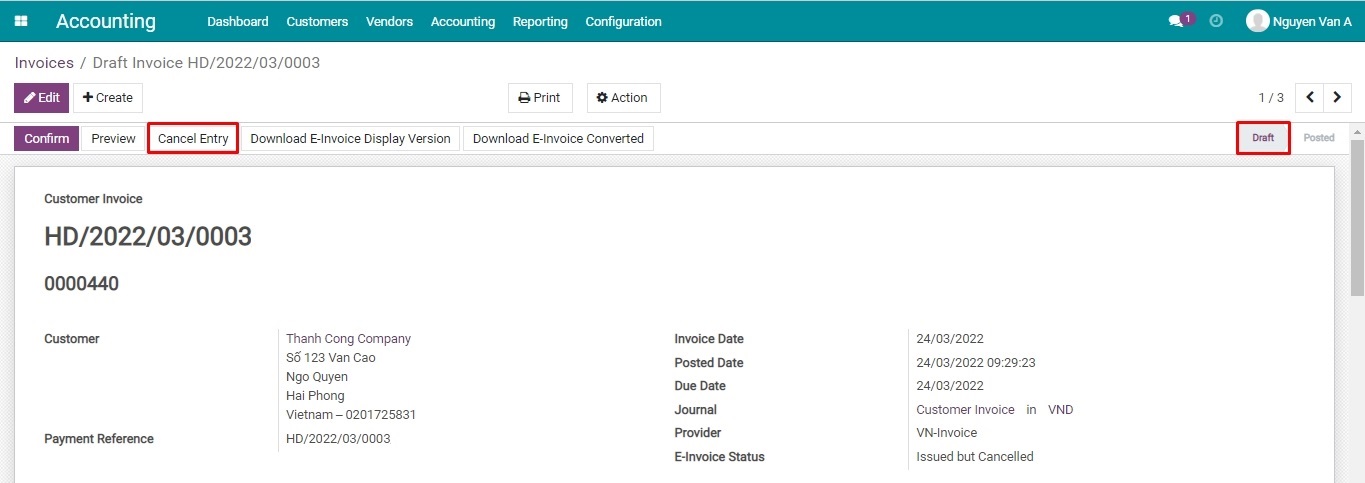
After canceling the invoice:
The invoice will be changed to the Cancelled stage.
The E-Invoice Status will be Issued but Cancelled.