Using Promotion Vouchers
Move Issued Vouchers to the Shops
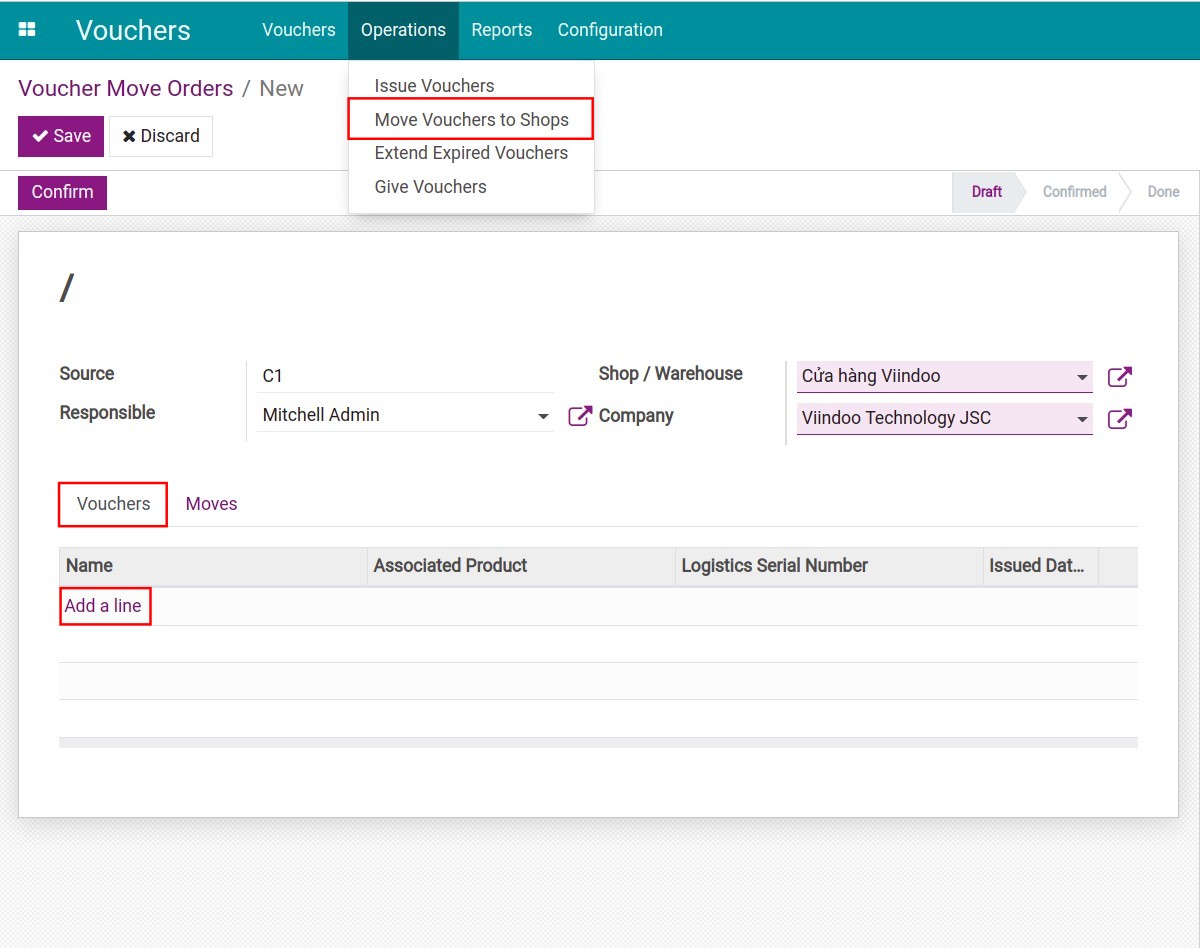
Navigate to Vouchers ‣ Operations ‣ Move Vouchers to Shops ‣ Create. On the Voucher, enter the following information:
Source: Refer to the document that creates the voucher move order.
Responsible: The employee in charge of moving the Vouchers.
Shop/Warehouse: The location that the Vouchers are moved to. This information is compulsory.
Vouchers tab: Press Add a line, select the issued Vouchers and press Select or Create if you want to create a new one.
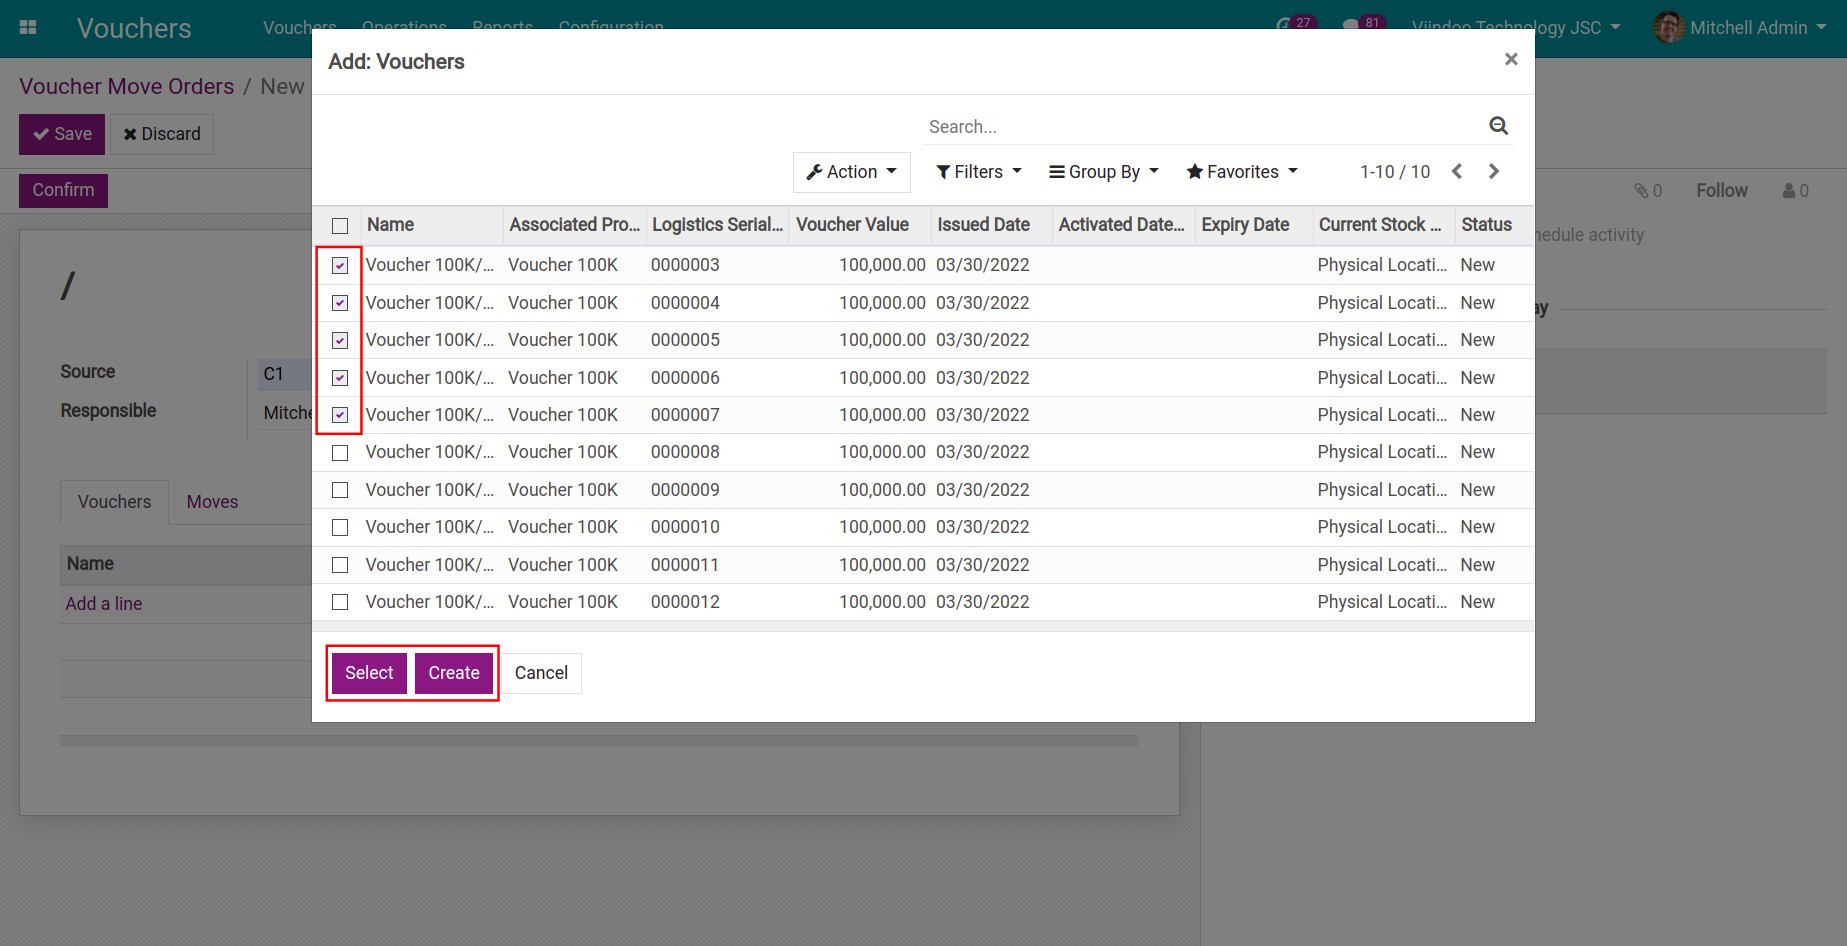
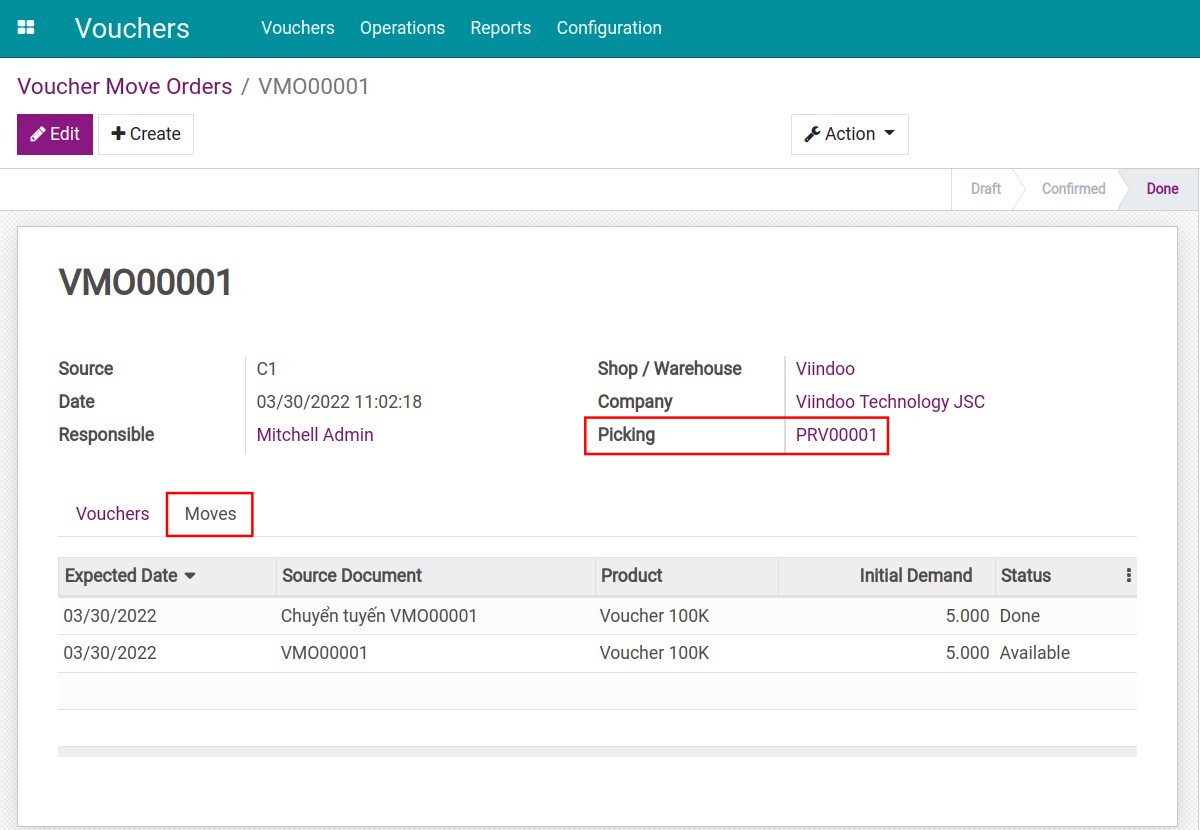
Press Save ‣ Confirm to confirm moving the Vouchers. The order’s stage will be changed to Confirmed. Then, press Move to transfer the selected Vouchers. The order’s stage will be changed to Done.
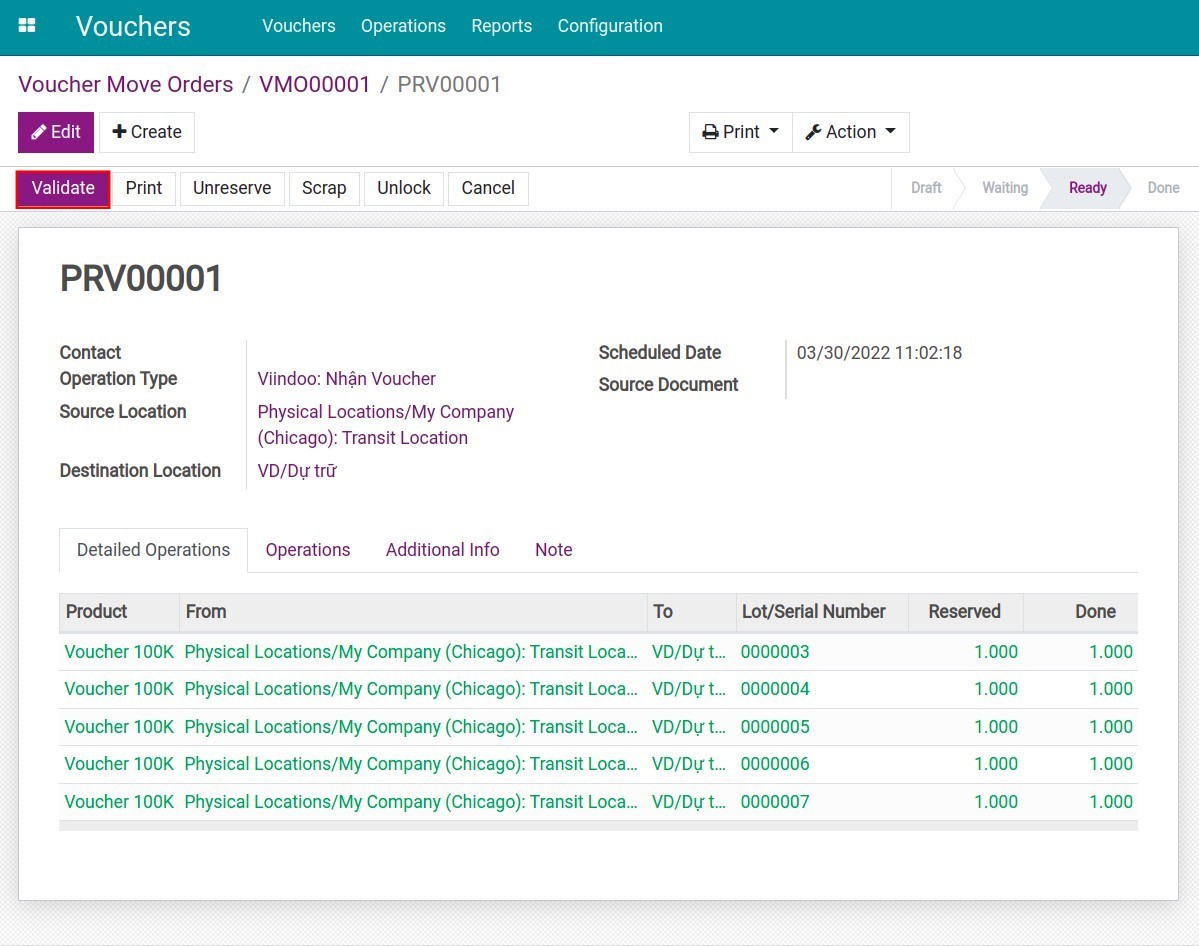
Right on the Voucher’s view, press the link on the Picking field, and then press Validate to finish moving the Vouchers to the shop.
Note
To validate the picking record, you need to have the Inventory access right.
Extend expired Vouchers
In case, there are some errors from the Voucher provider that make the customer can’t use the Voucher on time. You can extend the Voucher’s Valid Duration by following the steps below:
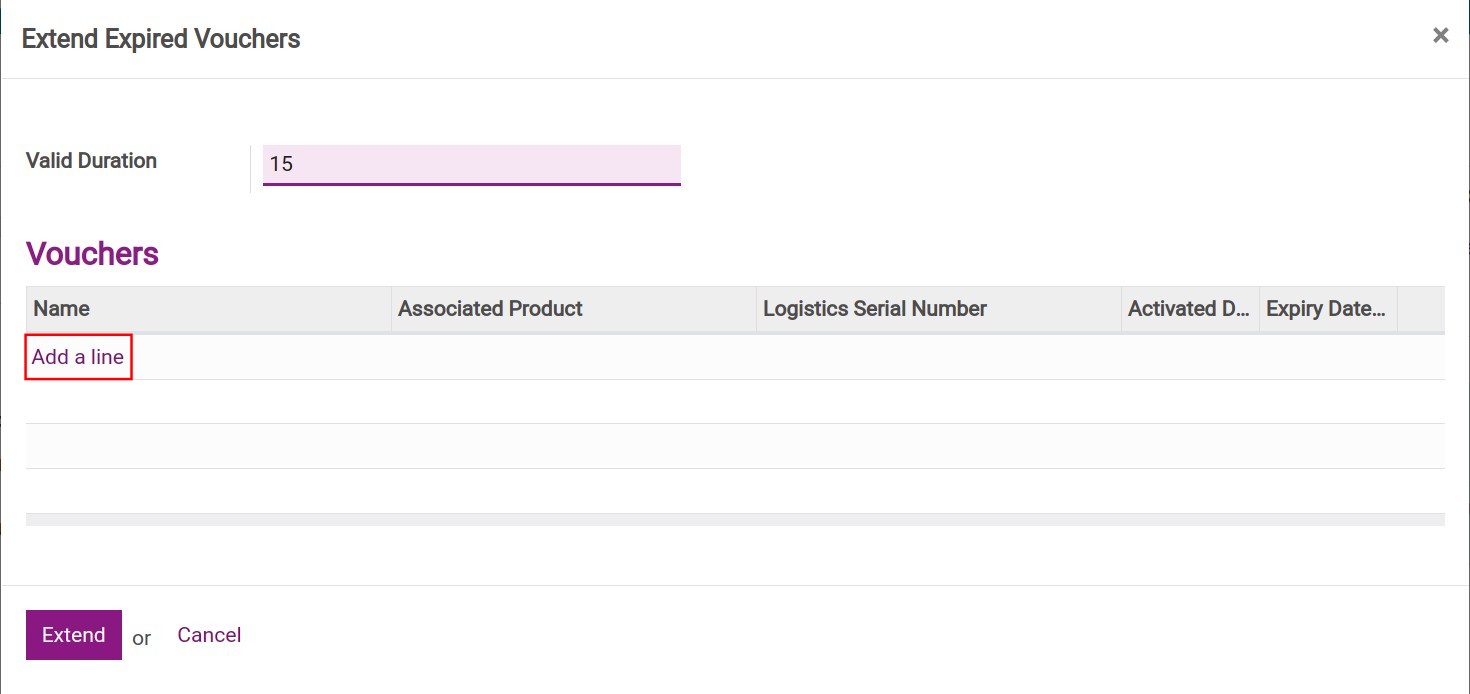
Navigate to Vouchers ‣ Operation ‣ Extend Exprired Vouchers.
At the Vouchers tab, press Add a line.
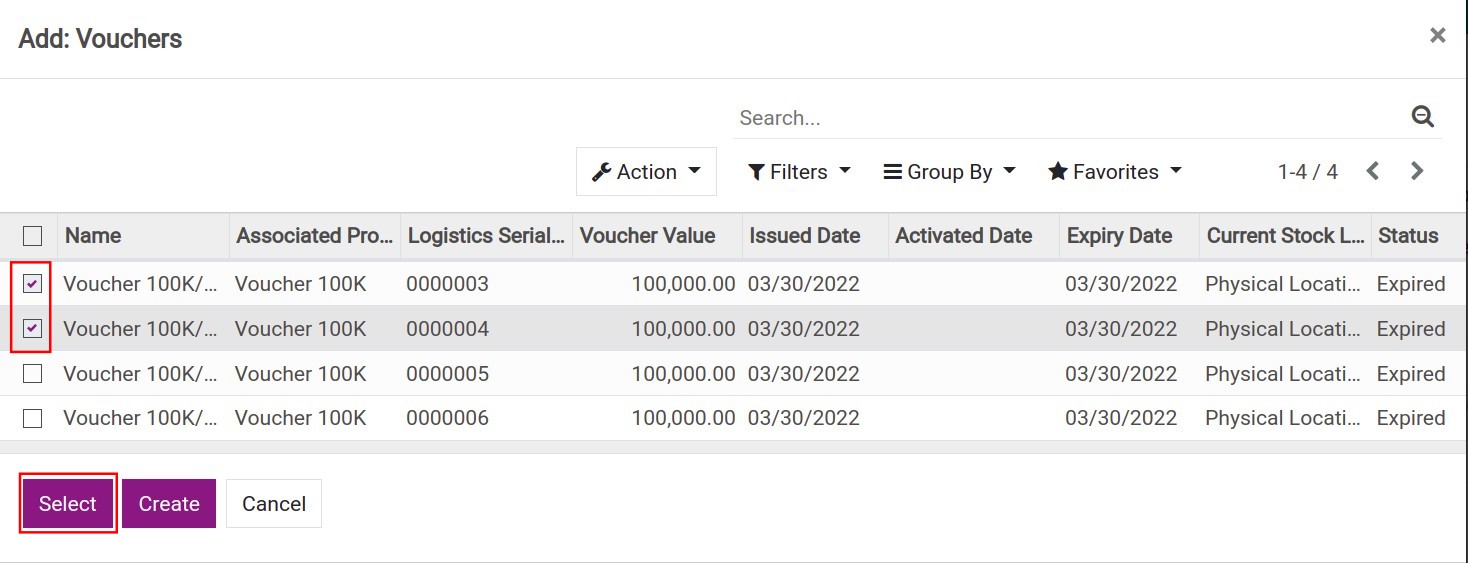
Select the Voucher you want to extend the duration and press Select.
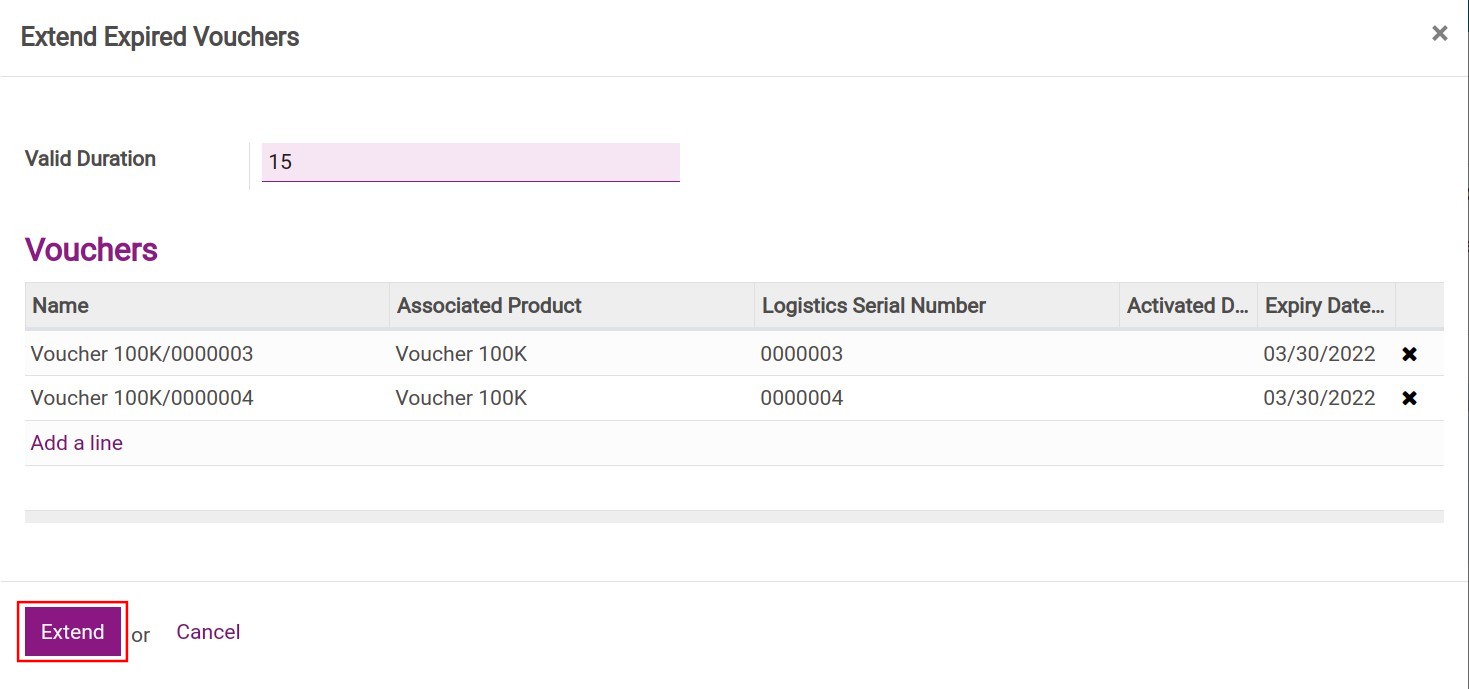
Based on Voucher’s Expiry Date, you type the numbers of the day you want to extend in Valid Duration field and press Extend.
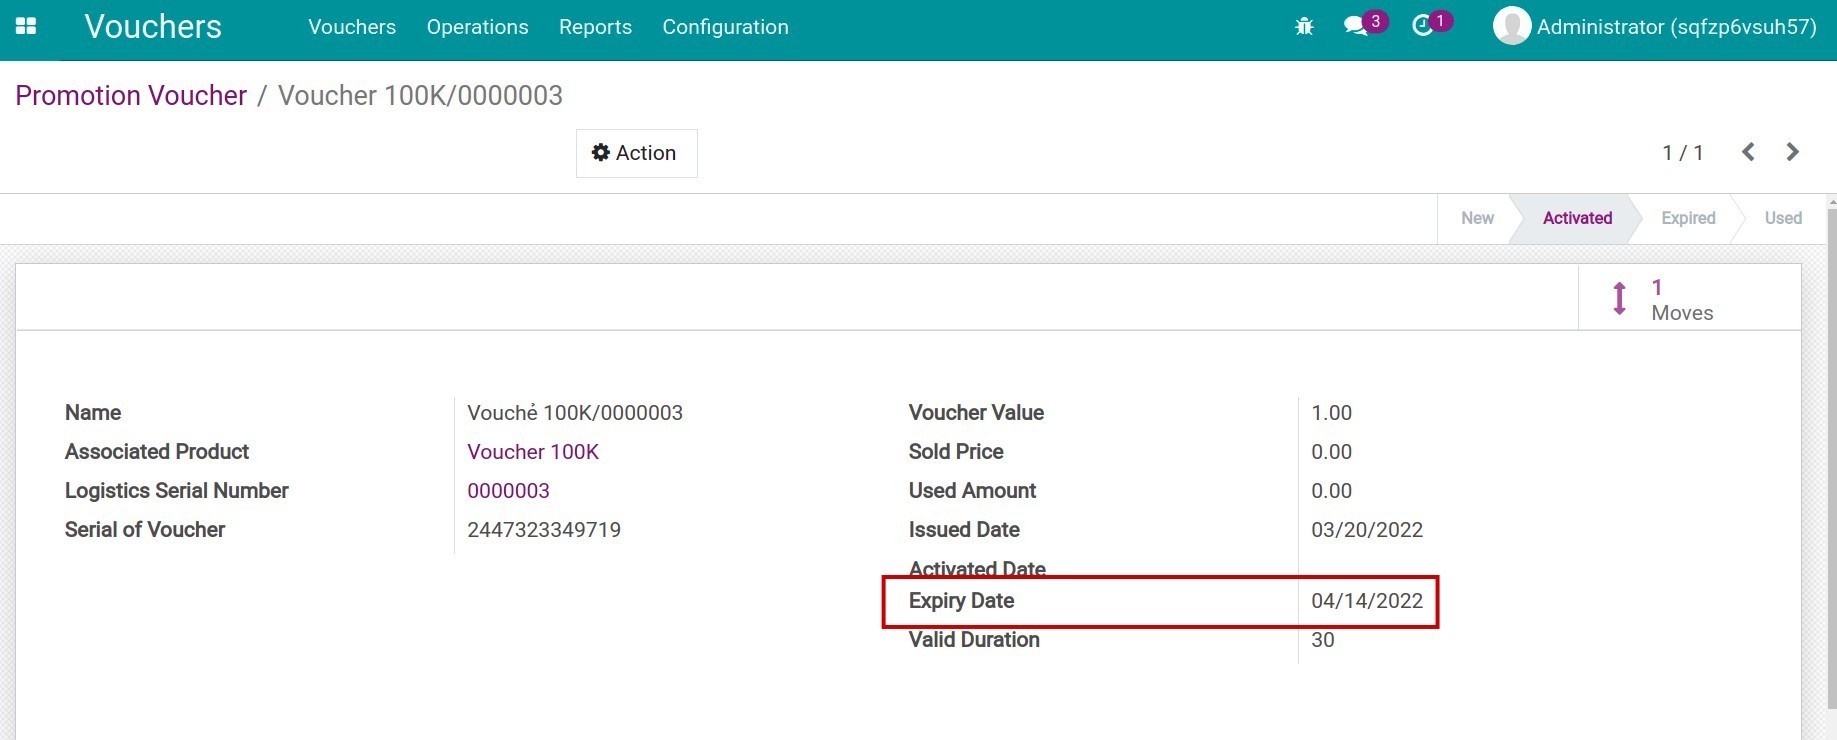
Now, you can find your extend Vouchers by going to Vouchers app > Vouchers > Activate Vouchers, typing the Voucher’s name or Voucher’s Logistics Serial number into the Search bar. This Voucher new Expiry Date = last Expiry Date + Valid Duration that you extended.
Give Vouchers
You have to give Vouchers to customers before they can use it for purchasing your products or services. This is also a way to attract and show gratitude to customers and partners.
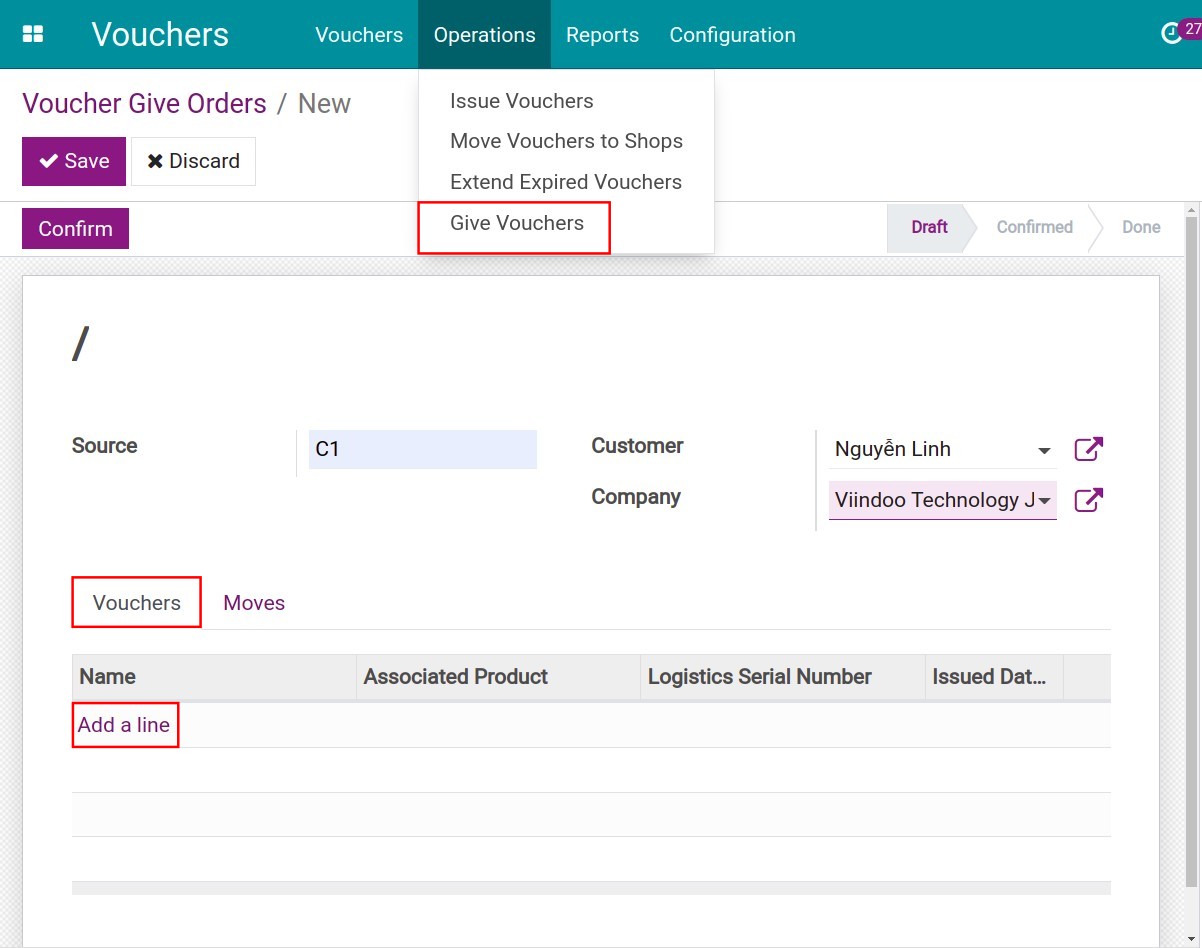
Navigate to Vouchers ‣ Operations ‣ Give Vouchers ‣ Create. Enter the following information:
Source: Refer to the document that creates the Voucher move order.
Customer: Customer you want to give Vouchers. Type the customer name or leave it blank if you want.
At the Vouchers tab, press Add a line.
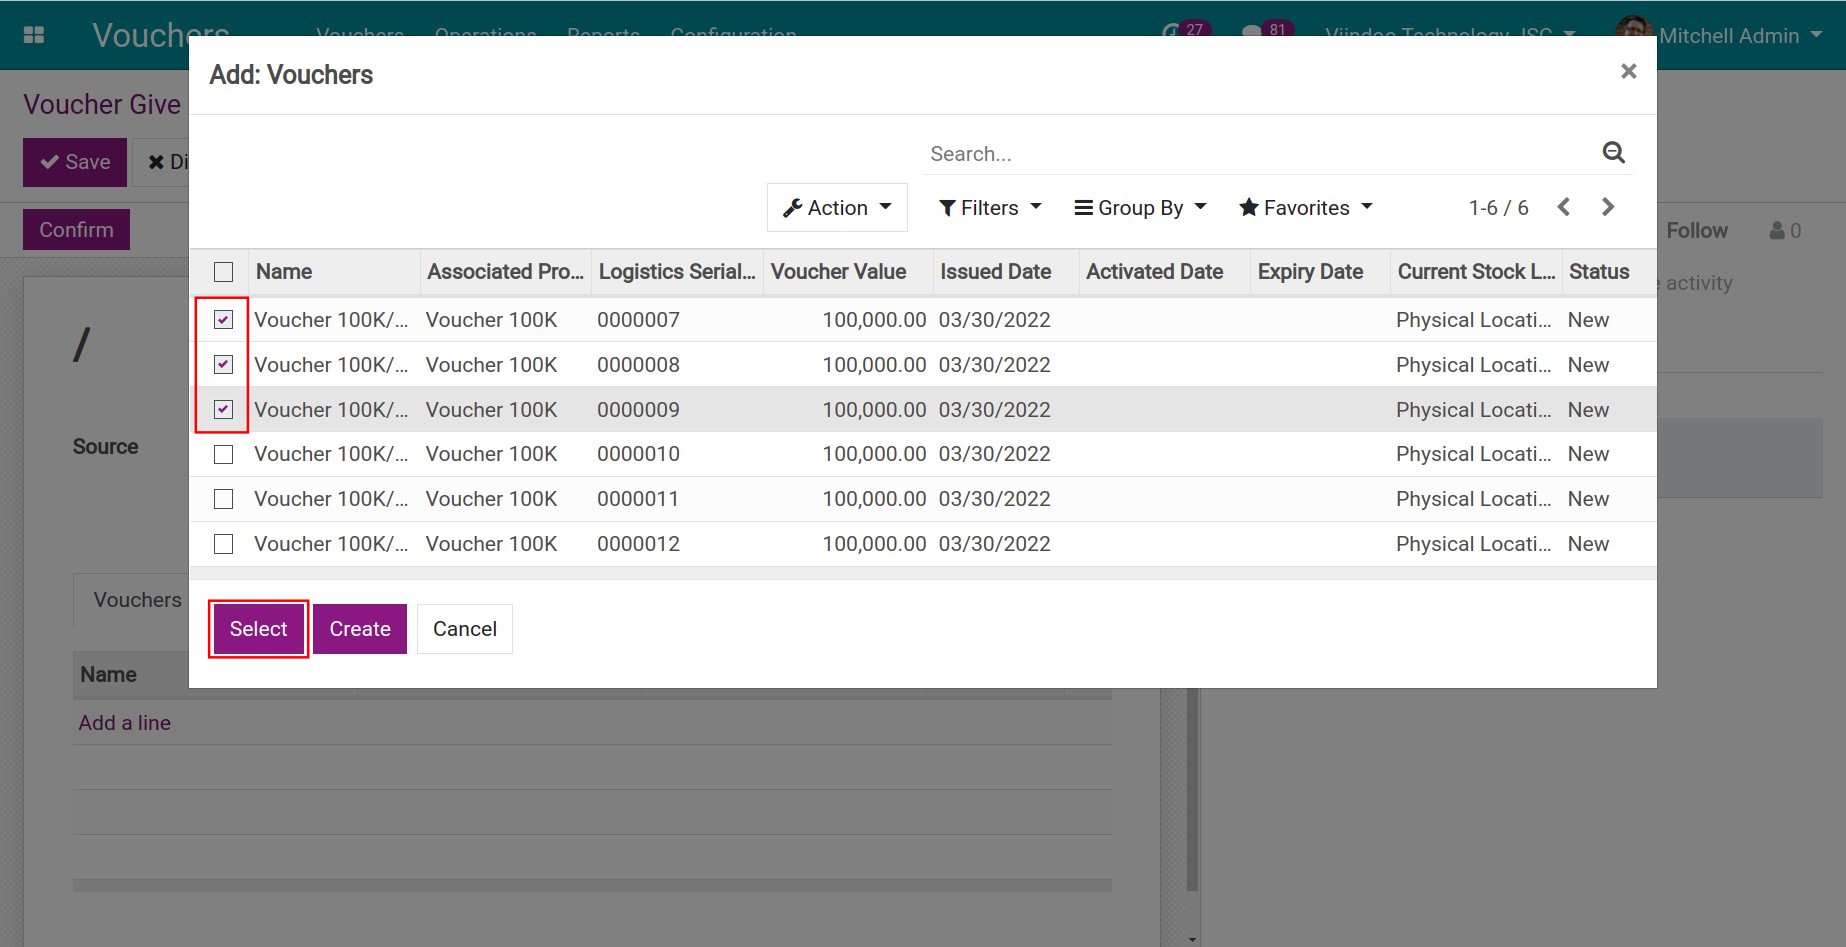
Select the Vouchers. And then press Select.
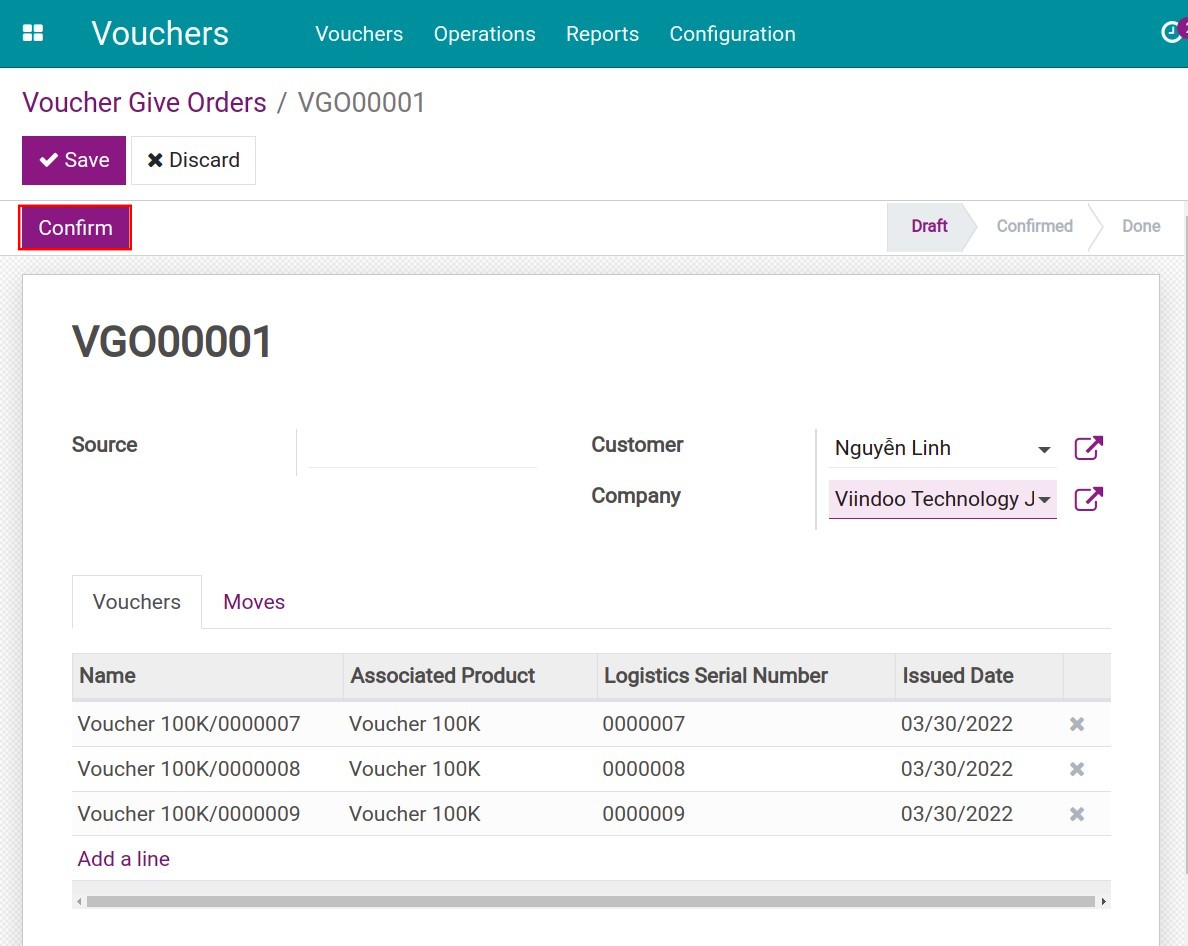
Check all the information then press Confirm.
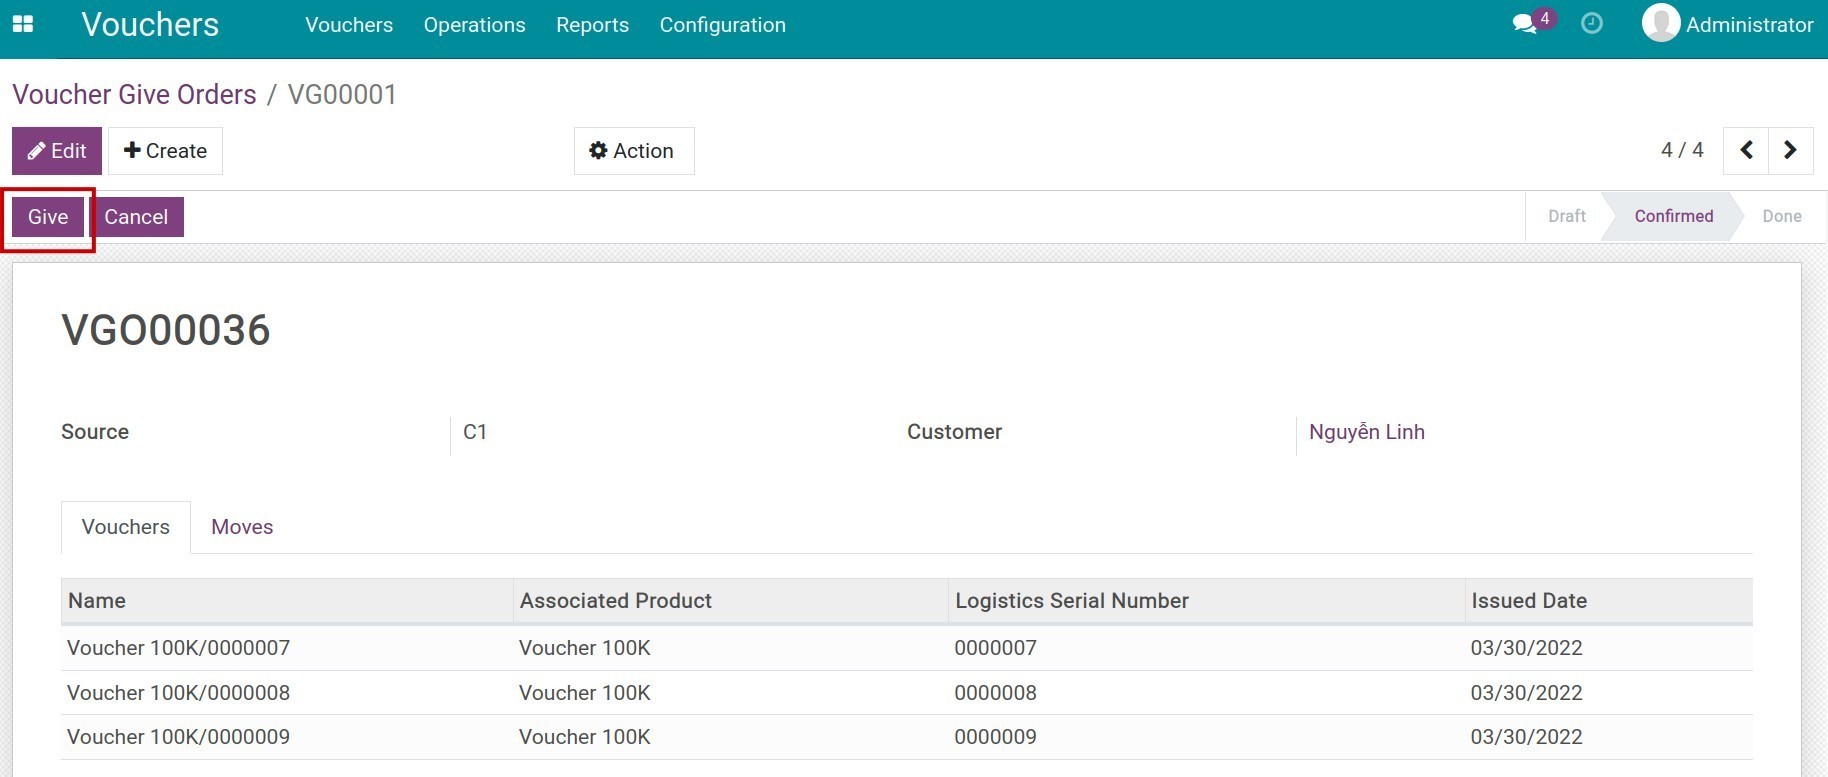
After the confirmation, press Give to move the Vouchers from the inventory to give to customers.
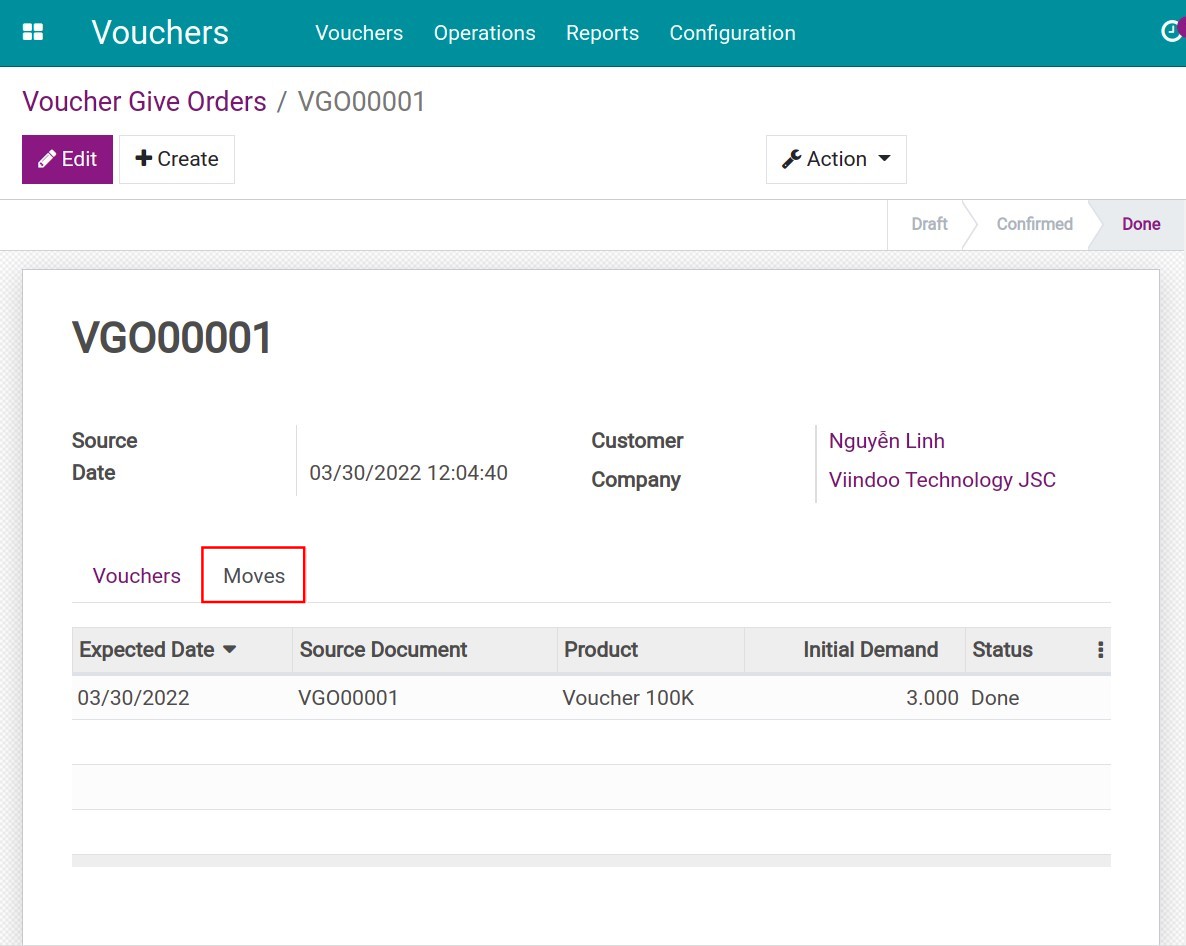
At the Moves tab, you can see the Vouchers.
Note
After you give the Vouchers, the Vouchers’ status is Actived.
How to use Vouchers for payment
After you receive the Vouchers, customers can use them when registering the payment to you.
To use the Voucher payment feature, you need to install the Promotion Voucher - Accounting Payment App. To see more information of installing app, please refer to Setting Apps and Modules.

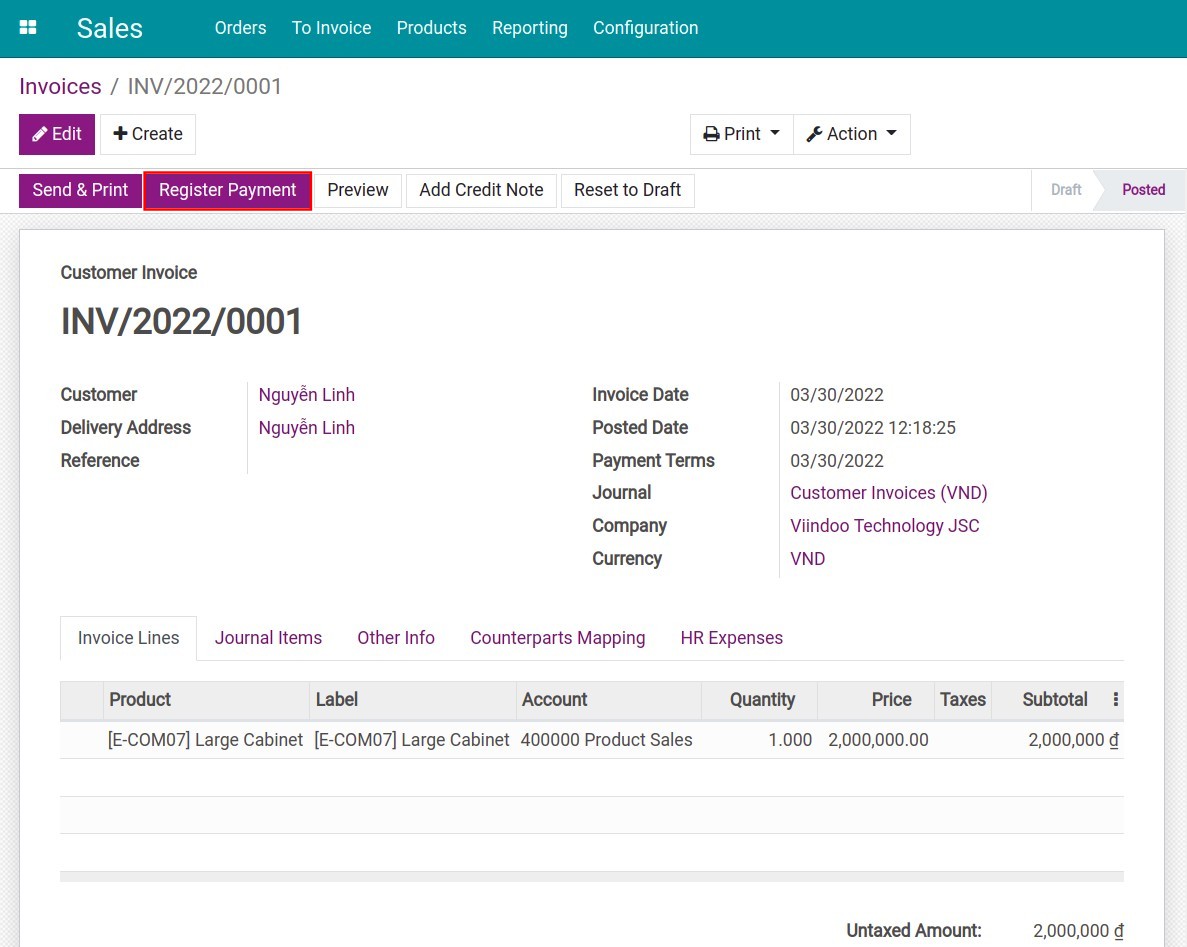
After creating and posting the order’s invoice, please refer to How to create Sales Quotation and Sales Order. On the customer invoice, press Register Payment.
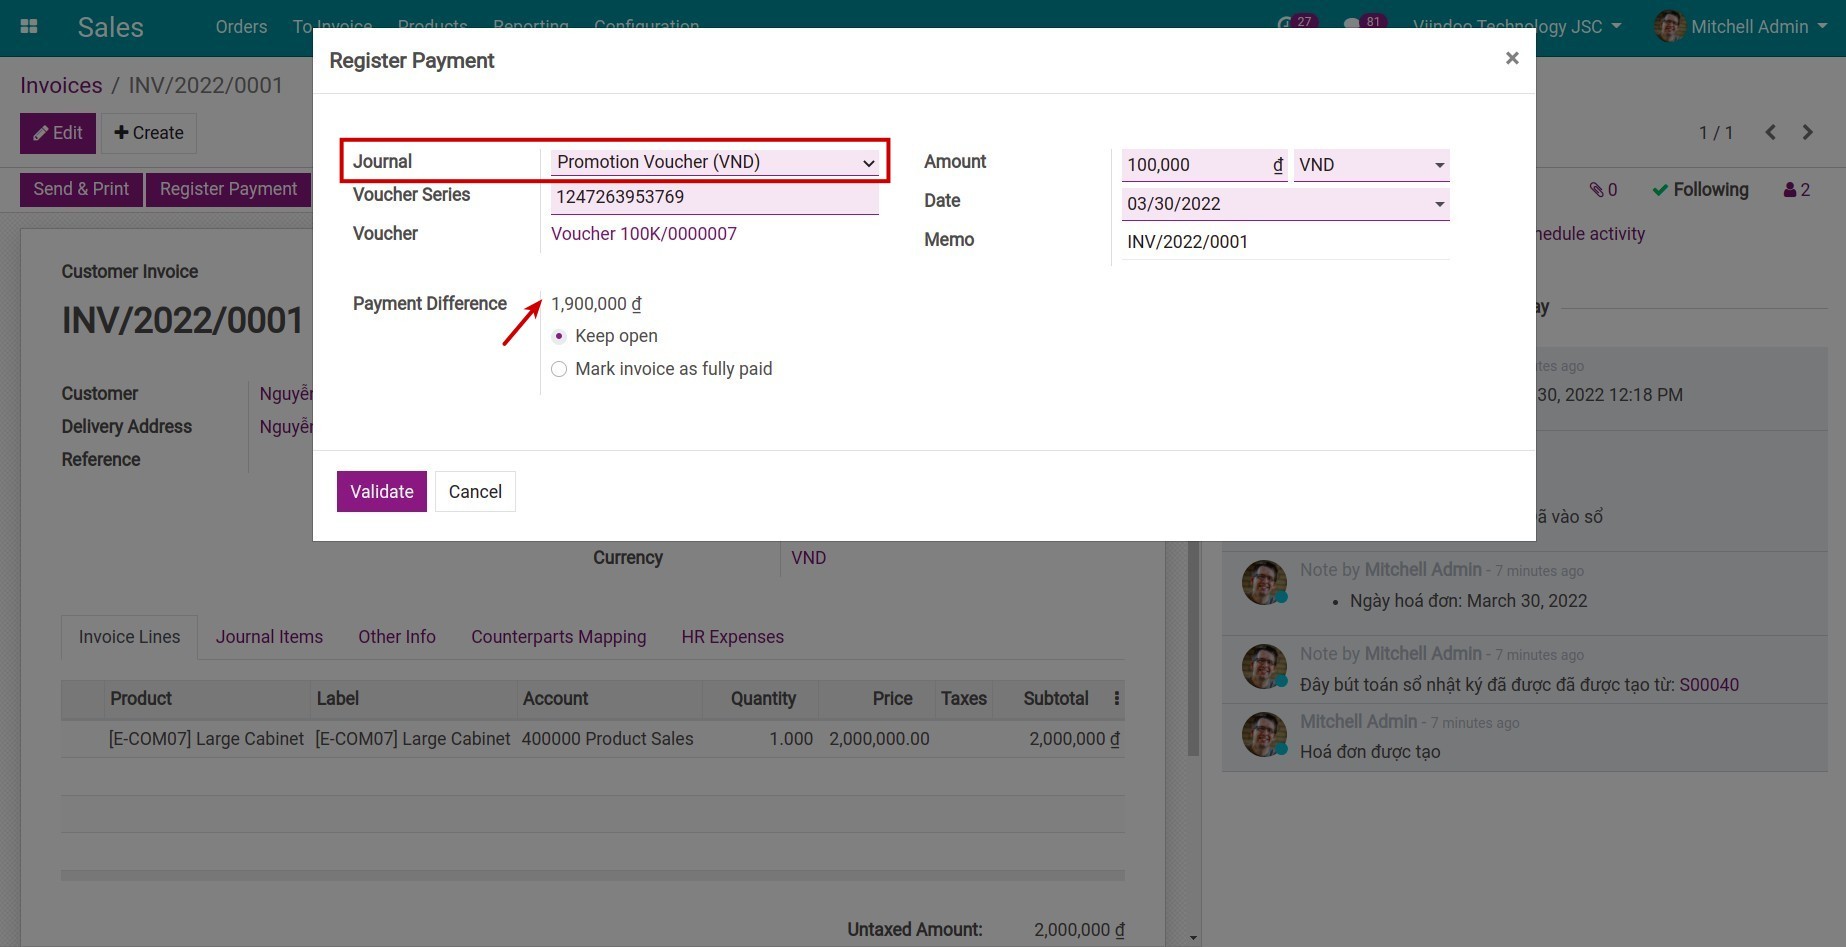
And then, select Journal to record the payment: Promotion Voucher, enter the Voucher Series. Payment Difference is to pay amount for invoice - Voucher amount. Press Validate.
Note
To see more about sale relate to payment feature, please refer to Advanced features related to payment.
Note
The Voucher series will be auto-created when Issuing the Vouchers.
On the Journal settings, you must enable Voucher Payment method.
To record the order’s payment, you need to have the Accounting access right.