How to create Time off Allocation?
In order to control the day off of employees, enterprises or the human resource officers need to allocate the employee’s time off. Viindoo Time-off Management Application will help enterprises allocate and control employees’ days off more efficiently.
Requirements
This tutorial requires the installation of the following applications/modules:
Time off Allocation Management
To create new time-off allocations for employees, first, you need to configure the time-off types. Read this article for more detail How to create Time off Types?
Next, you navigate to .
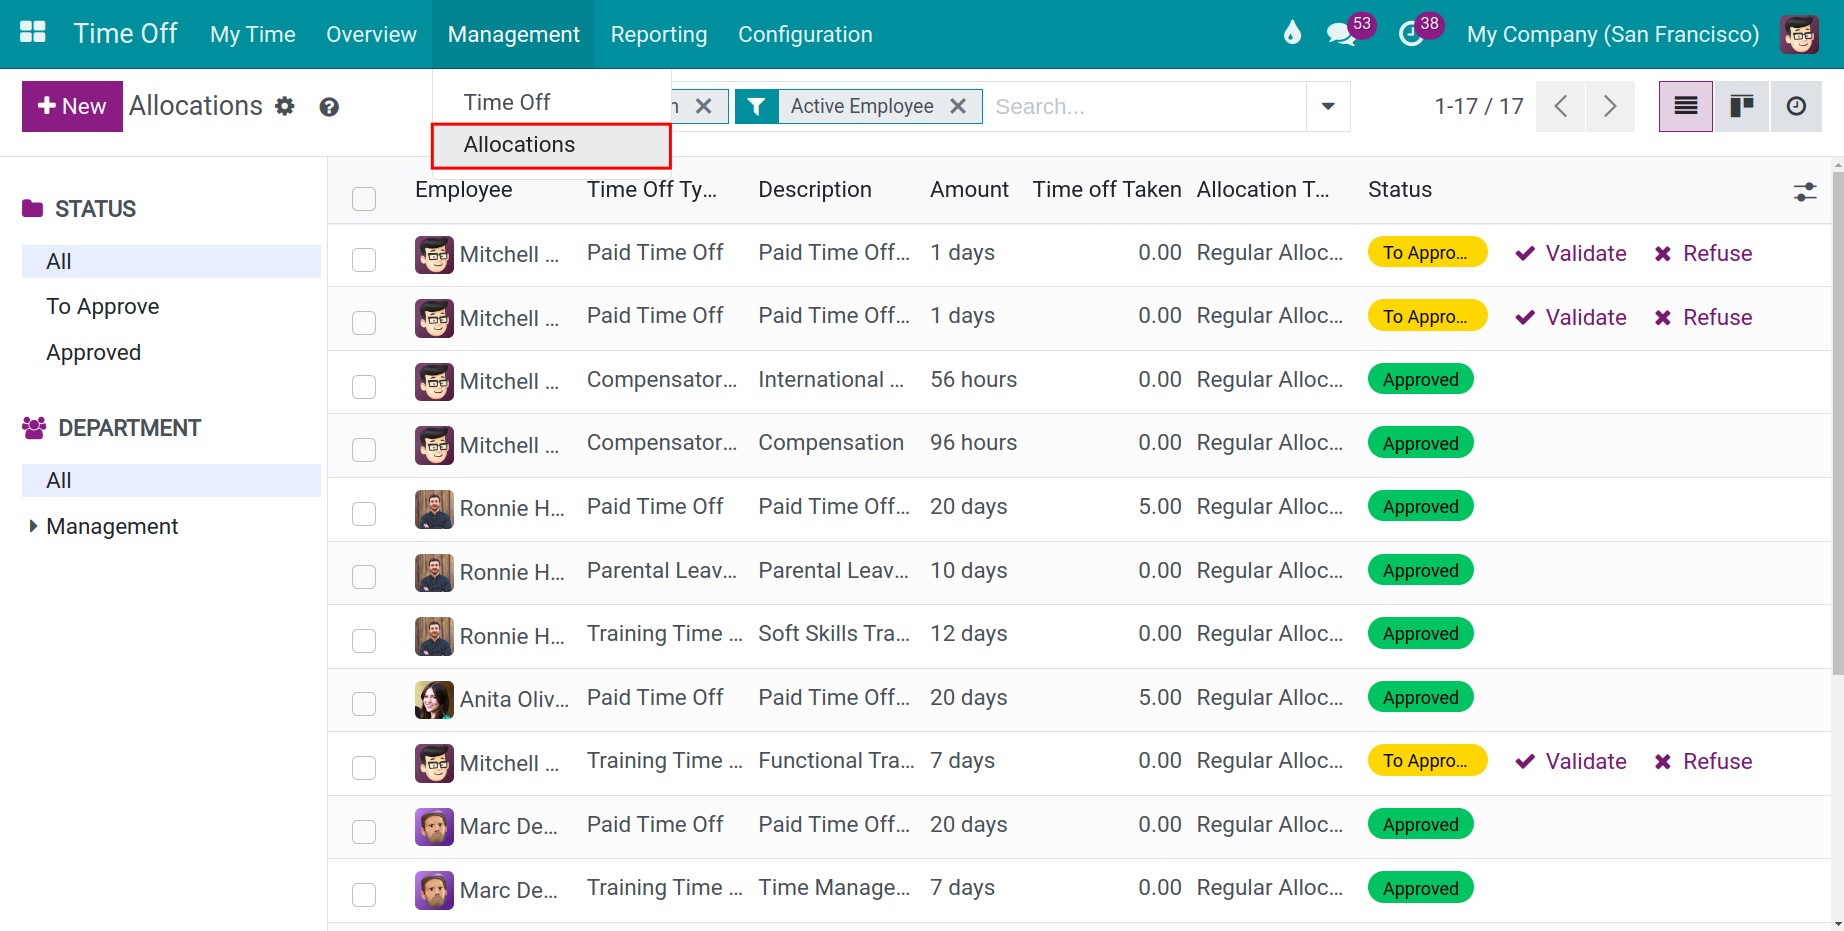
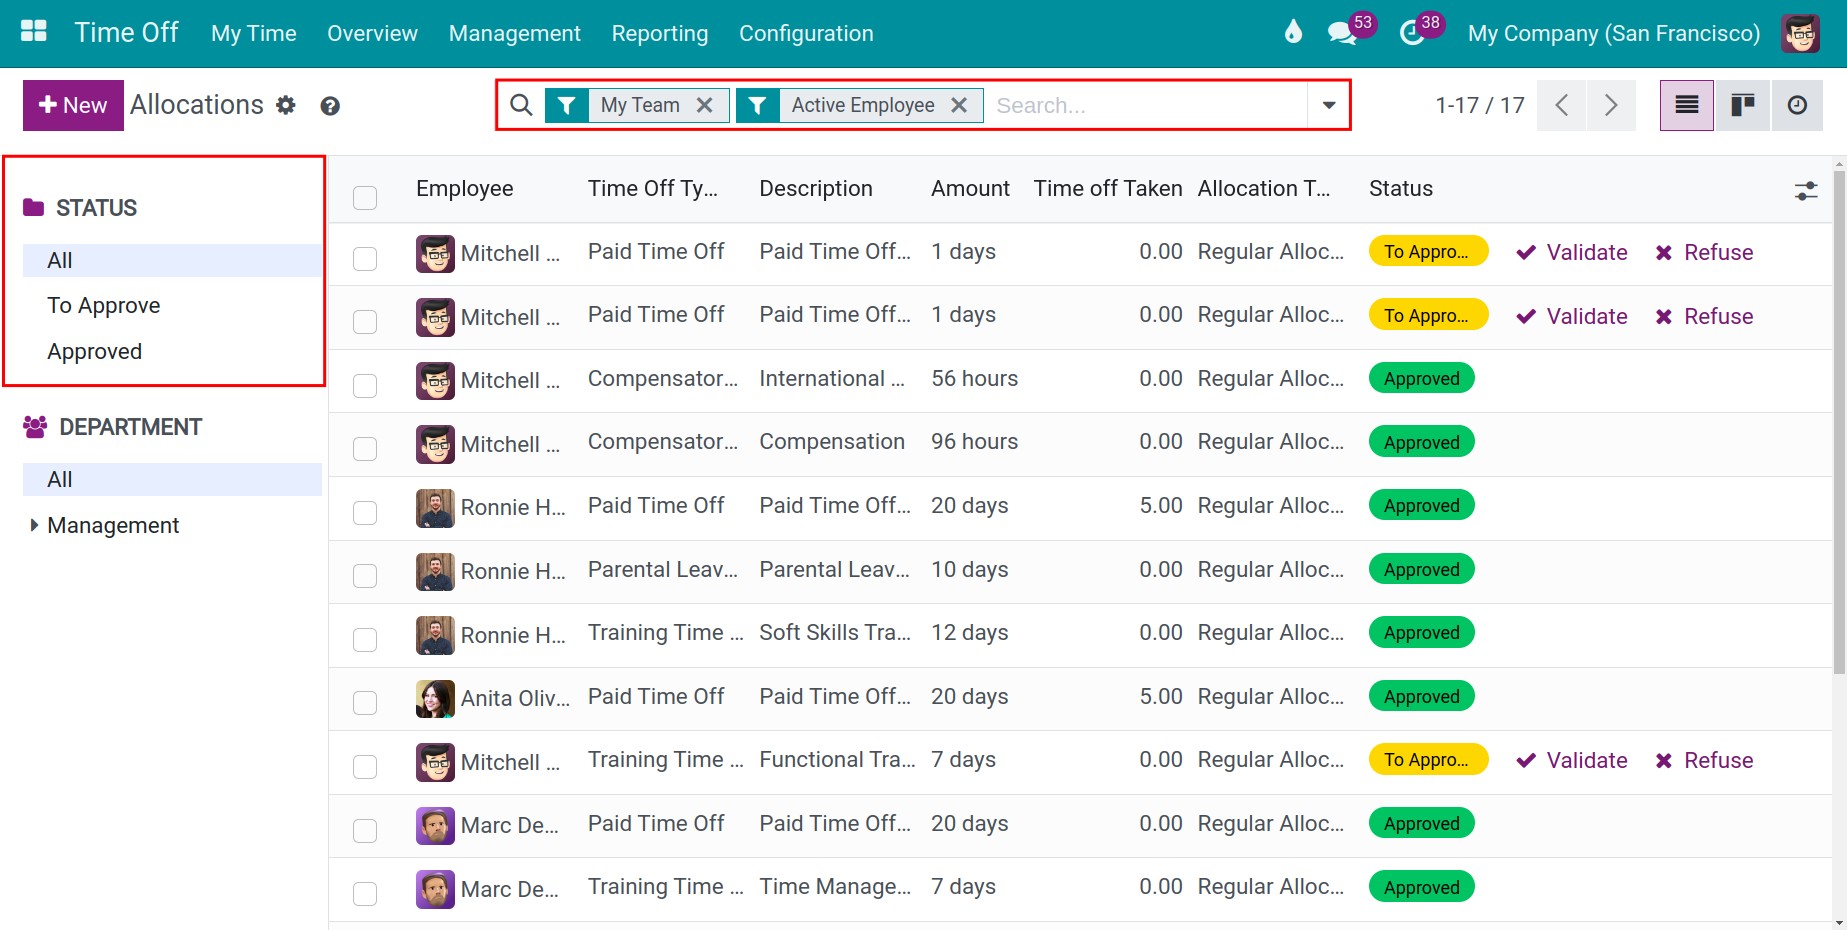
In this section, the system currently applied the “My Team” and “Active Employee” filters which helps the manager filter the time-off requests of the employees that they are in charge of. It also displays the list of employees’ allocation requests with the following information: Employee, Time Off Type, Description, Duration, Status, etc. The left column includes all the allocation statuses. When you select once, the system will automated filter depending on that choice.
Now, click on New to create a new allocation request. You need to fill in the following information:
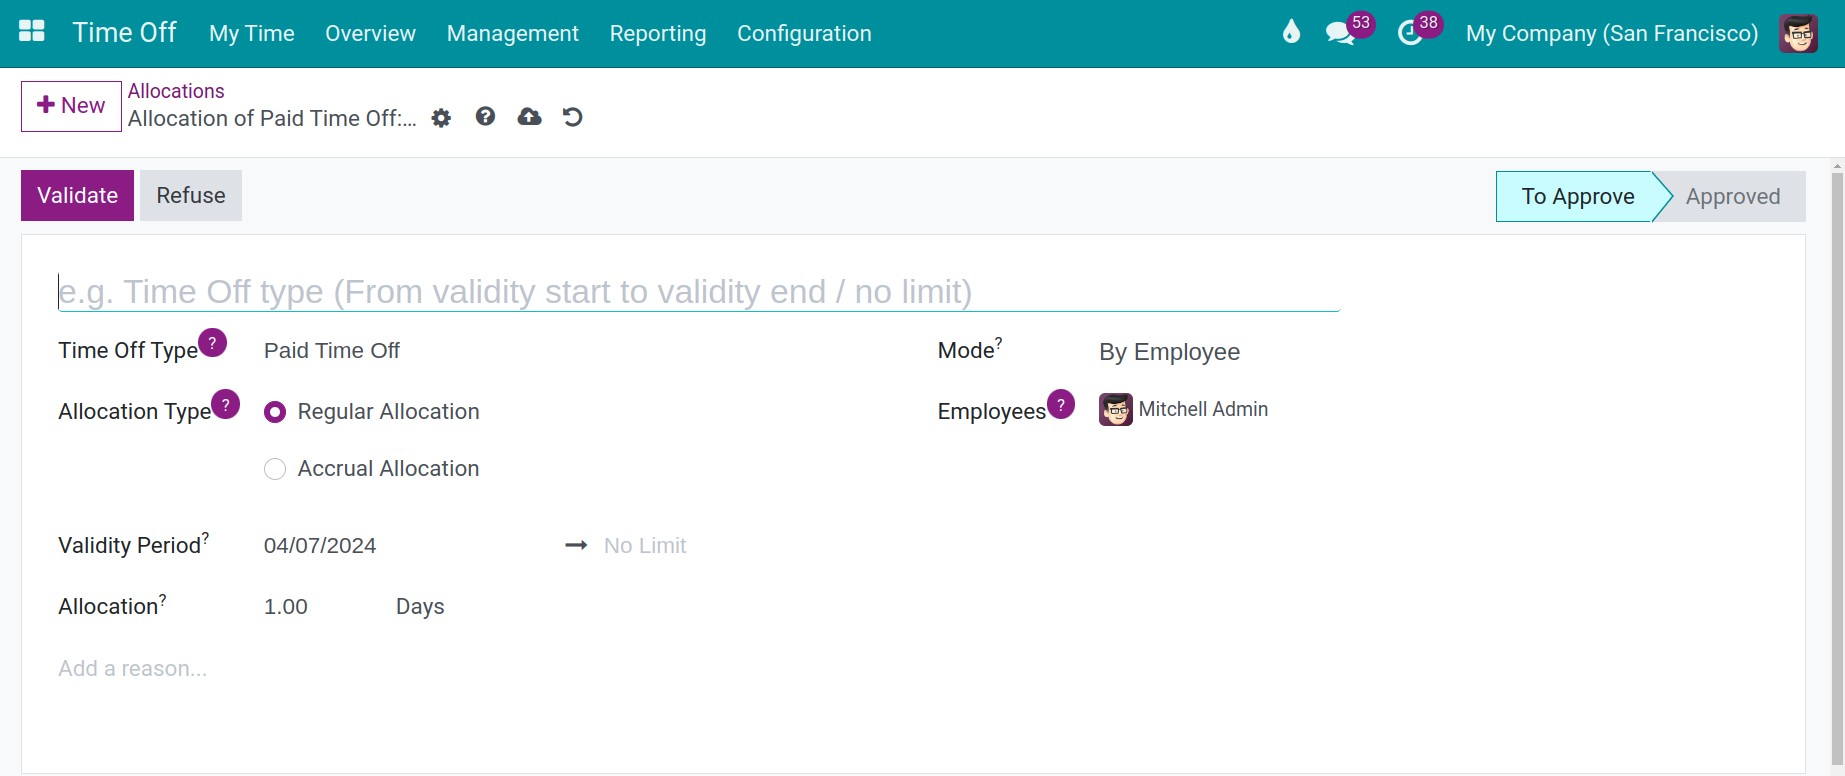
Allocation Title: Name of Allocation.
Time Off Type: Choosing the available time off type.
Mode: Allowing to create the allocation request by an employee, department, company, or employee tag. E.g: Allocating the Summer days off for the Teacher department.
Add a reason: Inputting a reason for the allocation request.
Allocation Type:
- Regular Allocation: A certain number of days/time offs are manually allocated to employees. See details: Regular Allocation.
- Accrual Allocation: The day-offs are allocated cumulatively and consecutively. See details: Accrual Allocation.
Note
Right at the view of the allocation request, you can see the time you have spent on the total allocated time in the statistics bar.
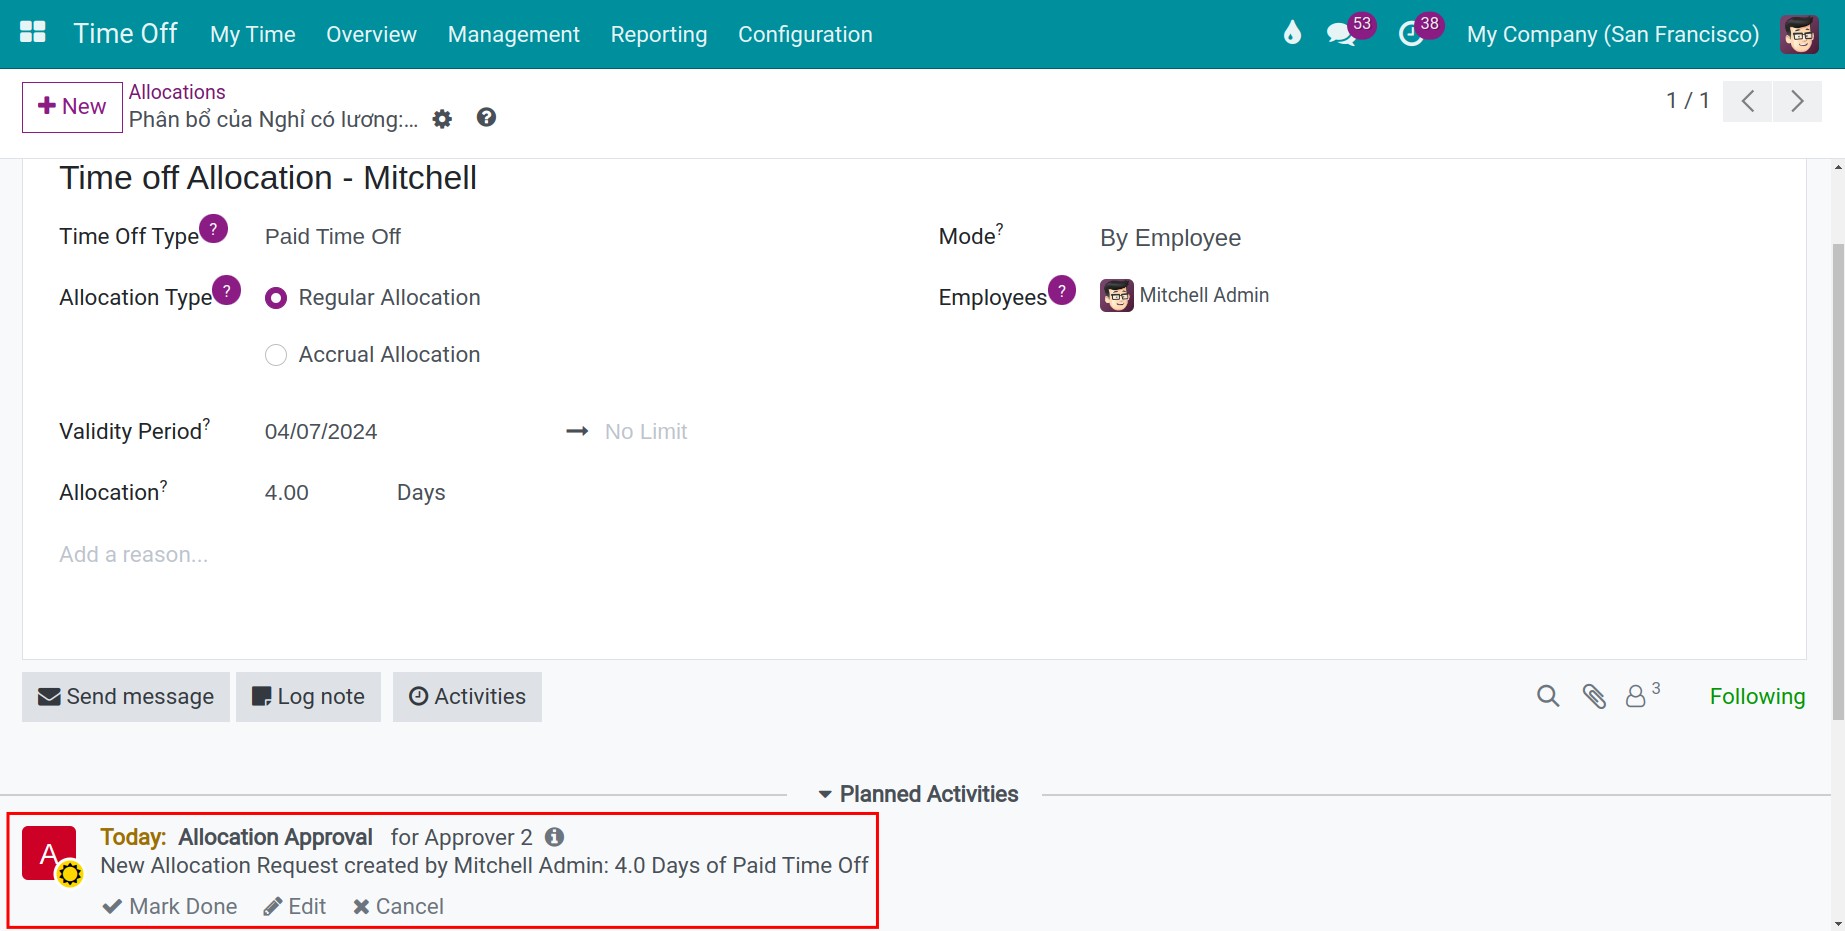
After you click on the Save icon, the system will automatically schedule an activity to notify the manager to approve this allocation request.
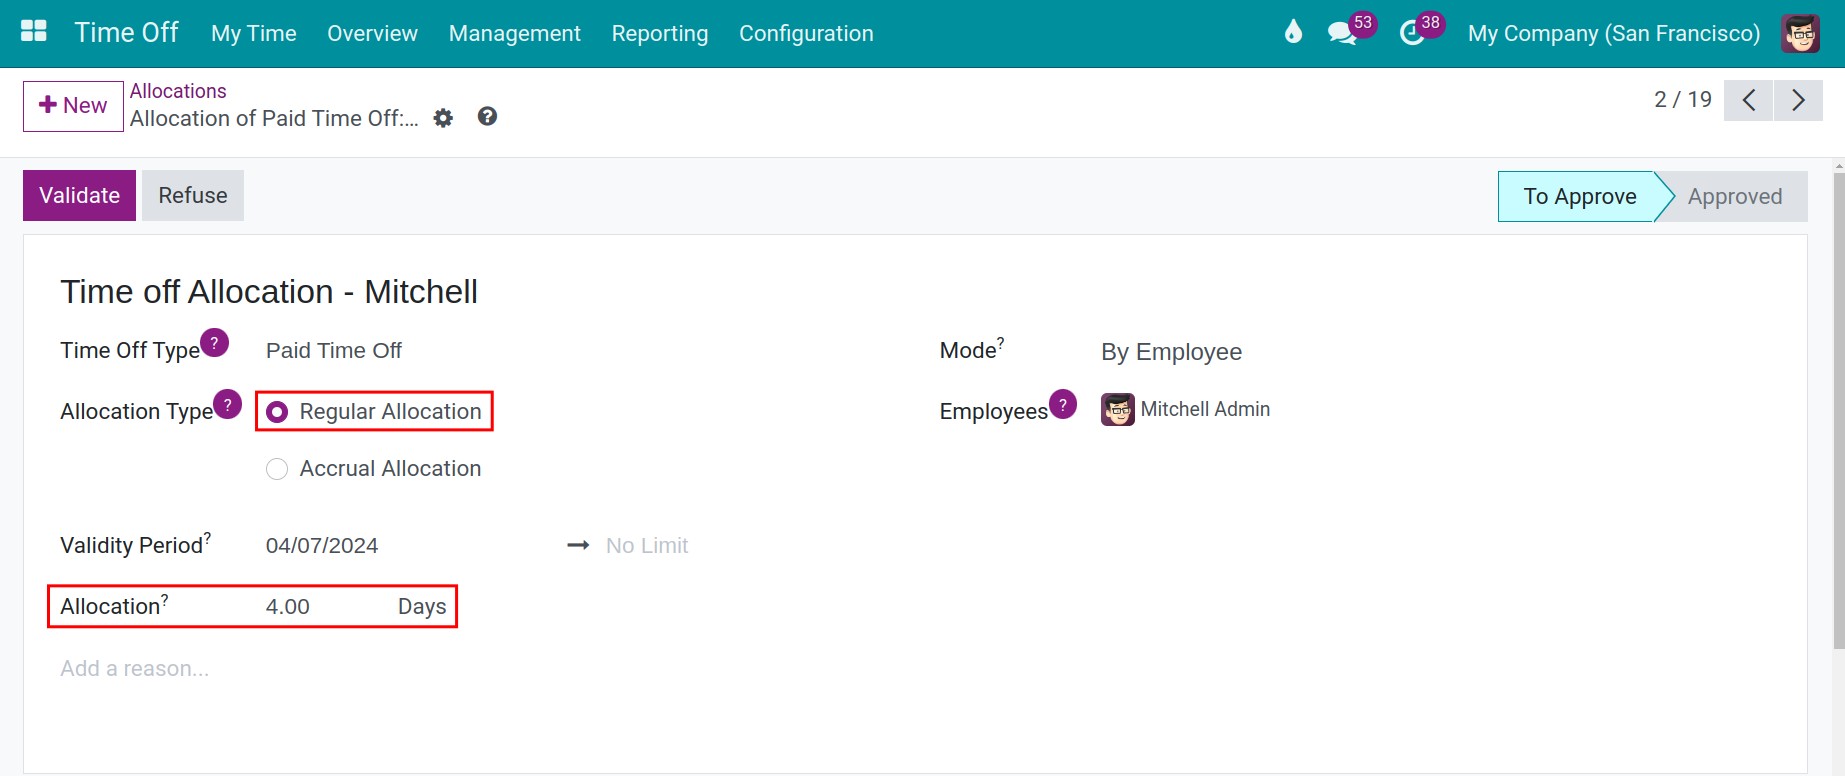
Regular Allocation
Choosing Regular Allocation on the Allocation Type field.
At the Duration field, you enter the number of allocated days. The unit of measure depends on the Time Off Type configuration.
Accrual Allocation
Configure Accrual Plans
Let’s look at an example to better understand Accrual Plans. Employees receive 12 days off per year. Additionally, if they have more than 1 year of work experience, they receive an extra day off each year. However, employees with more than 5 years of work experience receive 3 extra days off per year instead. This situation can be set up as follows:
Additionally, to better understand the fields, let’s consider an example of employee Admin who started working on 01/01/2024
Step 1: Navigate to Configuration > Accrual Plans > New. Enter the following information:
Name: Enter the name of the Accrual Plans.
Time Off Type: Select the Time Off Type you want to apply (Paid Time Off, Sick Time Off, v.v)
Milestone Transition:
- Immediately: For example, if you have a period to allocate time off from 01/01/2024 to 15/09/2029, when employee Admin reaches the milestone of 5 years of work experience, they can receive an additional day off immediately (01/01/2029) instead of waiting until the end of the period (15/09/2029).
- After this accrual’s period: The accrual will be completed (weekly, monthly), allocated, and switched to the next level when you reach the allocation date. You need to configure the rule of time, rate, limit, … for these Accrual Plans.
Accrued Gain Time: You need to choose whether the time accrues at the start or at the end of the accrual period.
At the start of the accrual period: Employee Admin’s time off will be calculated from the date they started working at the company (since 01/01/2024)
At the end of the accrual period: Employee Admin’s time off will be calculated after the accrual period. For example, according to company policies, after a 2-month probation period, employee Admin can start accumulating their time off.
Carry-Over Time: You need to choose whether the carryover time is applied at the start of the year, on the allocation date, or on another specified day.
At the start of the year: The system will take the milestone from 01/01/2024.
At the allocation date: The system will take the milestone from the day you start to set up an allocation time off request (Approved).
Other: You can set up another day according to your company’s policies.
Based on worked time: If checked, the accrual period will be calculated according to the work days, not calendar days.
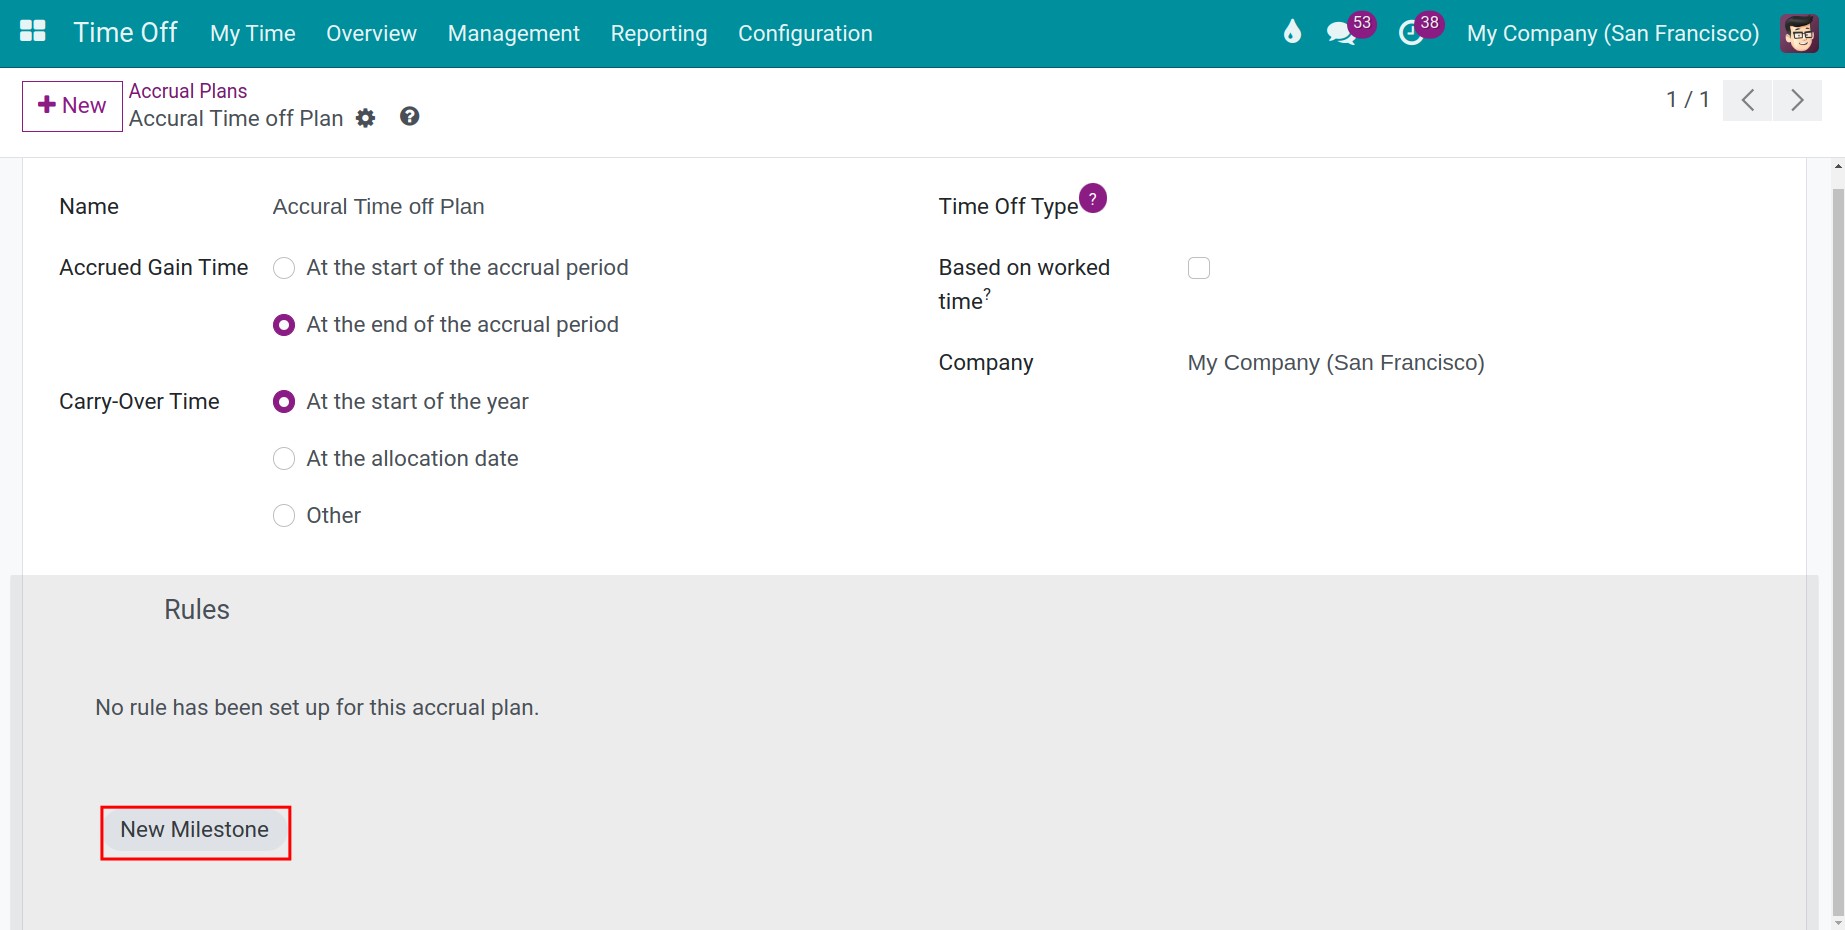
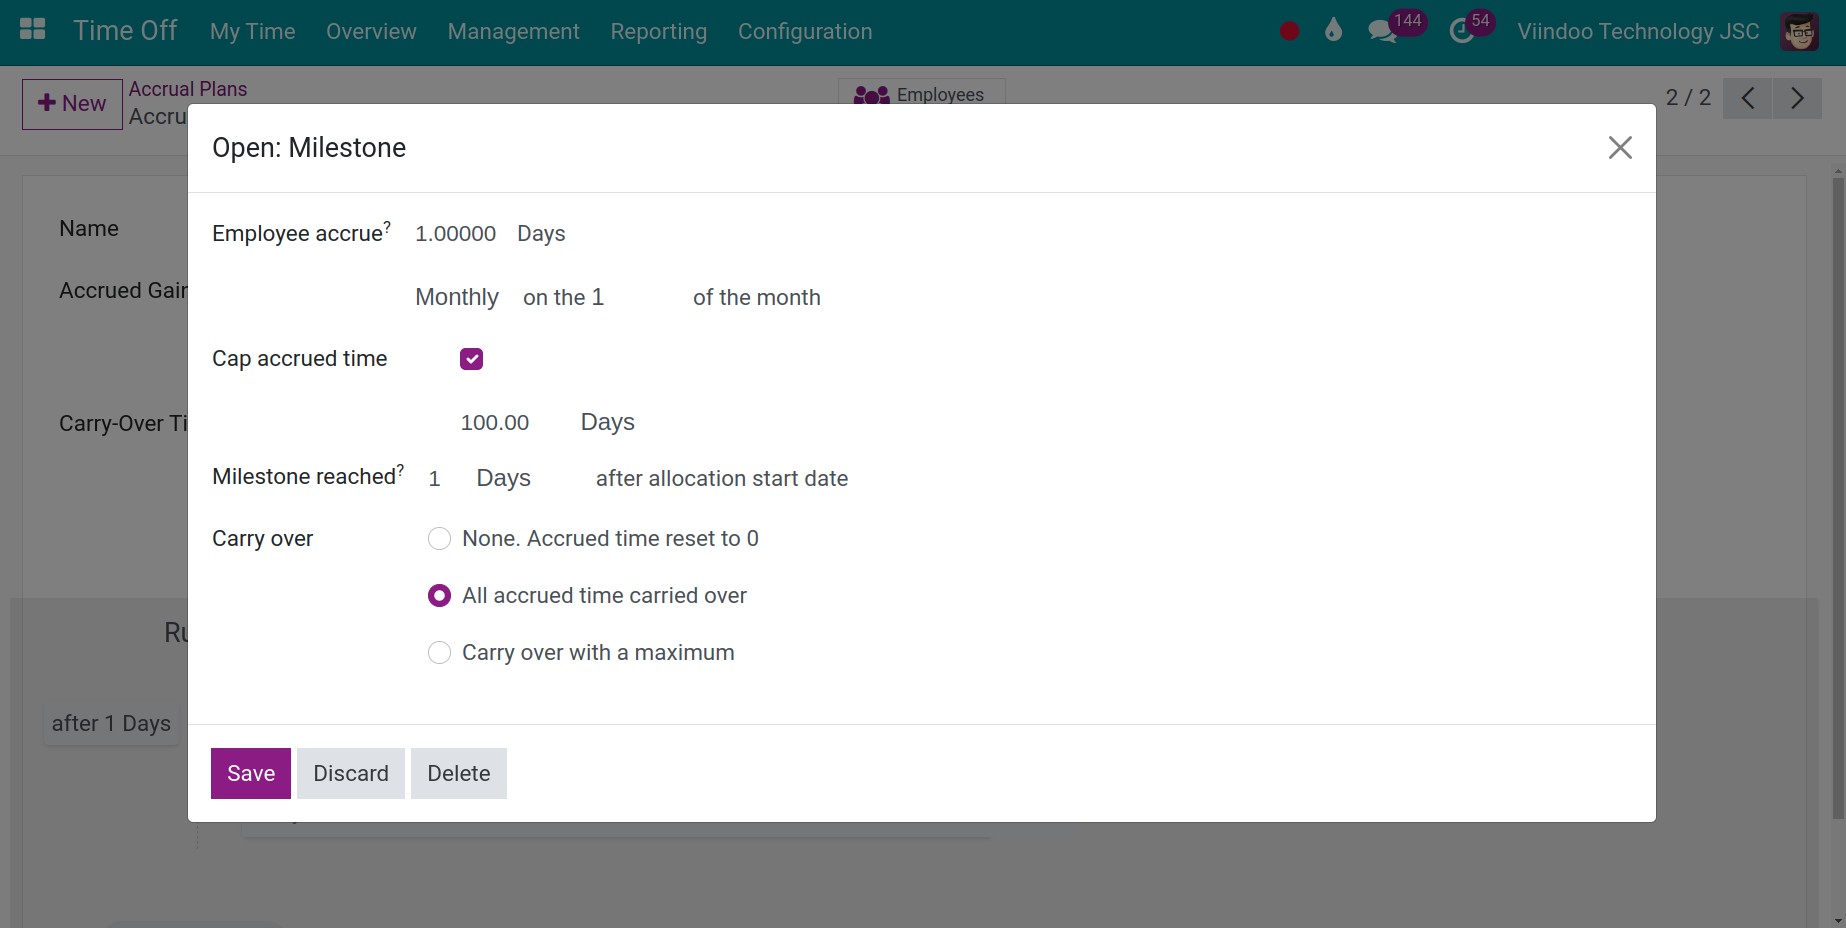
After that, you click on New Milestone button. In which:
Employee accrue: The number of hours/days incremented in each period’s specified Time Off Type. For example, if you set up an increment of 1, employee Admin will receive an additional day off based on your chosen period whether monthly, hourly, daily, weekly, twice a month, twice a year, or yearly. The specific increment depends on the rules you configure.
Cap accrued time: If this option is selected, the accumulation of vacation days will be capped at a specific limit. For example, if you set this field to 100 days, employee Admin will be allowed a maximum of 100 days off.
Milestone reached: The accrual starts after a defined period from the allocation start date. This field defines the number of days, months or years after which accrual is used
Carry over: You have three options for managing time off based on your company’s policies. For instance, if Employee A has 12 days off in 2024 and you want their time off to reset to 0 at the start of 2025, you should select None. Accrued time reset to 0.
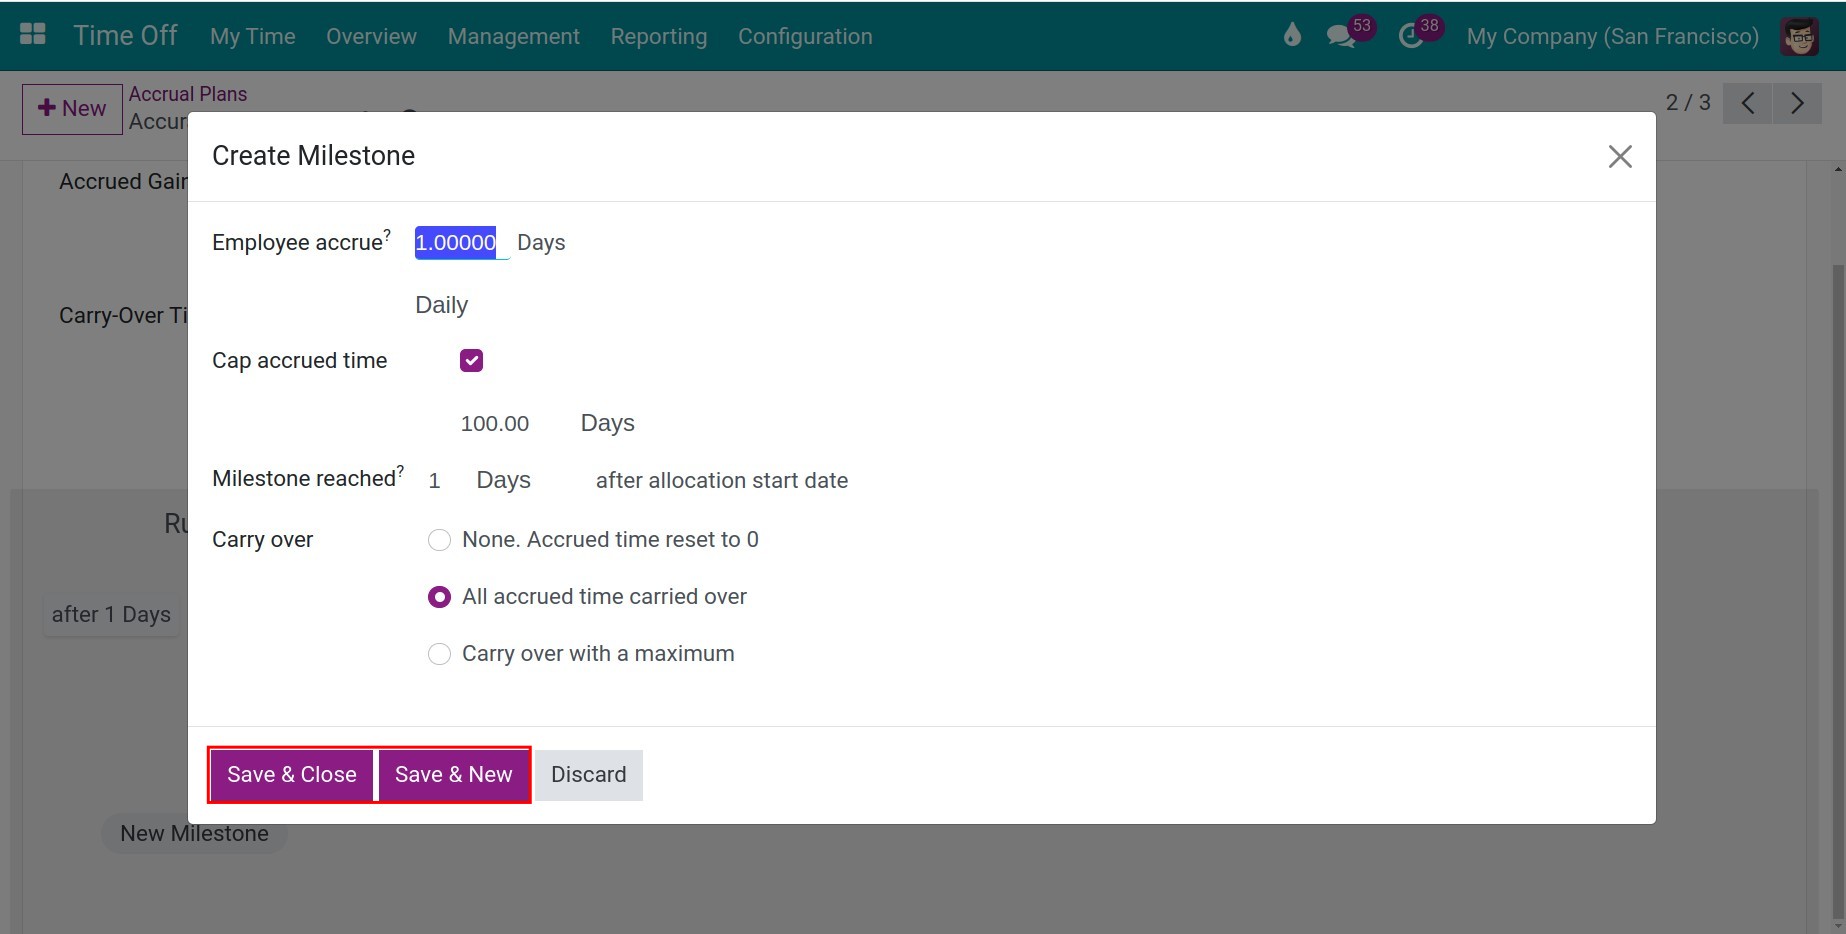
Then, you can click on Save & Close button or Save & New button determine whether you want to create additional rules or not.
Step 2: In the following situation, you can set it up as follows:
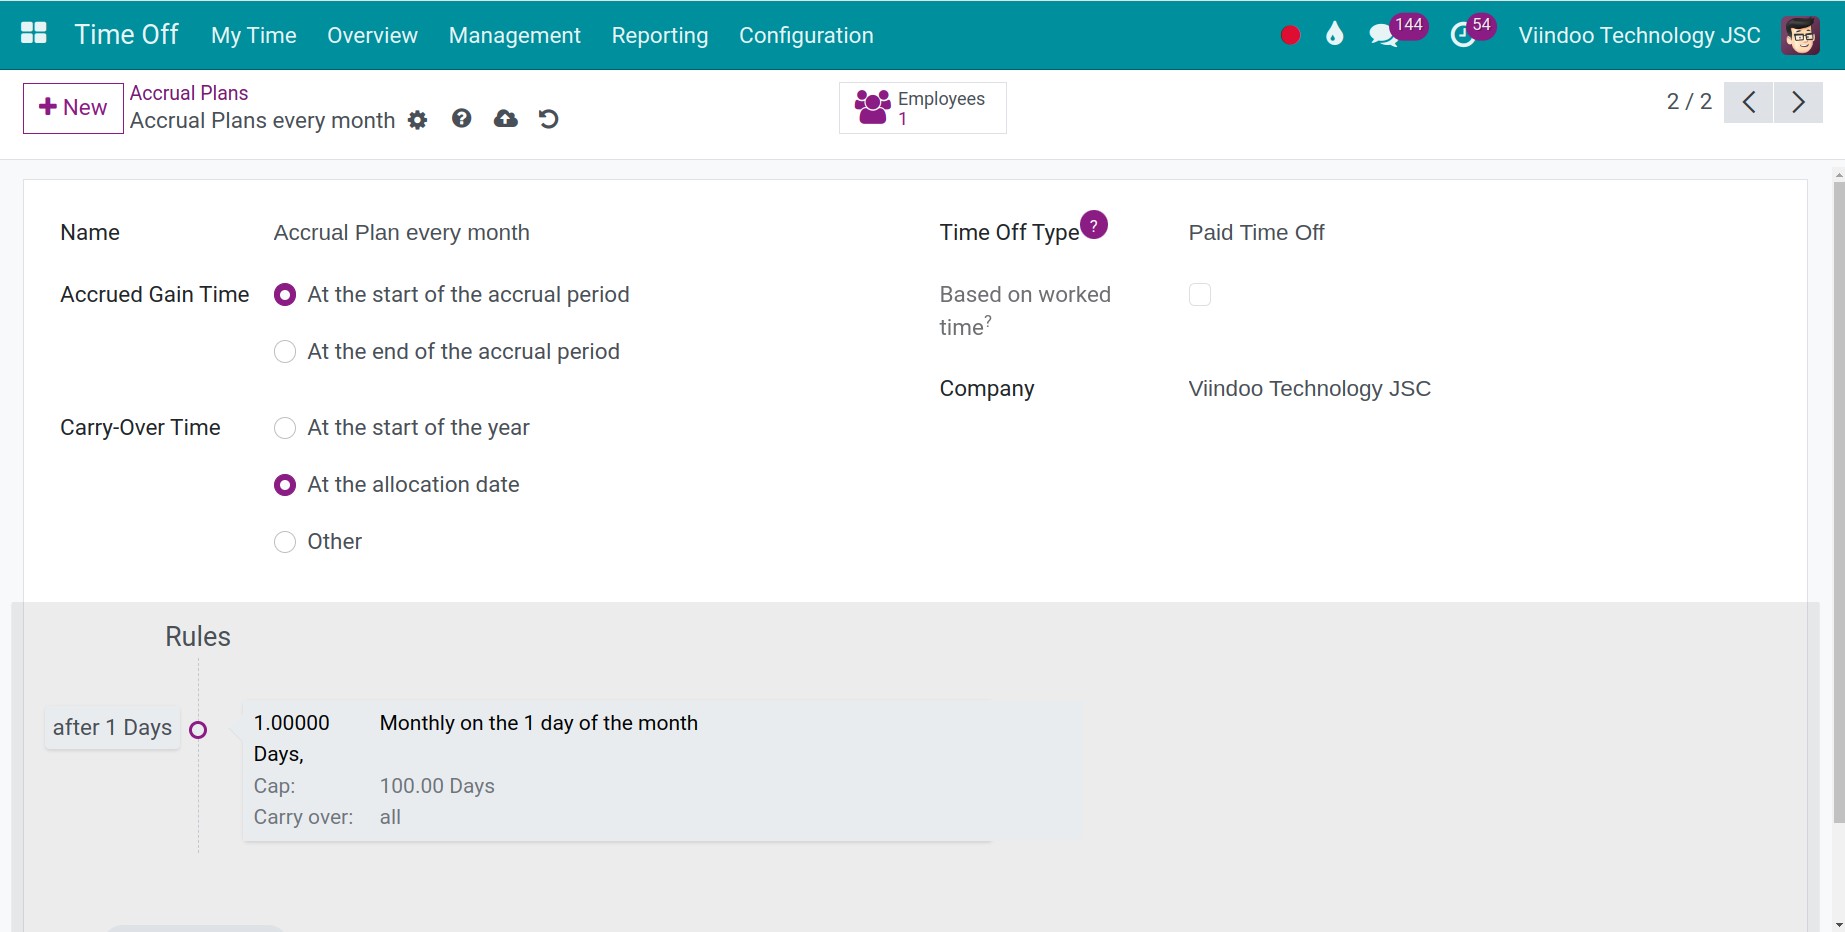
Firstly, create a new Accrual Plan for the number of days off accrued each month.
Secondly, create a new Accrual Plan for the number of days off based on years of work experience.

Thirdly, create a new rule for 1 year of work experience.

Finally, create a new rule for 5 years of work experience.

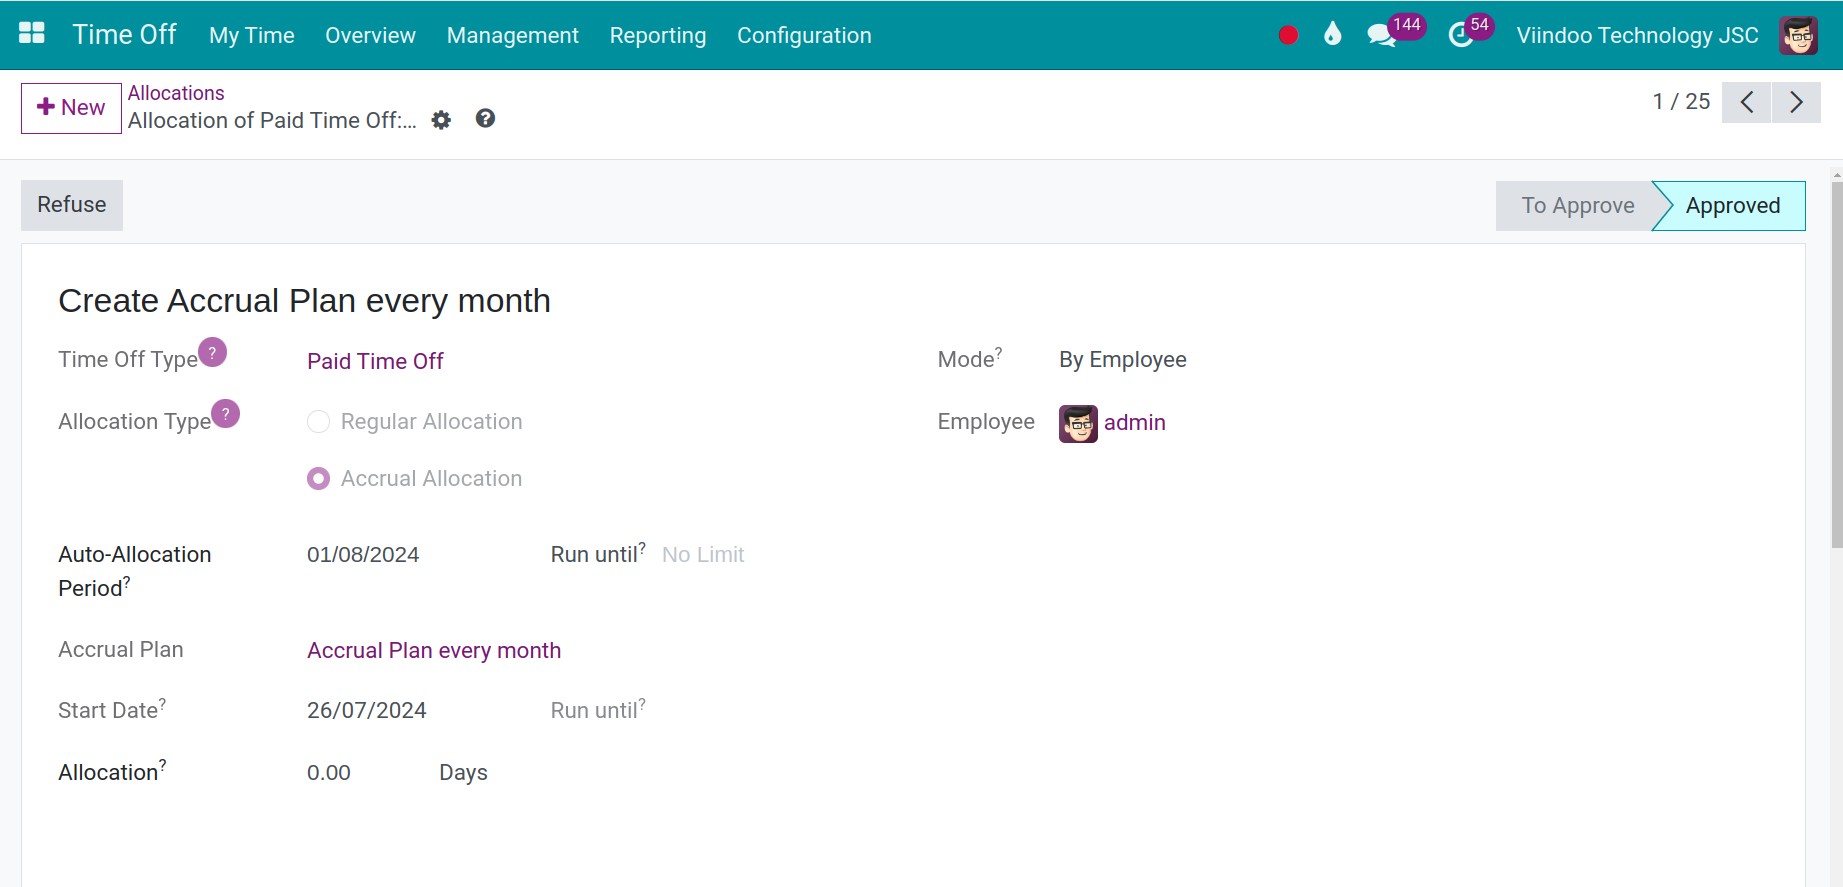
Step 3: Navigate to Time off > Management > Allocations to start creating time-off allocations for employee Admin.
Create an Accrual Plan that allocates days off on a monthly basis. Select the Accrual Plan for the number of days off accrued each month which you created.
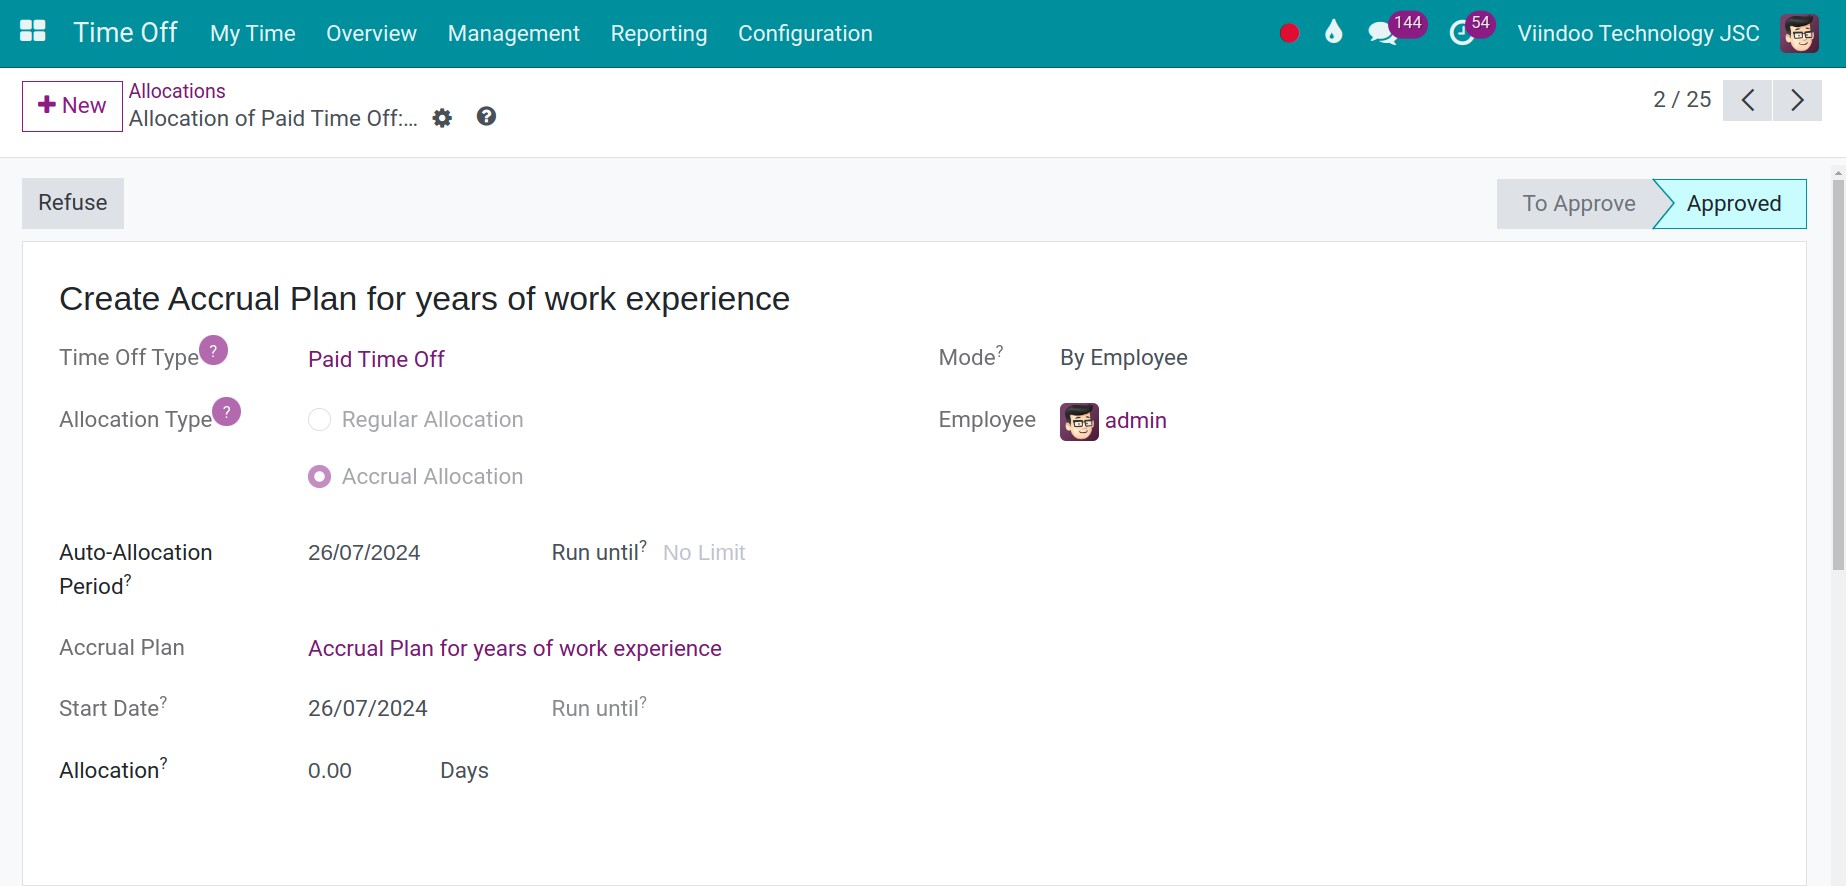
Create an Accrual Plan for years of work experience. Select the Accrual Plan for the number of days off based on years of work experience you created which you created.
In which:
- Auto-Allocation Period: The start date for the effective allocation period.
- Accrual Plan: Choosing a suitable Accrual Plans for the Time off Type you chose.
- Start Date: The day begin to allocate.
- Allocation: For an Accrual Allocation, this field contains the theorical amount of time given to the employee, due to a previous start date, on the first run of the plan. This can be manually
- Run Until: On the day of stopping allocate, you can skip this field if there is no limit on the end date.
Note
Accrual Allocation will be run automatically according to the configured rule and with a delay depending on the Scheduled Actions setting of the system.
Time off Allocation requested by Employees
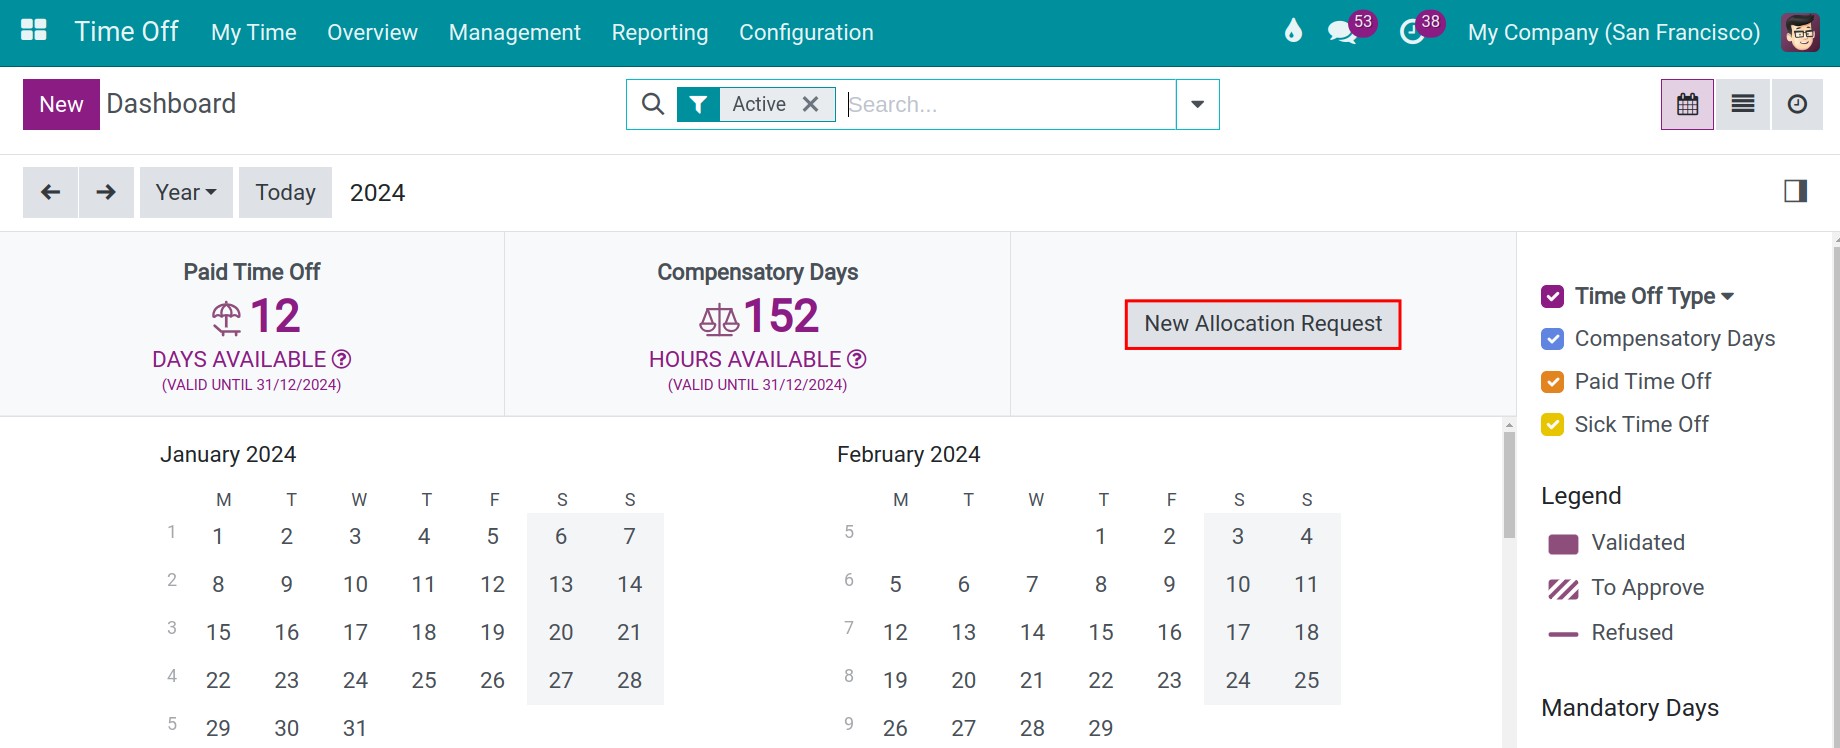
With the Extra Days Requests Allowed allocation configuration feature in Time Off Type, employees can create an allocation request for their day off. On the employee account, navigate to Time off application, then click on New Allocation Request.
The system displays an Allocation request and you need to enter the following information:
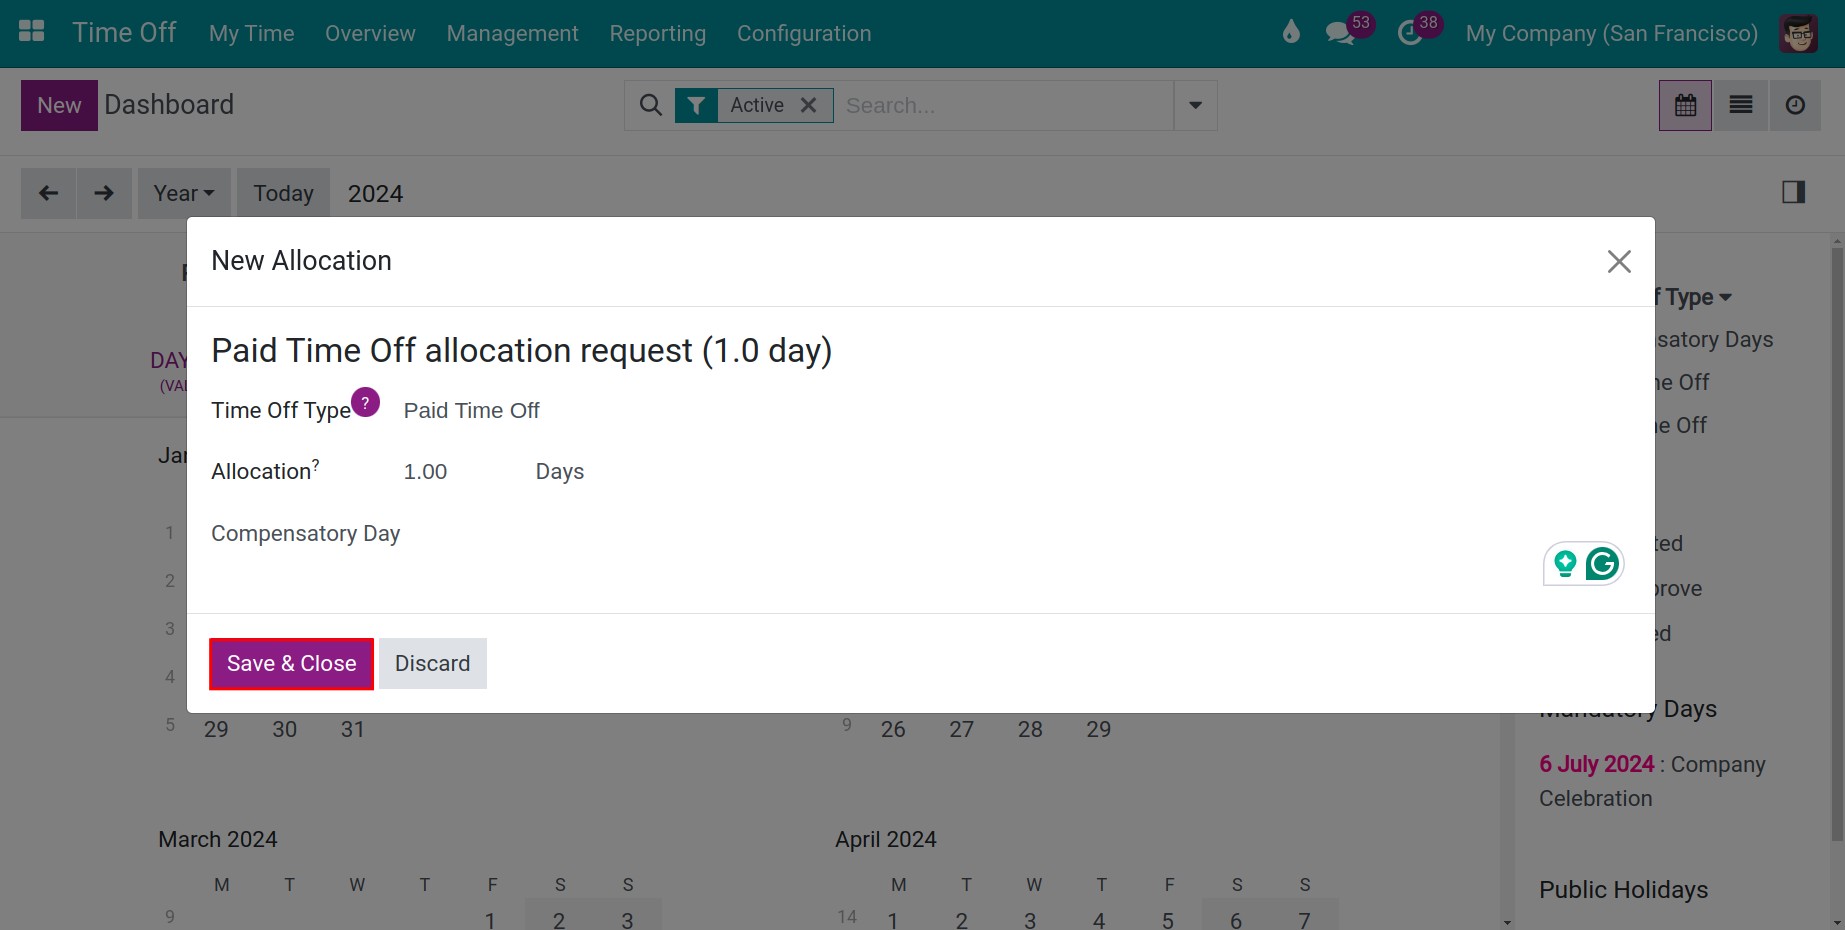
- Allocation Title.
- Time Off Type: Selecting the time-off type which had been configured in the Allow Employees Requests mode.
- Allocation: The duration of the allocated time-off you want to request. The unit of measure depends on the configuration in Time Off Type.
- Add a reason: Entering the reason for an allocation request.
Clicking on Save & Close. For detailed observation of your allocation request, you navigate to .
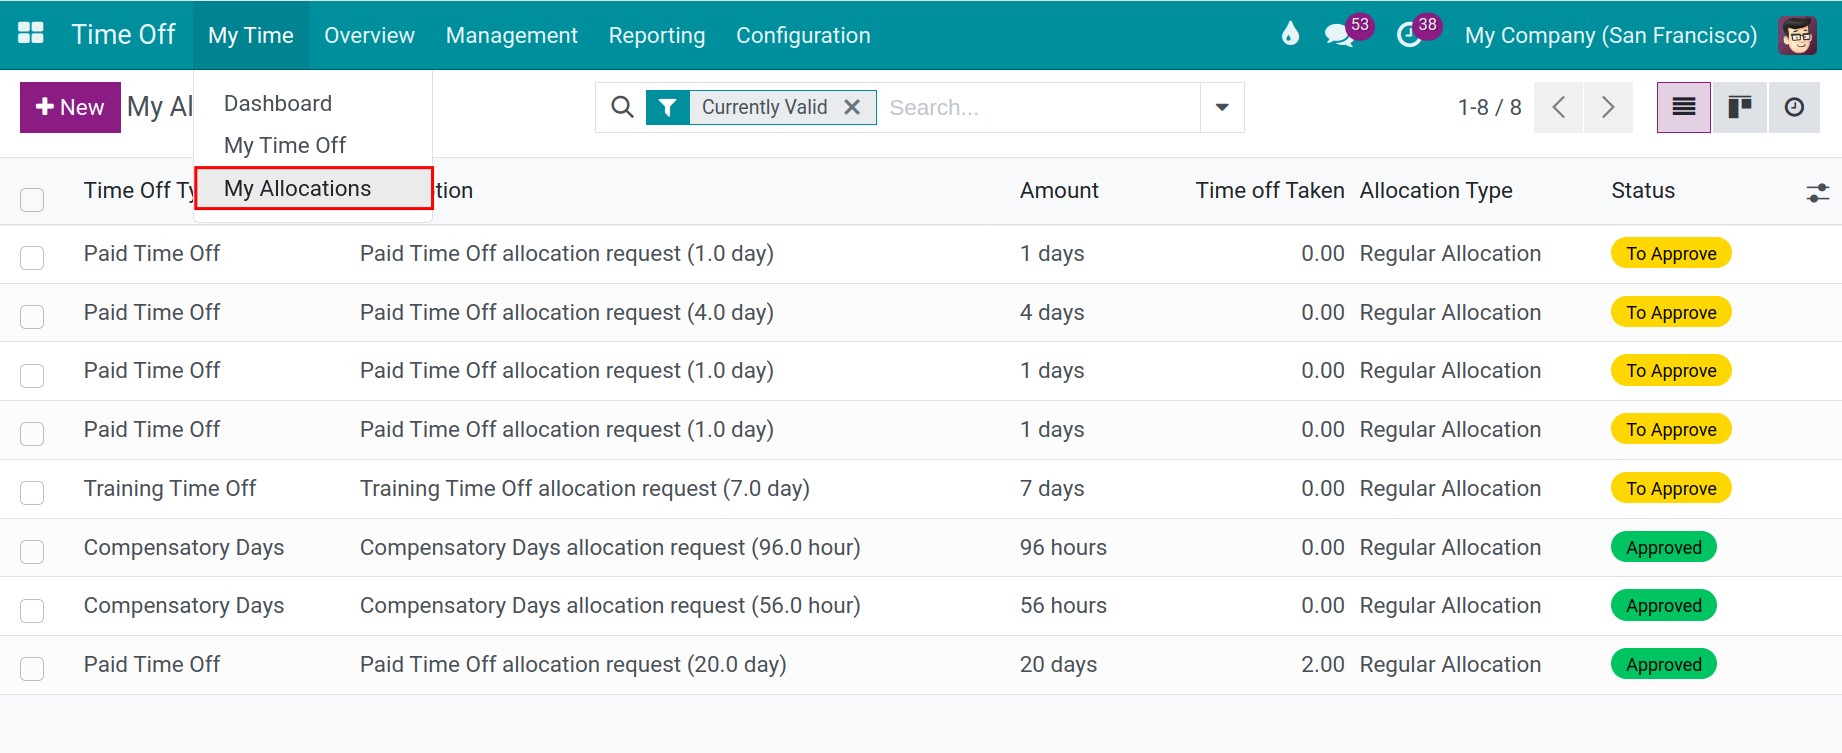
By choosing a random allocation request, you will see the information which you have filled in. You can also track the status of the created allocation request:
- To Submit: When an allocation request is created.
- To Approve: When an allocation request is confirmed.
- Approved: When an allocation request is approved by the manager.
- Refused: When an allocation request is refused by the manager (displayed only when the request is being declined).
After an allocation request had been confirmed, the system will automatically schedule an activity to notify the manager to approve this allocation request.
In case the manager approves the allocation request that the employee has created, the employee can proceed to create a time-off request.
See also
Related article
Optional module