Configure Zalo OA
Guide Info
Why Order Matters
If you click OAuth authenticate before entering the correct App ID and App Secret, or test webhook before OA is fully connected, Zalo’s verification process may fail. Your ops team then wastes time backtracking the error when the root cause was simply the order of steps.
The correct workflow is:
Quick Action Checklist (Correct Order)
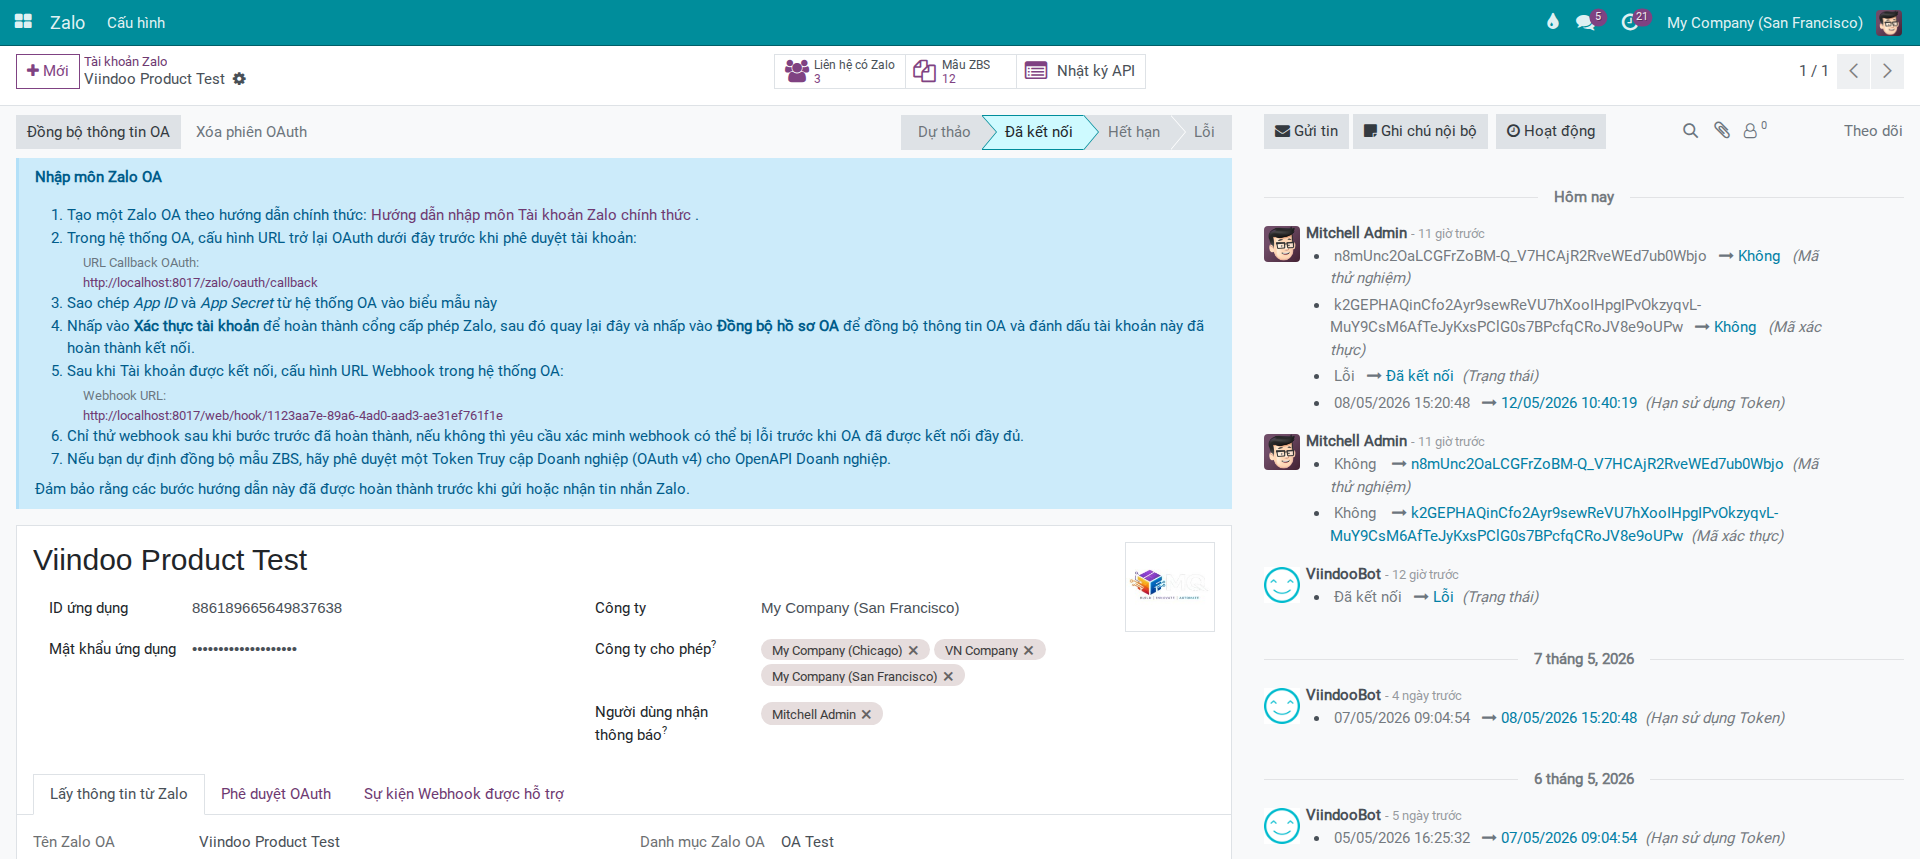
Create OA record Go to Accounts and create a new Zalo Account record.
Enter and save app credentials Fill in App ID + App Secret, then click Save.
Authenticate the connection Click Authorize Account to perform OAuth with Zalo.
Sync OA profile Return to Viindoo and click Sync OA Profile.
Configure webhook last Only configure/test webhook after the account is successfully connected.
Tip
Signs of success: OA status changes to Connected, OA profile data appears, and webhook test succeeds after sync.
Prerequisites
User has Zalo Admin permission.
You have an active OA on Zalo with App ID and App Secret already created.
You are in the correct company where the OA will be operated (relevant for multi-company setups).
Required Setup on Zalo OA Platform
Configuring Viindoo alone is not sufficient. For OA to send/receive via OpenAPI, Zalo side must complete account setup and grant permissions first.
Create and authenticate a Zalo Official Account (OA) following Zalo’s official guide.
Create a Zalo App (application on Zalo platform) to obtain
App IDandApp Secret.Complete app authentication and permission grant per Zalo’s developer documentation.
If using ZBS template messages, also prepare a ZBS Account and link it: - ZBS Account ↔ OA - ZBS Account ↔ Zalo App
Ensure admin has permissions on all related accounts (OA/App/ZBS). These may be different admins, but they must coordinate to apply correct permissions.
Note
For first-time integrations, the difficult part usually lies in creating the App, granting permissions, and linking OA-App-ZBS. Verify this setup on Zalo side before returning to OAuth in Viindoo.
Configuration Steps in Viindoo
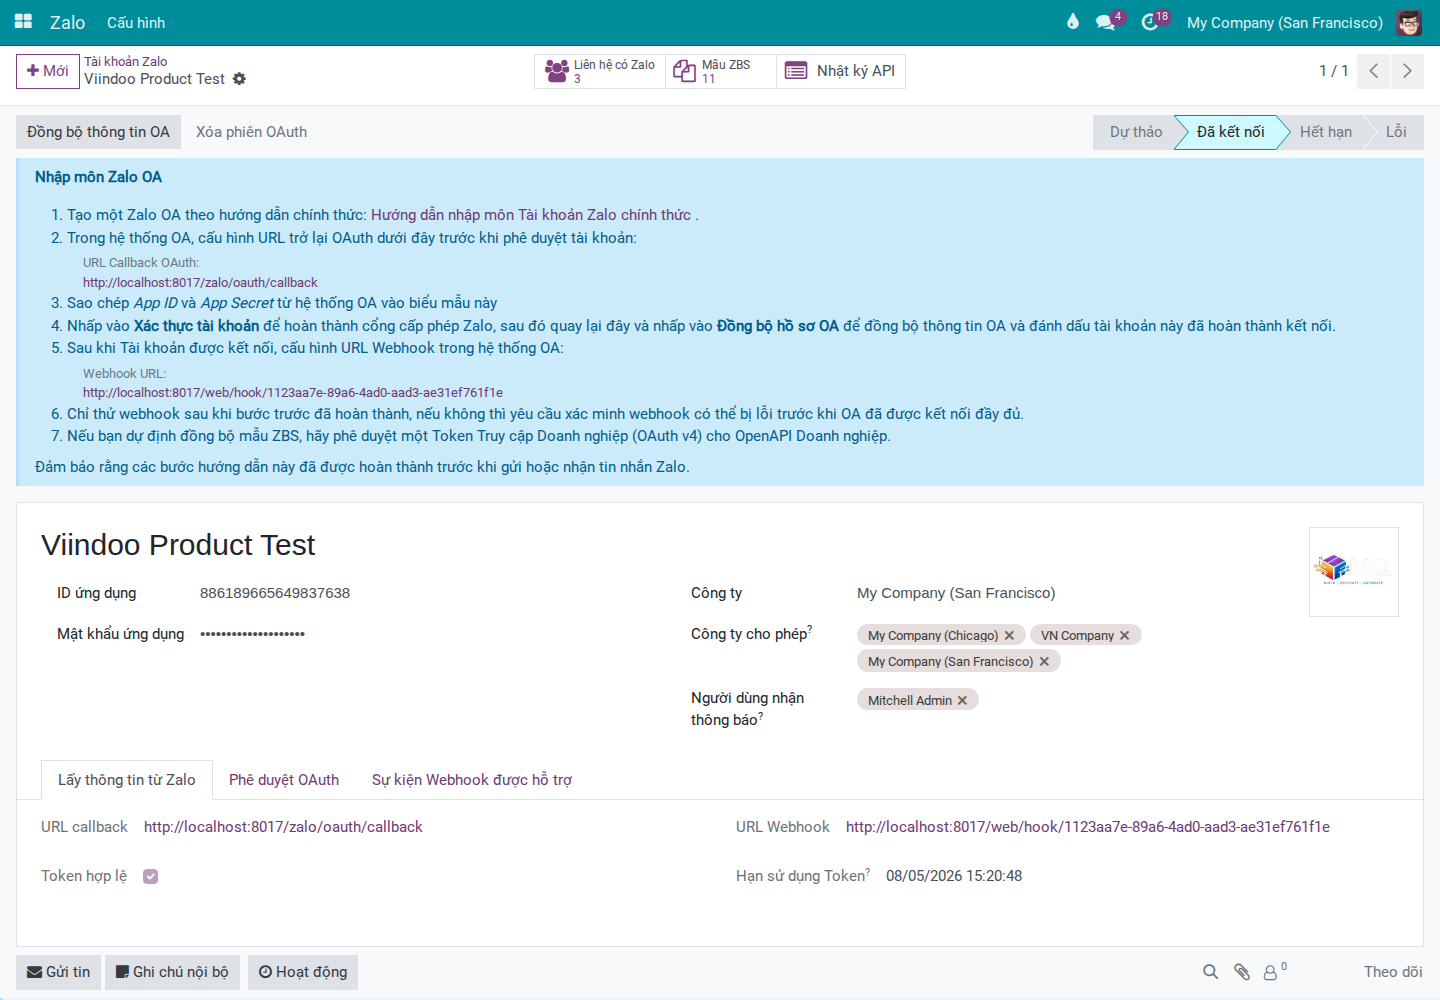
Go to , create or open a Zalo Account record.
Fill in required fields: - Name - App ID - App Secret - Company and Allowed Companies (if using multi-company setup)
Click Save.
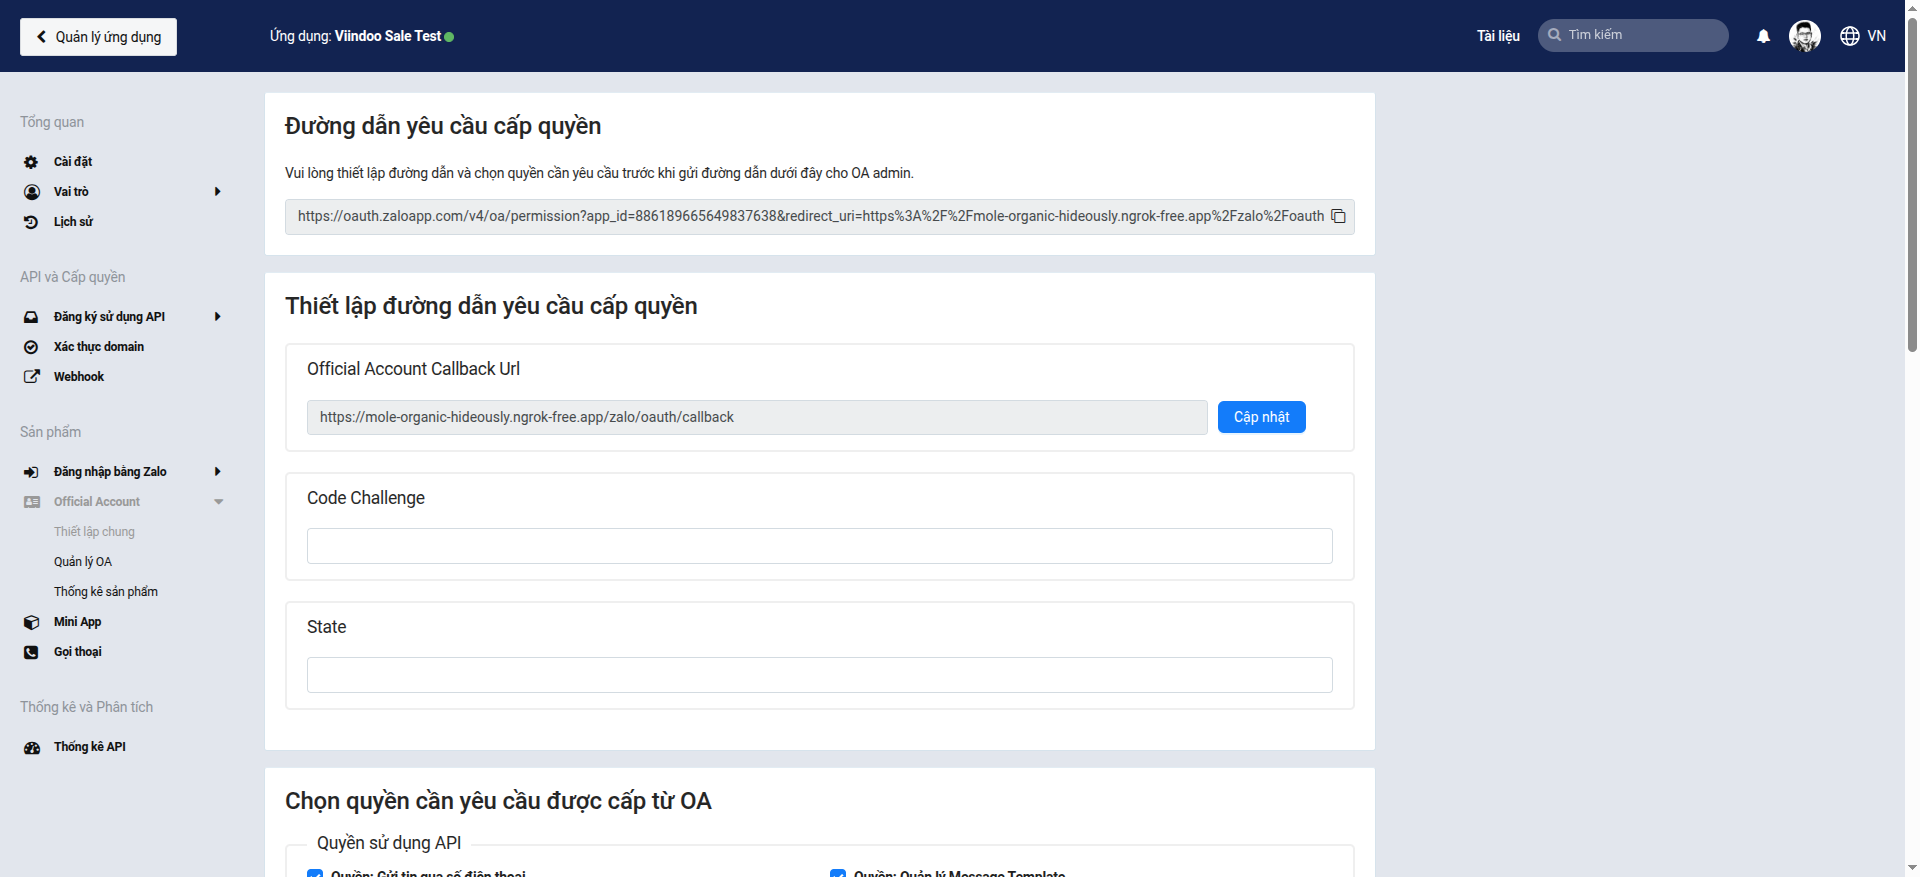
Copy the OAuth Callback URL shown on the form and configure it as callback in OA console.
Click Authorize Account to start OAuth flow. This step grants permission to Viindoo to send/receive on behalf of the OA — without this, Zalo API rejects all requests.
After callback returns to the system, return to the form and click Sync OA Profile — this updates OA name, avatar, and token in Viindoo. After successful sync, the tab Profile Get From Zalo shows data and the Zalo Partners button is ready to use.
Confirm status changes to Connected.
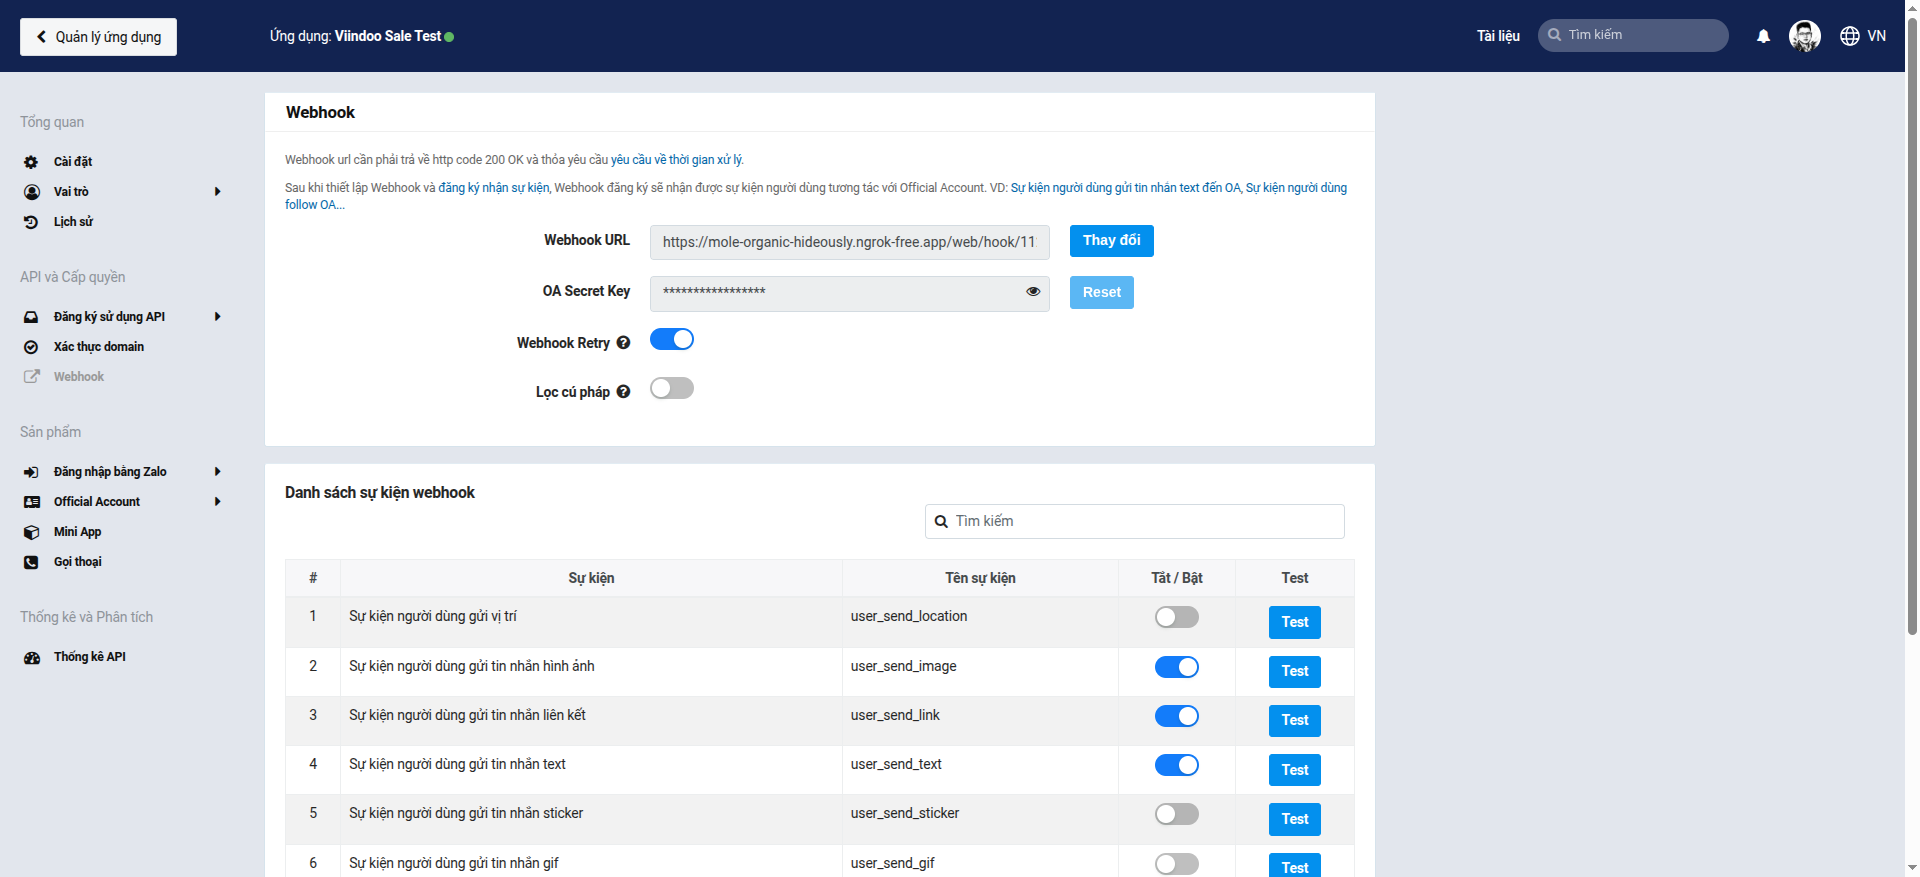
After successful connection, copy the Webhook URL shown on the form and configure it as webhook in OA console.

Note
The onboarding form includes a clear note: only test webhook after OA connection is complete; early testing may fail at the verify step.
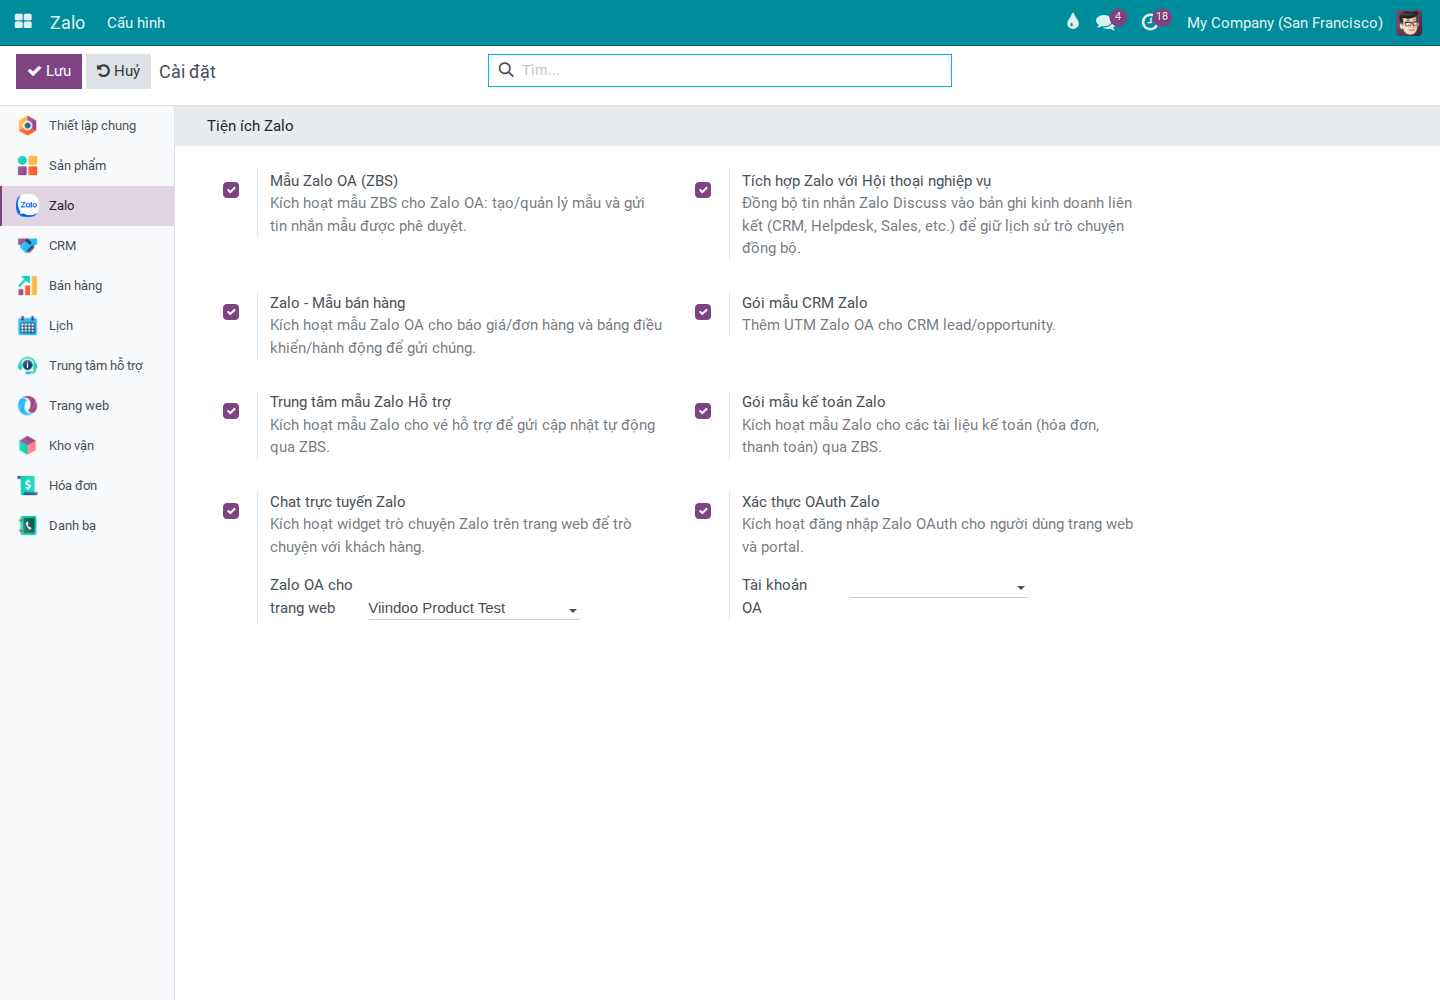
Configure Extension Modules in Settings
Go to and enable modules based on your operational needs:
Feature |
Enable when |
User Guide |
|---|---|---|
Zalo OA Templates (ZBS) |
CS/Marketing team needs to create, submit for approval, and send ZBS templates to customers. |
|
Zalo Chatter Bridge |
You need to save Zalo chat history to the chatter of business documents (sales orders, invoices, tickets) so all departments can follow along. |
|
Zalo - Sale Templates / Zalo Accounting Template Pack / Zalo Helpdesk Template Hub |
Sales/Accounting/Helpdesk team needs to send notifications via Zalo from their respective documents. |
Send ZBS Message Templates from Sales Orders, Send Payment Request Messages via Zalo from Invoices, Update Helpdesk Tickets via Zalo |
Zalo CRM Template Pack |
You want Zalo conversations to feed CRM — leads created from chat are tagged with the Zalo source for campaign tracking. |
|
Zalo Website Livechat |
Your website needs a floating Zalo chat button so visitors can message directly. |
|
Zalo OAuth Authentication |
Your customer portal needs a login button using Zalo account to reduce login friction. |
After enabling, click Save and verify the screen to confirm the feature is available.
If a module is not yet installed, the screen shows a Purchase or Learn more link.
Success Checkpoint
Tip
Signs of successful configuration:
OA record is in Connected status and has profile information in the Profile Get From Zalo tab.
OAuth Authorization tab shows Callback URL, Webhook URL, Token Valid, Token Expires At.
Sync OA Profile and Zalo Partners buttons appear on the form after successful sync. API Logs button is available regardless of connection status.
Common Issues and Solutions
Cannot see Authorize Account/Sync OA Profile buttons or cannot access Configuration menu: - Common cause: account lacks Zalo Admin permission or system admin permission to open Settings. - Solution: check user role and permissions.
OAuth callback reports invalid/expired state: - Common cause: old authentication link expired or OAuth flow was interrupted. - Solution: click Clear OAuth Session, then perform Authorize Account again.
Sync OA Profile fails: - Common cause: wrong App ID/App Secret or invalid token. - Solution: verify app info, re-authenticate OAuth, then sync profile again.
Webhook verify fails immediately after declaration: - Common cause: testing webhook before OA is truly connected. - Solution: confirm status is Connected first, then test webhook again.
Scope of This Guide
This guide covers OA connection setup and extension enablement only. For subsequent operational tasks, see:
Send ZBS Message Templates from Sales Orders — Send ZBS templates from sales orders (Sales)
Send Payment Request Messages via Zalo from Invoices — Send payment requests from invoices (Accounting)
Update Helpdesk Tickets via Zalo — Update ticket status via Zalo (Helpdesk)
Zalo Chat Button on Website — Zalo chat button on website (after enabling Zalo Website Livechat)
Log In to Portal with Zalo — Portal login with Zalo (after enabling Zalo OAuth Authentication)