
How to create Timesheets from other apps
Requirements
This tutorial requires the installation of the following applications:
Create Timesheets upon Time off app
In some situations, employees have a time off but still get paid like traveling for business or working from home. At this point, the manager also needs to know the work that the employee performed. Viindoo software makes it easy to manage with the link between the Timesheets application and Time-off application.
Steps to configure
To create a timesheet when confirming a time off, you need to make sure your system has successfully installed both Timesheets and Time Off.
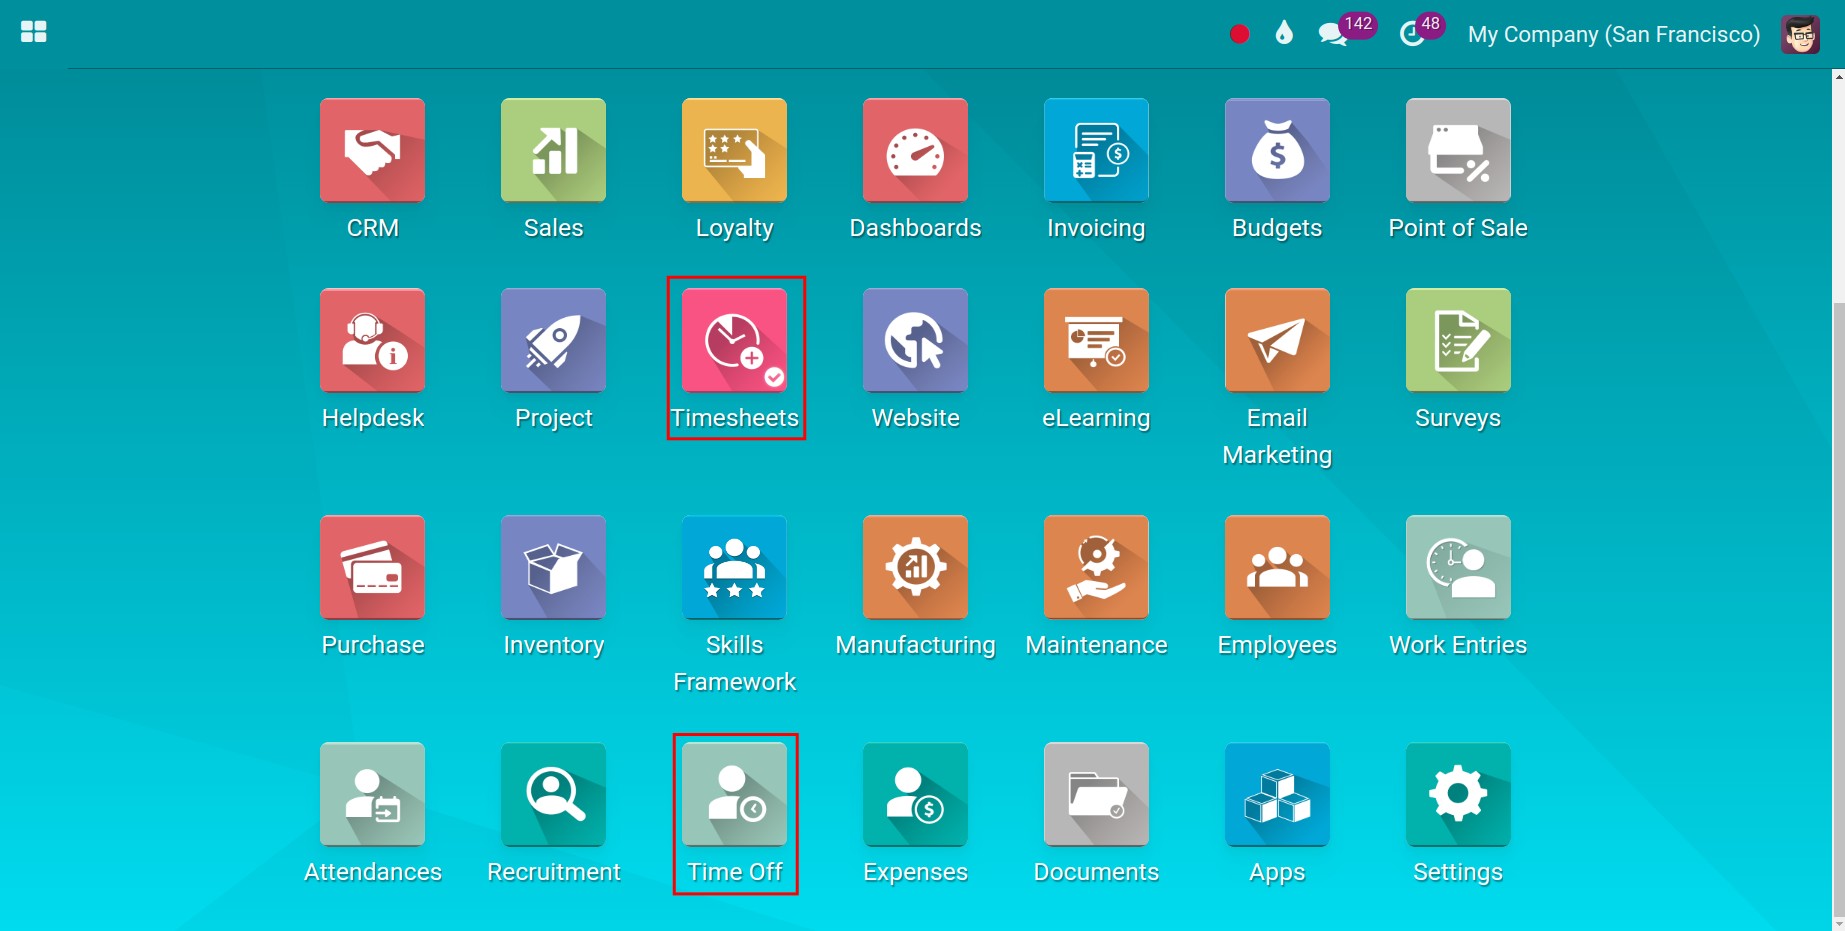
When both applications are installed, the link between them (the Timesheet when on Time Off module, project_timesheet_holidays) is activated automatically.
Check the Time Off feature of Timesheets
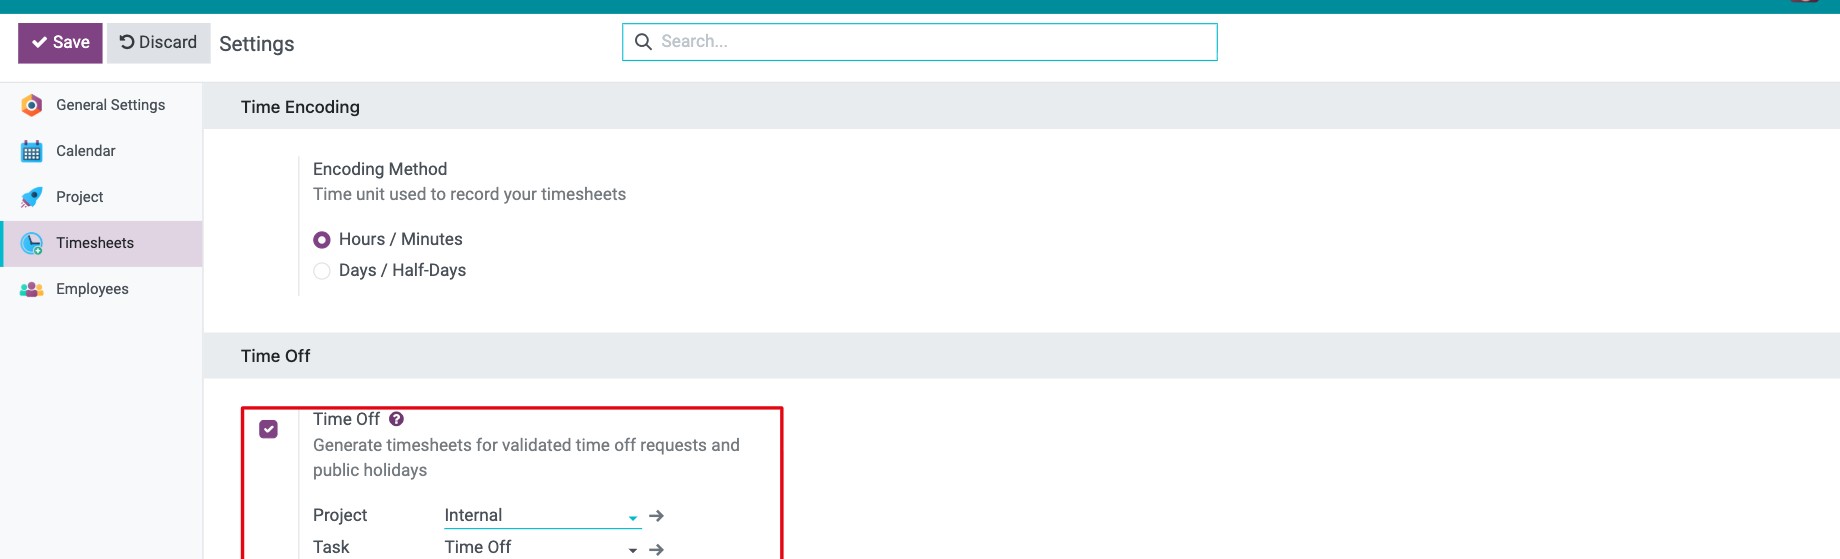
Go to Timesheets ‣ Configuration, in the Time Off section, make sure Time Off is ticked (tick it if it is not). Then select the suitable Project and Task where the timesheet needs displaying when confirming the time off. Next, press Save.
![Activate the featue]()
Note
A timesheet is generated only when both the project and the task are set, so select both of them.
Check the Time Off Types which are applied to Timesheets
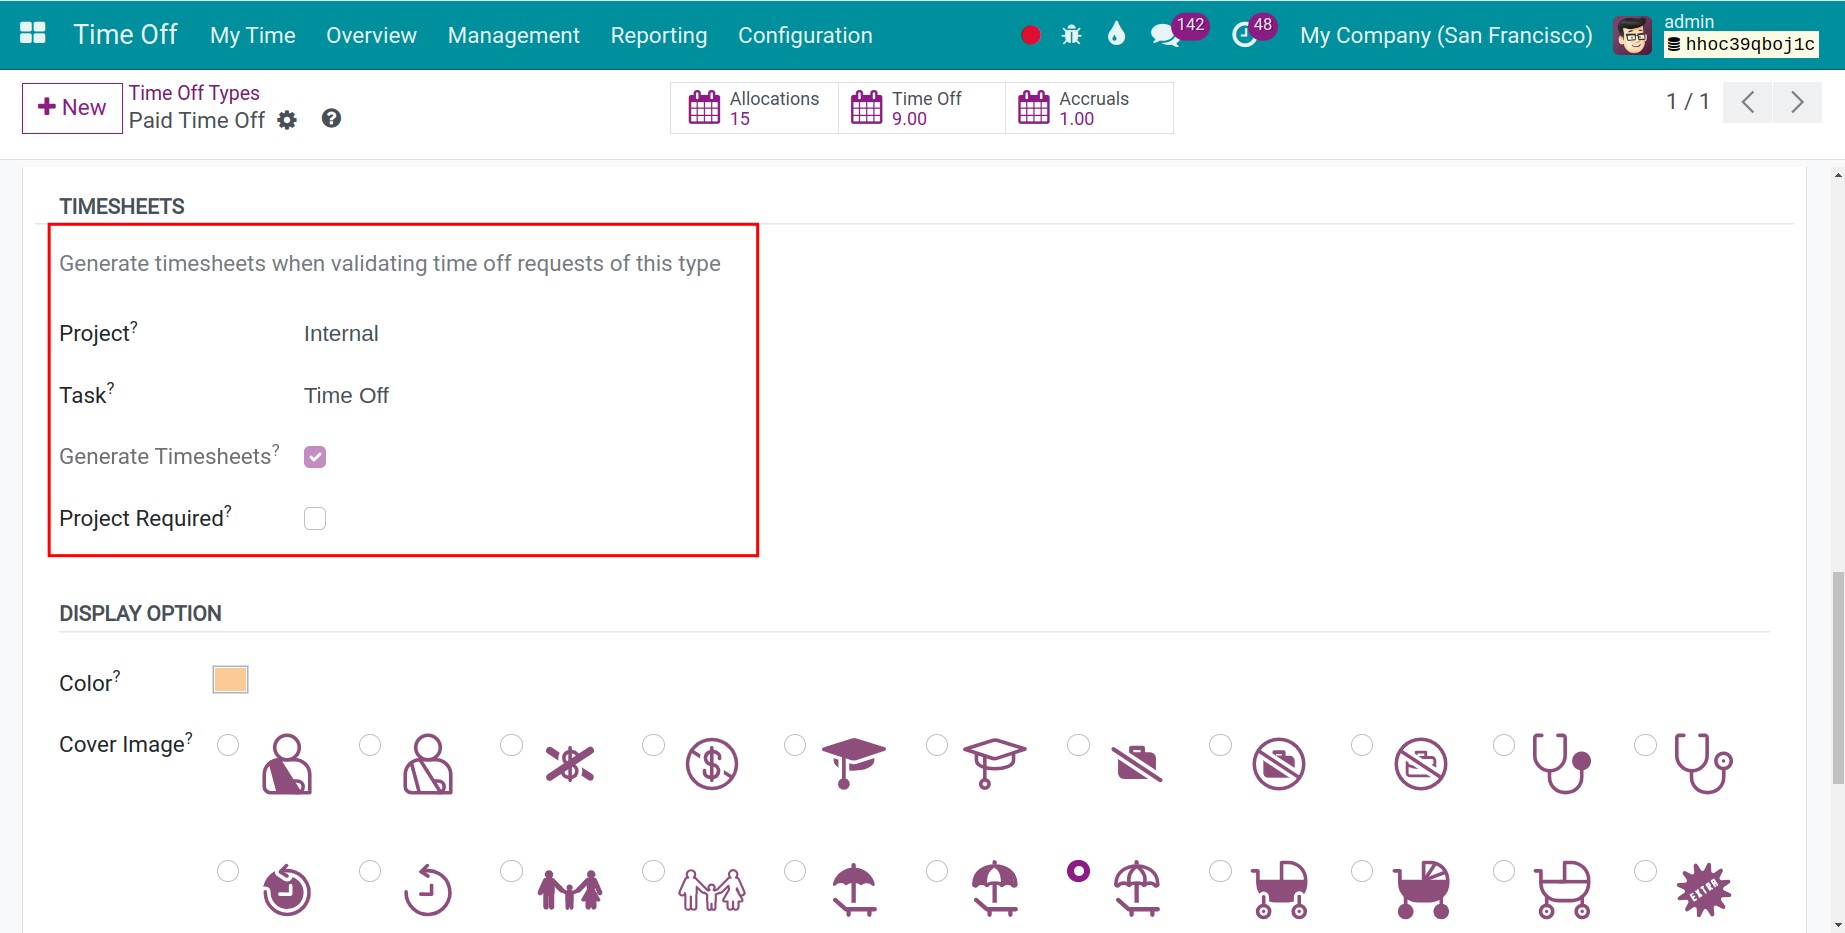
Next, check which type of Time Off generates a timesheet when a Time Off Request is validated. Go to Time Off ‣ Configuration ‣ Time Off Types and select the Time Off Type that you want to configure:
In the Time Off Requests section, select the Approval type when the employees create their Time Off requests.
In the Timesheets section (it is only displayed in developer mode):
Generate Timesheets: Ticked automatically (read-only) when the validated time off requests of this type generate timesheets.
Project Required: Tick it if the employee must select a Related Project on every time off request of this type (for example, a business trip that still counts as working time). If it is left empty, selecting a project on the request is optional.
![Configure Time Off Types which display in Calendar]()
Note
If your system operates with multiple companies, you can select a specific company on the Time Off Type. The Project and Task fields then appear in the Timesheets section, and Generate Timesheets is ticked only when both of them are selected.
Now, let’s see how it works.
Display the timesheet record after Time Off Validation
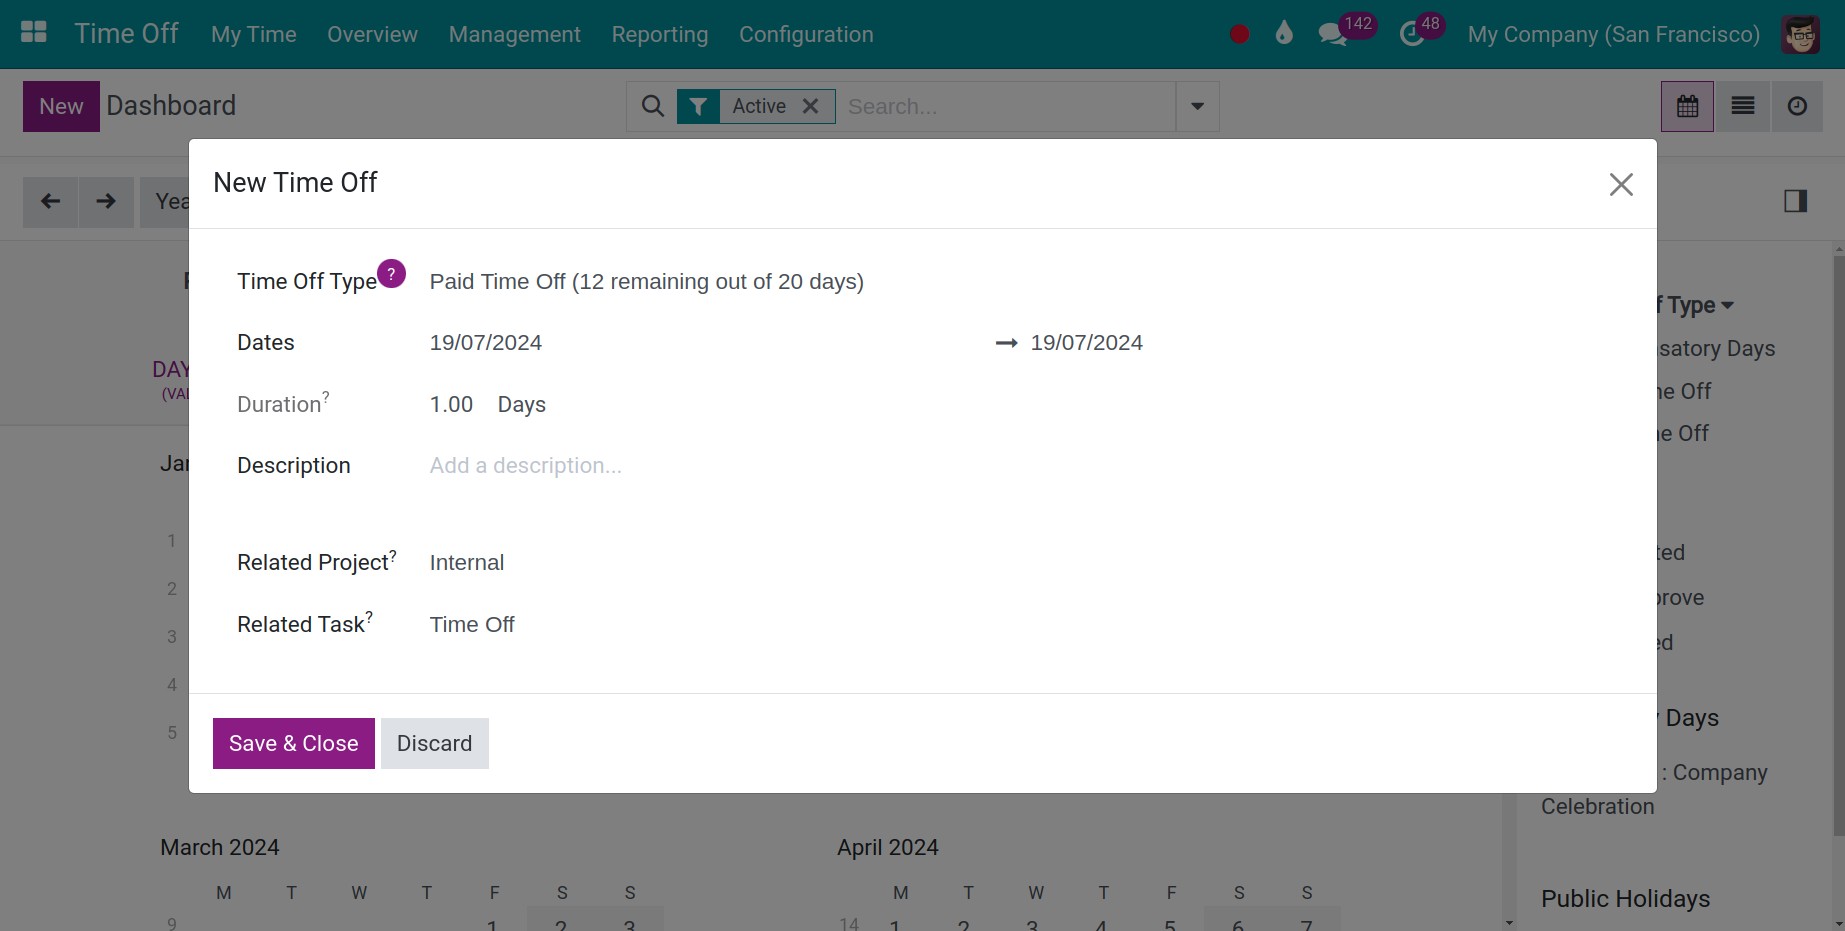
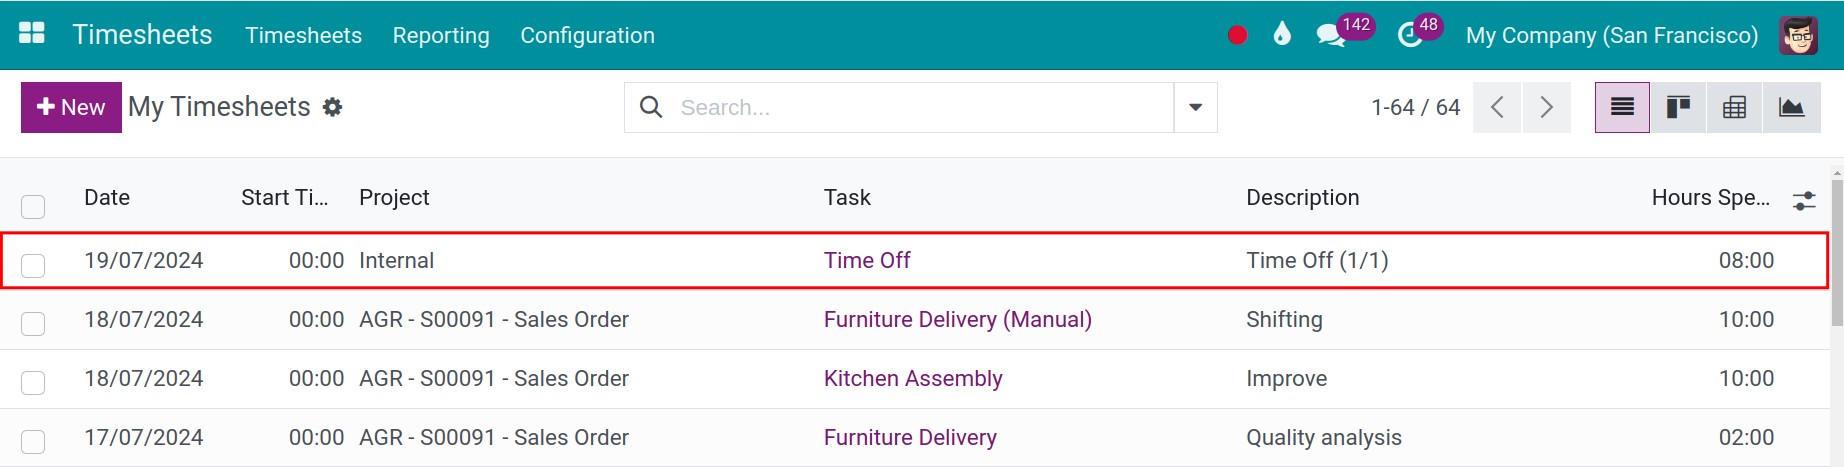
Once the employee has requested his time off and it has been validated, a new Timesheet will be created with both the information set in the time off type as the selected project, task, and the time on the created request. The employee can also select the Related Project and Related Task on the request itself. This is an example:
Create a new Time Off Request from November 16th, 2026 to November 17th, 2026:
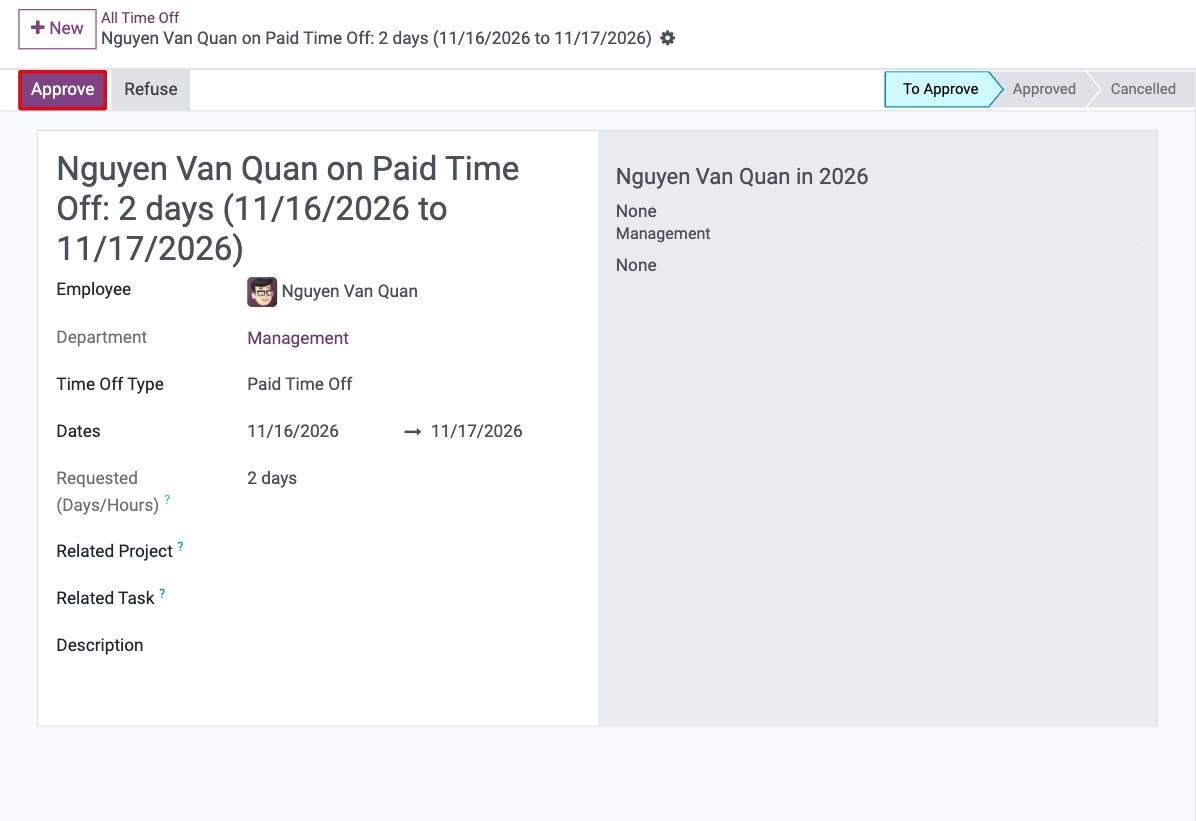
The time off officer or the approver goes to Time Off ‣ Management ‣ Time Off, opens the request, and presses Approve.
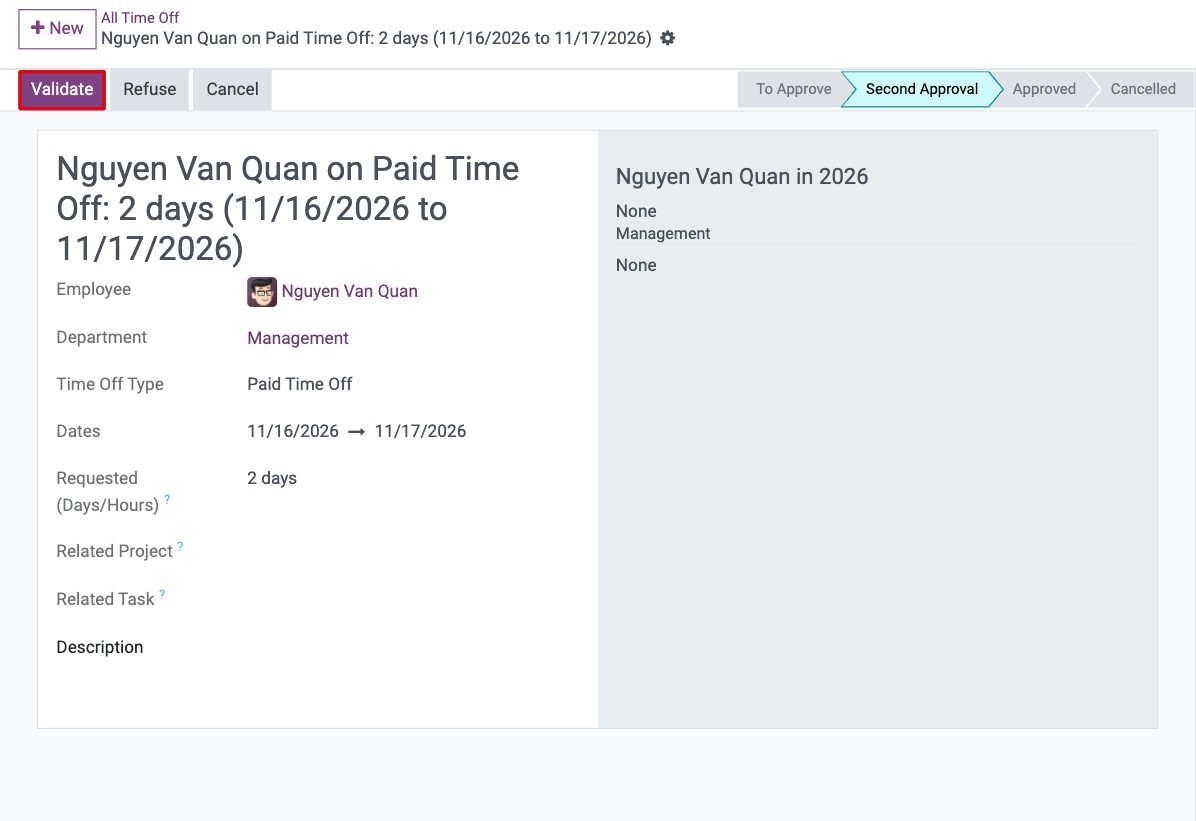
If the time off type requires a second approval (as the Paid Time Off type does), open the request again and press Validate.
Go to the application Timesheets ‣ Timesheets ‣ My Timesheets to take a look at the timesheet records automatically generated after the Time Off Request is validated.
Create Timesheets from Project app
To create timesheets on the project, you can refer at Guideline to timesheet in the project.
See also
Related articles:
Optional modules: