
How to receive goods in one step
With the one-step flow, a receipt moves goods from the vendor straight to the stock location of the warehouse. Create the receipt in , open it and click Validate: the receipt becomes Done and the products are in stock. One step is the default flow of every warehouse.
Who |
Users with the Inventory User access right. |
App |
Inventory ‣ Operations |
Before you start
Install the Inventory app.
The warehouse receives goods in one step. This is the default; if you changed it, see How to choose the receipt flow of a warehouse.
Know the vendor and the products to receive. If you also install the Purchase app, Viindoo creates the receipt when you confirm a purchase order.
How do I set a warehouse to receive in one step?
Turn on Multi-Step Routes (see How to choose the receipt flow of a warehouse).
Go to and open the warehouse.
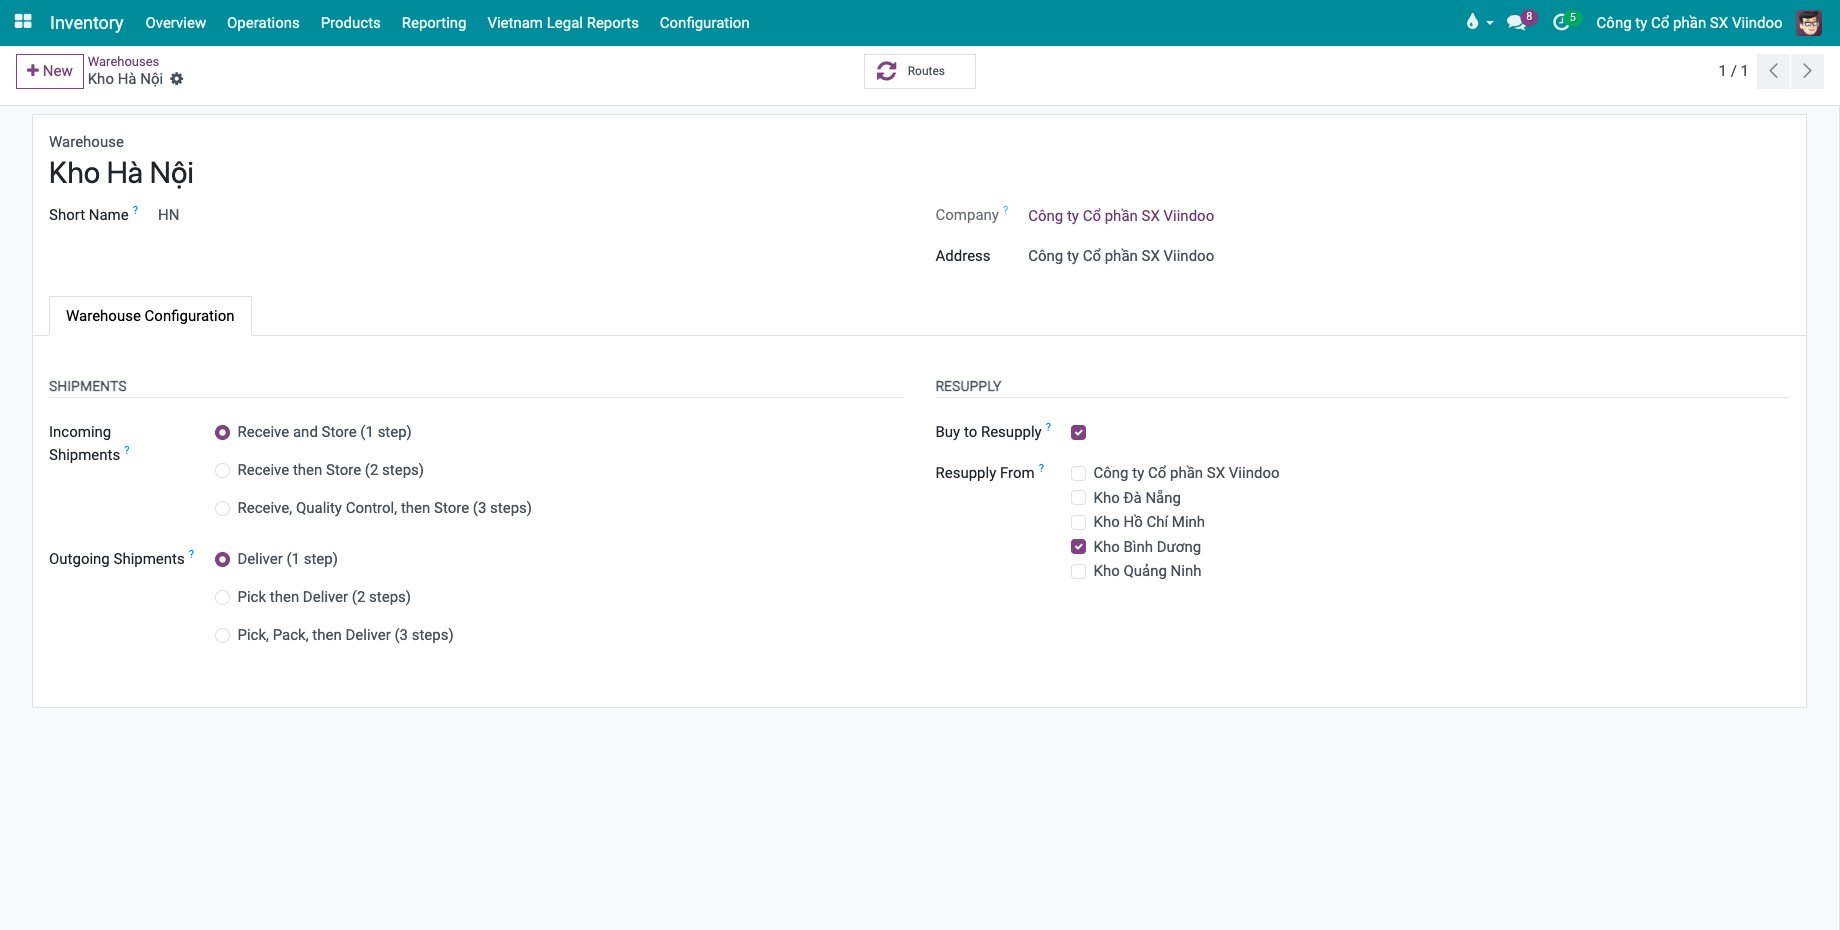
On the Warehouse Configuration tab, choose Receive and Store (1 step) under Incoming Shipments, then click Save.
![Receive and Store (1 step) selected under Incoming Shipments on the warehouse form]()
How do I create a receipt?
Go to and click New.
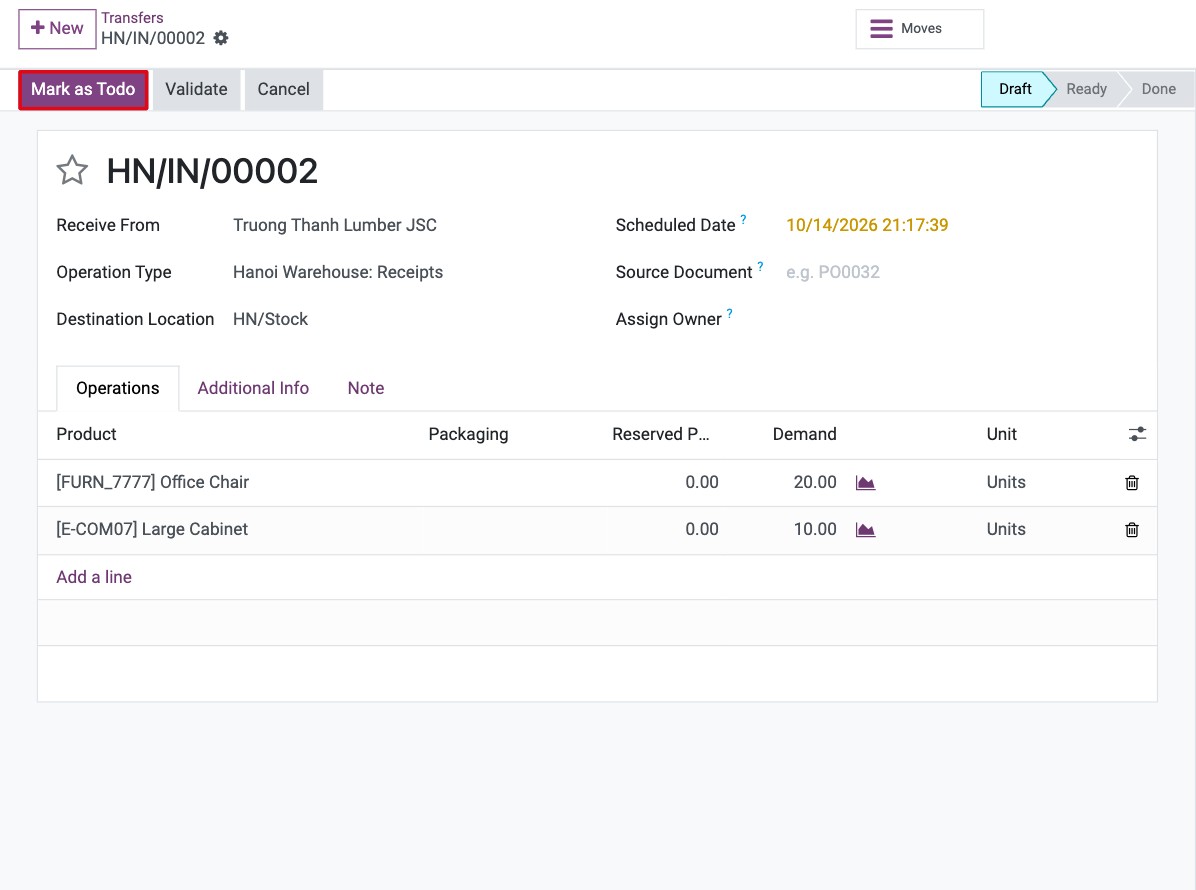
Choose the vendor in Receive From and check that Operation Type is the Receipts type of the right warehouse. Viindoo fills in the vendor location and the stock location of the warehouse.
On the Operations tab, click Add a line, choose the product and enter the Demand.
Click Mark as Todo. The receipt becomes Ready.
![New receipt with the vendor, the Receipts operation type and two product lines]()
If you also install Purchase, confirm the purchase order instead: Viindoo creates the receipt linked to it, and you open it with Receive Products on the order.
How do I validate the receipt?
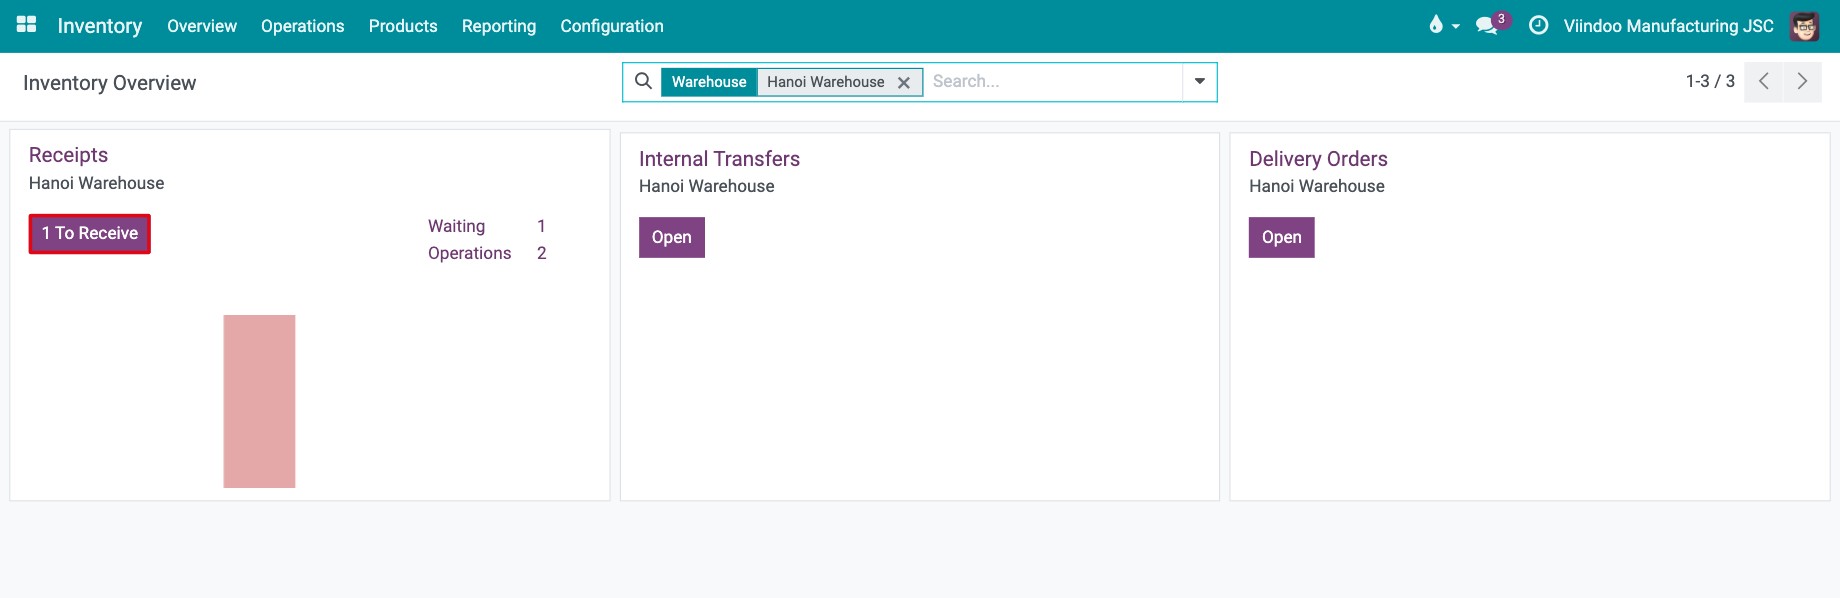
Go to and click To Receive on the Receipts card of the warehouse. You can also use .
![Receipts card of the warehouse in the Inventory overview with the To Receive button]()
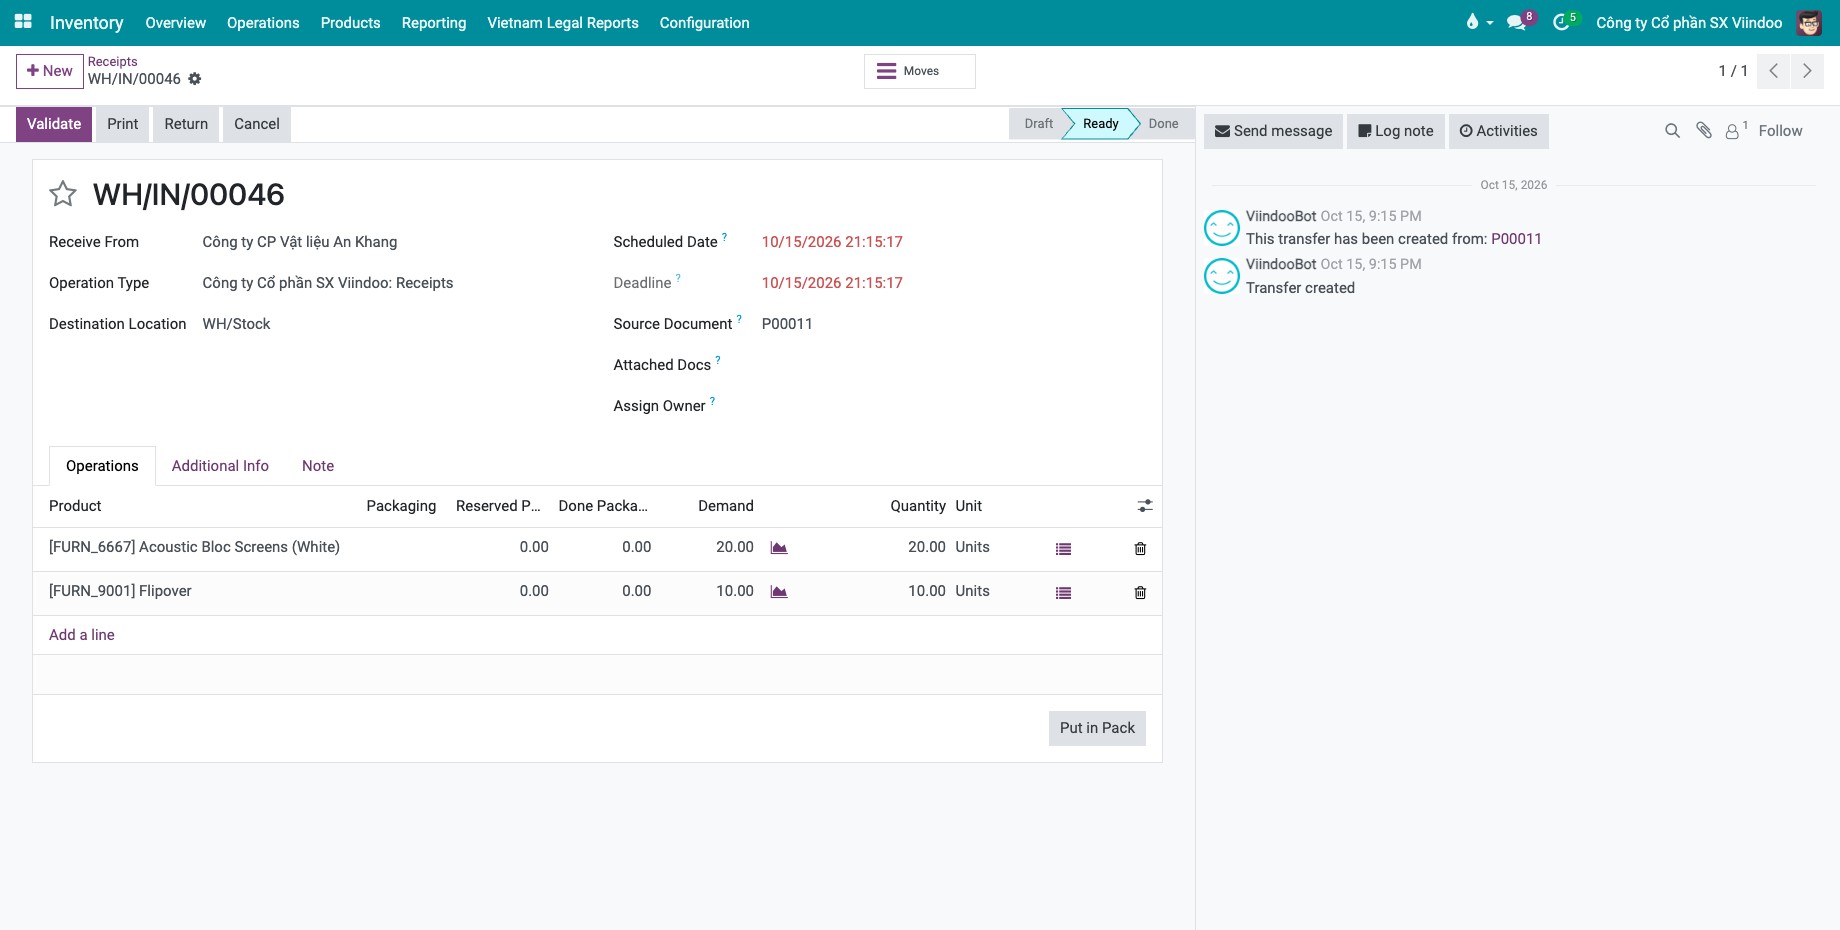
Open the receipt and check the Quantity of each line. Change it if you received a different quantity.
Click Validate.
![Validate button on a receipt in the Ready state]()
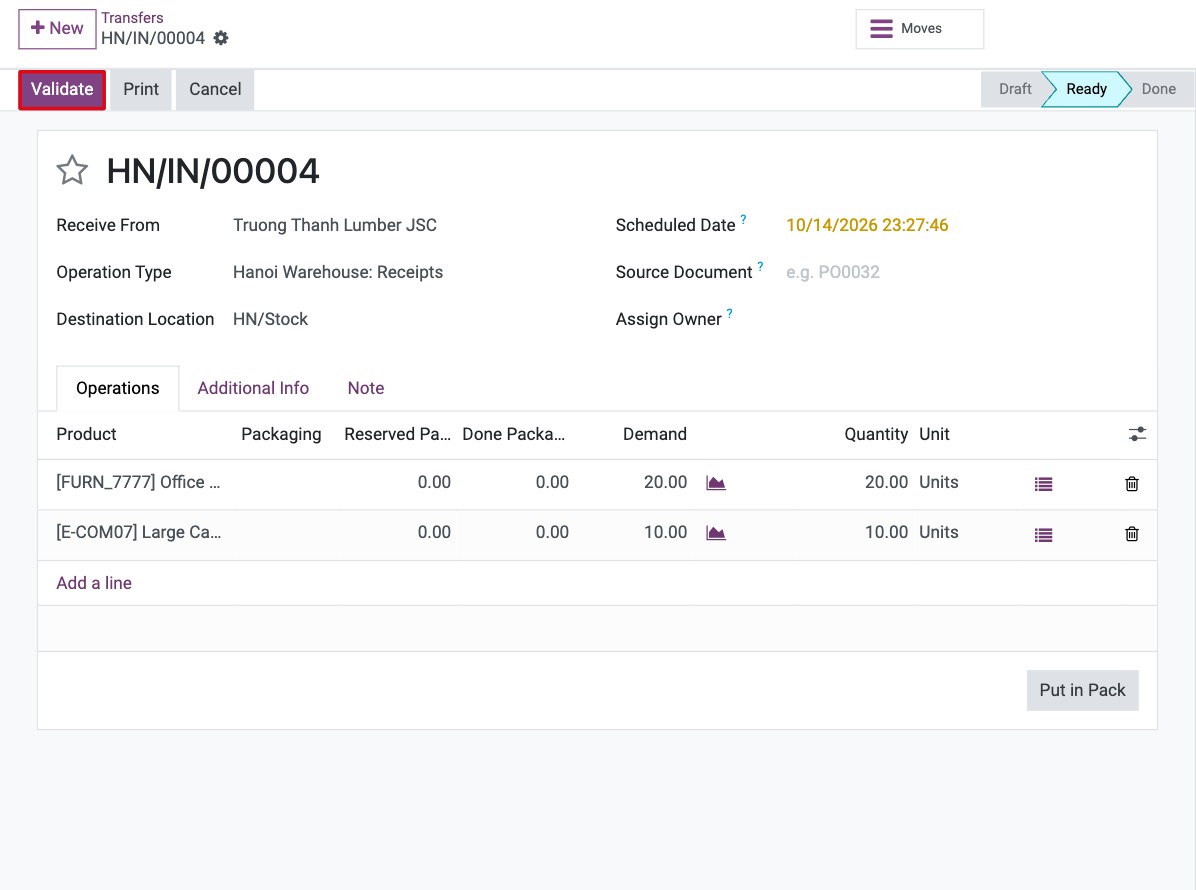
If you received less than the Demand, Viindoo asks whether to create a backorder: click Create Backorder to receive the rest later in a new receipt, or No Backorder to close the receipt with what you received.
What should I see after I validate?
The receipt status changes from Ready to Done, and the quantities you received are added to the stock location. Check them in .
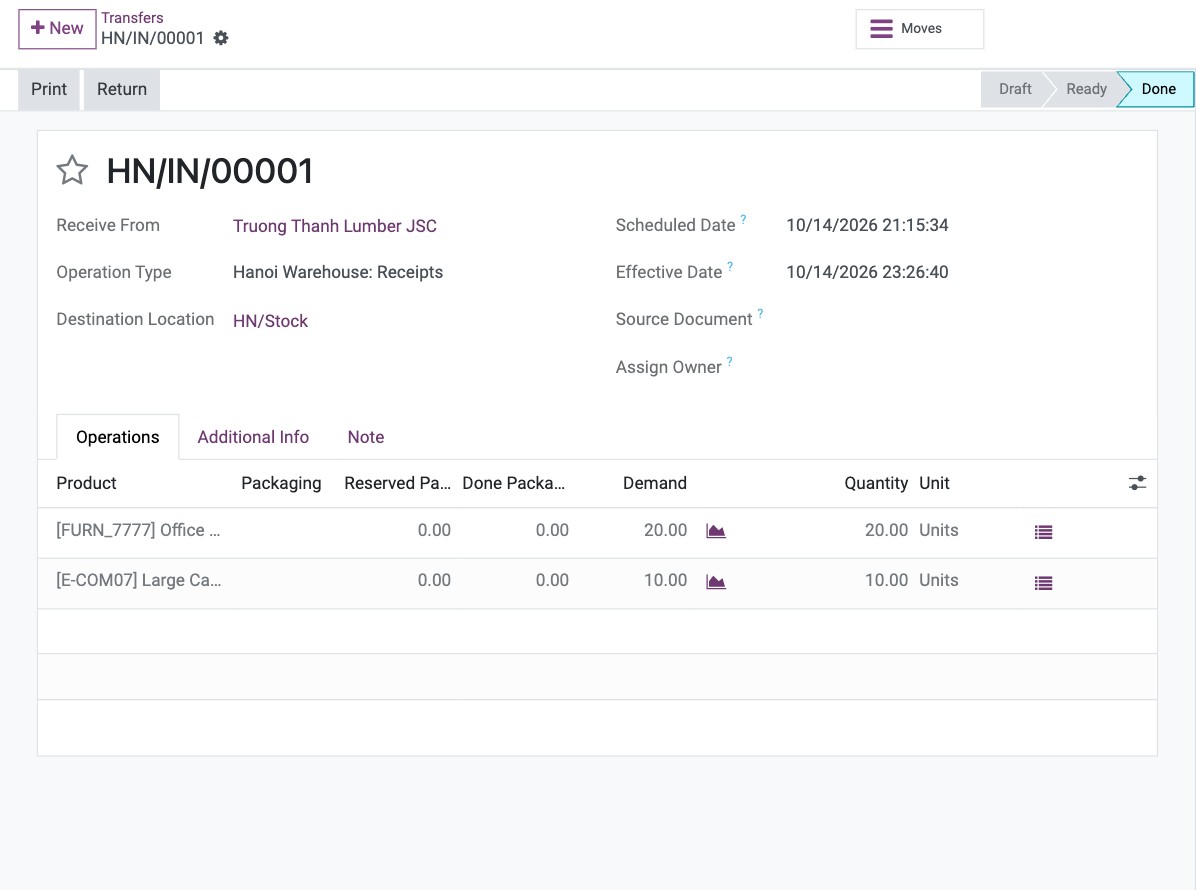
Which fields matter on a receipt?
Field |
Effect |
If wrong or empty |
|---|---|---|
Receive From |
The vendor. It is kept on the receipt and in the stock move history. |
Optional. You can validate a receipt without a vendor. |
Operation Type |
Decides the warehouse, the sequence of the receipt number (for example HN/IN/00001) and the default locations. |
Locations do not match the warehouse you expect. |
Destination Location |
Where the goods are stored: the stock location, or a sub-location chosen by a putaway rule. |
Goods end up in the wrong location. |
Source Document |
The order or reference the receipt comes from, for example a purchase order number. |
Optional. Without it, you cannot trace the receipt back to an order. |
Demand and Quantity |
Demand is what you expect; Quantity is what you received. |
A smaller Quantity opens the backorder window when you validate. |
Common errors
Message |
What to do |
|---|---|
You can’t validate an empty transfer. Please add some products to move before proceeding. |
Add at least one product line to the receipt. |
You cannot validate a transfer if no quantities are reserved, or if only non-reserved moves are picked.To force the transfer, encode quantities. |
The Quantity of every line is zero. Enter the quantity you received, then validate again. |
You need to supply a Lot/Serial number for products … |
The product is tracked by lot or serial number. Enter the number on each line before you validate. See How to track products by lot number. |
Next steps
How to receive goods in two steps (receive, then store): count and sort goods in an input area before they are stored.
How to return goods: return goods you received by mistake.
How to configure putaway rules in a warehouse: store received goods in a specific location automatically.