
Set up AI providers and freight document templates
Guide information
Warning
The screenshots on this page use hypothetical sample data. The documents, extracted values and AI results shown are illustrative only and do not come from a real AI analysis or a real business.
Requirements
This tutorial requires the installation of the following applications/modules:
Document Parsing - an add-on you install separately (installing it, with Freight Forwarder Management already active, activates Freight Document Parsing automatically - this is what loads the 5 freight document templates confirmed in this guide)
Every AI-assisted extraction in Fill a booking or shipment from a document with AI depends on at least one provider that actually answers. Skip this setup and the first person who clicks Import from Document hits a connection or API-key error instead of a filled-in shipment - and mistakes a configuration gap for a broken feature. This is a one-time setup per company, not a per-shipment step.
Running scenario: the company starts with the six providers included in the module. Google Gemini is marked as the default after installation; for this walkthrough, the administrator makes the approved OpenAI provider the default and tests its connection before the Documentation team uses it. The records are the Viindoo demo data, so yours will differ.
Open the AI Providers screen
Go to .
Note
This screen sits directly under the Settings app - it needs no Developer Mode and is not under Technical. Only a user with the Settings access level (in , tab Access Rights, section Administration) can create or edit a provider here, and only that level can see an API key field. Every other internal user can only read the list. This is a different, more technical level than the freight Administrator access level, so on a small team the same person often holds both.
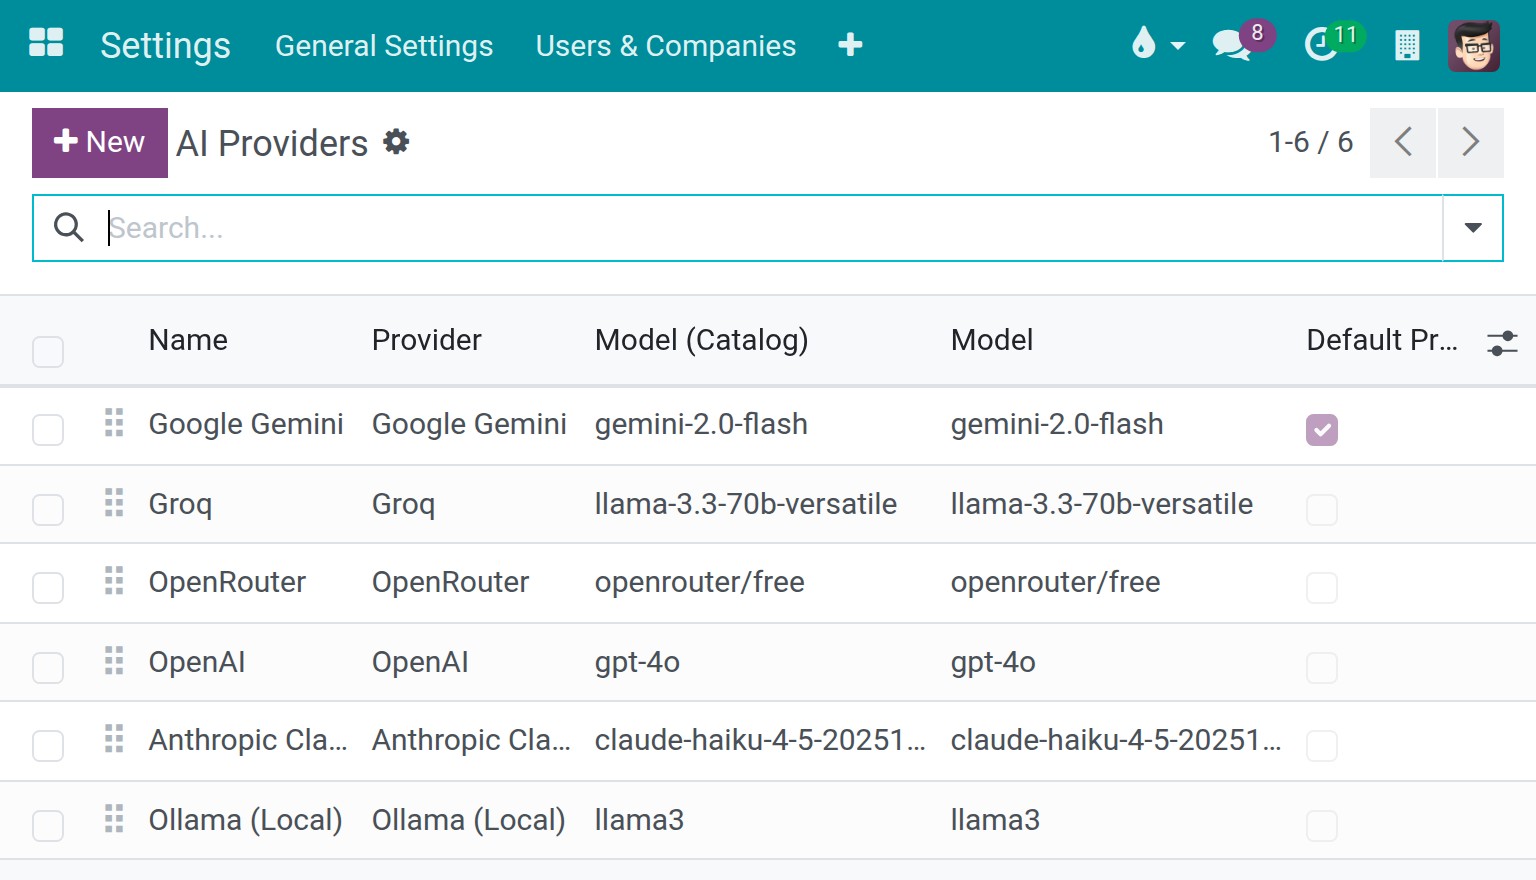
The list shows six providers, seeded with a name and a default model but no API key yet: Google Gemini, Groq, OpenRouter, OpenAI, Anthropic Claude and Ollama (Local). The Default Provider column is ticked on Google Gemini - the provider the Import from Document wizard preselects until you change it.
Tip
The setup is correct when: the list shows all 6 seeded providers, and the Google Gemini row is the one flagged as the default.
Decide which AI provider to set up
Option |
Use when |
What changes |
|---|---|---|
Use a seeded provider (OpenAI in this walkthrough) |
Your company has approved the provider and model for the documents being processed |
No new record is needed; add the provider’s API key and set it as default only if the team should have it preselected |
Create a Custom (OpenAI-compatible) provider |
Your company runs its own LLM endpoint, or uses a vendor not in the seeded list |
You create the record by hand and must fill in API Base URL yourself - Custom has no seed to start from |
Switch the Ollama provider’s model to |
You run AI locally through Ollama and need it to read scanned images or PDFs |
Ollama’s seeded default model ( |
Use a provider and model approved for your company’s data, security and cost requirements, and confirm the model can read the file types your team processes. If that approval or the model’s capability is unclear, ask the AI/IT administrator before adding a key or changing the default provider.
Enter the API key for your provider
A seeded provider already has a model and endpoint configured. Before using it, confirm that the model is approved for your documents and can read their file type; an API key is also required for the connection test to pass.
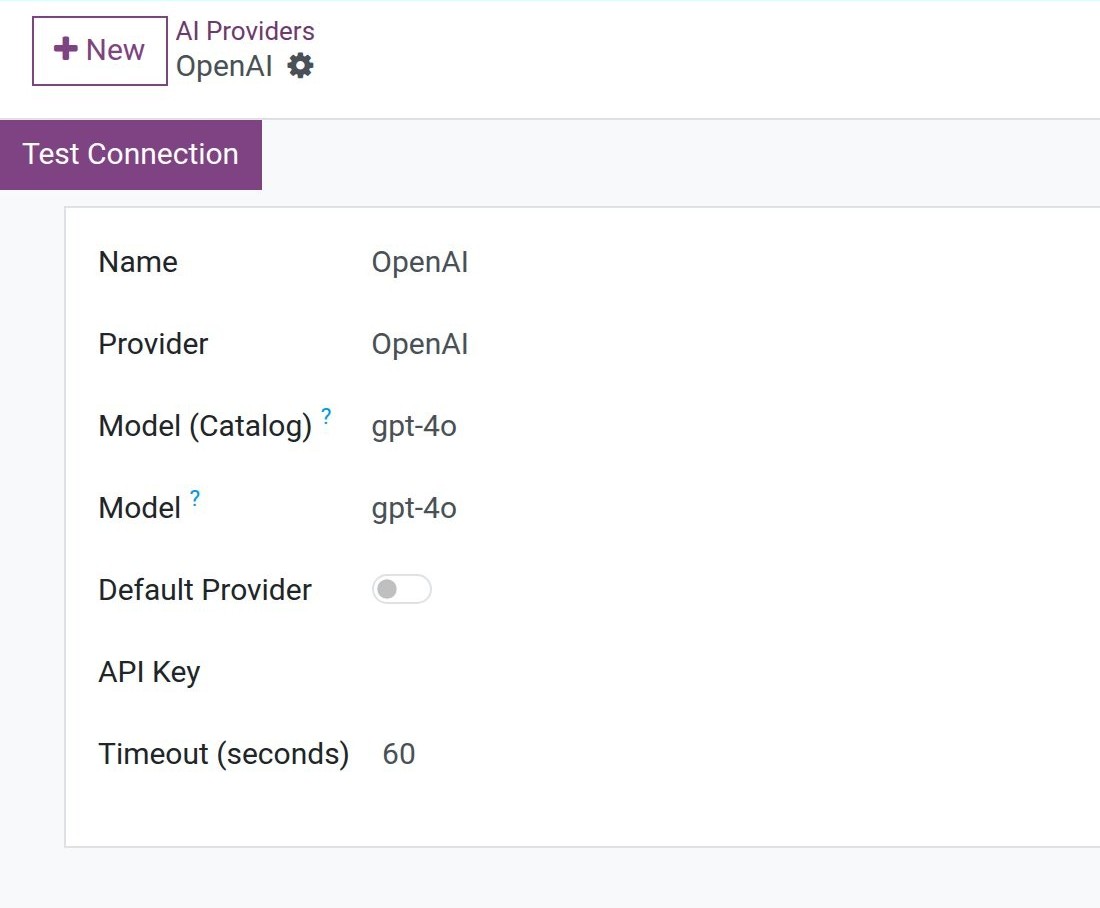
Open the OpenAI row, set Default Provider on for this example, and fill in its API Key using the credential supplied through your company’s approved secret-management process. The field shows only masked dots once saved; Viindoo does not show a saved key back to you. Setting Default Provider on one provider switches it off on the others, so only one provider is the default at a time.
Note
API Base URL is not shown for OpenAI because the provider uses its own endpoint. It is available for Ollama (Local) and Custom (OpenAI-compatible), where the endpoint depends on your environment.
Tip
This step is done when: the API Key field shows the masked dots instead of being empty, and the form has been saved.
Test the connection
A saved key can still be wrong - typed with an extra space, copied from the wrong project, or already revoked. Testing now catches that before Ops or Sales hits it in the middle of processing a real Shipping Instruction.
Click Test Connection, at the top of the provider’s form.
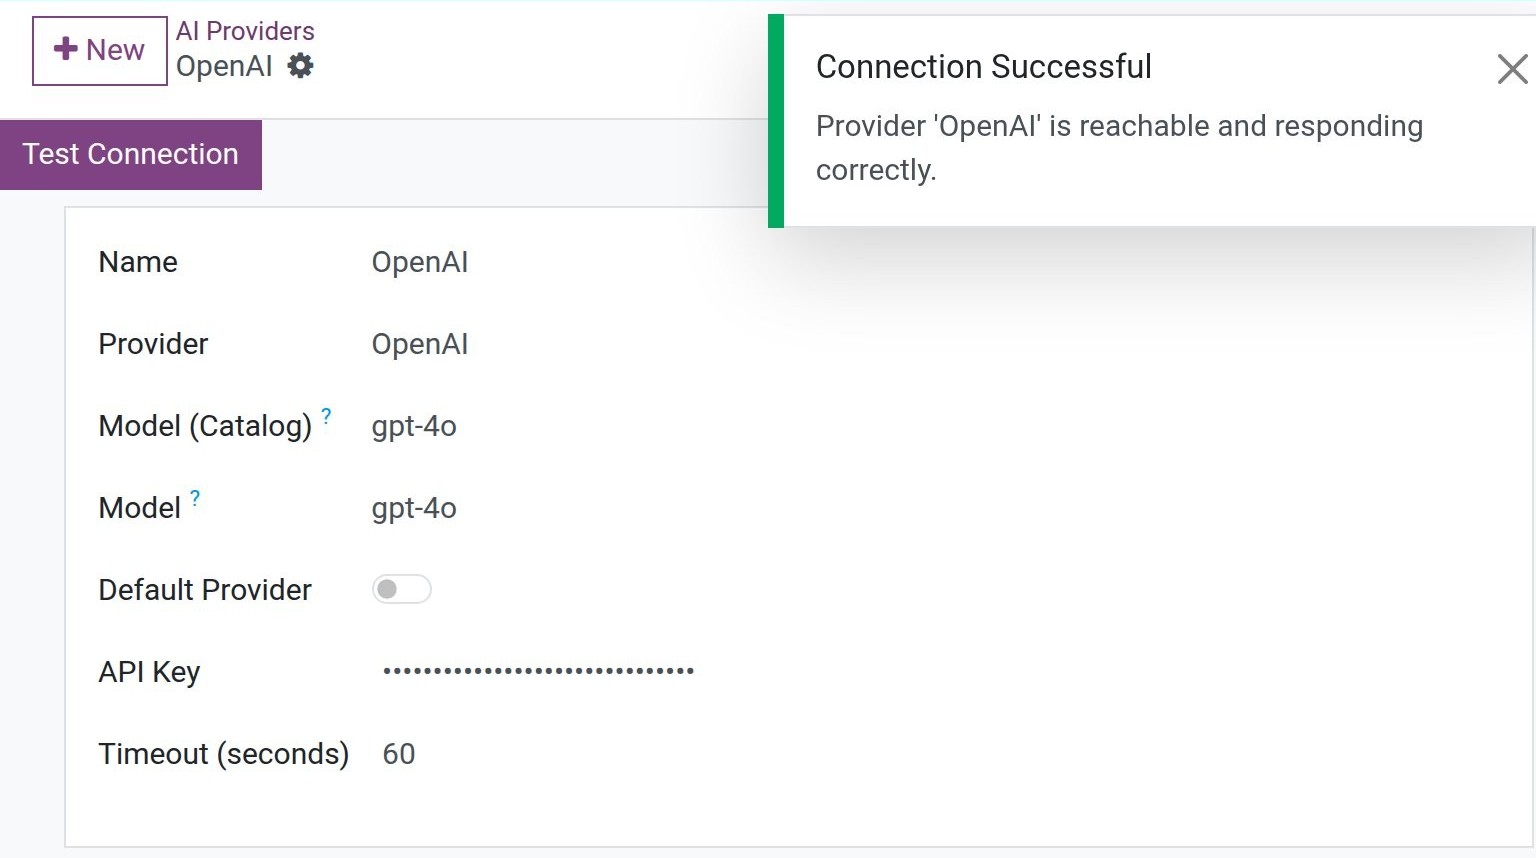
After you click it, Viindoo sends a minimal request to the provider and reads back the answer. When the provider answers correctly, a green notification reads Connection Successful - “Provider ‘OpenAI’ is reachable and responding correctly.” A wrong key or an unavailable endpoint shows an error message instead.
Tip
Step is done when: the green “Provider ‘OpenAI’ is reachable and responding correctly.” notification appears - not an error.
Confirm the freight document templates are ready
The freight document templates are data the module loads on install, not something you create here - this step only confirms they came in intact, because a missing template means Ops cannot pick the right document type at all when running Fill a booking or shipment from a document with AI.
Go to .
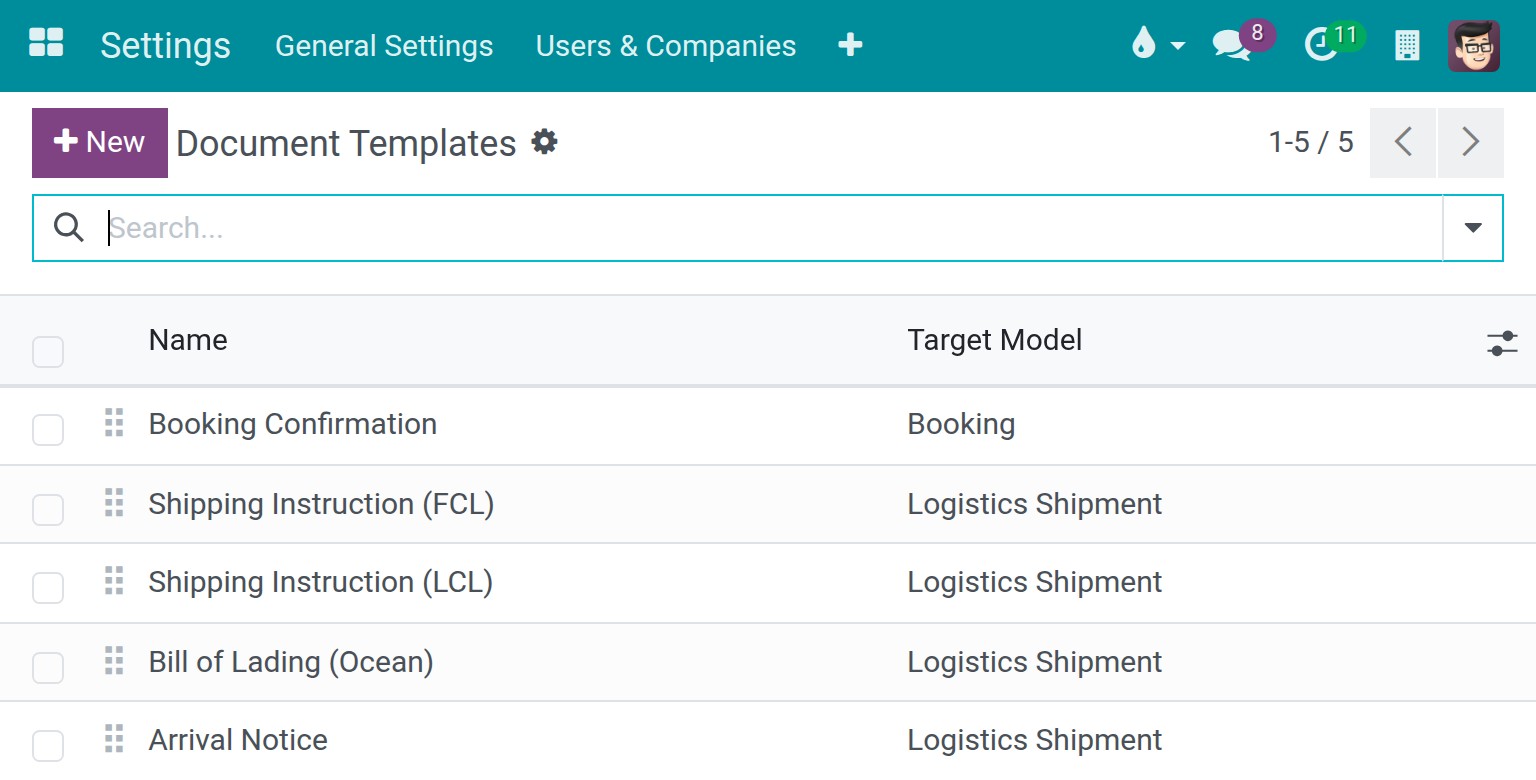
The list shows 5 rows: Booking Confirmation, Shipping Instruction (FCL), Shipping Instruction (LCL), Bill of Lading (Ocean) and Arrival Notice. Check the Target Model column: Booking for the first row, Logistics Shipment for the other four.
See also
Fill a booking or shipment from a document with AI - the wizard that reads a document against these templates and the provider you just configured.
Tip
The setup is correct when: all 5 rows are present, none of them archived, and the Target Model column reads Booking or Logistics Shipment as listed above.
Known limitations
Step |
What Viindoo does today |
What you do instead |
|---|---|---|
Test the connection |
Test Connection sits at the top of the provider’s form instead of in the usual button bar; the button works normally |
Look for Test Connection at the top of the form, not in the status bar |
Create a Custom provider |
No sample record to copy from - unlike the other 6 providers, Custom has nothing pre-filled |
Fill in every field by hand, starting with API Base URL, which is required for this provider |
Troubleshooting
“Unsupported provider” when analyzing a document
Symptom: The Import from Document wizard shows “Unsupported provider: …”.
Cause: The provider’s record was written with a value outside the 7 supported ones (OpenAI, Anthropic Claude, Google Gemini, Groq, OpenRouter, Ollama (Local), Custom (OpenAI-compatible)) - this normally only happens if the value was written through a route other than this screen, such as an import or an API call.
Fix:
Open the provider from .
Re-select a valid value for Provider, then save.
An API Base URL is requested
Symptom: Test Connection or Analyze Document fails with “Ollama requires an API Base URL…” or “Provider ‘…’ has no default endpoint. Set an API Base URL … before using this provider.”
Cause: Provider is Ollama (Local) or Custom (OpenAI-compatible) and API Base URL was left empty - neither has a single well-known address the way a cloud provider does.
Fix:
Enter your server’s address in API Base URL (for example
http://192.168.1.100:11434for Ollama).Click Test Connection again.
“Model ‘…’ cannot read images or PDF pages”
Symptom: Analyzing a scanned PDF or a photo fails with this message, even though Test Connection passed.
Cause: The model assigned to the provider is marked Vision Support: No in the AI Models catalog - Test Connection only checks that the provider answers, not that its model can read images.
Fix:
Go to and check the model’s Vision Support value.
Assign the provider a model marked Vision Support: Yes instead (for Ollama,
llavaorllama3.2-vision).