
External tools and feedback
Guide Overview
An external tool server gives the assistant extra actions from another service. Nothing is sent to a server until its address is approved, so the safe order is always: approve the service, then connect the server. A model reads only so much at once, so you also decide how the assistant presents its tools to the model. Feedback is the other half of quality control: people rate answers, and you read the ratings.
Before You Start
You need |
Why |
|---|---|
The Settings access right (system administrator) |
Approving a service, connecting a server, reading the ratings and defining feedback categories are system administrator tasks. An AI Administrator sees Servers and Approved Services but cannot change them. |
The address of the service |
You approve exactly the addresses the service uses, and no more. |
Developer mode |
The AI Request Logs list is shown only in developer mode. |
Approve a Service
By default nothing is approved, so no assistant contacts any external tool server.
Go to and click New.
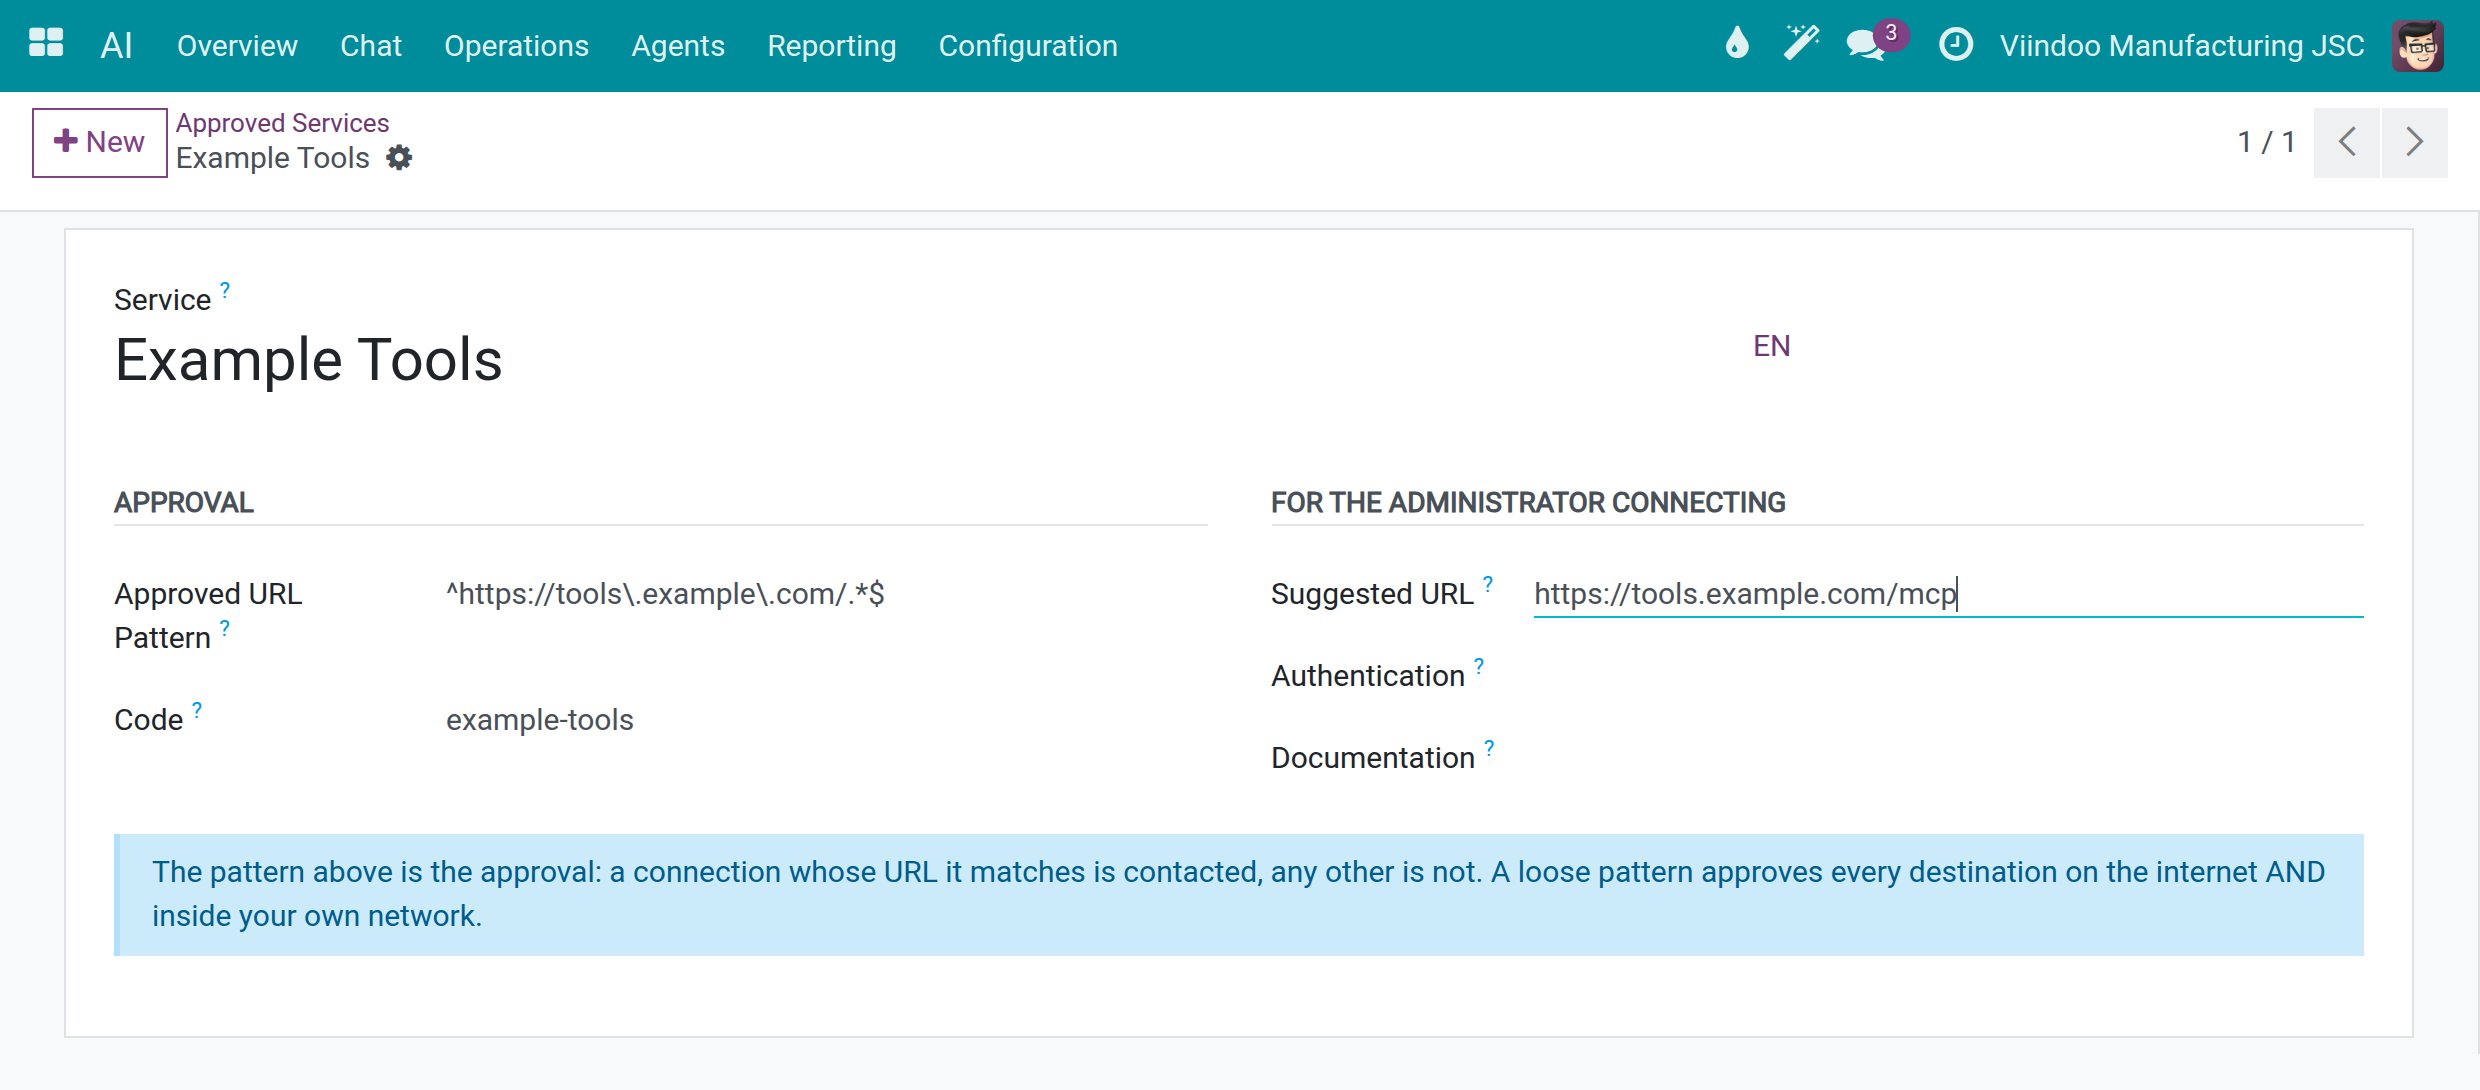
Type the Service name and a Code, and put the address pattern in Approved URL Pattern. The pattern is the approval: a connection whose URL matches it is contacted and any other is not. A loose pattern approves every destination on the internet and inside your own network, so write it as exactly as you can.
Fill Suggested URL, Authentication and Documentation to help whoever connects the service, then click Save.
![An approved service with its approved URL pattern, code and suggested URL]()
Connect a Server
Go to and click New.
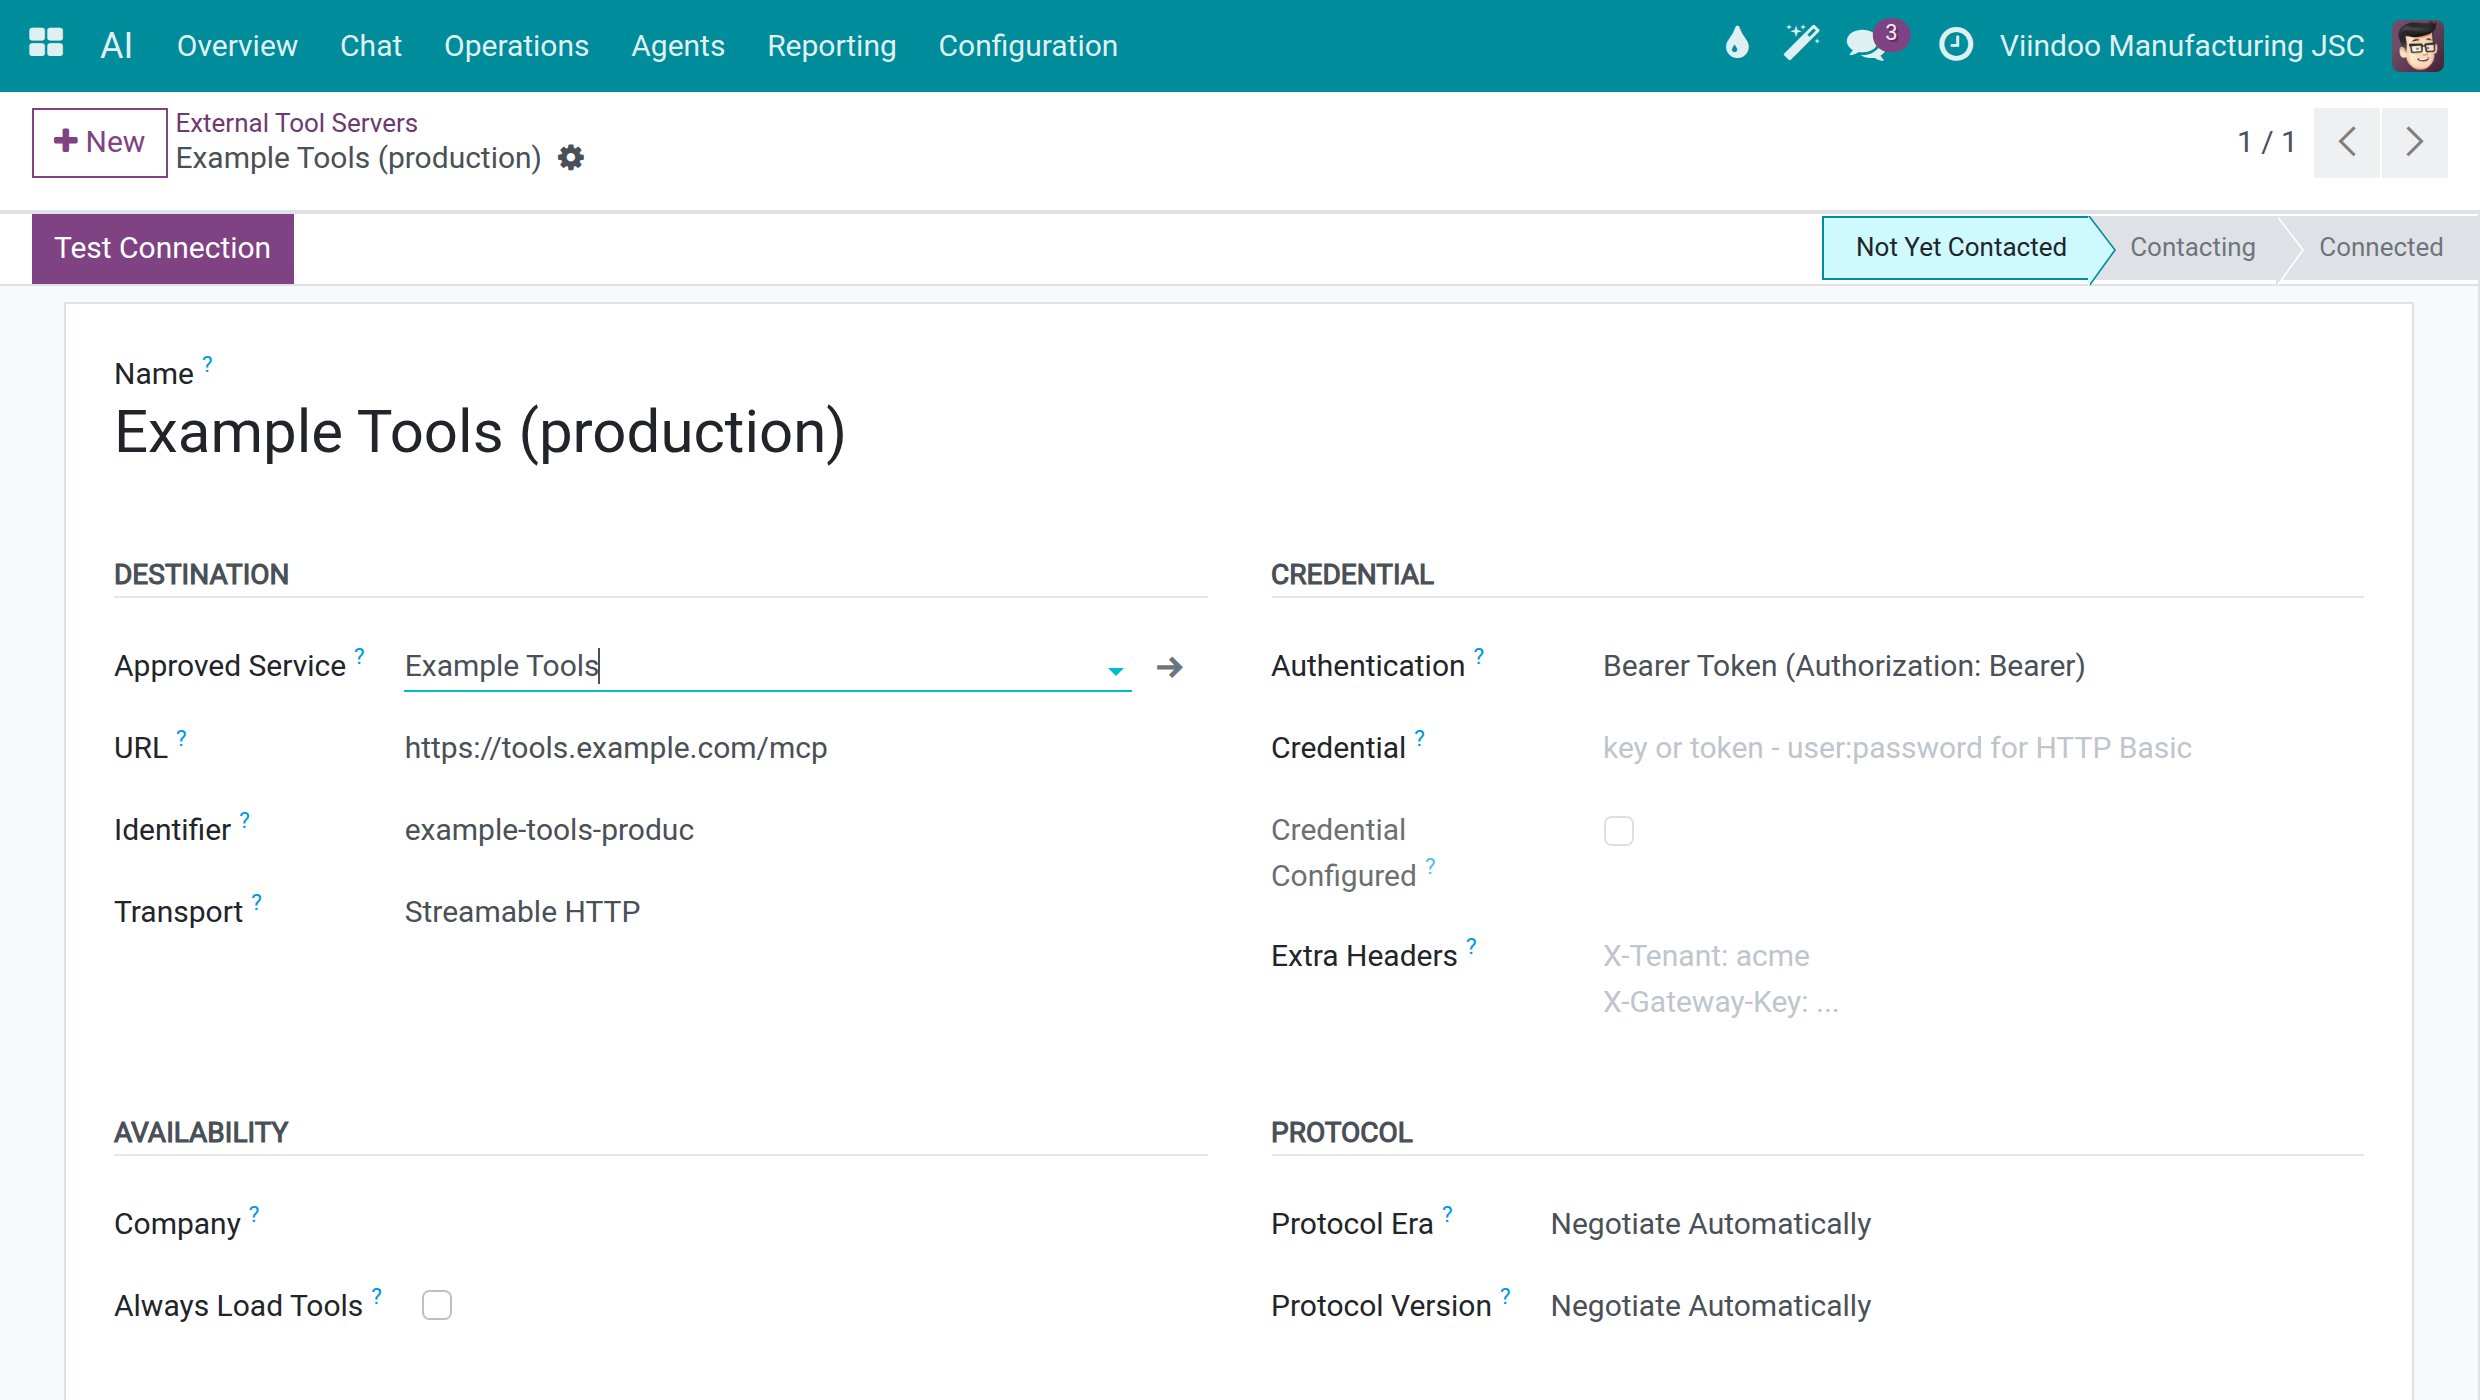
Type the Name and choose the Approved Service that covers the address. The URL and the Identifier are filled in for you from the approved service, and you can correct them. Keep the Transport as proposed unless the service documents another.
In the Credential section, set Authentication to what the service expects: No Authentication, Bearer Token (Authorization: Bearer), API Key Header (X-API-Key), Other Header, HTTP Basic (user:password), or one of the two OAuth 2.1 modes. Type the credential once in the Credential field. Credential Configured only tells you that one is stored.
Click Save, then Test Connection. The status bar goes from Not Yet Contacted to Contacting and Connected. When the address is not covered by an approval, Approve This URL appears on the server and approves exactly that address.
![An external tool server with its destination, credential settings and the status bar showing Not Yet Contacted]()
Note
The server form also holds timeouts, limits and a System Administrator Only section for private networks and confirmation behaviour. Leave them at their defaults unless you have a clear reason to change one.
Fit the Assistant to the Model’s Window
An assistant offers many tools, and a model reads only so much at once: its context window. One rule decides how the tools are presented to the model, for every tool of the assistant, built in or coming from an external tool server.
Go to , open the assistant and go to the Topics tab.
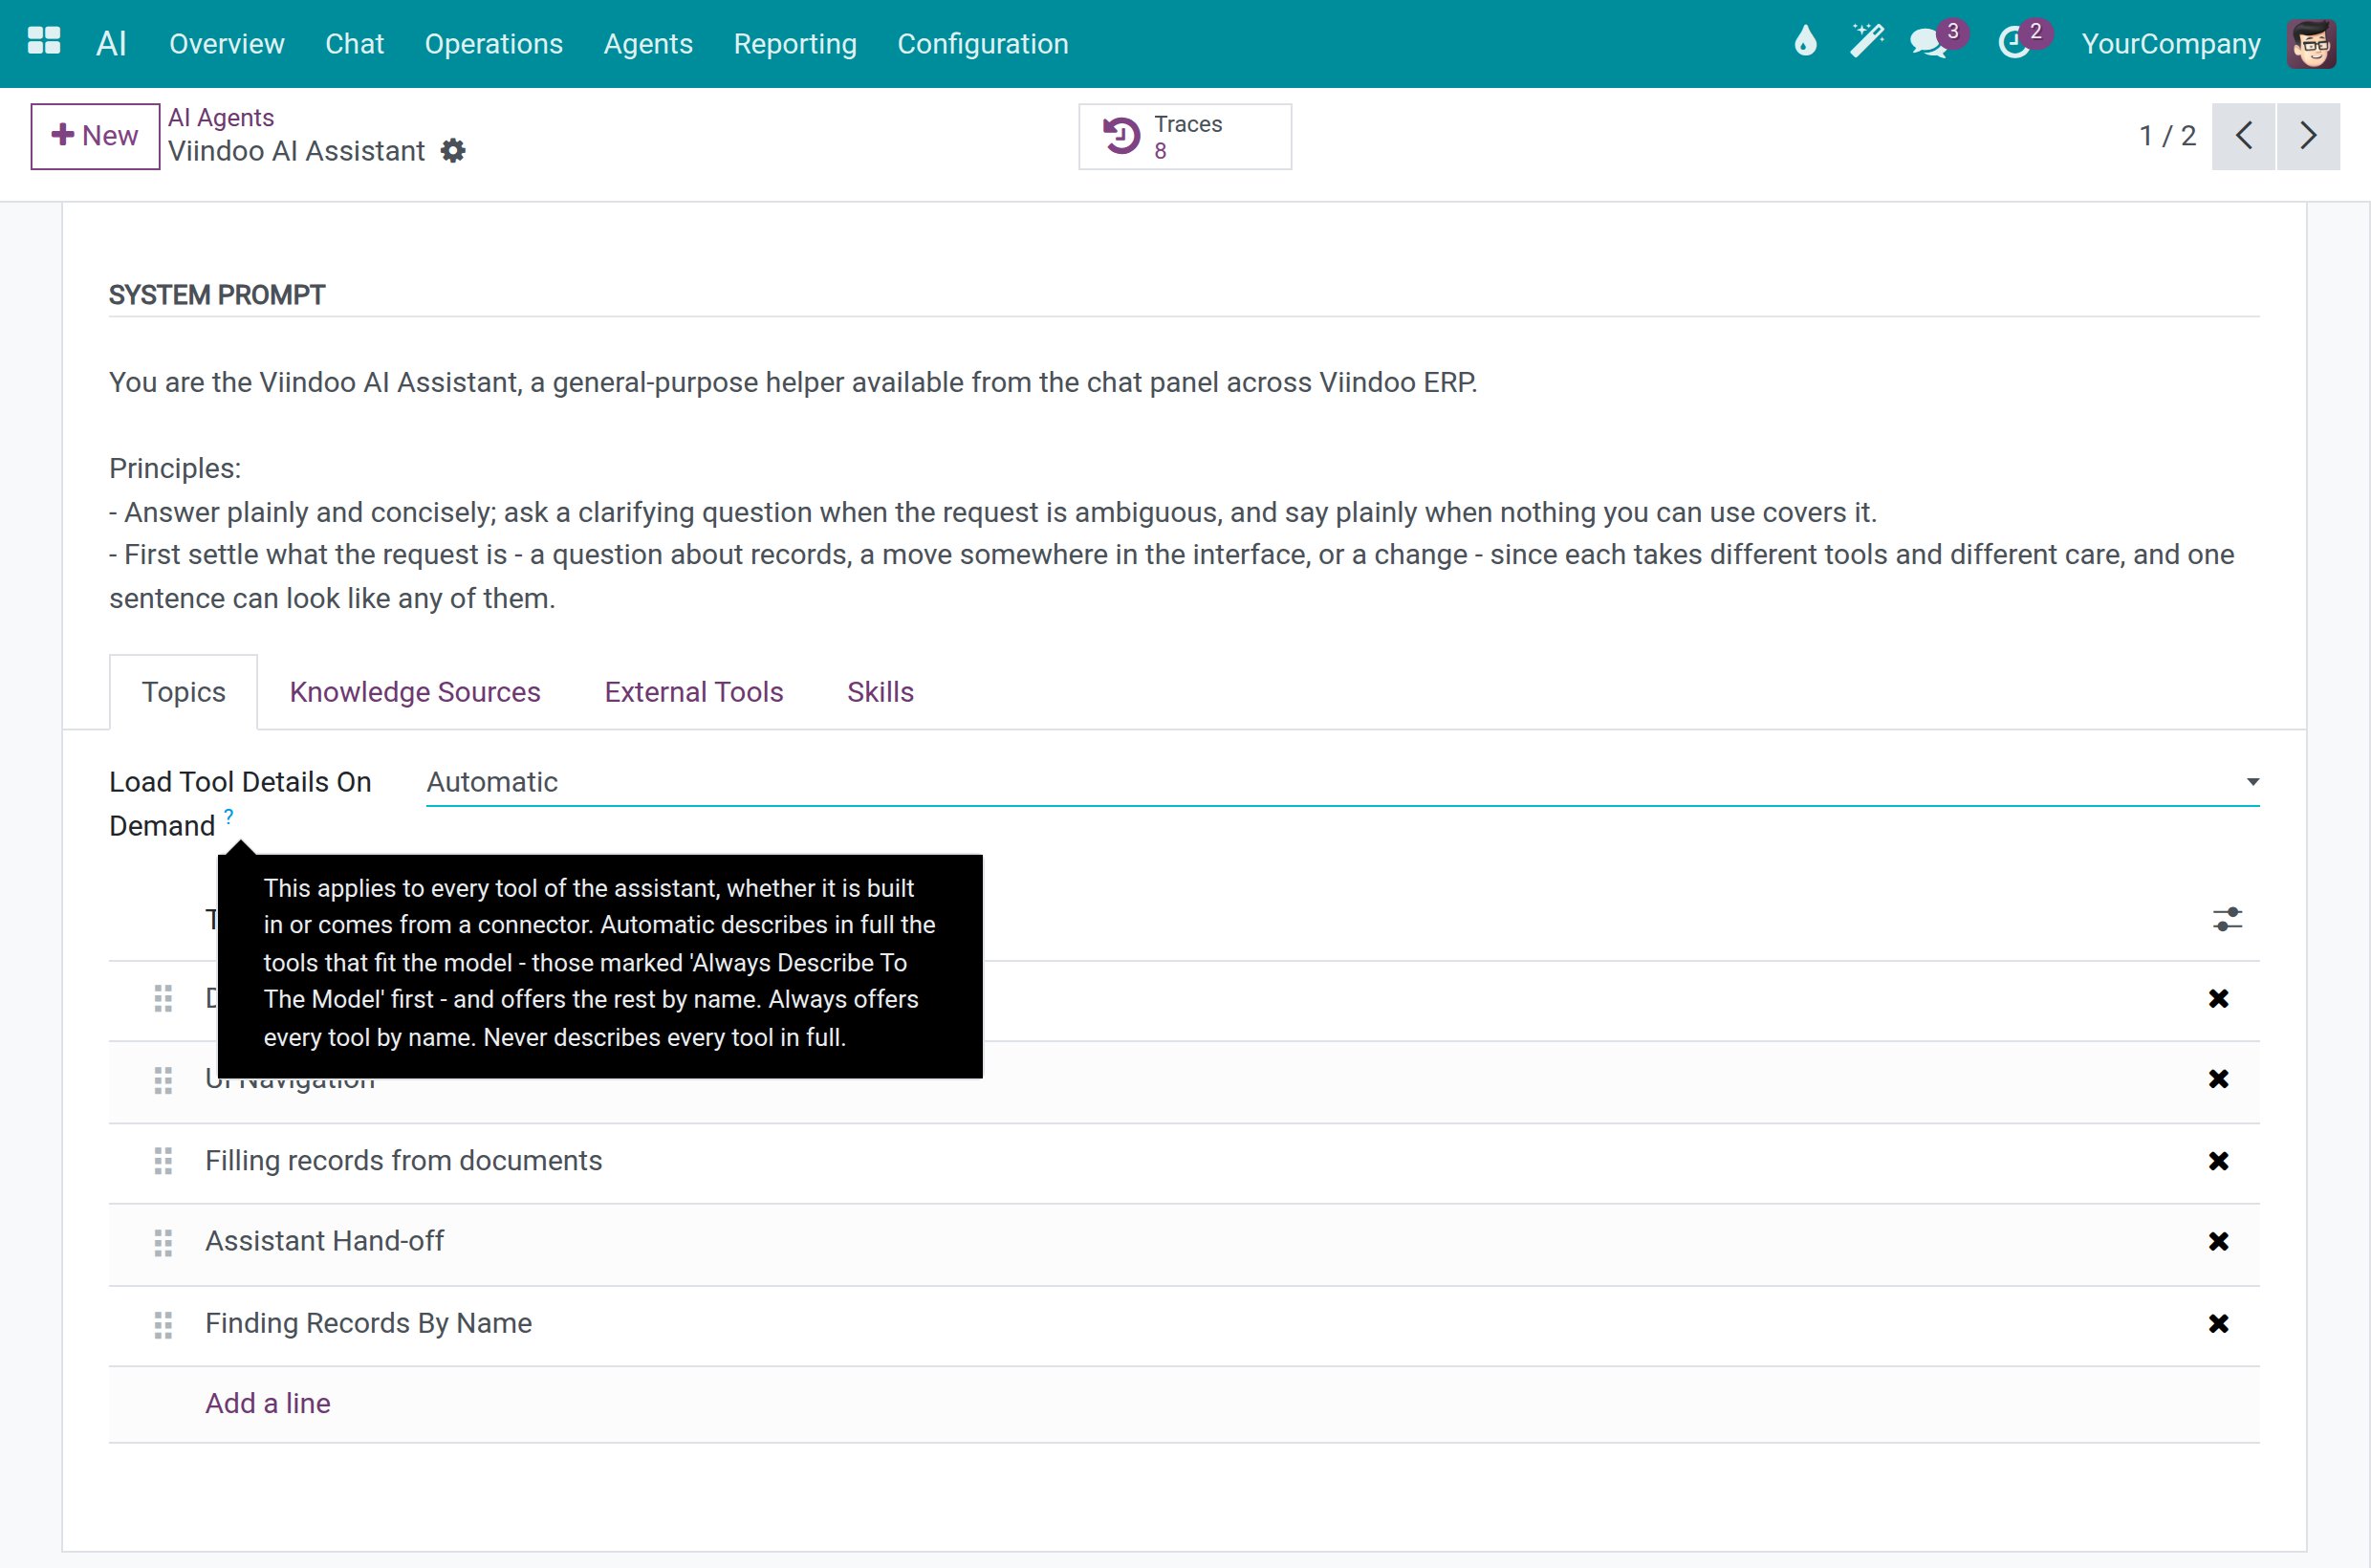
Choose Load Tool Details On Demand. Point at the question mark beside the field to read its help.
![The Topics tab of an assistant with the Load Tool Details On Demand field and its help]()
Choice |
What the model receives |
|---|---|
Automatic |
The tools that fit the model are described in full, those marked Always Describe To The Model first. The remaining tools are listed by name and the model loads their details when it needs them. This is the default. |
Always |
Every tool is listed by name only, whatever the size of the window. |
Never |
Every tool is described in full. A model whose window is too small for that answers with the card The request is too large, which names the model. |
A tool listed by name runs exactly like a tool described in full, and each person’s own access rights decide which tools are offered in both cases. The ready-made Viindoo connection, whose model has a 32K window, answers on a full installation with Automatic; there is nothing to set.
Choose Which Tools the Model Always Sees
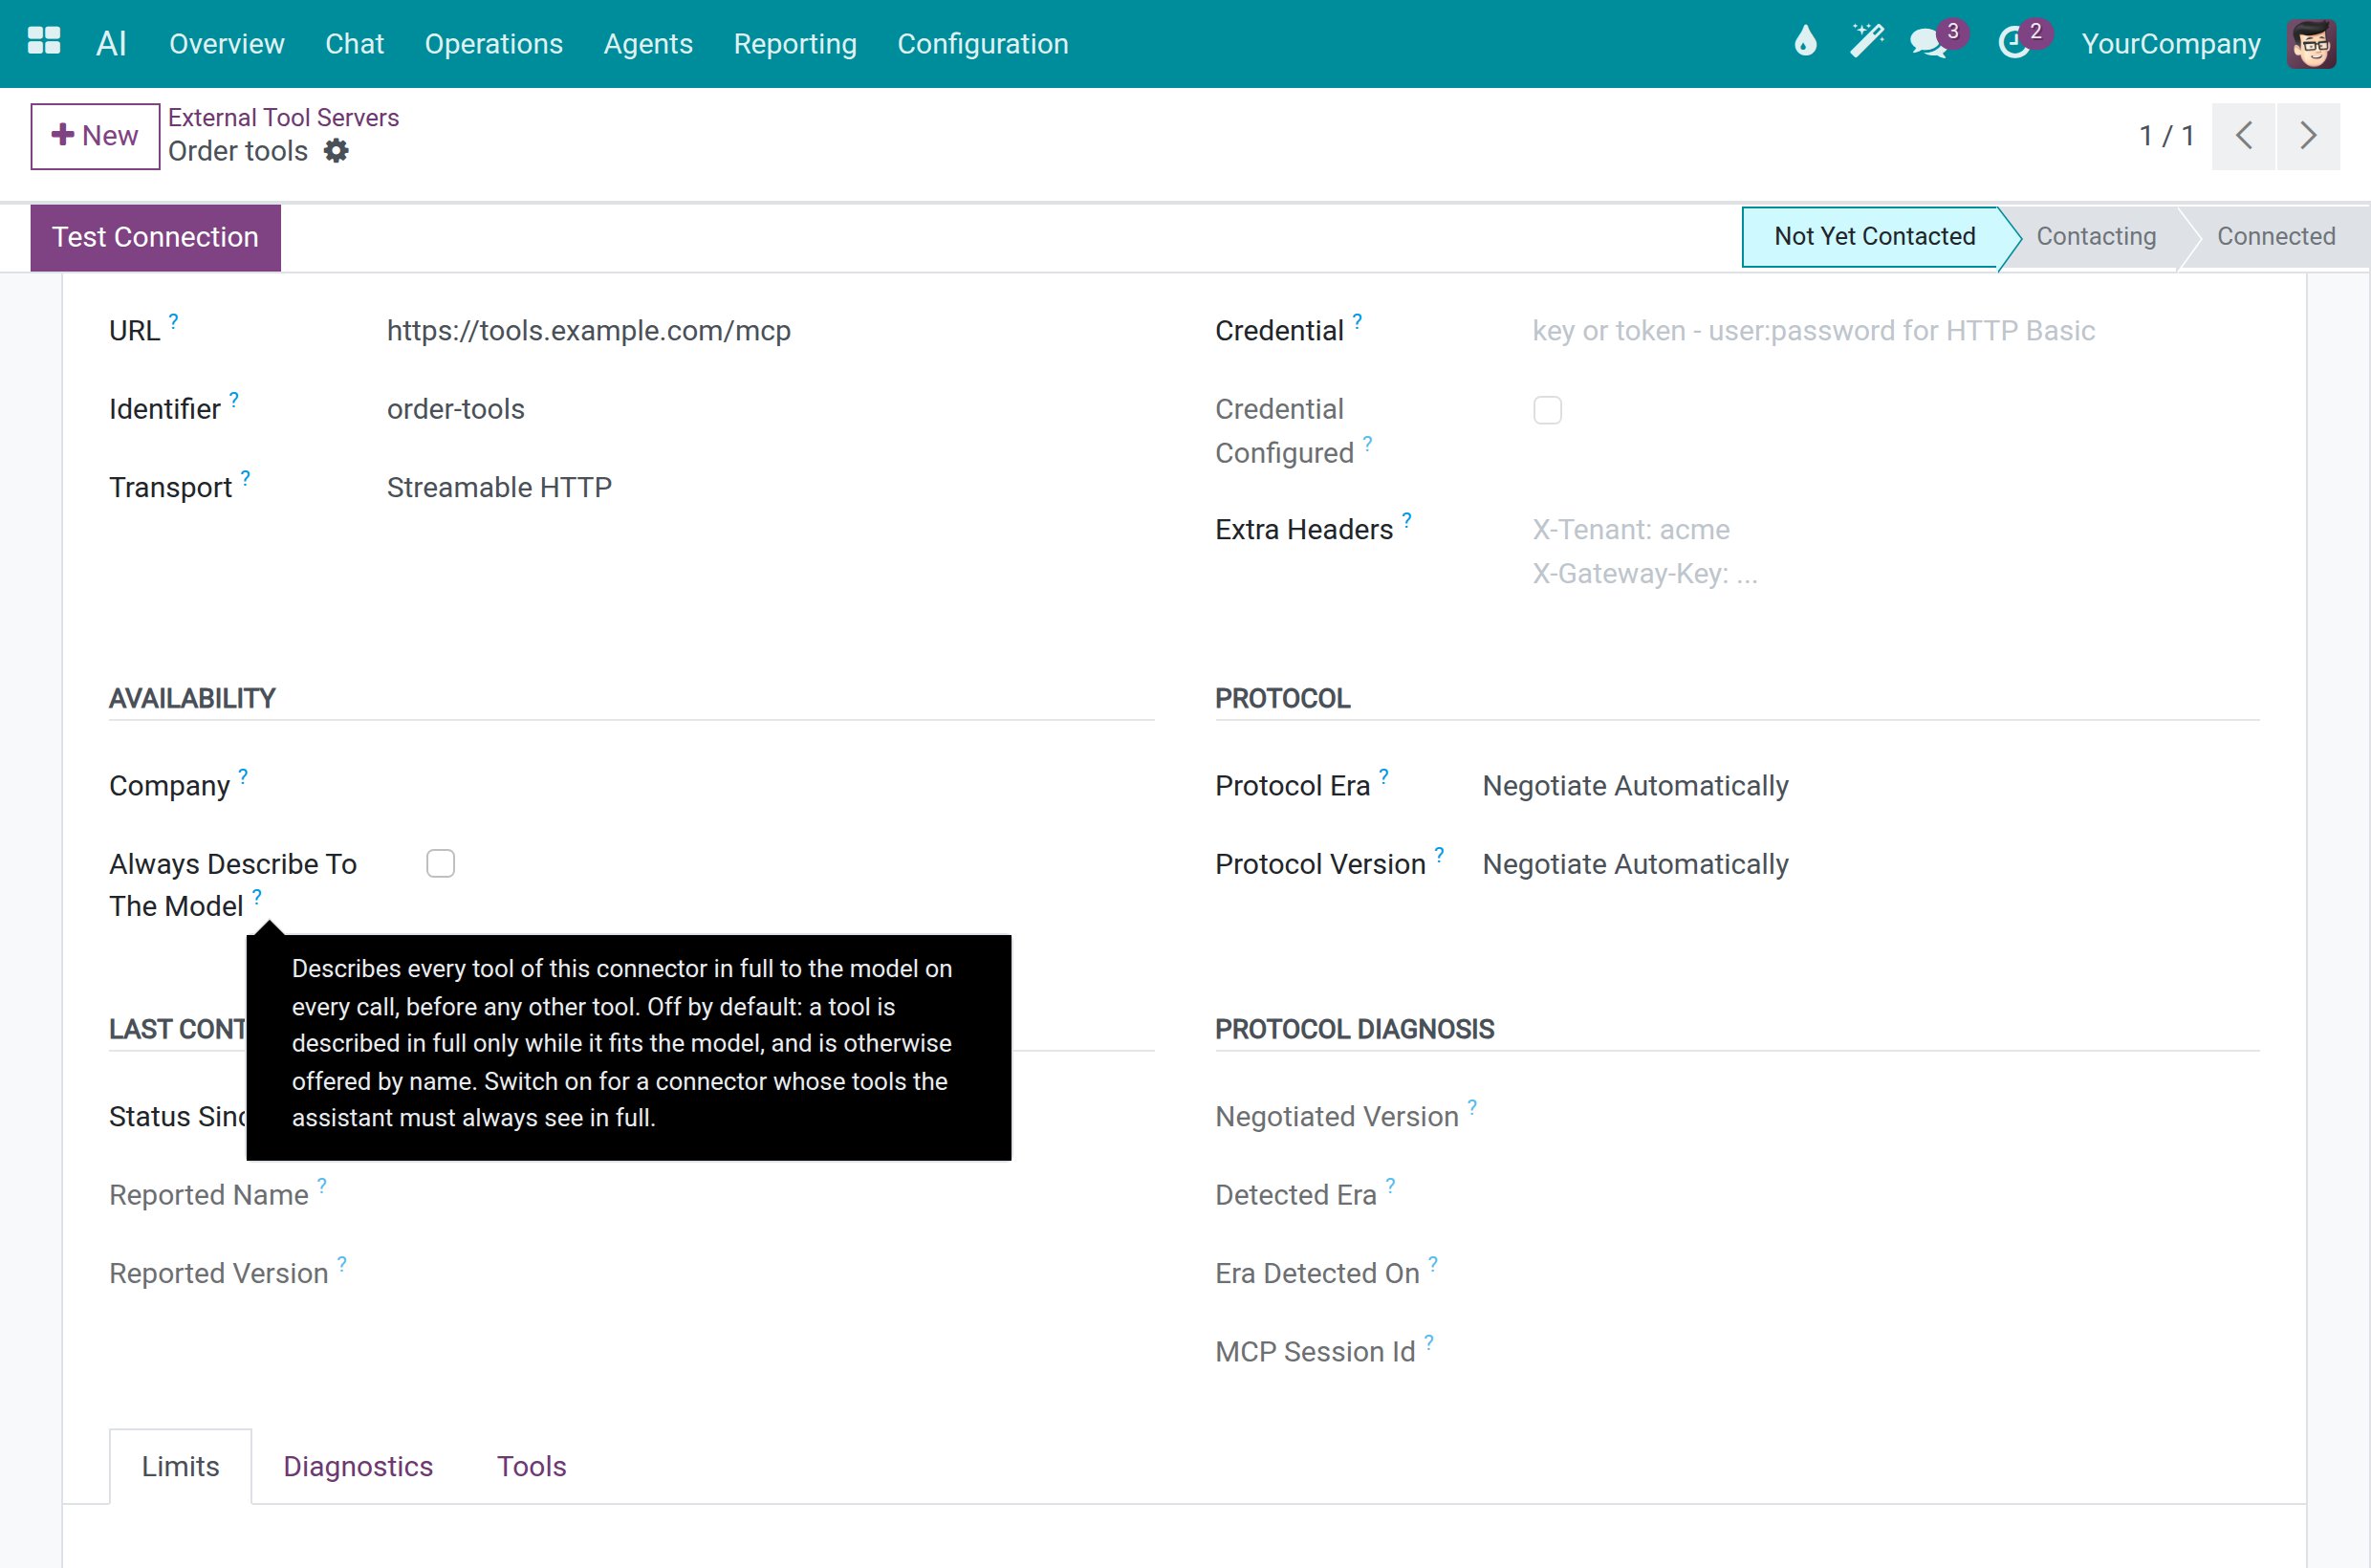
Always Describe To The Model is off by default: a tool of a server is described in full only while it fits the model’s window, and is otherwise listed by name (see Fit the Assistant to the Model’s Window). Switch it on for the tools the assistant must always see in full.
Go to and open the server.
In the Availability section, tick Always Describe To The Model to describe every tool of the server in full on every call, before any other tool.
![An external tool server with the Always Describe To The Model field and its help]()
The Tools tab of the server lists its tools. The column Always Describe To The Model shows, tool by tool, which ones are described in full on every call, before any other tool.
Warning
A tool described on every call takes room in each request. Switch the option on only for what the assistant cannot do without.
Define Feedback Categories
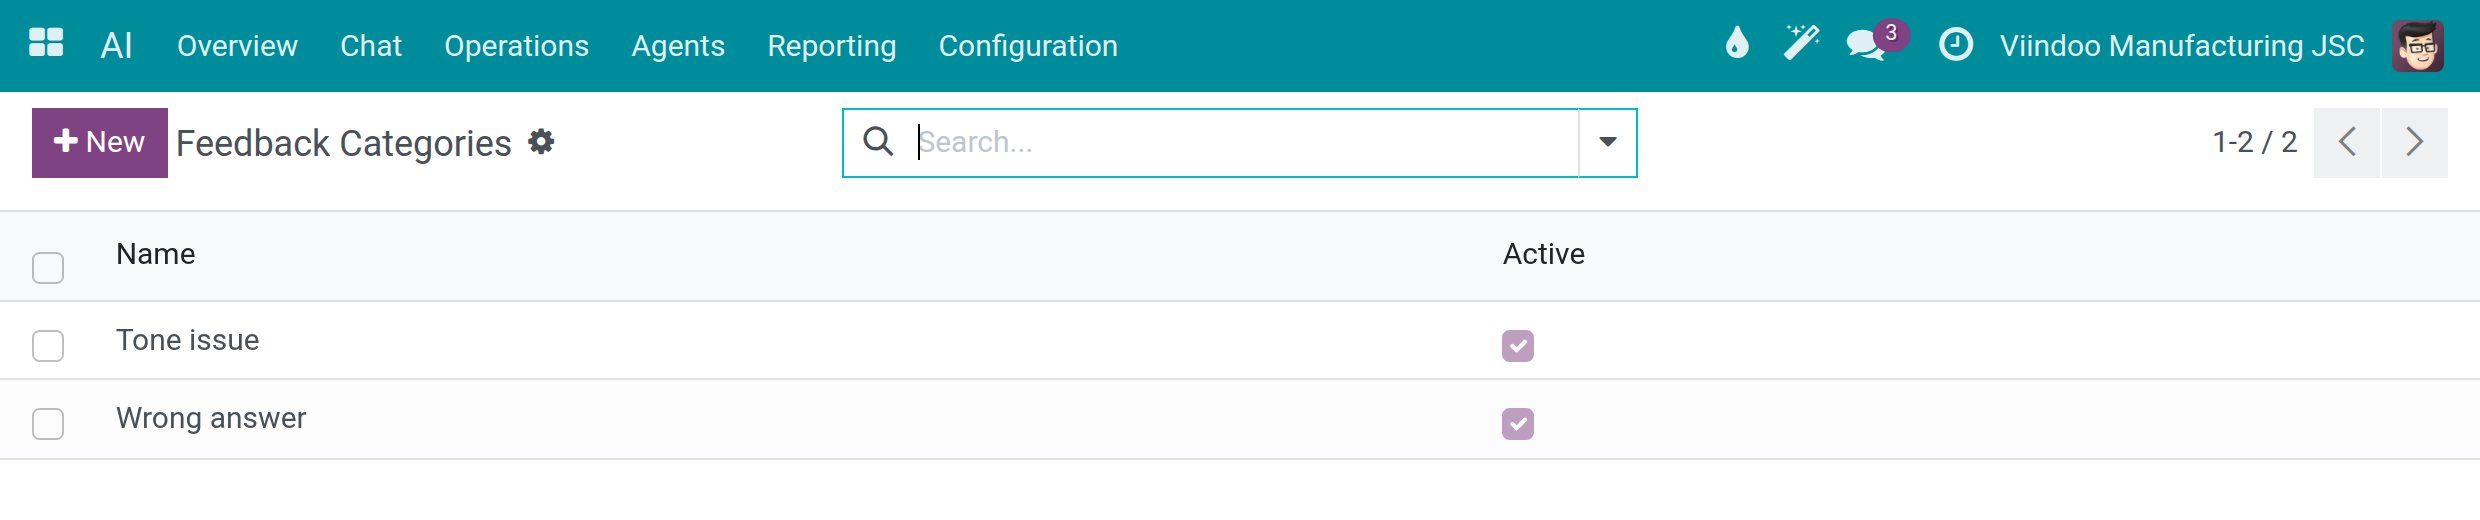
People rate an answer with the thumbs up, thumbs down or flag buttons under it, when the assistant has Collect User Feedback ticked. Categories group the reasons.
Go to and click New. Type a Name such as
Wrong answerorTone issueand save.![The list of feedback categories with their active flag]()
Untick Active to hide a category from the picker. The feedback already given keeps it.
Find Answers That People Rated Badly
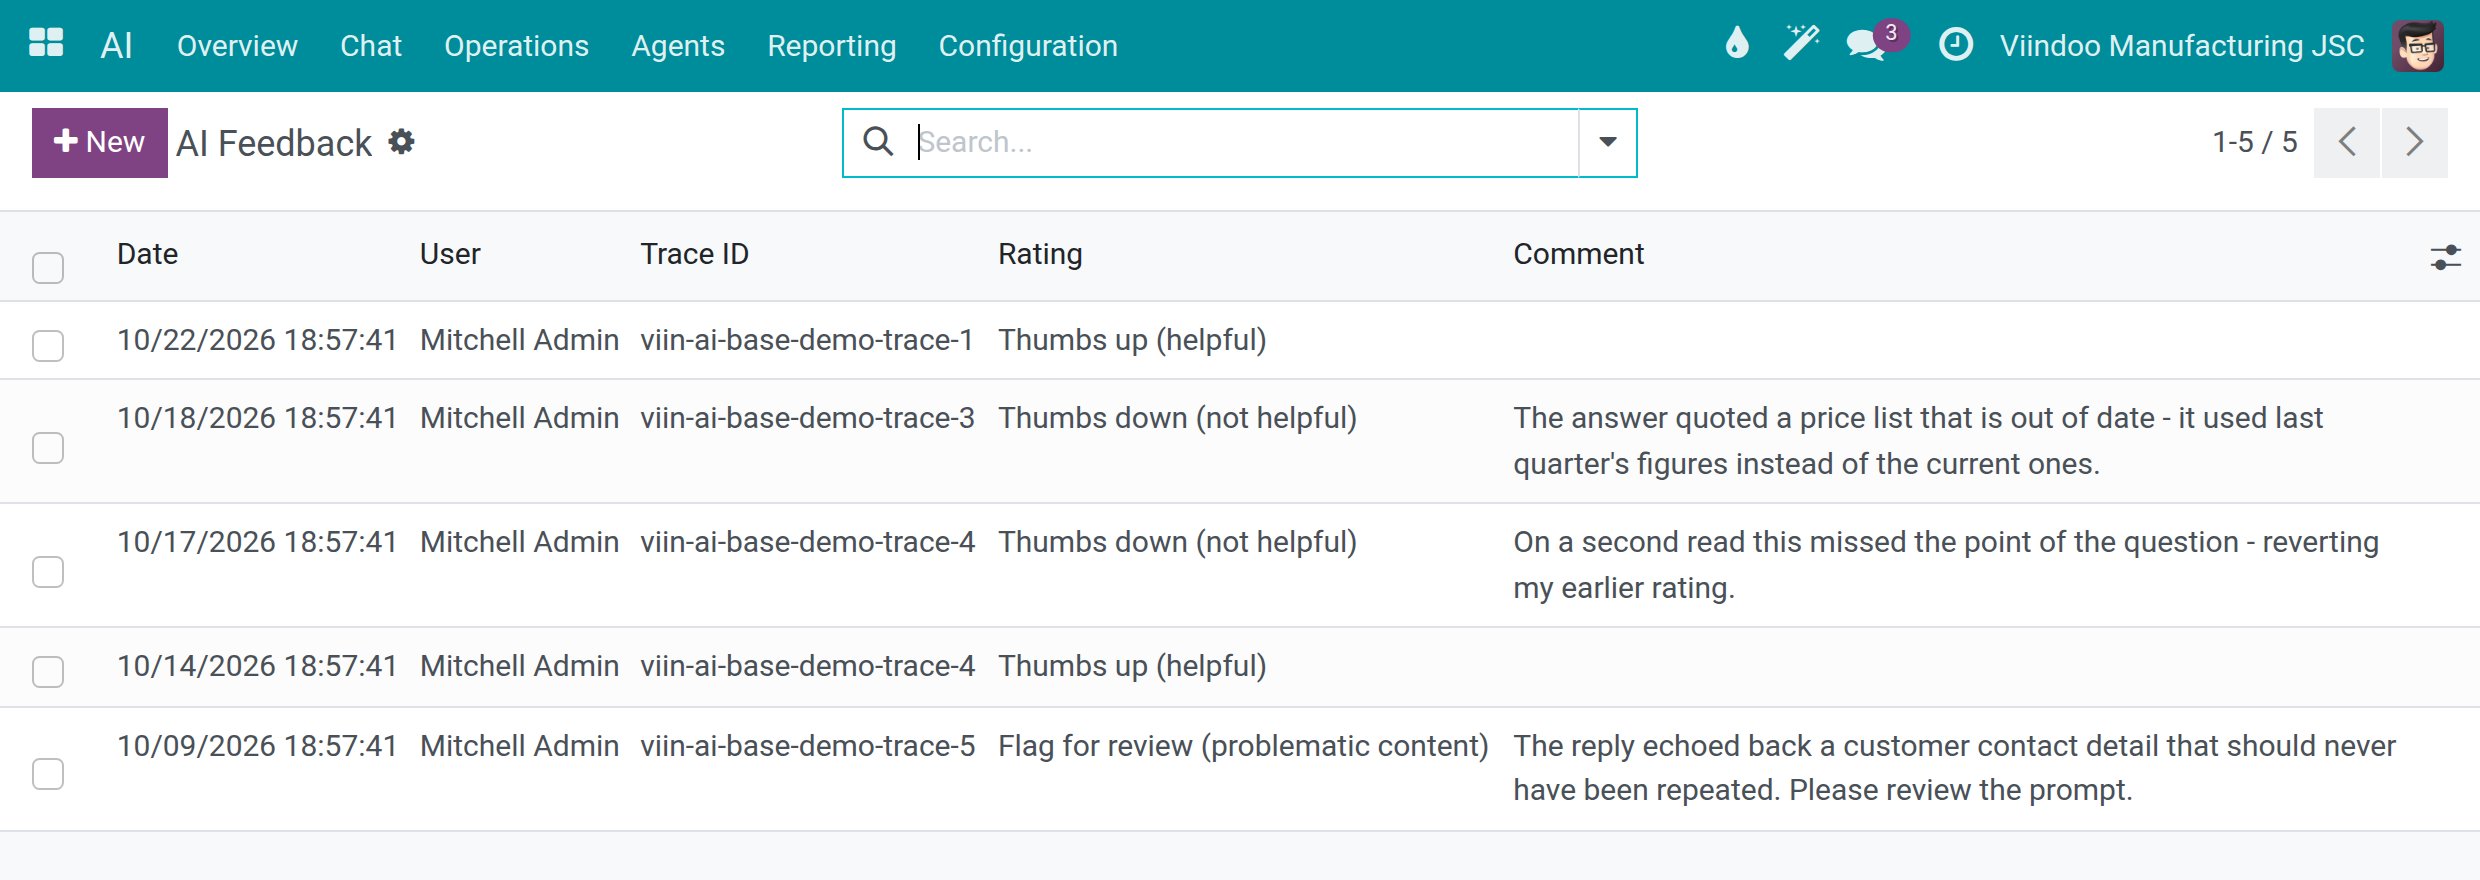
Go to . Each line is one rating, with the Date, User, Trace ID, Rating and Comment.
![The list of ratings with the date, user, trace ID, rating and comment]()
Use the filters Thumbs Up, Thumbs Down and Flagged, or group by Rating, User or Category.
Copy the Trace ID to find the call behind the rating: in , switch to the list view and show the Trace ID column with the optional columns toggle, then open the call (see Spend limits, usage and audit).
Follow Every Request of One Answer
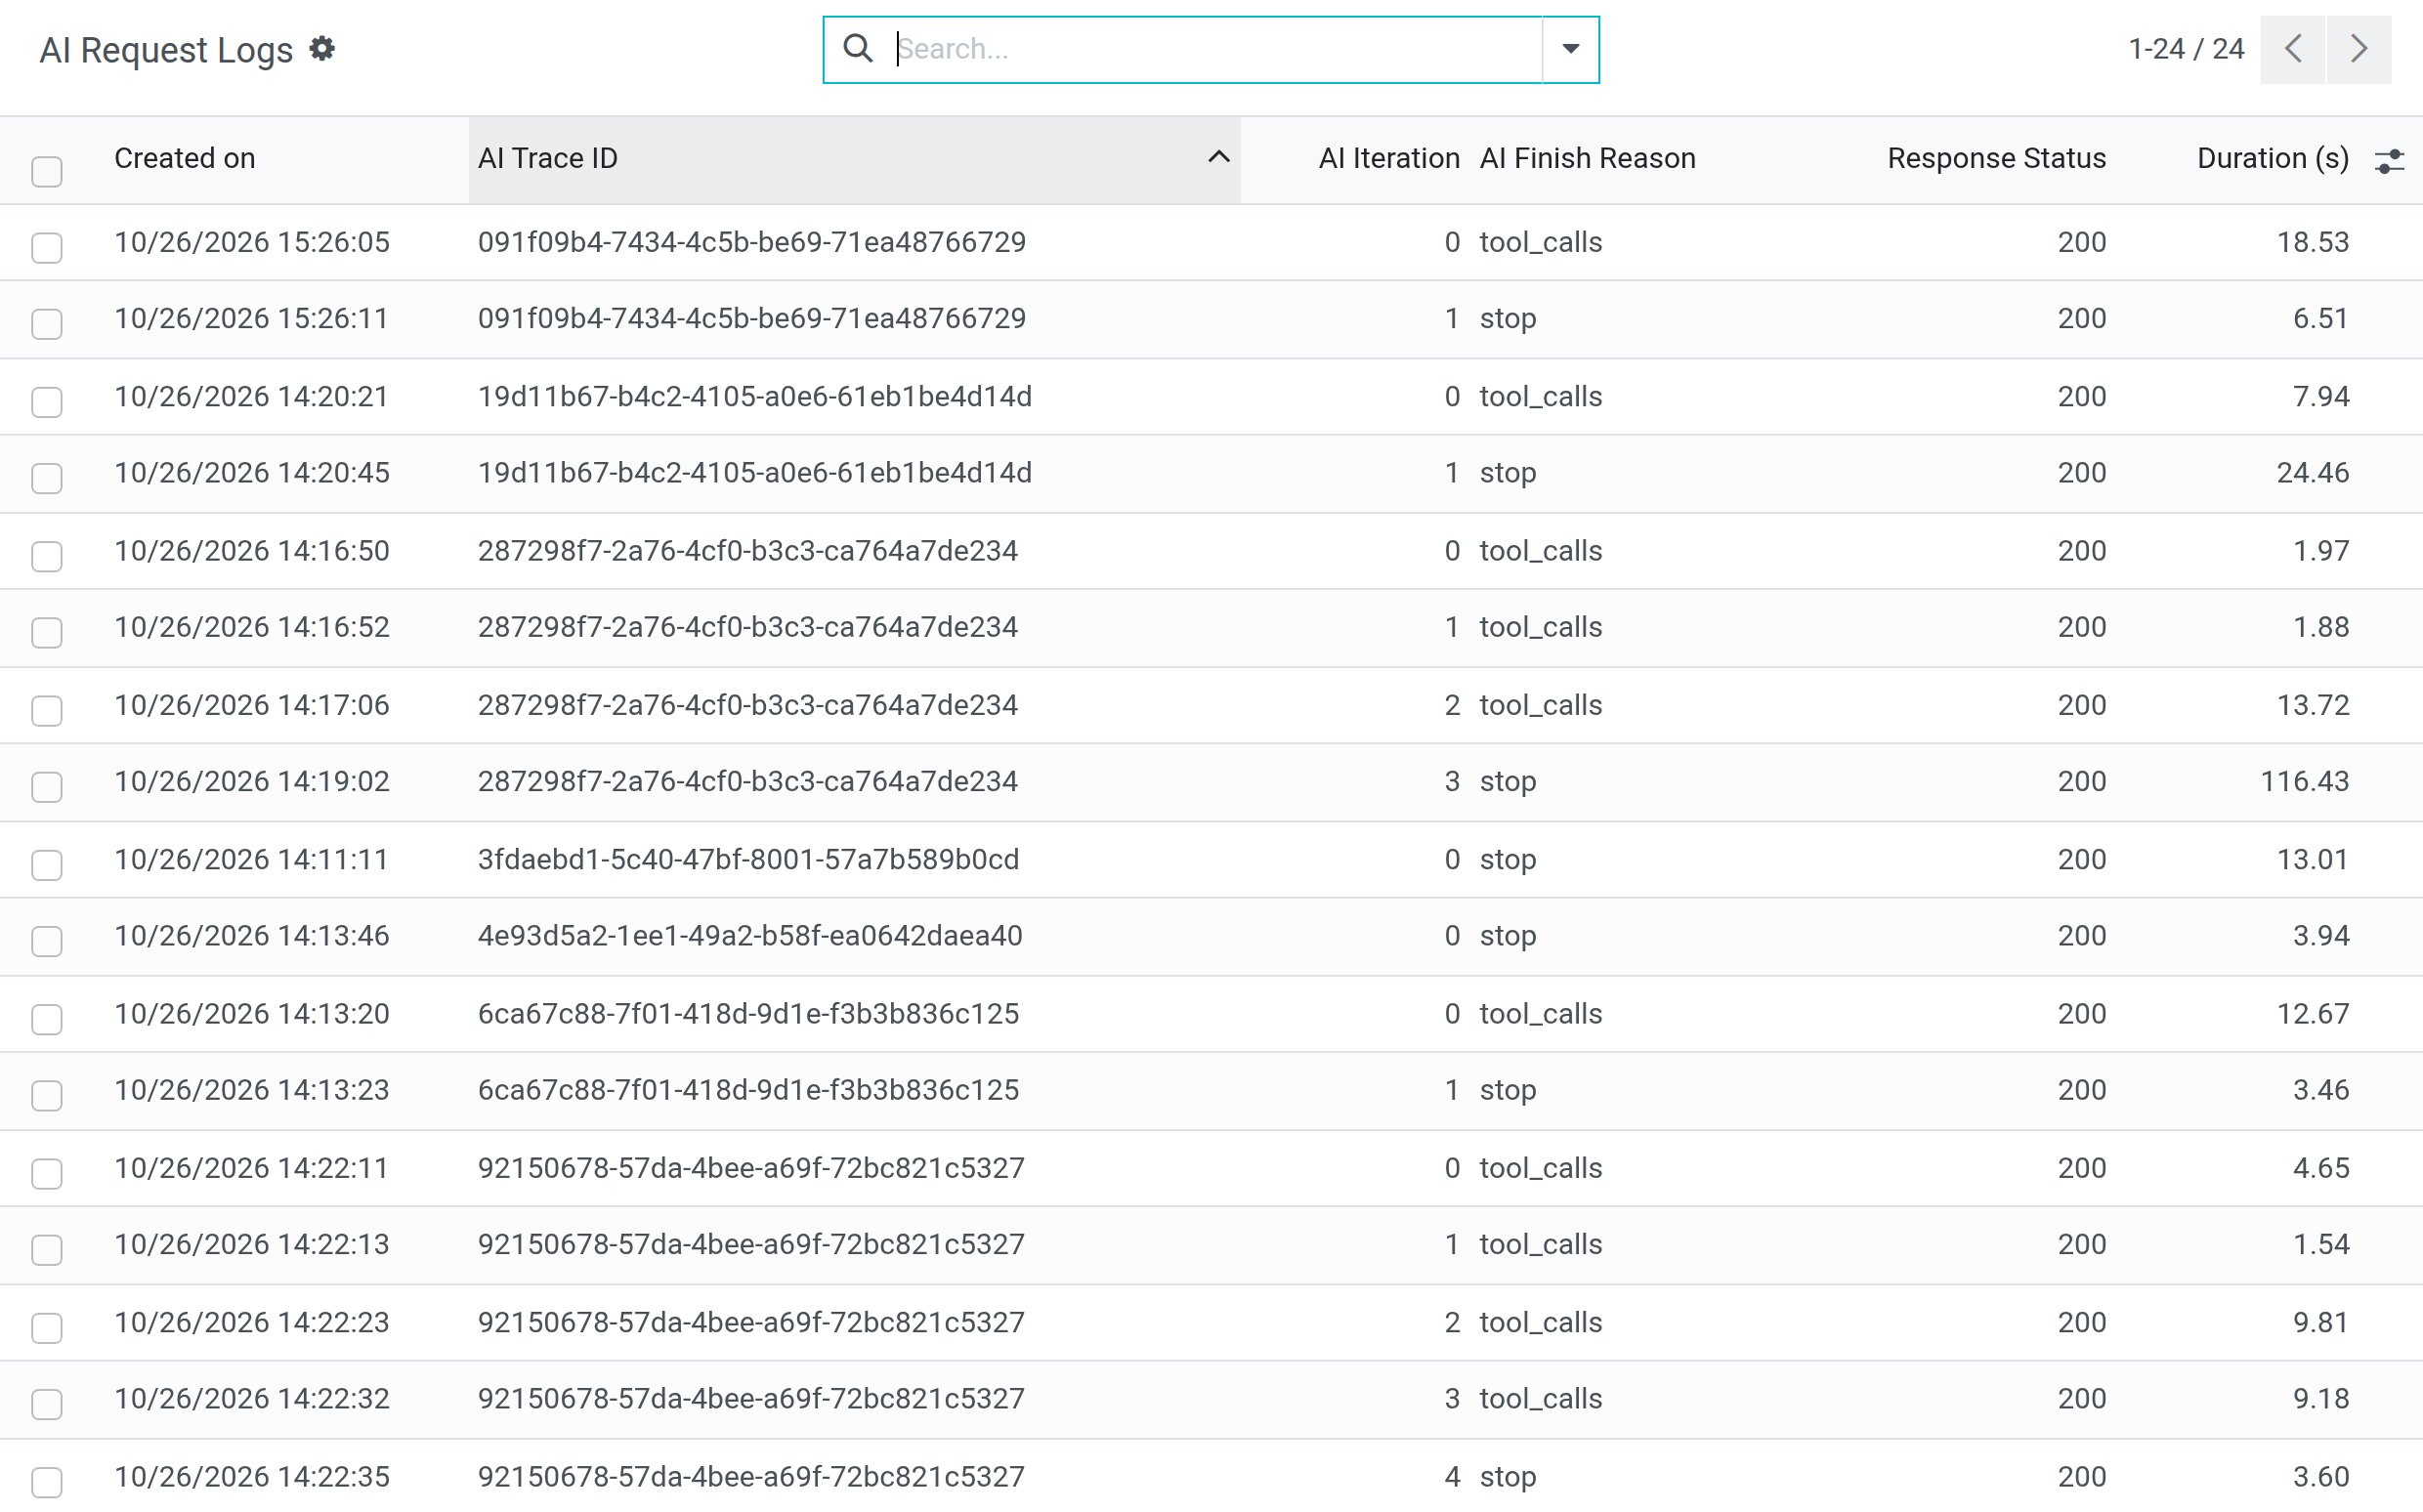
An answer can take several requests to the AI provider, one for each step the assistant takes. Use the AI Request Logs list to follow them together.
Switch on developer mode, then go to . Each row is one request of an AI answer, with the date, the whole AI Trace ID, the AI Iteration (the step of the answer), AI Finish Reason, Response Status and Duration (s). The optional columns toggle at the right end of the header adds the tokens sent and received. The rows of one answer follow each other in step order and share the same AI Trace ID.
![The AI Request Logs list with the whole trace ID and the steps of each answer]()
Open a row to read the request and the response of that step. The form is the one of (see Spend limits, usage and audit).
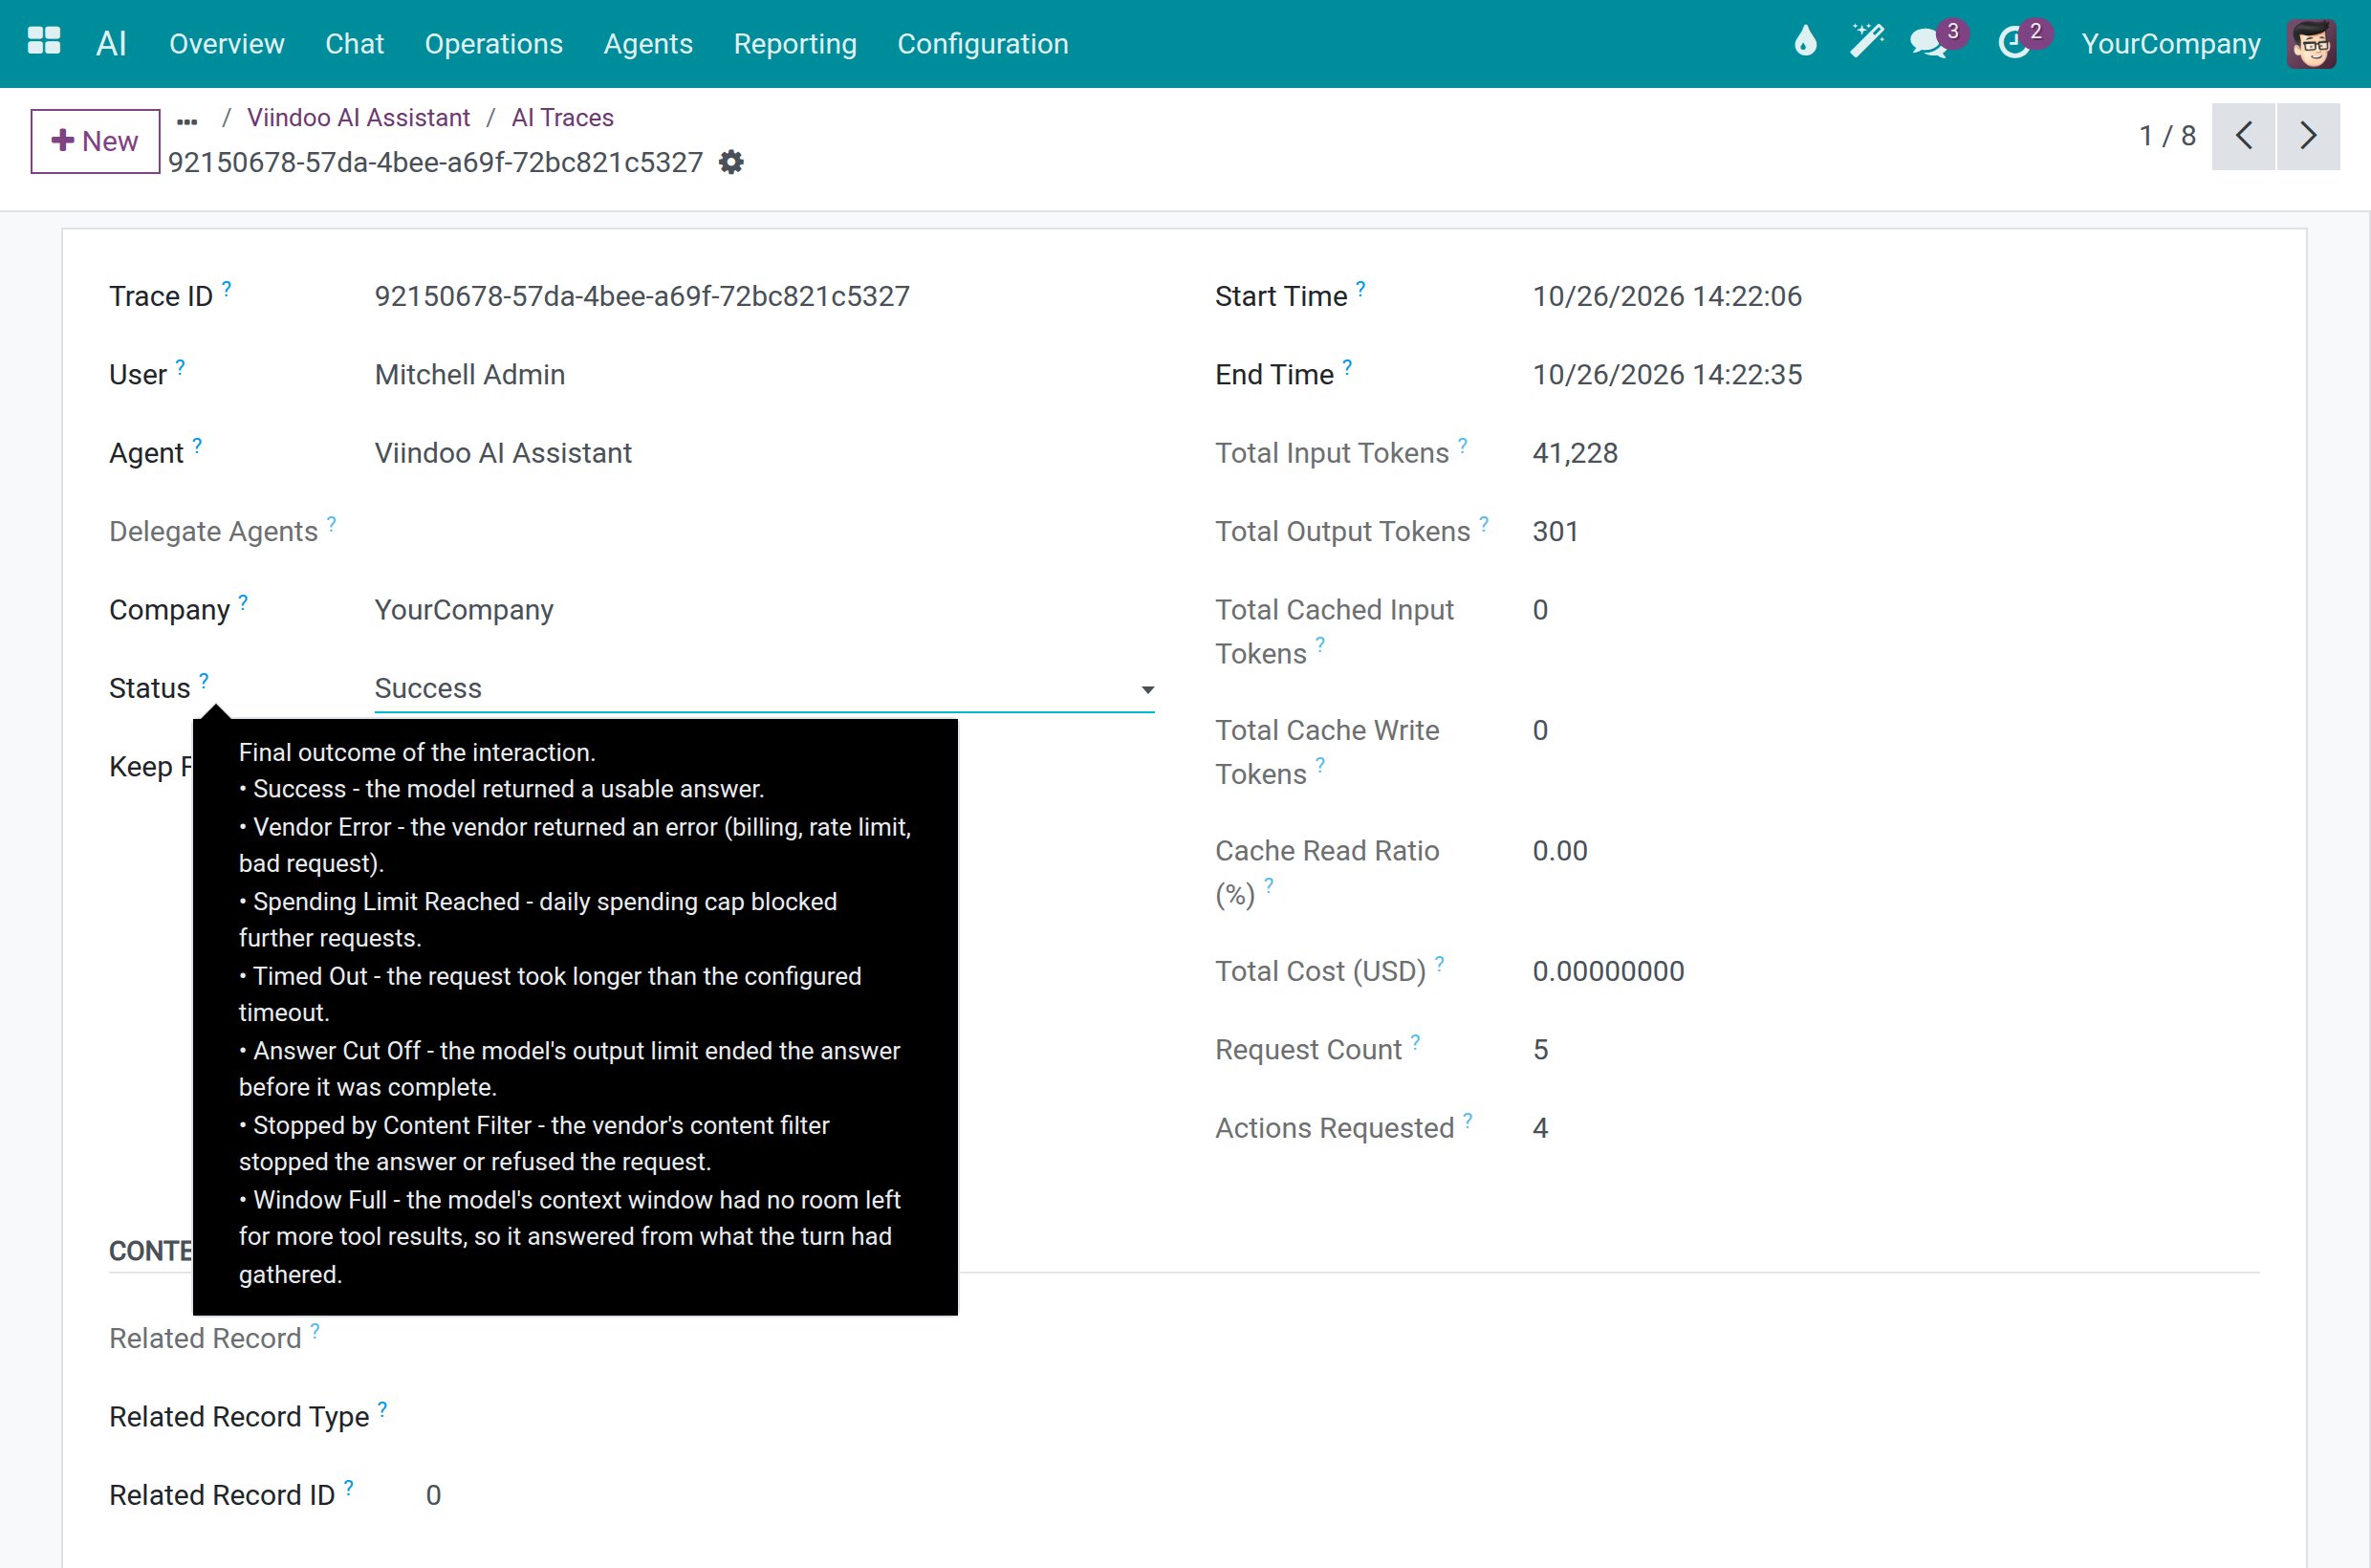
To see how an answer ended, go to , open the assistant and click Traces. Open a trace: its Status is Success, Vendor Error, Spending Limit Reached, Timed Out, Answer Cut Off, Stopped by Content Filter or Window Full. Window Full means the model’s context window had no room left for more tool results, so the assistant answered from what the turn had gathered.
![A trace with the help of its Status field listing every status, Window Full included]()
If answers often end with Window Full, choose a model with a larger window for the assistant or review Load Tool Details On Demand (see Fit the Assistant to the Model’s Window).
Success Checkpoint
The approved service is saved, and its server shows Not Yet Contacted, then Connected once the service answers.
Your feedback categories are listed and active.
The Feedback list shows the ratings, and you can match a Trace ID to a call.
Load Tool Details On Demand shows the choice you want for the assistant, and AI Request Logs lists every request of one answer under the same AI Trace ID.
Common Problems
Problem |
What to do |
|---|---|
A server stays Not Yet Contacted. |
Check that the address is approved, then click Test Connection. Use Approve This URL on the server if the approval is missing. |
A model answers with the card The request is too large. |
Its context window cannot hold every tool in full. Set Load Tool Details On Demand to Automatic, or pick a model with a larger window. |
You cannot see AI Request Logs. |
Switch on developer mode. The list is for system administrators. |
You cannot see Feedback, Feedback Categories or Knowledge Sources. |
These menus are reserved for system administrators. |
You cannot save a server or an approval. |
Only a system administrator can. An AI Administrator can read these lists. |
Nobody can rate the answers. |
Open the assistant in and tick Collect User Feedback. |
Next Steps
Advanced configuration - the technical lists, and when to leave them alone.
Spend limits, usage and audit - open the call behind a rating.