Fill in Shipment Detailed Information
Requirements
This guide requires the following applications:
Once the shipment exists, operations staff should review and complete every mandatory field so bookings, cost tracking, and customer updates stay accurate throughout the transport journey.
Access Shipment
Quickly open the shipment record you need to update using either of the following entry points.
From Sales Order
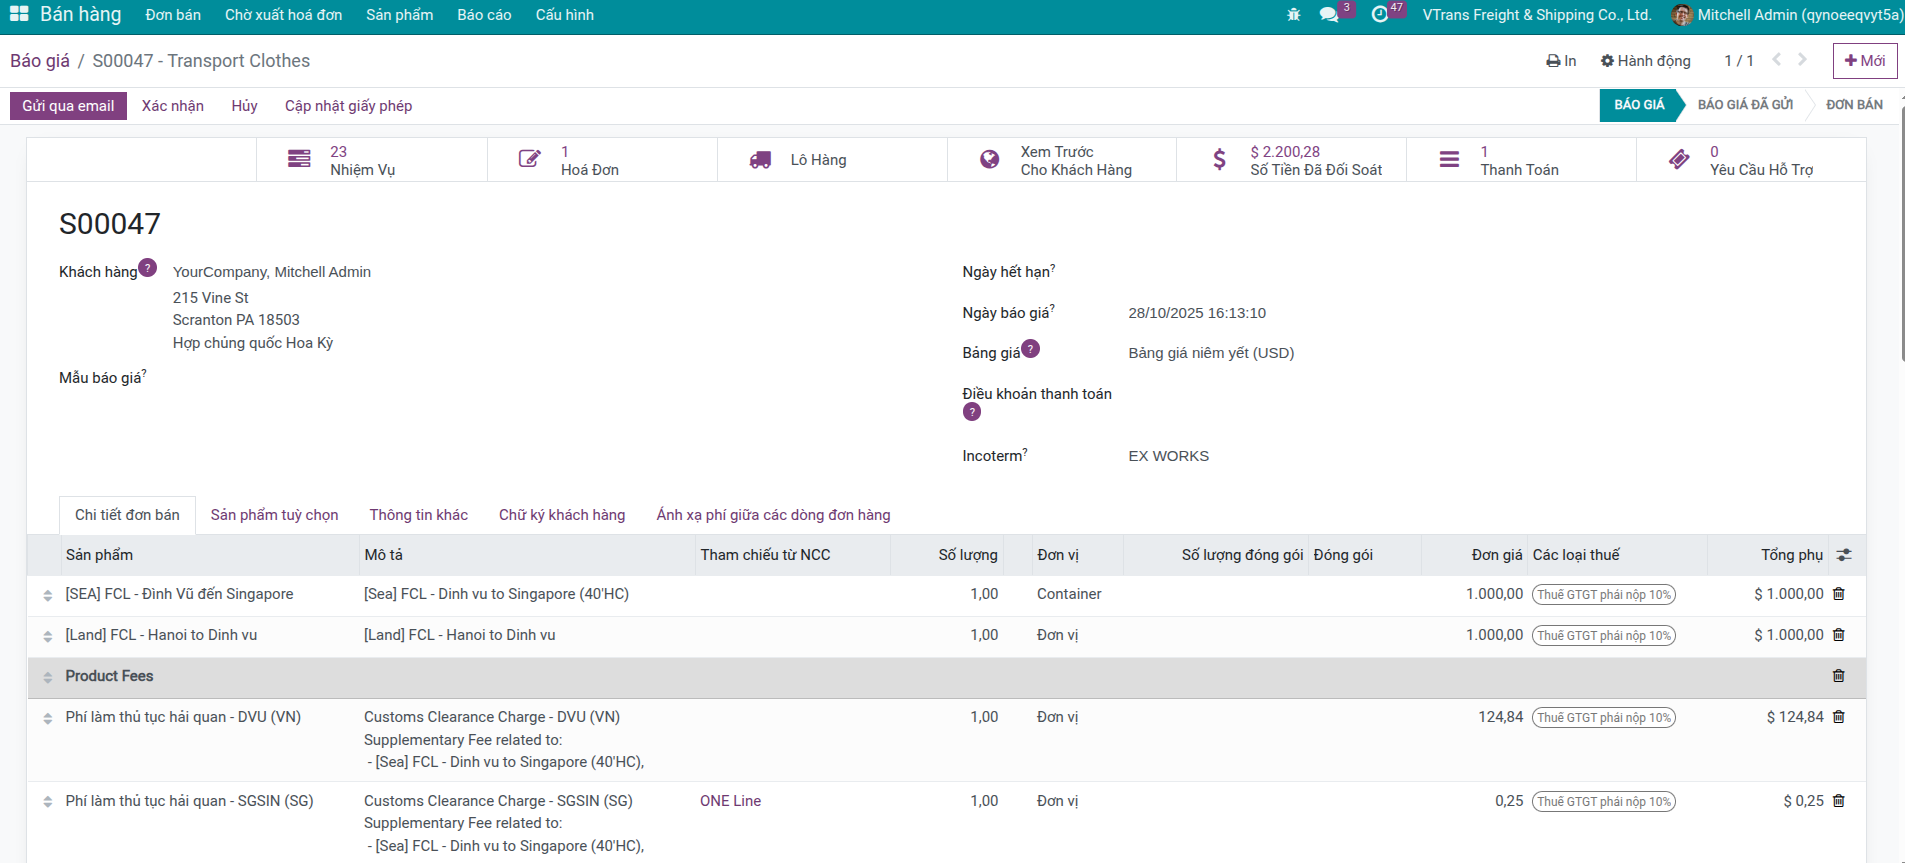
Open confirmed sales order
Click Shipment button in top corner
System opens automatically created shipment
Directly From Menu
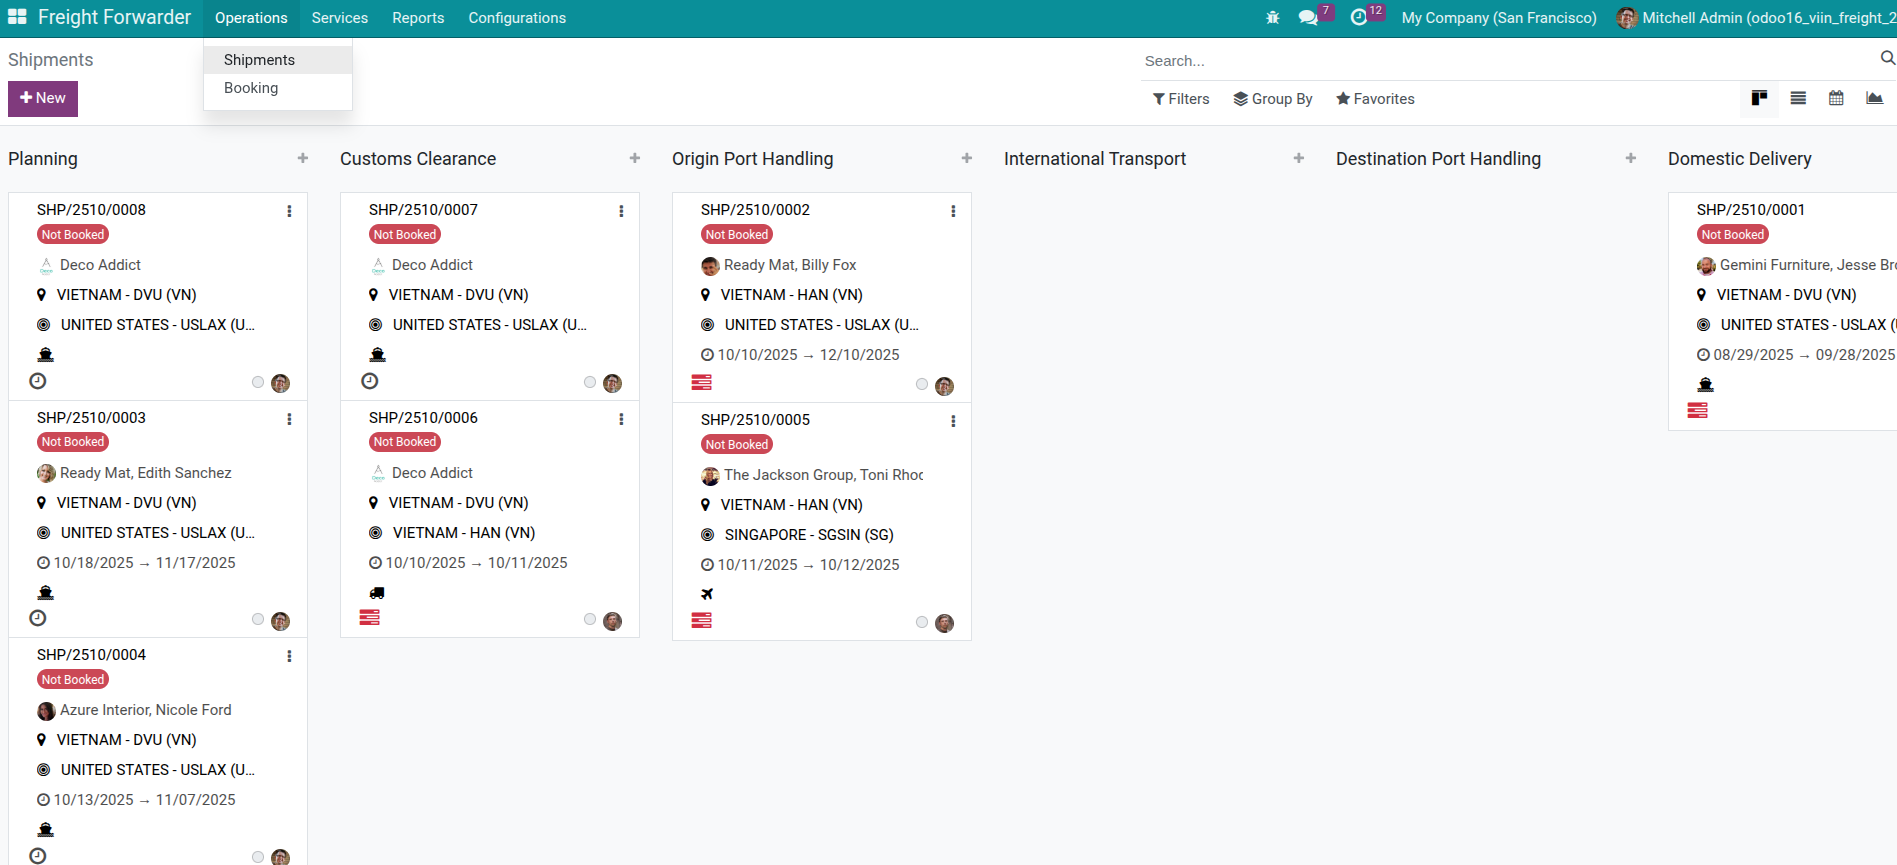
Access Freight Forwarder > Operations > Shipments
Find and open shipment needing information input
Populate Basic & Schedule Data
On the shipment form, review and complete the core data points below so downstream processes remain accurate.
General Information
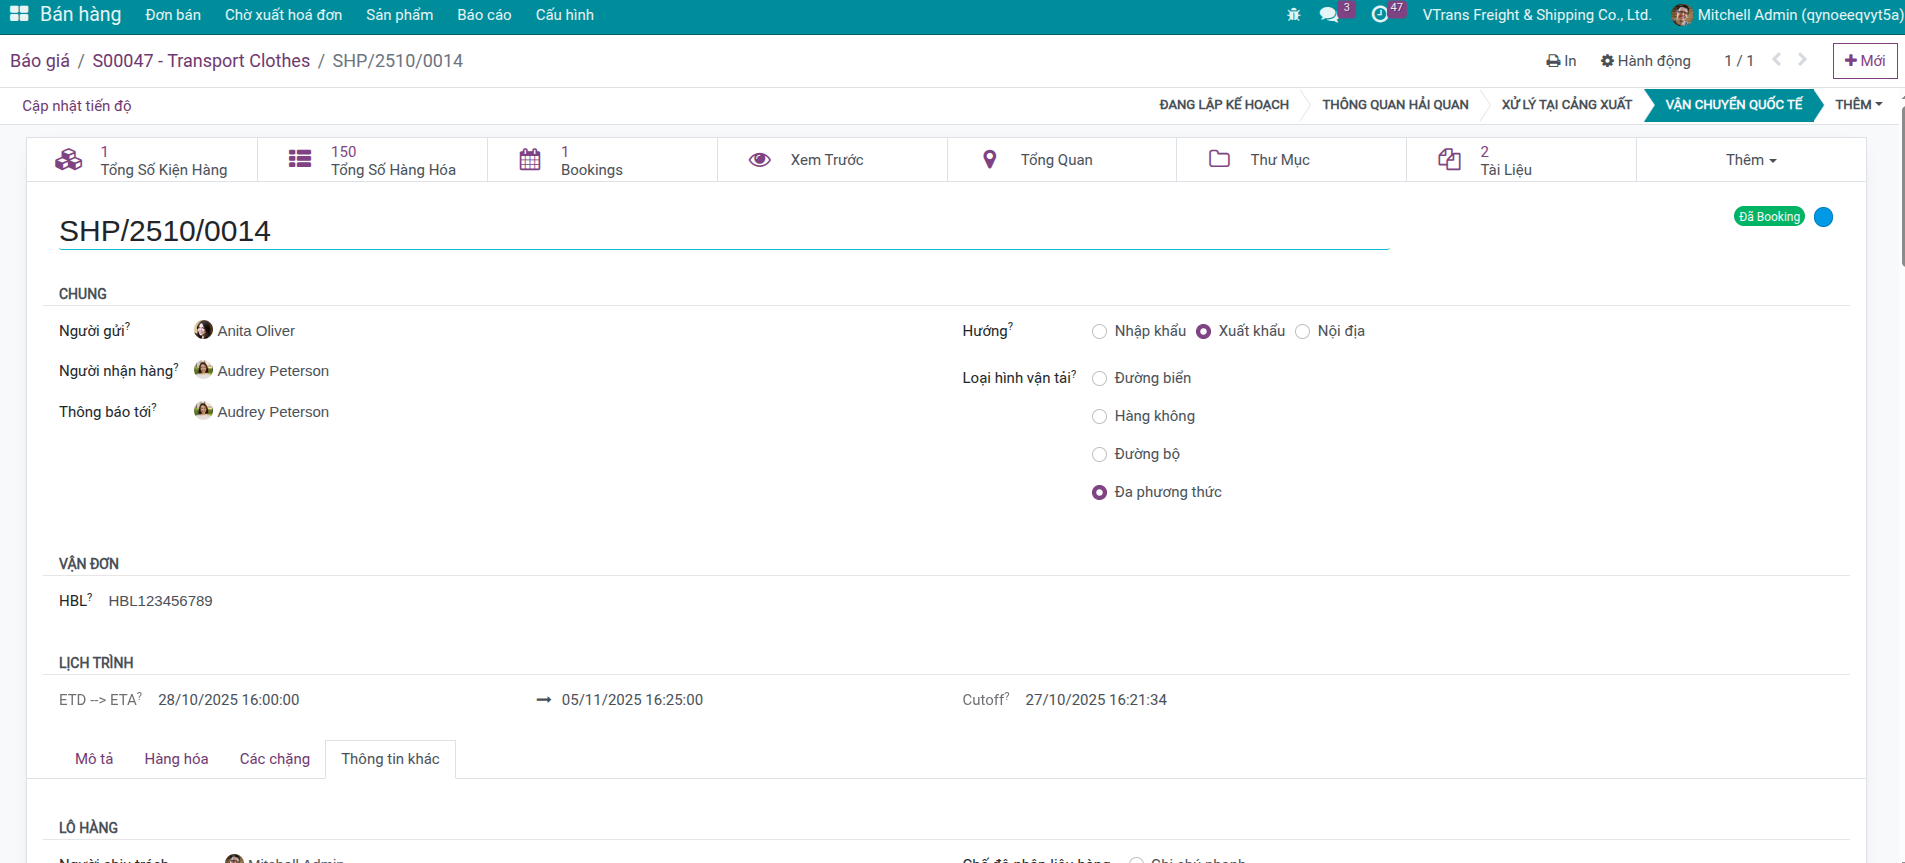
Shipment Number: Shipment identification code (automatically created if configured)
Customer: Customer requesting service (already from sales order)
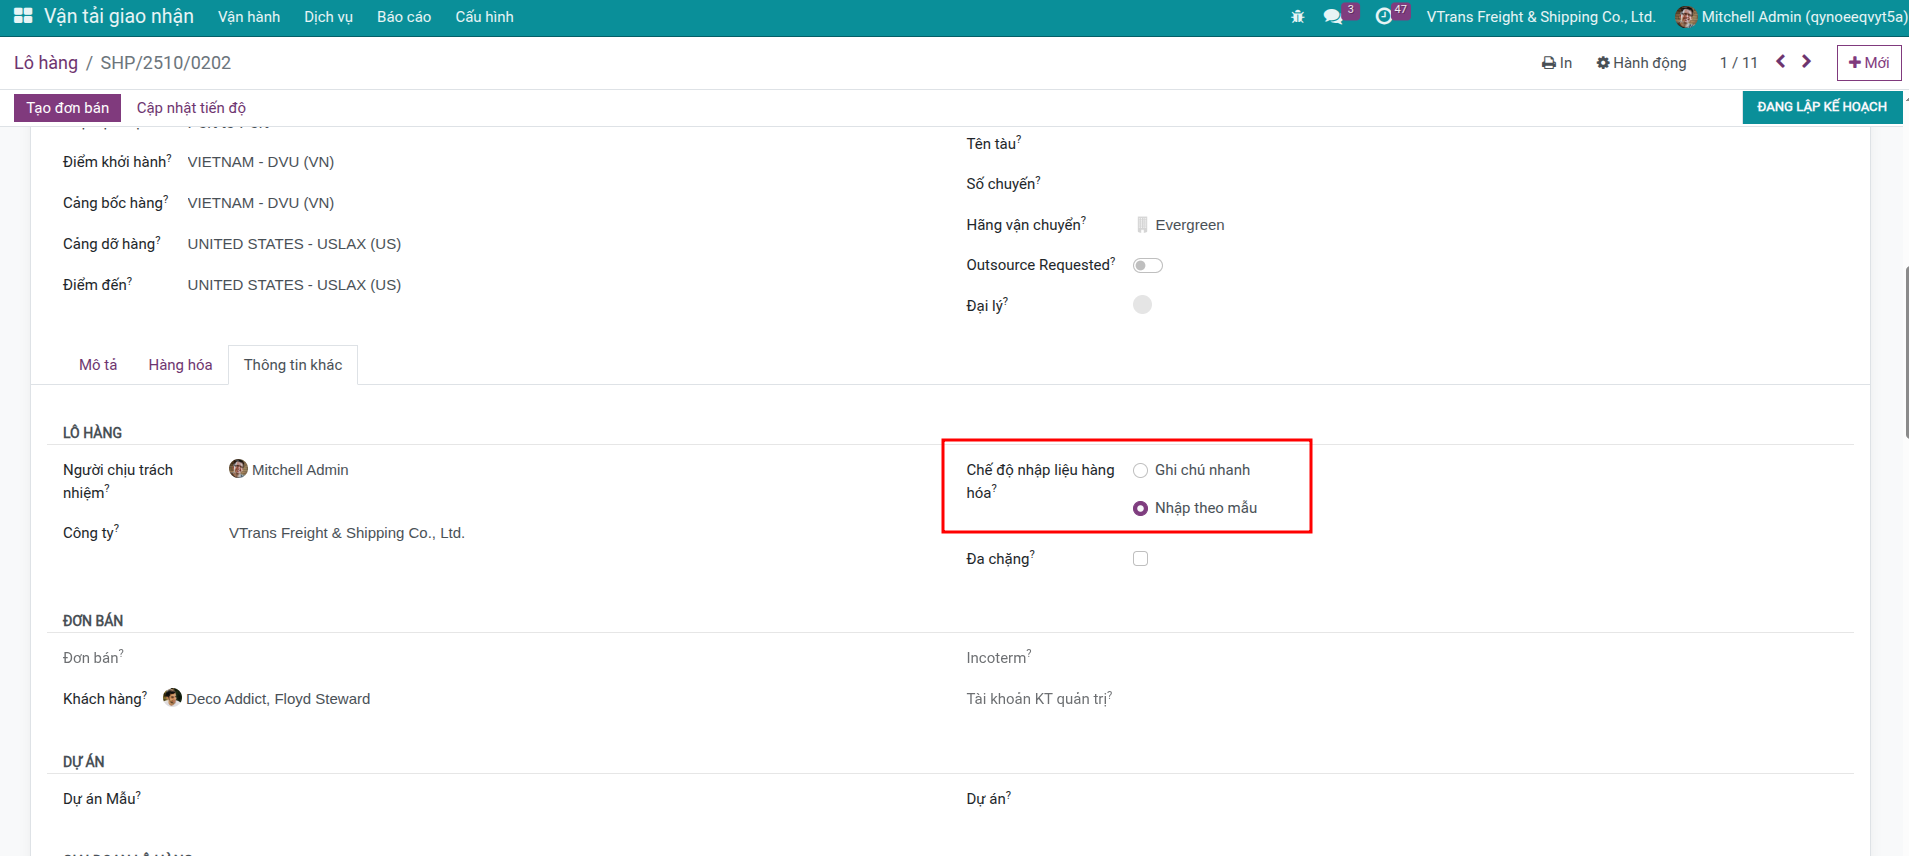
Responsible: Operations staff responsible for tracking this shipment
Related Party Information
Shipper: Consignor (can be customer or third party)
Consignee: Consignee
Notify Party: Party needing notification when goods arrive (usually consignee)
Tip
If consignee is a foreign company, Consignee information must be accurate for customs clearance and delivery procedures.
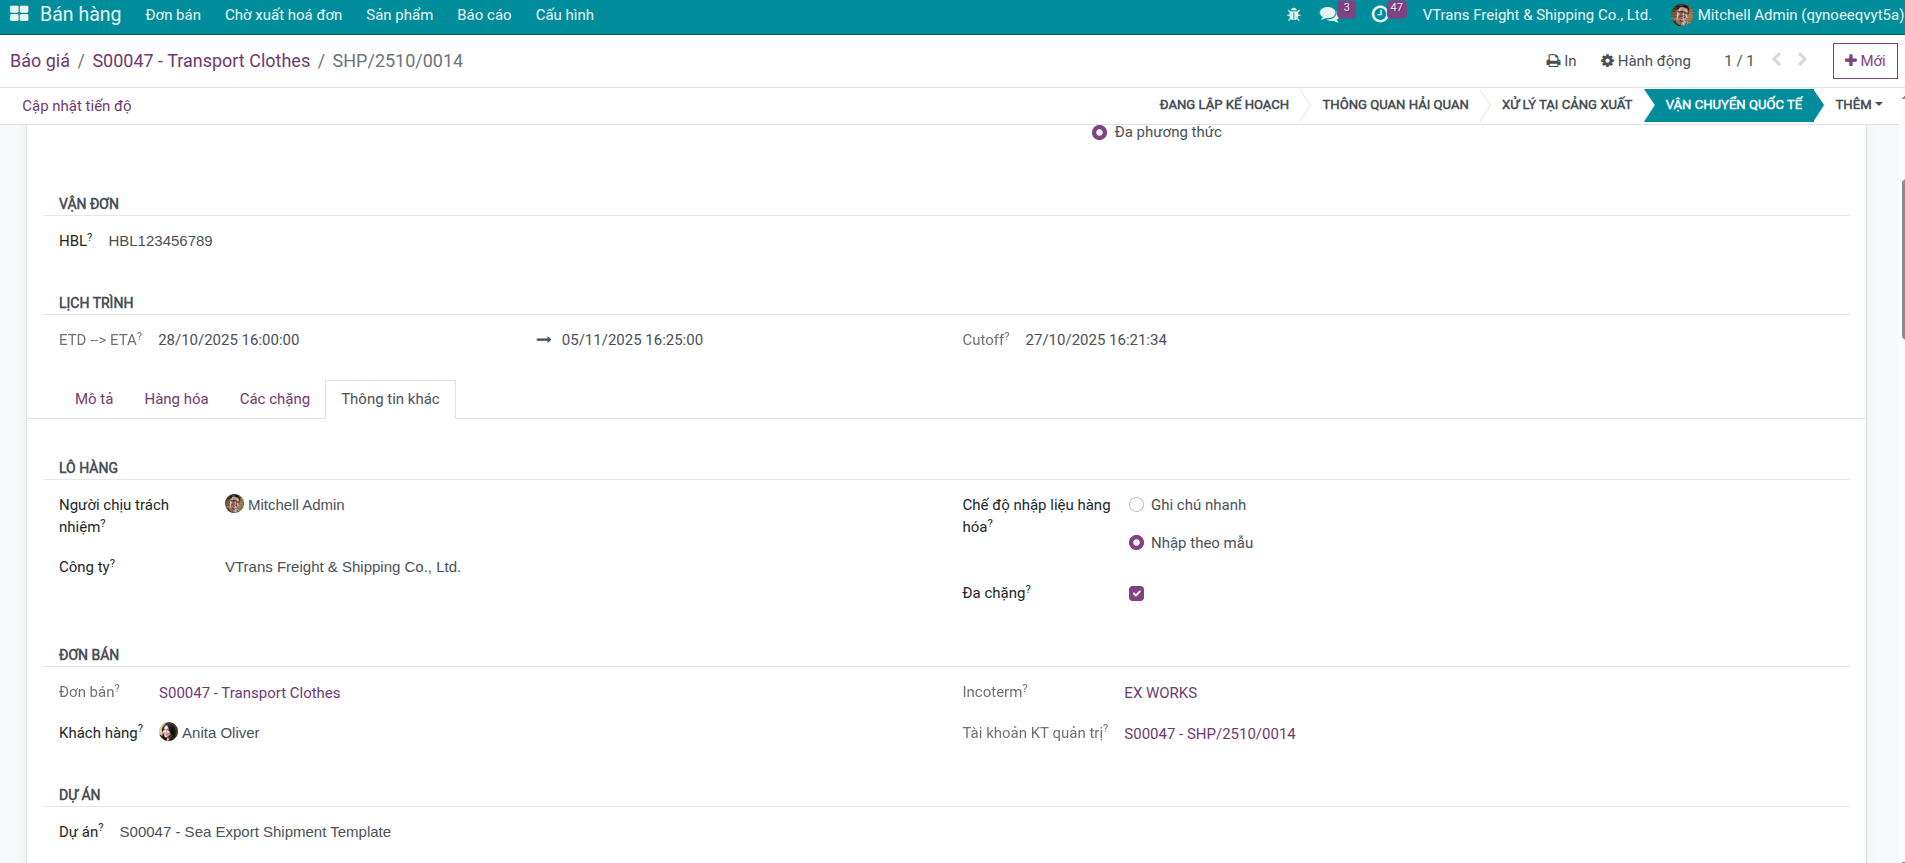
Transport Information
Transport Type: Select Single-modal or Multi-modal
Route: Transport route (already from sales order)
Transport Mode: Sea, Air, or Land
Carrier: Select carrier performing transport (if already determined)
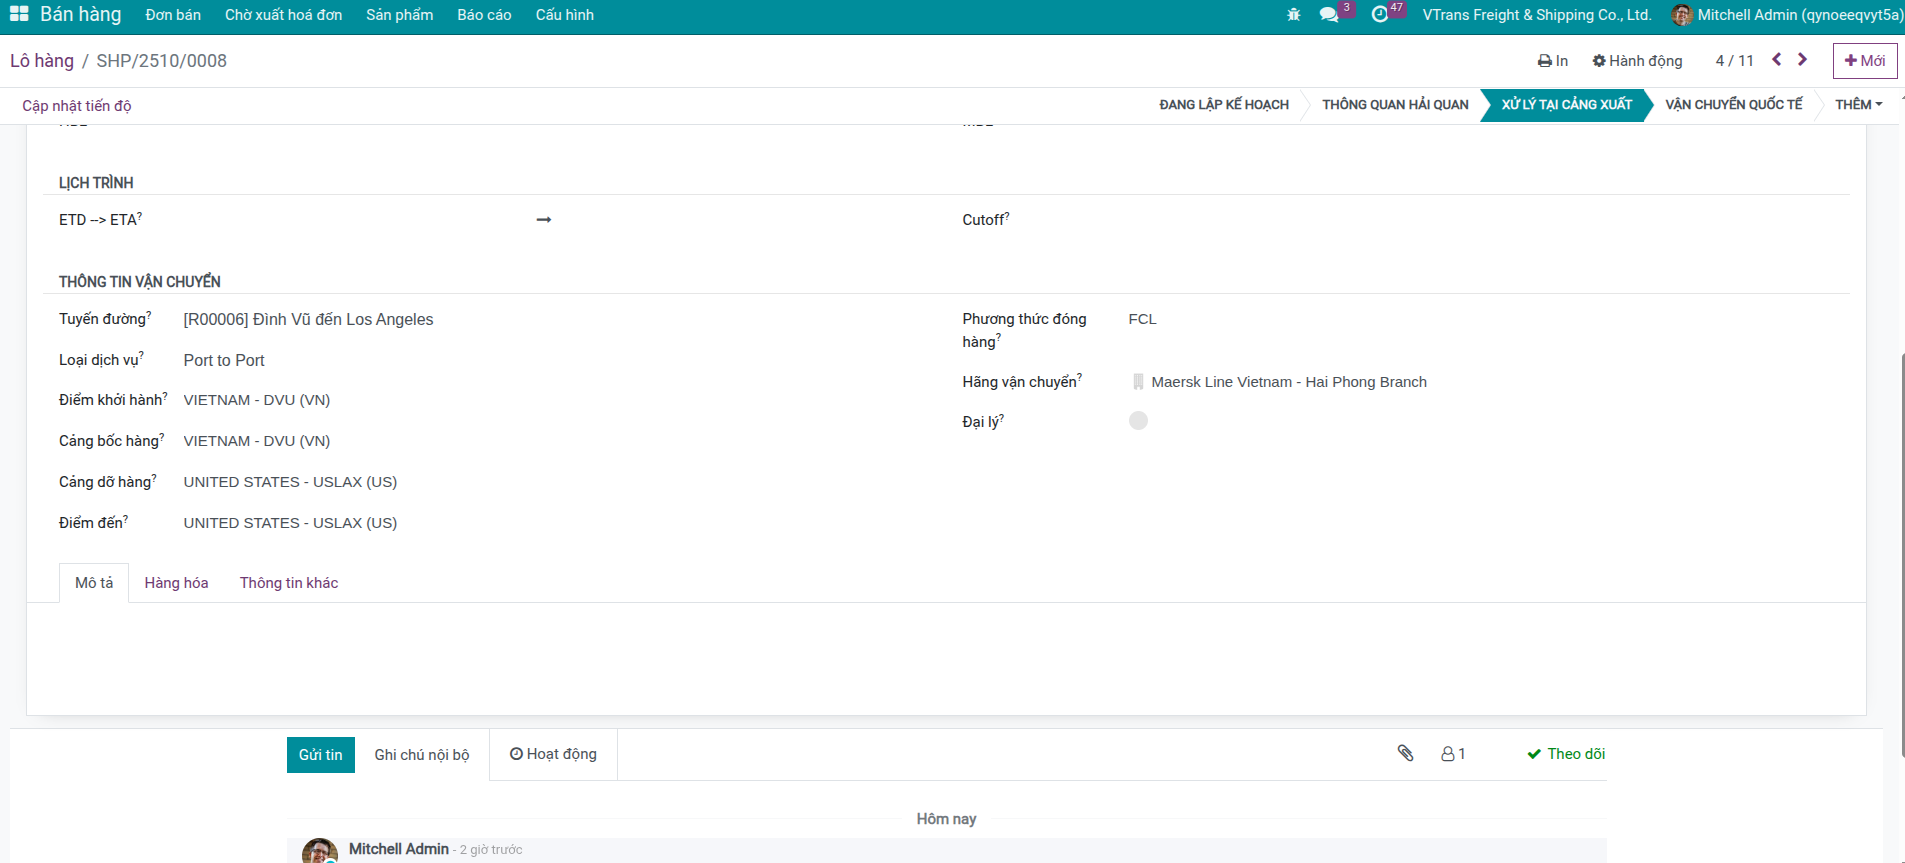
Location and Schedule Information
Origin: Origin point (already from route)
Destination: Destination point (already from route)
POL (Port/Airport of Loading): Port of Loading - loading port or departure airport
POD (Port/Airport of Discharge): Port of Discharge - discharge port or arrival airport
Estimated schedule:
ETD (Estimated Time of Departure): Estimated departure date/time
ETA (Estimated Time of Arrival): Estimated arrival date/time
Cutoff: Final deadline to deliver cargo to port/warehouse
Important
Note about ETD and Cutoff
Cutoff is usually earlier than ETD by 1-2 days (for sea transport) or a few hours (for air transport). Ensure cargo arrives at port/warehouse before cutoff to catch the voyage.
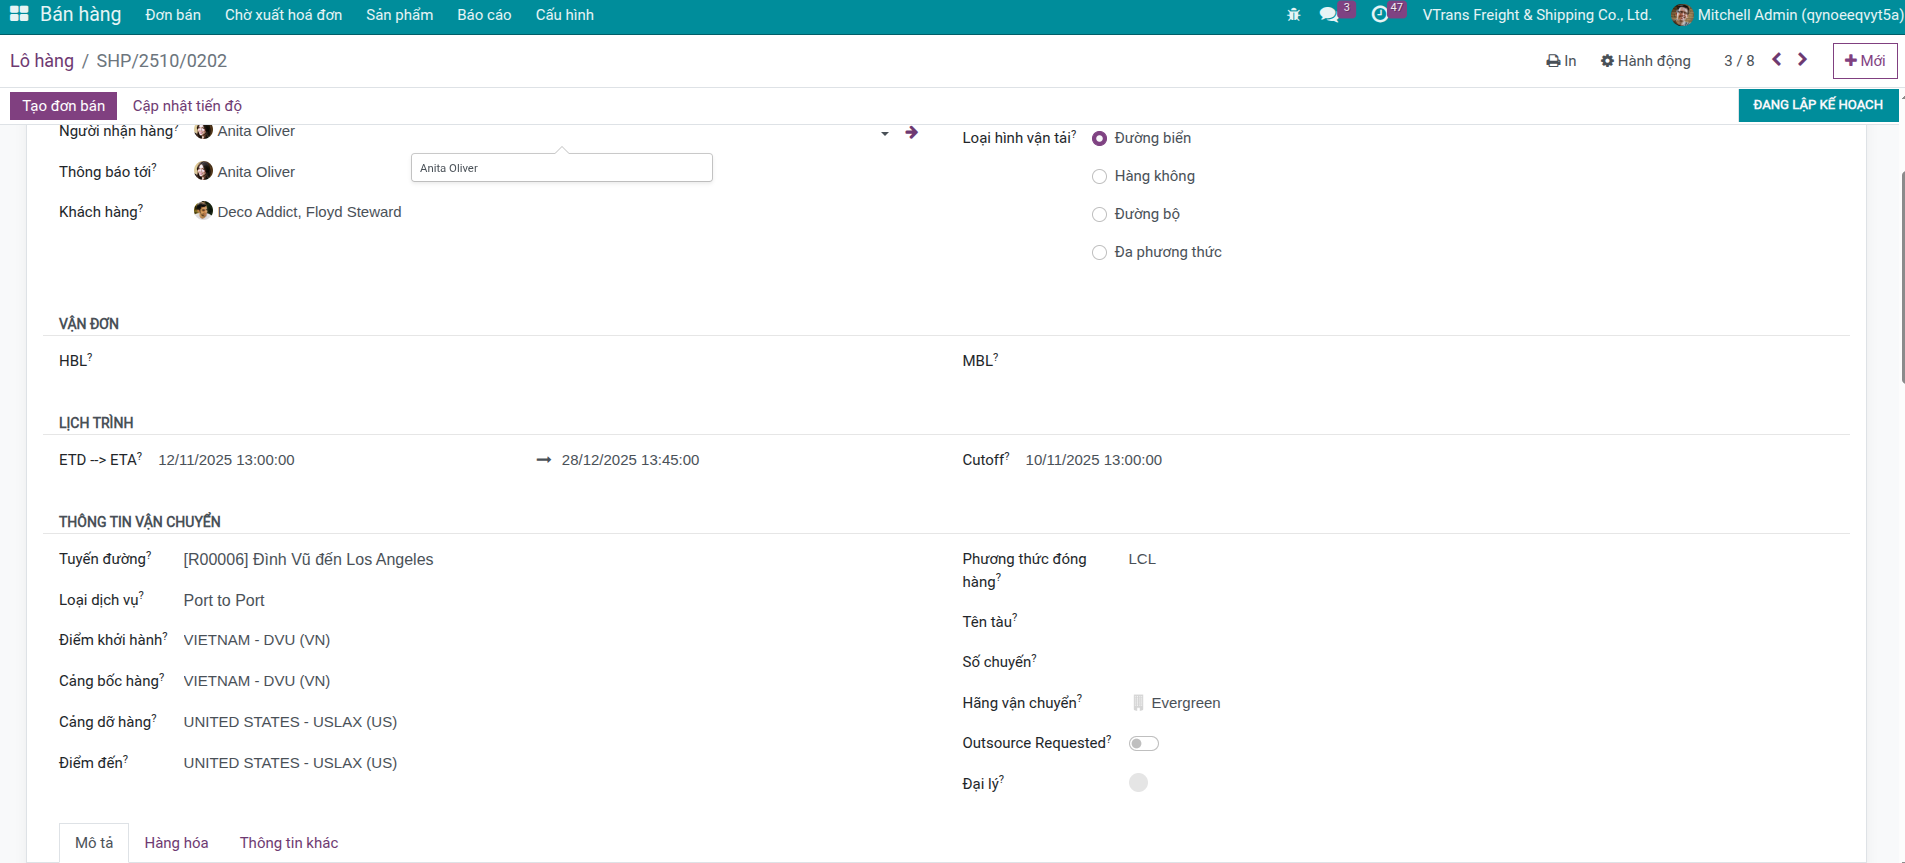
Example: FCL export from Hai Phong to Los Angeles
Origin / POL: Dinh Vu Port (Hai Phong, Vietnam)
Destination / POD: Port of Los Angeles (USA) Cutoff: 10/11/2025 13:00
ETD: 12/11/2025 13:00
ETA: 28/12/2025 13:45
Carrier: Evergreen
Transport Mode: Sea – Single leg
Configure Cargo Details
Use the Cargo tab to describe goods at the level of depth your customer or carrier requires.
Method 1: Quick Note Entry
Suitable when needing quick input of overview information:
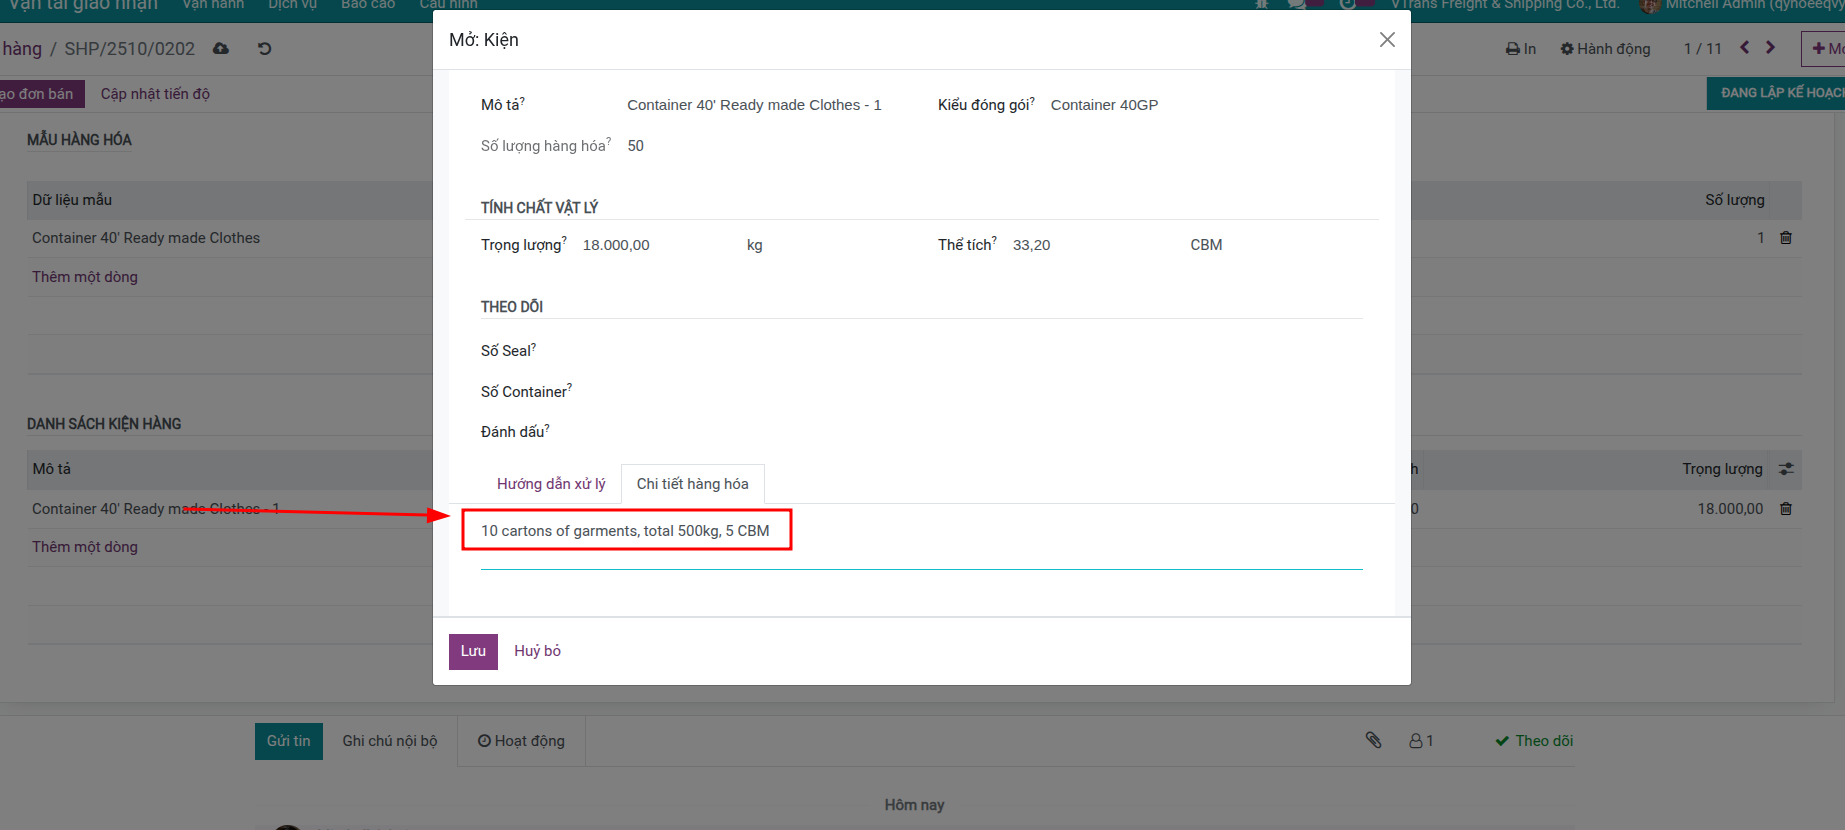
Access Cargo tab in shipment form
Enter cargo description in Cargo Note Details field
Example: “10 cartons of garments, total 500kg, 5 CBM”
Tip
Advantages:
Quick input
No complex structure needed
Suitable for simple cargo
Disadvantages:
Cannot track each package in detail
Difficult to calculate automatically
Cannot create detailed reports
Method 2: Structured Entry
Suitable when needing detailed and accurate management:
Step 1: Add packages (packages/containers)
Access Cargo tab in shipment form
Packages section - Click Add a line
Fill in information for each package:
Package Type: Package type (Container 20ft, 40ft, Pallet, Carton…)
Quantity: Number of packages
Gross Weight: Total weight including packaging (kg)
Net Weight: Actual cargo weight (kg)
Volume: Volume (CBM)
Container No: Container number (if known)
Seal No: Seal number (if known)
Click Save
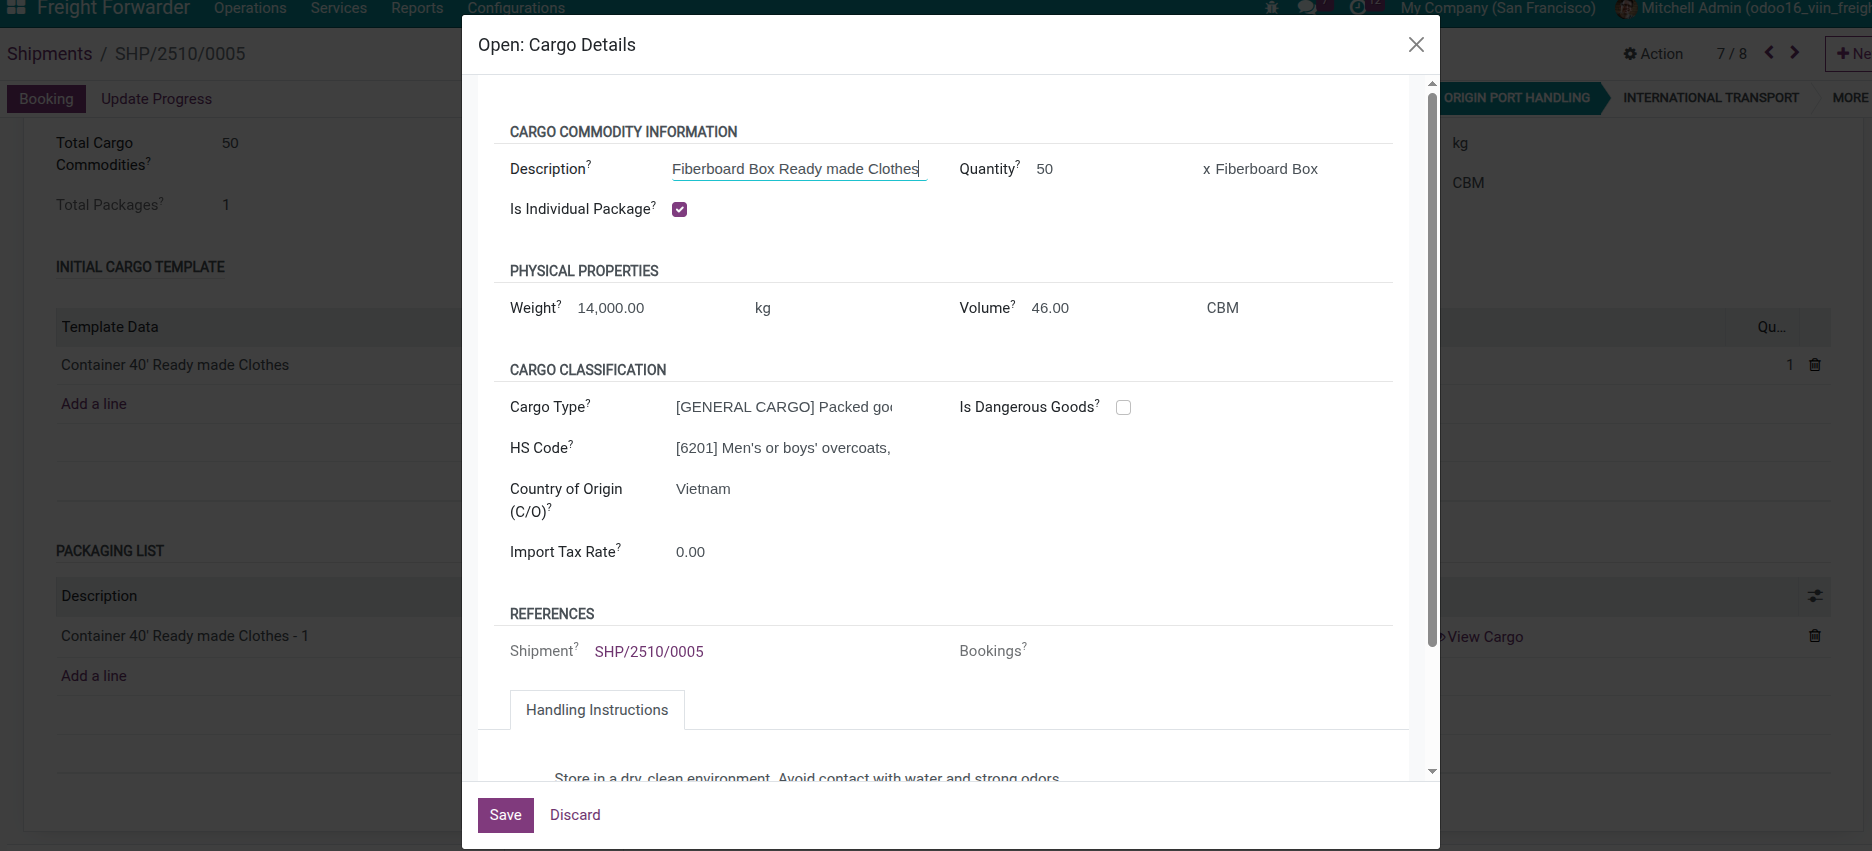
Step 2: Add cargo details (cargo details by commodity)
In Cargo tab, Cargo Details section - Click Add a line
Fill in information for each cargo type:
Commodity: Cargo type (Garments, Electronics, Food…)
Description: Detailed description
HS Code: HS code (if any)
Quantity: Quantity
Unit: Unit of measure
Gross Weight: Weight
Volume: Volume
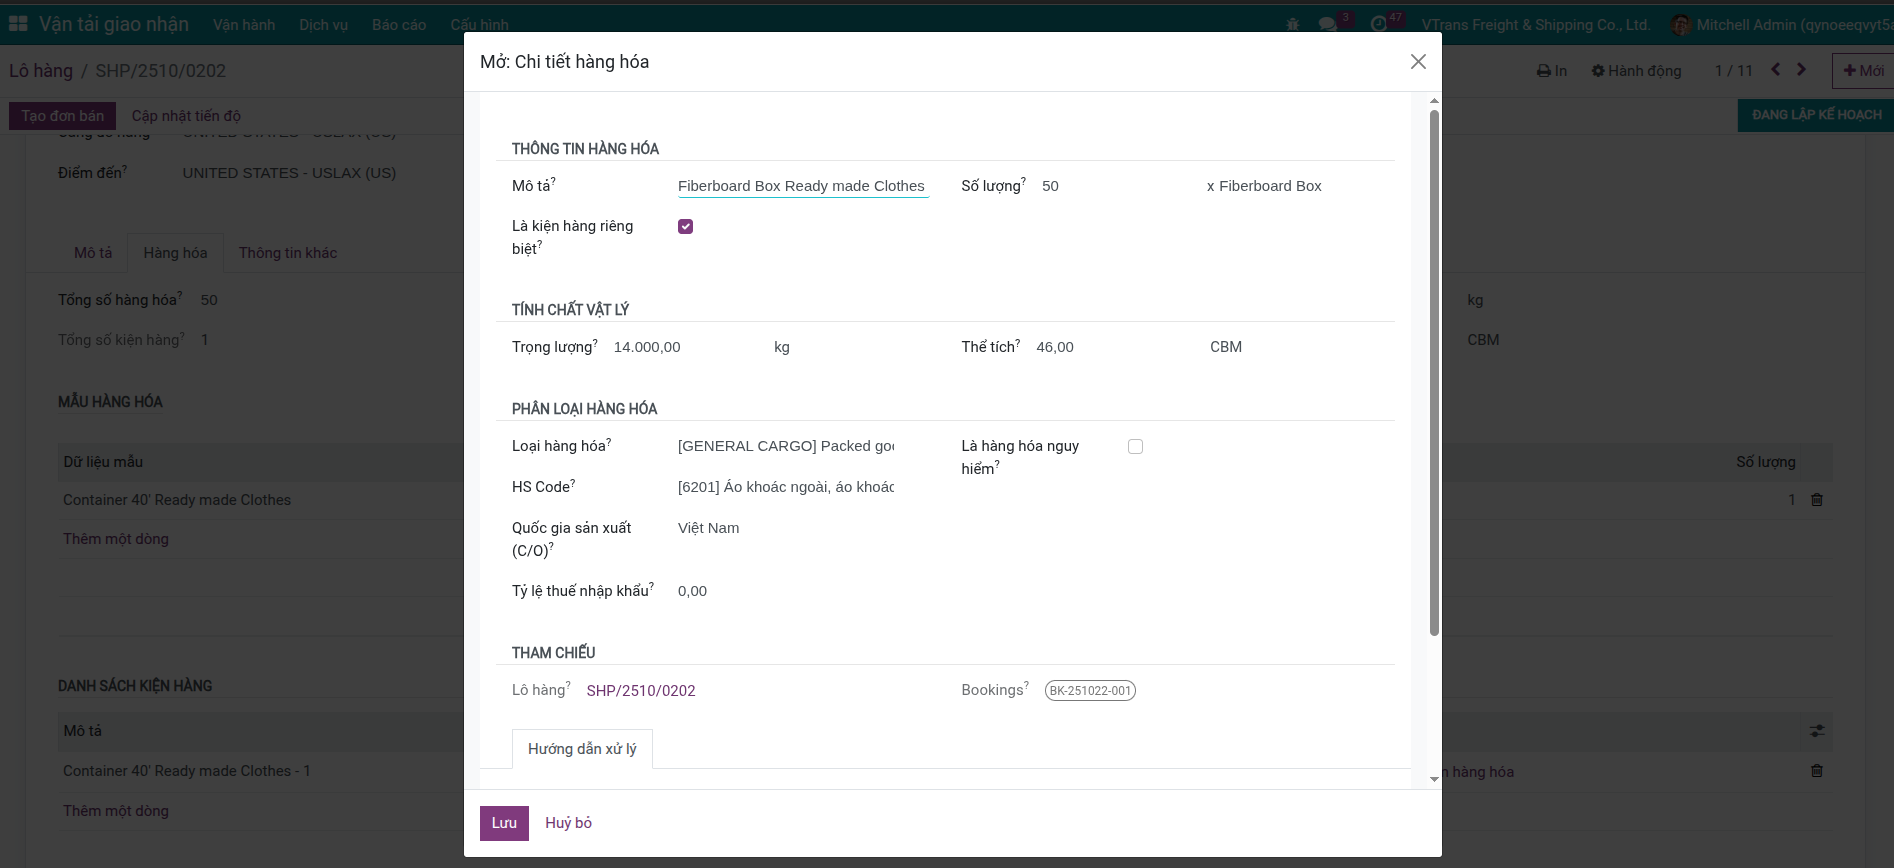
Click Save
Tip
Advantages:
Track each package in detail
Automatically calculate total weight, volume
Create accurate reports
Good support for booking
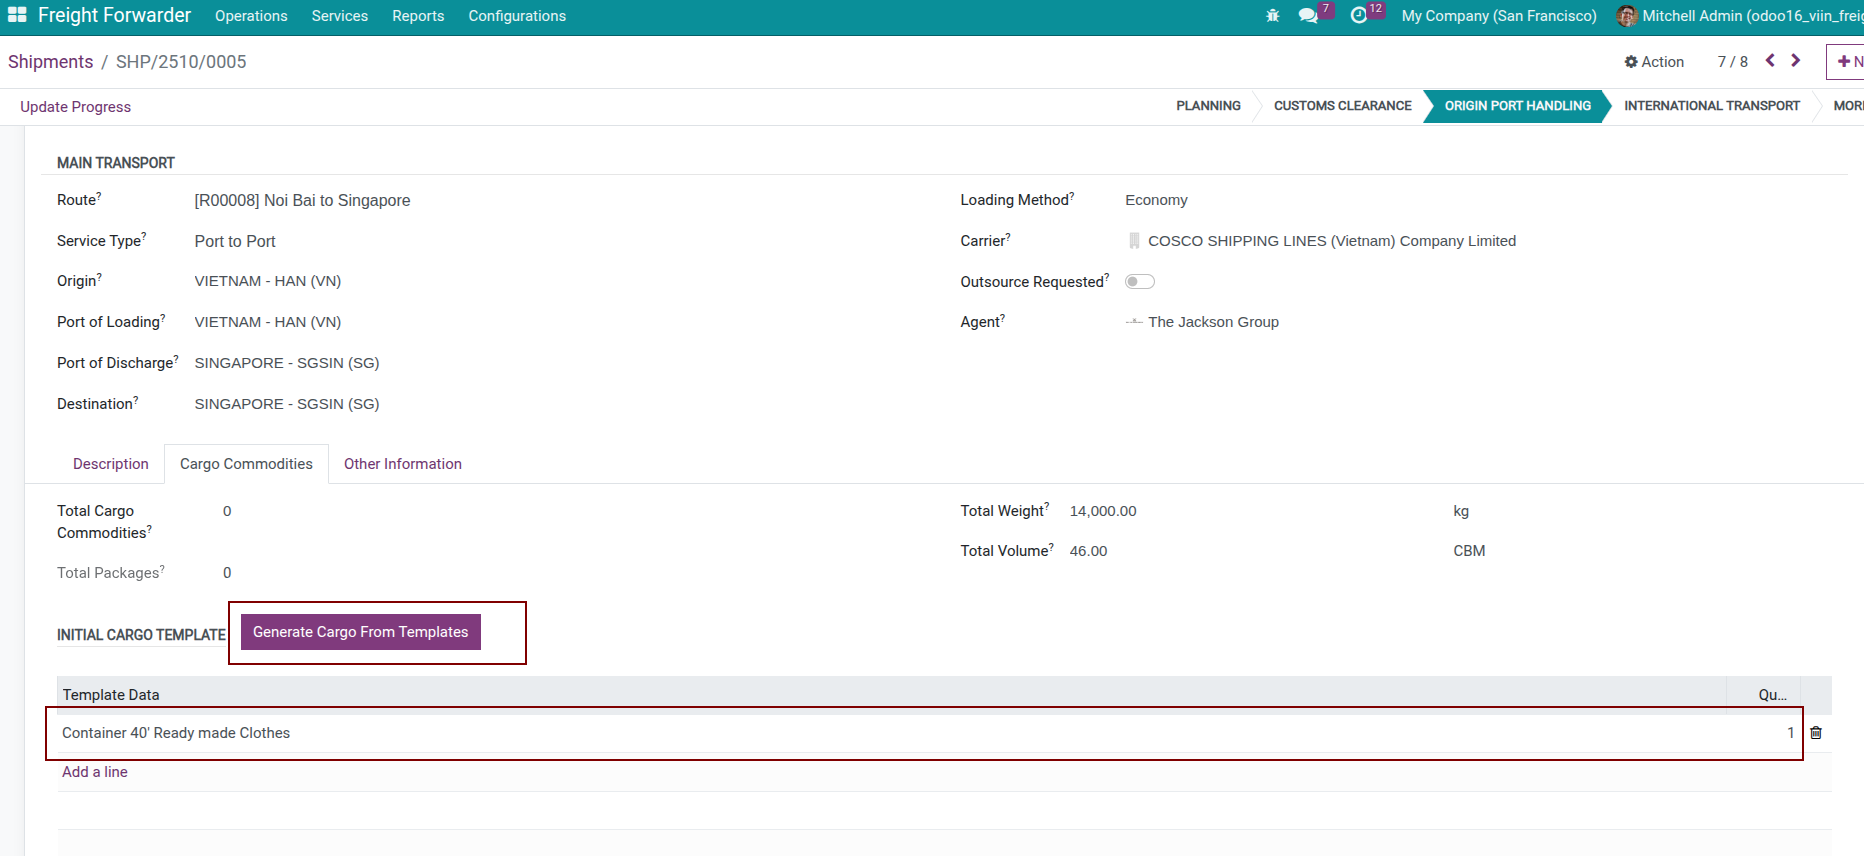
Use Cargo Templates
To save time when entering frequently occurring cargo, you can use templates:
Step 1: Create cargo template (one time)
Access Freight Forwarder > Configuration > Cargo Templates
Click Create
Name template (example: “Export garments - 1x40ft”)
Add template packages and cargo details
Save template
Step 2: Use template for shipment
Access Cargo tab in shipment form
Click Generate Cargo From Templates button
Select appropriate cargo template
System automatically creates packages and cargo details from template
Adjust information if needed (container number, weight…)
Tip
Time-saving tip
If frequently transporting similar cargo types, create templates for each type in advance. This saves up to 70% of data entry time and ensures consistency.
Plan Complex Routes
Multi-leg shipments let you mirror real transport flows that span several carriers or modes.
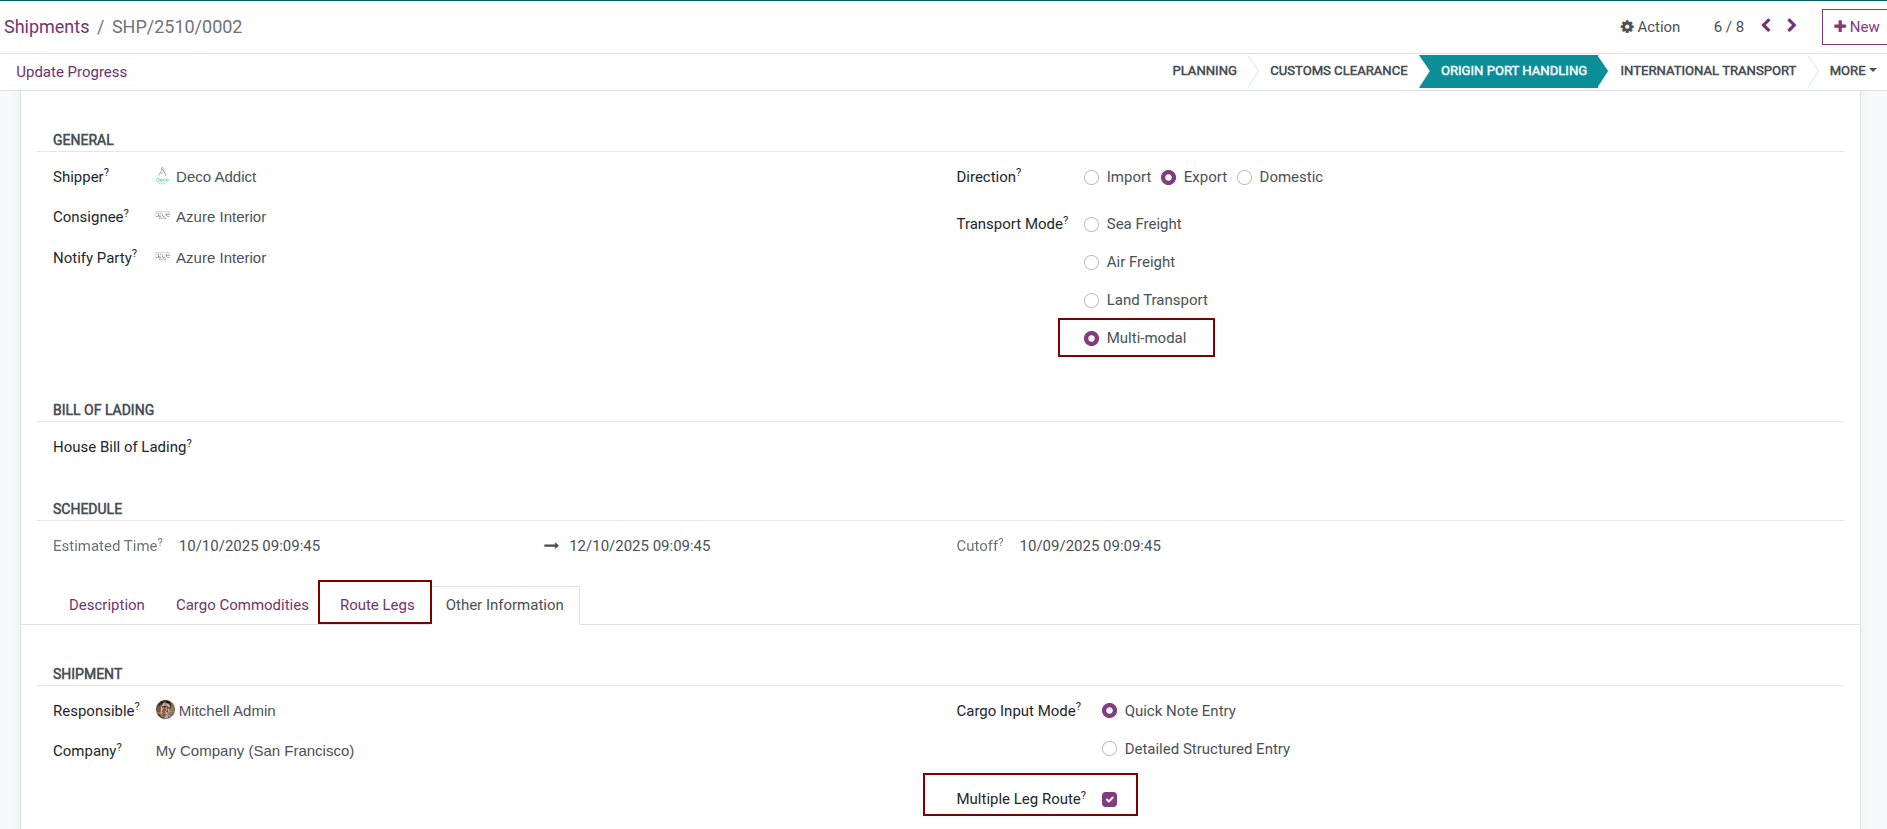
When to Use Multi-Leg Shipment?
Use multi-leg shipment (Multiple Leg Route) when cargo needs transport through multiple legs and may use different transport modes.
Example scenario:
Transport cargo from Hanoi to Los Angeles (USA):
Leg 1: Customer warehouse (Hanoi) → Hai Phong Port (Land transport)
Leg 2: Hai Phong Port → Singapore Port (Sea transport)
Leg 3: Singapore Port → Los Angeles Port (Sea transport)
Leg 4: Los Angeles Port → Consignee warehouse (Land transport)
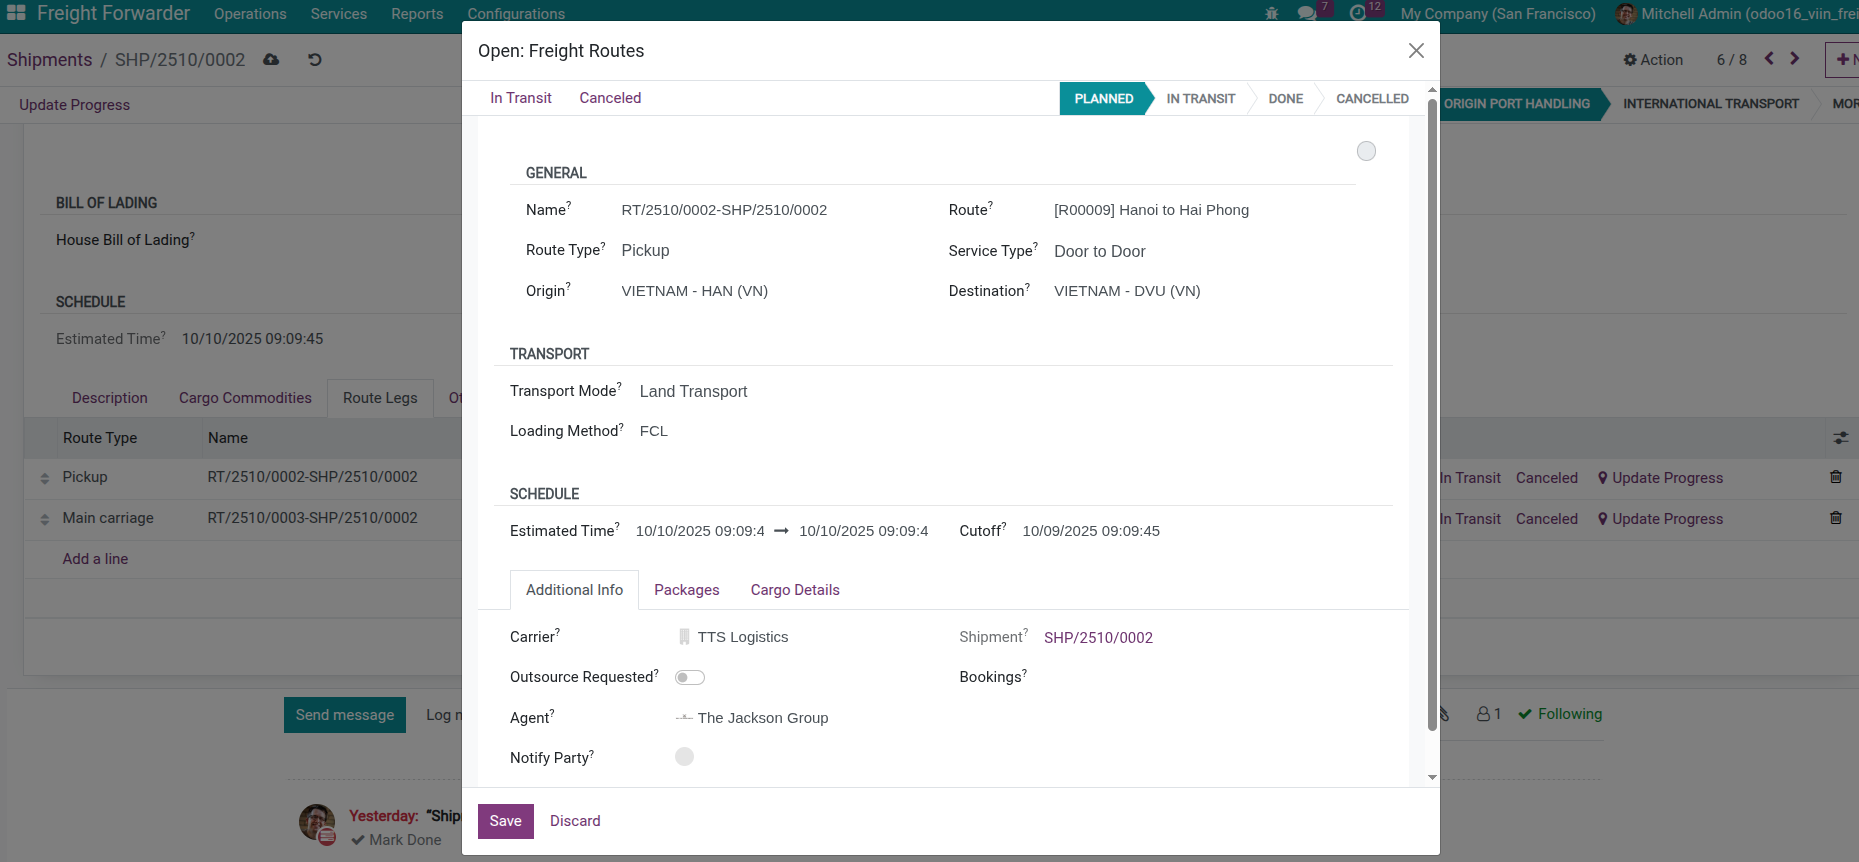
How to Set Up Multi-Leg Shipment
Step 1: Switch transport type
In shipment form, change Transport Mode to Multi-modal
Or in Other Information tab > Check Multiple Leg Route
Step 2: Create route legs
Access Route Legs tab
Click Add a line to add route leg
Fill in information for each leg:
Sequence: Leg order (1, 2, 3…)
Transport Mode: Transport mode of this leg
Carrier: Carrier performing this leg
Origin: Origin point of leg
Destination: Destination point of leg
ETD: Estimated departure date for this leg
ETA: Estimated arrival date for this leg
Repeat for all legs
Step 3: Allocate cargo to legs
After creating packages, you need to allocate them to appropriate legs:
In Route Legs tab, select leg needing allocation
Packages section - select packages needing transport in this leg
Save
Note
Typically, cargo will go through all legs. However, in some special cases (warehouse transfer, split cargo…), each leg may transport different packages.
Tip
Automatic ETD/ETA calculation
When you enter ETD/ETA for each leg, system will automatically calculate:
Shipment ETD = Earliest ETD among legs
Shipment ETA = Latest ETA among legs
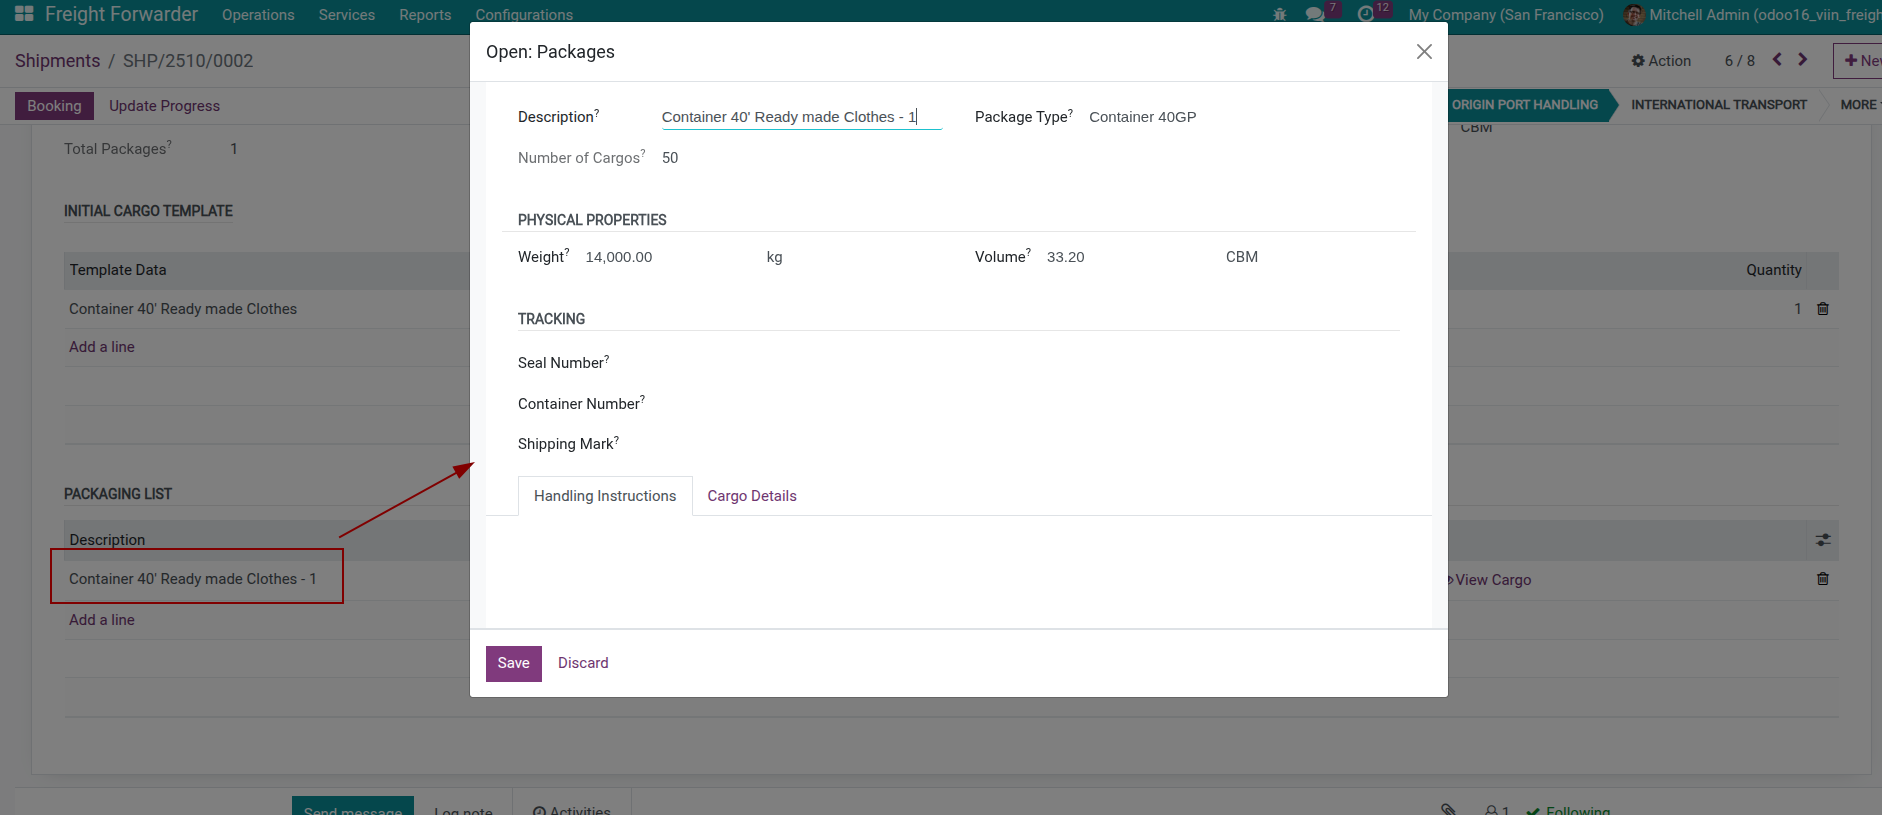
Enter Container Specifics
For FCL or FTL moves, capture container-level details directly on the Packages grid.
How to Enter Container Information
In Cargo tab, Packages section
Select Package Type = Container (20ft, 40ft, 40ft HC…)
Fill in information:
Container No: Container number (example: MSCU1234567)
Seal No: Seal number (example: ABC123456)
Net Weight: Actual cargo weight
If multiple containers, add multiple lines
Note
Container and seal numbers
Container and seal numbers are usually provided after cargo packing and sealing
If not available, can leave blank and update later
This information is very important for cargo tracking and customs clearance procedures
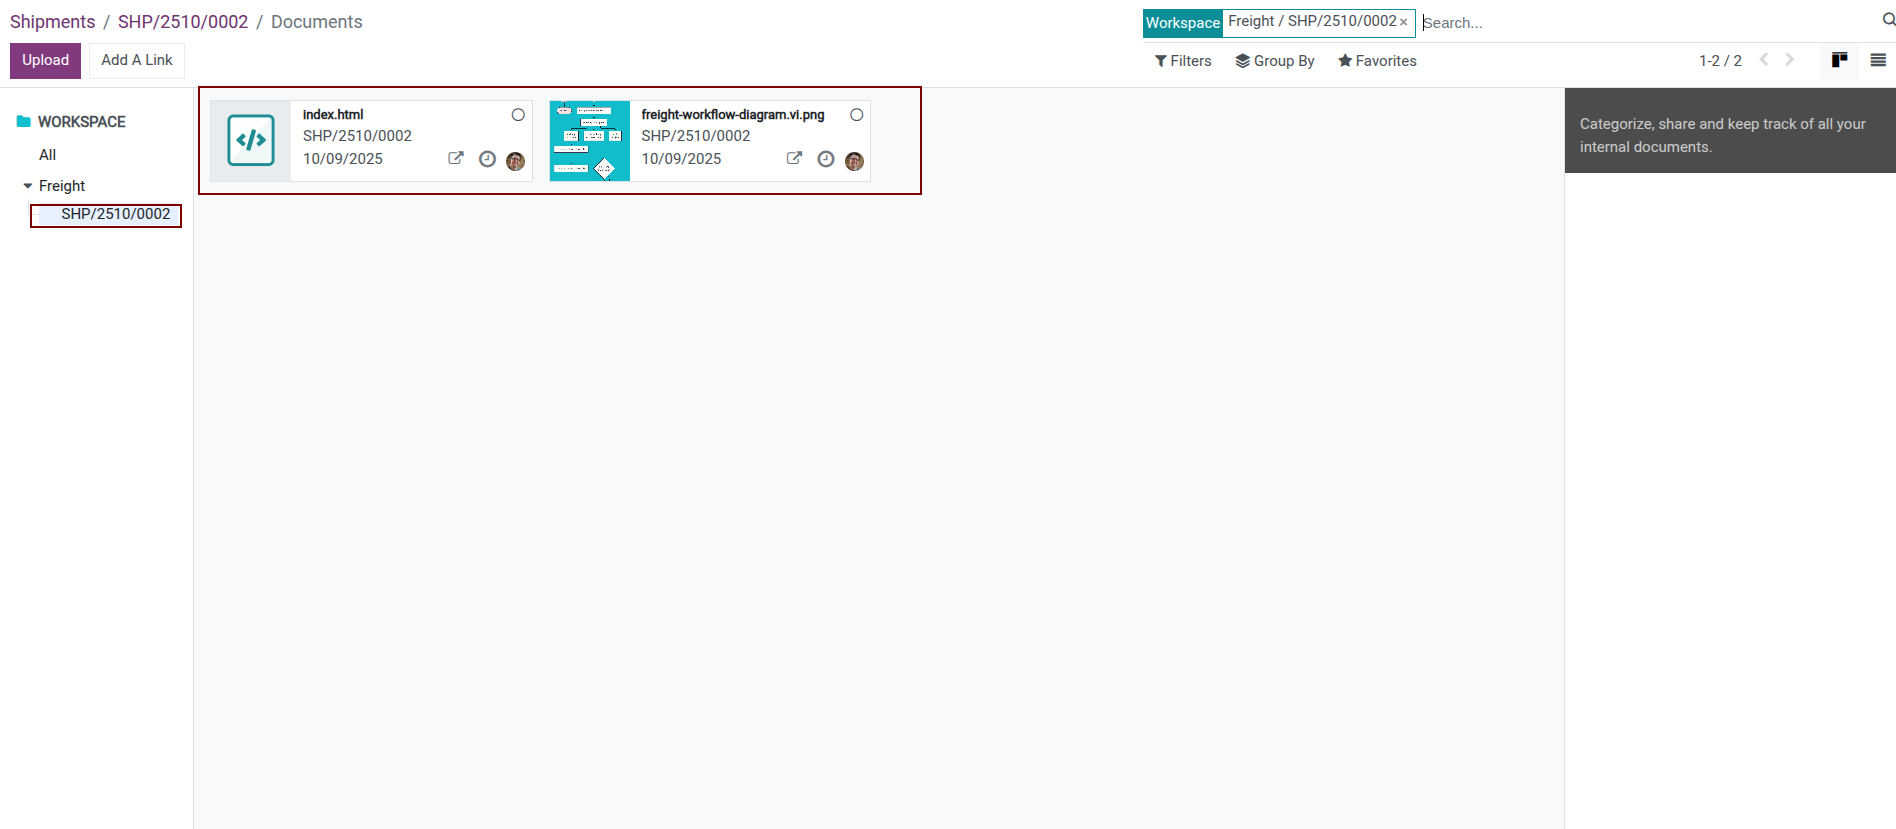
Manage Shipment Documents
Store every transport, commercial, and customs file on the shipment so stakeholders can retrieve them later.
How to Attach Documents to Shipment
Method 1: Upload directly from shipment form
Open shipment form
Click Attachment icon in top corner (paperclip icon)
Select file from your computer
File is uploaded and automatically saved to system
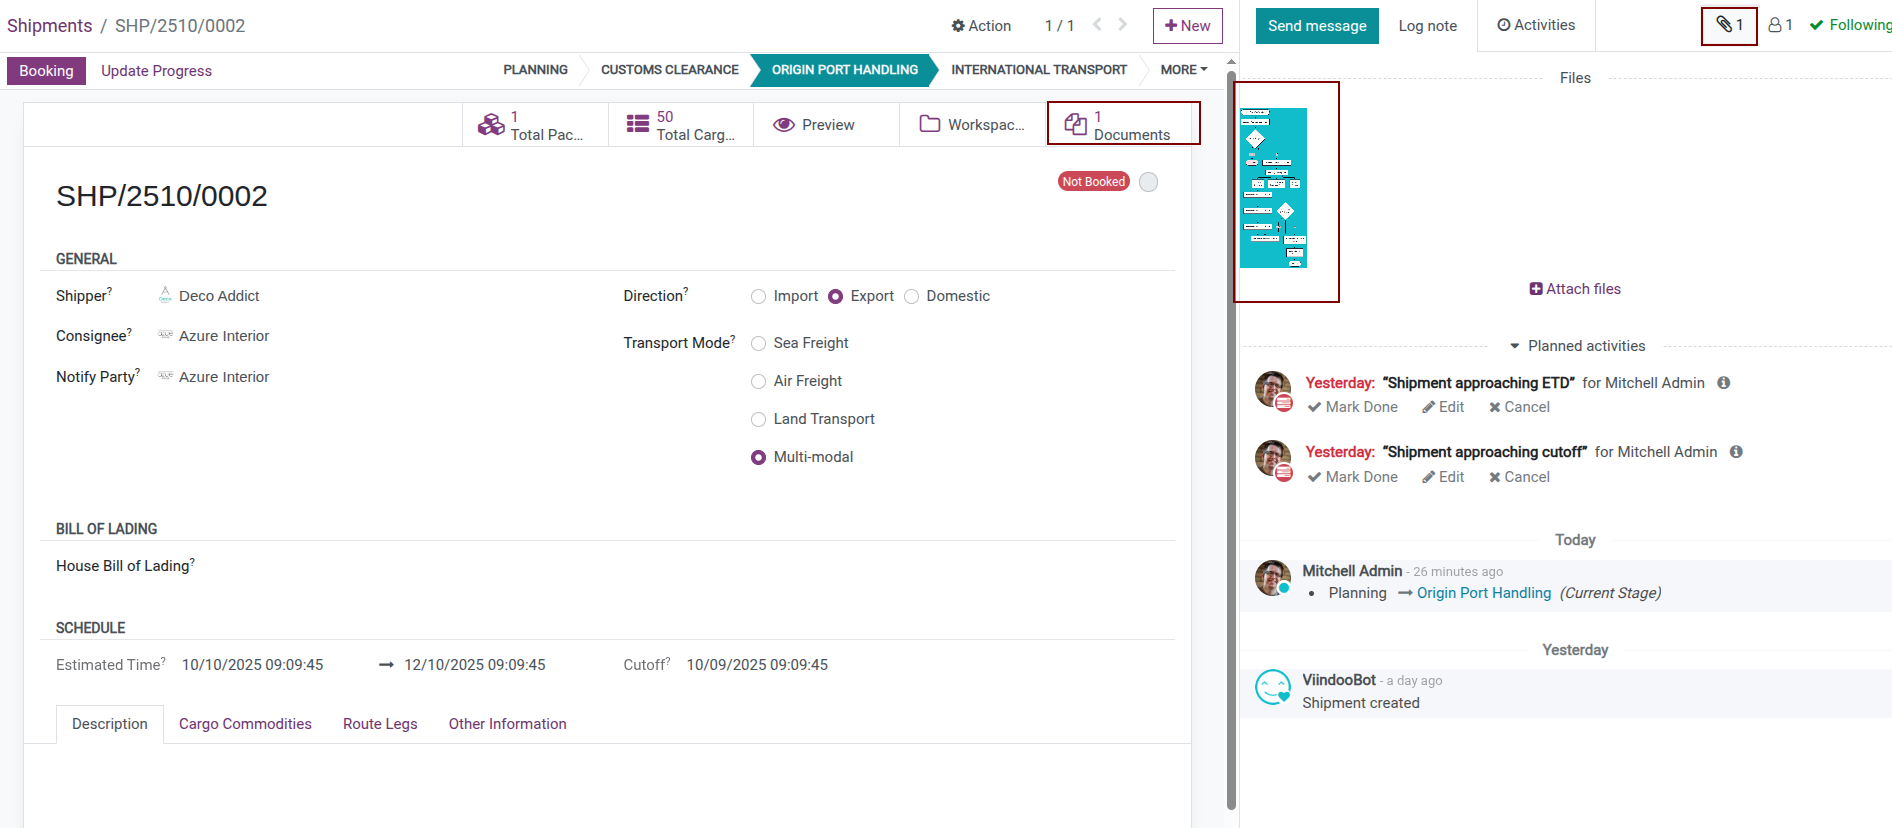
Method 2: Upload in Documents application
Access shipment form.
Click Documents button.
Click Upload button in Documents interface.
Select file from your computer, Click confirm.
File is successfully uploaded and linked to shipment.
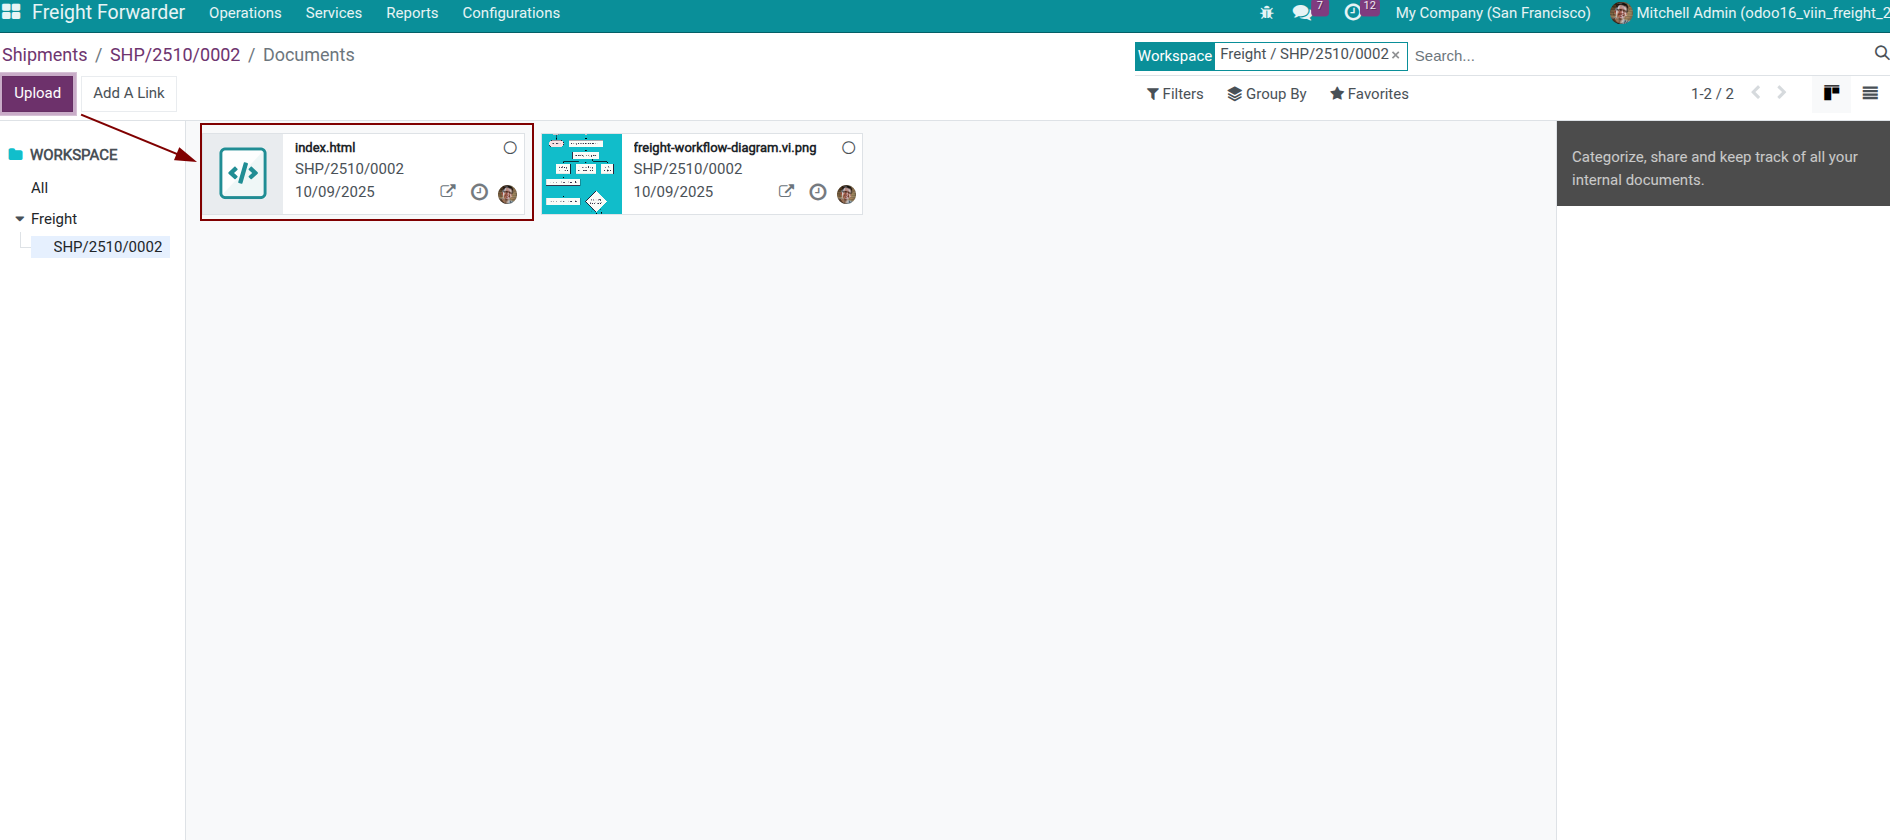
Result:
File attachment is stored in system.
System automatically creates corresponding Document record.
Document is organized in appropriate Workspace (based on Auto Generate Rule).
You can view document list by clicking Documents smart button on shipment form.
Note
Automatic Document creation mechanism
When you attach file to shipment, system automatically:
Creates
document.documentrecord linked to file attachmentClassifies into appropriate Workspace according to Document Auto Generate Rule configuration
Links document to shipment for easy reference
This helps you centrally manage all documents in Document Management module.
Important
Only useful when integrated with Documents application with viin_document_freight module.
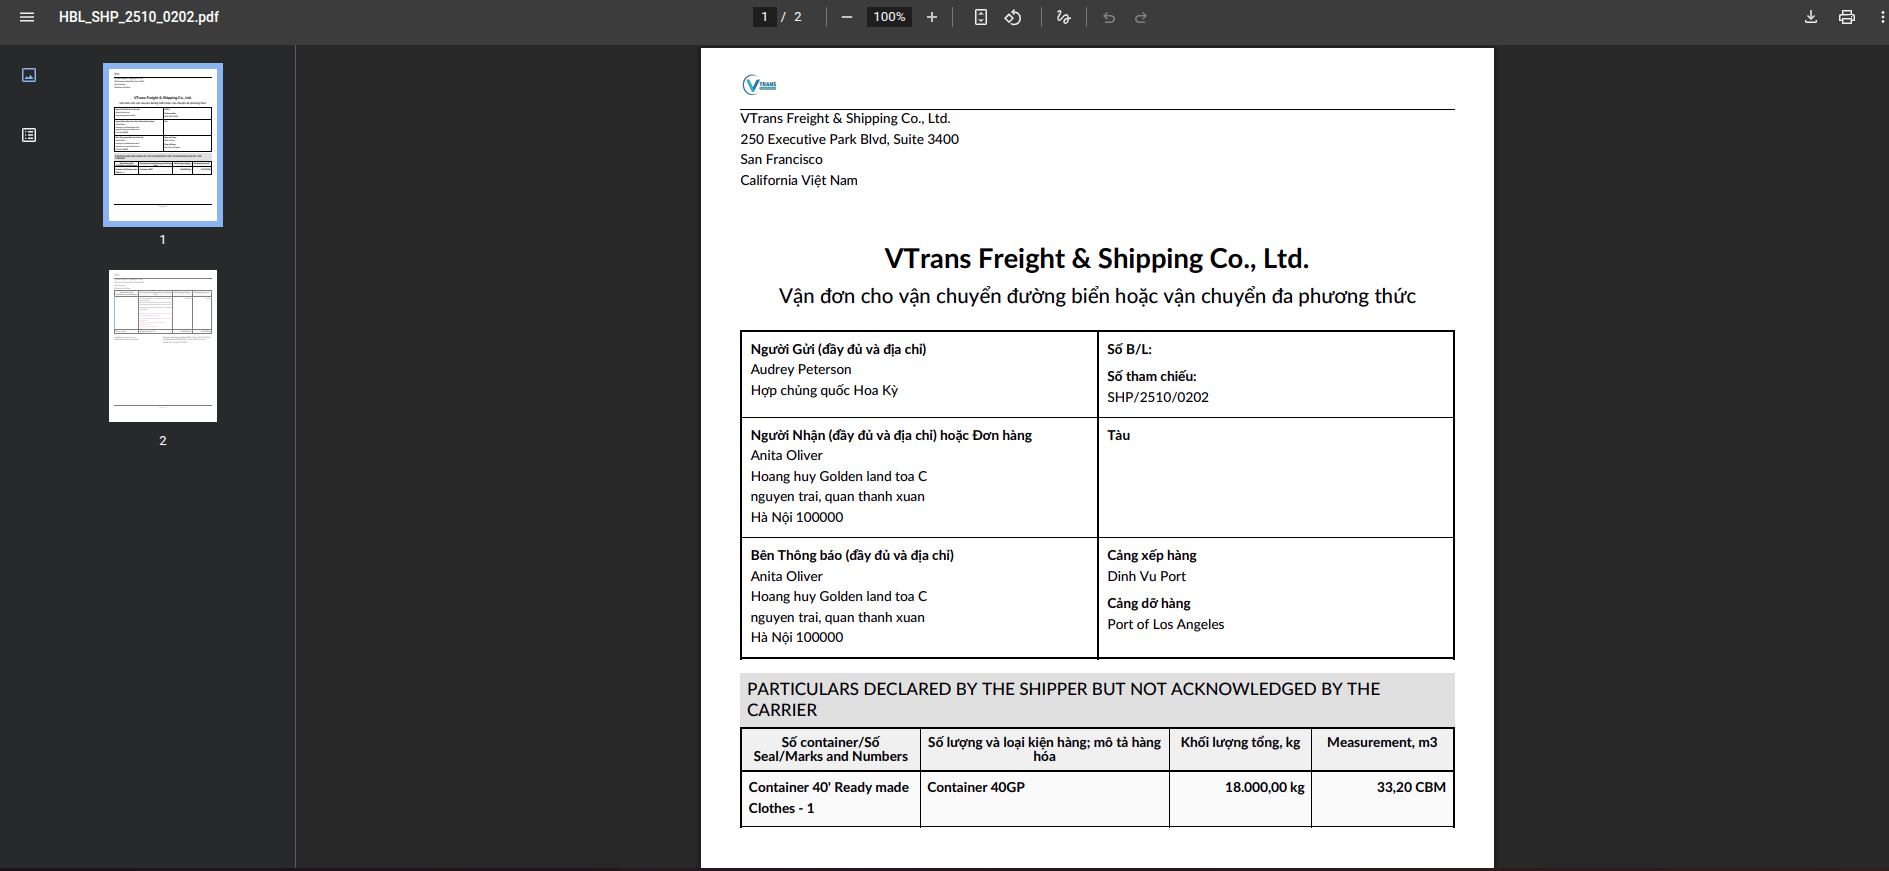
Print House Bill of Lading (HBL)
When the shipment already contains the HBL data (house bill number, shipper/consignee, ports, packages, etc.), you can issue the official document straight from the form.
Open the shipment, verify the House Bill Number plus shipper, consignee, notify party, routing, vessel/flight information, and cargo lines are accurate.
Click the Print dropdown (top-left of the form) and choose HBL.
The system renders the House Bill of Lading PDF, attaches it to the shipment, and makes it available from the Documents smart button.
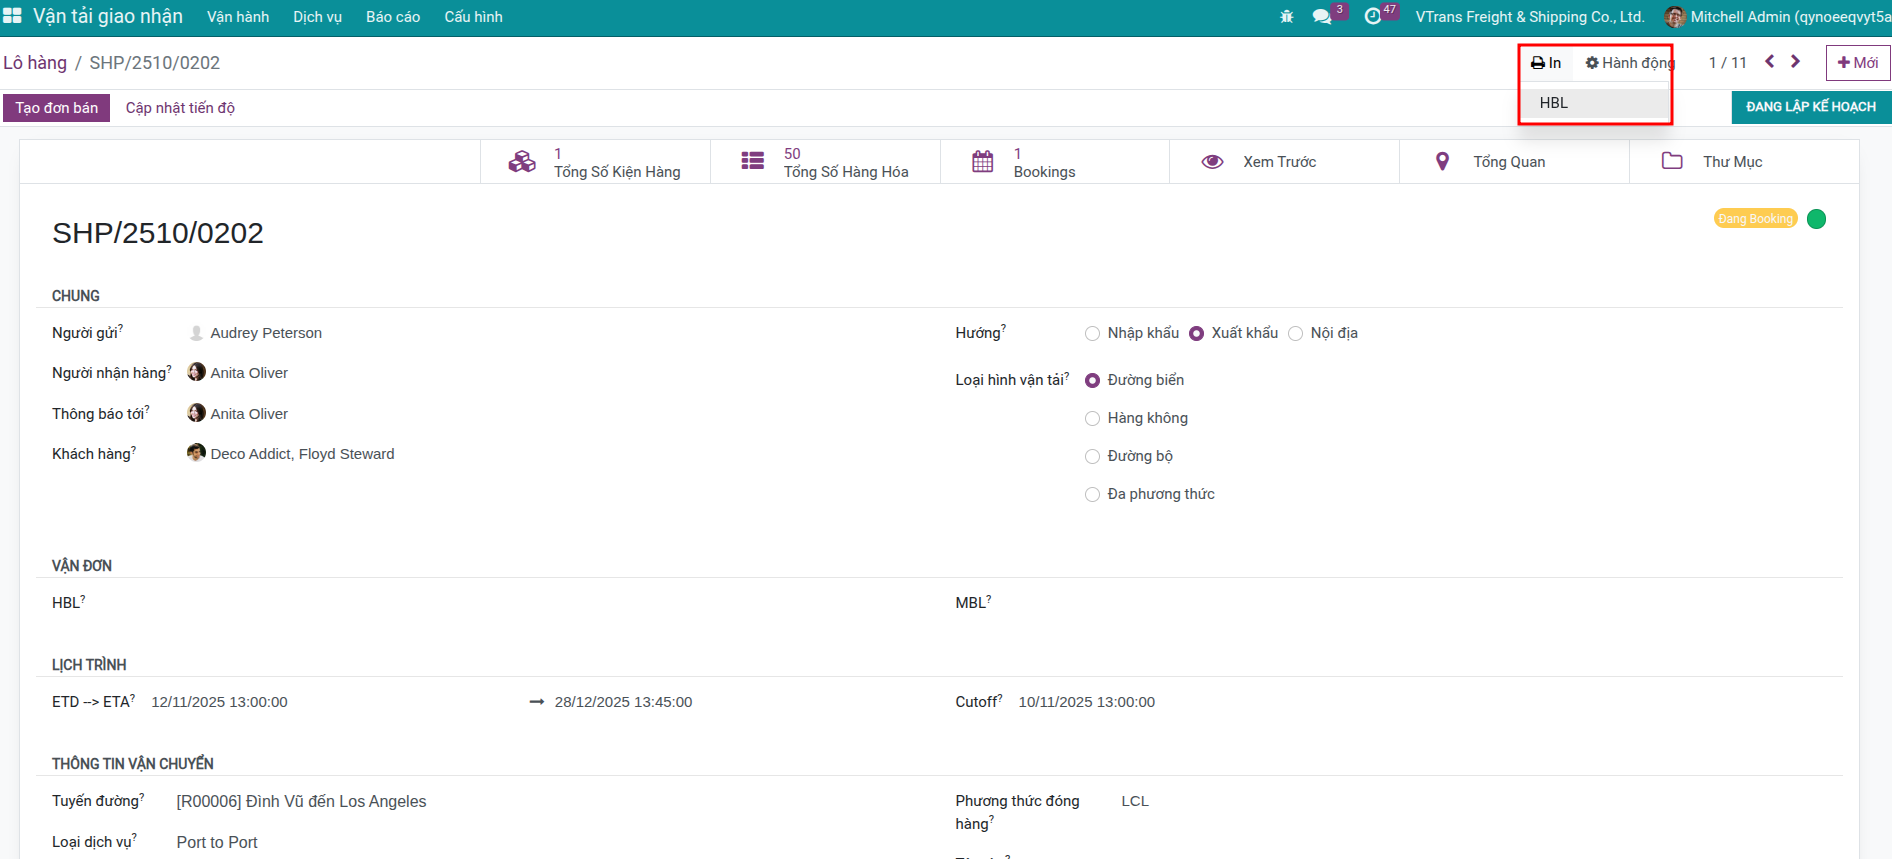
Note
The HBL report action belongs to the Freight User group. Ensure your operators have this access right before trying to print.
Common Document Types
Transport documents:
Bill of Lading (B/L): Sea bill of lading
Air Waybill (AWB): Air waybill
CMR: International land transport waybill
Commercial documents:
Commercial Invoice: Commercial invoice
Packing List: Packing list
Certificate of Origin (C/O): Certificate of origin
Customs documents:
Customs Declaration: Customs declaration form
Import/Export License: Import/export license
Phytosanitary Certificate: Phytosanitary certificate
Other documents:
Insurance Certificate: Insurance certificate
Fumigation Certificate: Fumigation certificate
Health Certificate: Health certificate
Quality Certificate: Quality certificate
Tip
Benefits of digitizing documents
Storing electronic documents on system helps:
Quick reference: Search documents by filename, document type, or shipment in seconds
Easy sharing: Customers can view and download documents via portal
Security: Reduce risk of loss or damage to documents
Remote work: Access documents from anywhere with internet
Version management: Easily update new versions of documents
Validate & Progress Shipment
Once data entry is complete, validate the record and move on to booking or operations updates.
Step 1: Save Information
Click Save button to save all entered information
System checks data validity
Step 2: Check Information
Before proceeding to booking, recheck important information:
Cargo information:
Do packages or cargo details exist?
Are weight and volume accurate?
Is container information (if any) complete?
Transport information:
Is route correct?
Is ETD/ETA schedule reasonable?
Is carrier selected correctly? (if known)
For multi-leg shipments:
Are all legs created?
Is carrier information for each leg available?
Are cargo allocated to legs?
Step 3: Next Steps
After shipment information is complete:
Perform booking with carrier
Update progress when cargo starts transport
Track and notify customers
See also
Operational Tips
Adopt these shortcuts to keep shipment maintenance fast and consistent.
Copy From Old Shipment
If there’s similar shipment done before:
Open old shipment
Click Action > Duplicate
System creates copy
Edit different information (customer, dates…)
Save new shipment
Bulk Data Entry
If need to enter multiple packages at once:
Use Import from Excel feature
Export template file from system
Fill information in Excel file
Import file to system
Check Before Booking
System requires:
Must have at least one package or cargo detail
Must have carrier (for single-leg shipment)
Must have route
If missing, system will show error when you click Booking button.
Use Chatter for Notes
Chatter section at bottom of shipment form allows:
Internal notes about shipment
Send messages to colleagues
Schedule work to do
Track change history
Frequently Asked Questions
Can shipment information be edited after booking created?
Can edit most information. However:
Cargo information (packages, cargo details) in booking is readonly
If need to change cargo, edit on shipment then create new booking or cancel old booking
Is entering container number from the beginning mandatory?
No. Container and seal numbers are usually only available after cargo packing. You can:
Leave blank when creating shipment
Update after getting information
Or update directly on booking
How to know if enough information entered?
When clicking Booking button, if missing important information, system will show error and request addition. Mandatory information:
Cargo information (packages or cargo details)
Carrier (if single-leg shipment)
Route
Quick Note Entry or Structured Entry better?
Depends on purpose:
Quick Note Entry: Fast, simple, suitable for simple cargo and no need for detailed reports
Structured Entry: Detailed, accurate, suitable for complex cargo and needs careful tracking
For professional freight forwarder businesses, should use Structured Entry.
Can change from single-leg to multi-leg shipment?
Yes. Just need to:
Change Transport Mode to Multi-modal
Create legs in Route Legs tab
Allocate cargo to legs
However, if booking already created, need to consider cancelling old booking and creating new one.
How is multi-leg shipment ETD/ETA calculated?
System automatically calculates:
Shipment ETD = Earliest ETD among all legs
Shipment ETA = Latest ETA among all legs
Why need to allocate cargo to legs?
For multi-leg shipments, each leg may transport different packages. Example:
Pickup leg: Transport all cargo from customer warehouse
Main carriage leg: Only transport export cargo
Delivery leg: Transport customs cleared cargo
Allocation helps system create accurate booking for each leg.
See also
Related articles