Setting advanced features of Viindoo Project
To make the most of the advantages of using the Project app, users need to set up the advanced features of the app by navigating to Project app > Configuration > Settings and selecting the additional advanced feature.
Sub-tasks
The sub-tasks feature is used to divide the work into many smaller tasks thereby also helping managers track work and progress more effectively.
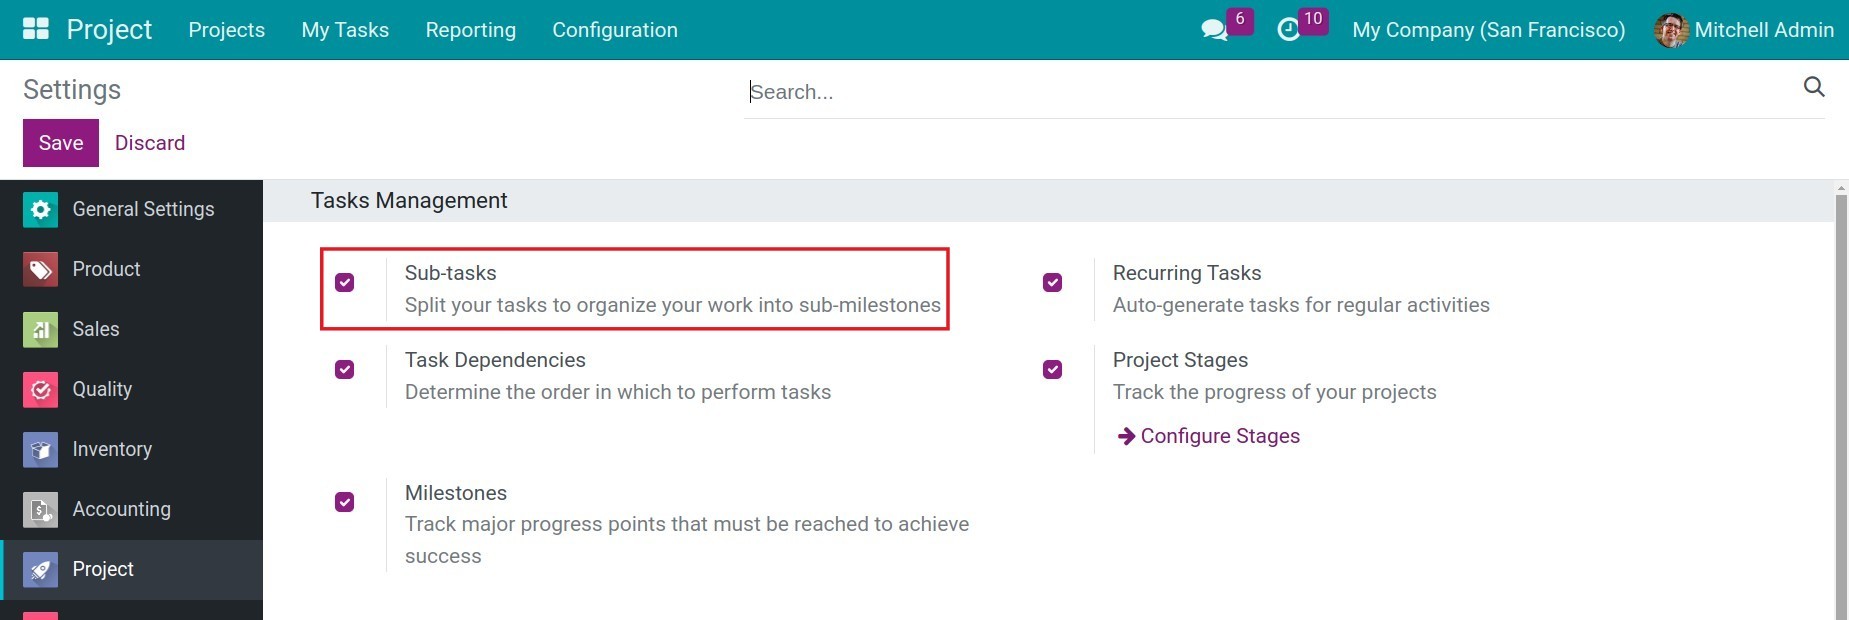
To enable the sub-tasks feature, you can go to Project > Configuration > Settings, check the Sub-tasks box, and then click Save.
To create a sub-task, follow these steps:
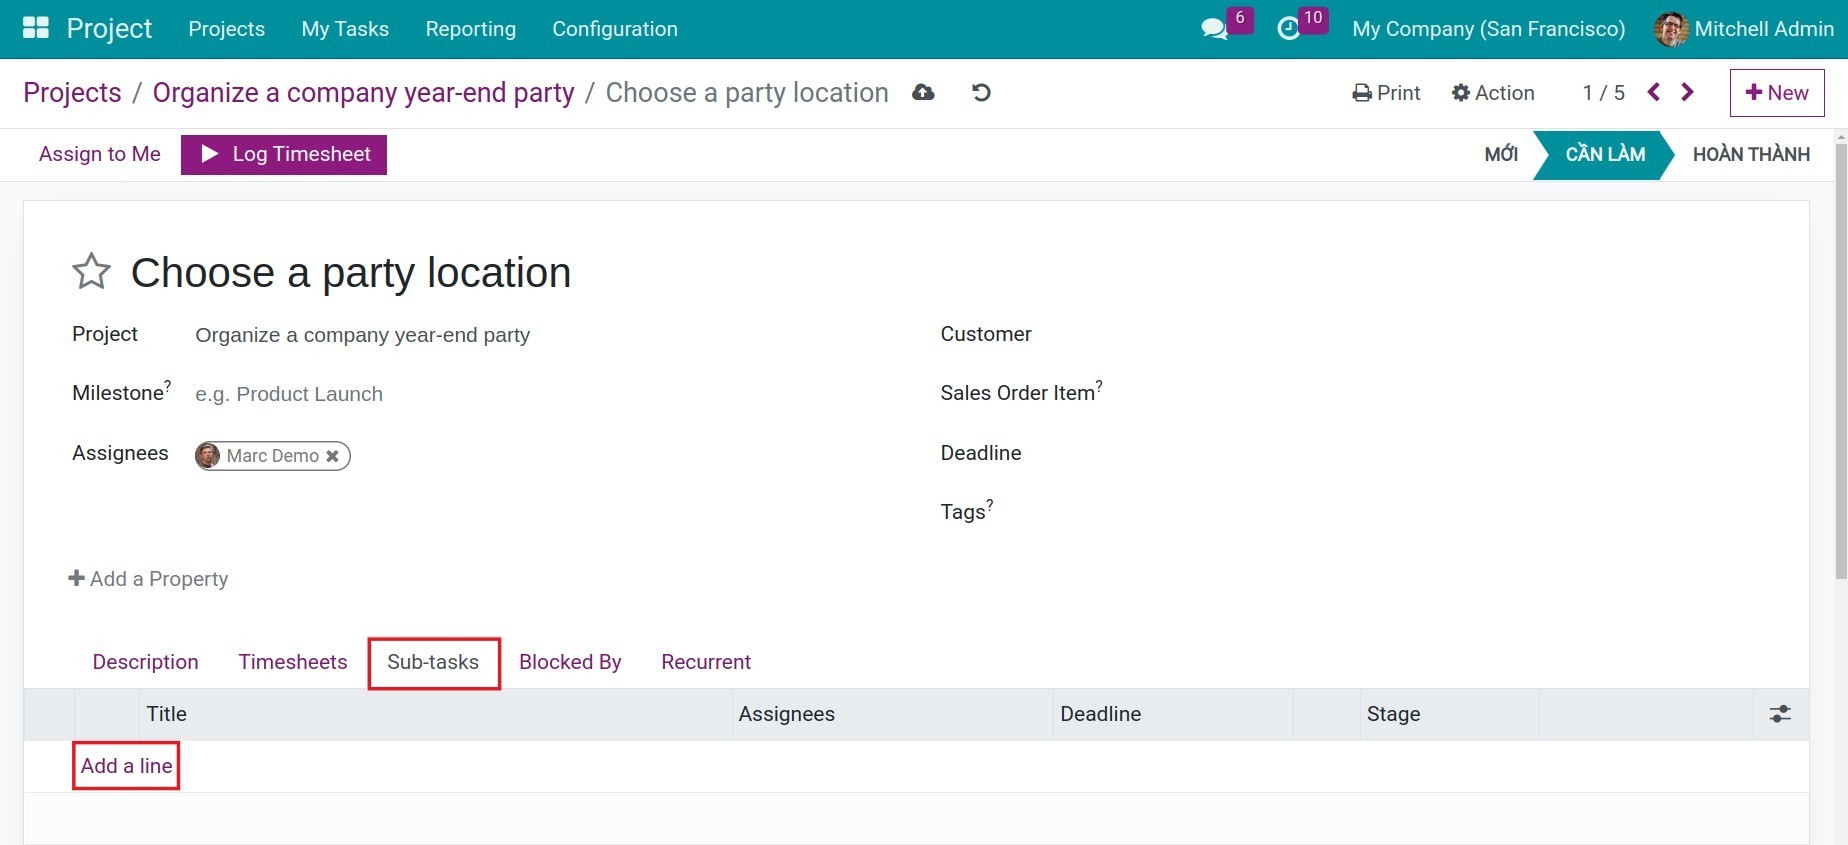
Step 1: Access the Project menu, select the project you want to set up. Click on a task that you want to divide into multiple sub-tasks. In the Sub-tasks tab, click Add a line.
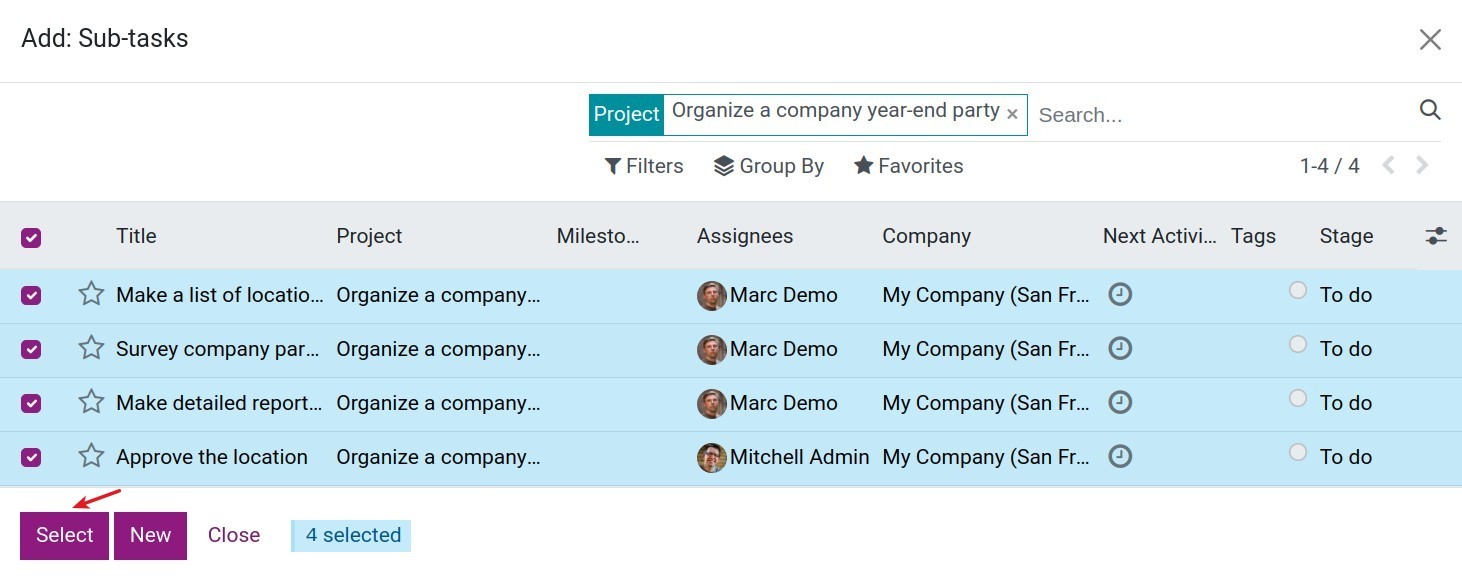
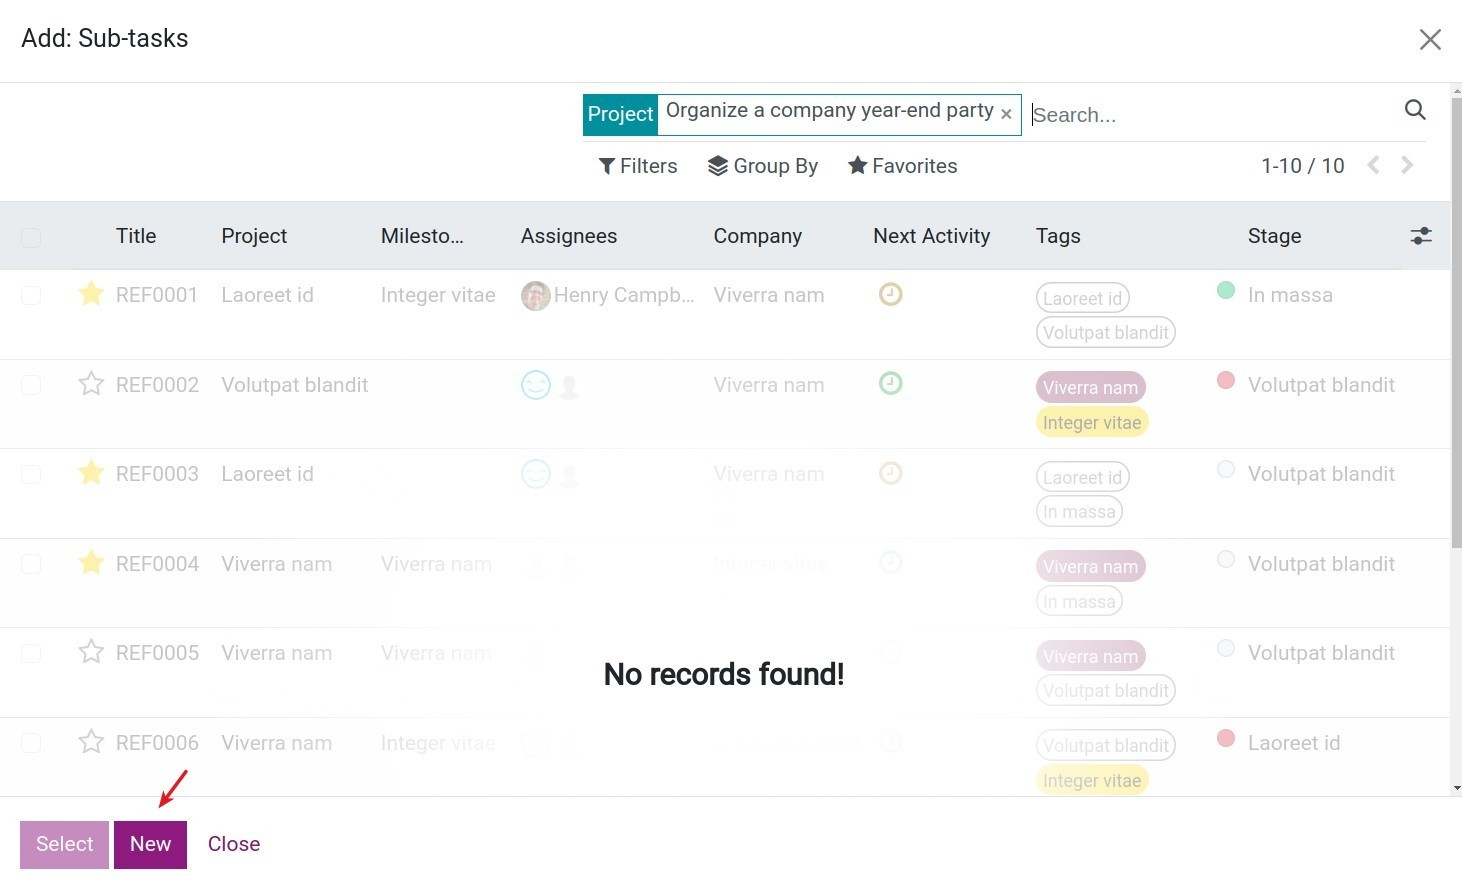
Step 2: In the pop-up window, you have two options:
Check the tasks that you want to make sub-tasks of the parent task. You can select multiple tasks at once. After finishing, click the Select button.
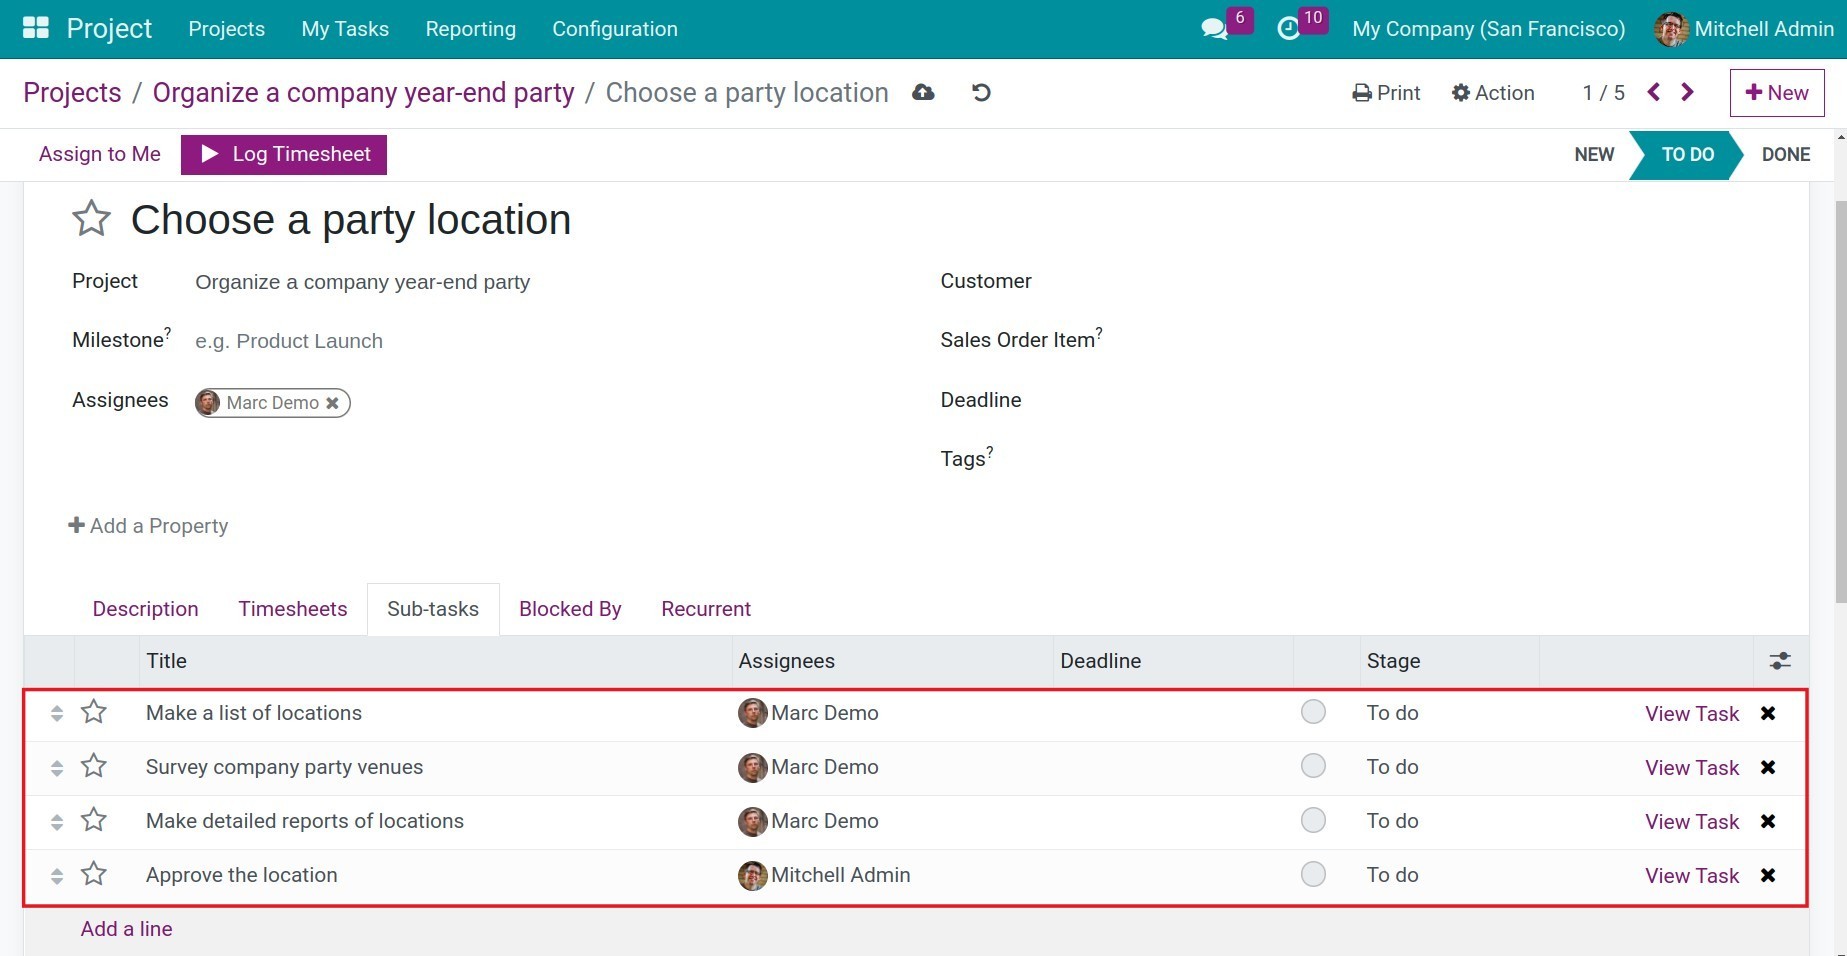
The system will take you back to the parent task interface, and you will see the subtasks added to the list in the Sub-tasks tab.
You can also create a new sub-task from the parent task by clicking the New button in the pop-up window.
Here, you can set the information for the subtask as instructed in the article Guideline to Basic Features of Viindoo Project.
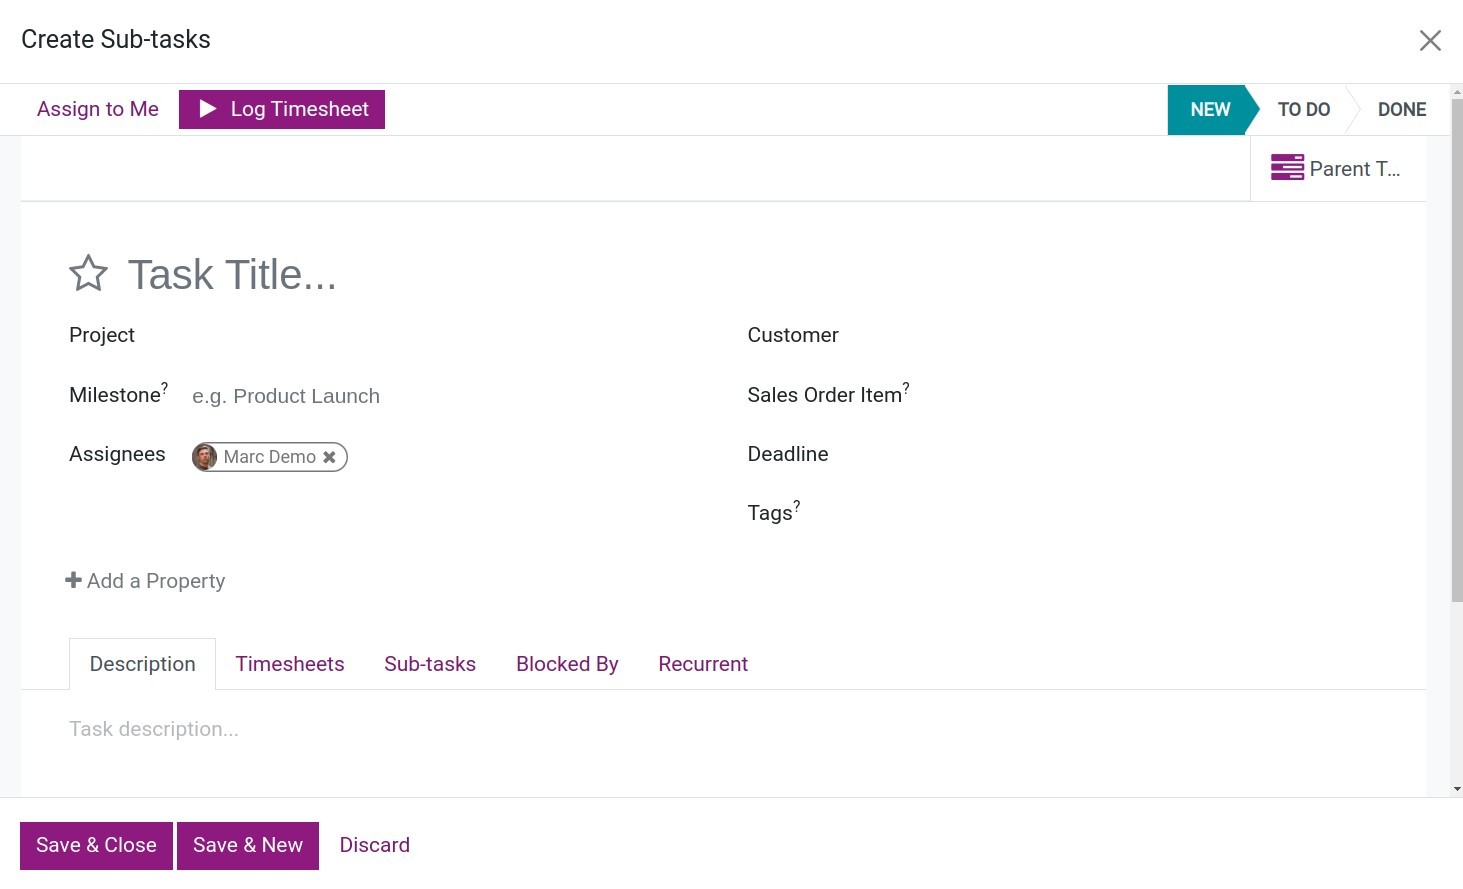
Click Save & Close to complete or click Save & New to save the current task and create a new sub-task.
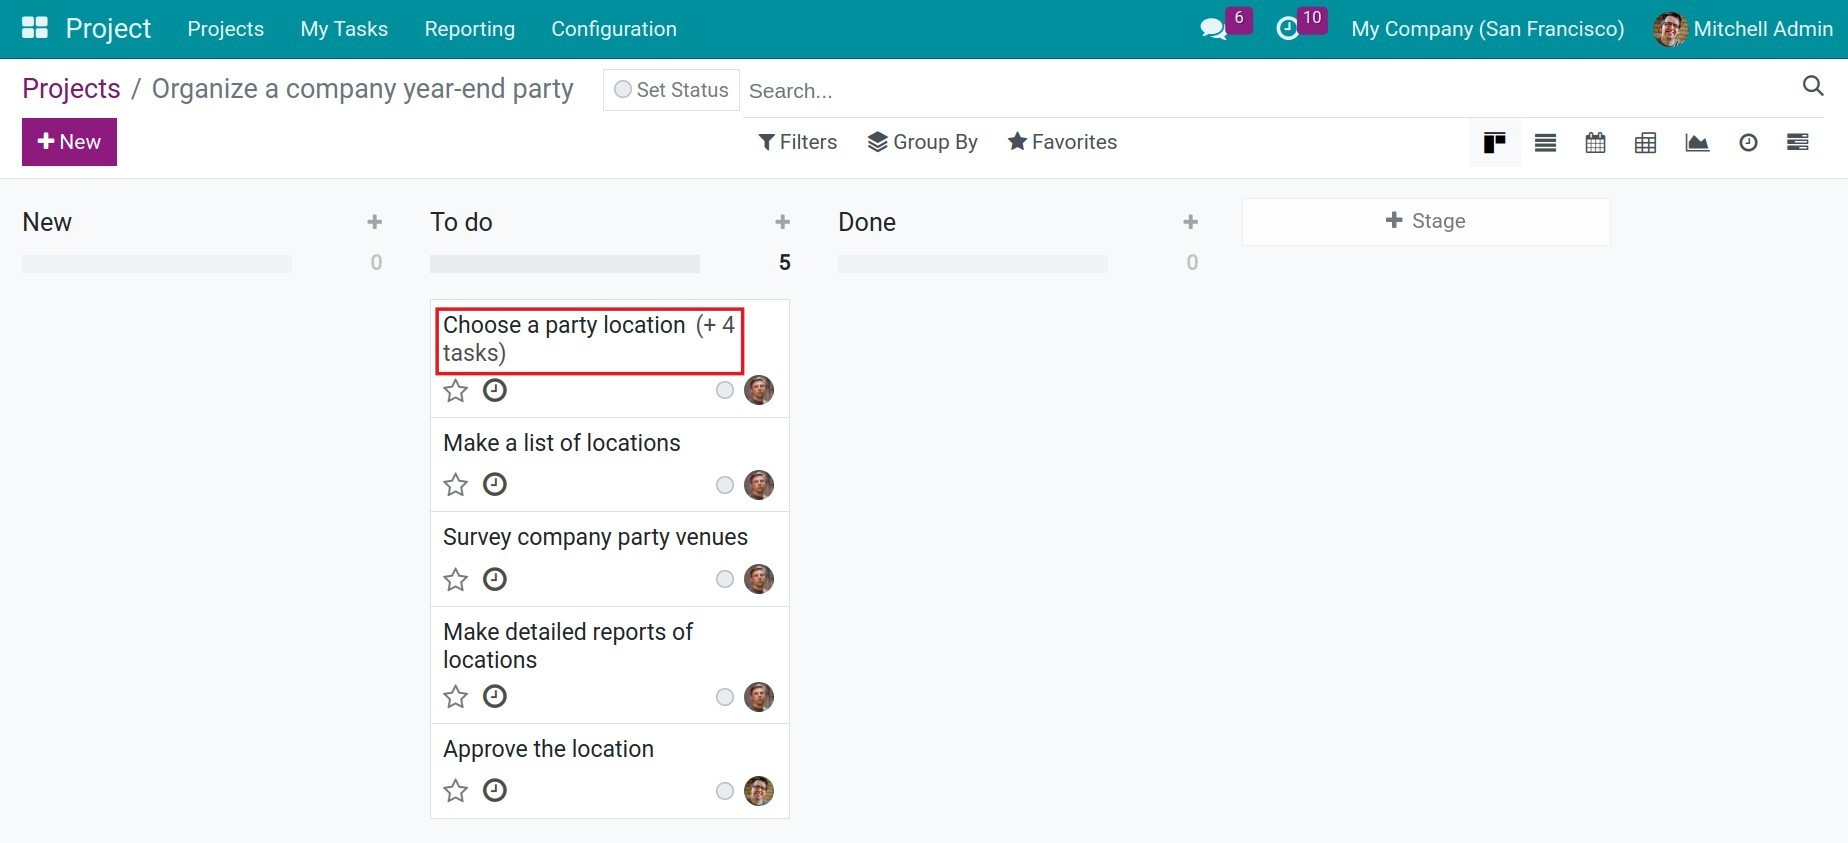
You can also view the number of sub-tasks for a task on the Kanban view.
Task Dependencies
The task dependencies feature allows you to set up 1 task to depend on others. Allows you to arrange the order of which task should be done first before other the task can be done.
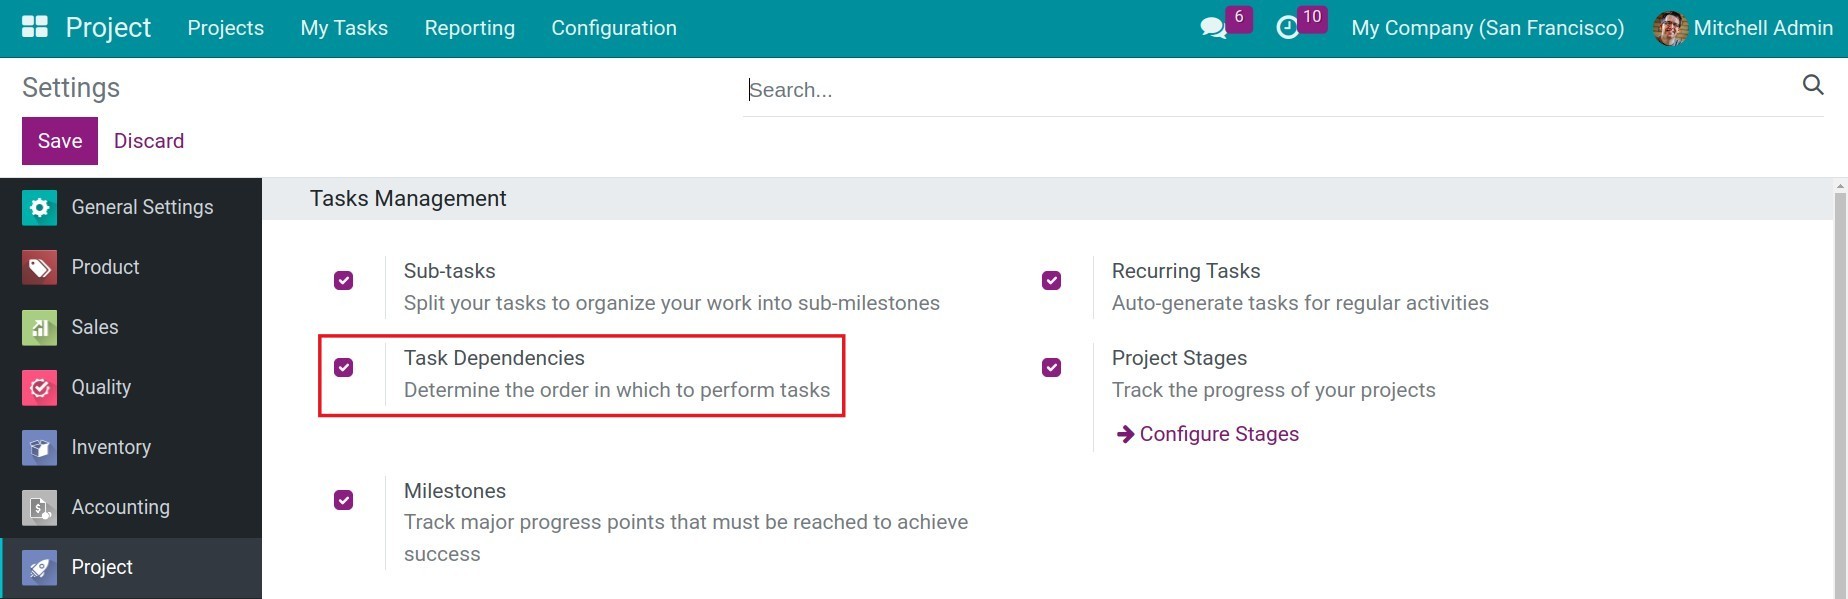
To activate this feature, navigate to Project > Configuration > Settings, at the Task Management section, check on Task Dependencies.
Let’s look at the following example to better understand how to use this feature.
Example: Office Redesign Project consists of 3 tasks:
Planning.
Furniture Purchase.
Office Arrangement.
These tasks need to be performed in sequential order: Planning > Furniture Purchase > Office Arrangement. This means that the task Office Arrangement can only be performed when the task Furniture Purchase is completed, and the task Furniture Purchase can only be performed when the task Planning is completed. Here’s how you would set it up:
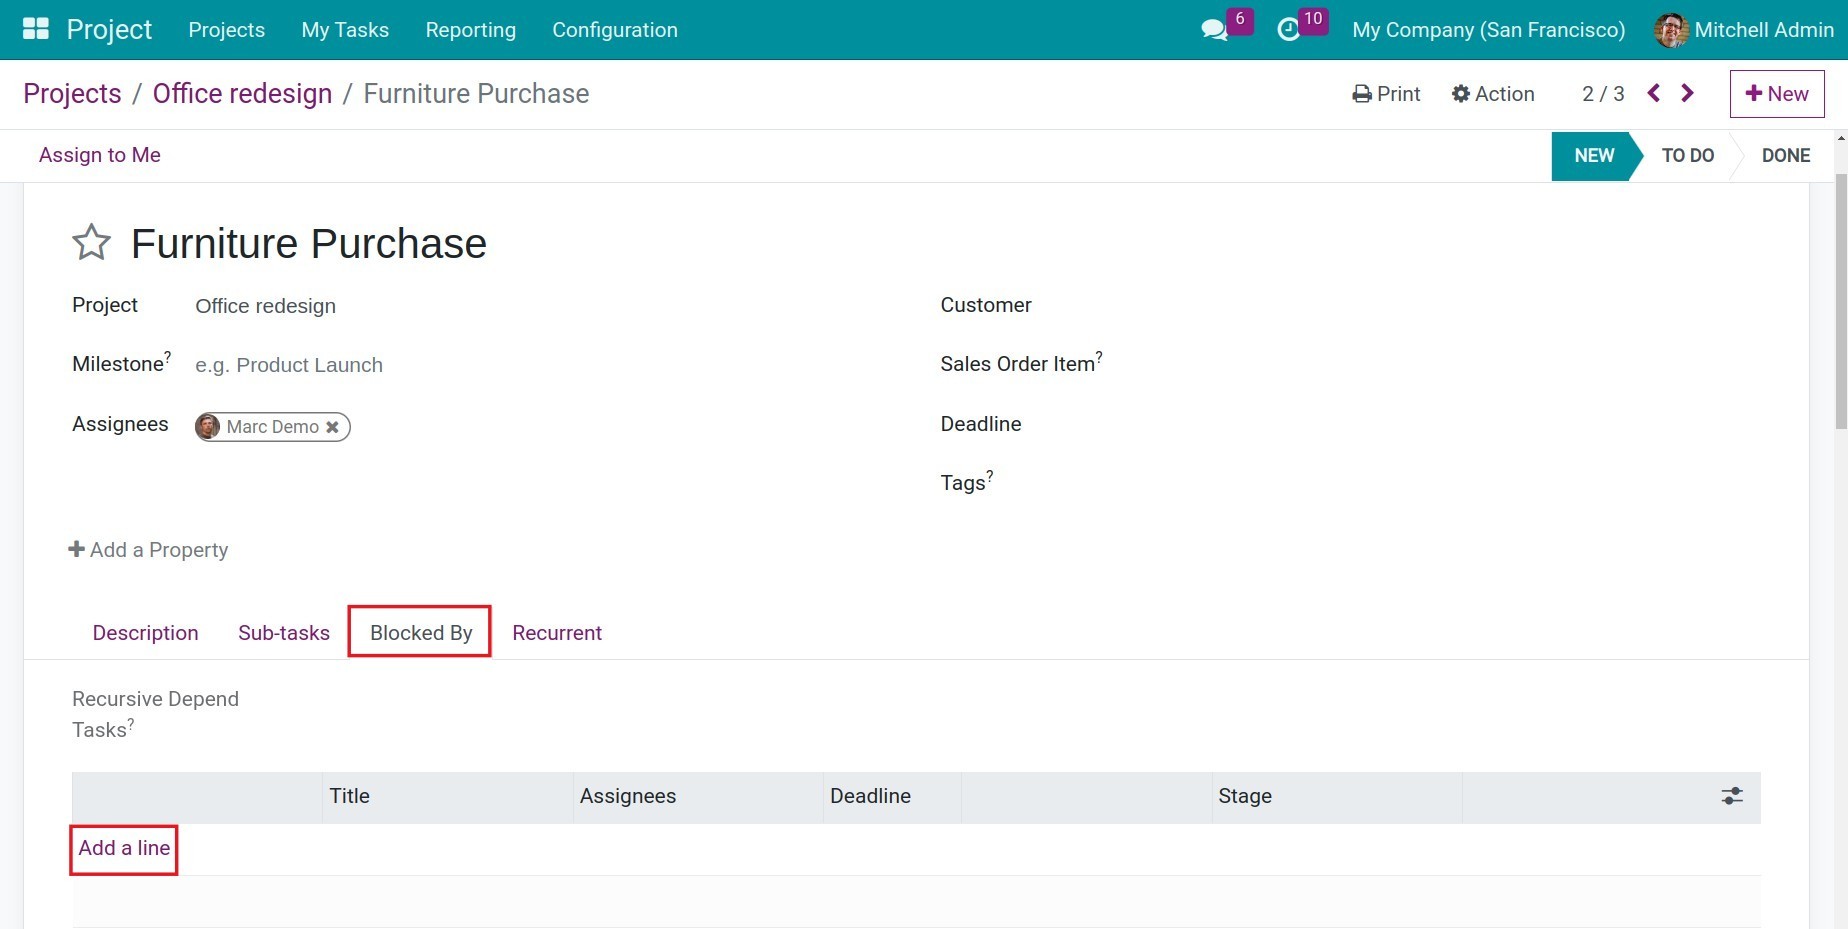
Access the Project application, select the Office Redesign Project, and click on the task Furniture Purchase. Switch to the Blocked By tab, click Add a line, and select the task Planning.
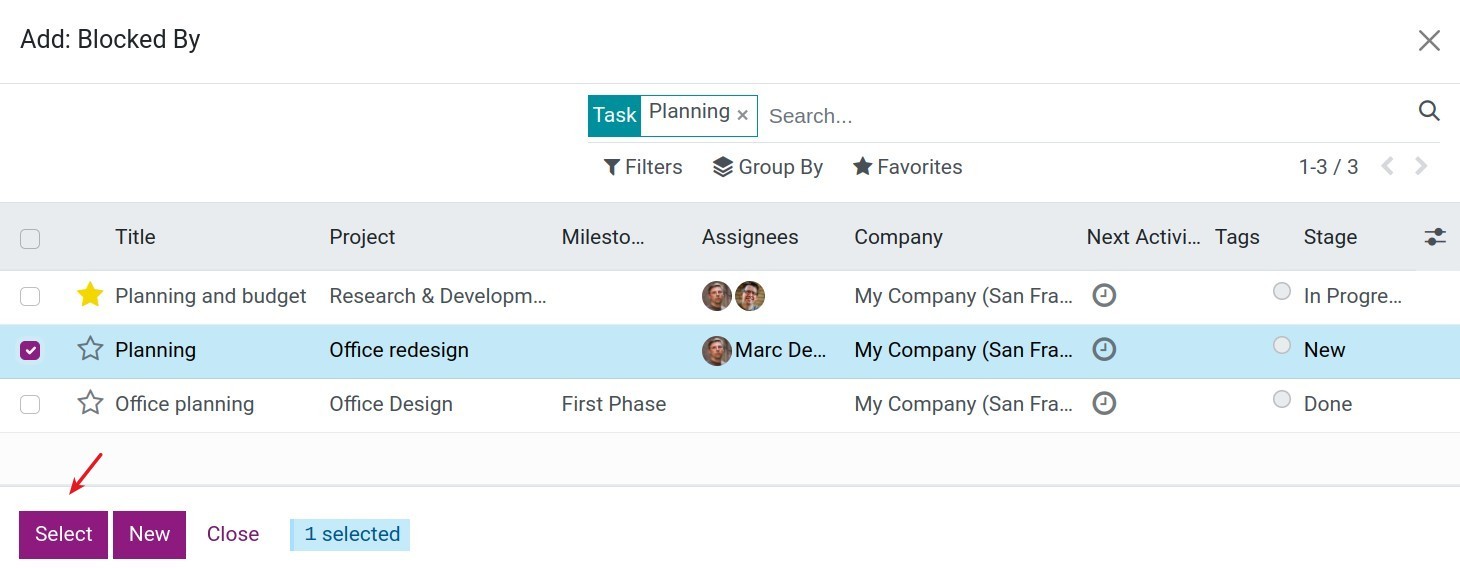
In the pop-up window, you select the task Planning and click Select.
Perform the same steps with the task Office Arrangement, as this task depends on the task Furniture Purchase.

You can view the dependencies of a task in detail by Activating Developer Mode. On the task interface, switch to the Blocked By tab.
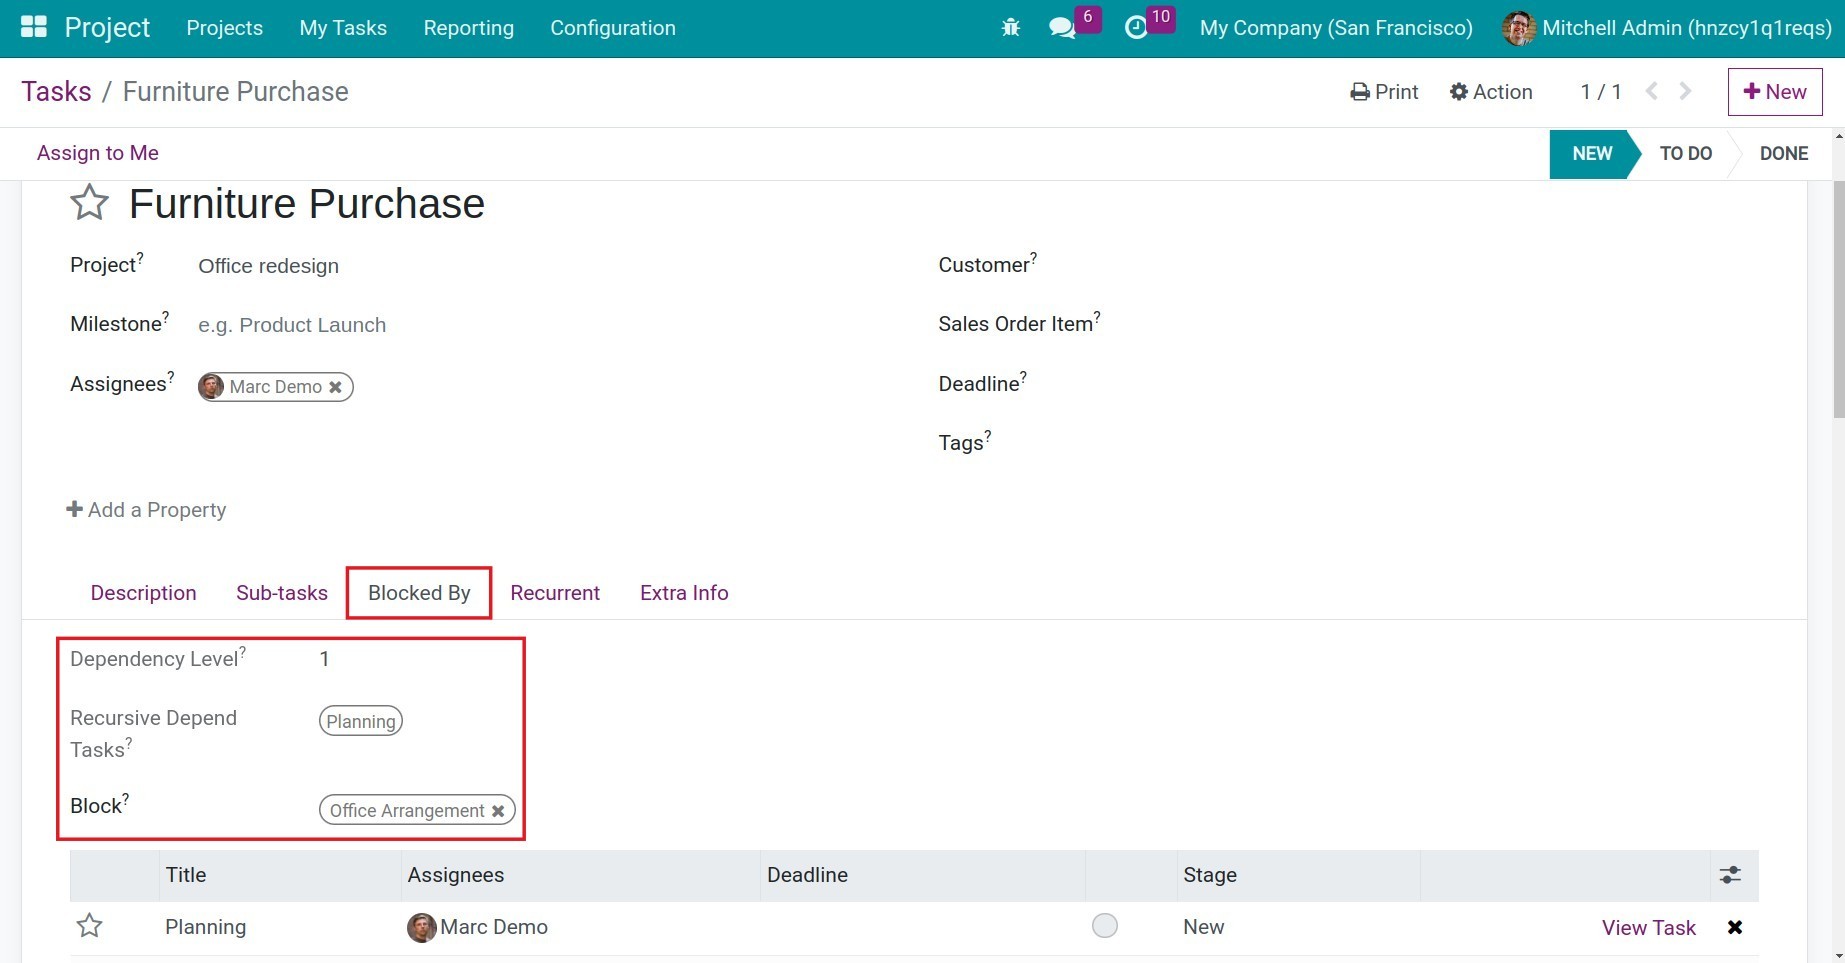
Dependency Level: If a task is dependent on another task and that task is not dependent on any other tasks, the dependency level will be 1. In this example, the task Furniture Purchase depends on the task Planning, so the dependency level will be 1. The task Office Arrangement will have a dependency level of 2 because it depends on the task Furniture Purchase, which itself depends on the task Planning.
Recursive Depend Tasks: This field will display the tasks that the current task depends on (both direct and indirect dependencies).
Block: This field will display the tasks that depend on the current task.
You can also visually view task dependencies on a Gantt chart. Navigate to Project, select the project you want to view, and switch to the Gantt chart view by clicking on the Gantt chart icon.
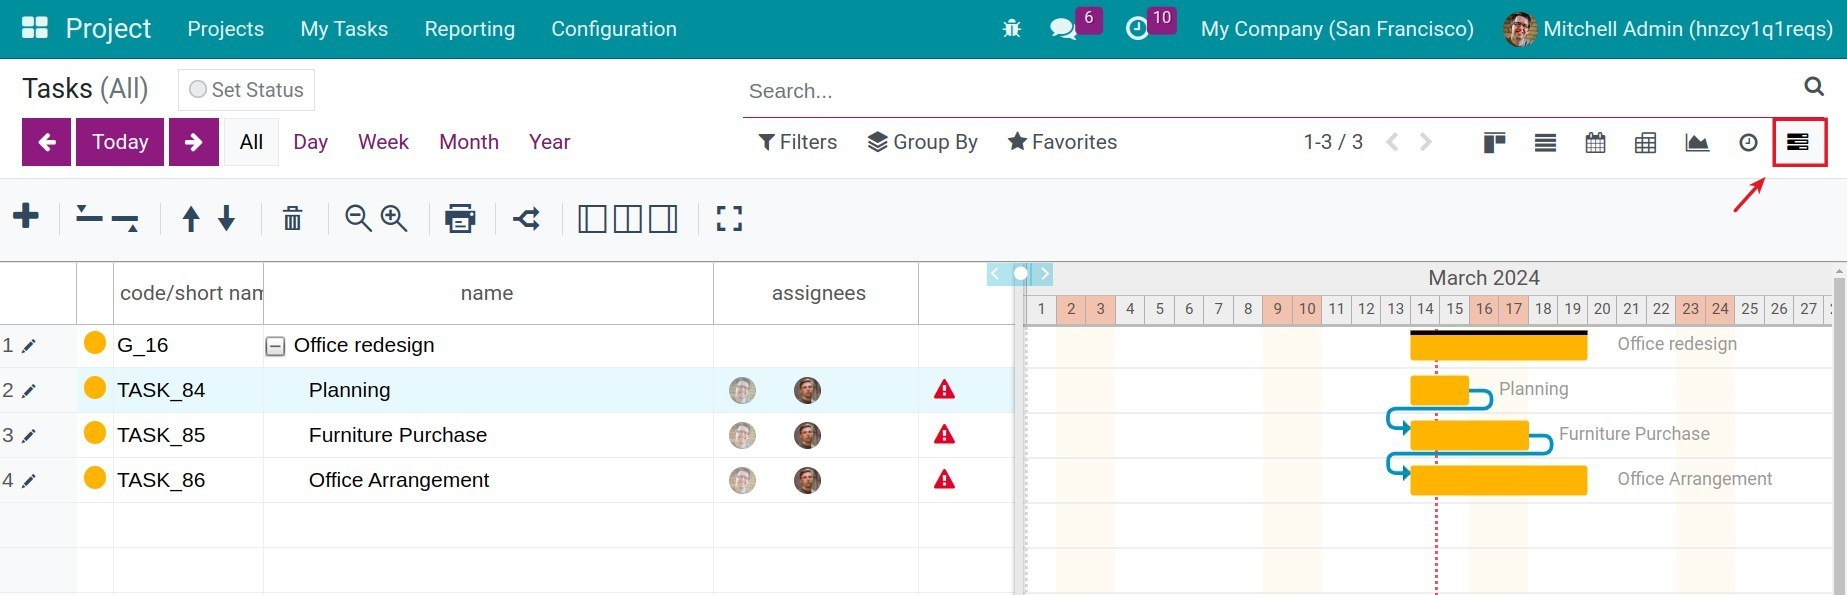
In this viewing mode, you can see the tasks represented with dependency arrows to indicate the dependencies.
Note
You need to install the module Project Scheduling to view the project as a Gantt chart.
Recurring Tasks
The project app also provides one more helpful feature of Recurring Tasks. With this feature, the tasks of regular activities are auto-generated.
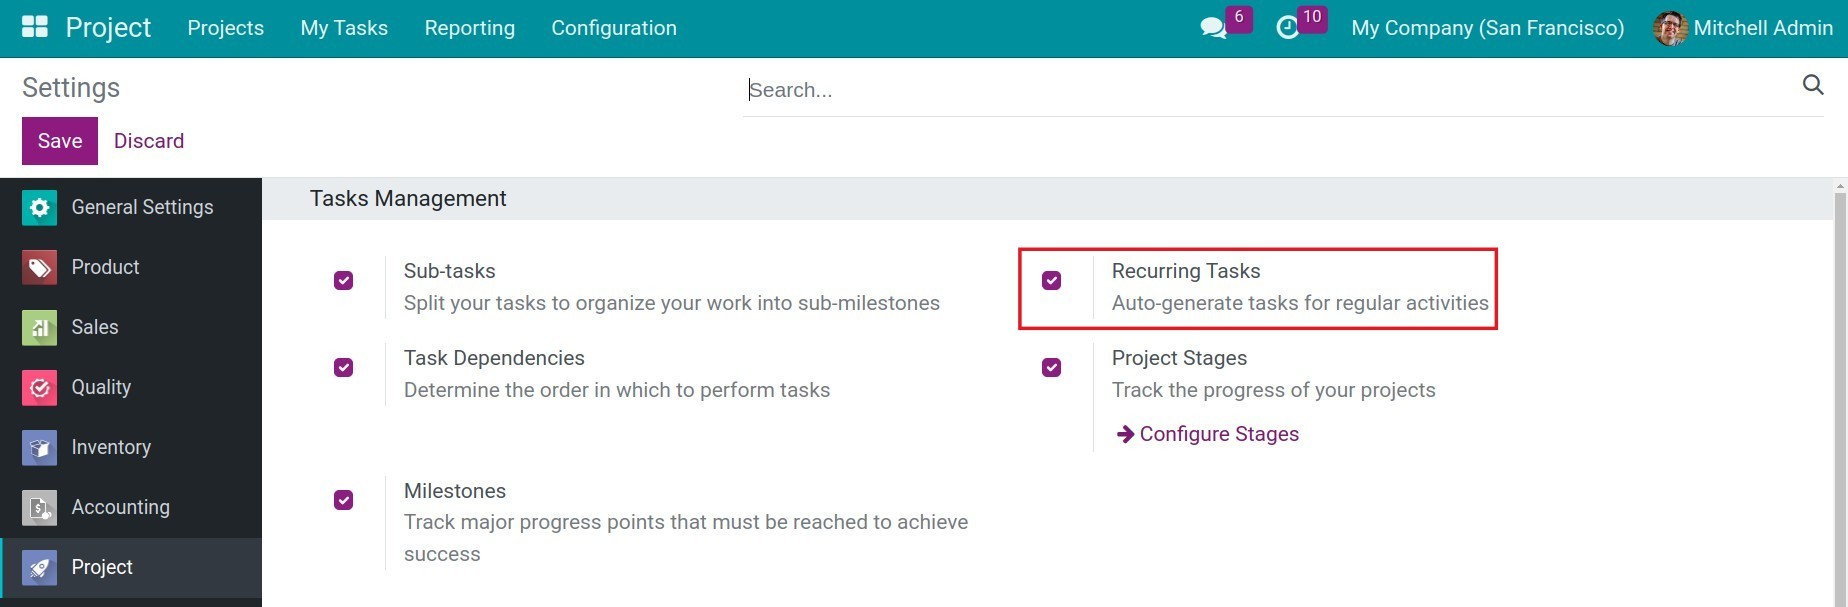
To enable the feature, navigate to Project > Configuration > Settings and check on the Recurring Tasks > Save.
Navigate a project, click on the task you want to set up a recurrence for. Switch to the Recurrent tab and check the Recurrent box.
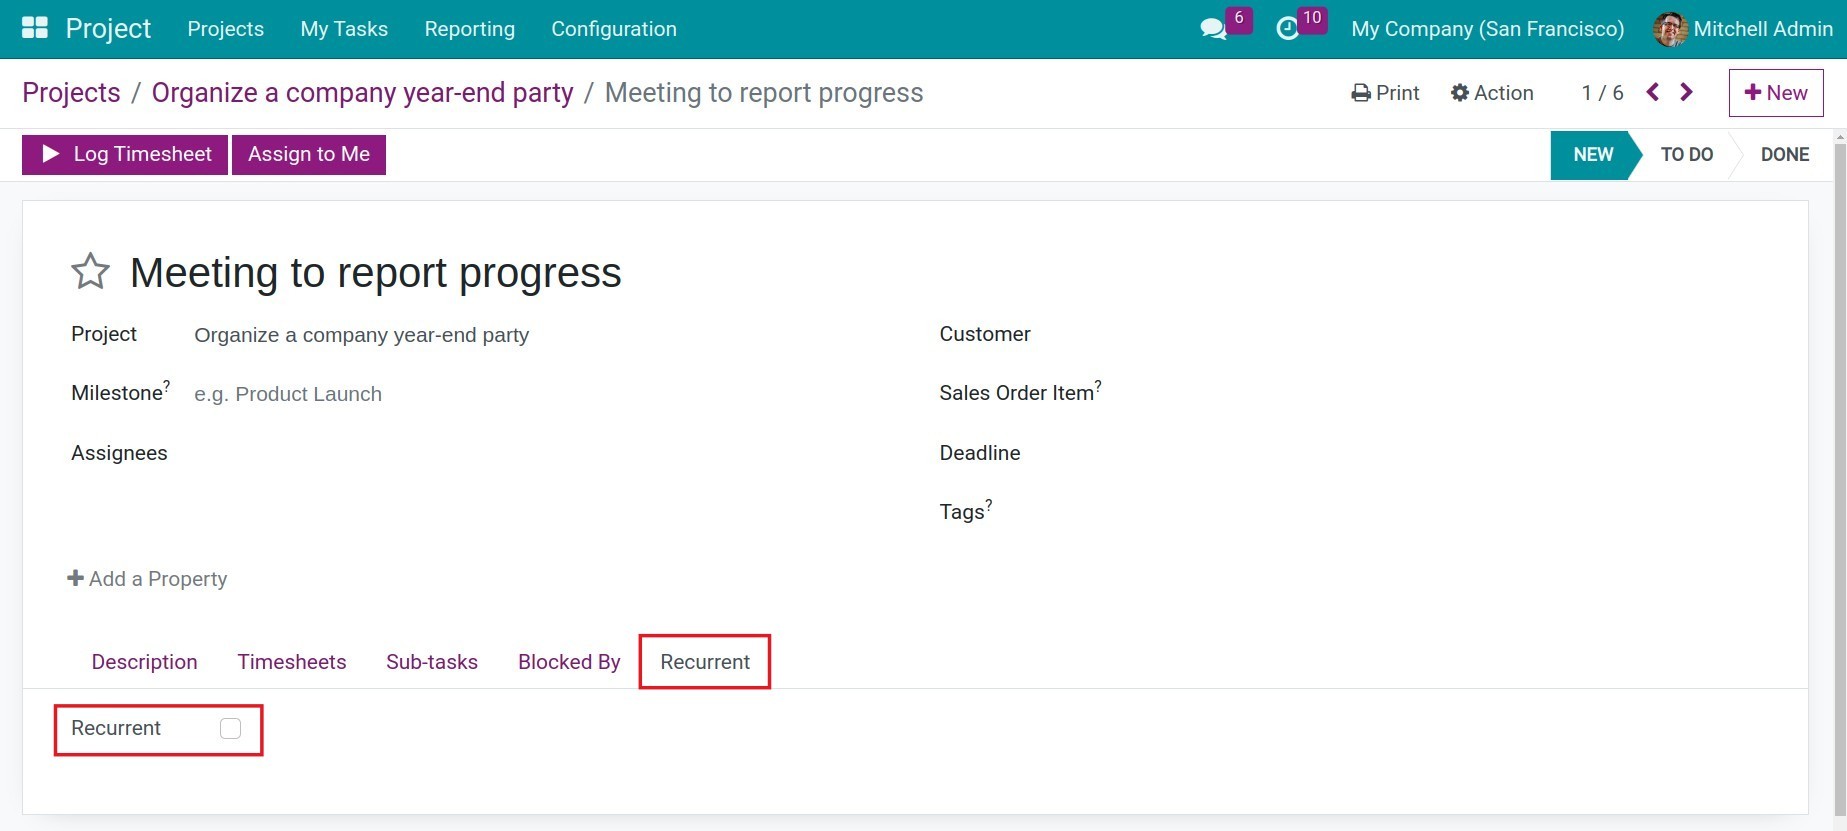
After checking the Recurrent box, the system will display an interface for you to set the recurrence cycle for the task.
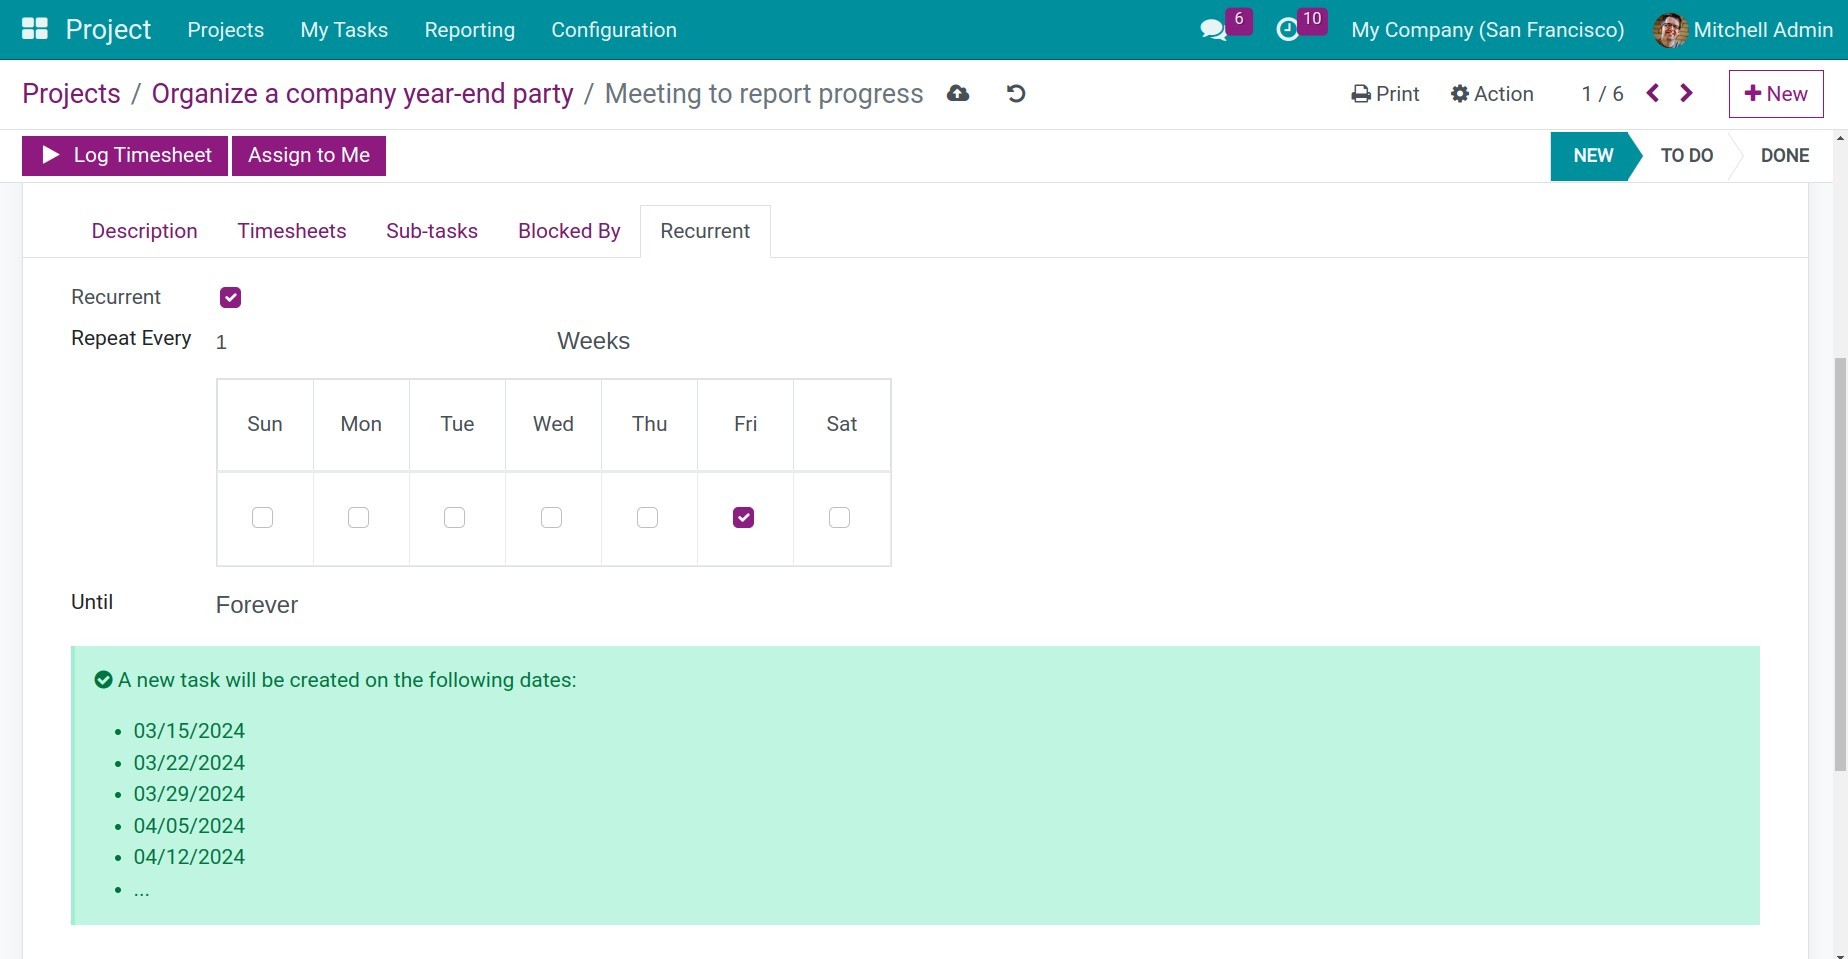
Repeat every: Here you can set the recurrence cycle for the task. You can choose the cycle based on Day, Week, Month, Year, and the number of repetitions within the cycle.
Ends: You have three options as follows. For each option, the system will suggest the dates when the task will repeat in the highlighted field.
Forever: The cycle will repeat indefinitely.
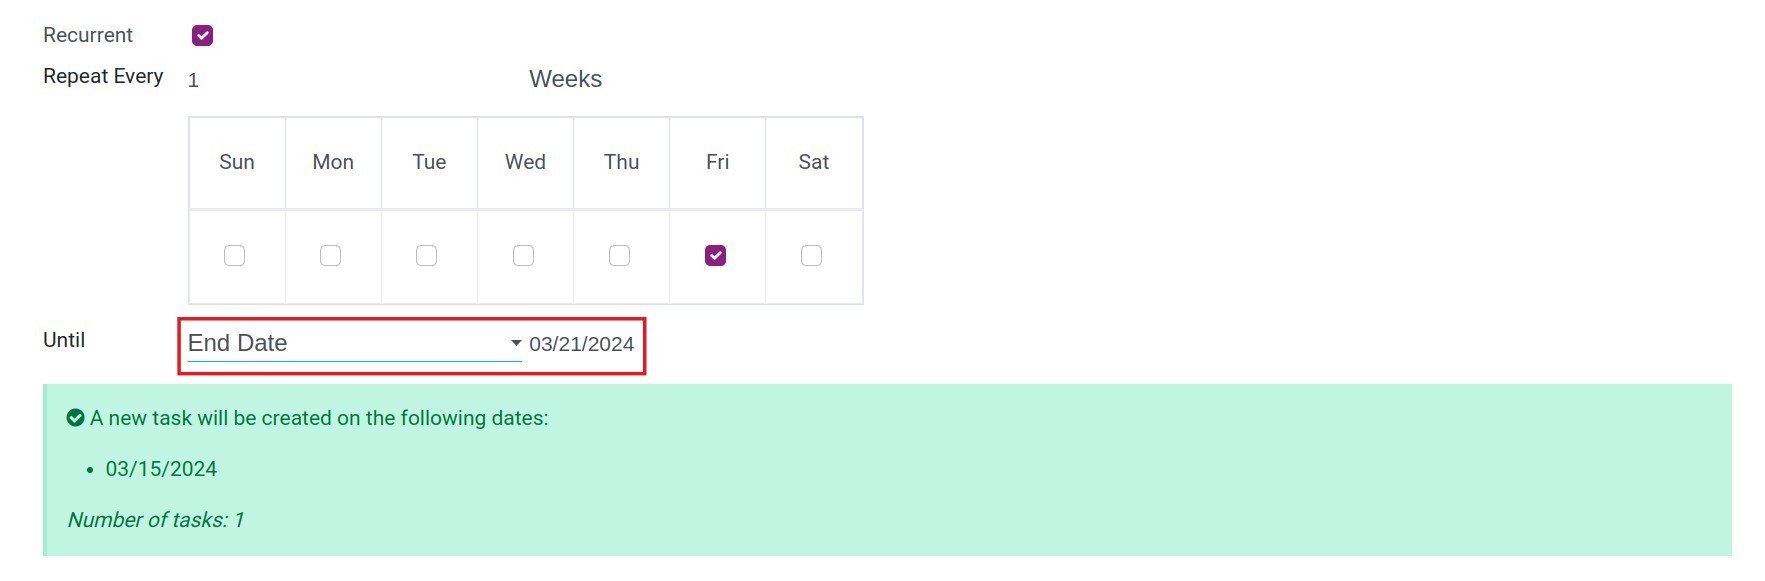
End date: The cycle will repeat until the date you set in this field.
![Set the end date of the cycle]()
Number of occurrences: The cycle will repeat the specified number of times you set here.
![Set the number of occurrences for the task]()
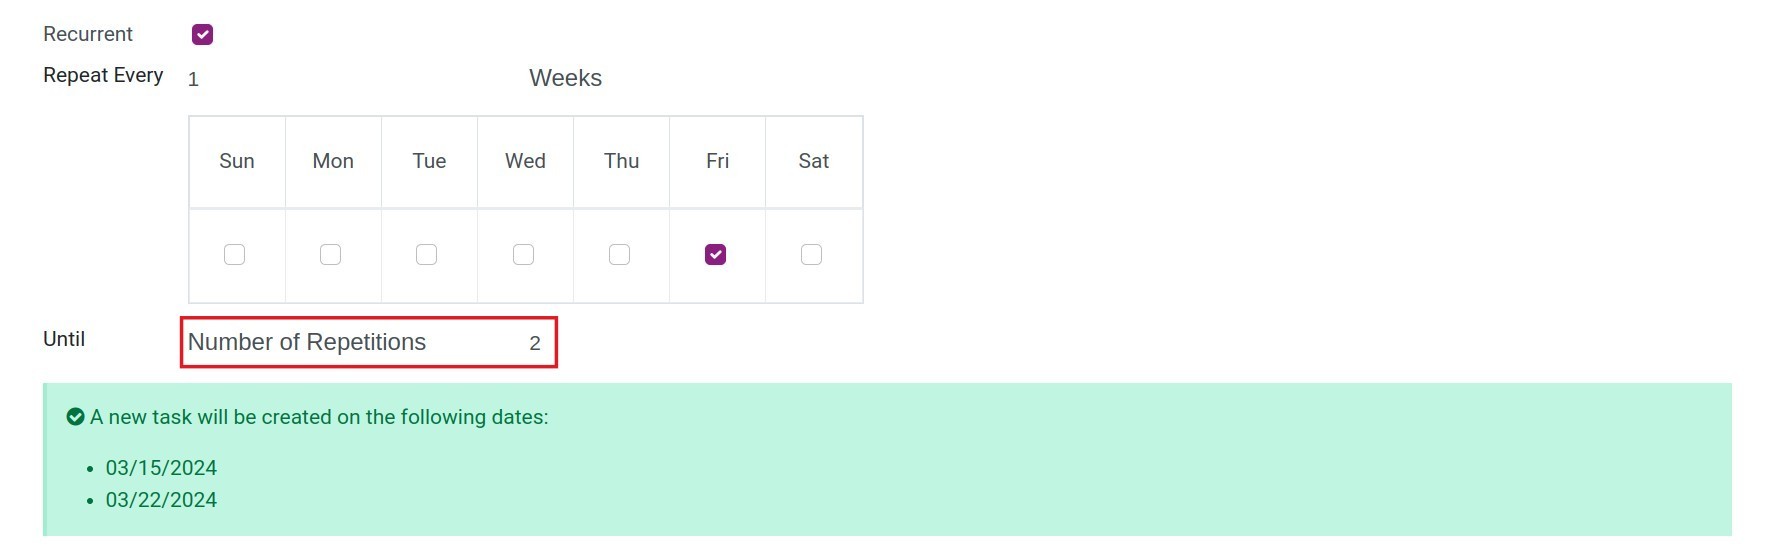
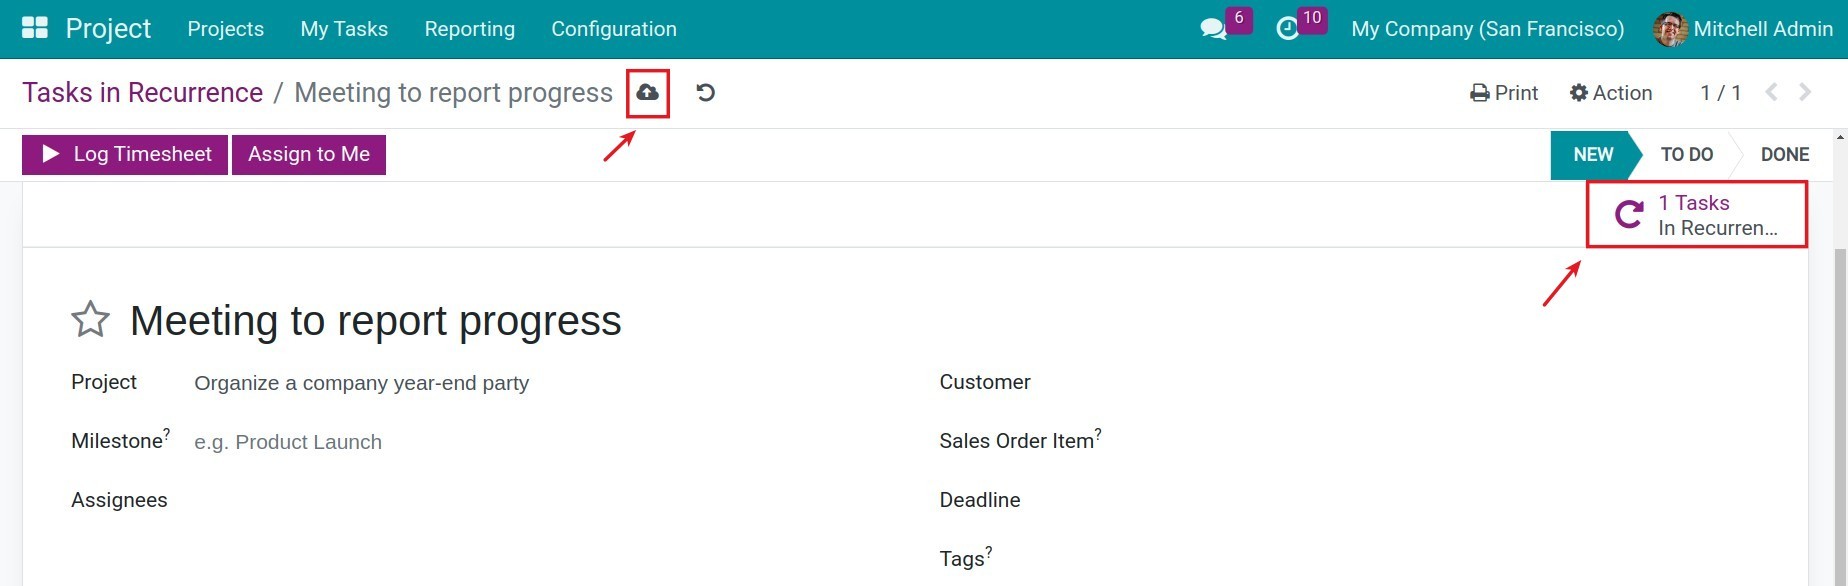
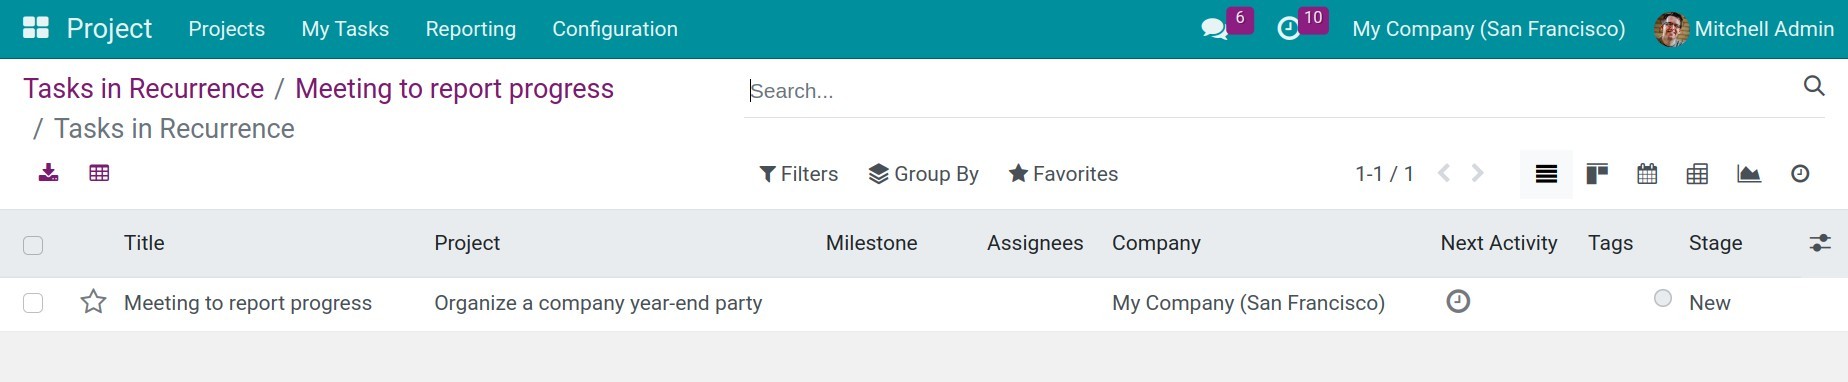
After completing the setup, click the save icon. Based on the recurring action, the system will automatically generate the next tasks when the specified dates arrive. Click the Tasks button to view the recurring tasks.
On the interface of the recurring task setup, the system will suggest the following options for editing recurring tasks:
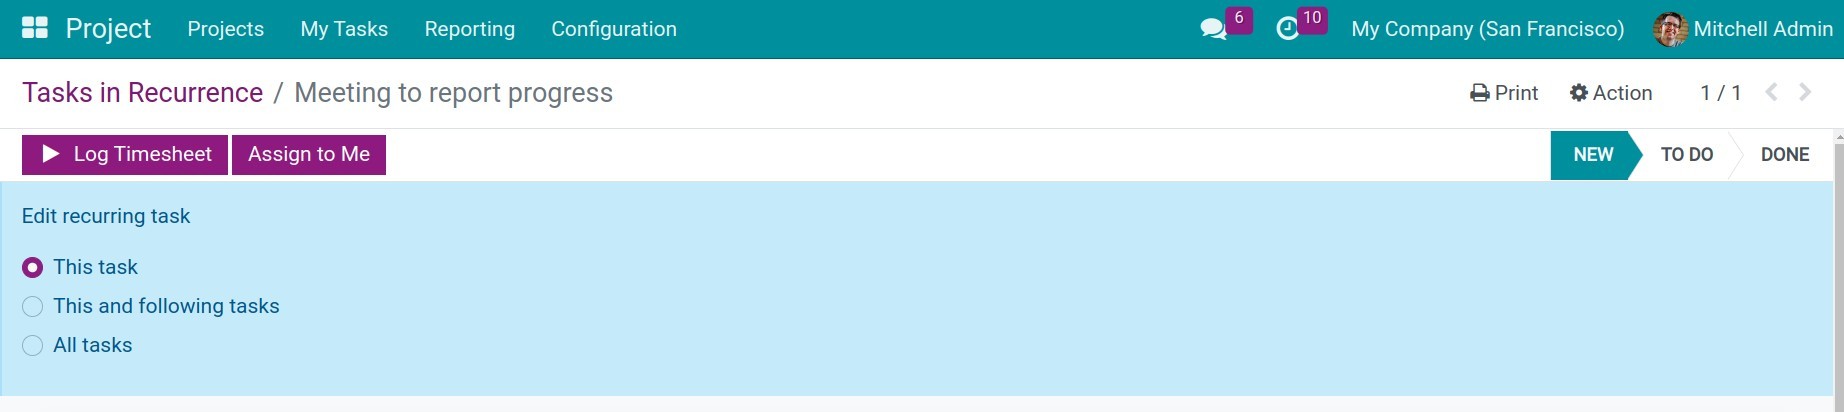
This task: The changes will be applied to the edited task.
This and following tasks: The changes will be applied to this task and the followings.
All tasks: The changes will be applied to all tasks of the project.
You can choose the appropriate editing option if you want to make changes and save it.
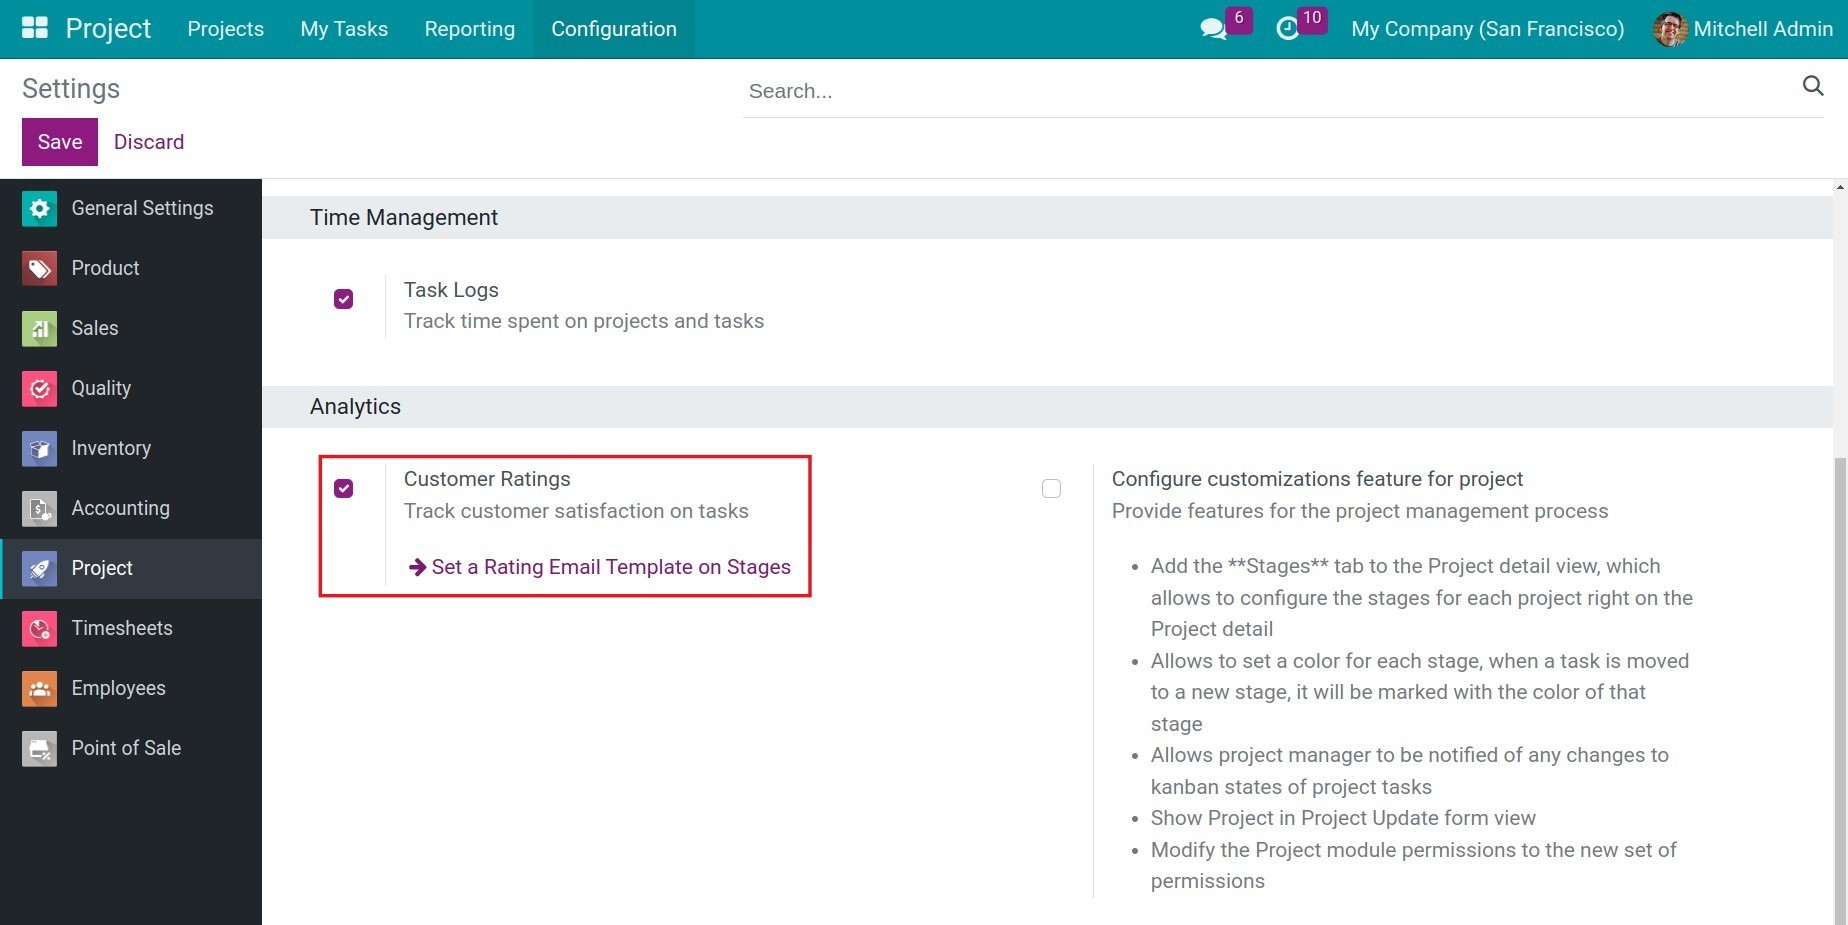
Customer Ratings
The project managers need to track the customer’s feedback and ratings of a task for successful project management. Check on Customer Ratings > Save in the Settings of the Project app.
Access the Project and select a project that requires customer ratings. Click on the three-dot icon and then click Settings. In the project interface, switch to the Settings tab and navigate to the Analytics section.
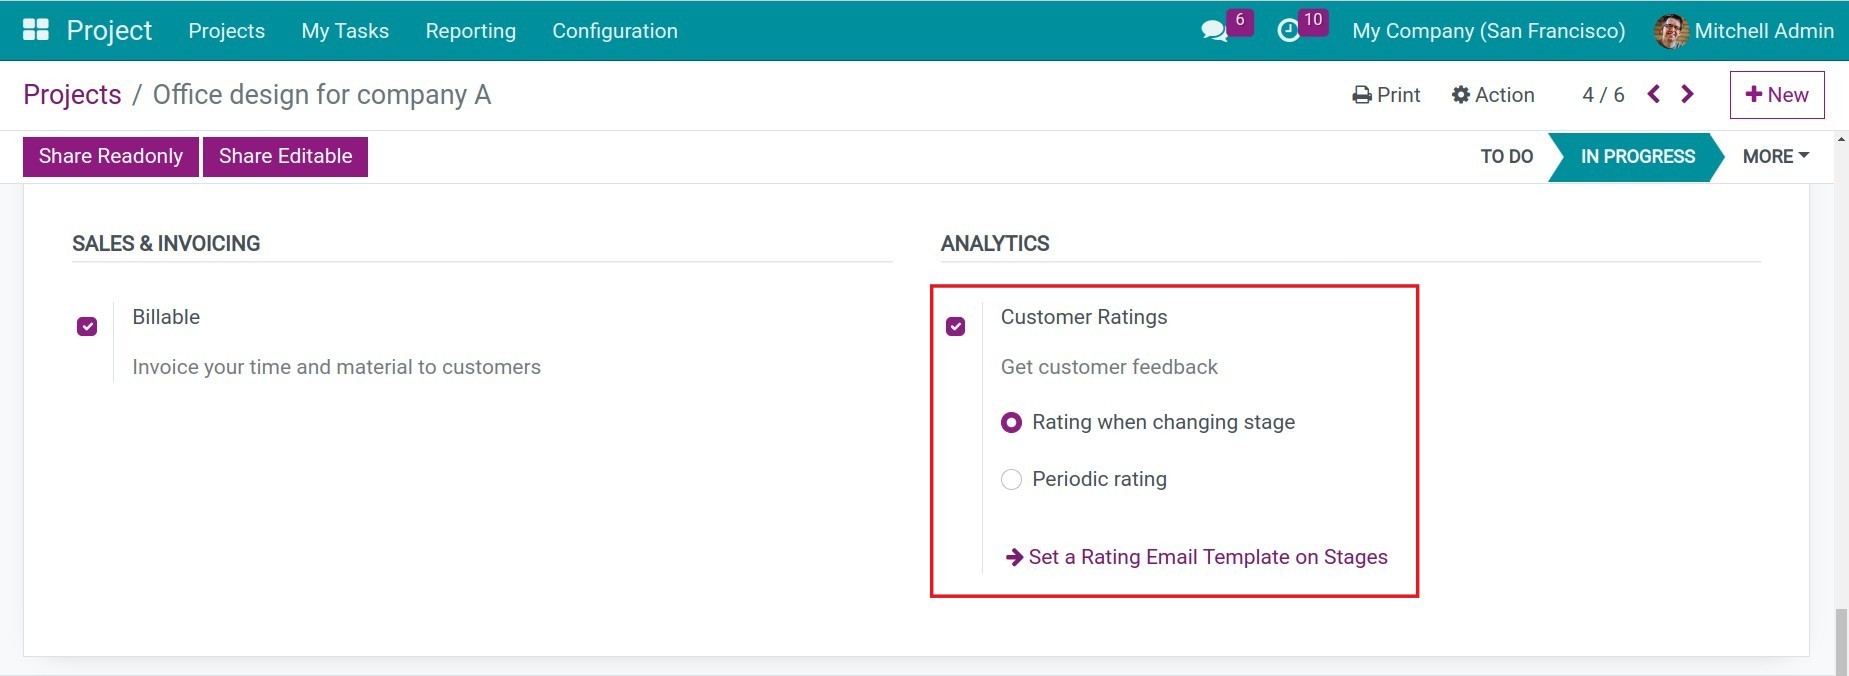
Here, you can choose to rate using one of the following two options:
Rating when changing stage: an email will be sent if the task is dragged to another stage.
Periodical rating: emails will be sent to customers periodically following the selected option in Rating Frequency.

Next, click on ➡ Set a Rating Email Template on Stages. Select a project stage that needs to be configured.
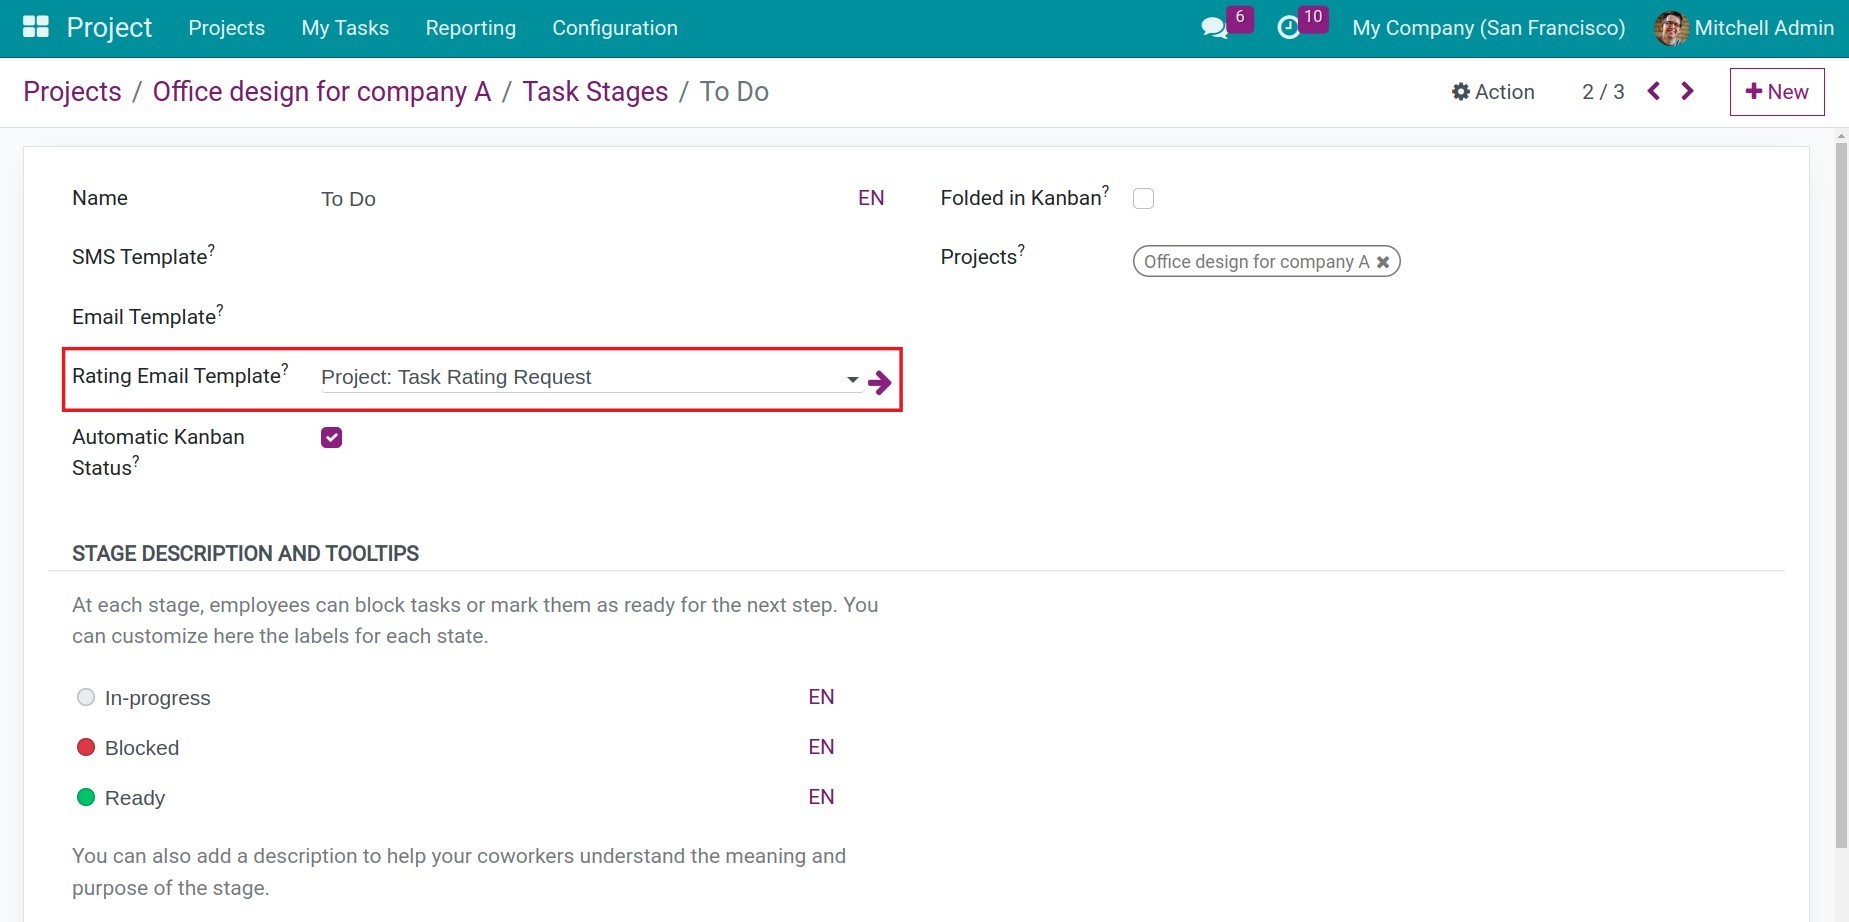
Rating Email Template: Here you set up email templates to send to customers in the following cases:
In the case where you set up to receive a Rating when changing stage, a rating request will be automatically sent to the customer via email when the task reaches this stage.
In the case where you set up to receive a Periodical rating, when the rating period falls within the configured stage, a rating request will be automatically sent to the customer via email using the email template you set up for that stage.
After selecting the email template, the Automatic Kanban status field will appear.
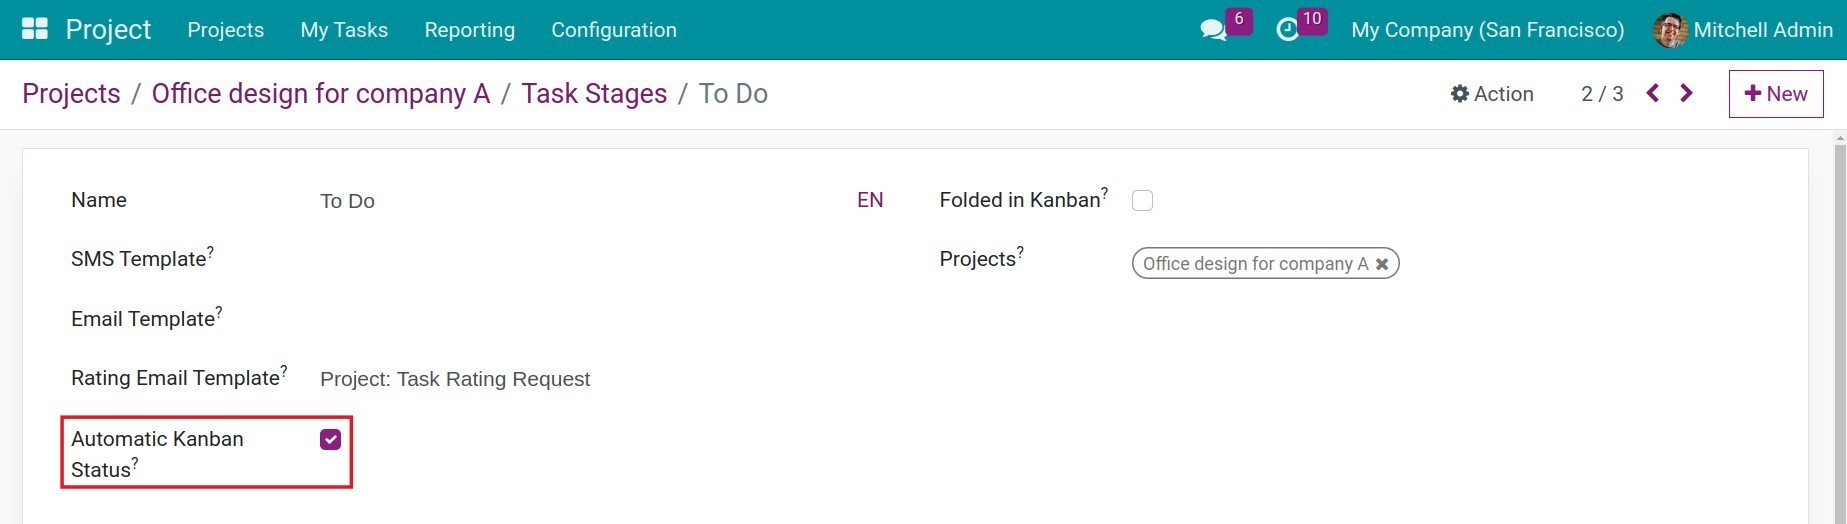
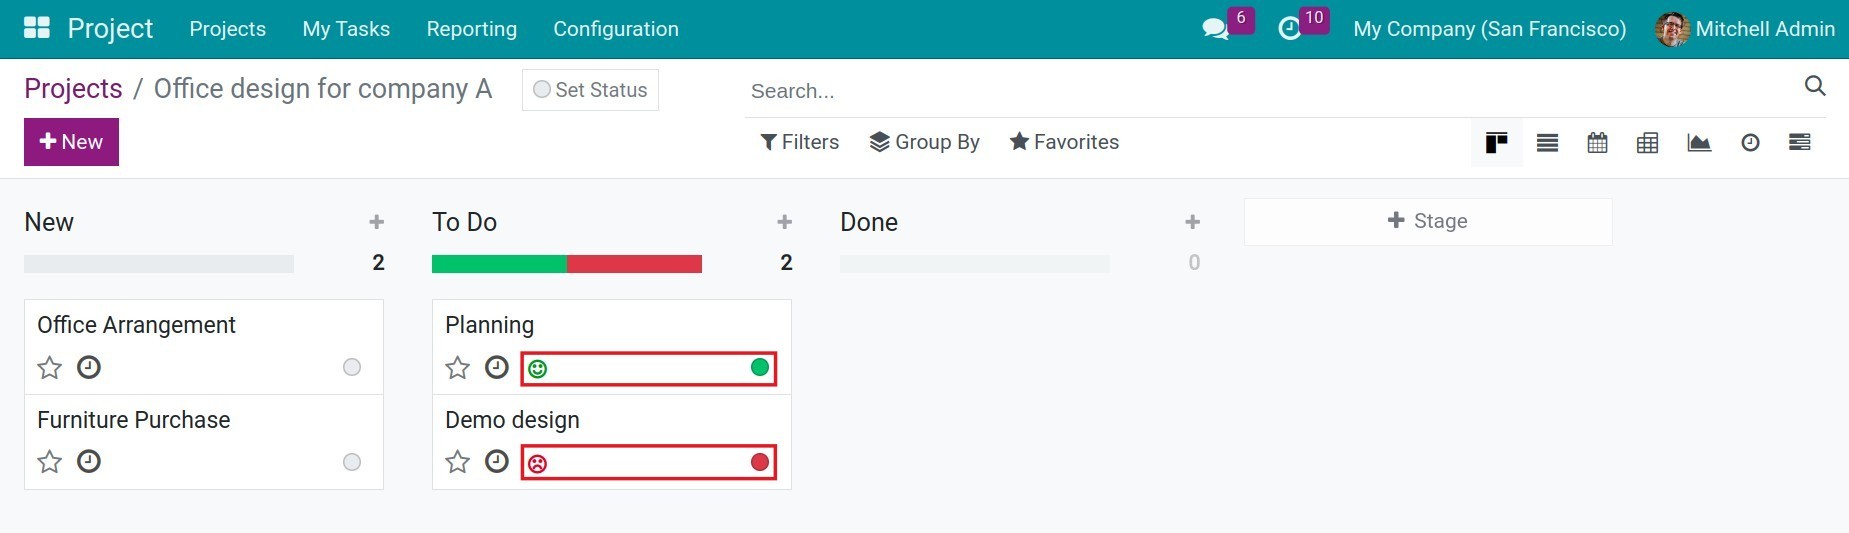
If checked, the system will automatically update and display the task as Kanban when the customer provides feedback on this stage as follows:
If the feedback is Satisfied, the status of the task will be changed to Ready for Next Stage (green dot).
If the feedback is Not Satisfied or Highly Dissatisfied, the status of the task will be changed to Blocked (red dot).
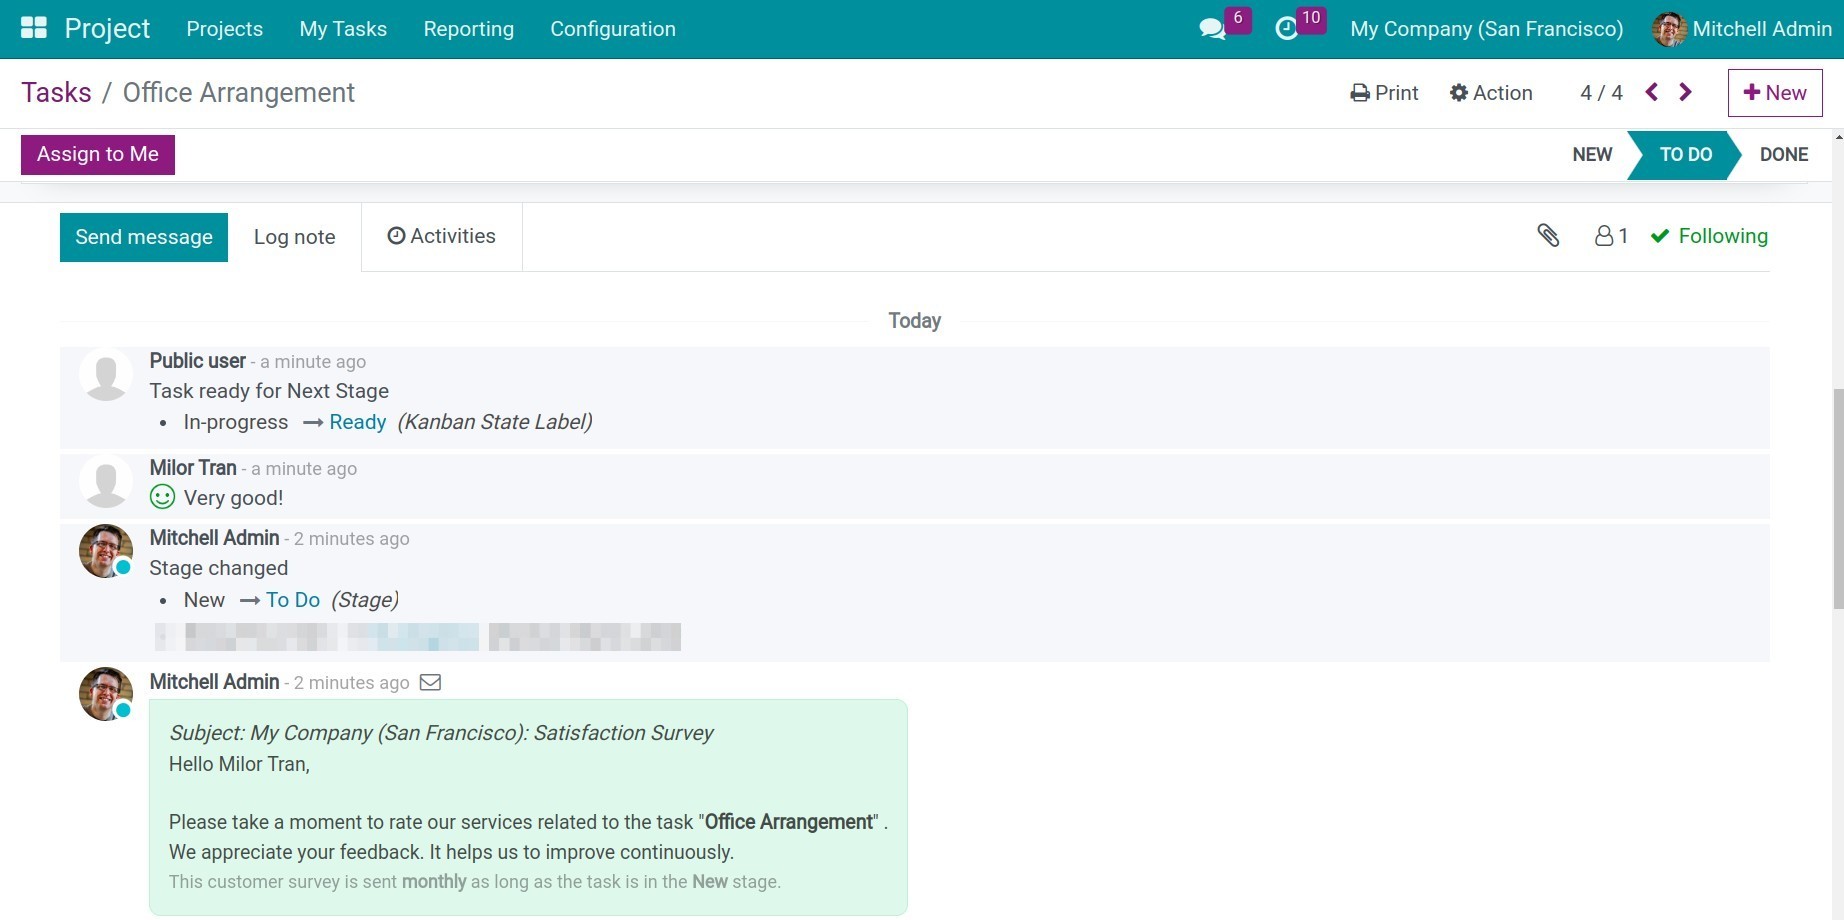
Customer ratings history will be displayed in the task’s chatter section.
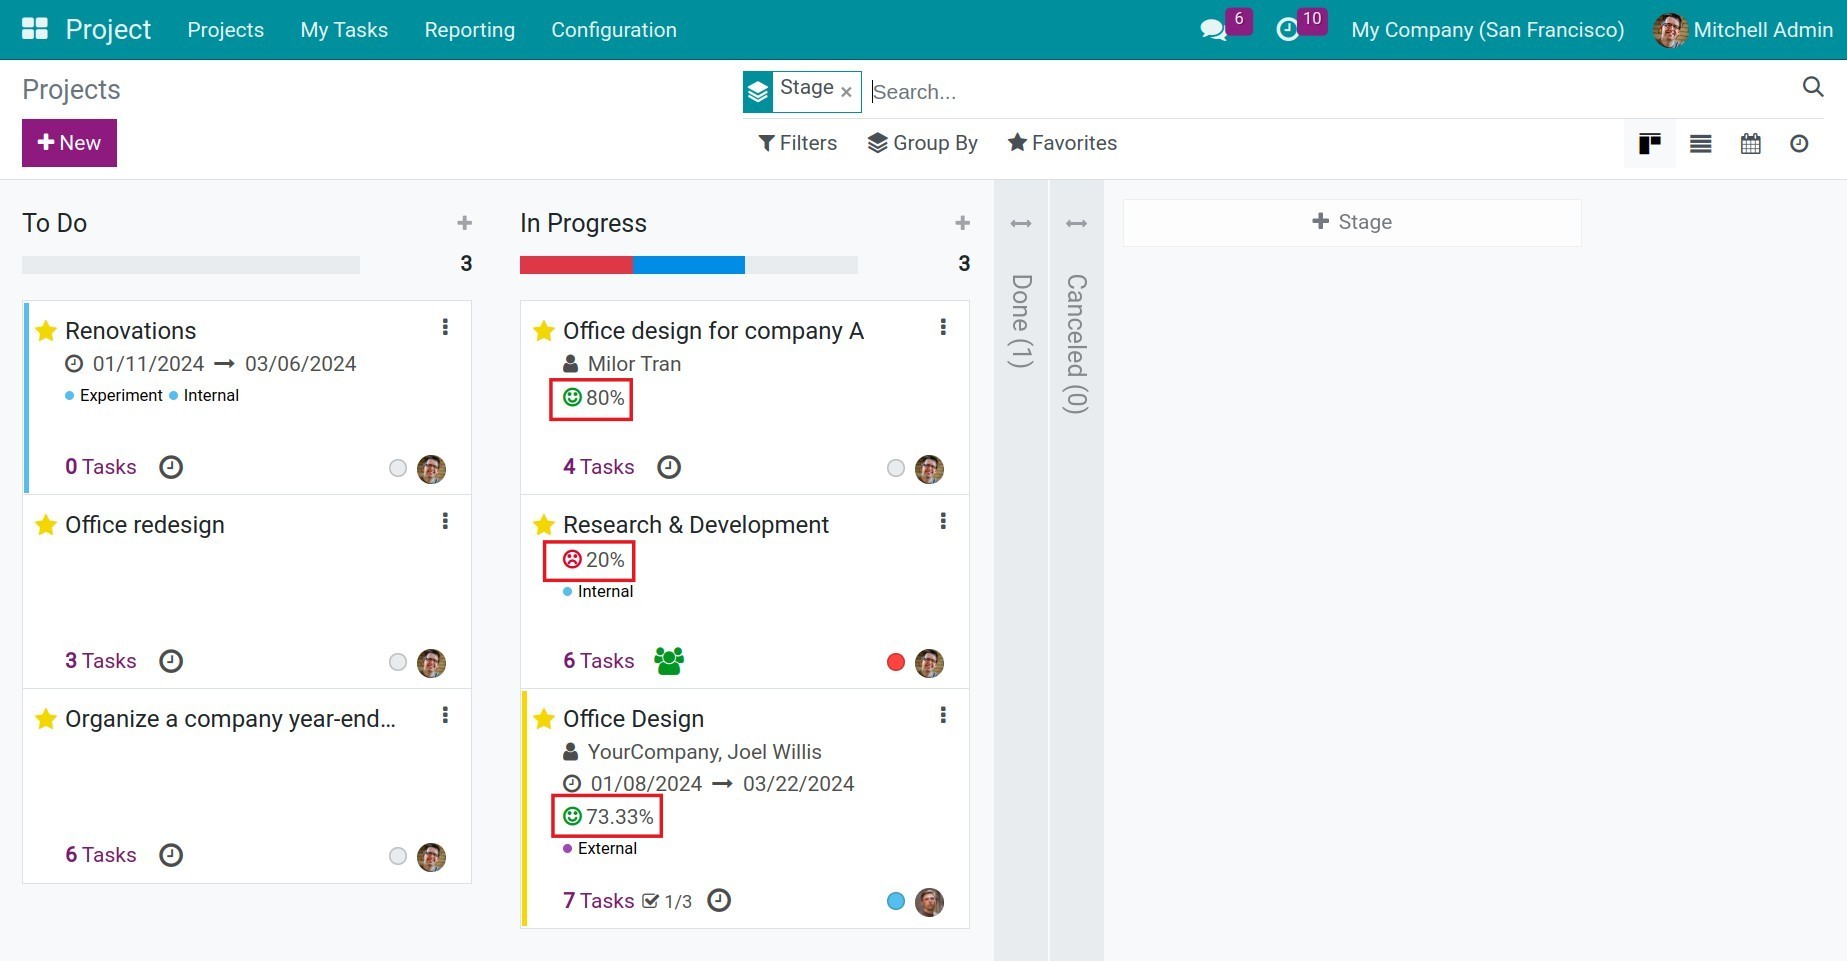
To show the customer ratings, navigate to the project overview and click on the rating percentage icon.
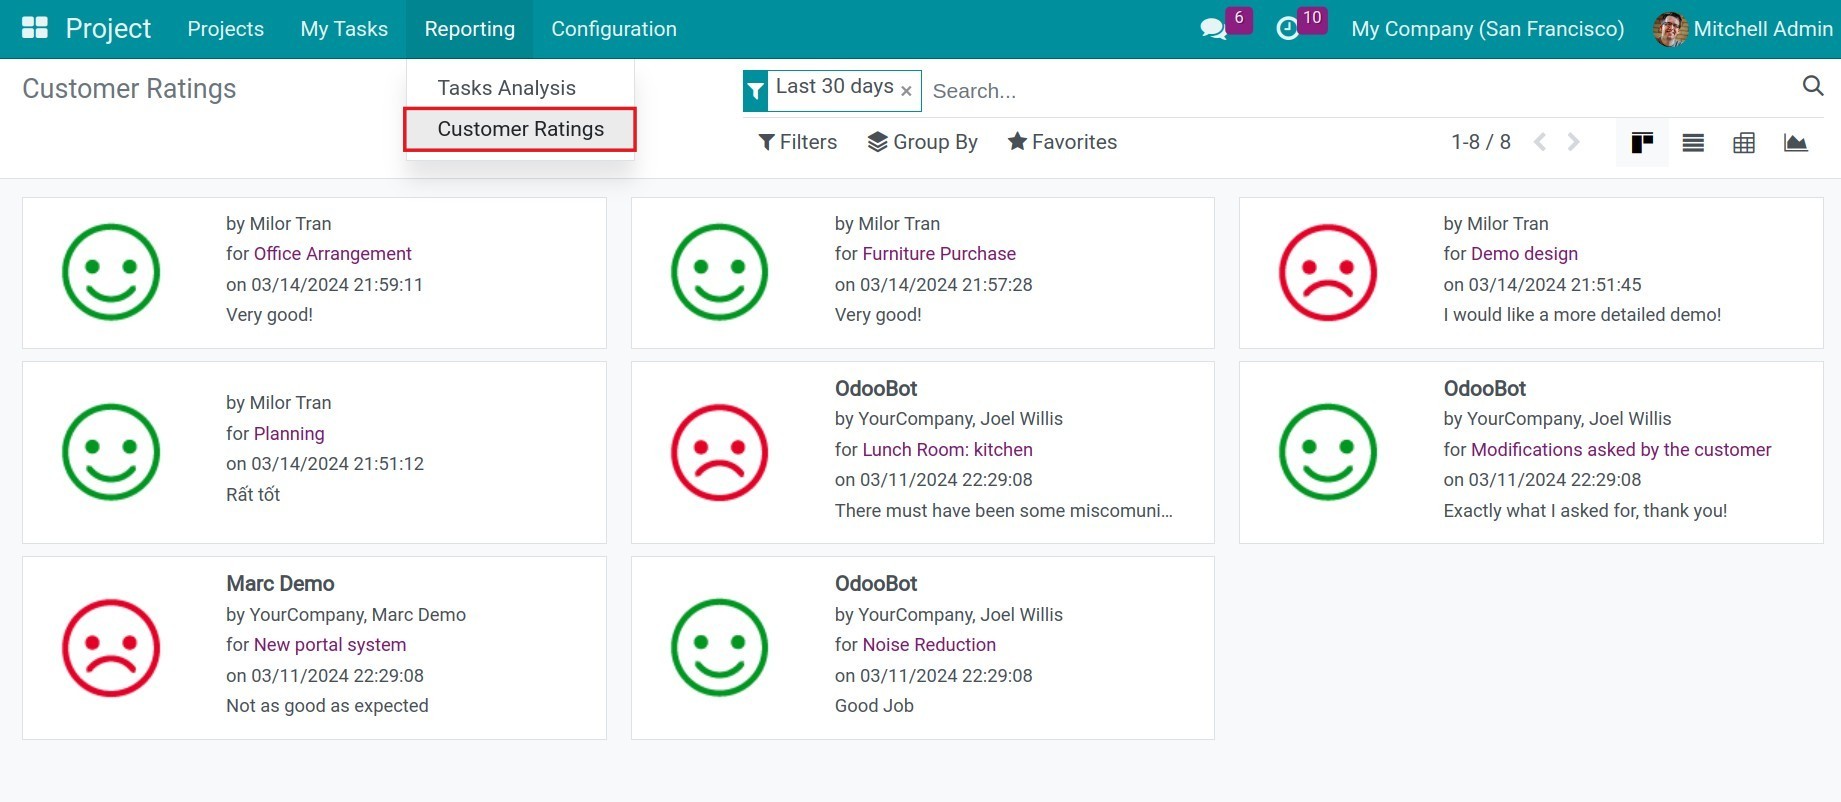
Additionally, to show the customer ratings of all projects, navigate to Project > Reporting > Customer Ratings.
See also
Related articles:
Optional modules: