Managing objects on a Marketplace
This article will guide you to manage objects on a Marketplace developed by Viindoo, including:
Merchant: Individuals or organizations that provide products or services by registering a merchant account to sell online on a Marketplace.
Merchant store: An area of the Marketplace dedicated to merchants who want to sell online. Stores contain products and services offered by merchants to buyers.
Commission fee: The fee that the Marketplace charges merchants for each successful order generated on the marketplace.
Requirements
This tutorial requires the installation of the following applications/modules:
Merchant on the Marketplace
How to create merchant account
Instead of users registering themselves as merchants, the manager can support them to create a merchant account on a marketplace by following these steps:
Step 01: Create Merchant contact
Navigate to Marketplace > Contacts and click on New to create a new merchant contact.

On the contact form, select Individual or Company, then fill in the corresponding information. See more at: The information in a contact
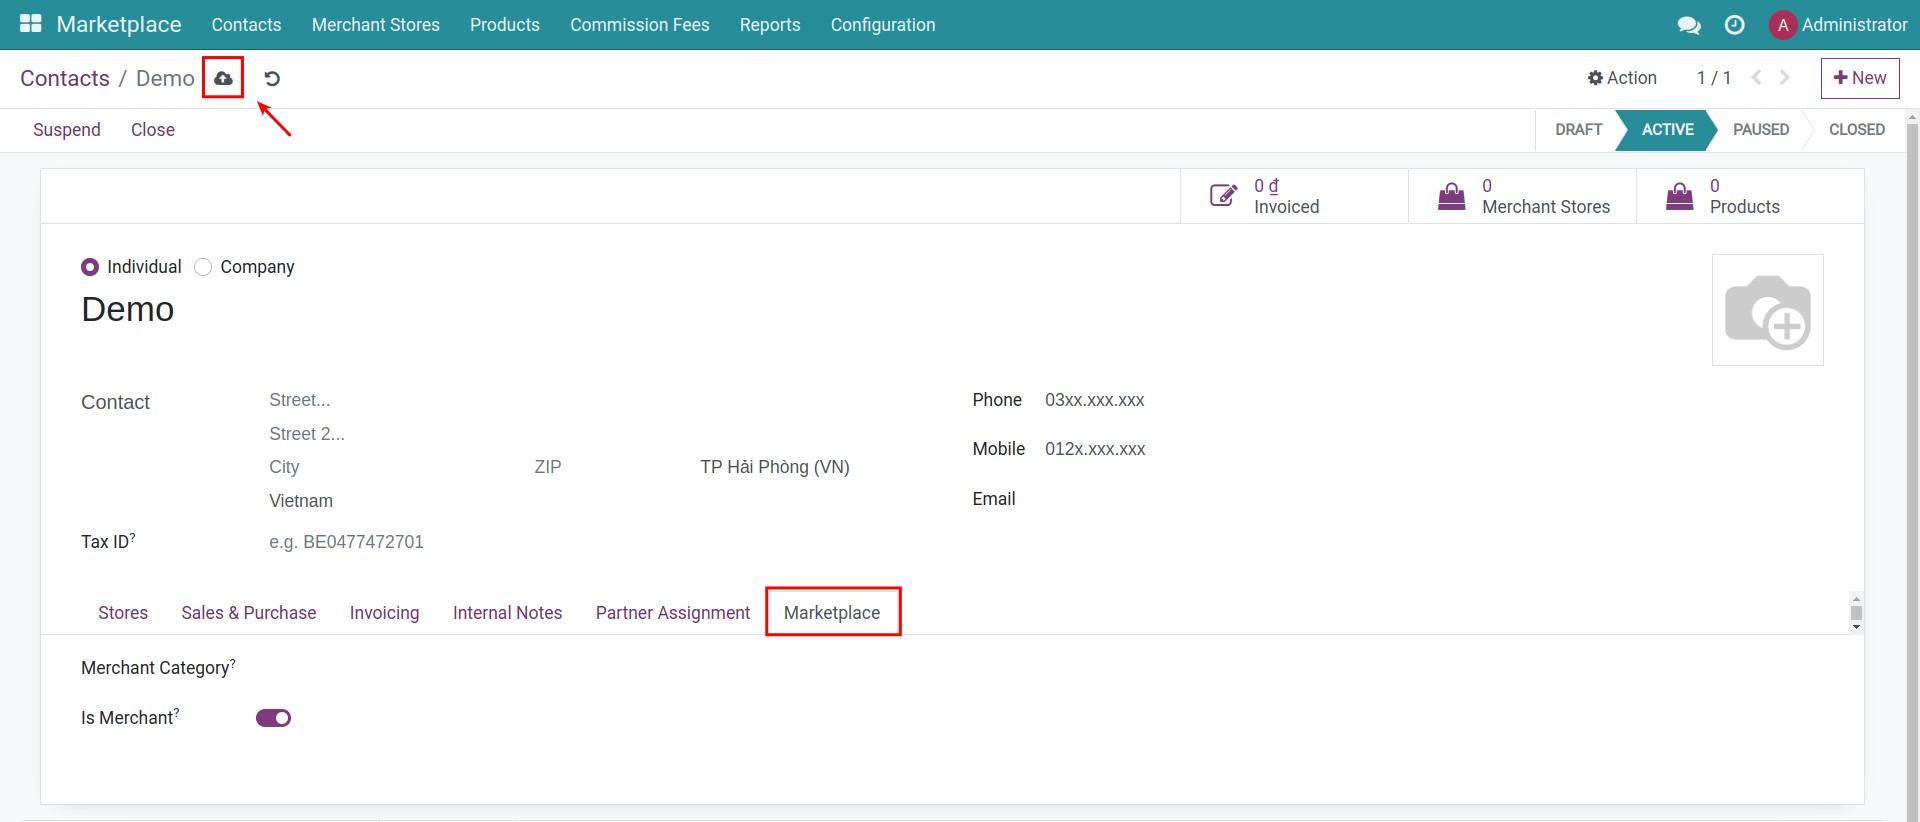
After that, go to Marketplace tab:
Merchant Category: Set up category for this merchant.
Is Merchant: Check this box to mark this contact as a merchant contact.
Press on the Save button to finish.
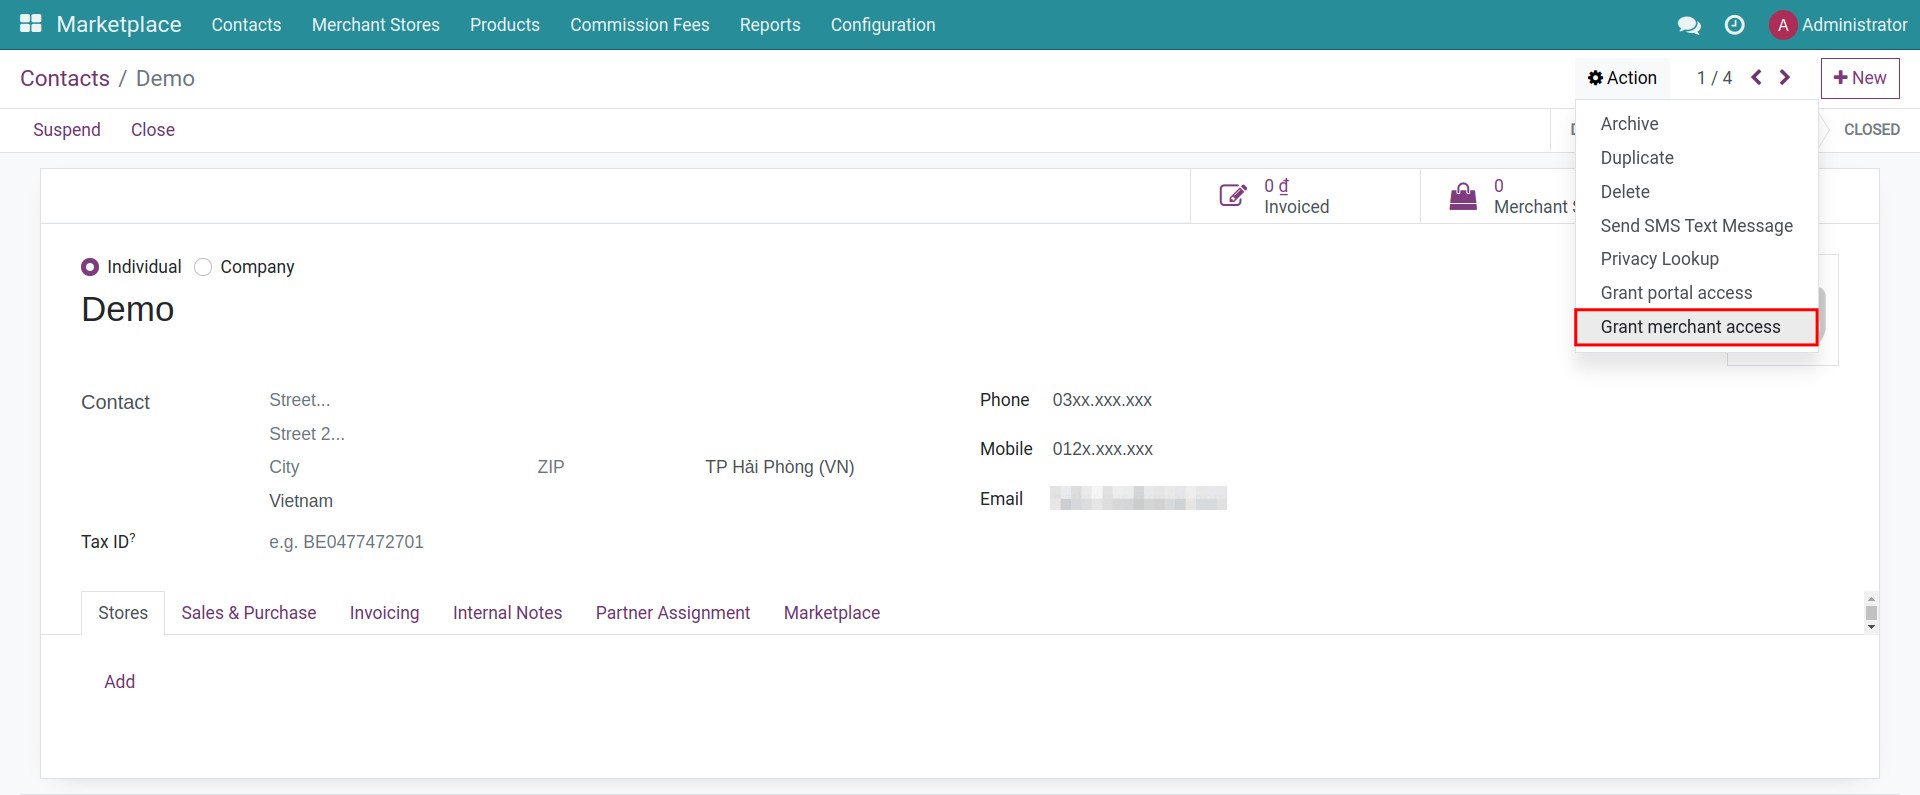
Step 02: Grant merchant access
On the merchant contact you just create, click on Action > Grant merchant access.
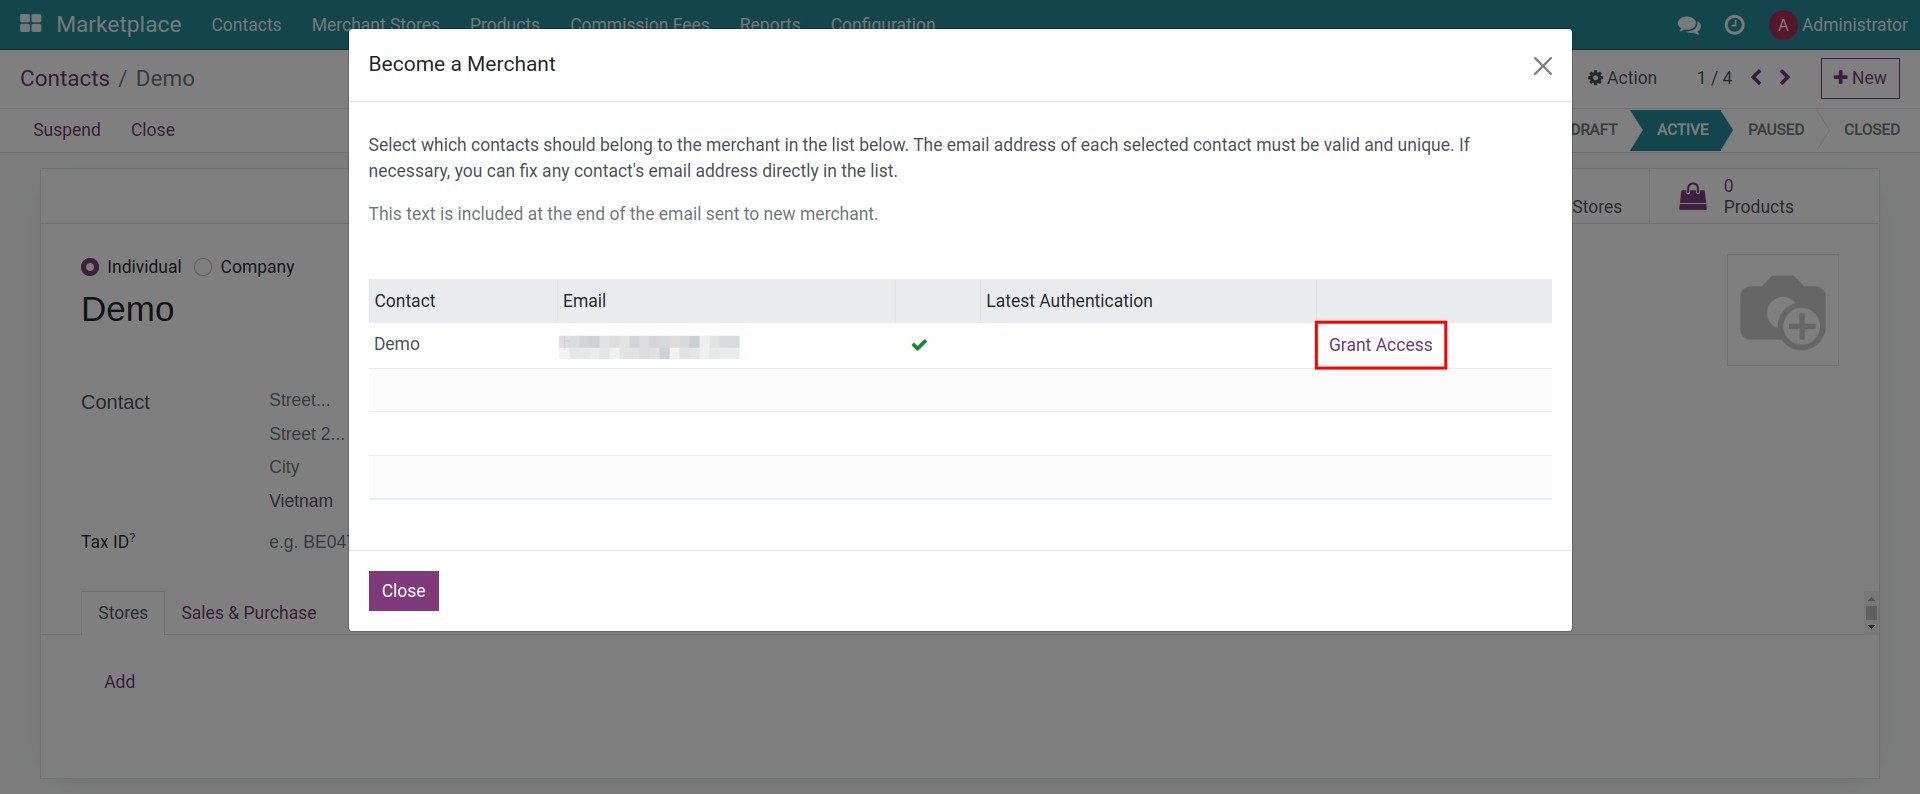
At the Become a Merchant pop-up, press on Grant Access and then click on Close.
The system will send an email to email address of merchant, click on Activate Account.
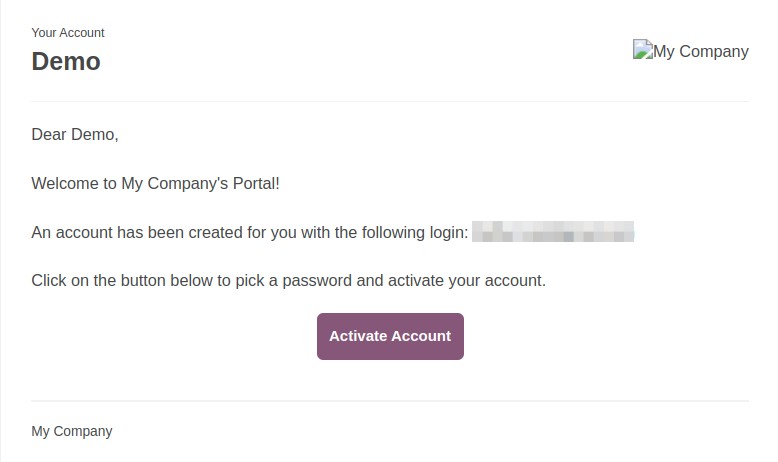
Tip
To send emails outside of the system, please set up outgoing/incoming mail server.
After accepting, merchant can negative to the sign up page. Enter password and click on Sign up.

Confirm successfull, merchant can log in and start operating on a Marketplace.
This user account will be granted Merchant access as follow:
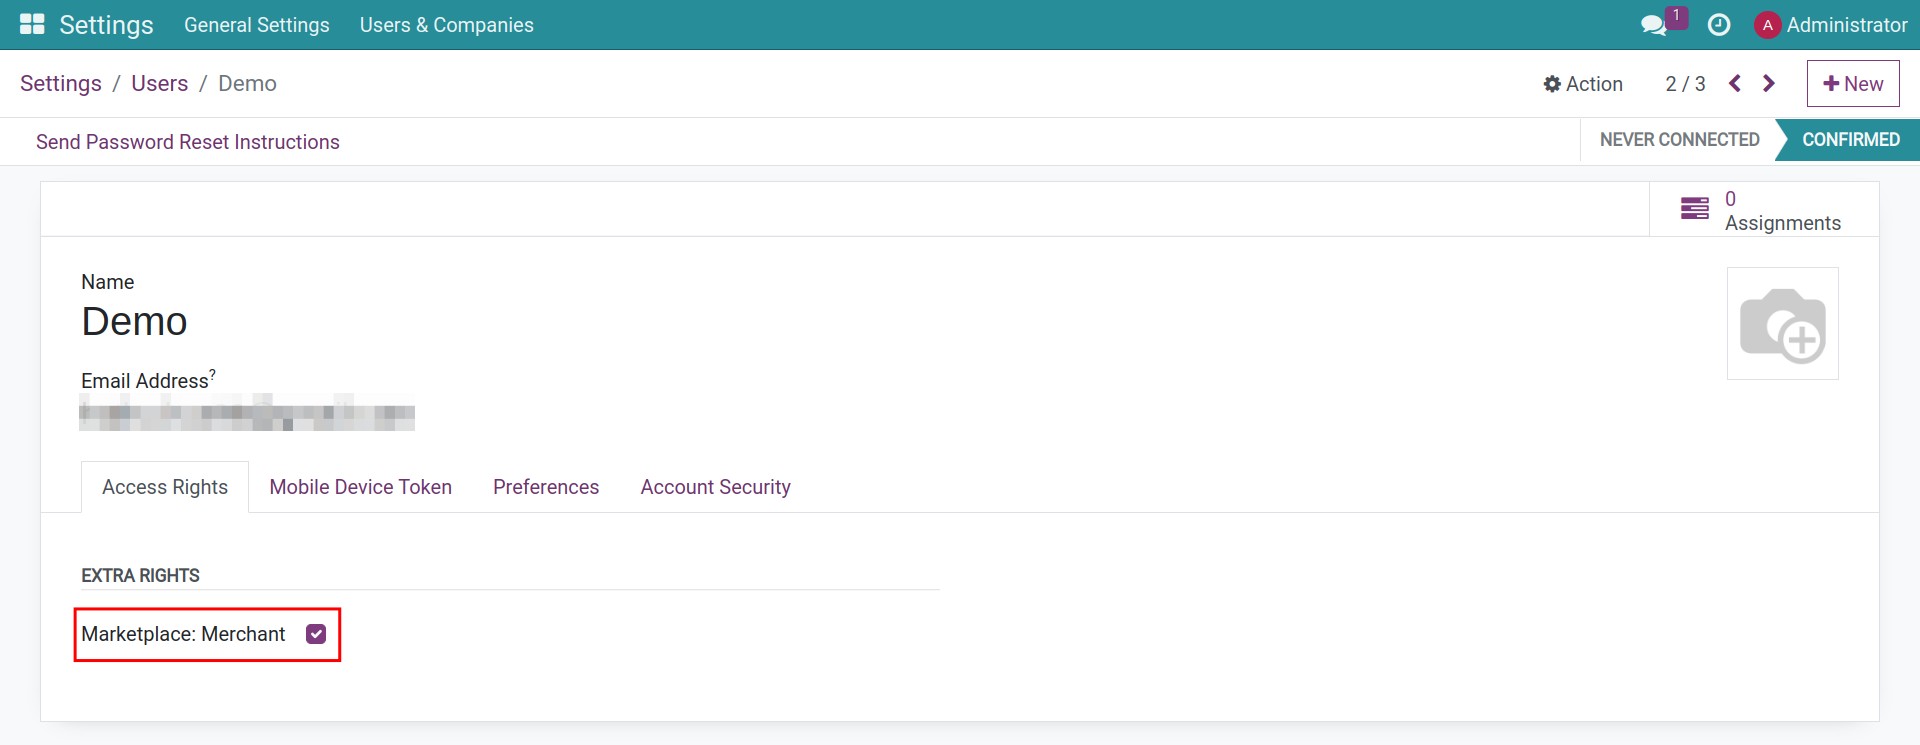
Merchant State
Set up the default Merchant State
To set up the default Merchant State, go to Marketplace > Configuration > Settings, on the General section, select Default Merchant/Store State:
Draft
Active
Paused
Closed
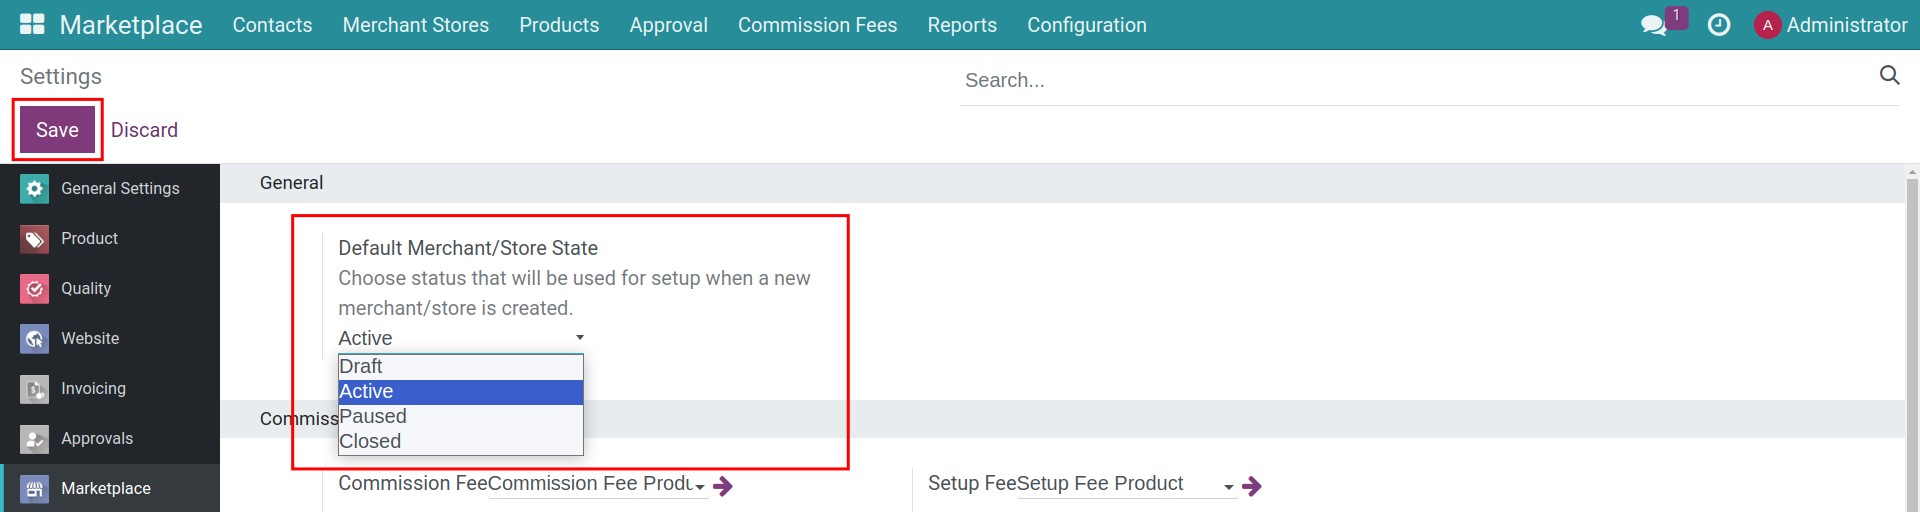
When newly created, the merchant will have the default status as set.
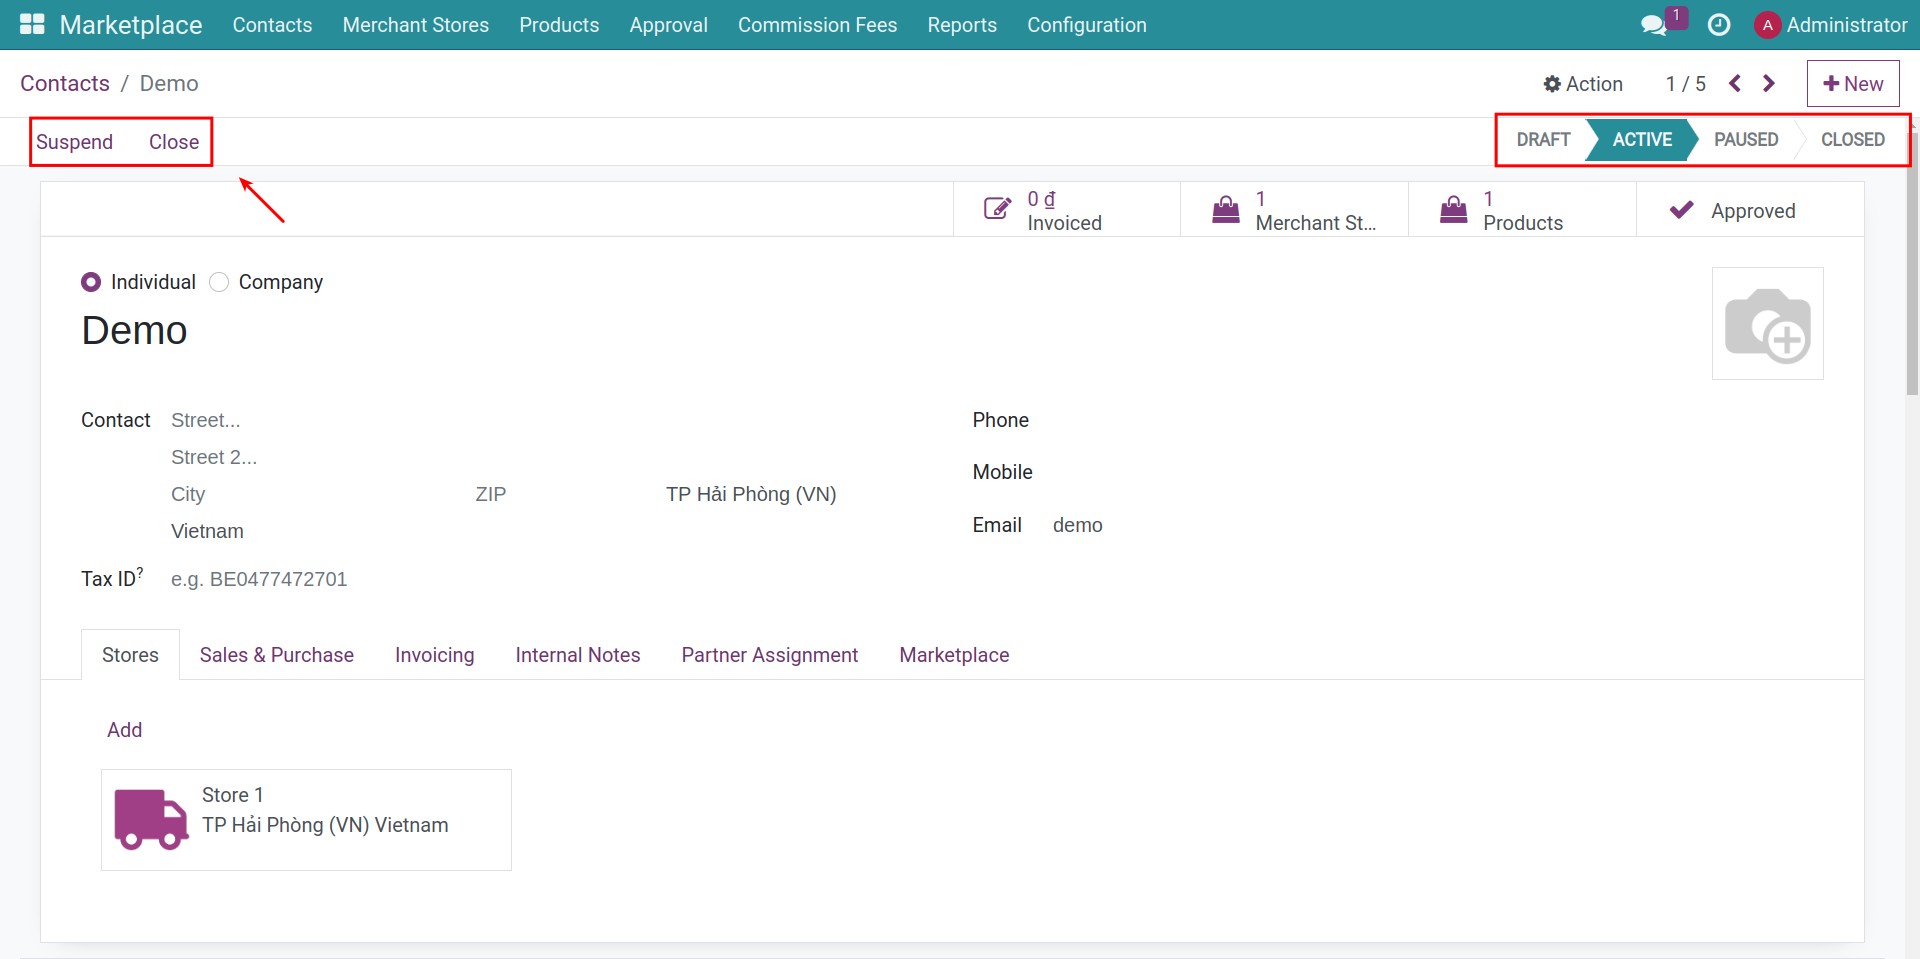
Change the Merchant State
The software allows users to modify the merchant’status. Press the Suspend, Activate, Close buttons to switch to the respective statuses.
For Merchant: can pause or re-activate their own merchant contact, but can not active while in drafting or closing.
For manager’s account: in addition to pausing/activating, can also close merchant account (if violations, fraud, etc.).
Approve merchant
To activate the Merchant Approval feature, you need go to Marketplace > Configuration > Settings, on the Marketplace Approval section, check on the box next to Merchant Approval feature.
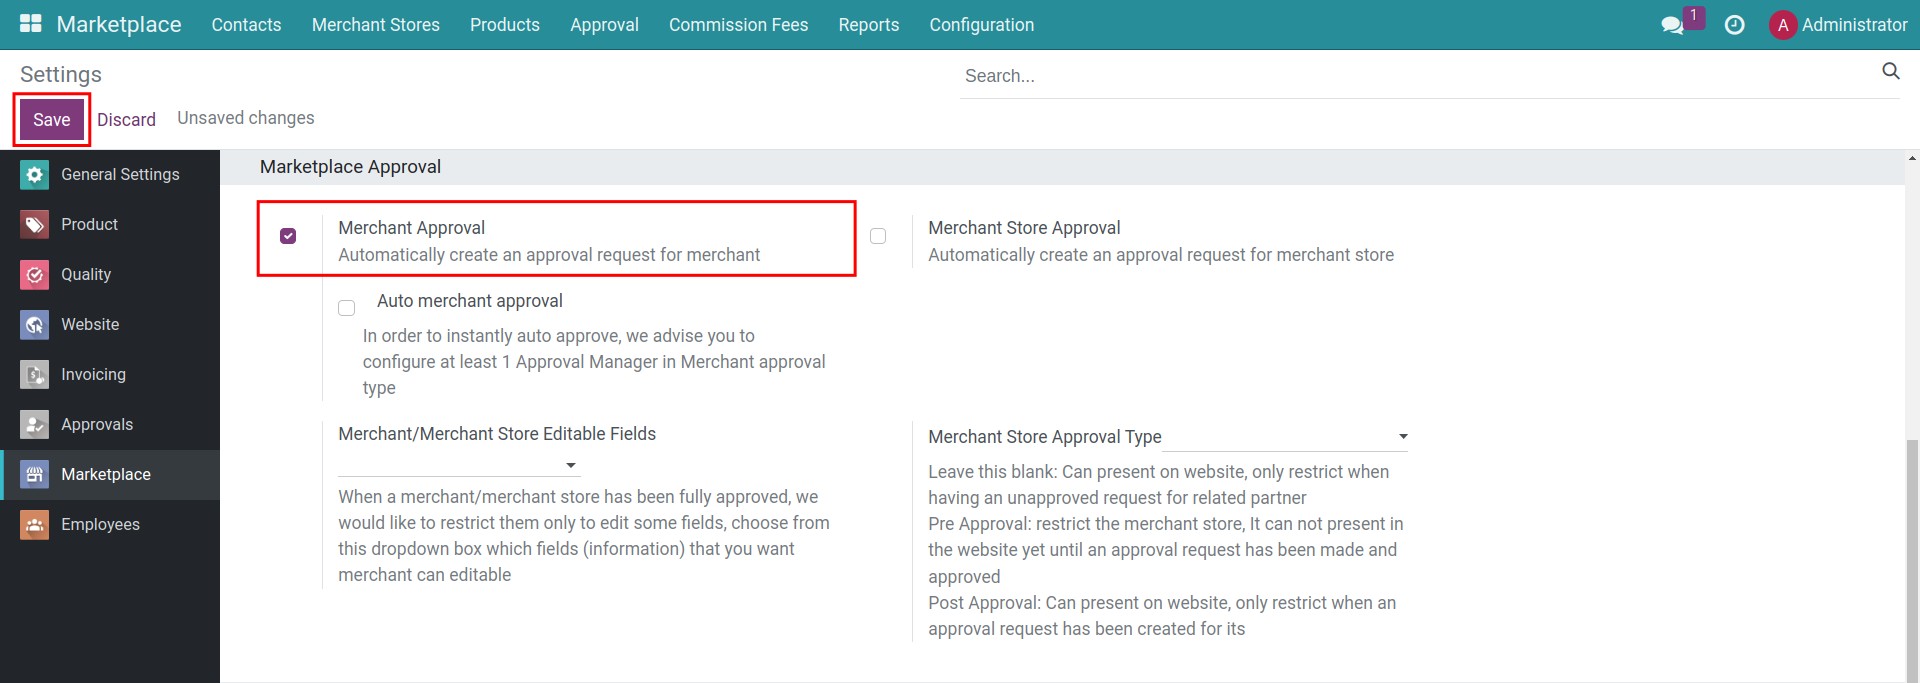
After users register as merchants, the system automatically generates an approval request and send a notification to manager.
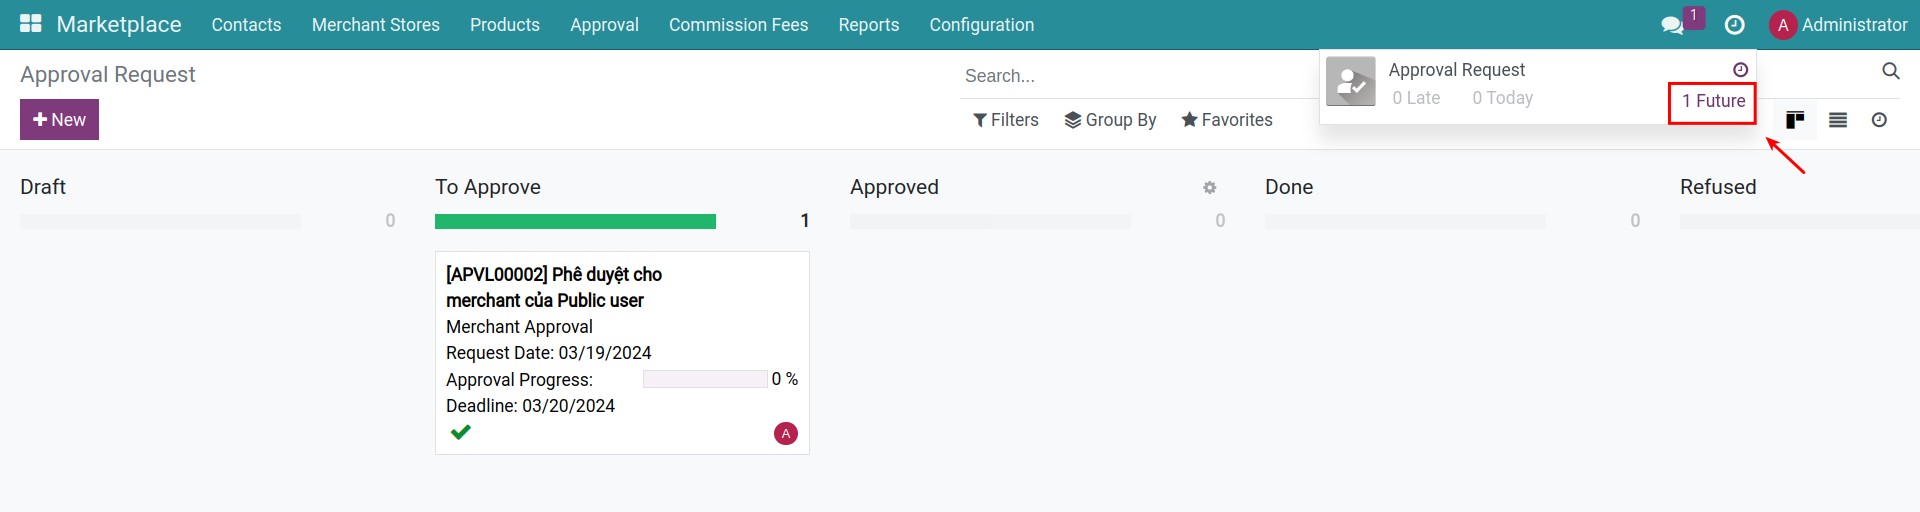
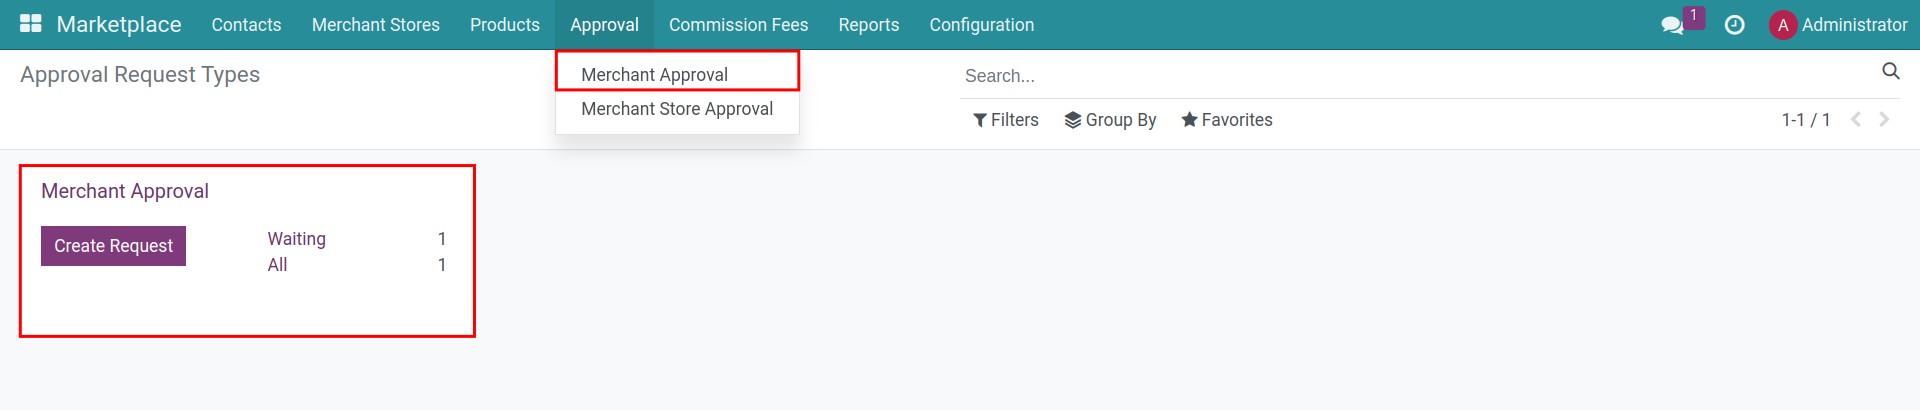
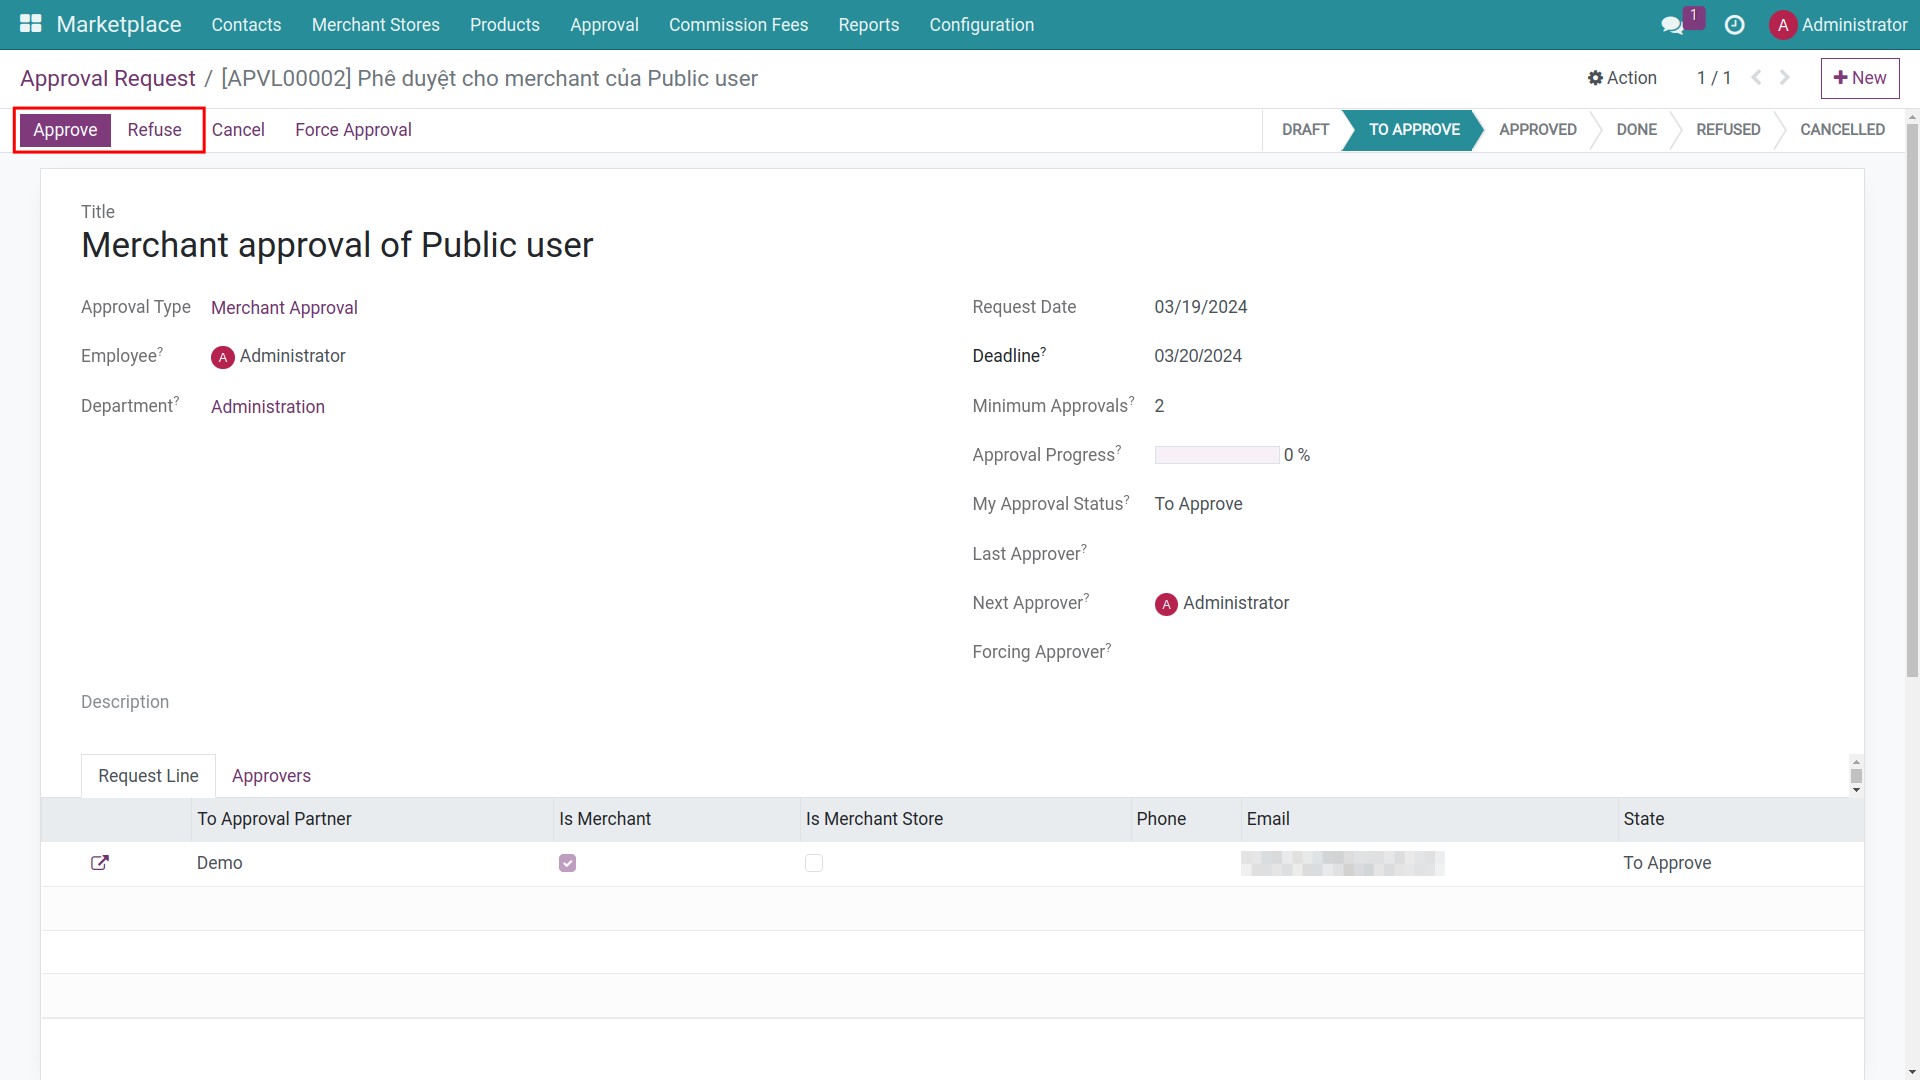
You can also go to Marketplace > Approval > Merchant Approval to see all Merchant Approval requests.
Select an approval request. If you agree, press Approve, otherwise, press Refuse.
After approval, merchant can create the store and operate on the marketplace.
Merchant Store on the Marketplace
How to create a merchant stores
There are two way to create and set up information for merchant store: merchants can create their own stores or manager of the marketplace assist them in setting up their stores.
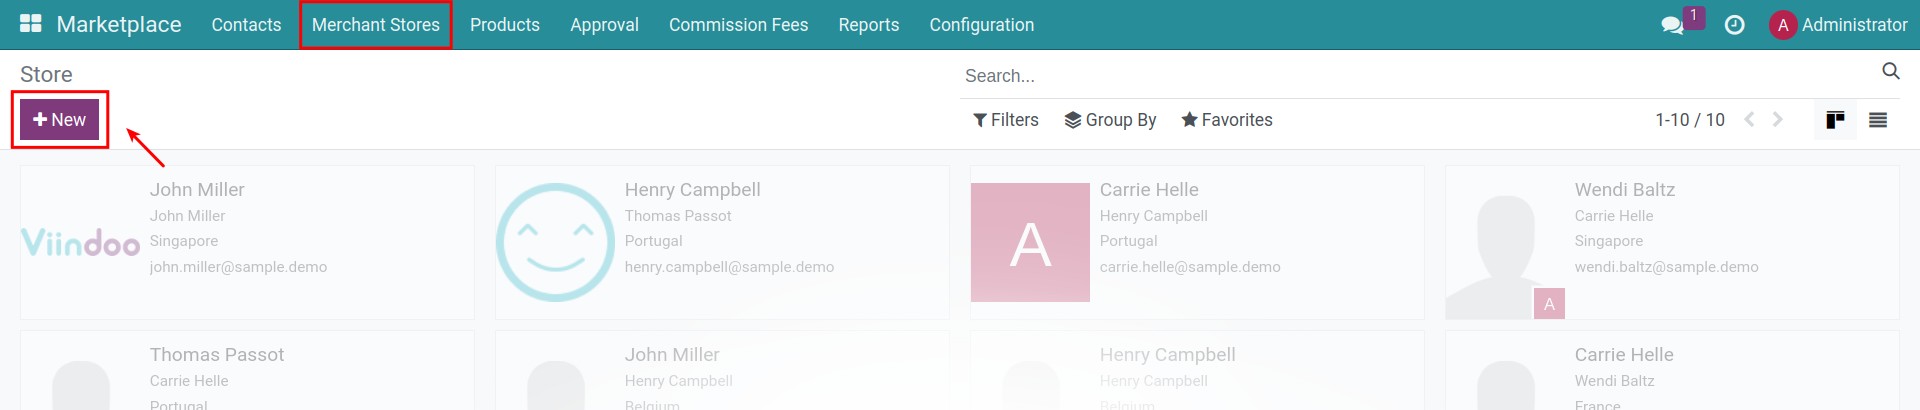
At the manager’s account, on the Marketplace app, go to Merchant Stores > New to create a new merchant store.
Fill in the form with the following information:
Name: enter the name of the store
Address: the address of store. Fill in the information as follow:
Country: select the country.
State: select the state.
City: type the city name.
Street: type the address number and street name.
Street2: type the district (optional).
ZIP: type the federal state zip code.
Tax ID: the tax code.
Phone: the phone number of the store
Mobile: the mobile phone number of the store
Email: the email of the store
Language: to define the languge of the email templates in the system that are used to send to this store.
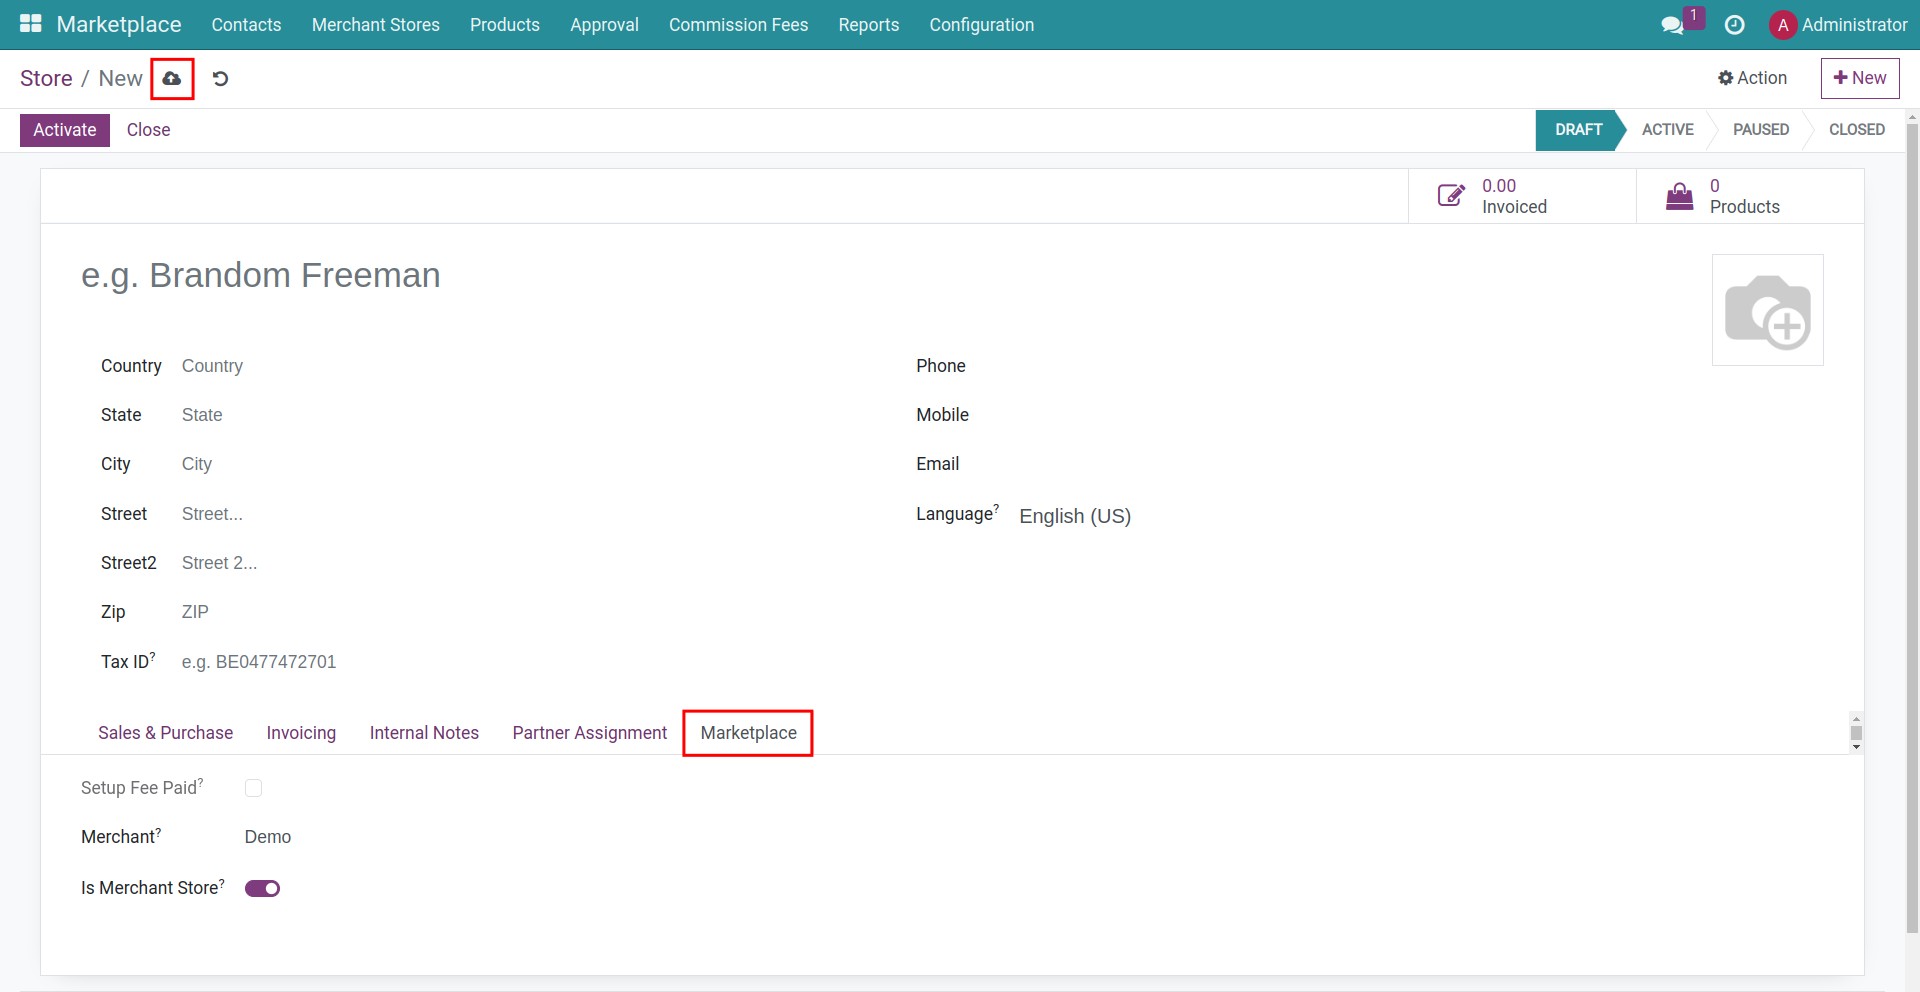
After filling in the information of the store, go to Marketplace tab, select Merchant and check on Is Merchant Store.
Click on the Save button to finish.
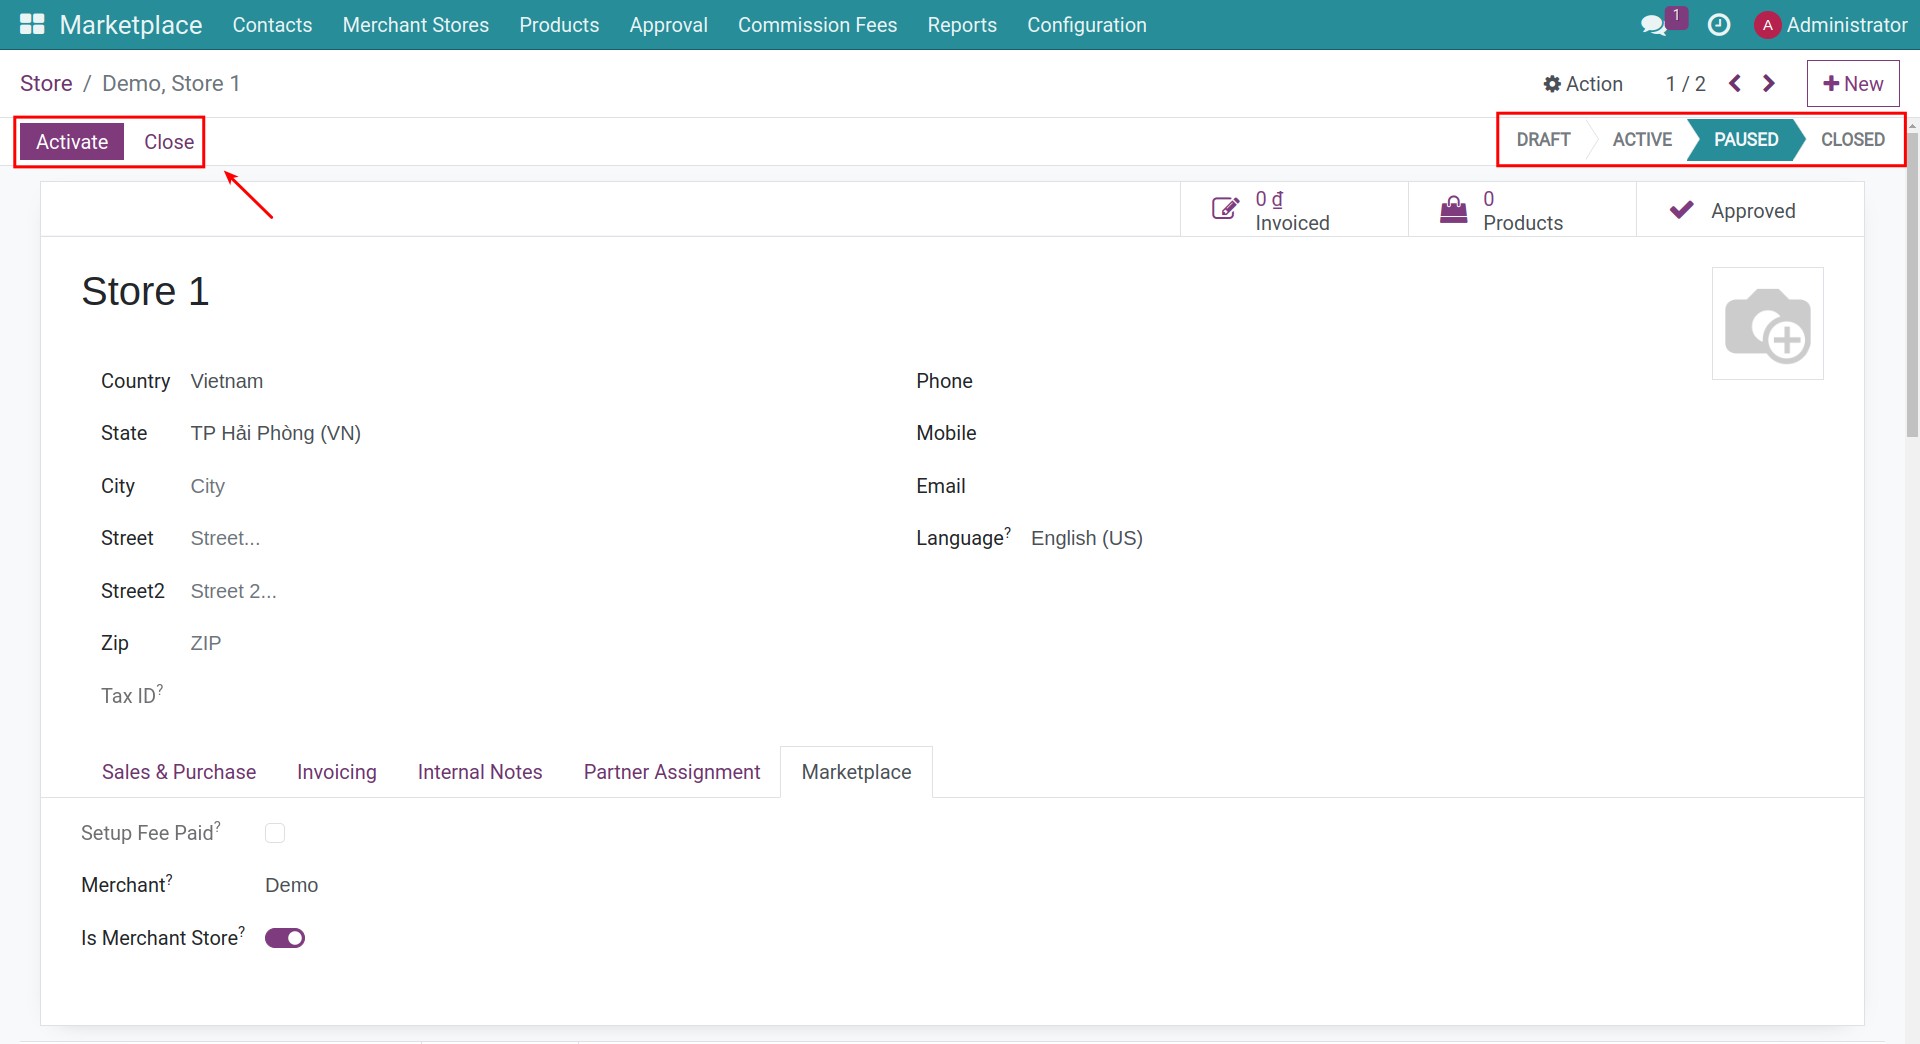
Merchant Store State
The store’s status is also set by default and can be changed similarly to the merchant state.
Note
The store can only be activated when the merchant is in active status.
Approve merchant store
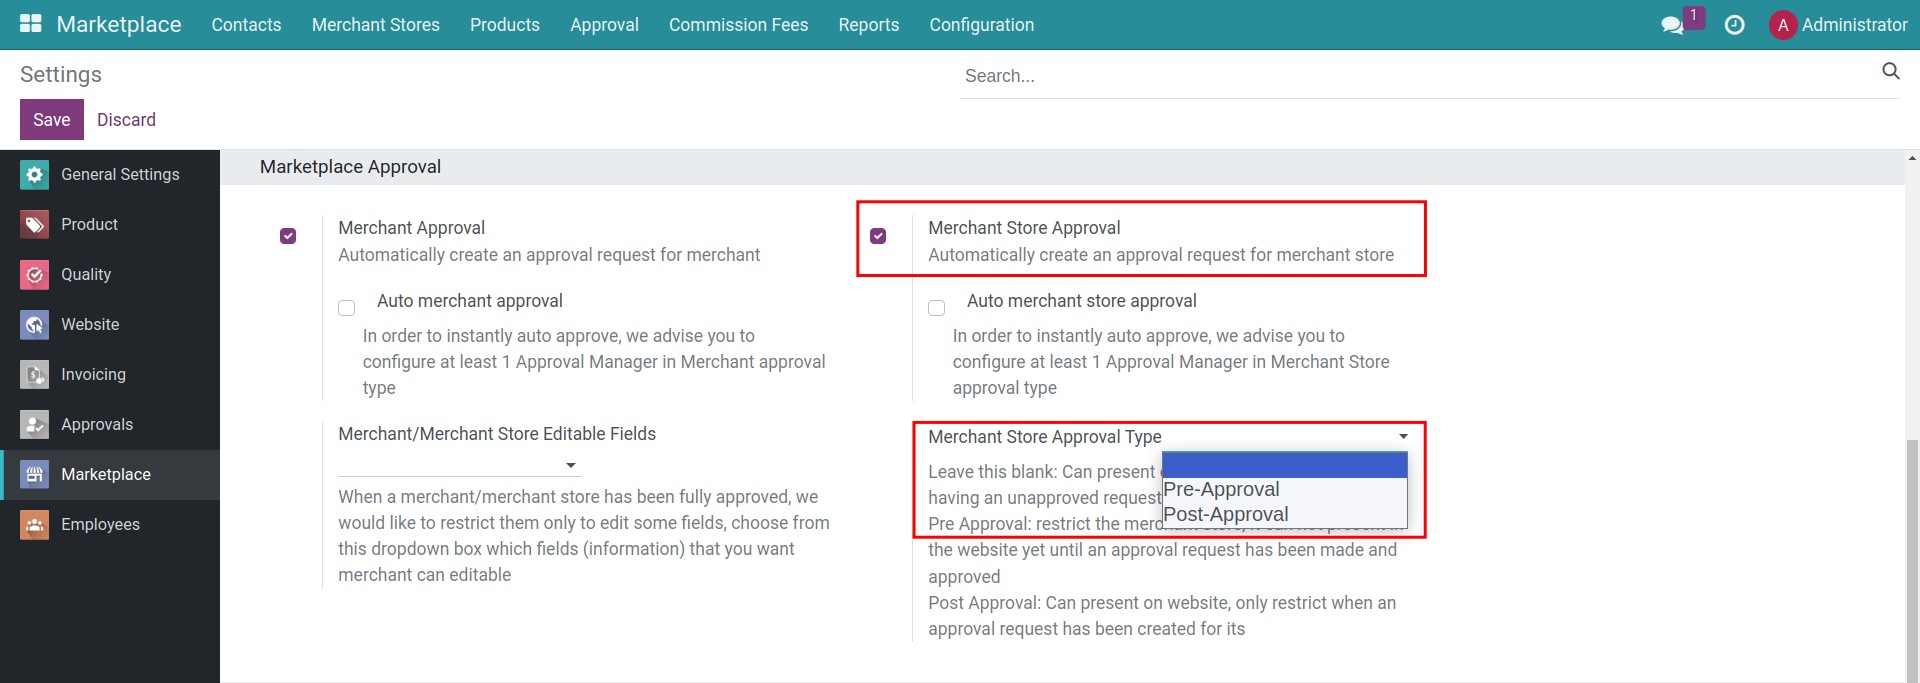
Navigate to Marketplace > Configuration > Settings, on the Marketplace Approval section, check on the box next to Merchant Store Approval to activate the feature.
Select the Merchant Store Approval Type:
Pre-Approval: The store cannot operate until it is approved.
Post-Approval: The store can operate before approval. The manager can review it later.
After the merchant registers a store, the system automatically generates an approval request and send a notification to manager. Go to Marketplace > Approval > Merchant store approval to see all Merchant store approval requests.
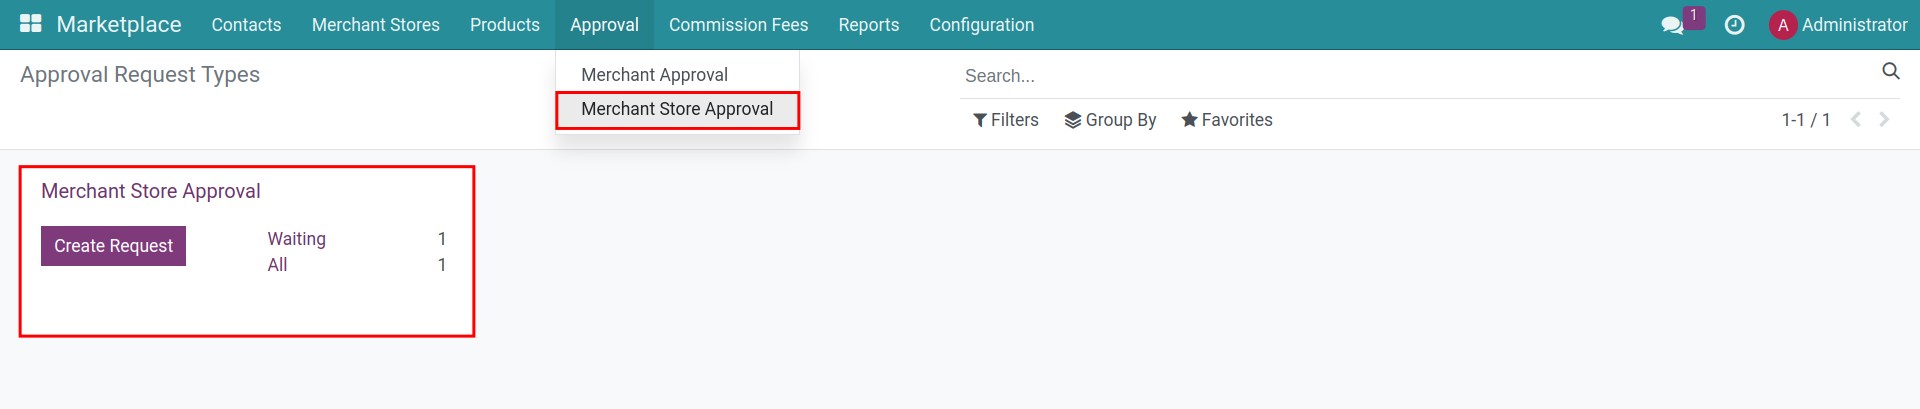
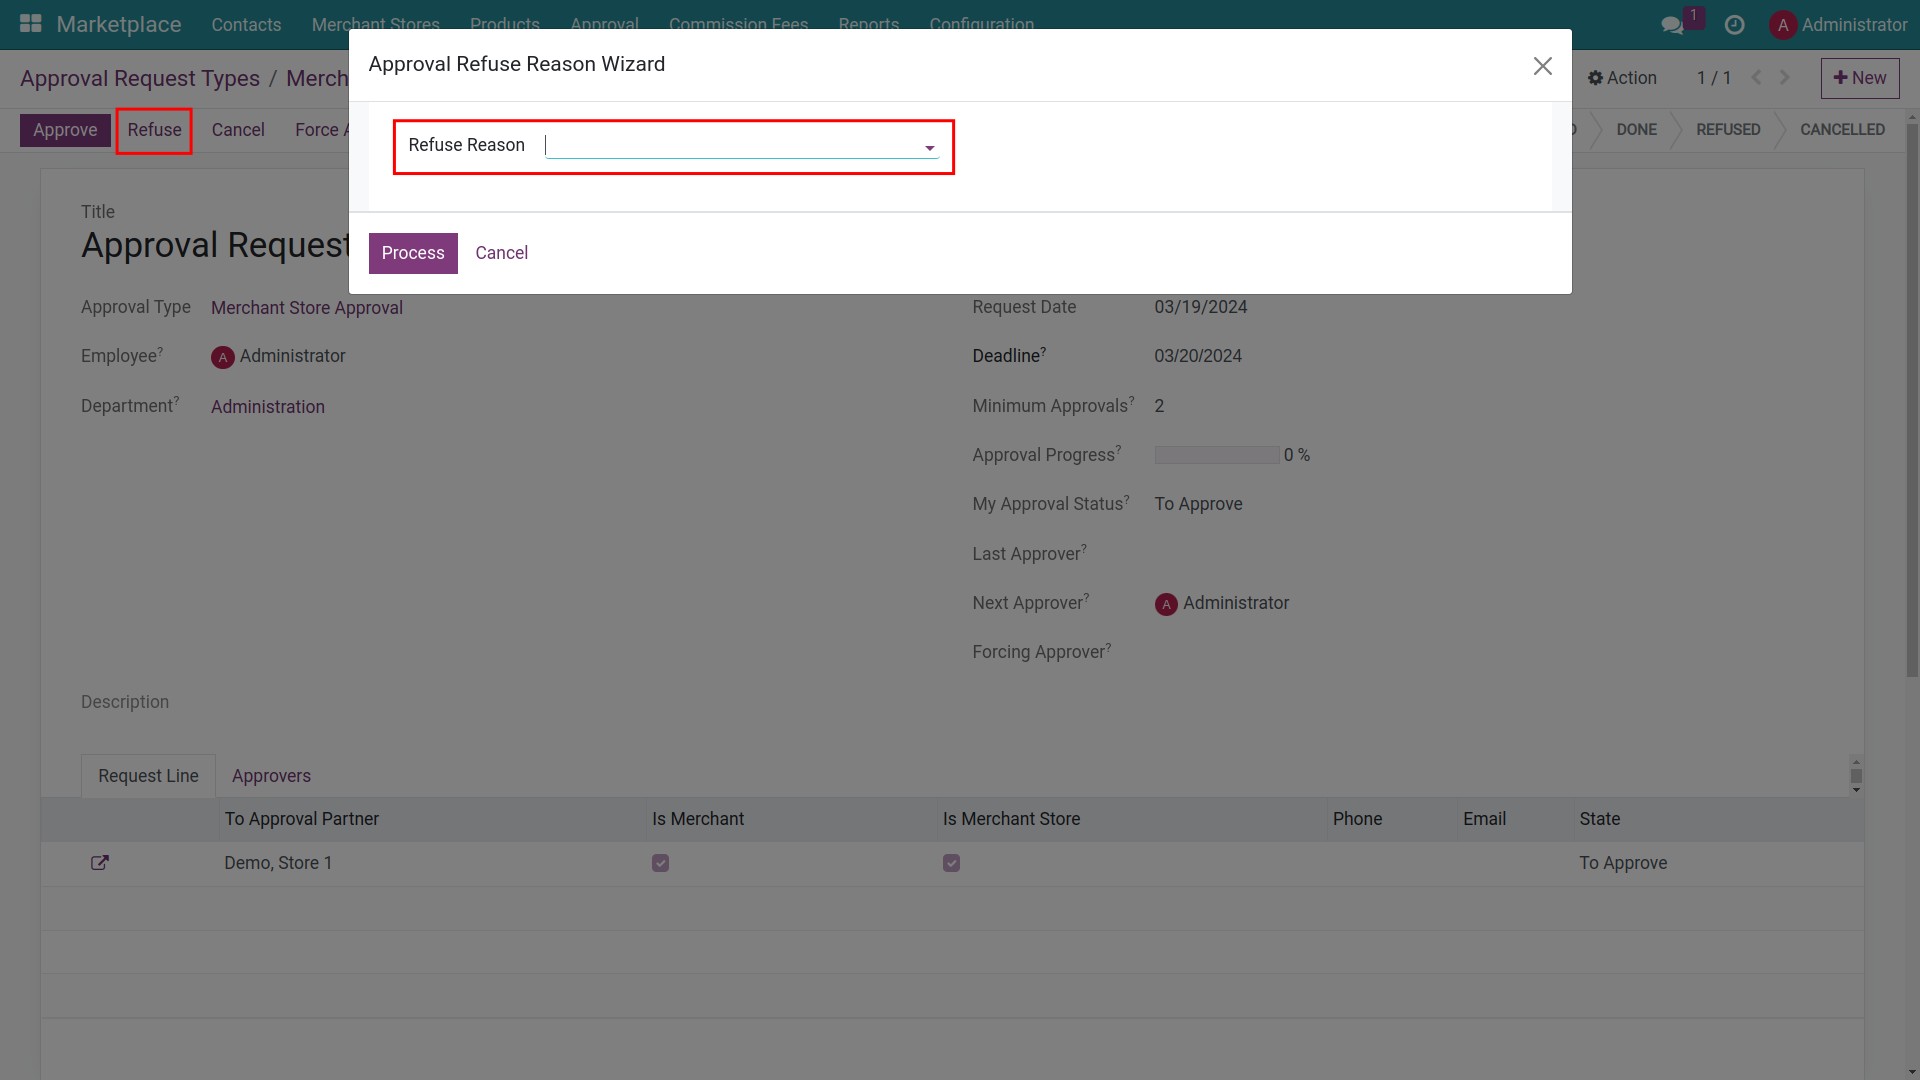
Select the request that you want to validate. Here, the manager can review and approve the request. If you agree to the request, press Approve.

If you want to reject, click on Refuse and select a Refuse Reason, the store has been denied approval and will not be displayed on Marketplace.
Set up commission fee of marketplace
General settings
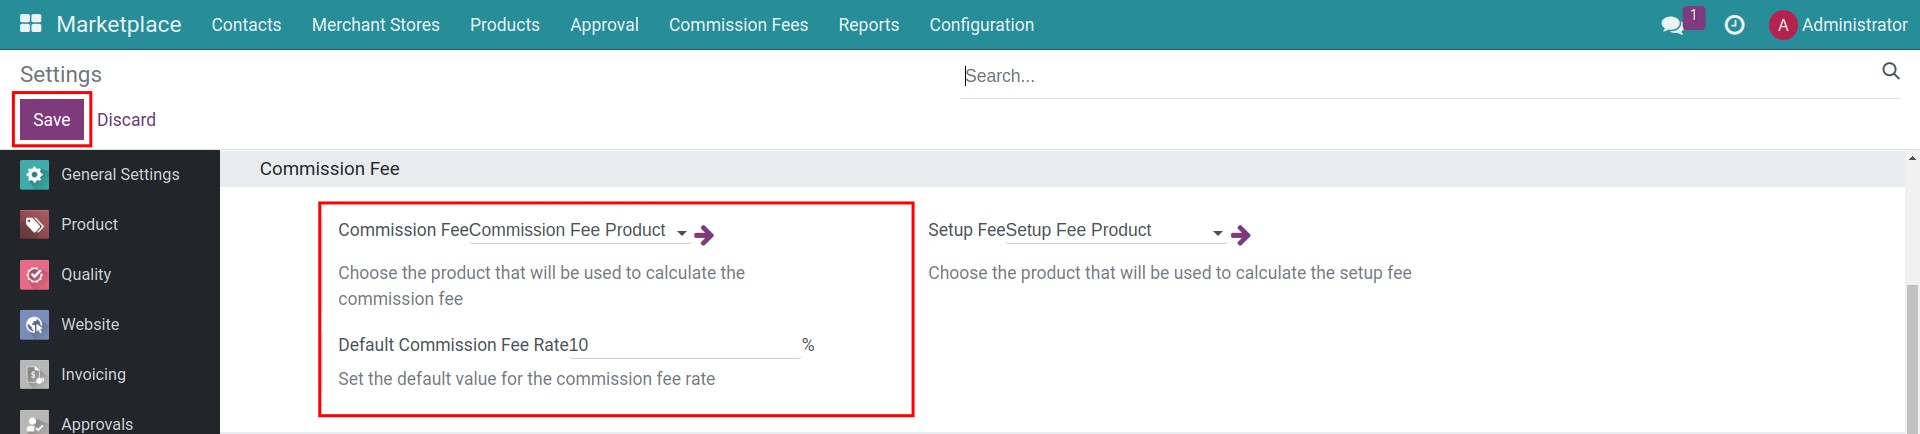
Go to Marketplace > Configuration > Settings, on the Commission Fee section, set up general information for Commission Fee:
Commisson Fee: The product that represents the commission fee. Note, the product type for this product is Service.
Default Commission Fee Rate: Set up value for the commission fee rate, is default value when creating commission rule.
Press on Save to finish.
Create Commission fee rules
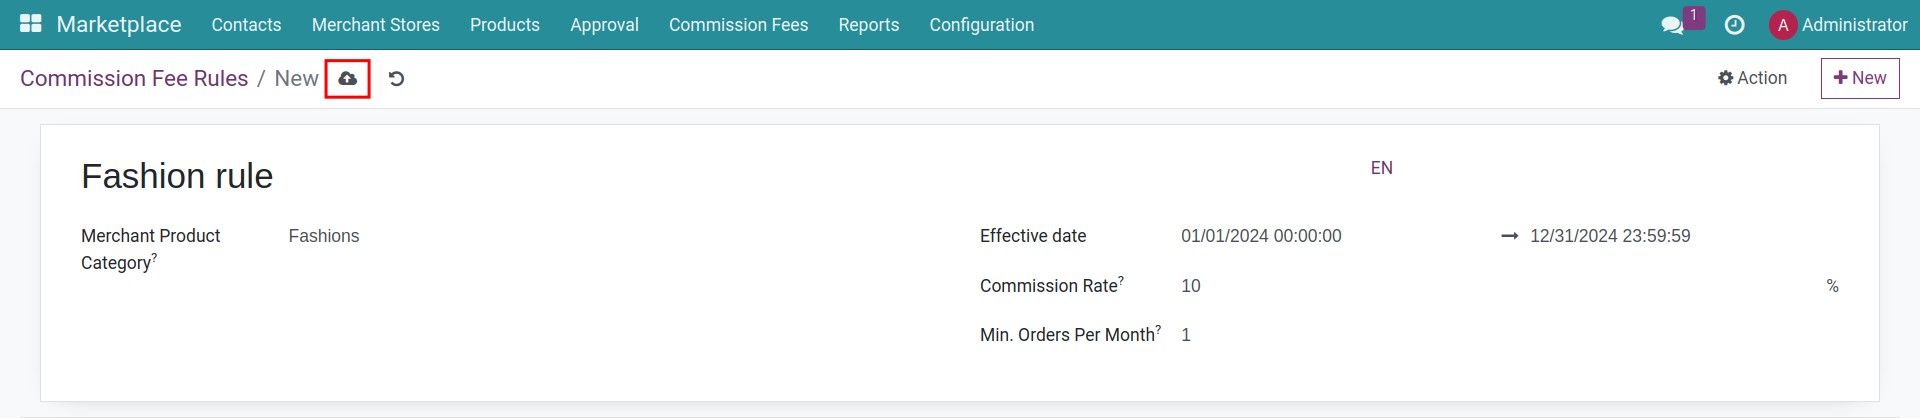
To create a new commission fee rule, go to Marketplace > Configuration > Commission Fee Rule, click on New button.
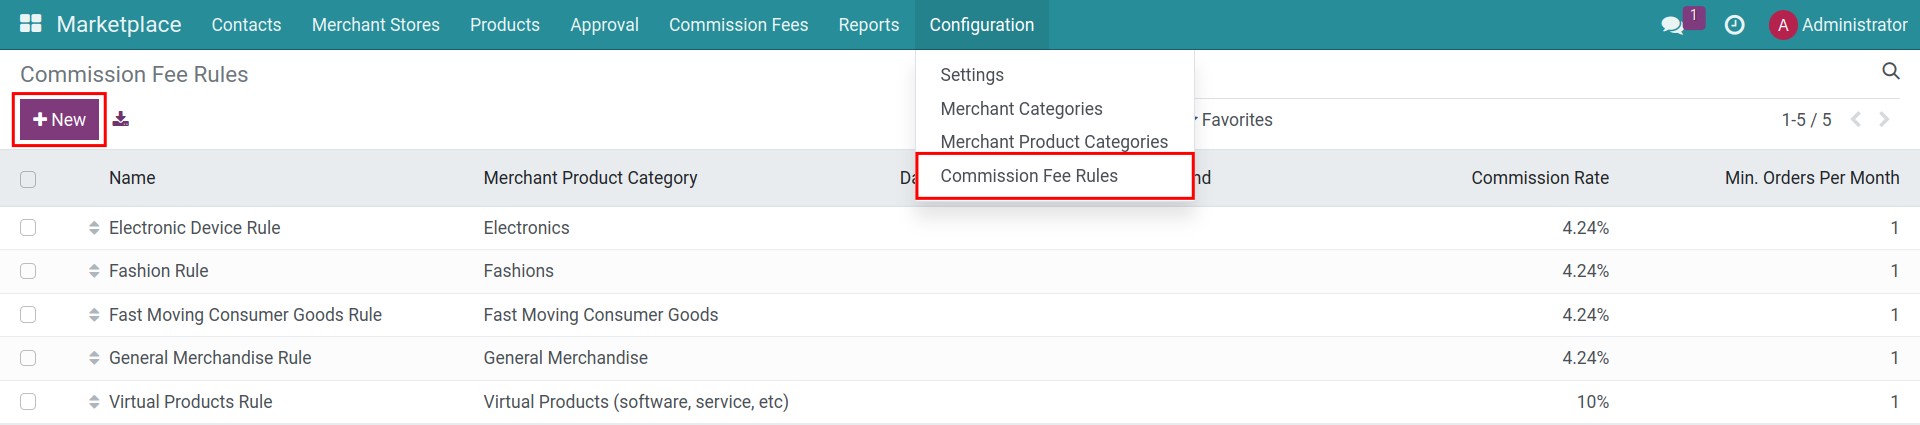
Fill in the form with the following information:
Name: The name of the commission fee rule
Merchant product category: Select merchant product category apply this rule.
Effective date: Select a time period to apply this rule.
Commission Rate: Set up rate (%) to calculate the commission fee.
Min.Orders Per Month: Type the minimum order per month to apply this rule (feature not yet supported).
Click on the Save button to finish.
Set up automatic creating commission fee invoice
For the system to automatically create commission fee invoice, you need to go on Marketplace > Configuration > Settings, on the Invoices section, check on the box next to the Auto Create Marketplace Commission Fees Invoices feature to activate.
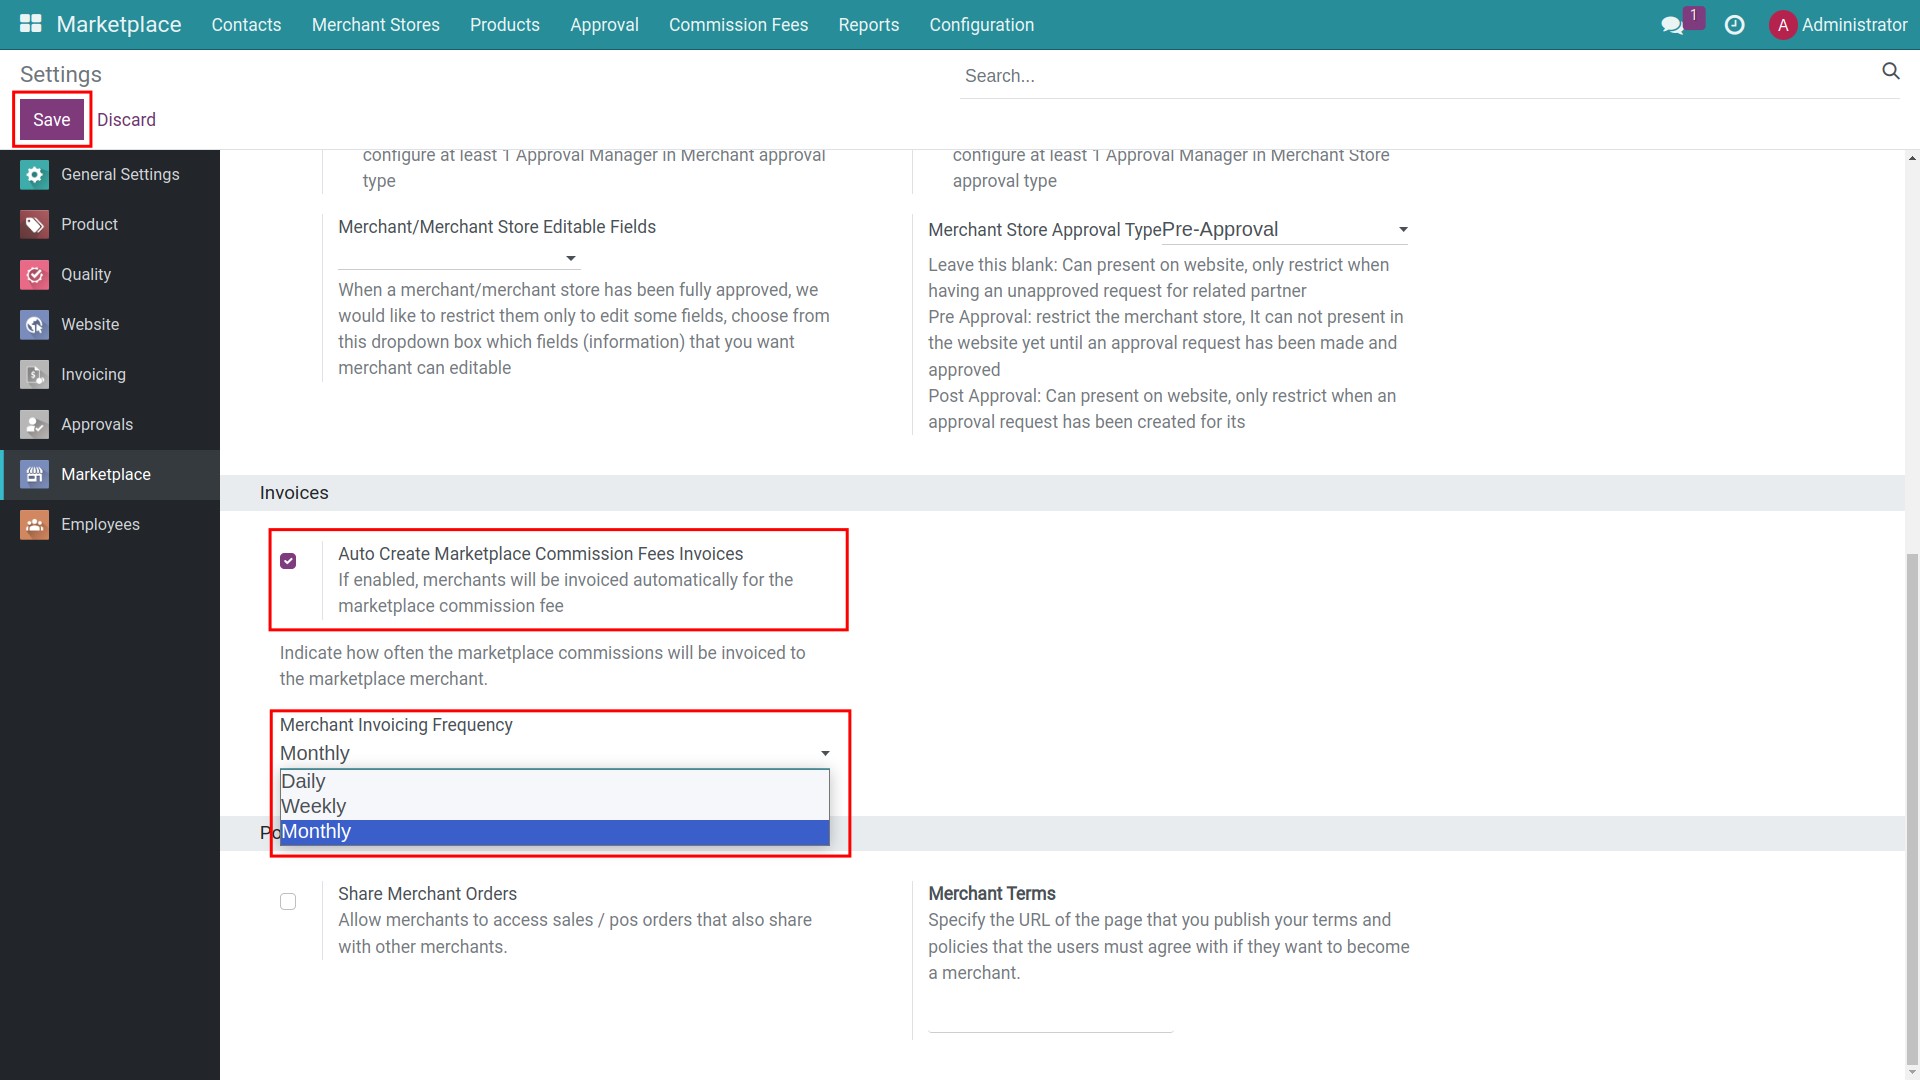
You will have 3 options for invoice frequency:
Daily.
Weekly.
Monthly.
Select one option and then click on Save.