Make Overtime Approval Requests
To implement the business plans or handle the urgent tasks in time, employees can make Overtime Approval Requests with full information of date, time and tasks to submit to the direct managers. The entire process of this approval will be executed on the software to ensure quick-close and on time. At the same time, save the whole history to serve the management, payroll… afterward.
Requirements
This tutorial requires the installation of the following applications/modules:
Before creating and approving the Overtime Request on the system, you need to check the following information:
Install the Overtime Approval app (viin_hr_overtime_approval).
Contracts of employees who register for overtime are in the Running stage.
Setting Approval Request Types
The Overtime Approval app is integrated with the Approval app (to_approvals). At the Approval app, you can create an Overtime Approval Type to apply to the process of requesting and approving overtime.
Create an Overtime Request
General information
First, you need to activate the Overtime Plan Approval feature.
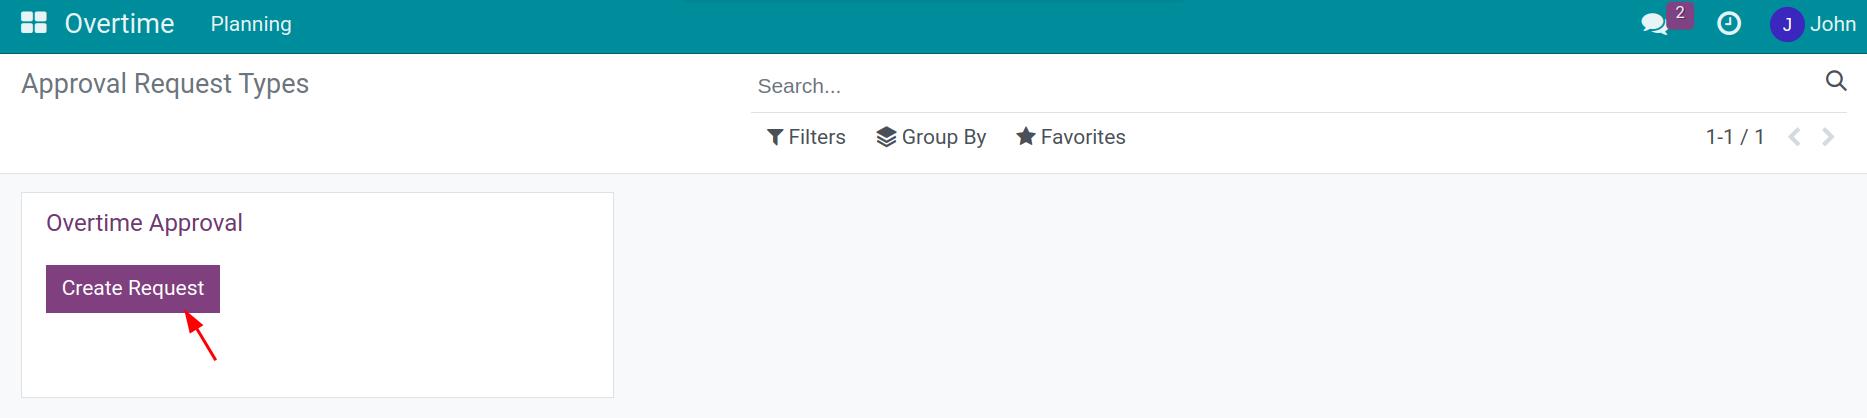
To create an individual overtime request, go to the Overtime app, press Create Request.
You need to fill the following information as below:
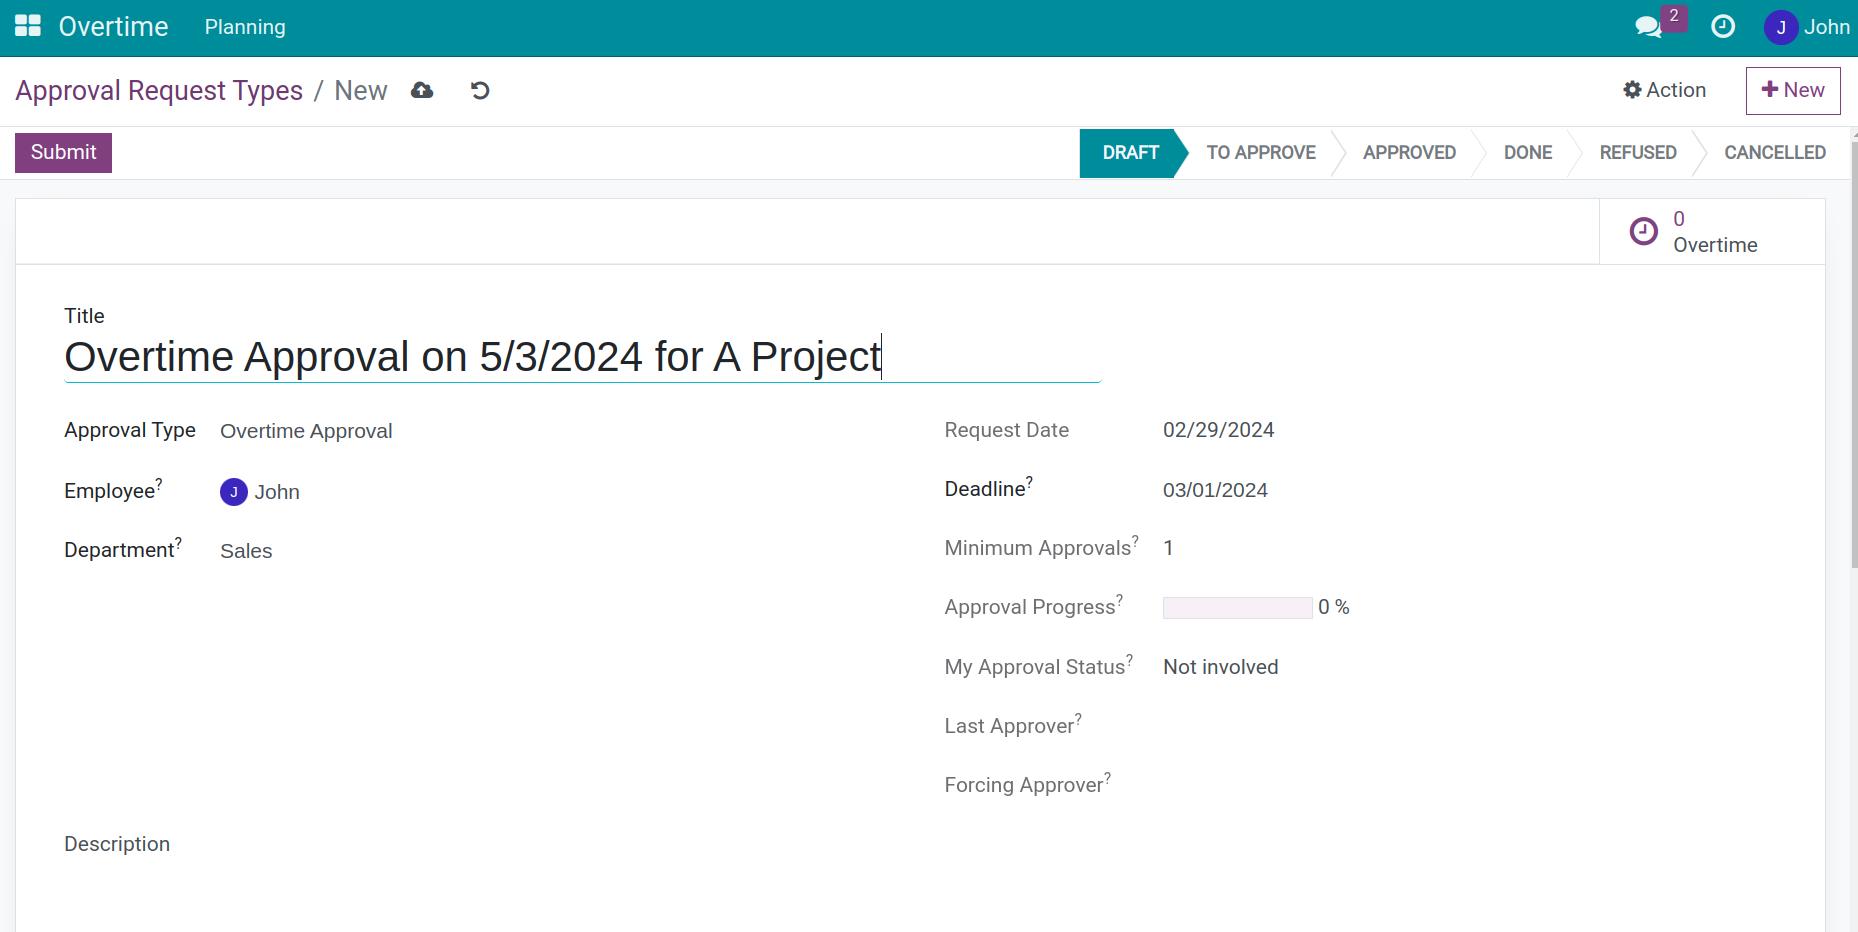
- Title: title of the overtime request. It is necessary to clearly state the purpose, reason, and time of the overtime to enable Approver to get full information when looking at the title. For example, Overtime Approval on 05/03/2024 for Project A.
- Approval Type: select Overtime Approval already established.
- Employee: Employee creates requests, it is automatically filled by the software according to the creator. You can create overtime requests for employees under your management if you are granted one of the following access rights:
- Team Approval access right of the Overtime app and at least the Team Approver access right of Approvals app.
- Officer access right of the Overtime app.
- Administrator access right of Overtime app.
- Department: the department of the employee who creates a request, will be automatically filled by the software.
- Request date: the request creation date, the software automatically enters the current date.
- Deadline: the date by which this request should get fully approved. The approver will rely on this to ensure the progress of the work. At the same time, the software also creates a schedule activity to remind approver about this request.
- Minimum Approvals: the minimum number of approvals for the request to be accepted, which is automatically filled with the Approval Request Types. This field enable creator to take the initiative in waiting for approval.
- Approval Process: approval progress of the current request in percentages. For example, this request needs to go through 2 stages of approval: Manager and CEO. After the manager approved, the approval process is 50%; after the CEO approves, the approval process is 100% - Done.
- My Approval Status: status of the request for the user who is accessing. There are selections:
- Not involved: the user who is accessing is not involved in this process of proposal or approval.
Draft: you have not confirmed the request.
To Approve: you are assigned to approve the request, but have not yet proceeded with approval.
Approved: you have approved the request.
Refused: the request is not accepted by the manager.
Note
My Approval Status is only visible when the user has the minimum access right as Team Approval on the Overtime access group.
- Last Approver: the last approver who had previously approved the request, which is automatically recognized by the software. For example, this request needs to go through 2 stages of approval: Manager and CEO. After the manager approves, the last approver is manager. If CEO approves, the last approver is CEO.
- Forcing Approver: the user who forced the request to be approved without waiting for other steps.
- Description: the creator can add the reason for example purpose of overtime: for which project, based on department’s plans, etc.
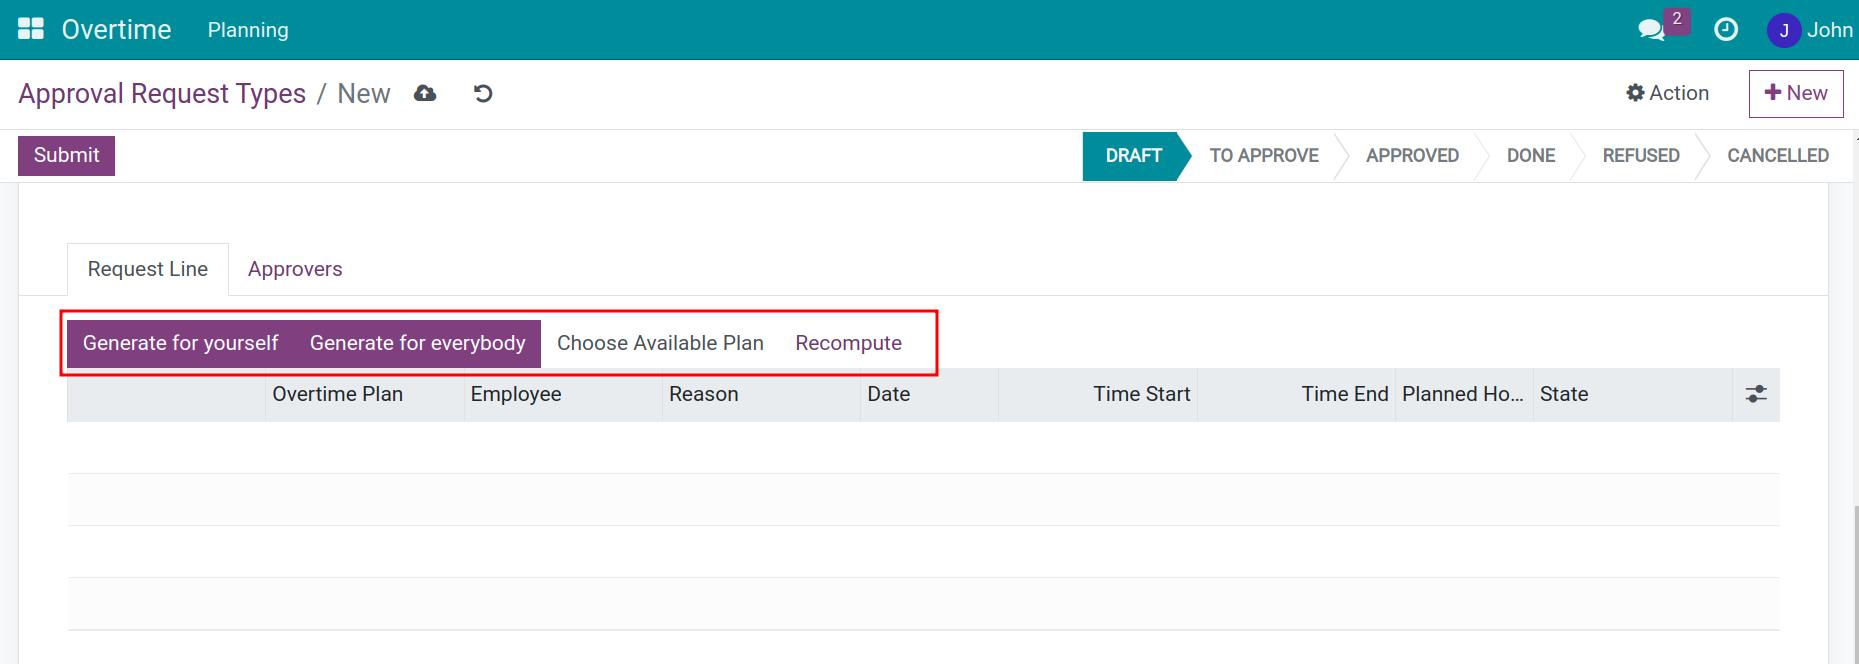
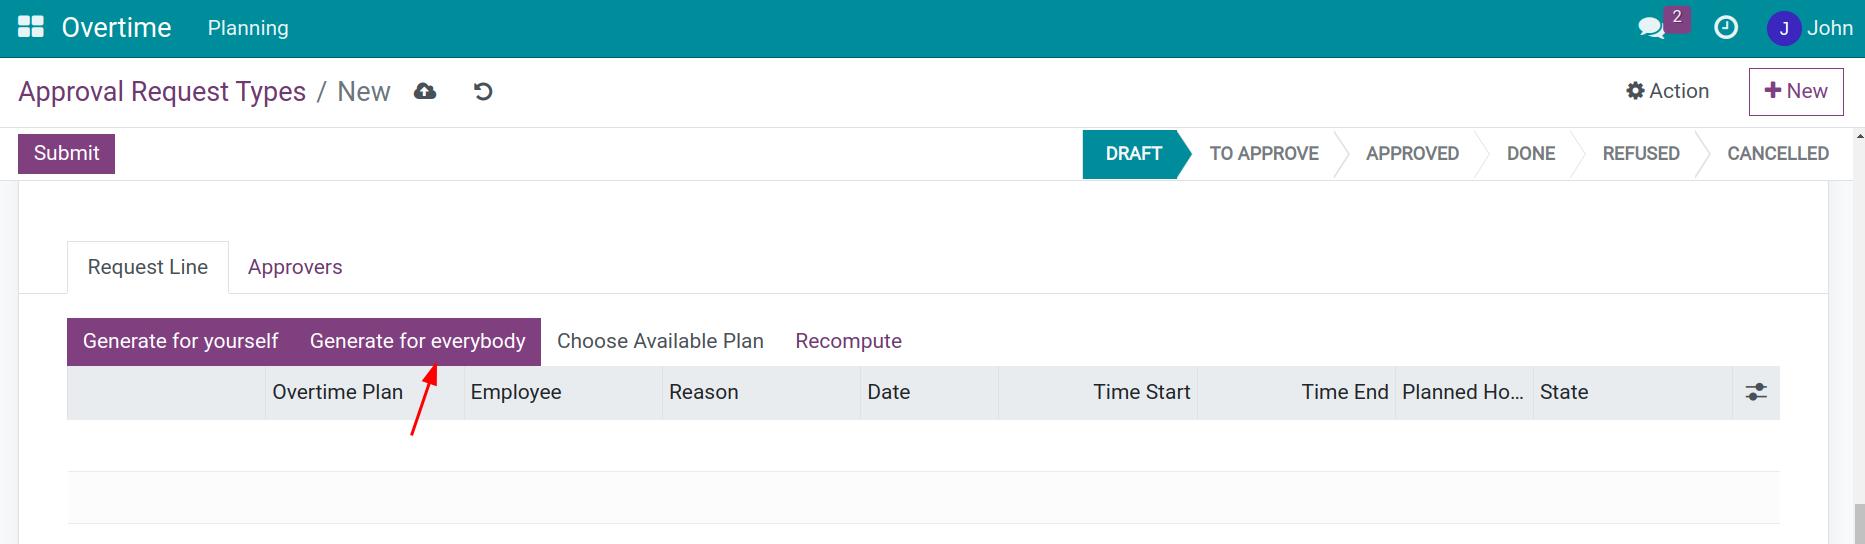
At Request Line tab displays the detailed information of the overtime schedule. You can enter an overtime schedule for an employee or a department you are in charge.
- Generate for yourself: enter the overtime plans for the employee who created the approval request.
- Generate for everybody: create the overtime plans for many employees in the department you are in charge.
- Choose Available Plan: choose from available overtime plans in the system that have not been added to any approval request.
- Recompute: recalculate overtime lines when there are changes in time, contract and salary.
Create an Individual Overtime Request
Click Generate for yourself button at Request Line tab, the display shows the window allows you to create a Overtime Planning:
Reason: choose the reason for overtime.
Project: only appears if the Project is installed, which allows you to select the project that the employee is involved in during this overtime period. The approver looking at this can understand the purpose of overtime, and the system will record the cost of this project.
- Date/Time Start/Time End: date, start time, and end of overtime. You should not choose the same period of overtime as the previously overtime registration (if any) or same as the normal working hours.
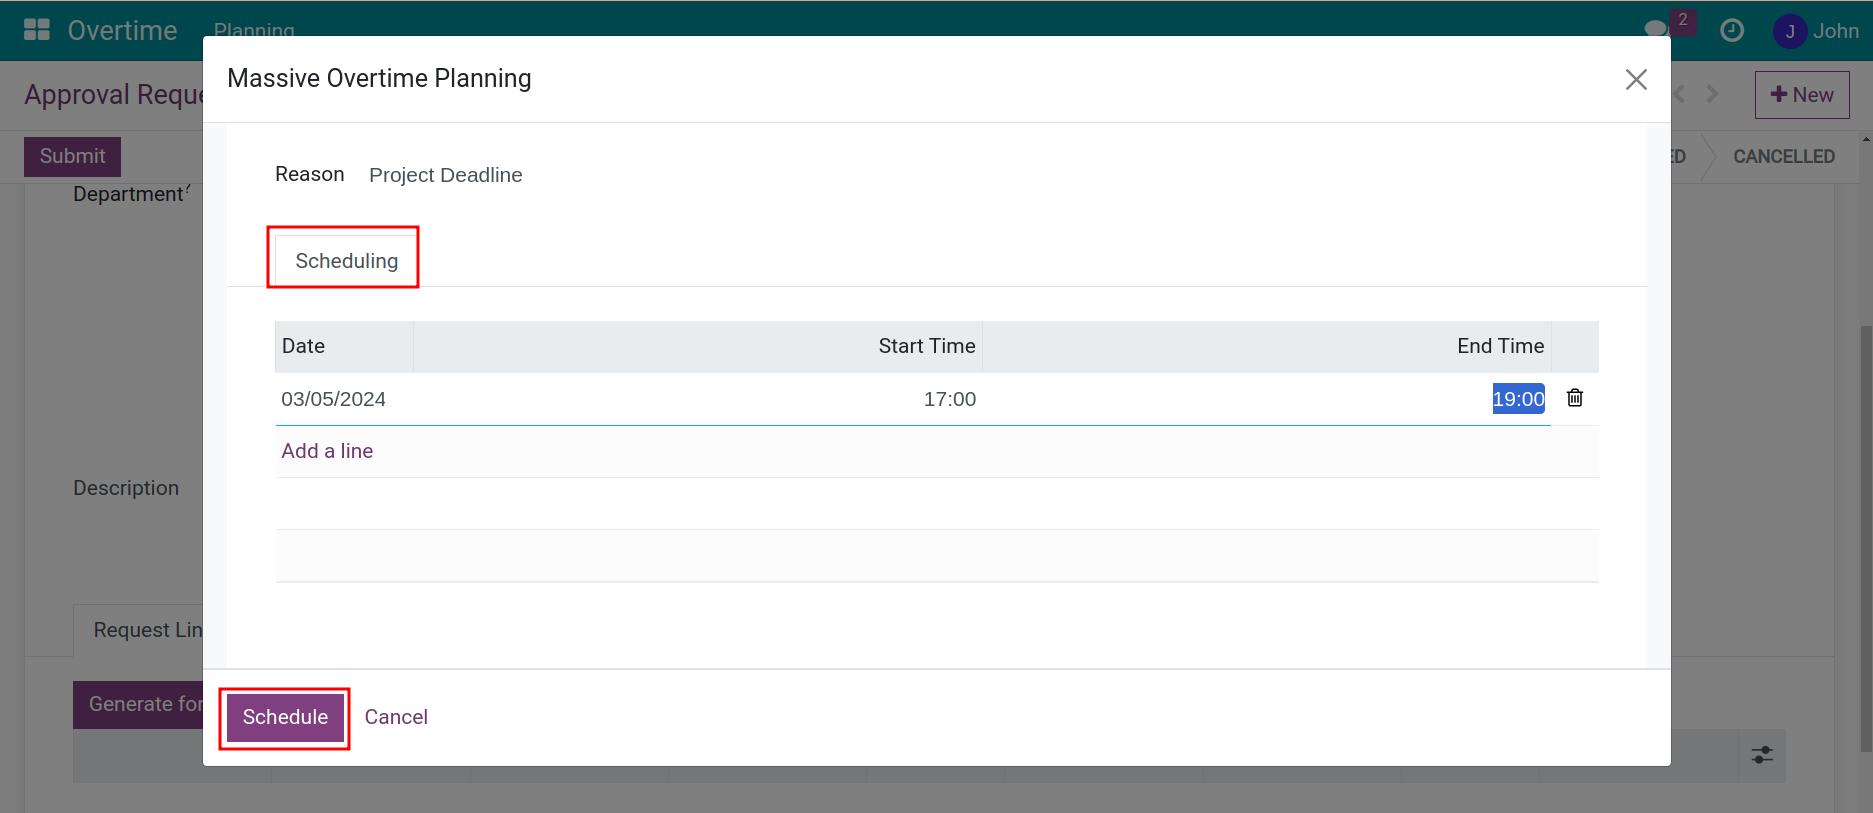
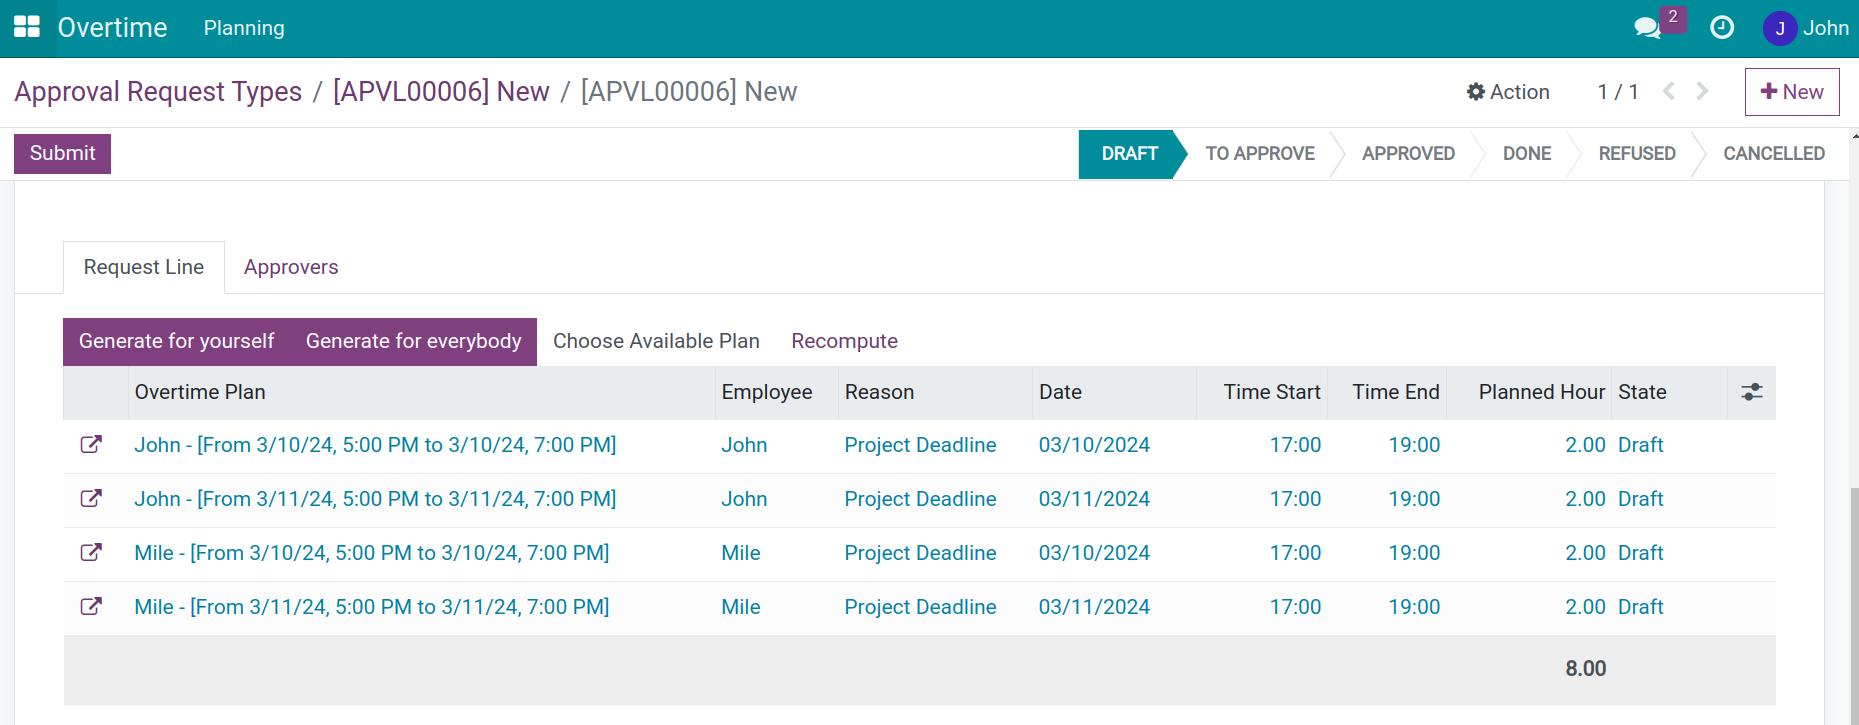
Click Schedule to add overtime schedule in the Request Line tab.
- Overtime Plan: the name of the overtime plan just created above. Includes: Employee Name - [Date, overtime period].
- Planned Hours: total planned hours for overtime registration is automatically calculated by the software and enter here.
- Actual Overtime Hours: the actual overtime hours recognized by selected Recognition Mode.
- Employee: name of the employee who registers for overtime.
- Reason, Date, Time Start, Time End: automatically fill based on the created Overtime Plan.
Status: status of each overtime registration line. The software will automatically update according to the approver’s action. For example, overtime registration lines showing status Refused, Cancelled, Approved as below photo:

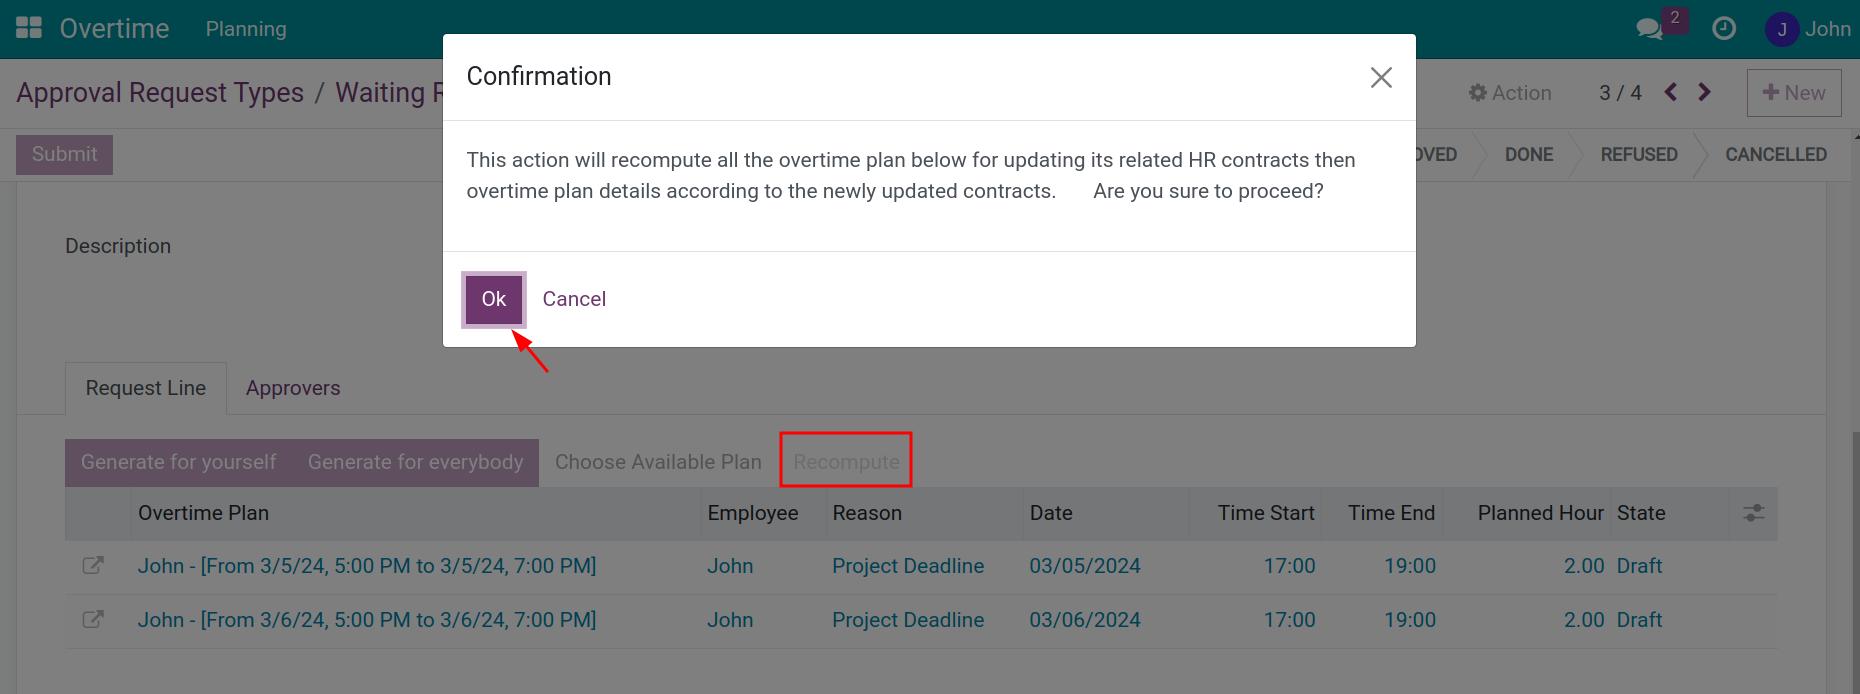
Press Save to save the request. To make sure the overtime registration hours are not the same as the normal working hours of the employees, click the Recompute button to match these overtime registrations with the latest labor contracts. At the same time, the software also recomputes based on the latest updated Salary/Wages on the contract.
Click OK to proceed action.
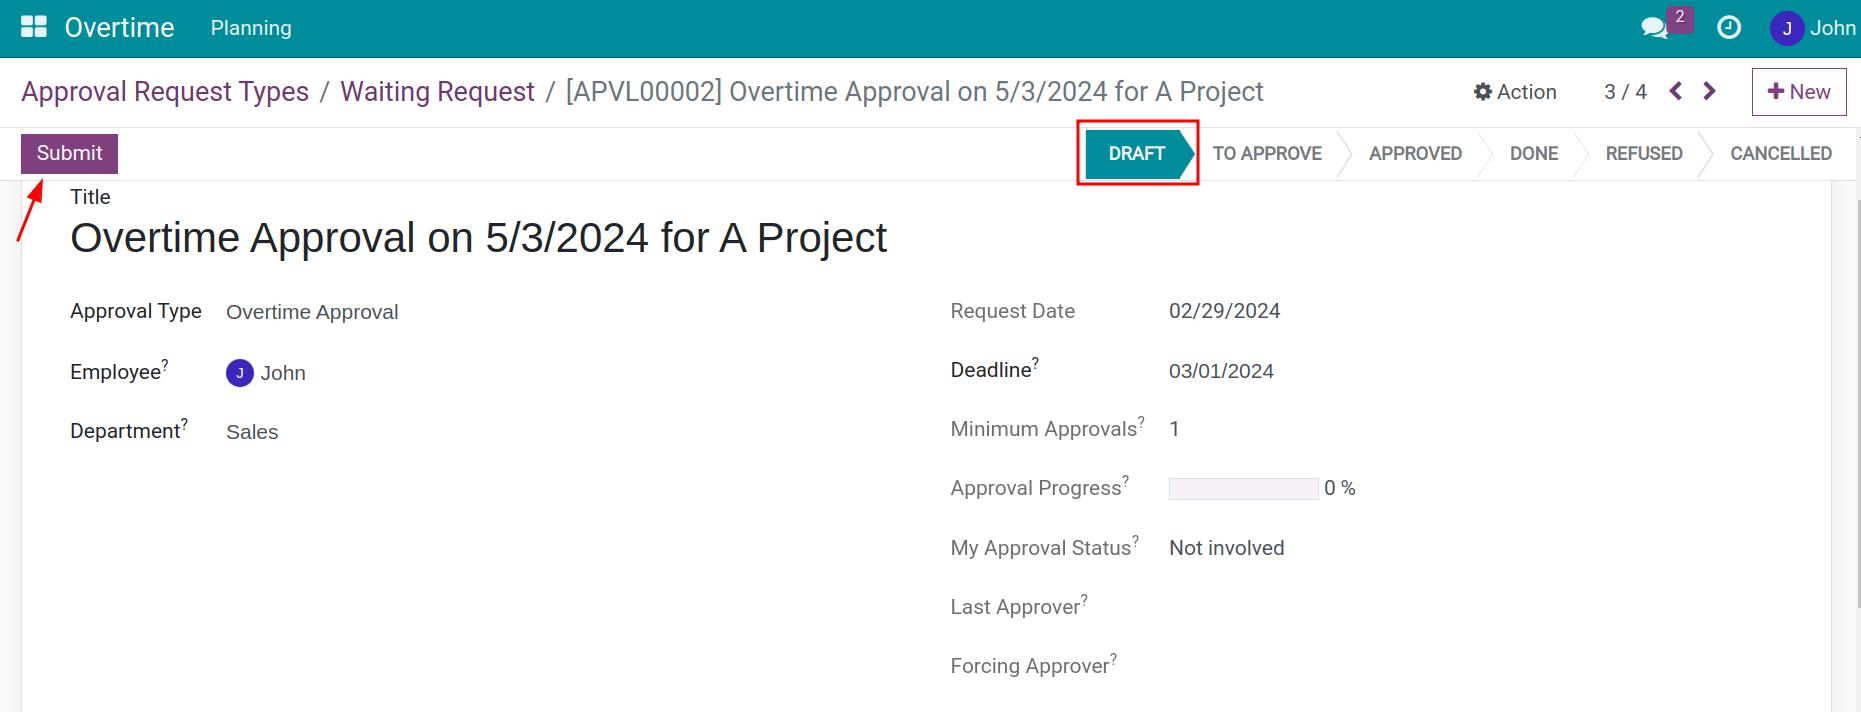
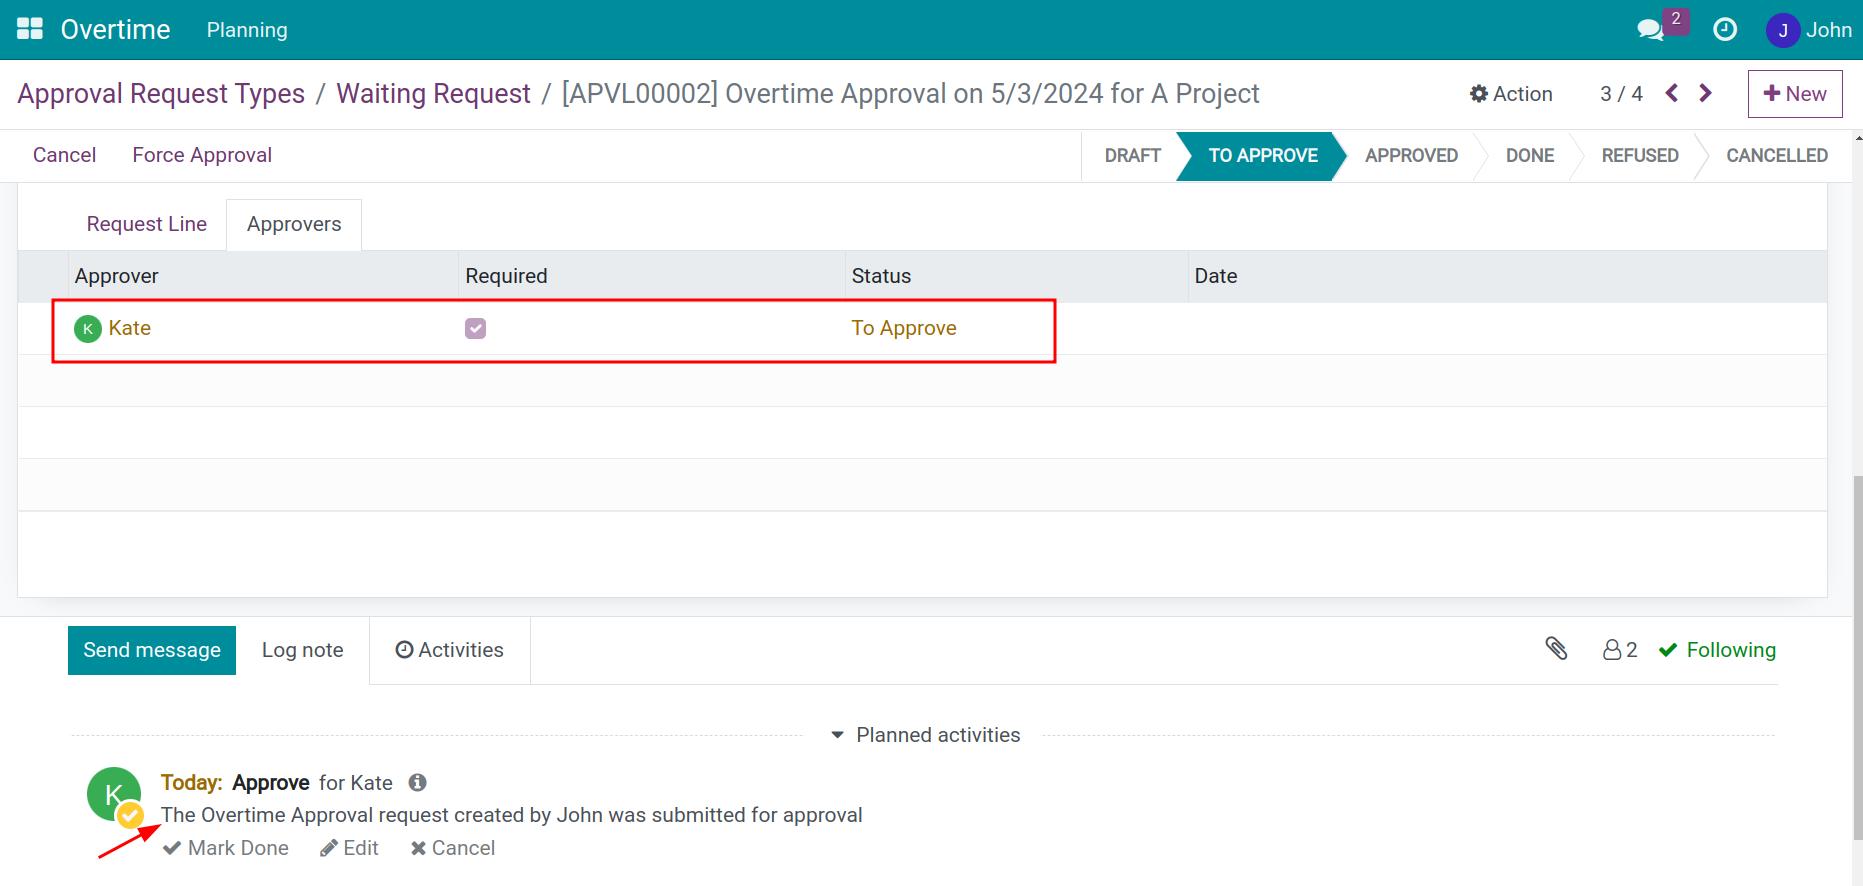
After checking the information on the request, click the Submit button. The request will move from Draft to To Approve.
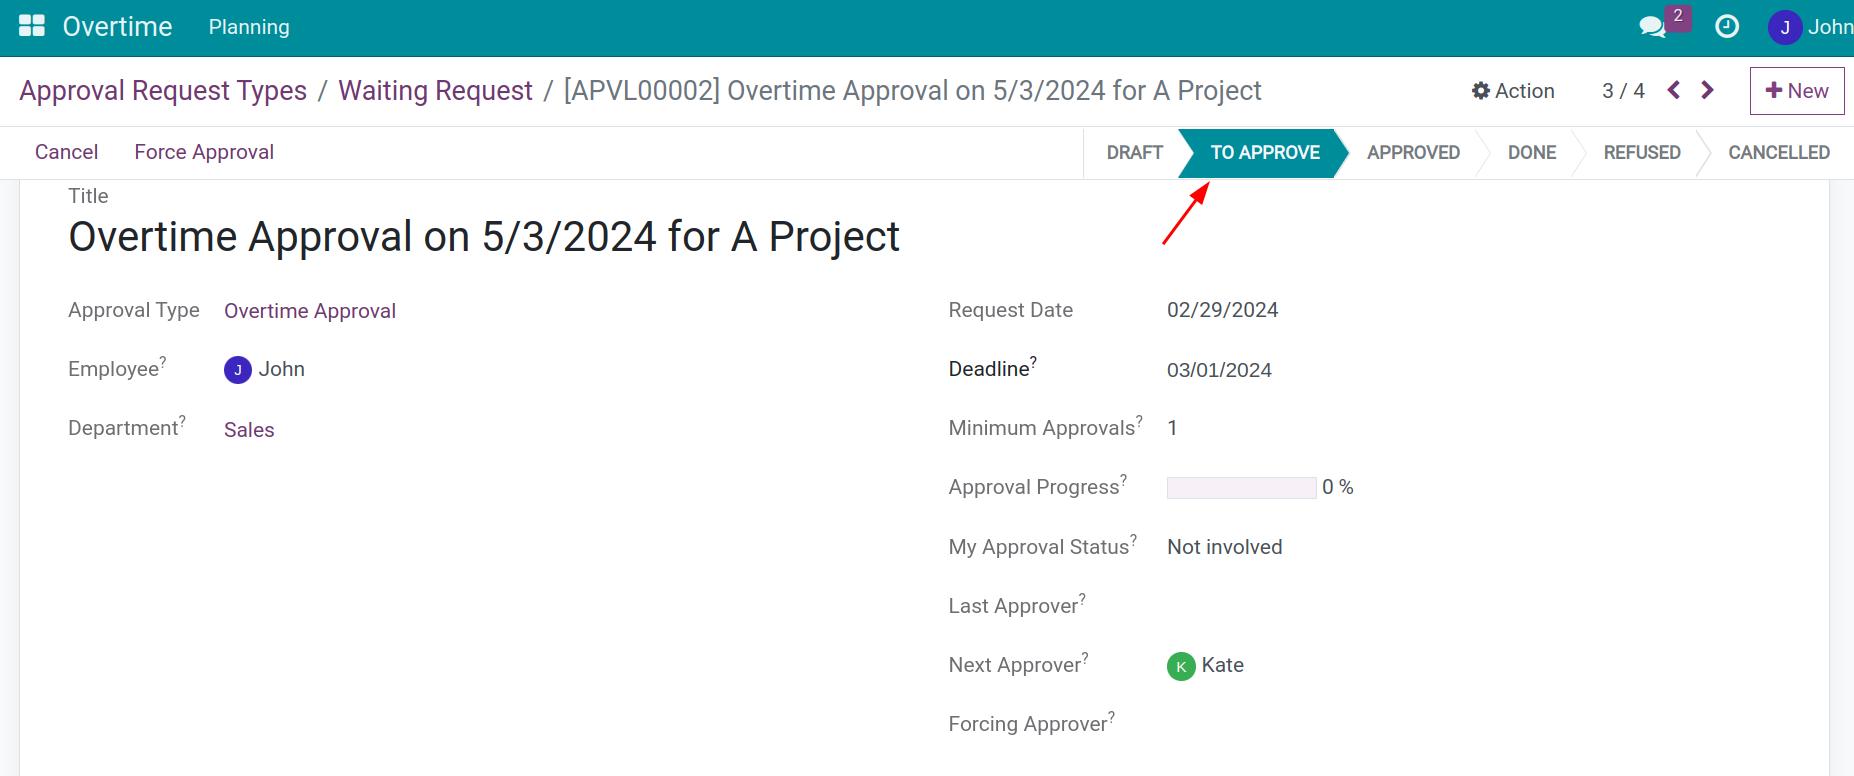
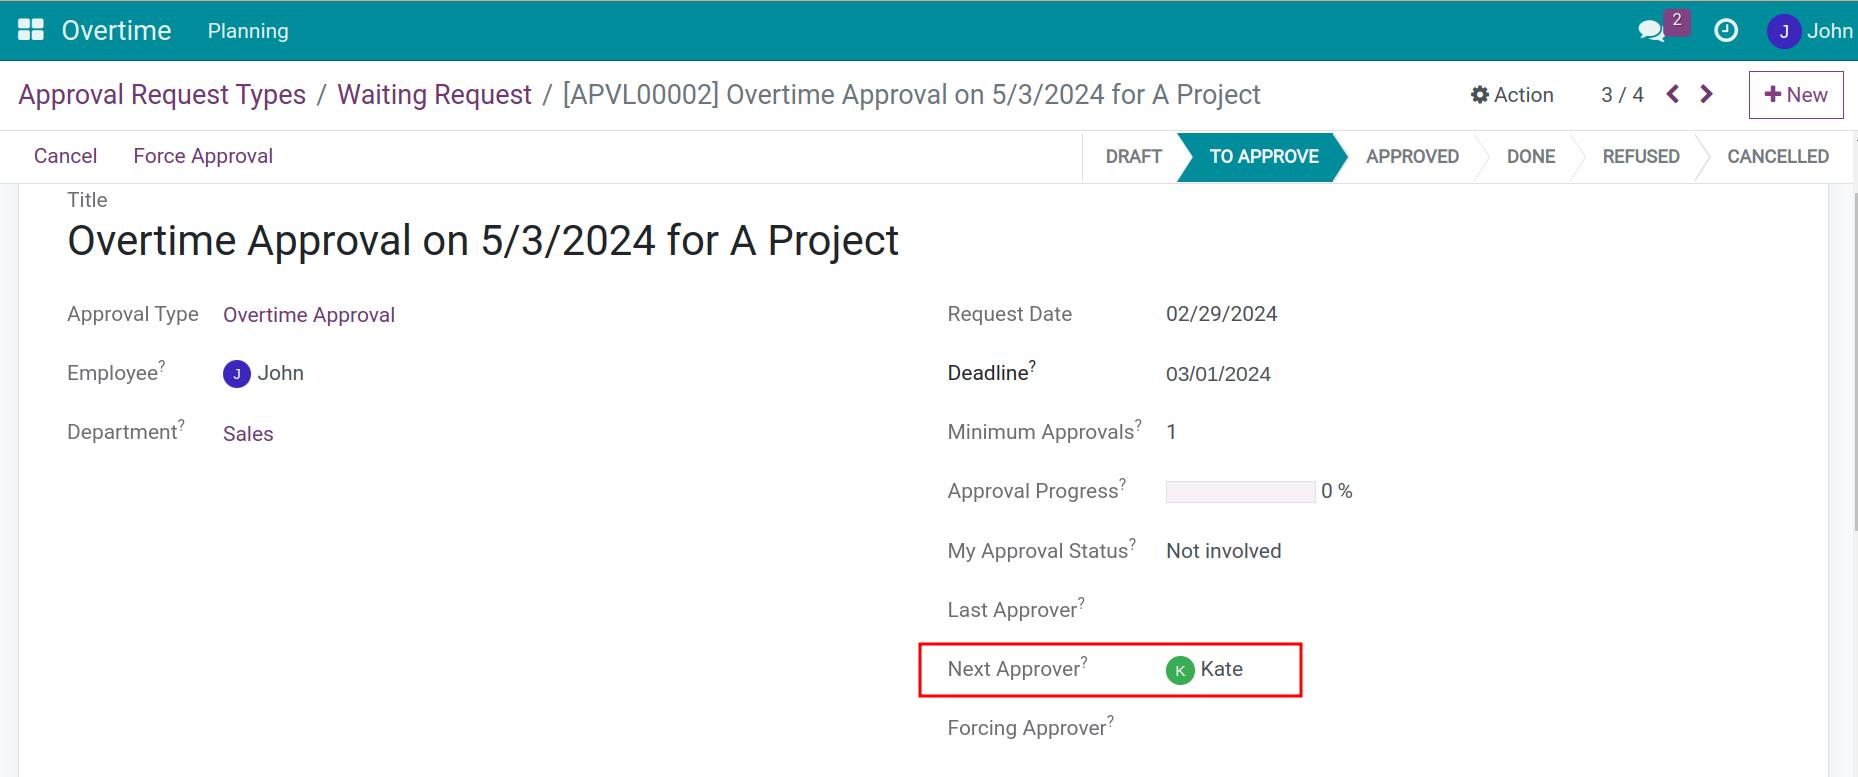
The interface will now appear with a Next Approver field. The next approver is the person who will be responsible for the subsequent approval of this request.
For example, this request needs to go through 2 steps of approval: Manager and CEO. After the employee creates the request, the next approver is manager. After the manager approves, the next approver is the CEO who has established.
You’ll see the approval action assigned to Approver.
Create Mass Overtime Registration
To create overtime registrations for a team, after filling the information for the Overtime Approval Requests, click the Generate for everybody button at Request Line tab.
Note
The user has to has the minimum access right as Team Approval on the Overtime access group in order to execute this action on the system.
Once clicked, the display shows the window allows you to create a Massive Overtime Planning.
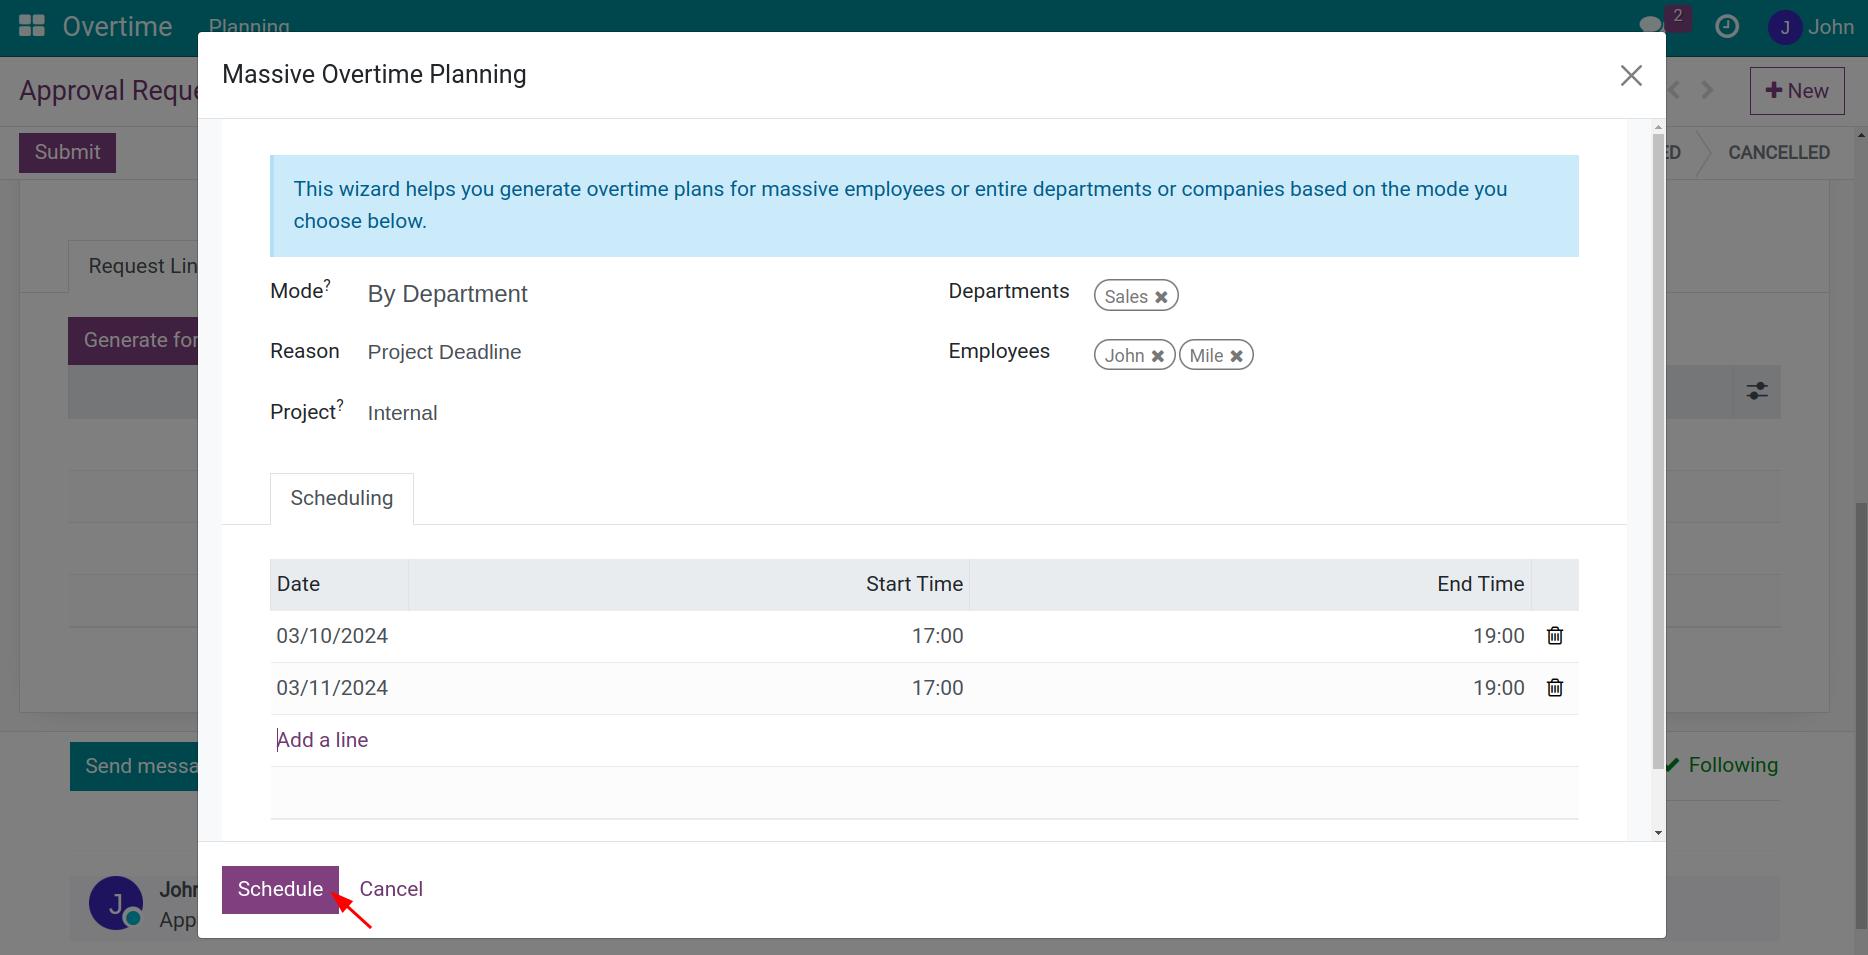
Now you make an overtime registration for your department.
Click the Submit button, the request will move from Draft to To Approve.
Approve Overtime request
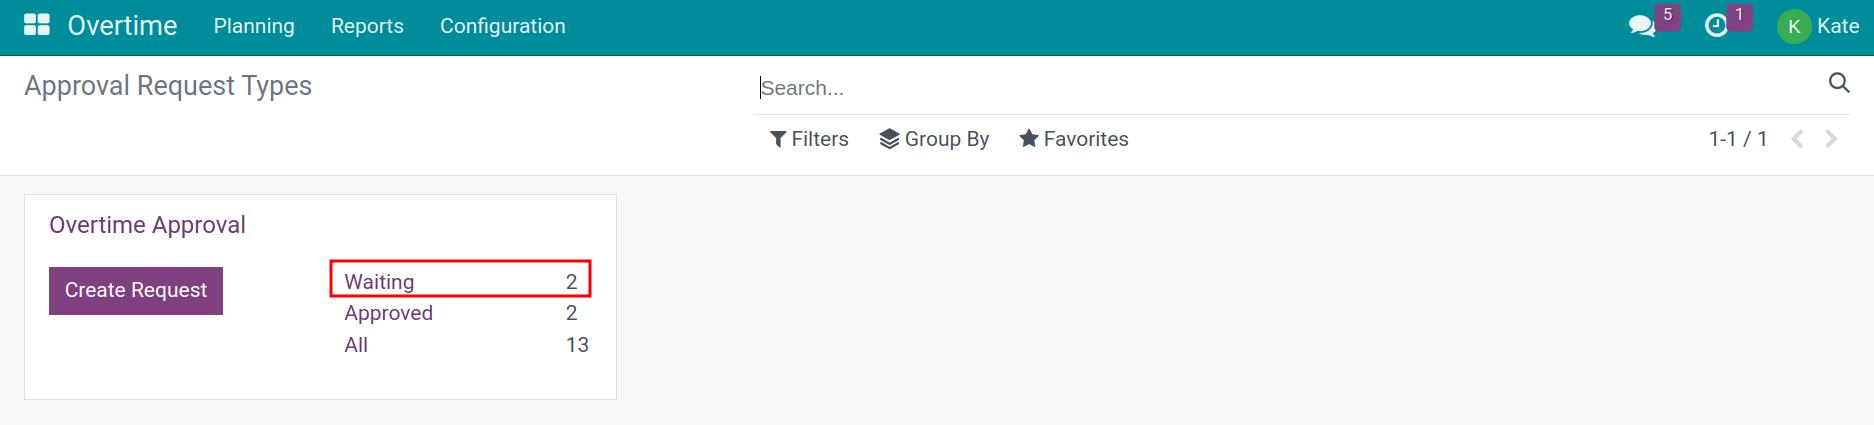
As an approver, you’ll get the full rights to accept or reject the request. Navigate to , click Waiting to display the list of overtime requests that need approval.
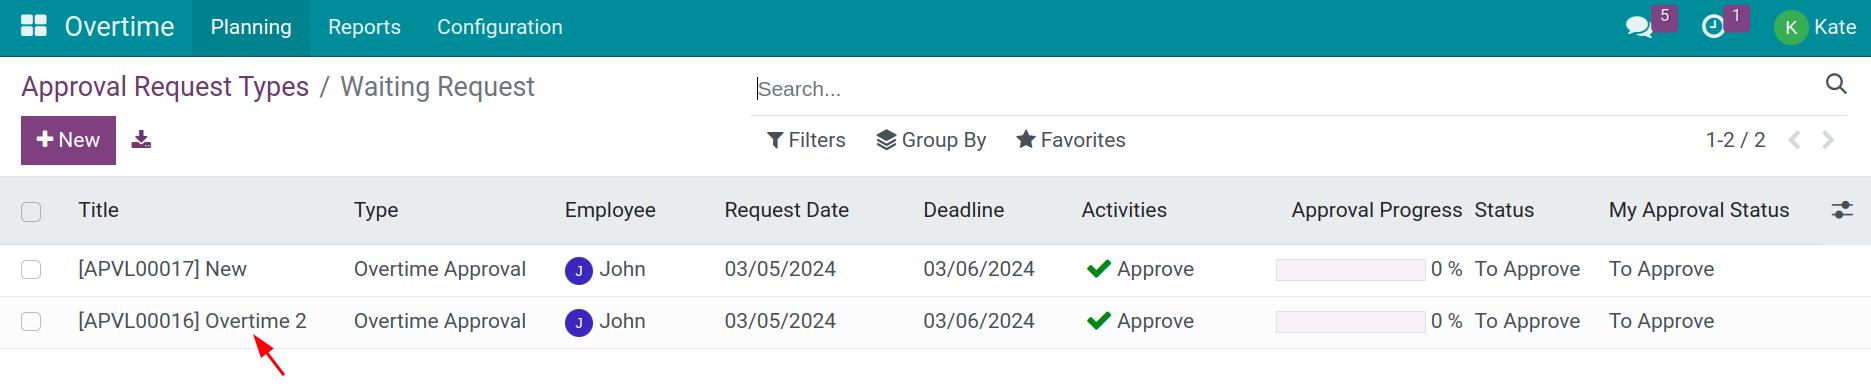
Click on an overtime request you want to approve to display detailed information. Here, the screen displays function buttons that allow you to Approve, Reject, Cancel, Force approval of overtime requests as desired..

See the instructions for setting Approval Request Types at How to create approval types and approval levels.
Cancelling Overtime Requests
The Employee cancels the Overtime requests
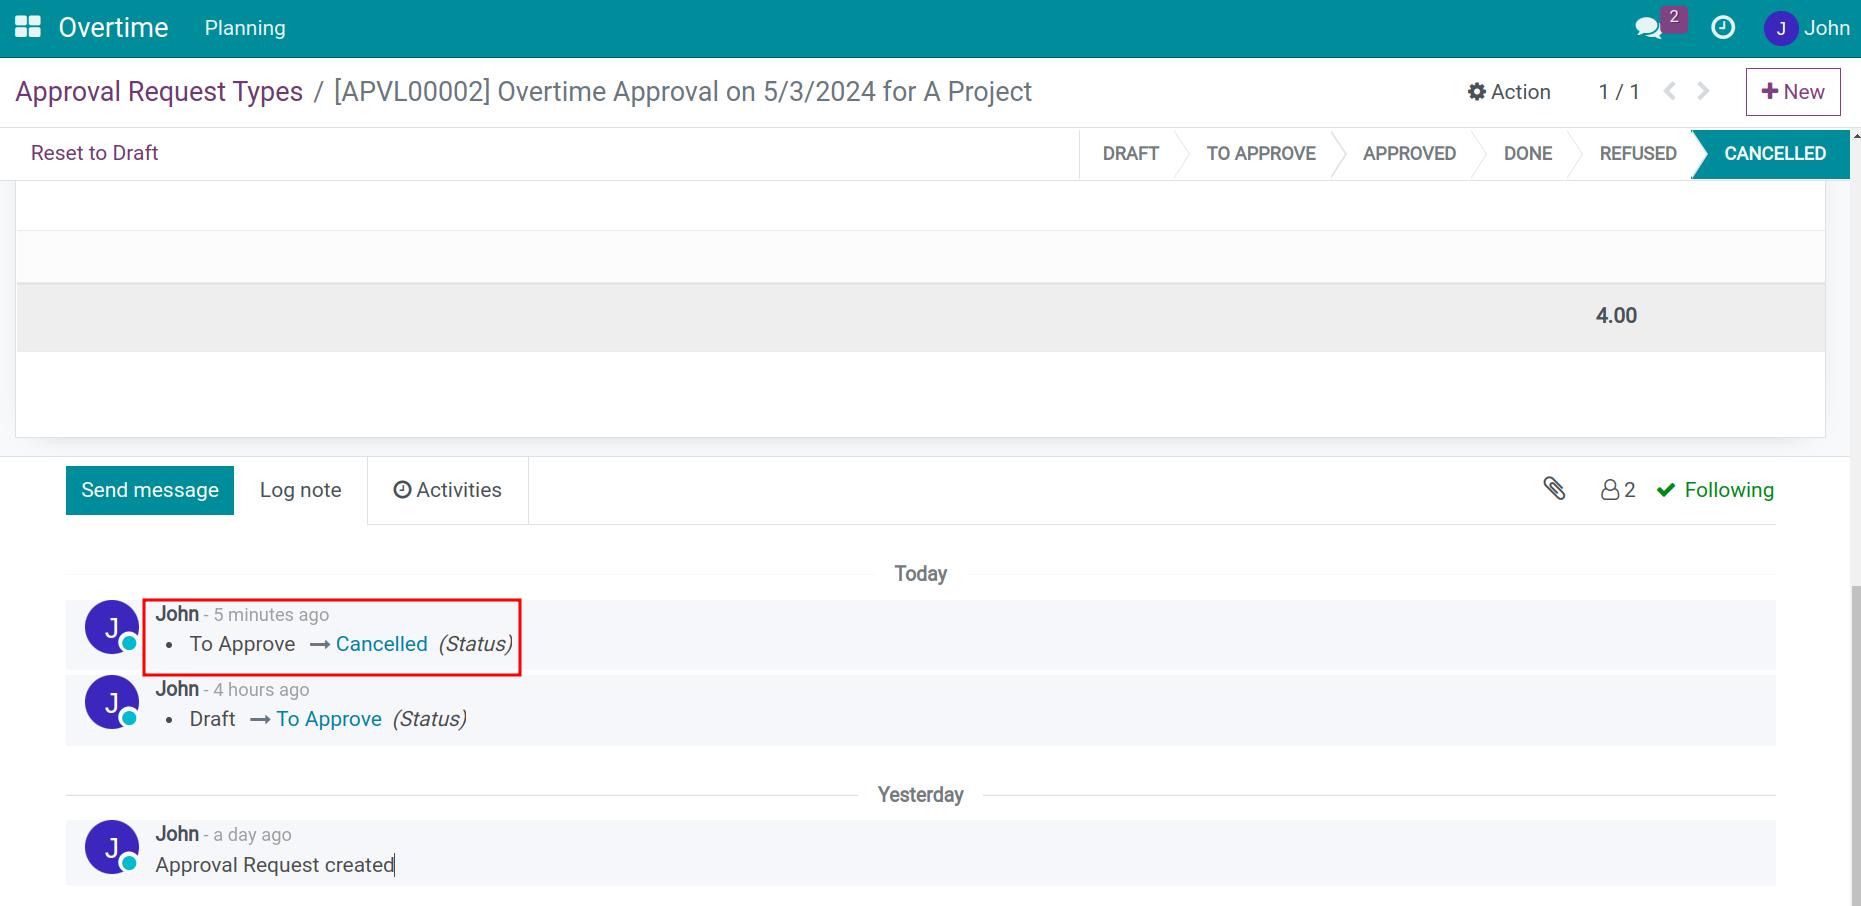
The overtime request has been created and is in To Approve status. To cancel the request, click the Cancel button on the overtime request.
After clicking, the overtime request changes to Cancel status. The approval action assigned to the Approver on the ticket is also automatically canceled.
The Approver cancels the overtime requests
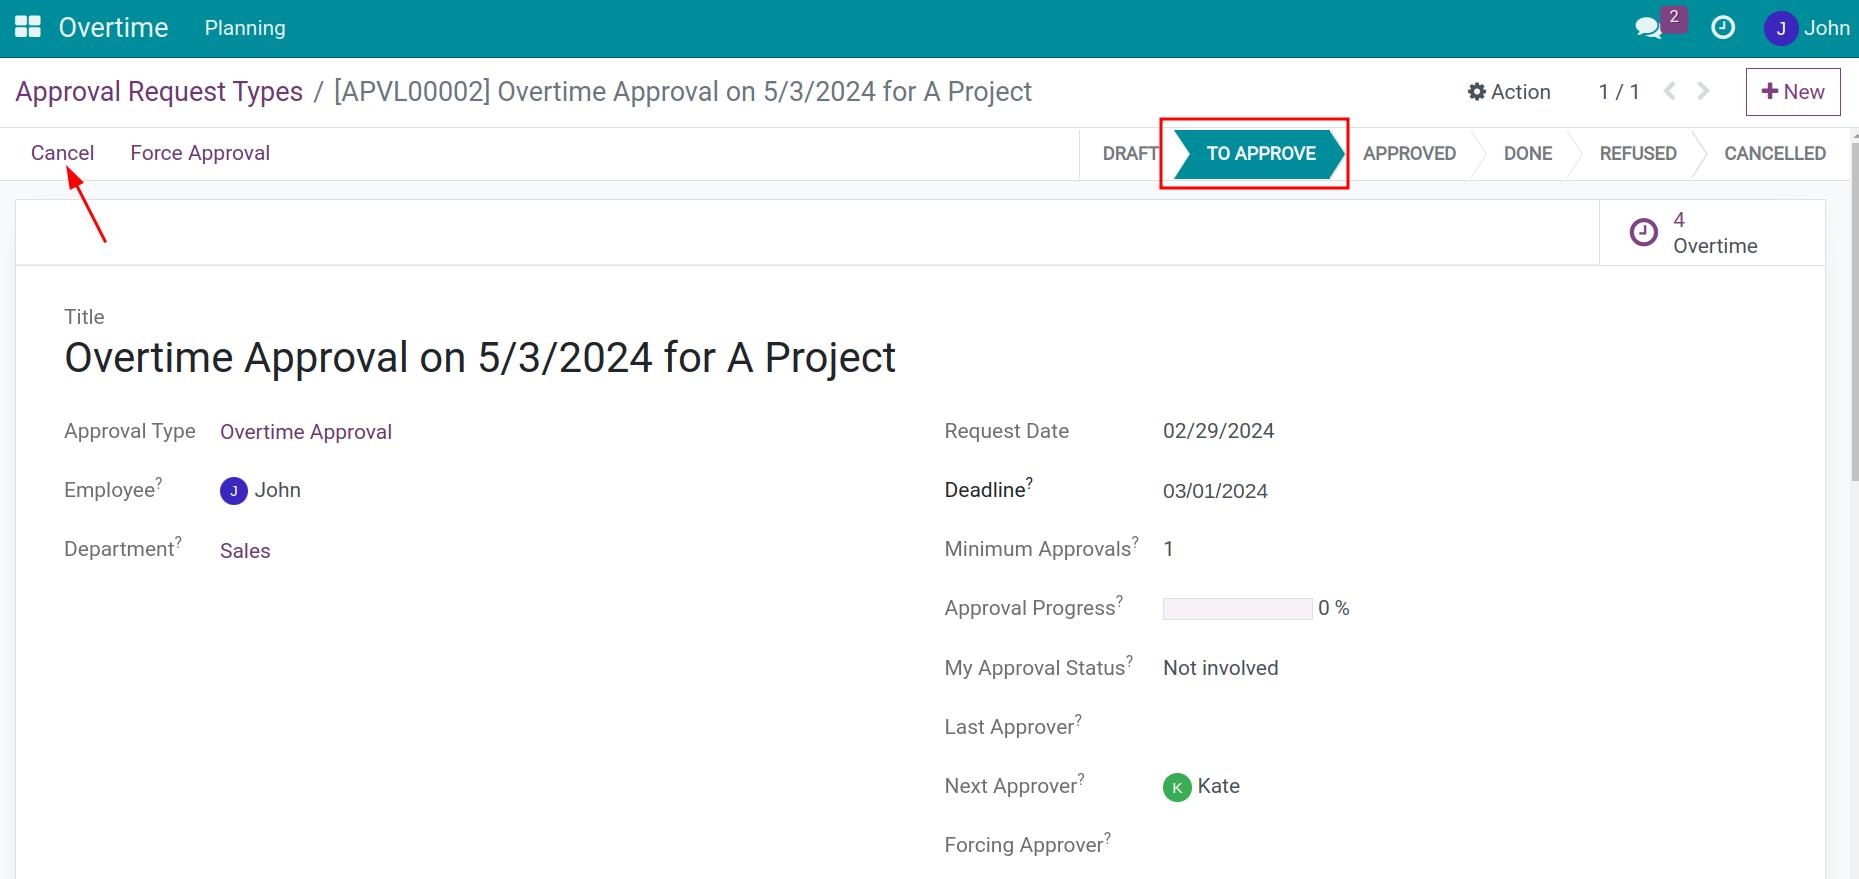
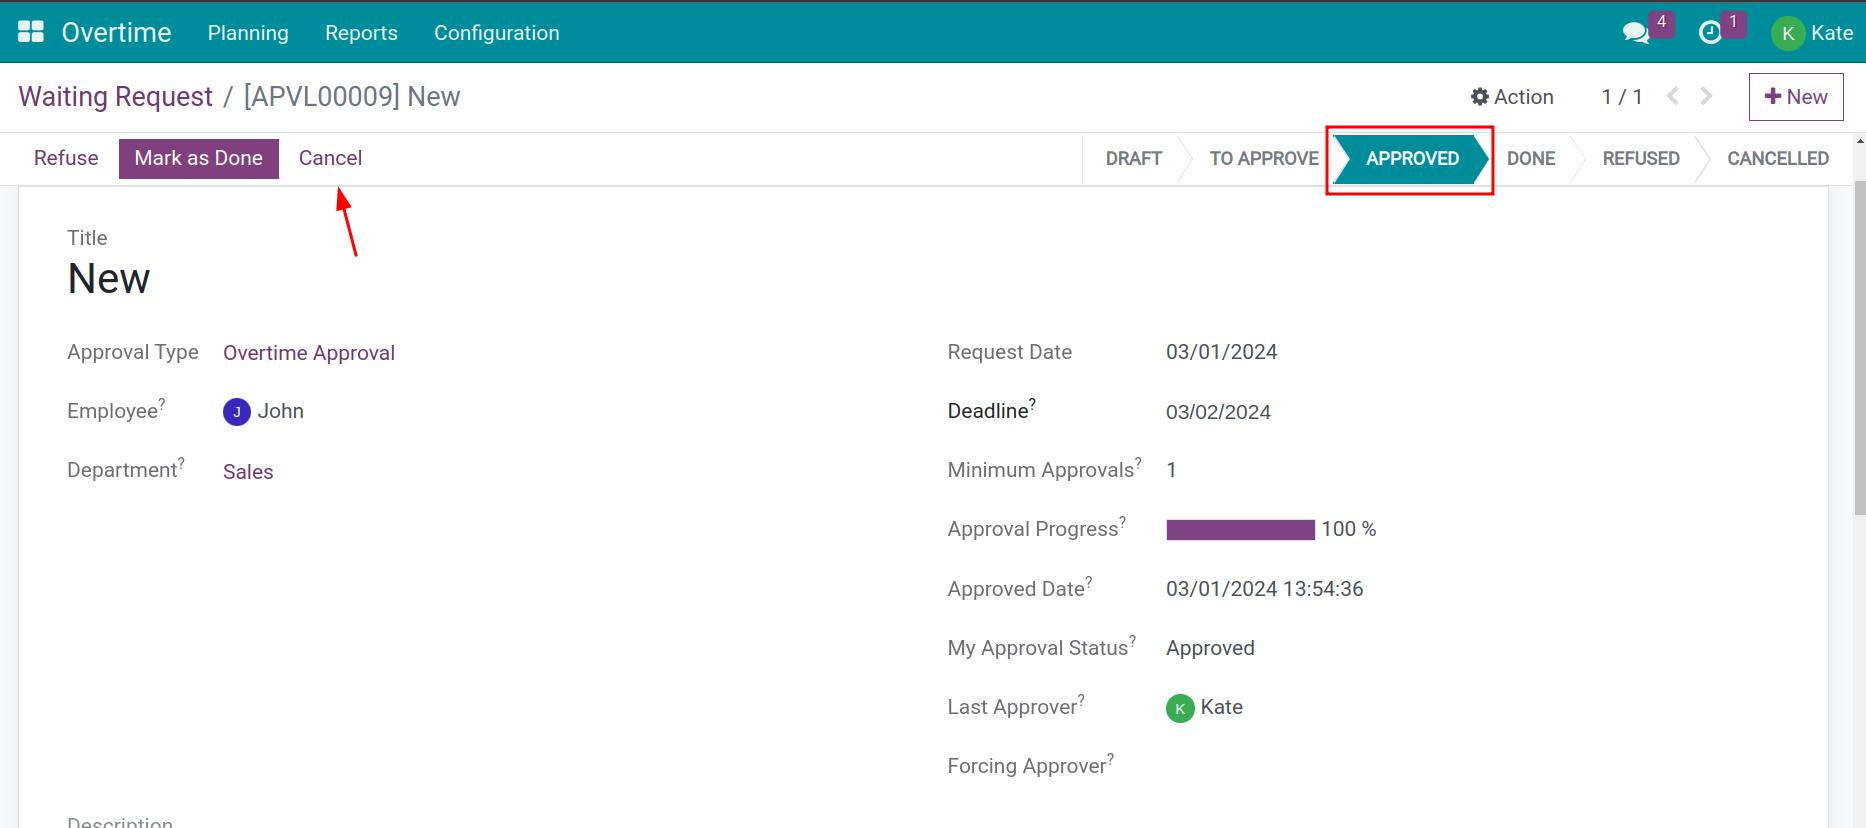
As an Approver, you want to cancel an Overtime request that is in To Approve, Approved or Refused status. On the overtime request, press the Cancel button.
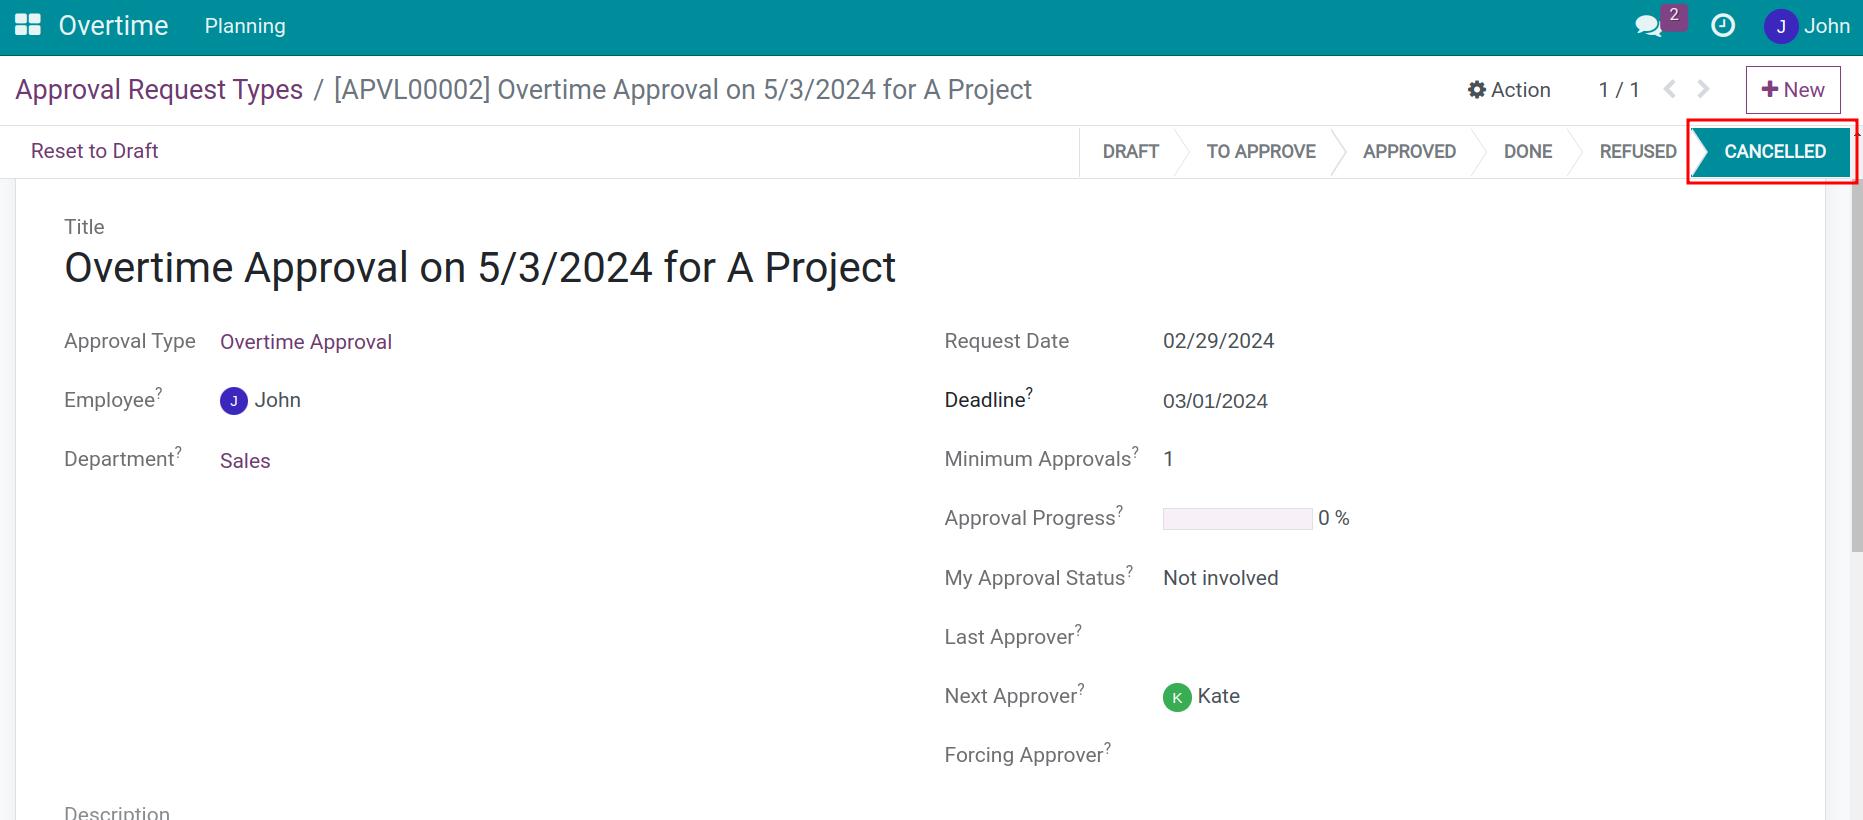
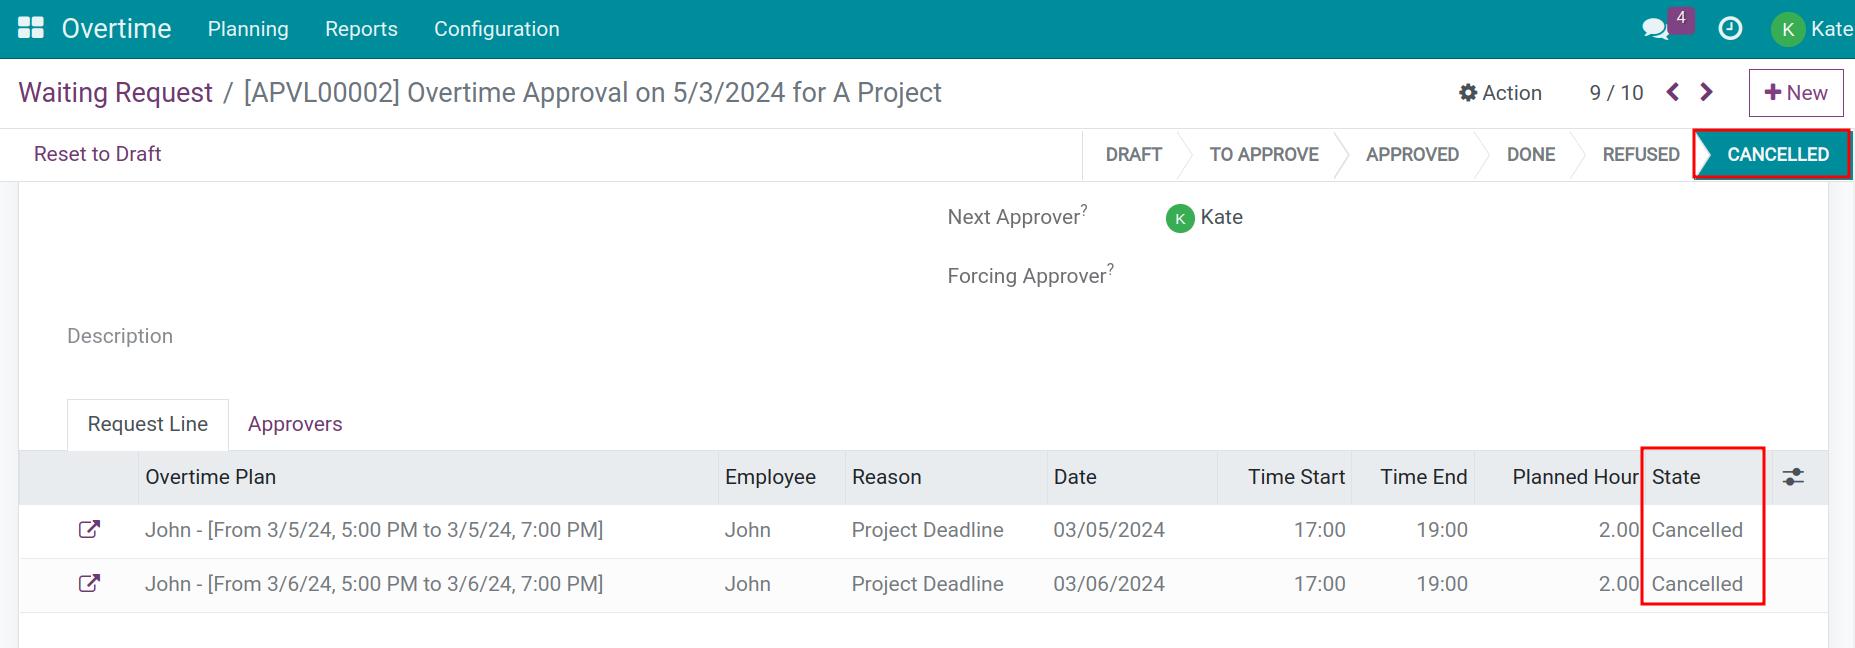
The overtime request will move to Cancelled status. The person who created the ticket will see that overtime request has been Canceled, so they can move it to Draft status to edit and resubmit for approval.
See also
Related article
Optional module