Setting up the validity period for quotation
This writing will guide you on adding expiration dates to quotations, thereby promoting customers to quickly make their purchasing decisions, saving time on closing deals.
Set up expiration dates on quotations
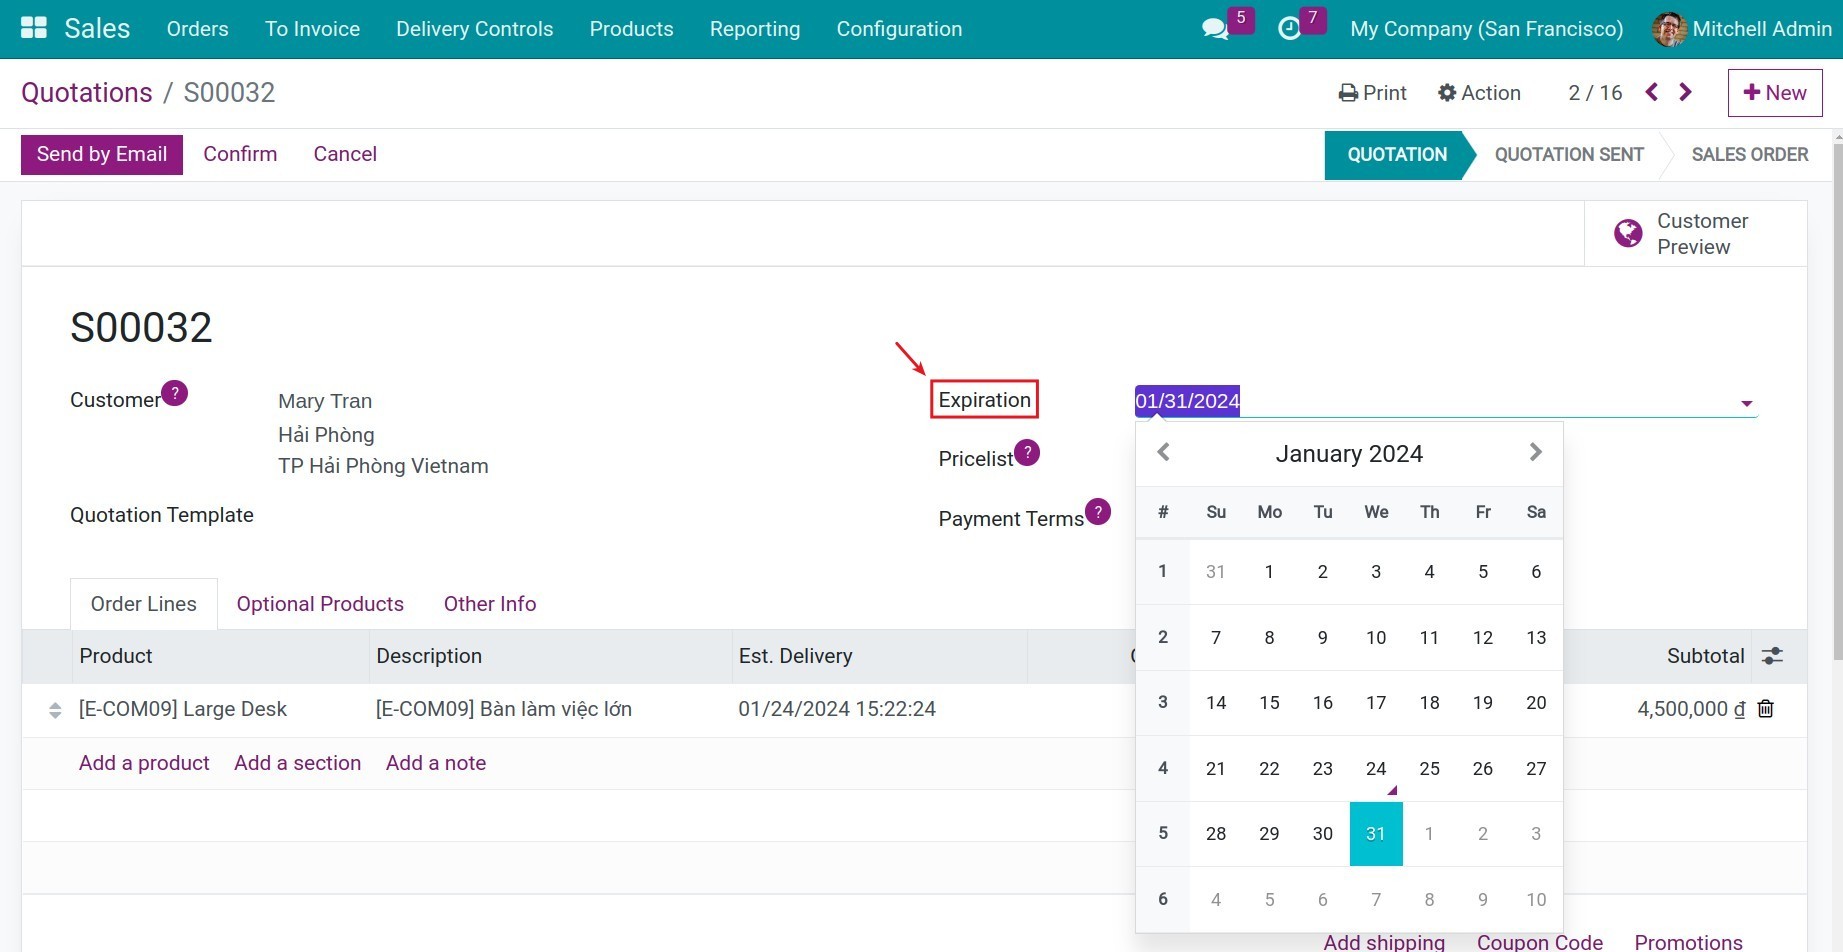
Firstly, navigate to Sales > Orders > Quotations and click on New to create a new quotation.
Enter an expiration date to set the last validity date of this quotation. After this date, the quotation will expire.
Expiration dates on quotation templates
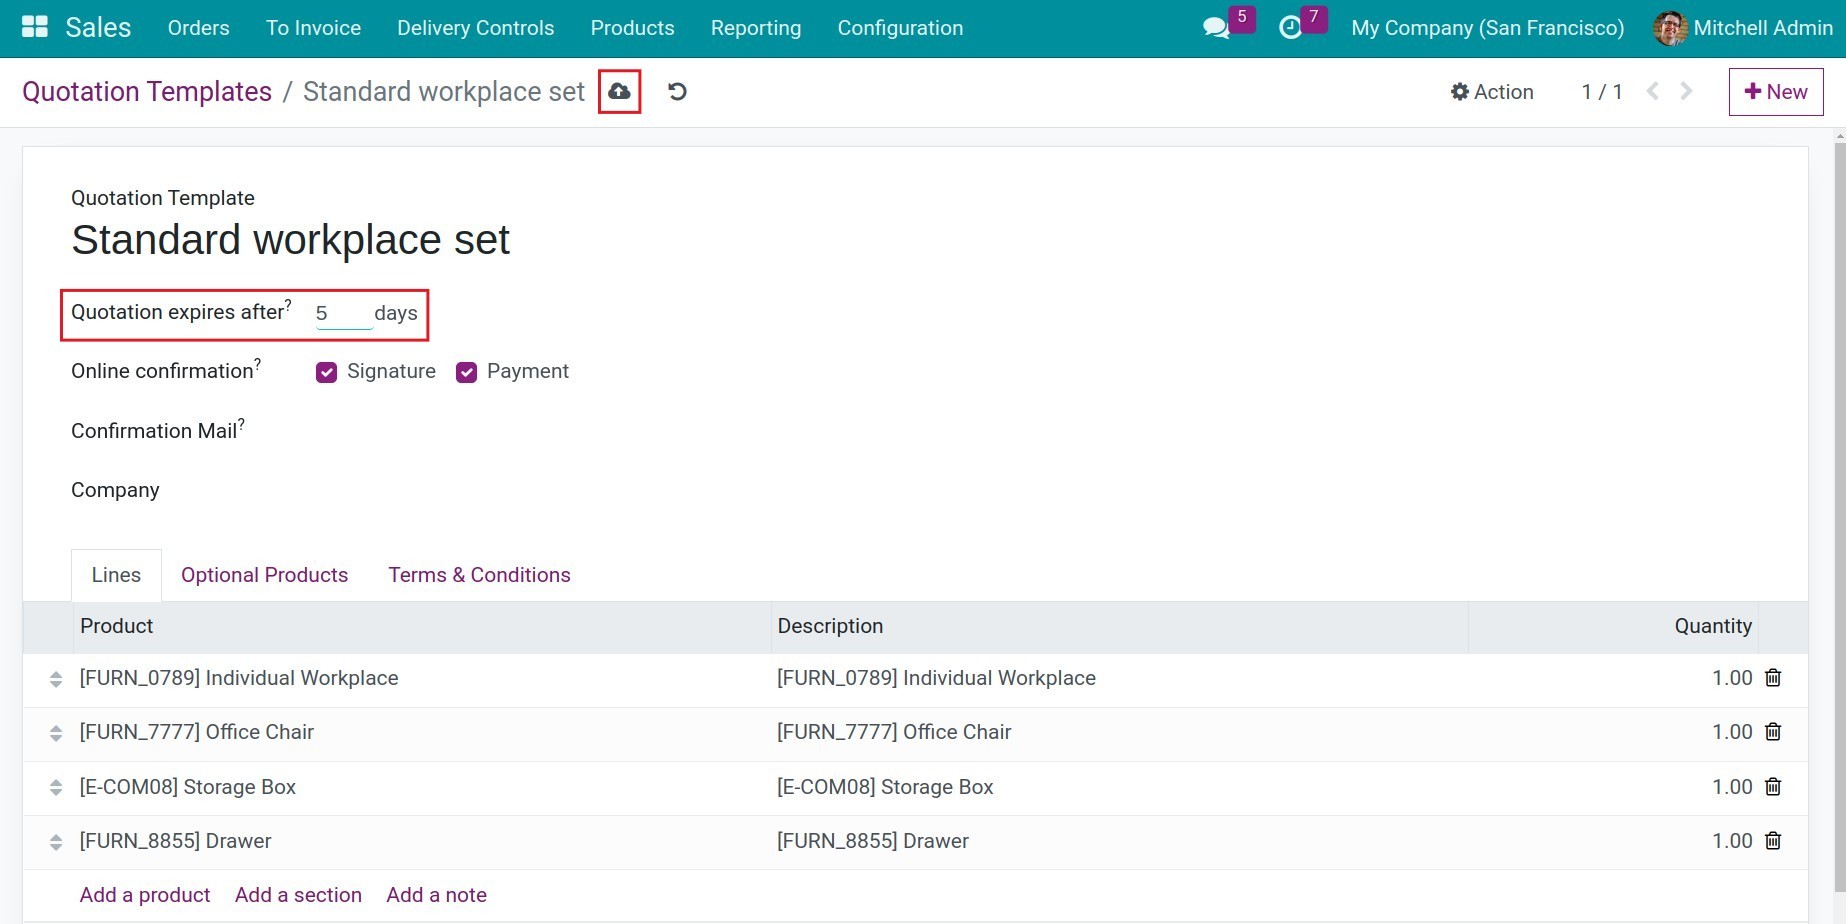
Additionally, you can also set up expiration dates on quotation templates. Refer to Designing Quotation Template for fast and efficient sales process.
Navigate to Sales > Configurations > Quotation Templates and select any quotation template that needs to be configured and edit it.

In the Quotation expires after field, enter the total number of effective days of quotation. The system will automatically save the data you edit. You can also save manually by clicking on the manual save icon.
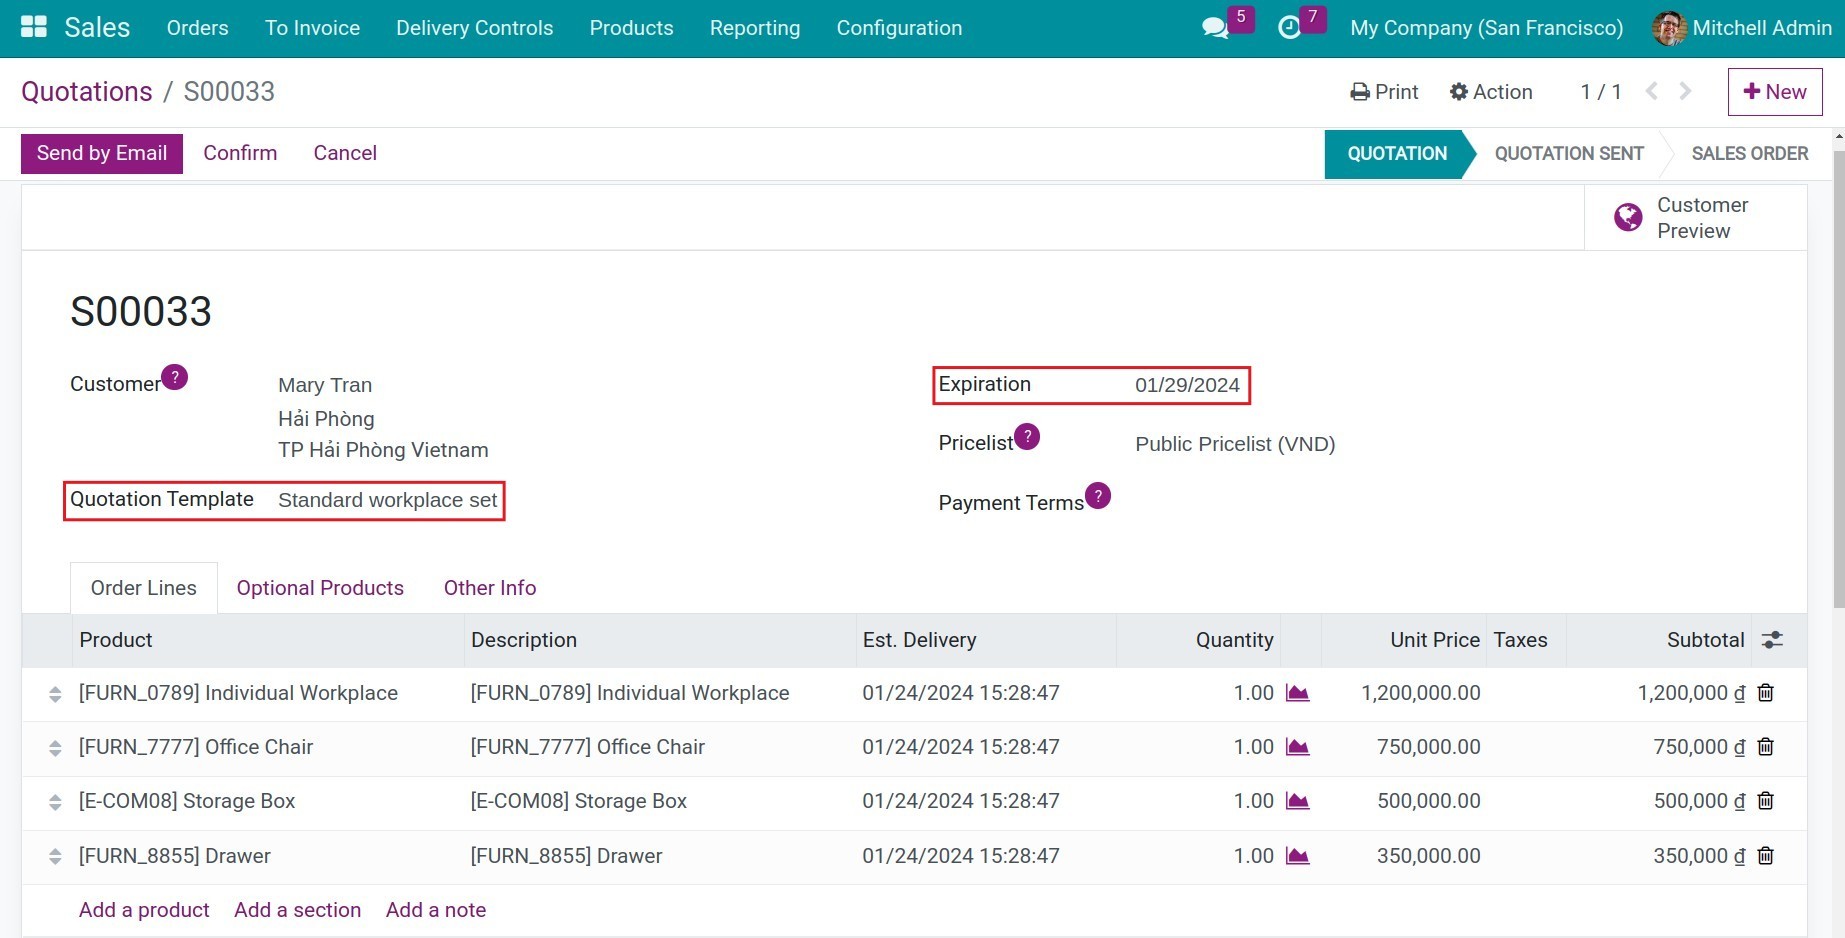
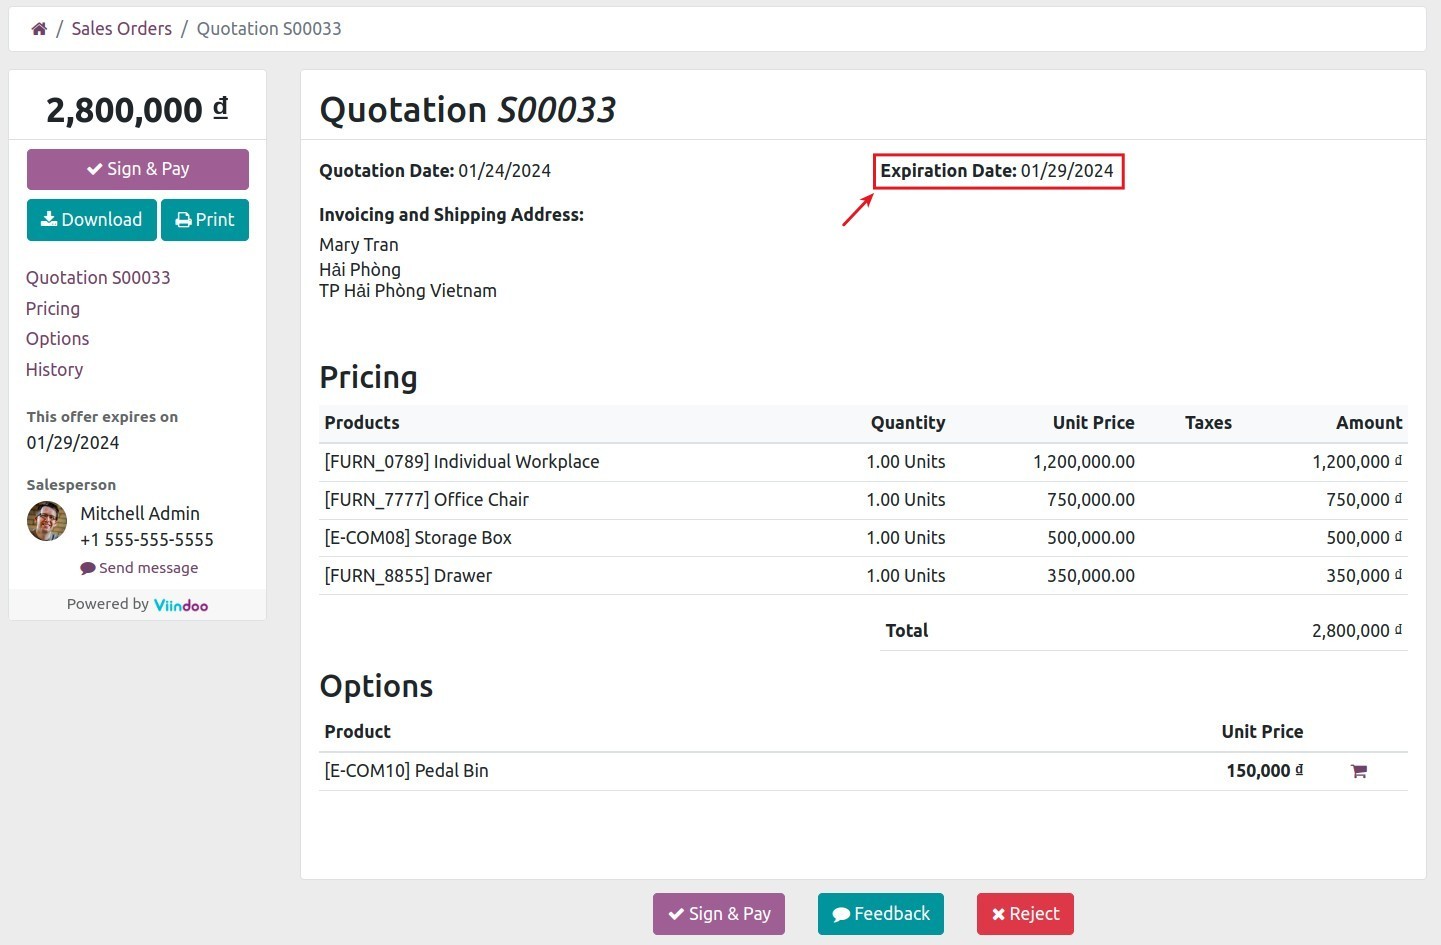
After that, create a new quotation and select the above-created quotation template. The expiration dates on the Expiration field of the quotation will be auto-updated by the system. Because the creation date of the quotation is 24/01/2024, the total number of quotation’s validity dates in the templates is 5. So, the expiration date of the quotation is updated to 29/01/2024.
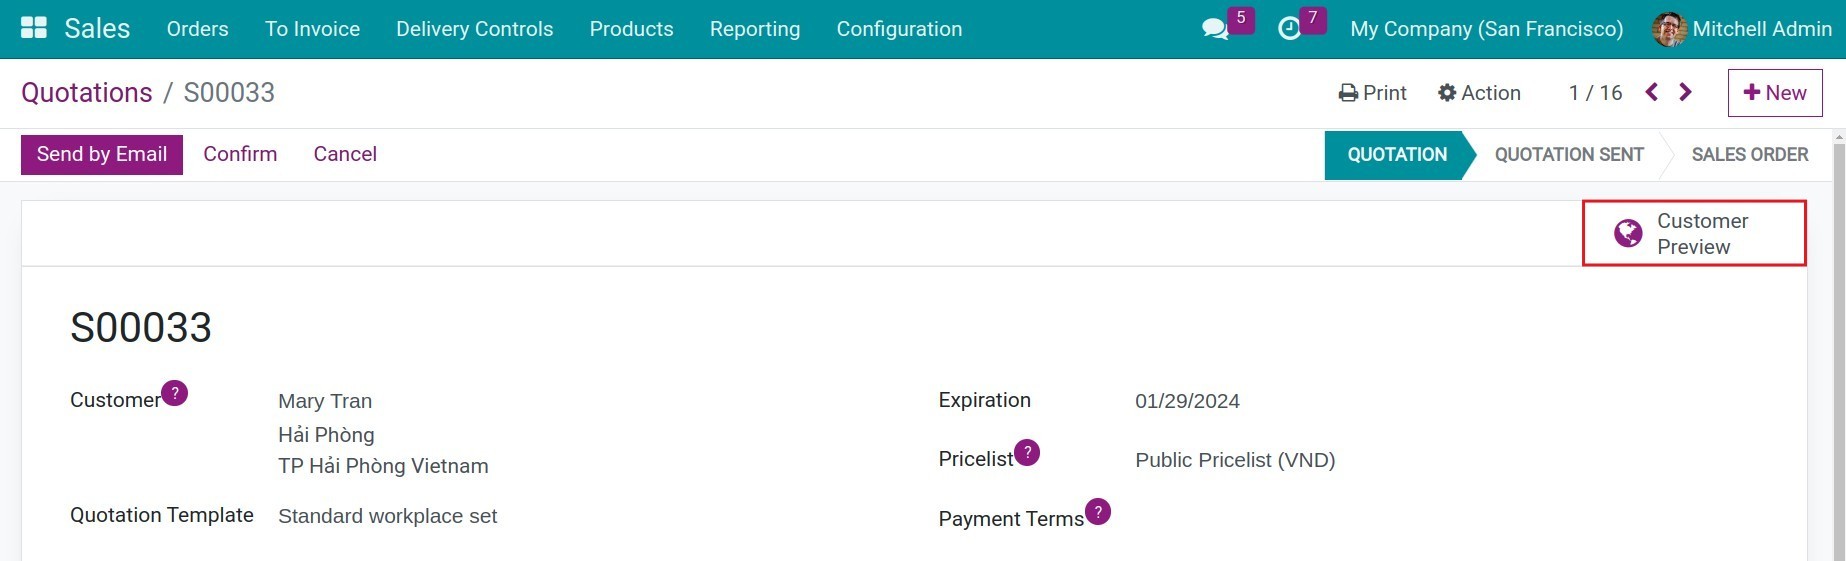
Customers can also view this information when accessing the online quotations on the website. To show the online quotations to customers, click on Customer Preview.
See also
Related article
Optional module