How to manage your mailing lists
Create Mailing lists
Requirements
This tutorial requires the installation of the following applications/modules:
Before starting an email marketing campaign, you need to divide all the emails into different lists, for example, VIP customer list, potential customer list, loyalty customer list, promotion subscriber list, etc.
Go to Email Marketing > Mailing Lists > Mailing Lists and click on New.

Type in a name for the mailing list then click on the Save button.

Mailing list contacts
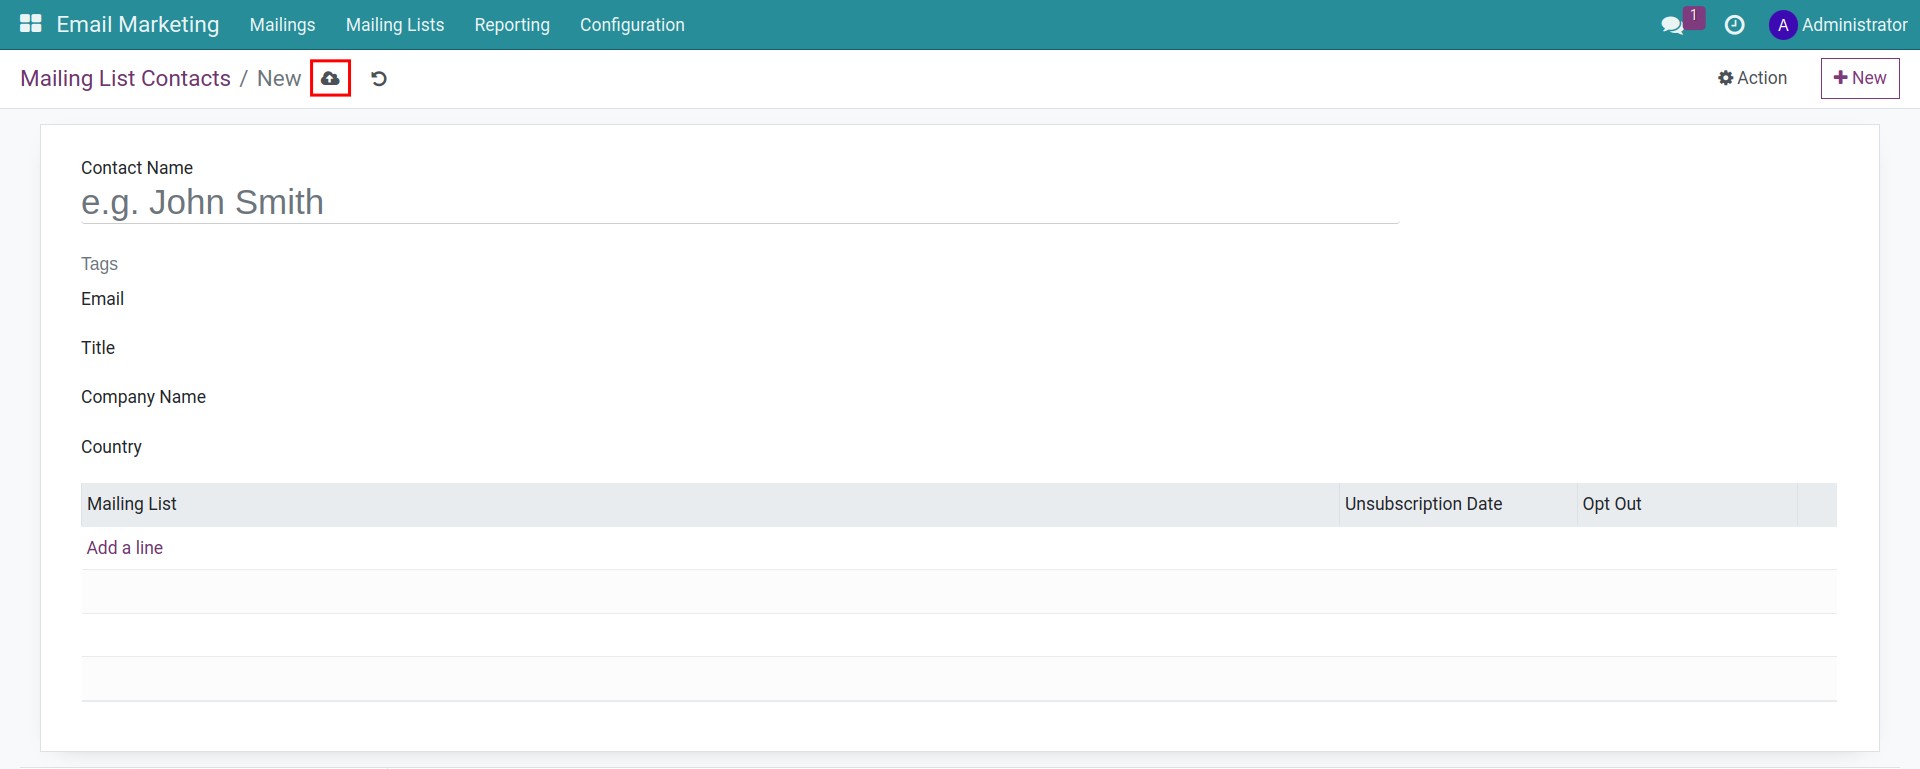
Go to Email Marketing > Mailing Lists > Mailing List Contacts and hit the New button.

Fill in the form with the following information:
Contact Name: information about the name of the recipient of the mail.
Tags: enter keywords for information search.
Email: fill in the recipient’s email information.
Title: select the company of the recipient of the mail.
Company Name: select the company of the recipient of the mail.
Country: select the country of the mail recipient.
Click on Save button to finish.

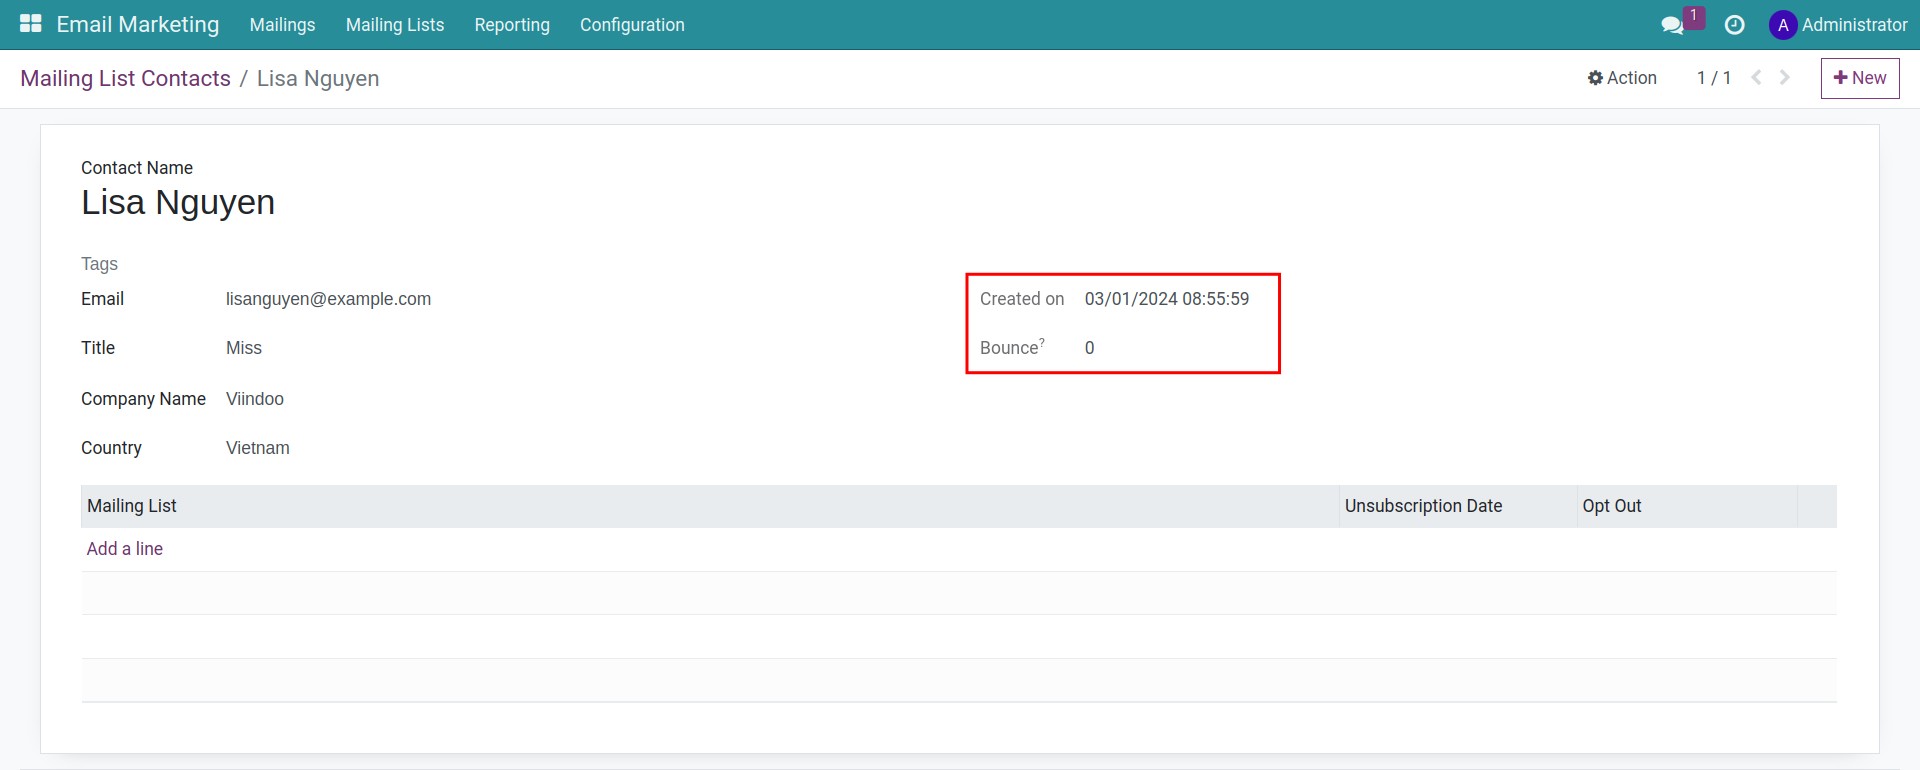
After saving, 2 fields will appear automatically calculated by the system:
Created on: the system will automatically record the creation time of the mail recipient.
Bounce: counter of the number of bounced emails for this contact.

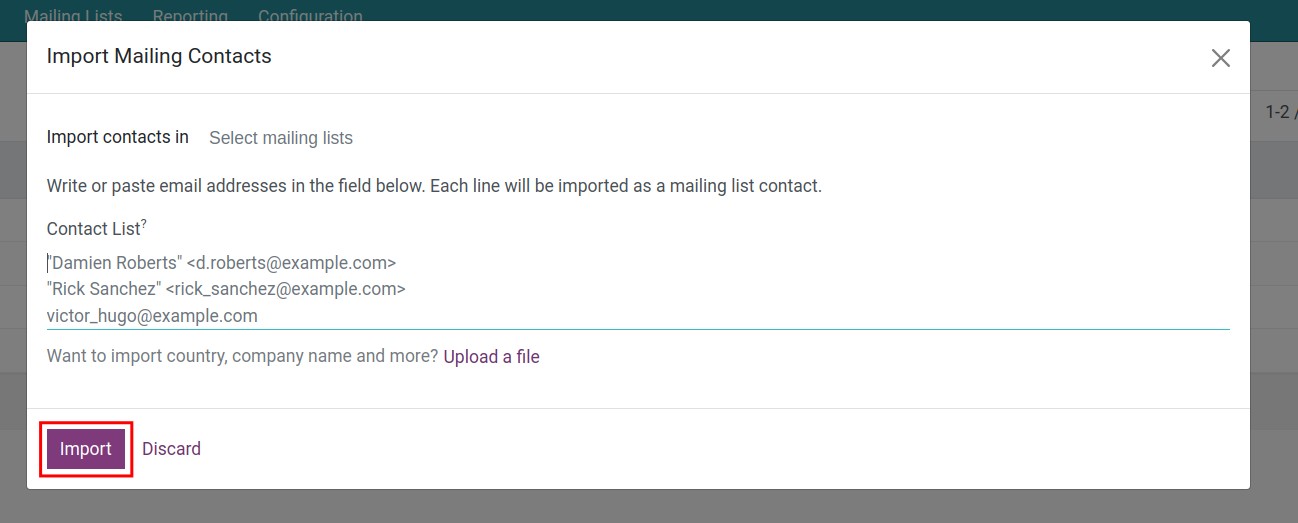
On the other hand, you can also quickly import mailing contacts by clicking on Import.

Now the Import mailing contacts pop-up is opened for you to enter the information:
Import contacts in: select the mailing lists.
Contact List: write or paste email address, each line fill in one contact.
Click on Import to finish.

Tip
You can create a mass number of mailing contacts easily with the Import data feature. Read more at Guiding to Import and Export Data.
Link a mailing contact with many mailing lists
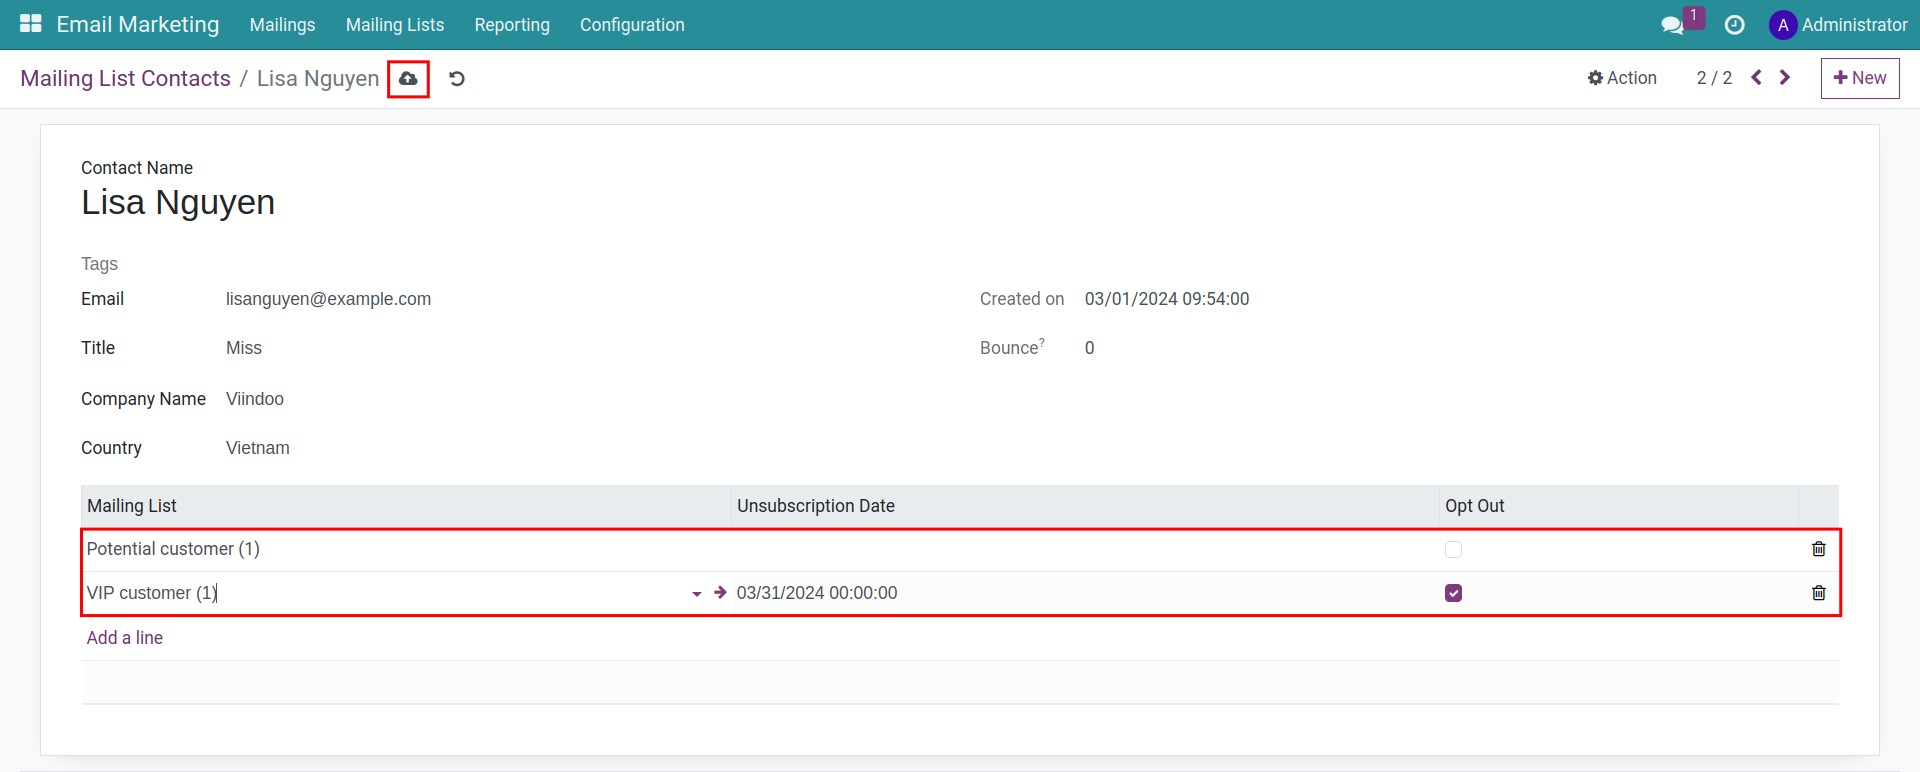
To send different marketing emails to a mailing contact, you should put the contact on many mailing lists. Go to that mailing contact, click on Add a line to add more mailing lists. When you want to stop mailing to that contact, let’s fill in two fields below:
Unsubscription Date: The system will stop sending emails since this date.
Opt Out: Check this box to activate the unsubscription.
If your customer unsubscribes from a mailing list, this information will be auto-updated.

Click on the Save button to finish. For example: If the contact is listed in the VIP customer list and the potential customer list, this contact will receive marketing emails from these two lists.
Note
When you apply an email marketing campaign for a contact that belongs to many mailing lists, the system will send only one email. Your customers will not be spammed.
See also
Related article
Optional module