Employee Advance Process
This article will guide you through the steps in an employee advance process. Before learning these steps, you need to understand the access rights of the Employee Advance module. Refer to: Overview about employee advance
Requirements
This tutorial requires the installation of the following applications/modules:
Create employee advance requests
To create employee advance requests, navigate to Employee Advance > New.

On the employee advance view, enter the following information:
- Employee: The person that needs advance. The system will auto-add the advance request creator to this field. If the user is an Approver/Administrator of the Employee Advance access app, he/she can create advances for their co-worker by typing another employee in this field.
- Job Position, Department: The job position, department of the person that needs the advance. The system will auto-fill this field according to the selected employee.
- Advance Date: The day the advance is created.
- Total Amount: The advance amount, the system will auto-calculate it by calculating the sum of the Advance Lines.
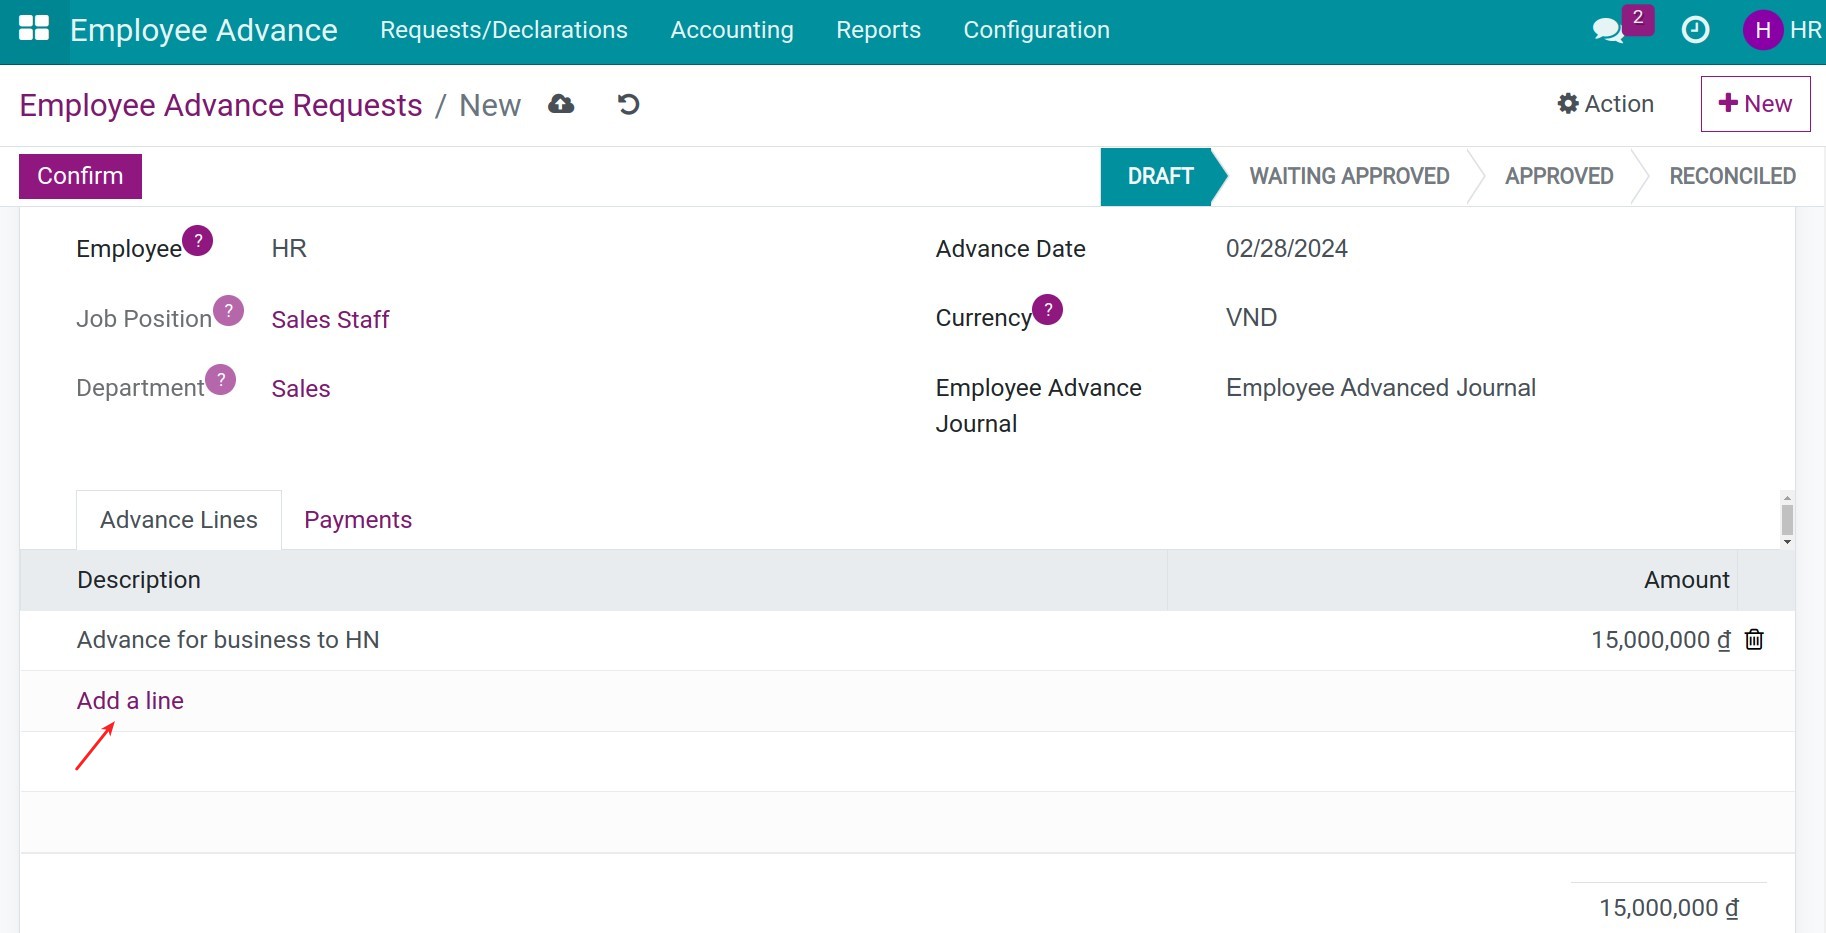
- Advance Lines tab: Details of each advance item. Press Add a line, type the Description and the Amount of each advance item.
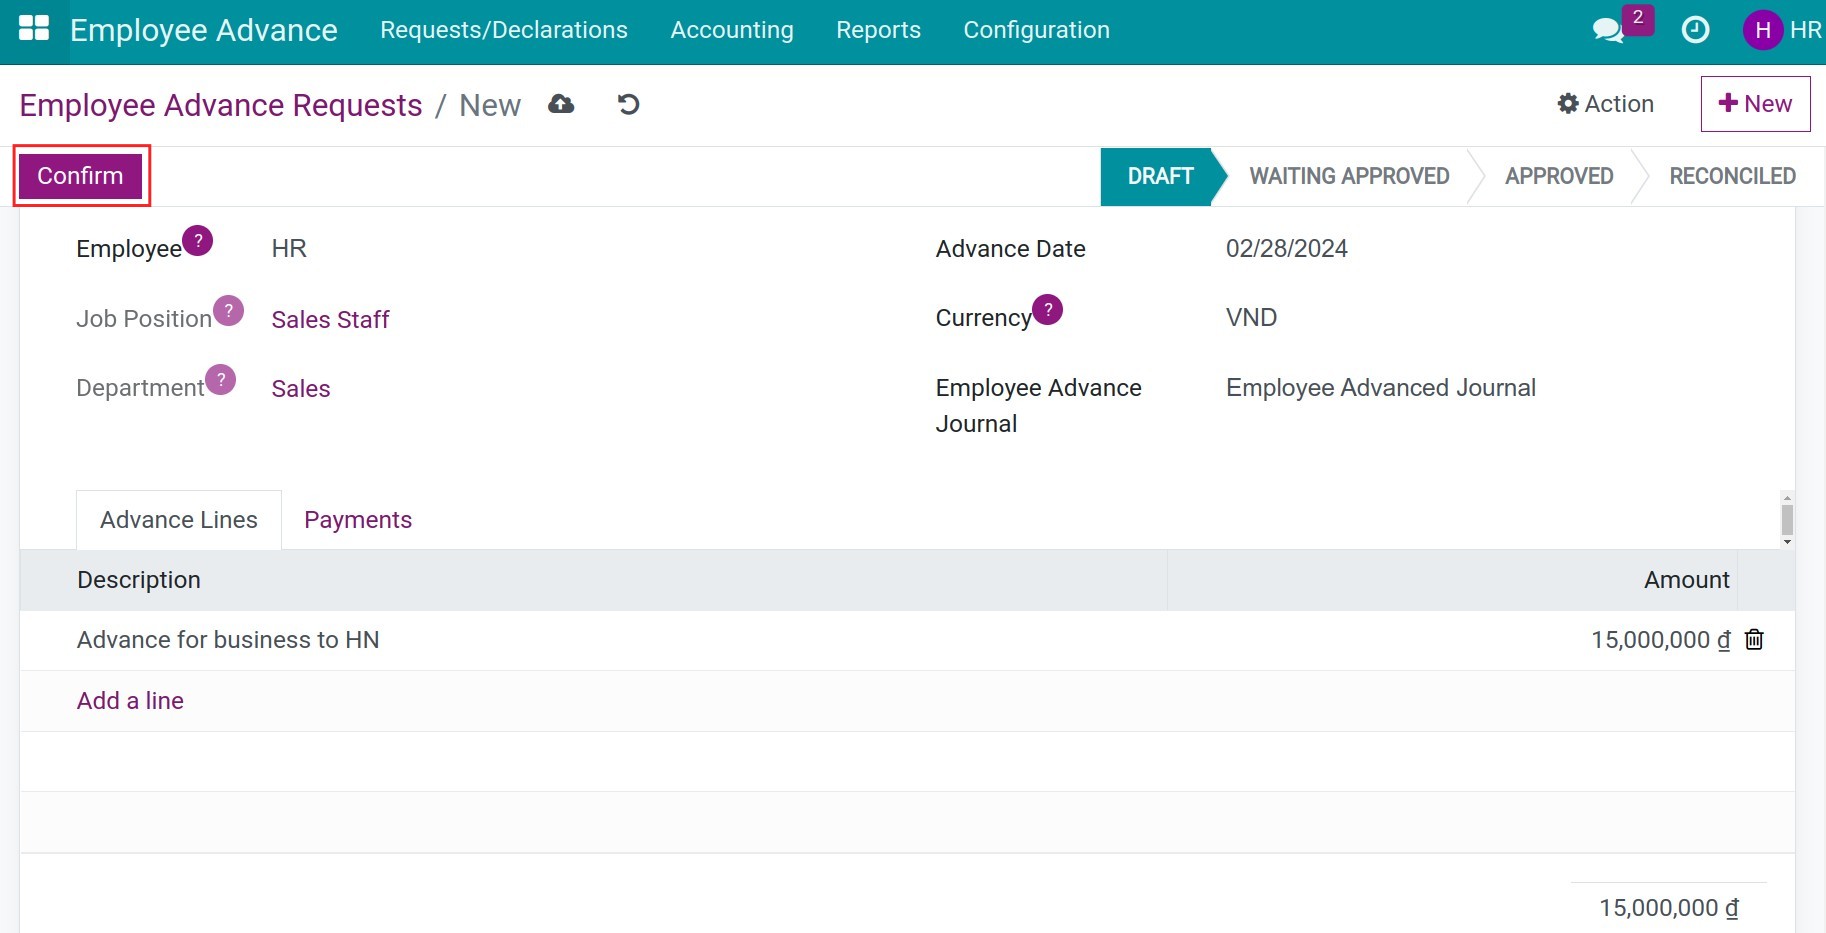
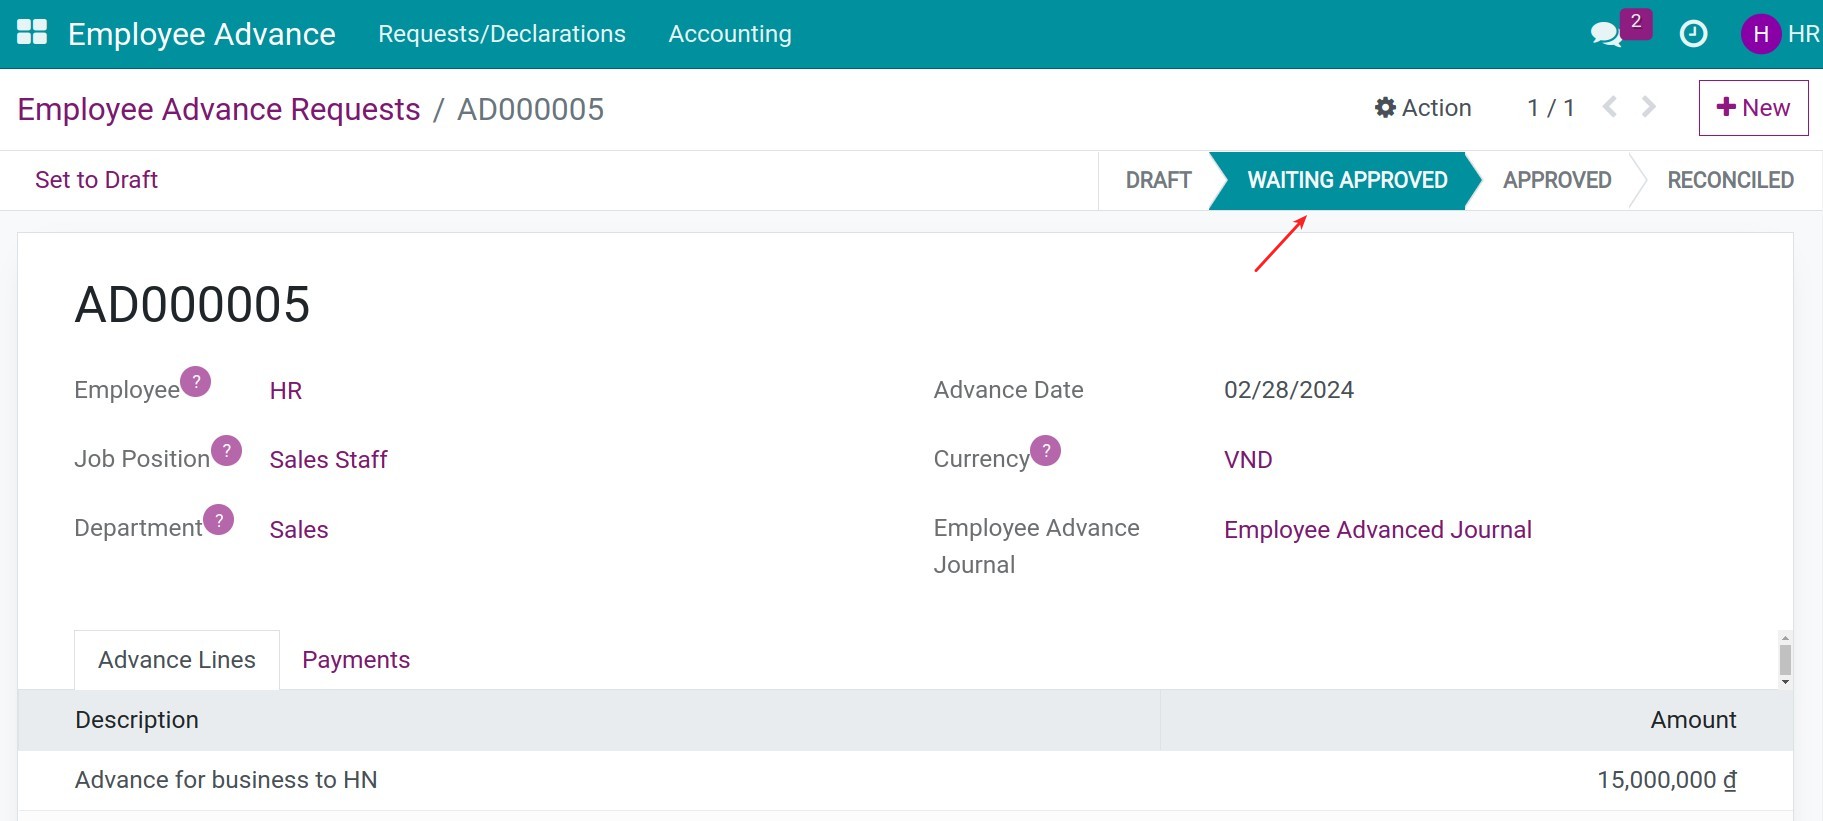
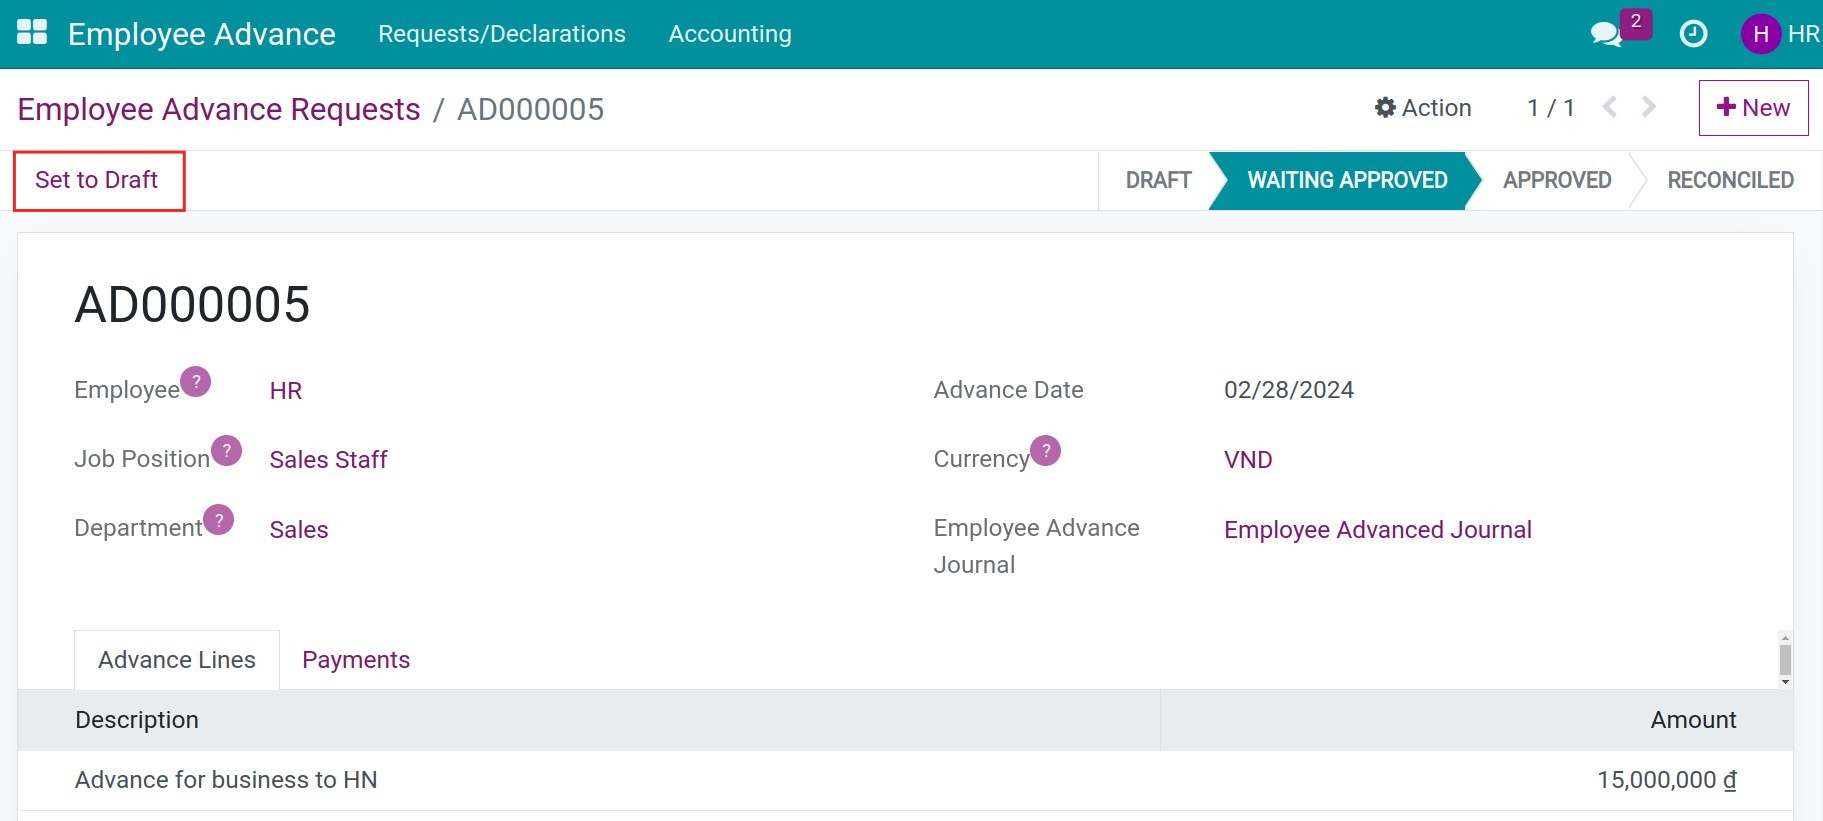
Review the information and then press Confirm to send to the Approver to approve. The request’s state will move to Waiting Approved.
To edit the information on the request, press Set to Draft. After pressing, the request will be moved to the Draft state, you can edit the information.
Approve the Advance request
To approve the advance request, navigate to Employee Advance > Requests/Declarations > To Approve. Search and select the request you want to approve.
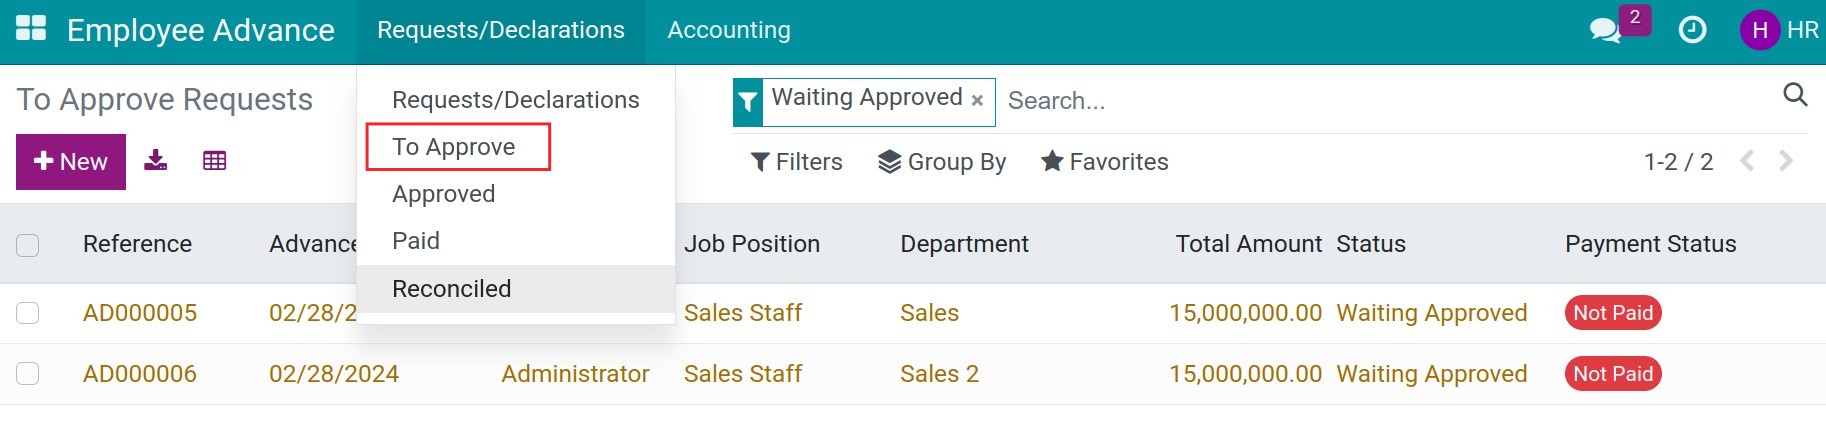
After checking the information, press Approve, Refuse or Set to Draft to edit.

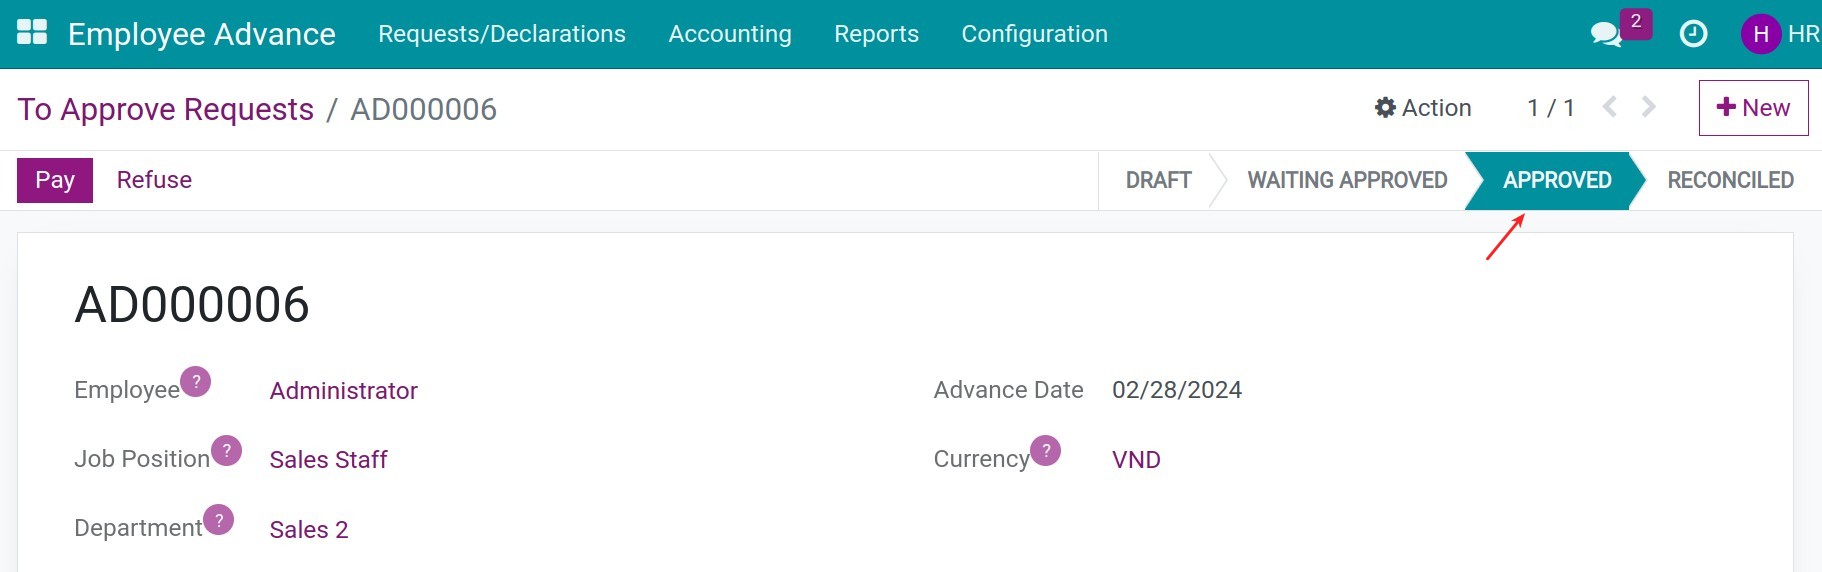
When approve the advance request, approval process will take 2 options:
- If your company go through one step approval process, the Users with the Administrator access right could approve this request and the request’s status would change from Waiting Approved to Approved:
![The Advance request on the Approved state]()
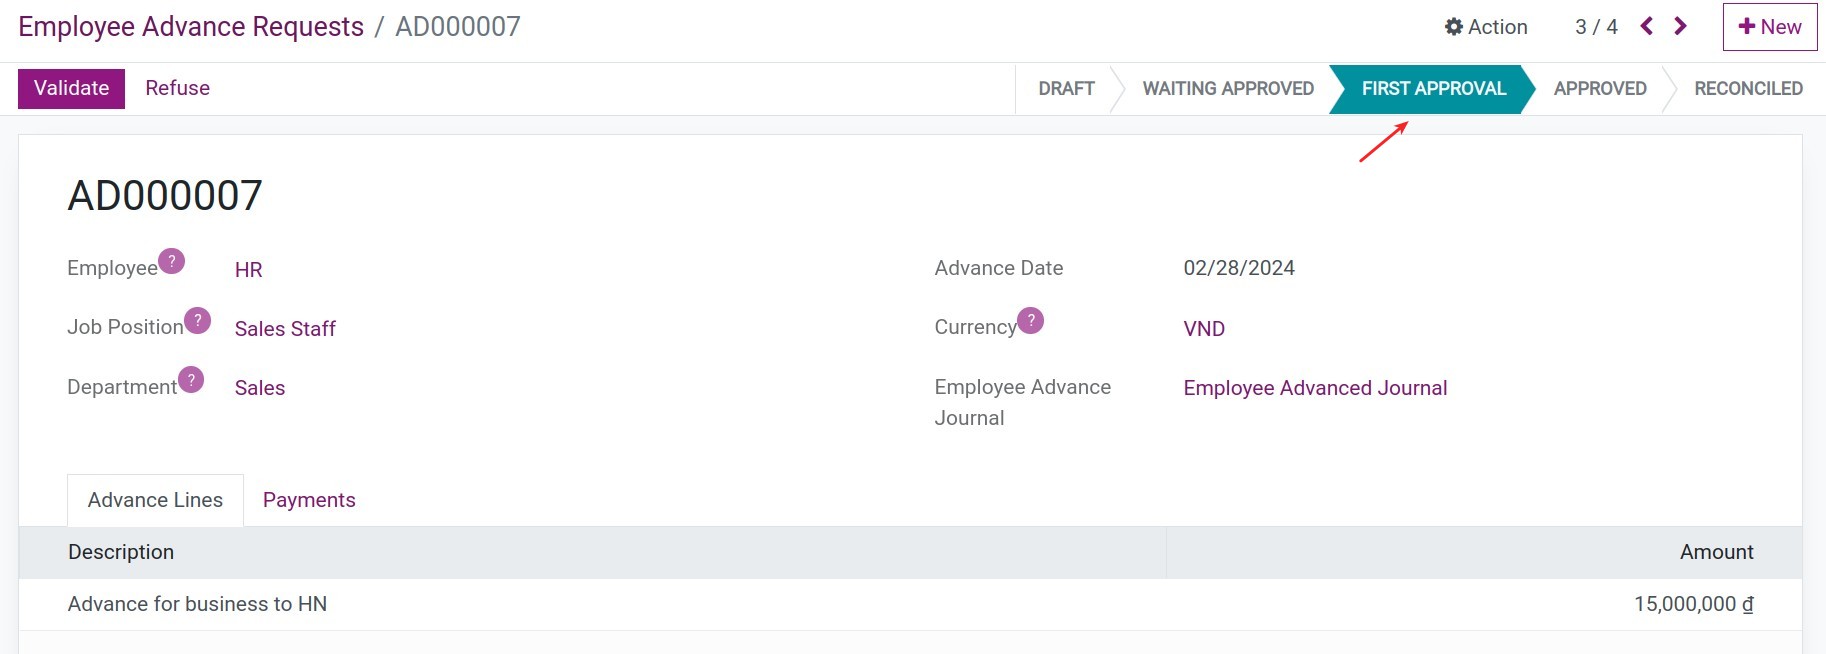
- If your company go through two steps approval process, the Users with the Appover access right will do the first approval, and then the Administrator access right could approve this request.The request’s status would change from Waiting Approved to First Approval and then to Approved:
![The advance request on the First Approval state.]()
![The Advance request on the Approved state]()
Note
If your company only applies for 1 step approval, you need to assign the Administrator access right to the person in charge of approving the advance request.
Advance request payment
After the request is approved, the accounting department will transfer the advance amount to the requesting person. To pay the Advance request for the employee in your company, you need to:
- At least be granted as the User on the access right of Employee Advance.
- At least be granted as the Accountant on the access right of Invoicing, refer to How to configure Viindoo Accounting and Invoicing before using.
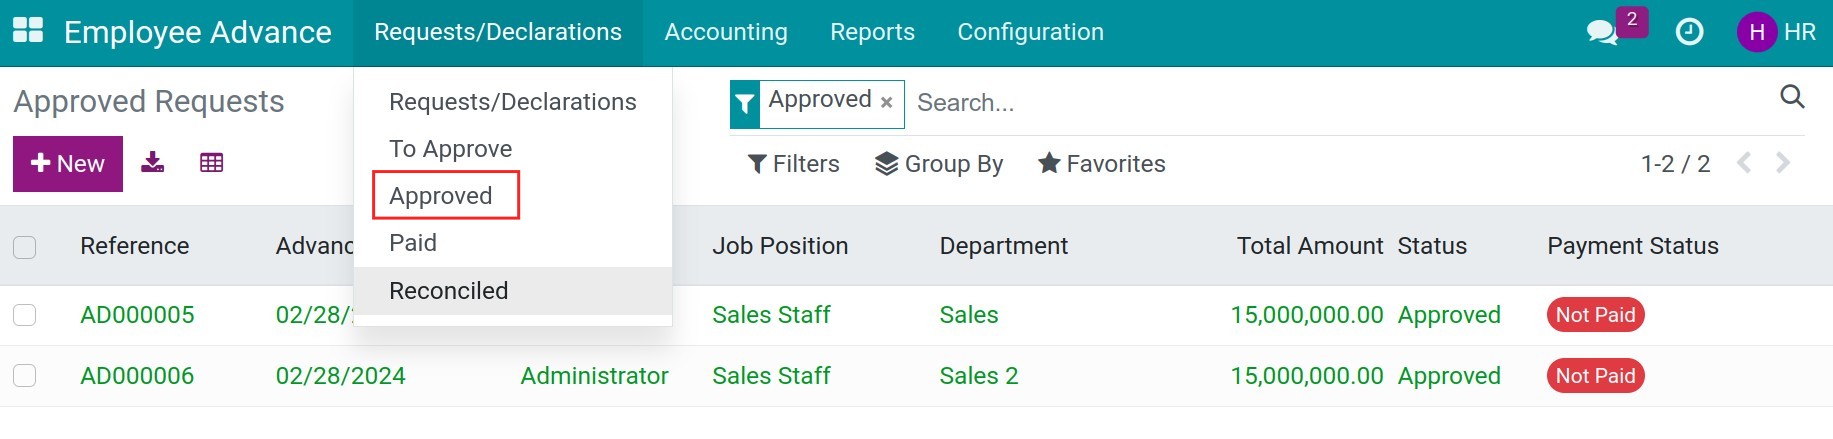
Navigate to Employee Advance > Requests/Declarations > Approved, search for the request you want to pay for. You can filter by the employee, etc.
Press Pay on the advance request and enter the payment information:
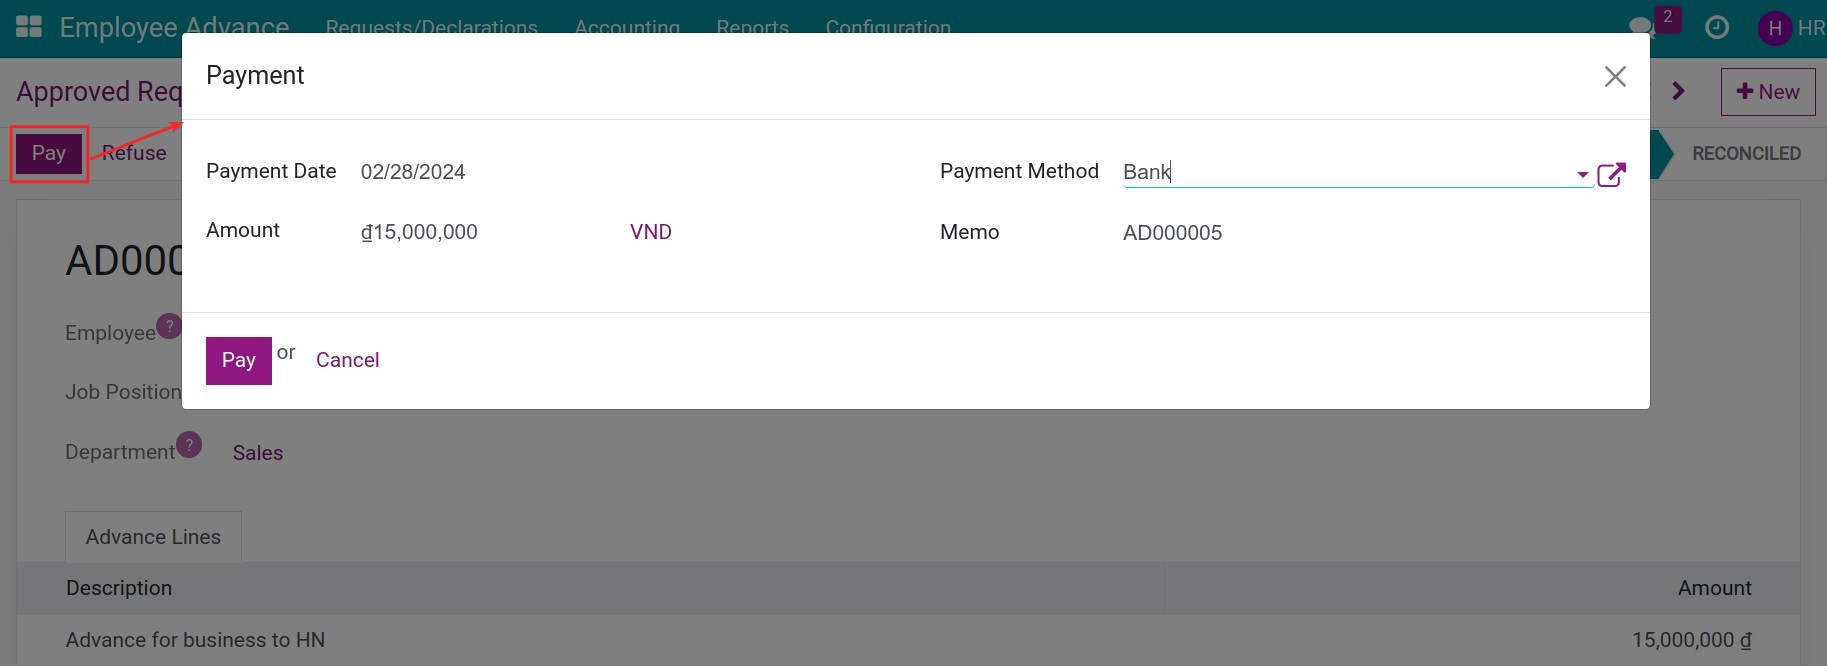
Payment Date: Select the accounting date of the payment entry.
Amount: The payment amount paid to the Employee. You can enter a smaller amount (split the payment). On the next payment, the system will suggest the remaining amount.
Payment Method: Select a journal corresponding to the advance’s payment method.
Memo: Type something to help you remember this payment, to make it easier to search, lookup afterward.
Press Pay.
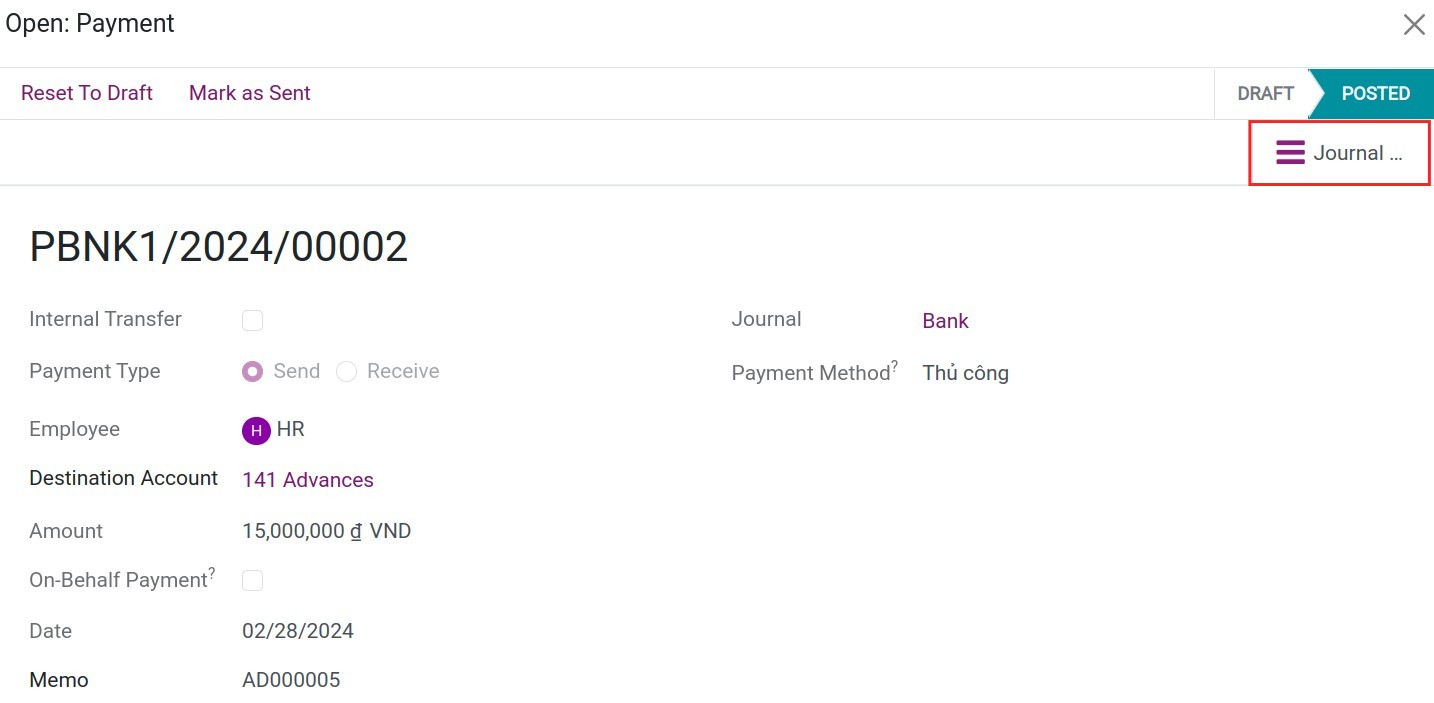
After the payment, you will see the payment information on the Payments tab with the Posted status.
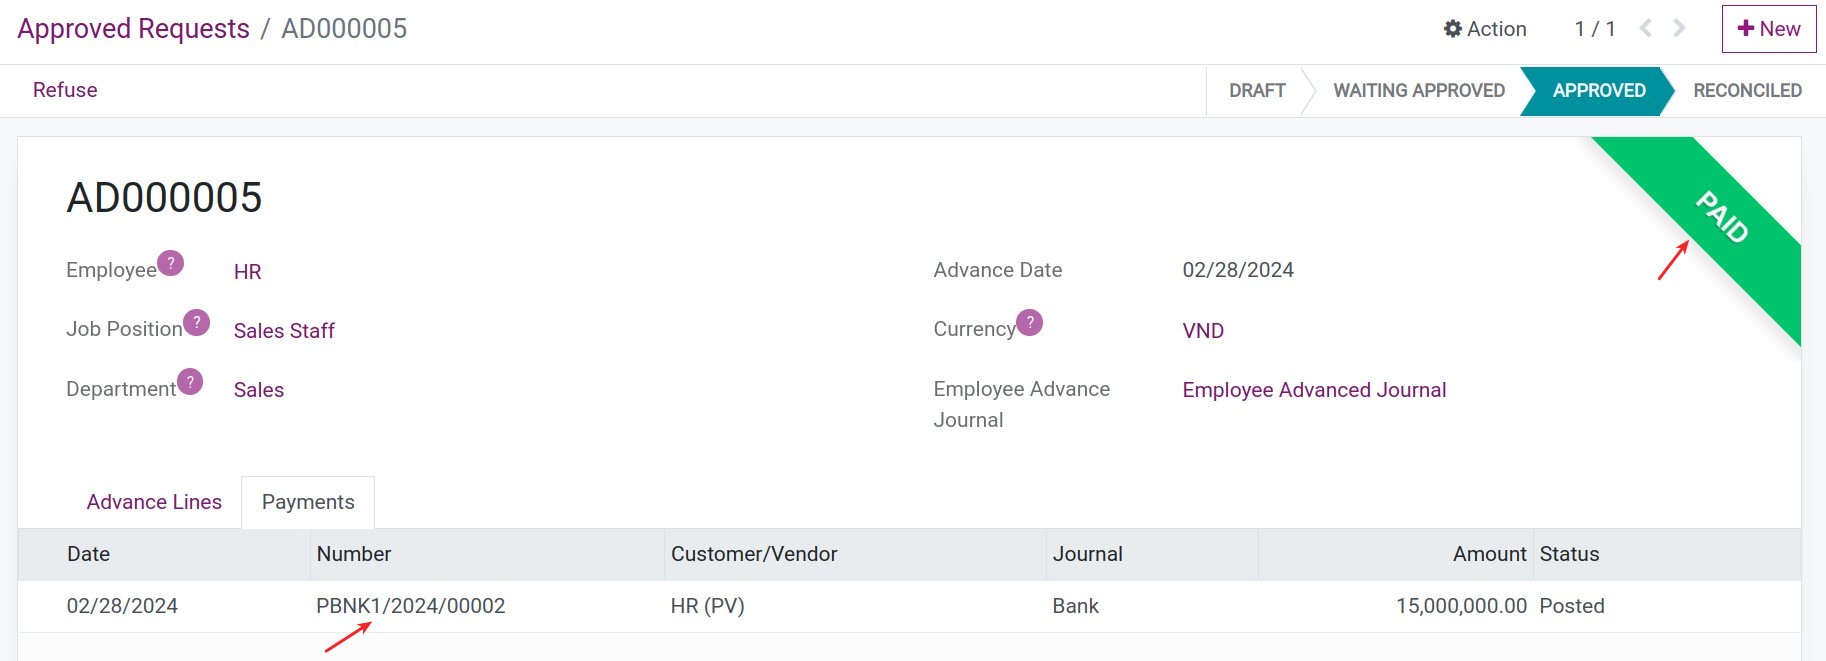
Then, you can check the items of the posted Journal entry, press Journal Entry to review the information on the Journal entry: