Shipment Scheduling
Shipment Scheduling is a feature that helps businesses optimize their shipping process by effectively planning and managing delivery schedules. This feature allows for the allocation of inbound and outbound shipping orders to vehicles or trips in a rational manner based on vehicle capacity or trip plans. By doing so, businesses can minimize transportation costs, improve resource utilization, ensure on-time deliveries, and enhance the customer experience.
Requirements
This tutorial requires the installation of the following applications/modules:
Initial Configuration
Module Installation
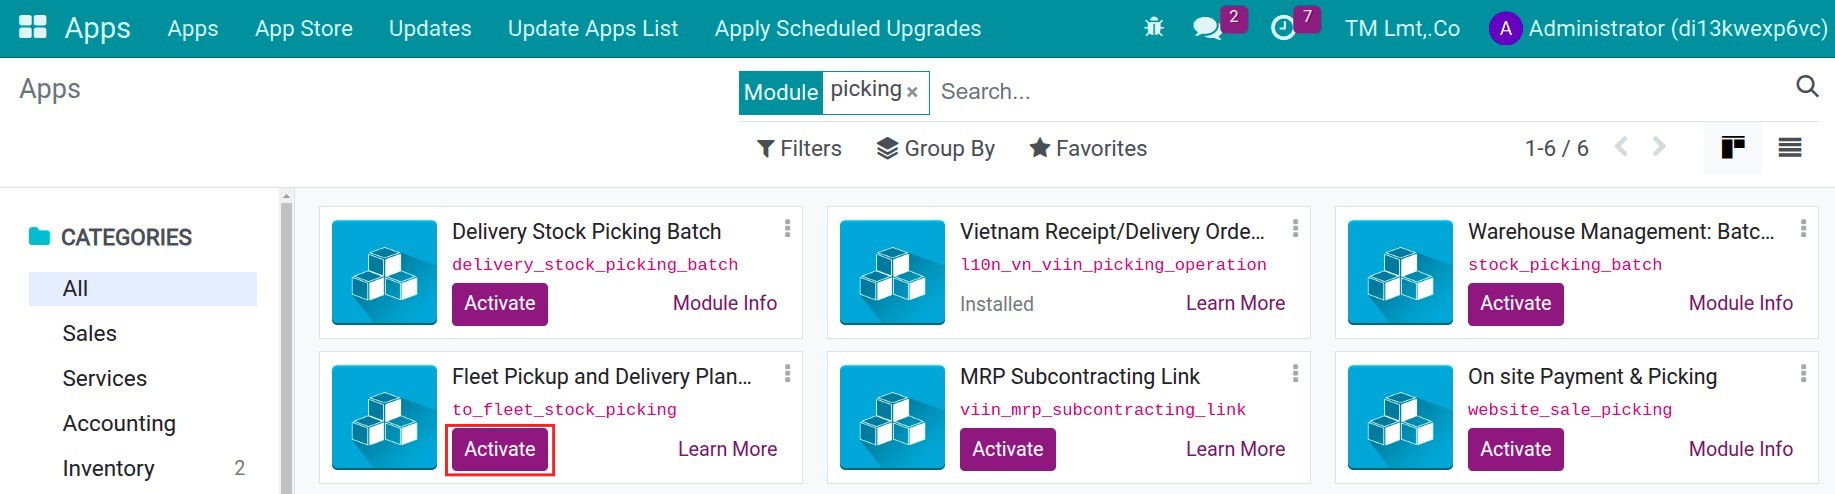
To install the module, navigate to Viindoo Apps, remove the default filter and search for the to_fleet_stock_picking module then press Activate.
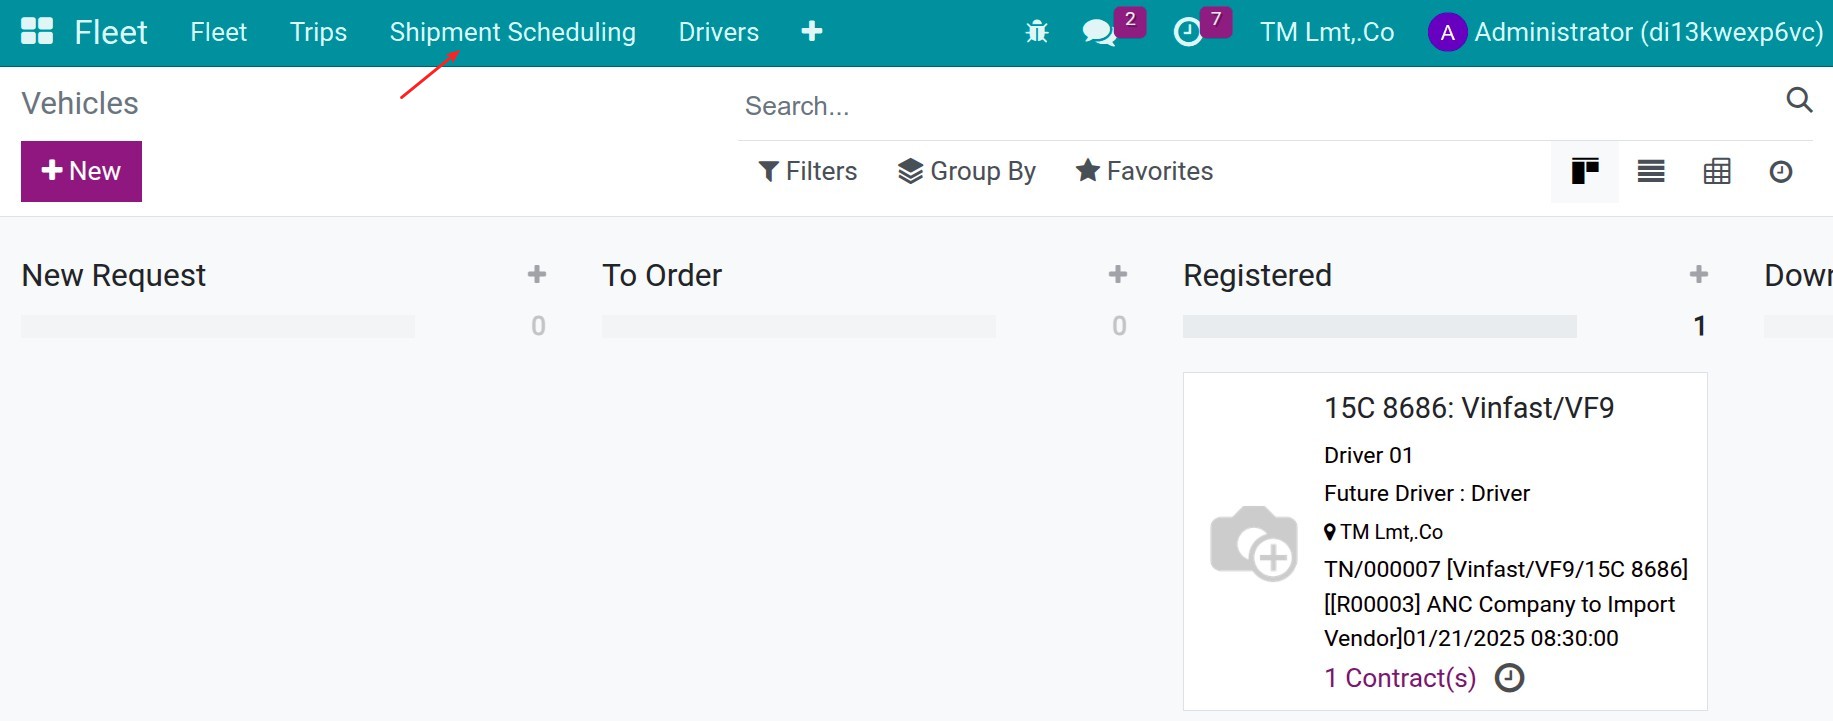
After installing sucessfully, a new menu Shipment Scheduling will be appeared, where you can assign the delivery or receipt note for vehicles or trips.
Vehicle Configuration
In trip/vehicle scheduling operations, optimizing vehicle load capacity is as critical as managing their itinerary. This not only ensures the safety for vehicles and goods but also help bussiness reduce operational costs and enhance efficiency in a sustainable manner.
In Viindoo Fleet, you can declare the loading capacity for each vehicle, and then the system will raise a warning if you are assigning over its capacity. To state the vehicle load capacity, navigate to the Fleet list, choose the needed vehicle. In the Loading Parameters area, declare the capacity as follows:

Warning Volume: The total volume (m3) can be safely loaded onto the vehicle.
Max. Volume: The maximum volume (m3) can be loaded onto the vehicle, but not recommended.
Warning Weight Load: The total weight (kg) can be safely loaded onto the vehicle.
Max. Weight Load: The maximum weight (kg) can be loaded onto the vehicle, but not recommended.
Besides, you need to activate the Can Transport Goods feature for this vehicle. You also can make a rule of carrying goods to this vehicle by setting the domain.
Product Configuration
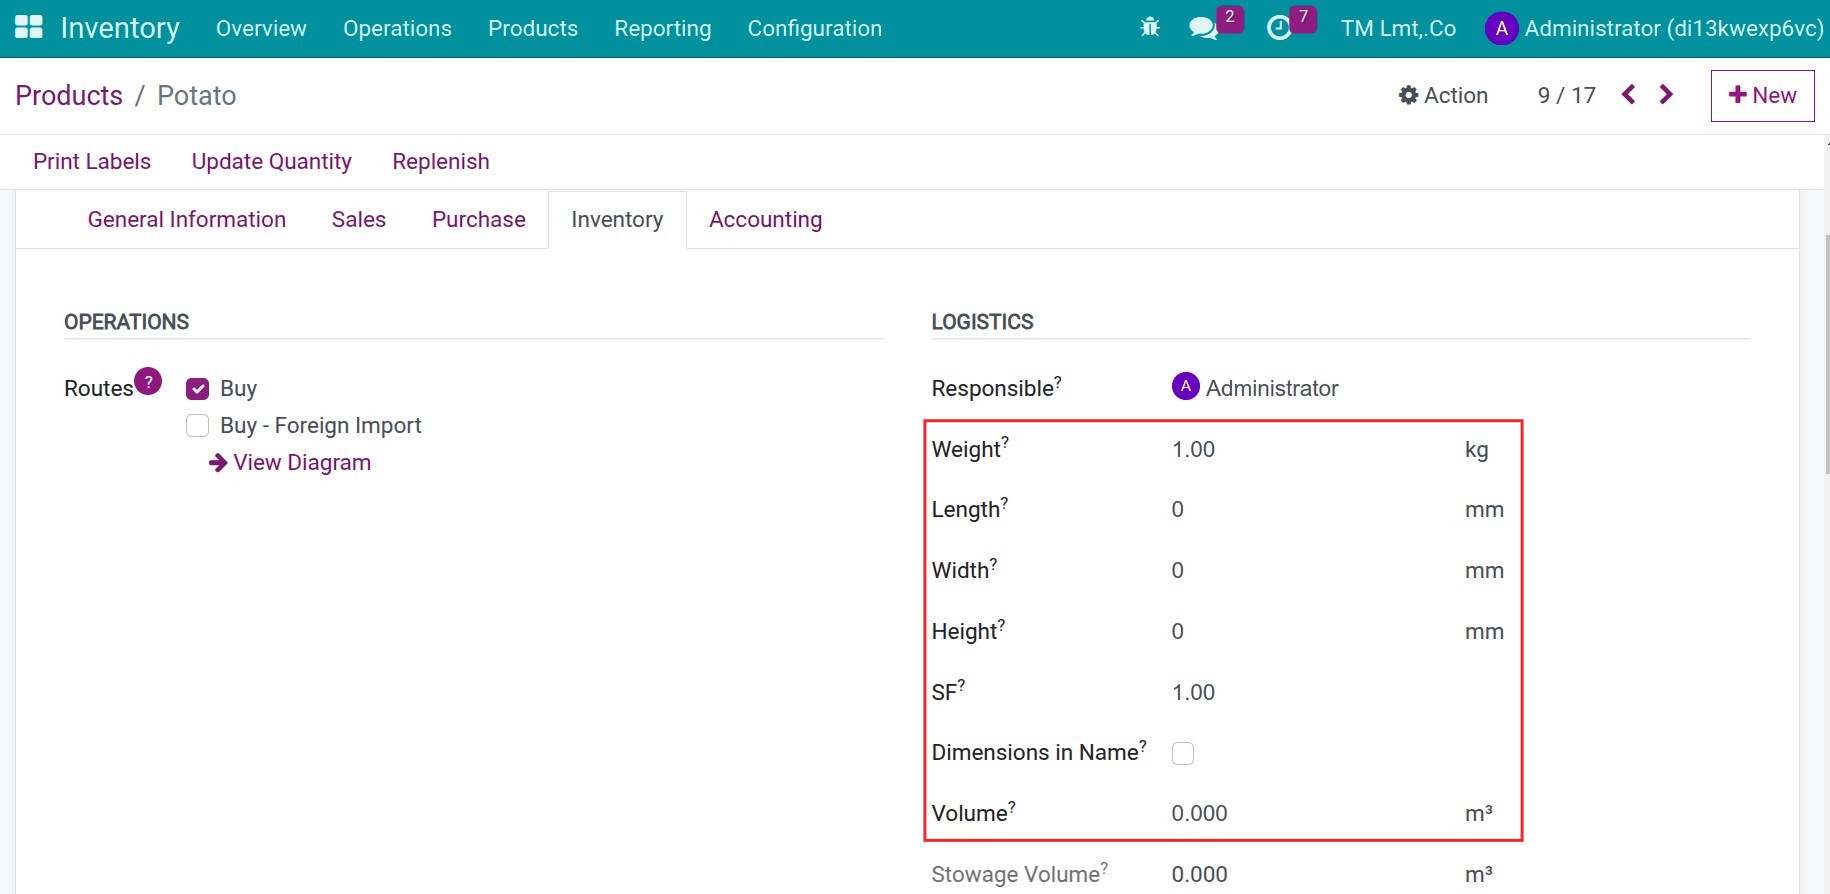
Besides configuring the vehicle loading capacity, you also must to state the weight load or volume for the goods. So, based on this information and the picking quantities, the system will calculate the total weight of each picking, and then compare it with the vehicle capacity.
To state the weight load and volume for goods, navigate to Inventory > Products > Products, choose or create a product. Then, go to the Inventory tab to state the information:
Note
With the goods having the unit of measure is on the weight category, you can set 1 in the weight of the product.
In case the goods are packed, the total weight or volume will be both.
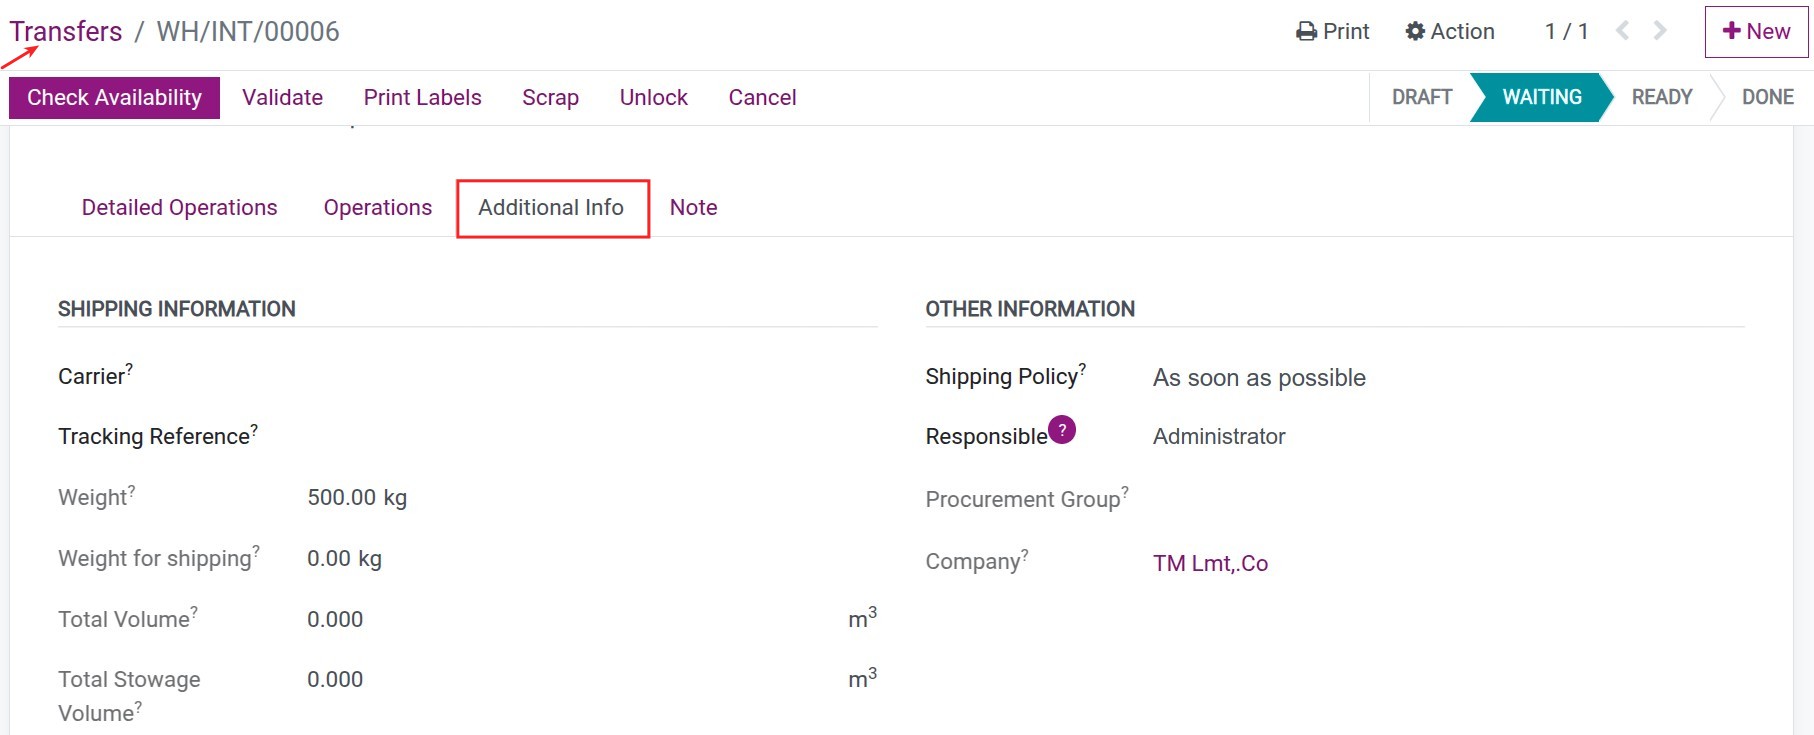
In the stock pickings, you can see the total weight or volume in the Additional Info tab:
Shipment Scheduling for Vehicle
Navigate to Fleet > Shipment Scheduling, fulfill the below information:
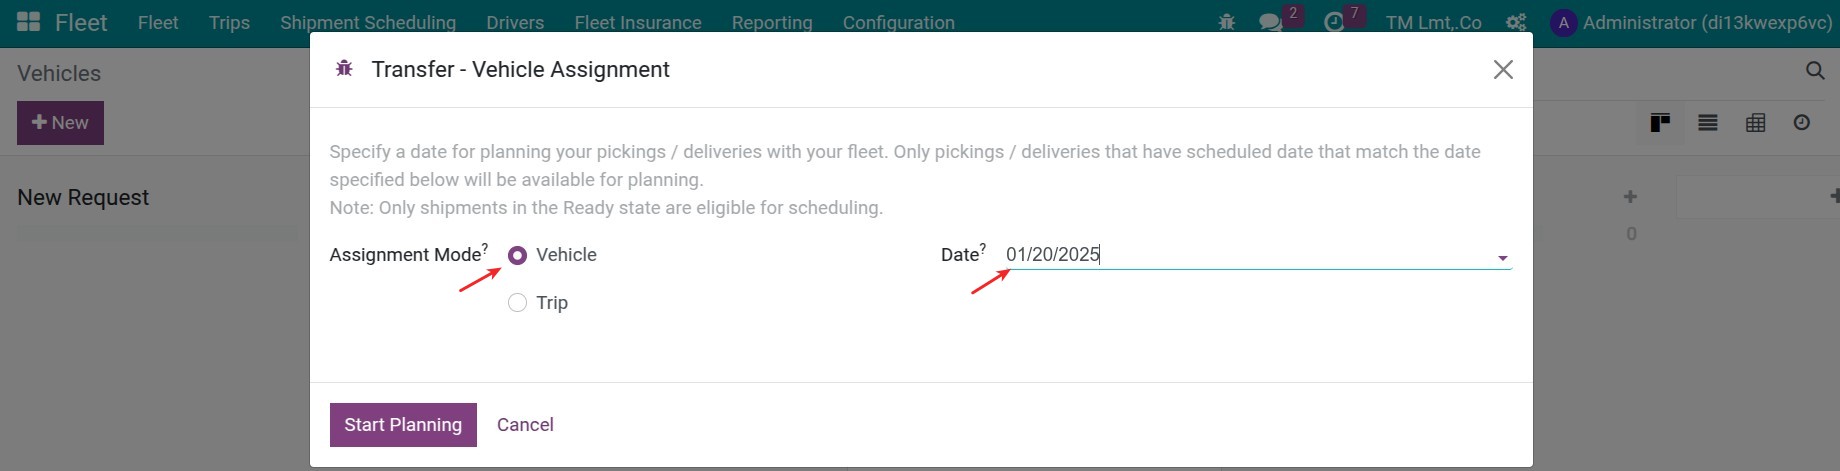
Assignment Mode: Choose the Vehicle mode.
Date: Choose the expectation date for planning. All the transfers have a scheduled date that matches the chosen date here will be shown for planning. It means all the transfers have a scheduled date that is at least equal to or later than this date will be available.
Then press the button Start Planning, you will be moved to the transfer assignment window. Here, you can drag and drop the transfers to each vehicle.
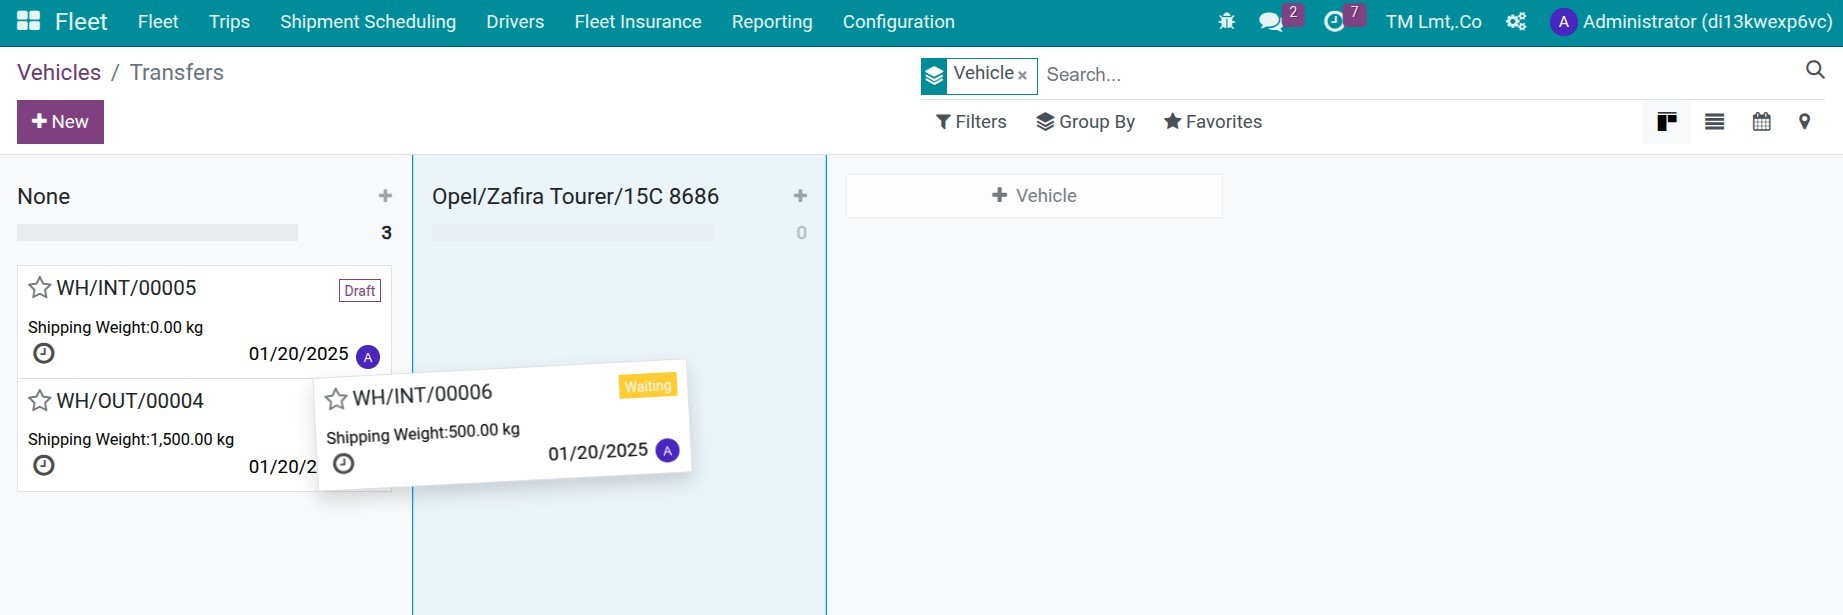
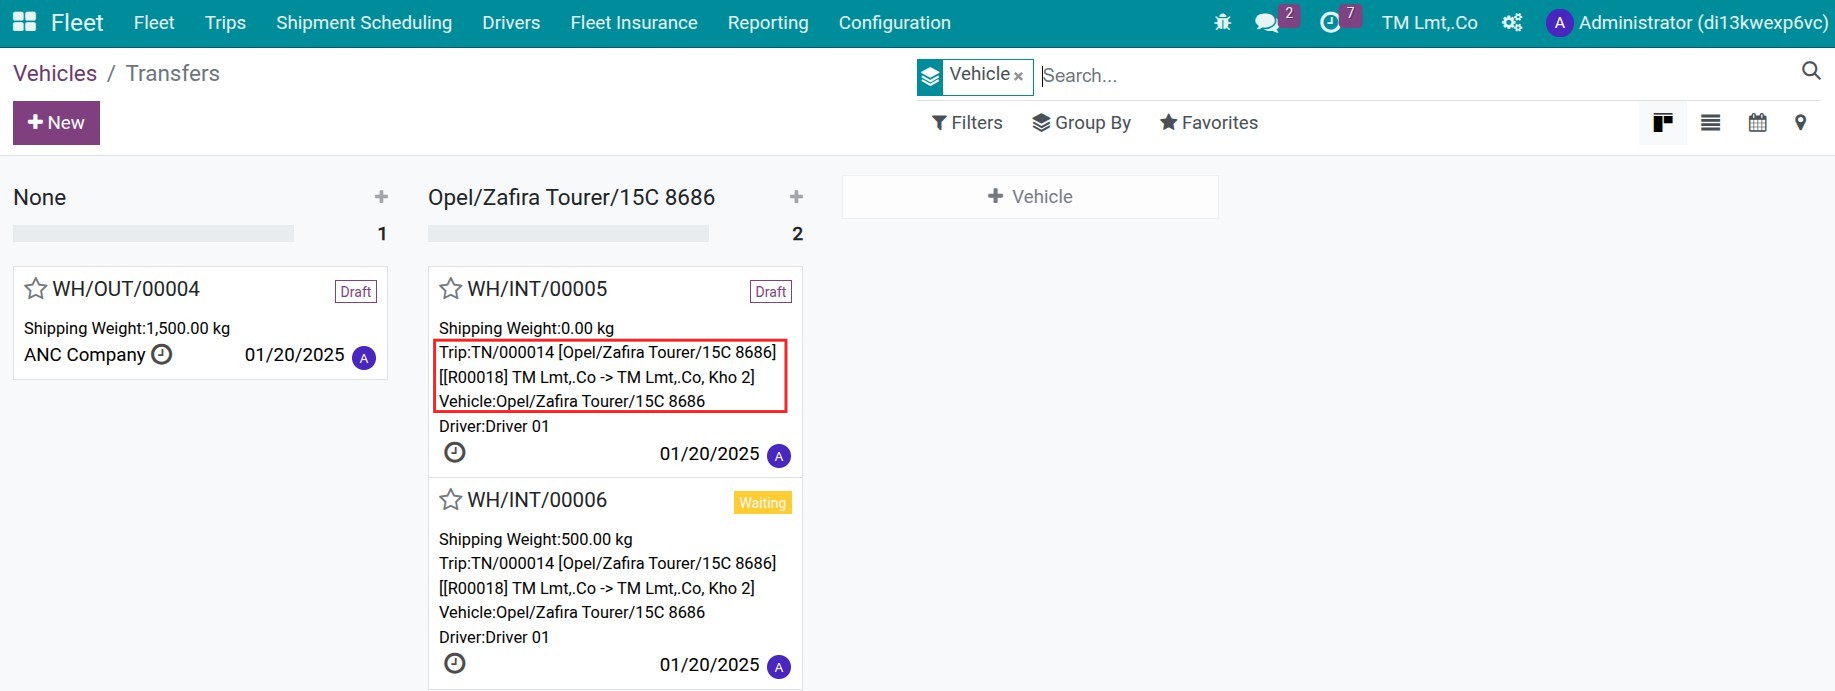
After the assignment, you will see the information of vehicle and the respective trip on the transfer. The system will auto-create a new trip based on the address of the source and destination locations.
Note
The source location and destination location must have different addresses.
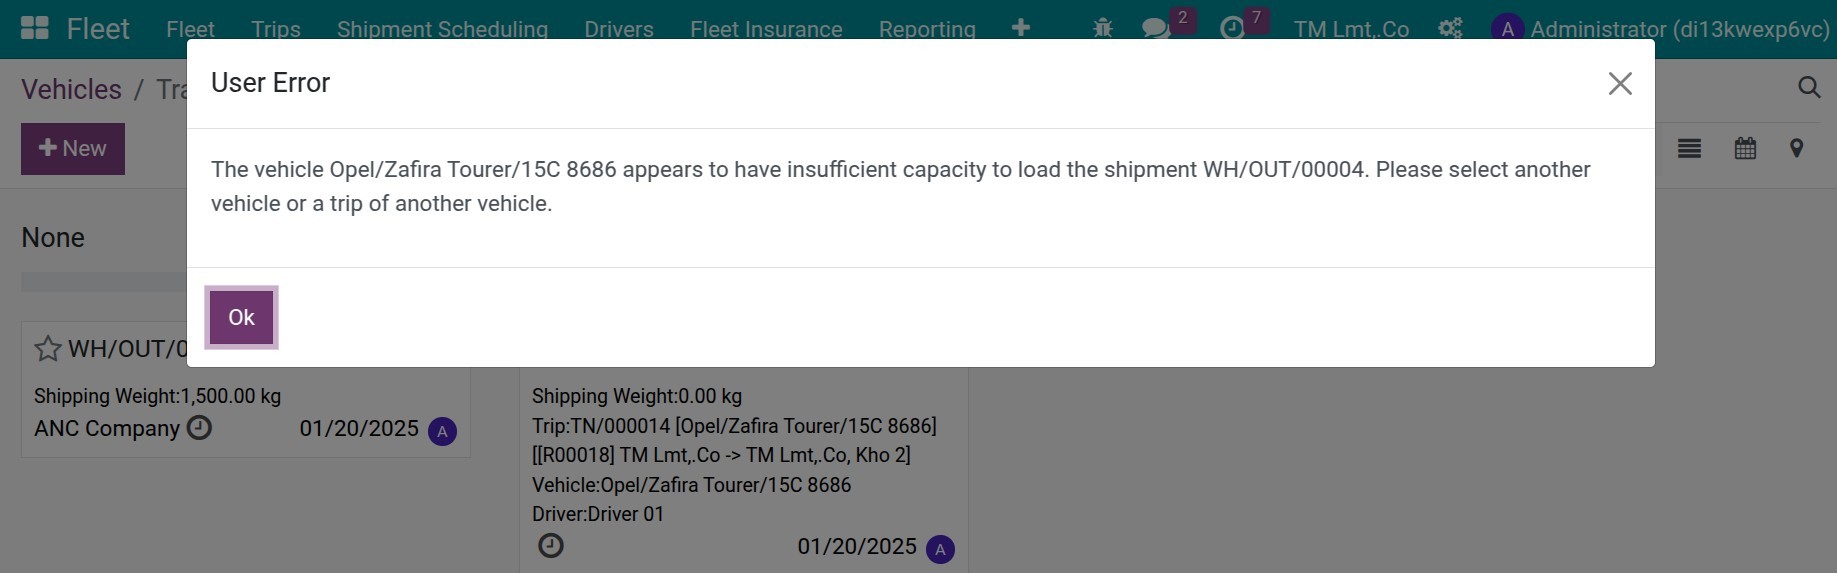
In case the total weight of all the transfers overwhelm the vehicle load capacity, the system will raise the warning:
Shipment Scheduling for Trips
Navigate to Fleet > Shipment Scheduling, fulfill the below information:
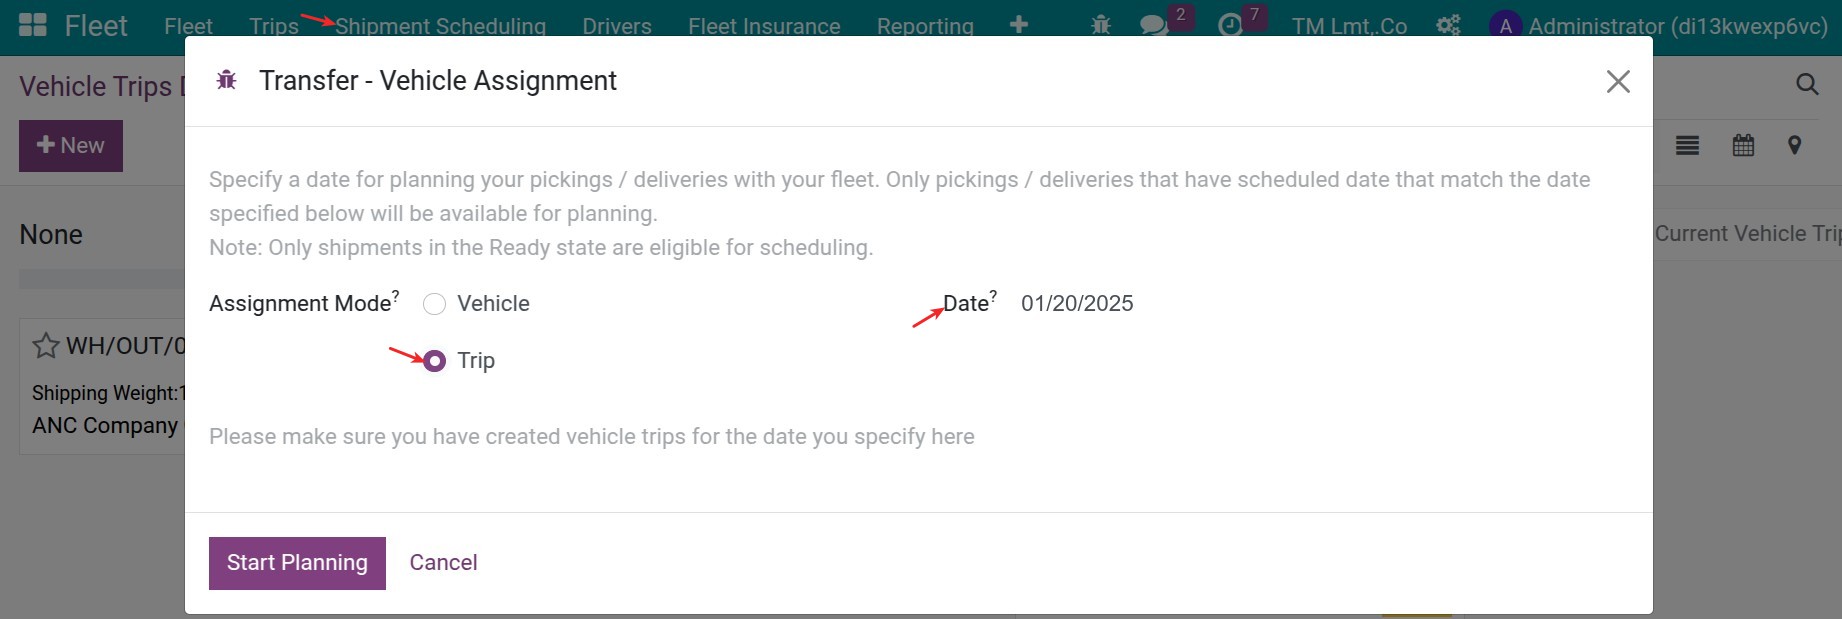
Assignment Mode: Choose the Trip mode.
Date: Choose the expectation date for planning. All the transfers have a scheduled date that matches the chosen date here will be shown for planning. It means all the transfers have a scheduled date that is at least equal to or later than this date will be available.
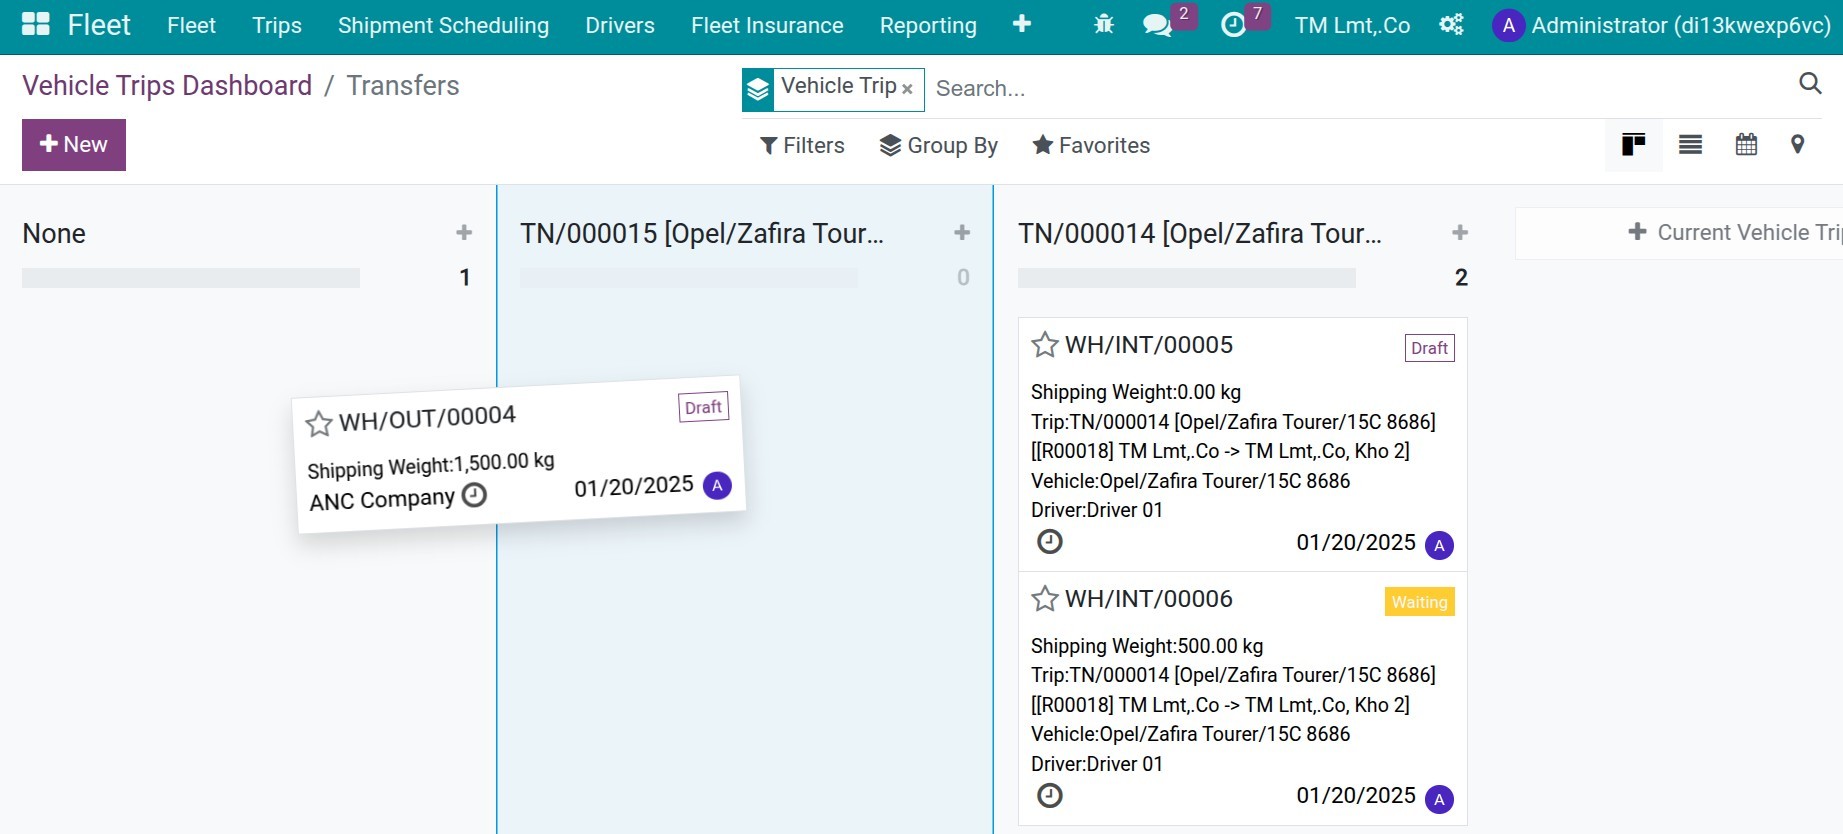
Then press the button Start Planning, you will be moved to the transfer assignment window. Here, you can drag and drop the transfers to each vehicle.
Note
Before doing this, make sure you created a trip as follows Schedule and Planning Vehicle Management.
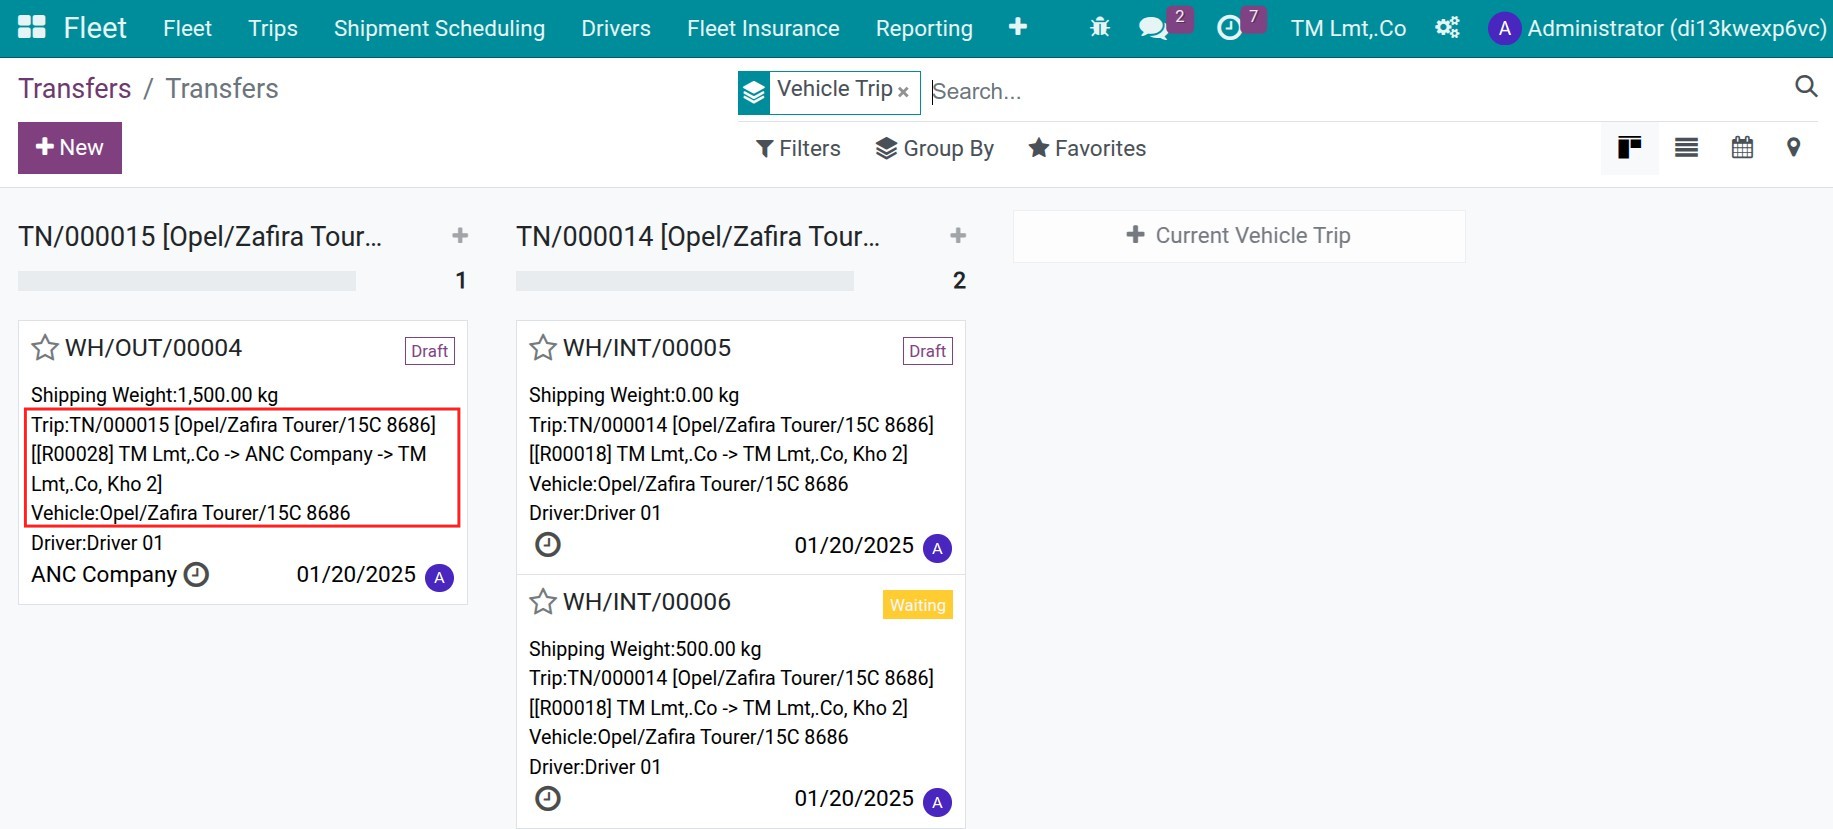
After the assignment, you will see the information of the trip and the respective vehicle on the transfer.
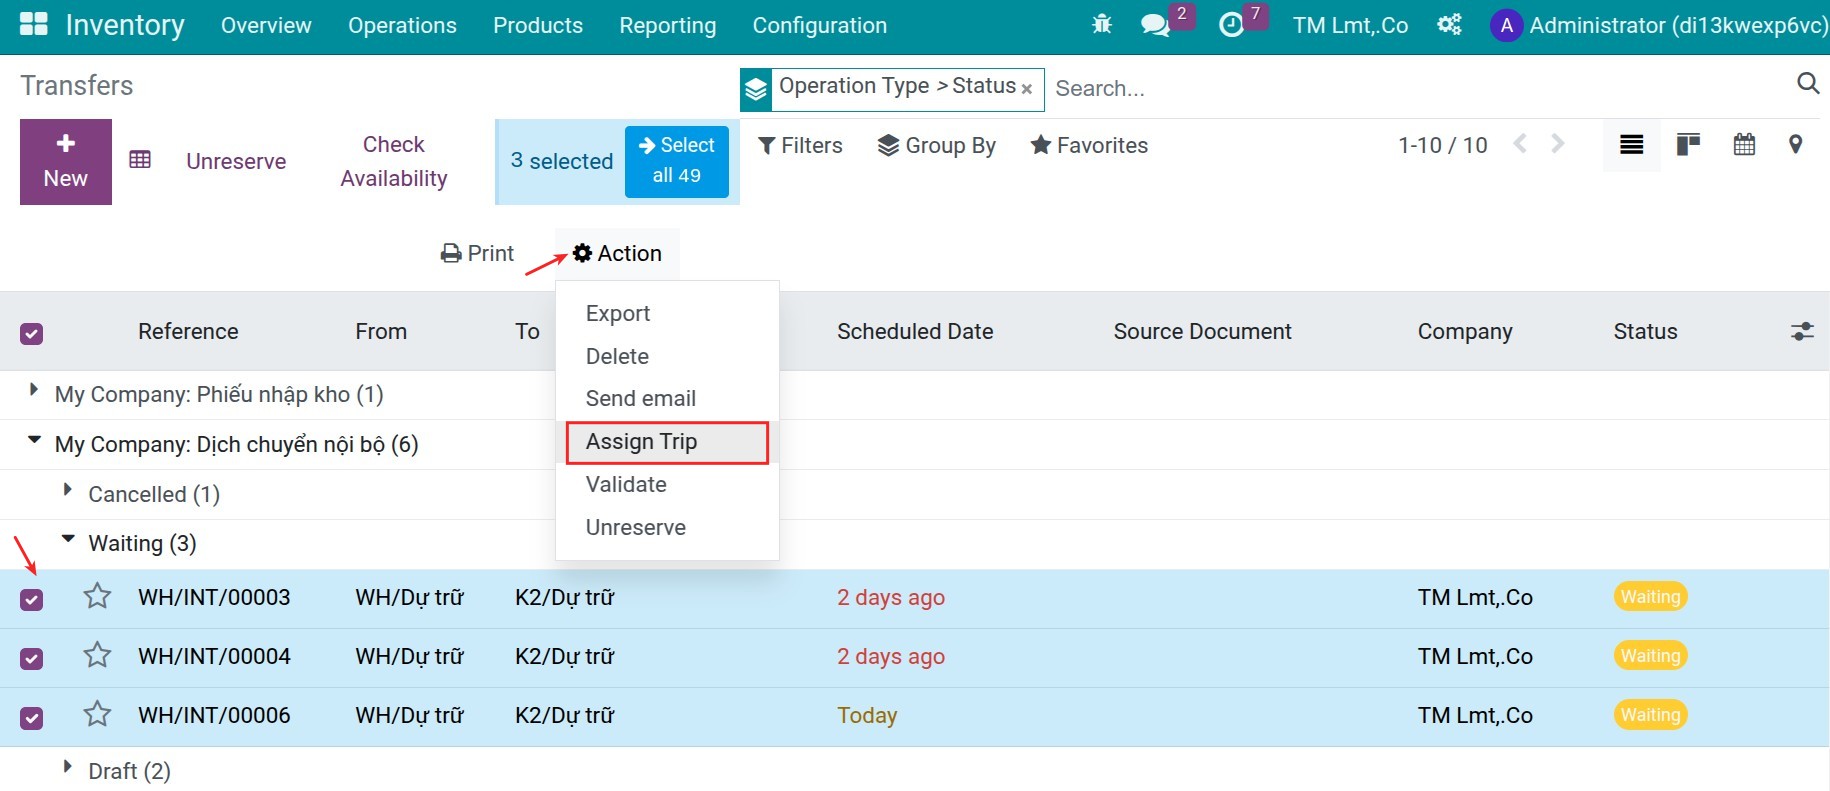
Besides, you can assign batch of transfers to a trip by:
Navigating to Inventory > Operations > Transfers.
Pressing Group By with Operation Type criteria or using the filter to search the needed transfers.
Choose the needed transfers.
Pressing Action > Assign Trip.
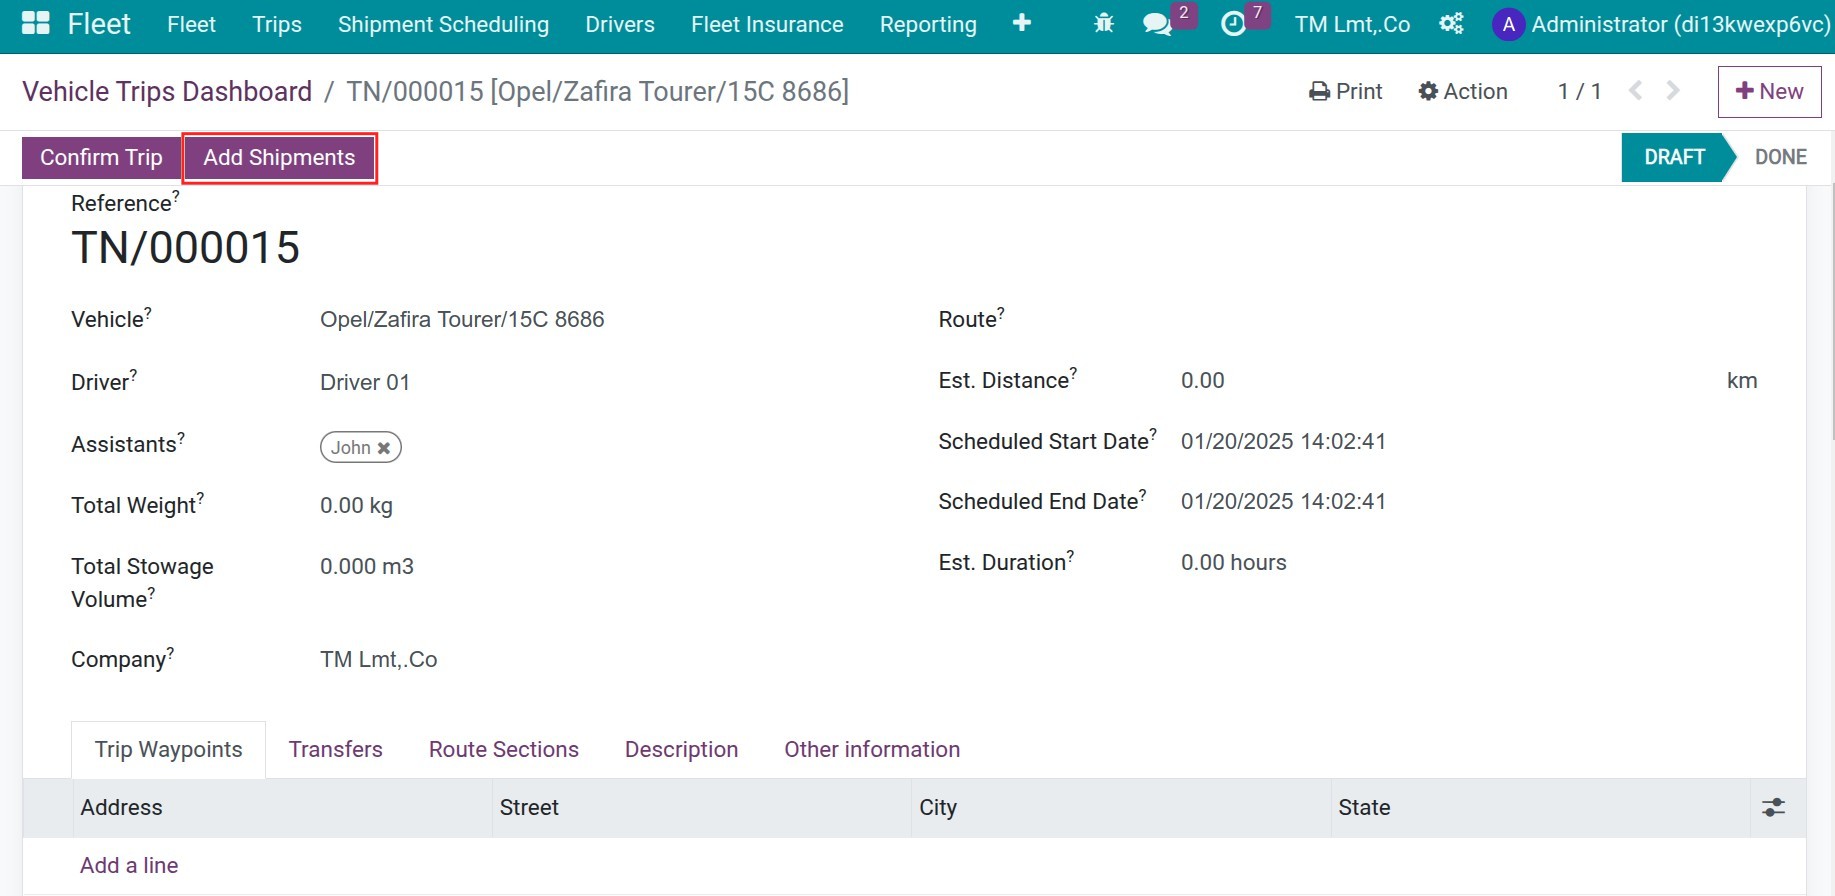
Or on the specific trip, you also can assign transfers by pressing Add Shipments, choose the transfers. The system also auto-create a new route with the respective waypoints.
See also
Related article
Optional module