Customize the existing interface
With the Viindoo Customizer application, you can easily customize the existing interfaces of the Viindoo Enterprise Management Software applications according to your preferences without requiring deep technical knowledge. This article will guide you through the steps of customizing an existing interface using the Viindoo Customizer application.
Requirements
This tutorial requires the installation of the following applications/modules:
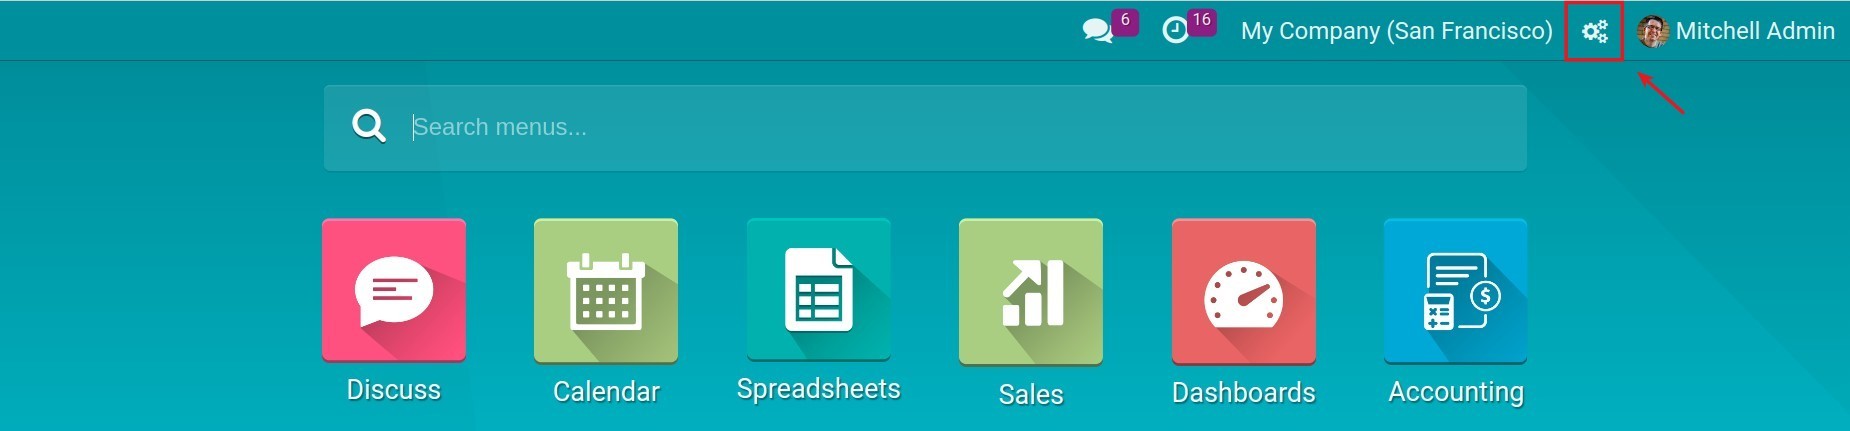
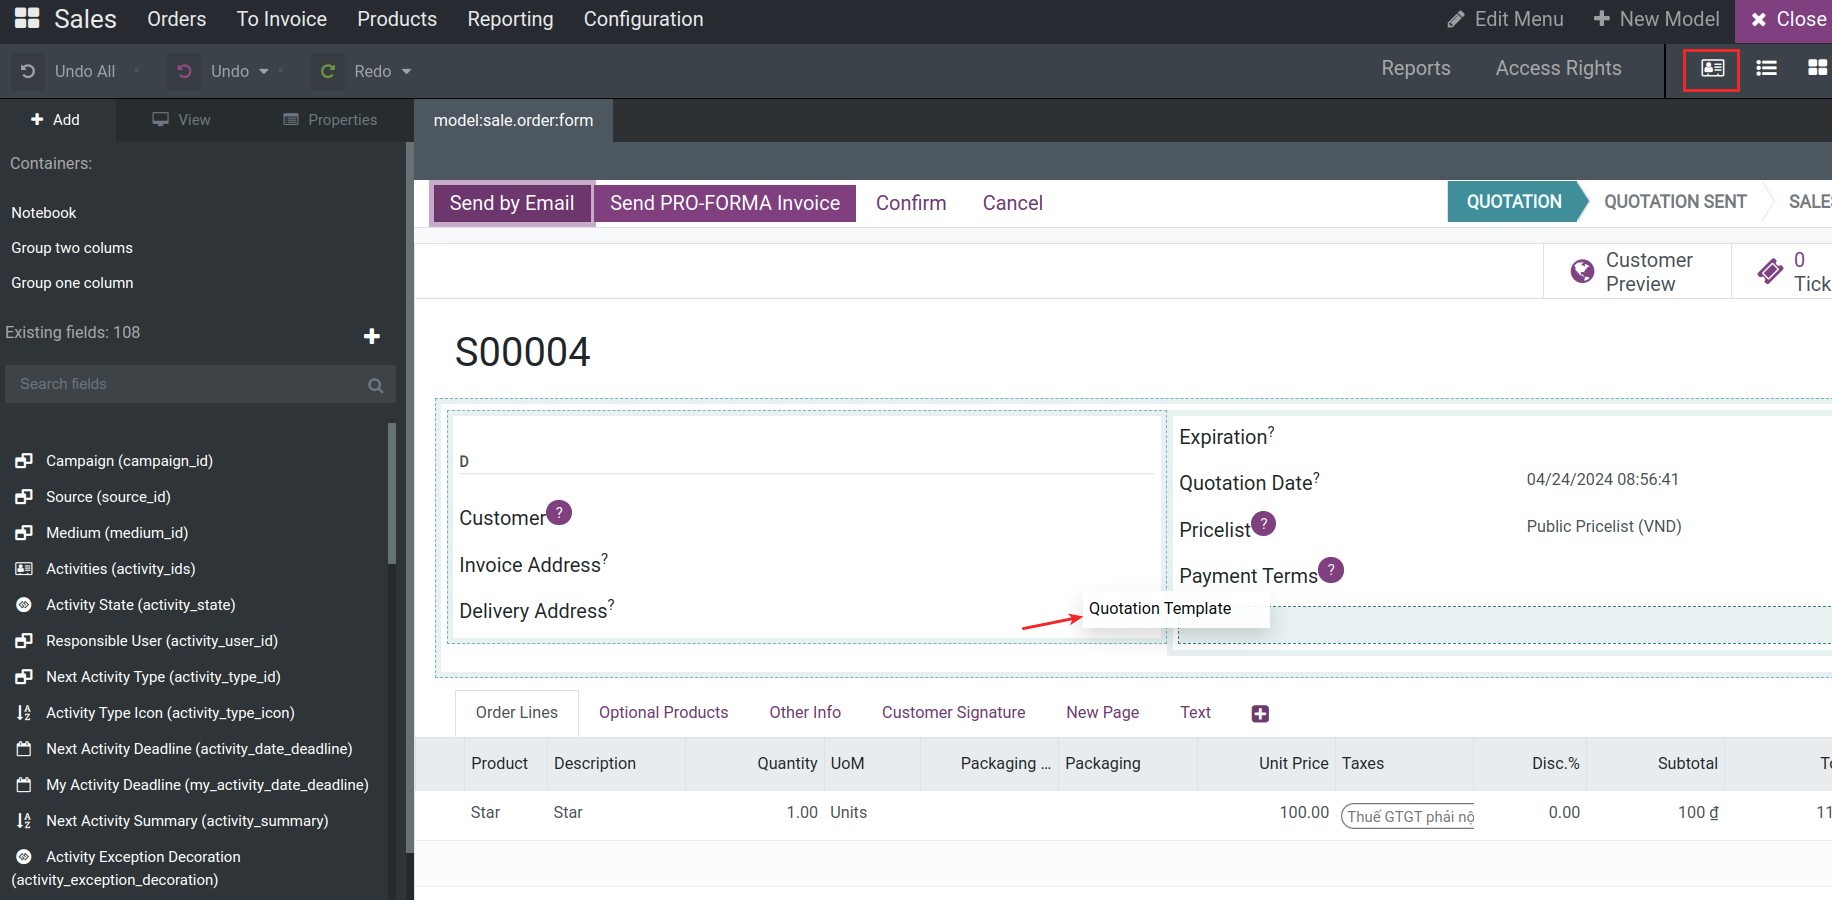
To customize an existing interface, you access the Viindoo Customizer app by clicking on the gear icon as shown in the image.
Edit Menu
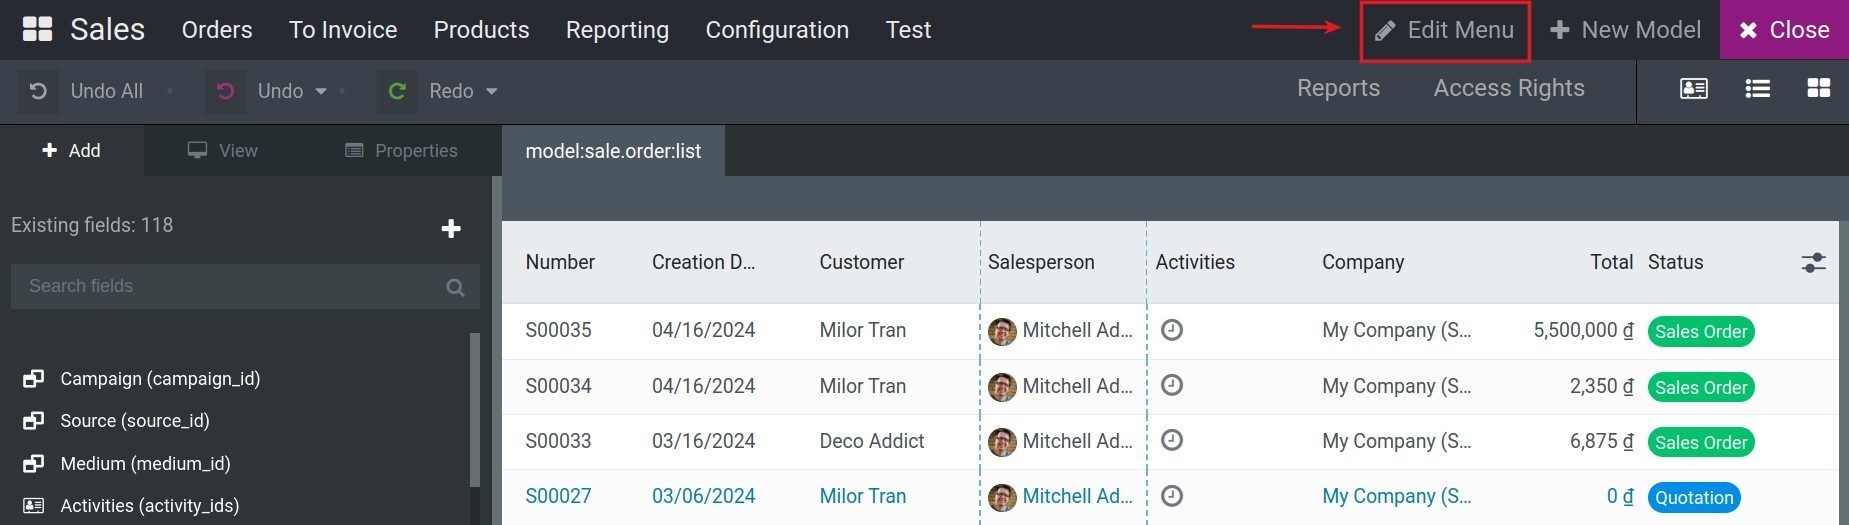
To edit the menu of an application, access that application in the customization interface and click on Edit Menu.
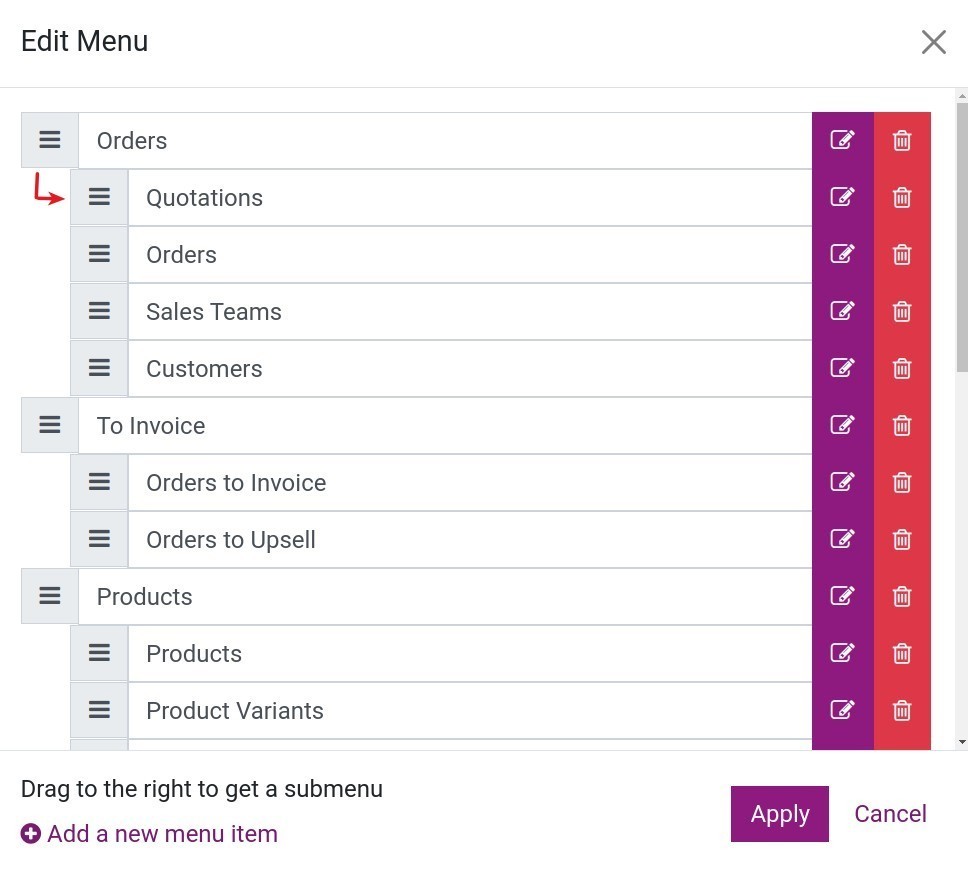
A pop-up window will appear, where you will see all the main menus and submenus of the application. You can delete a menu by clicking on the red trash icon and edit a menu by clicking on the purple edit icon. To change the order of the menus, click on the menu you want to move, hold it, and drag it to the desired position.
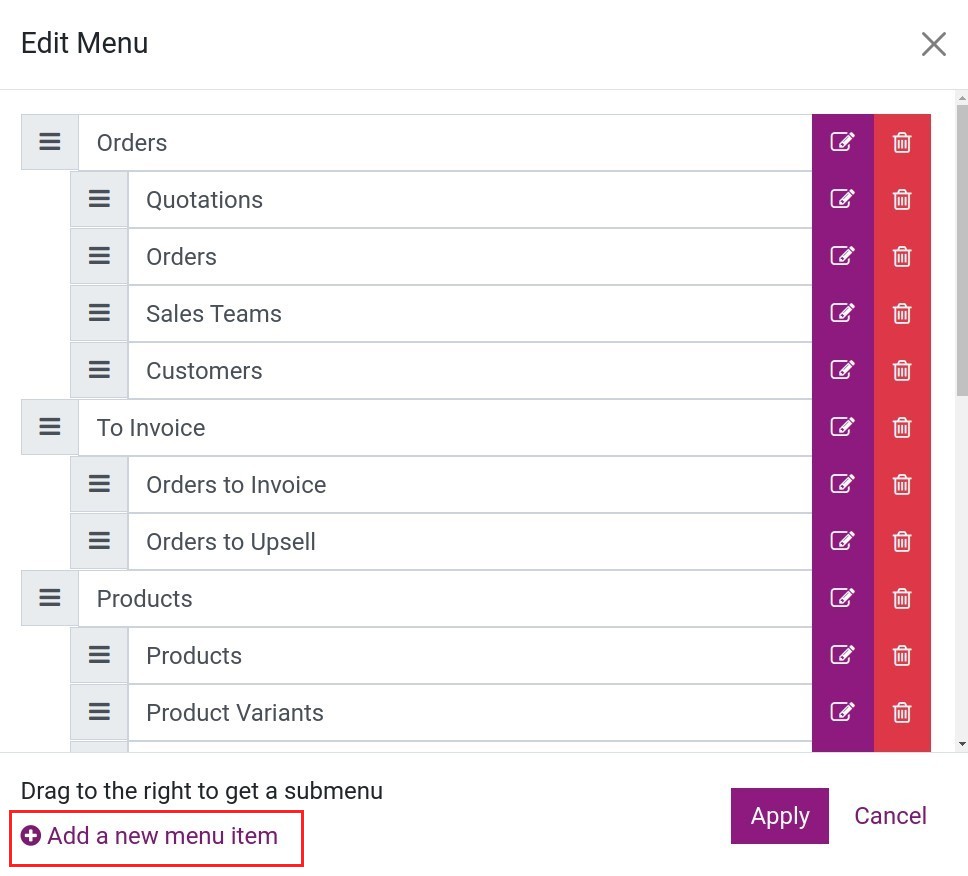
To create a new menu, click on Add a new menu item. A pop-up window will appear, where you can set the information for the new menu as follows:
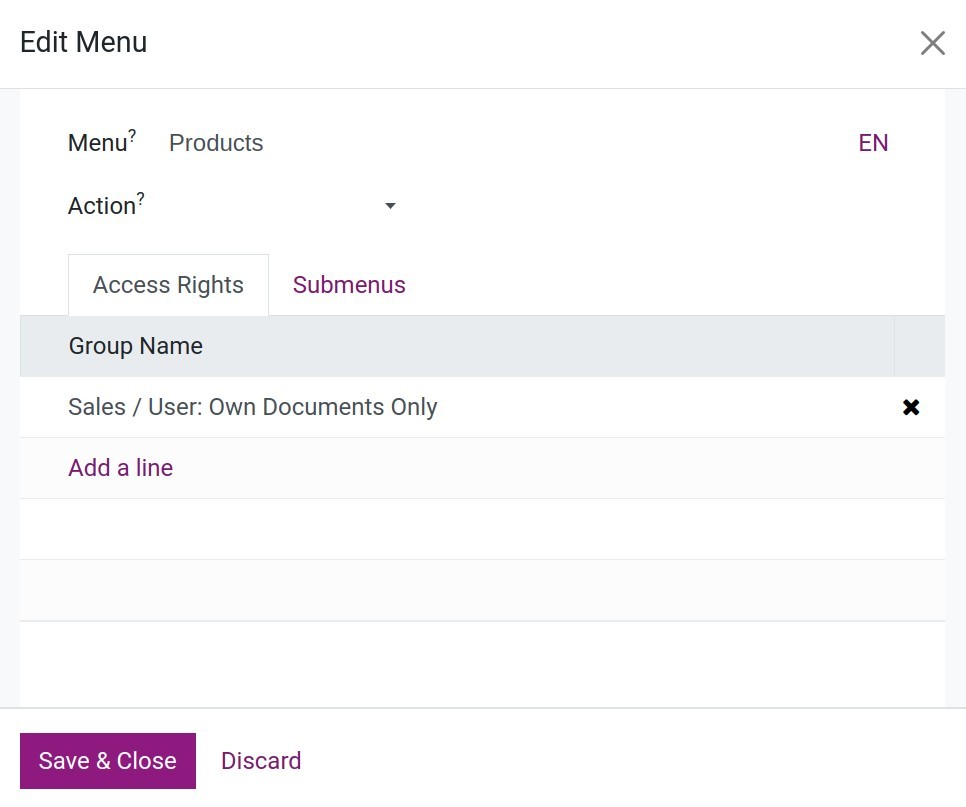
Menu: Enter a name for the menu.
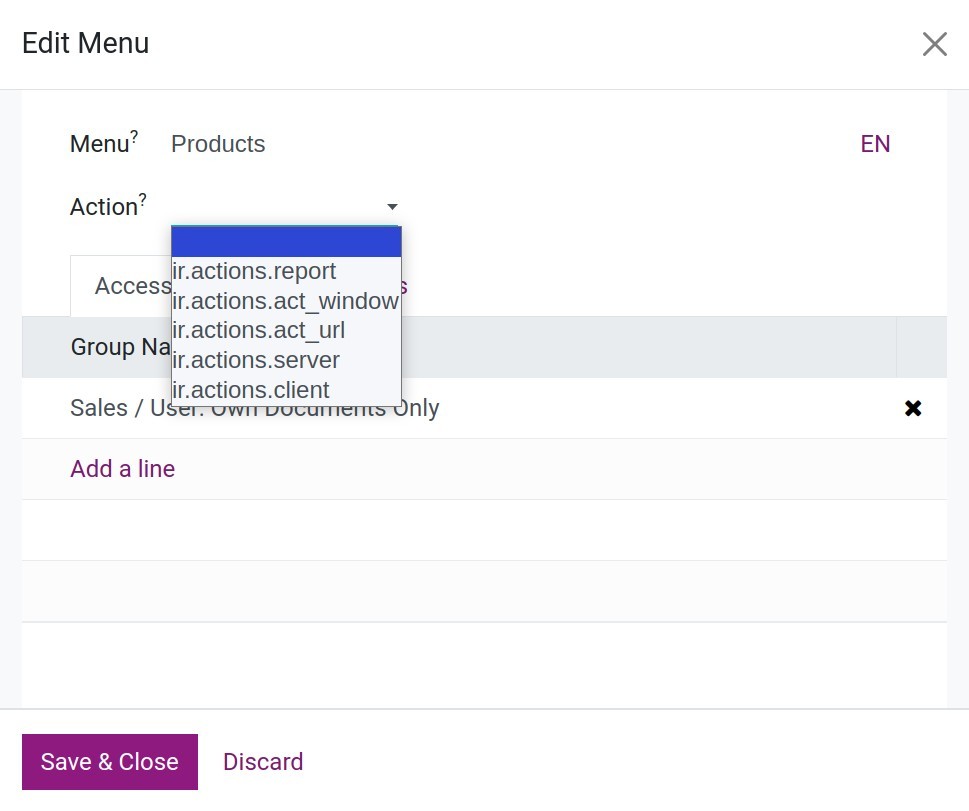
Action: Choose an action from the following options. These actions will determine the system’s behavior in response to user actions.
![../../_images/4-hanh-dong-menu.en.jpg]()
Report Action (ir.actions.report): This action will trigger the printing of a report. Choose the type of report to print in the empty field next to it.
Window Action (ir.actions.act_window): This action will open specific records of an object (model). Choose a specific object in the empty field next to it so that when this menu is clicked, the records of that object will be opened.
URL Action (ir.actions.act_url): This action allows you to open a link to a web page. Choose and set the target web page in the empty field next to it.
Server Action (ir.actions.server): This action is performed by the server when triggered, used to perform complex calculations, batch actions, create dynamic reports, or interact with an external service through an API. Choose or create a specific server action in the empty field next to it.
Client Action (ir.actions.client): This action is used to trigger an action performed entirely in the client. For example, opening a new window, displaying or notifying an alert, creating and displaying dynamic reports, etc. Choose or create a specific client action in the empty field next to it.
Access Rights Tab: Here, you set the access rights for this menu.
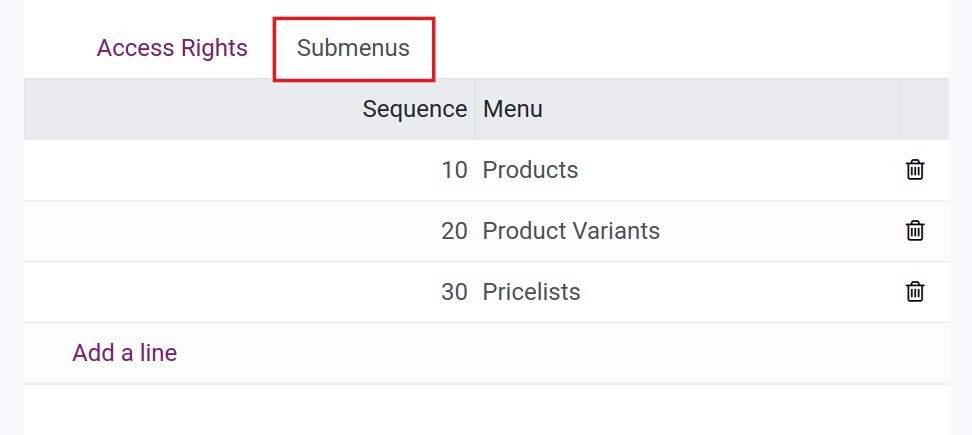
Submenus Tab: Here, you set the submenus for the menu being configured. You need to enable developer mode to set up submenus for this menu.
Edit Fields
Edit the position of the field
On the form view
You can change the position of a field by clicking and holding the field, then dragging it to the desired position.
On the tree view
Please move to the tree view, click and hold the desired field, and drag it to the destination position.
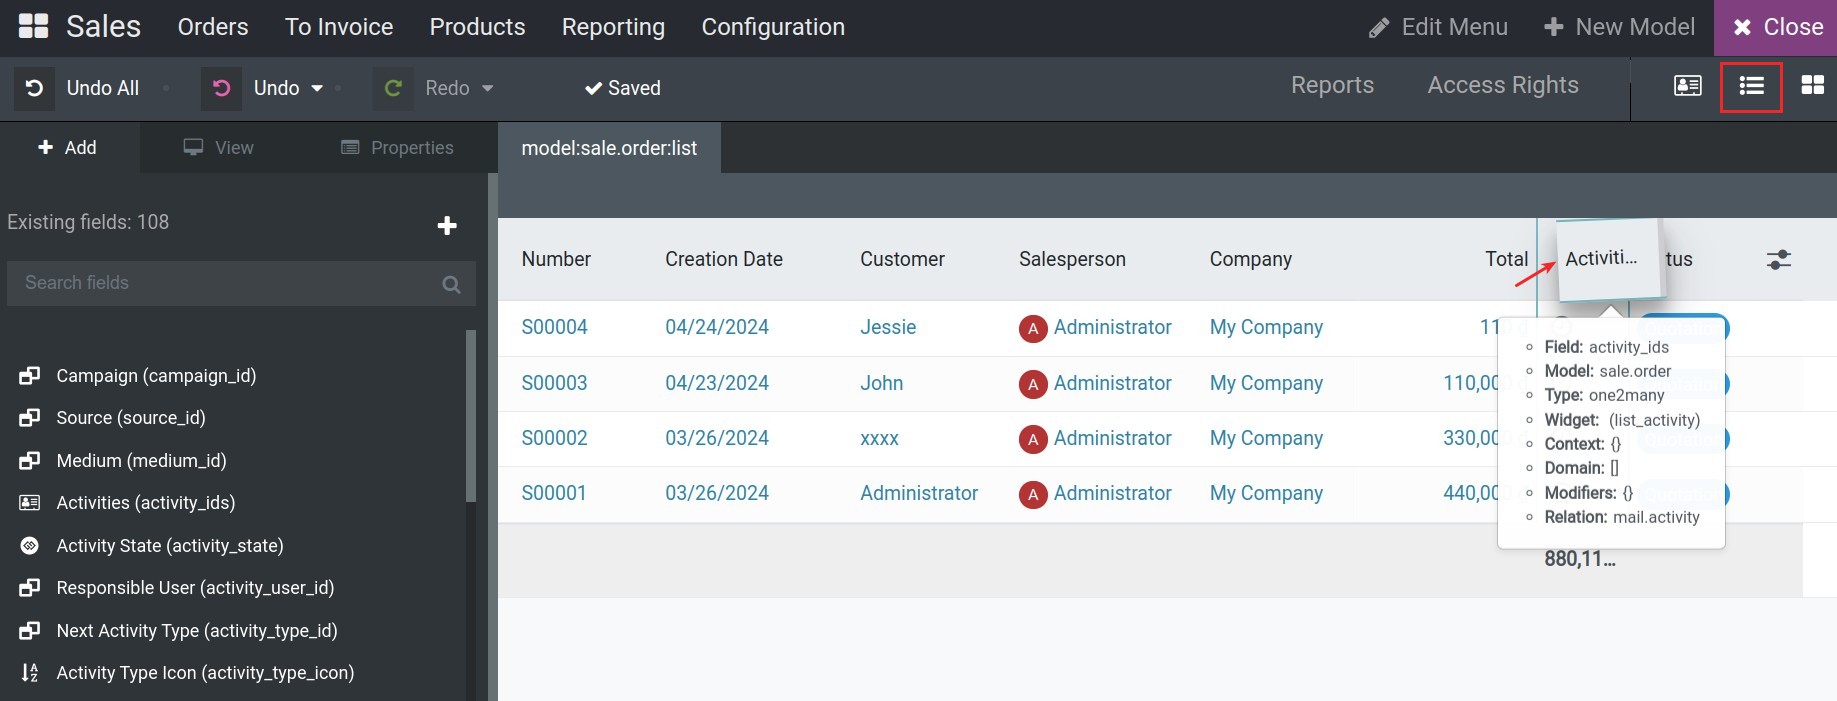
Edit the properties of the field
To edit the properties of a field, you directly click on the field. In the customization panel on the left side of the screen, you edit the attributes of the field:
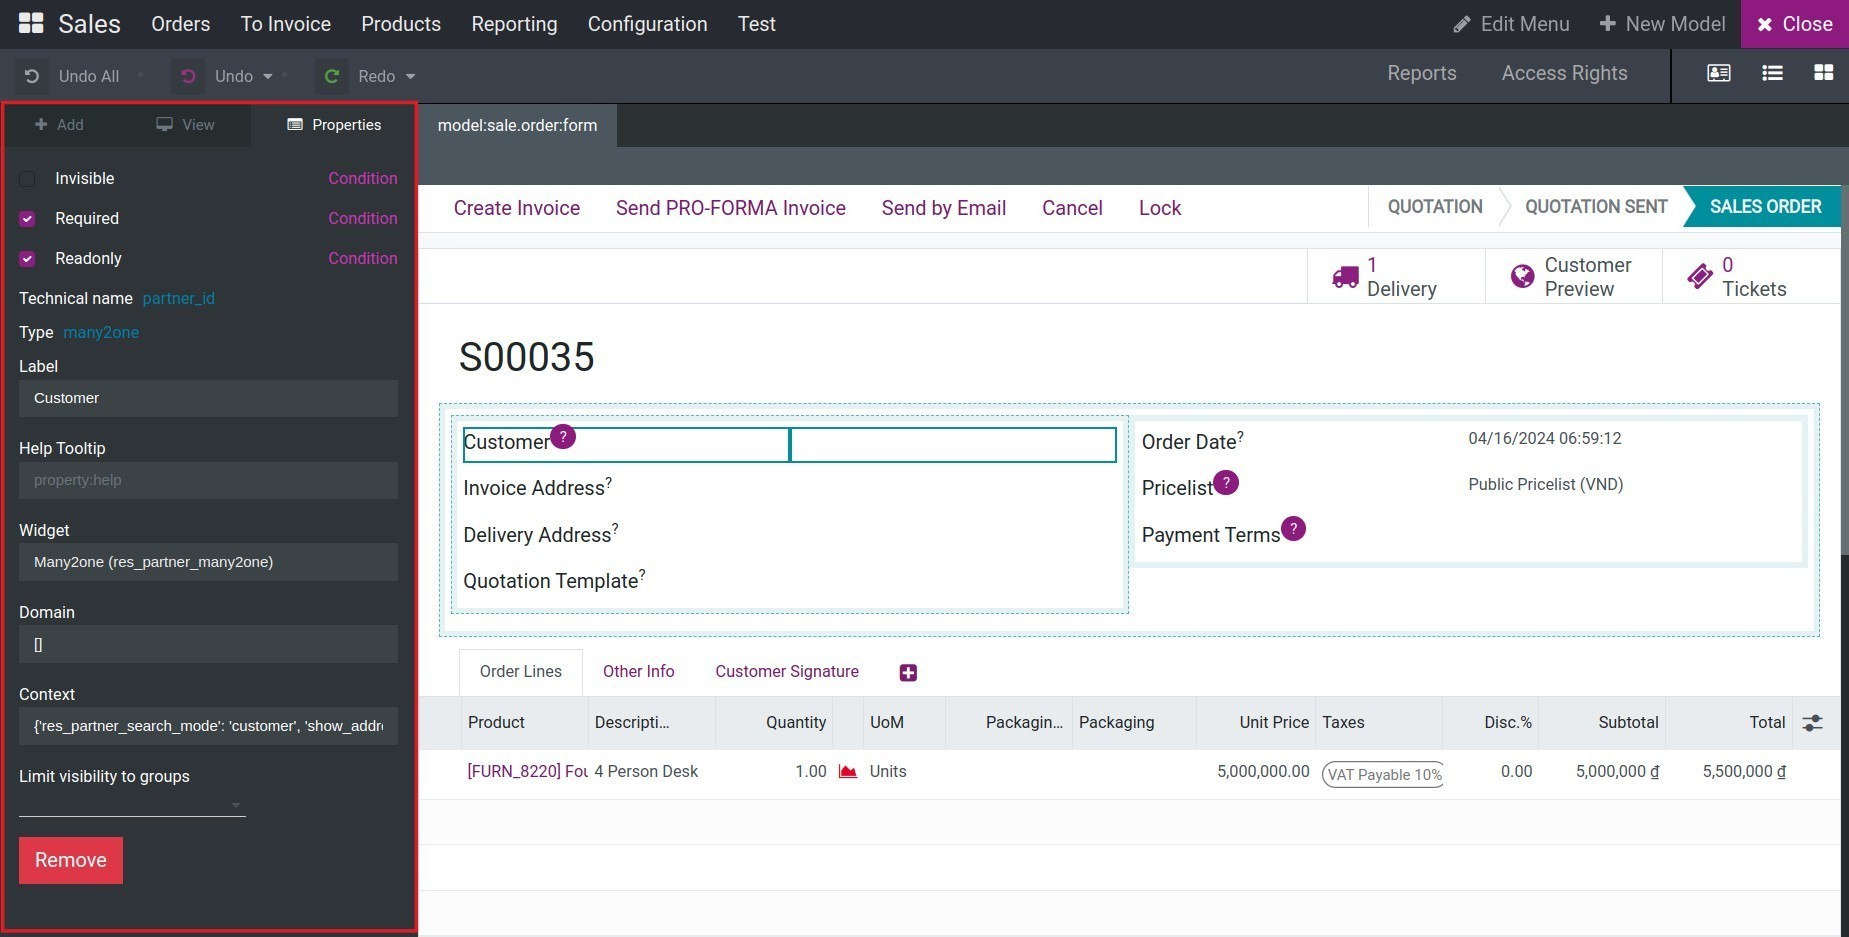
Control field properties: You can modify the properties of the field with one of the following options:
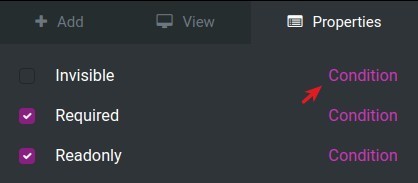
Invisible: Used to hide the field on the user interface. When a field is set to invisible, it means the field is not displayed to the user, it does not appear on the screen. This is often used to adjust the interface based on different conditions or logic. For example, a field can be set to invisible based on the value of another field or complex logical conditions. This allows adjusting the interface and displaying fields only when the conditions are met, providing a more flexible user experience. You can set the conditions for hiding the field by clicking on Condition.
![Set conditions]()
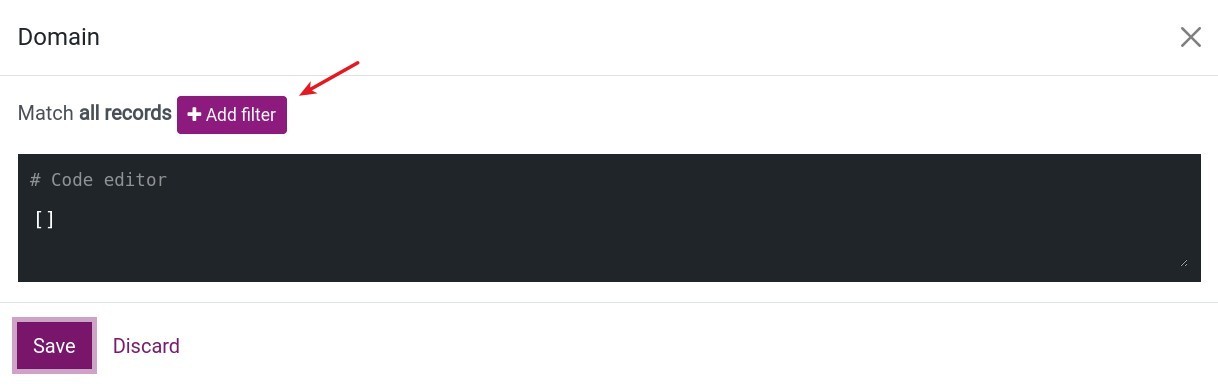
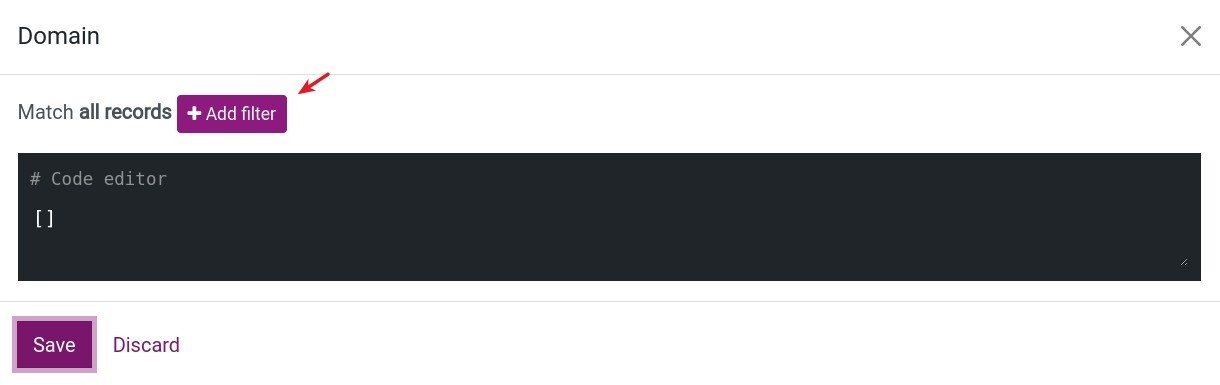
Then click Add filter to set the conditions.
![Add conditions]()
Required: Used to specify that a field must be filled in before data is saved to a record. When a field is set to Required, the user cannot save or create a new record without entering a value for that field. You can also set conditions for this field to be required as instructed above.
Readonly: Used to specify that a field can only be read and cannot be edited. When a field is set to Readonly, the user can only view the value of the field without being able to change it. Similar to the above two properties, you can also set readonly conditions for the field.
Label: The label of the field is used to display the name of the field on the user interface. You can edit the label of the field here.
Help Tooltip: Used to provide additional information when the user hovers over an element on the user interface, such as a field or a button. The tooltip provides hints, descriptions, or explanations of the function or meaning of that element. You can add or edit a tooltip for an existing field here.
Widget: Edit the widget of the field here if desired. Learn more about widget in Viindoo in the article Introduce about fields, widget and views.
Domain: The domain attribute of a field is used to determine the set of records that the field applies to. The domain helps limit the data displayed and used on the user interface based on specific conditions or constraints. For example, if you have a model in Viindoo to manage a customer list, and you want to apply a domain on the Address field so that only addresses in New York City are displayed, you would set that condition here. Click Domain and then click Add filter to set the domain for the field.
Limit visibility to groups: Here, you can set or change the display limit of the field for a specific user group. Learn more about adjusting access right for fields in the article The access rights in Viindoo Customizer.
Add a field to an existing interface
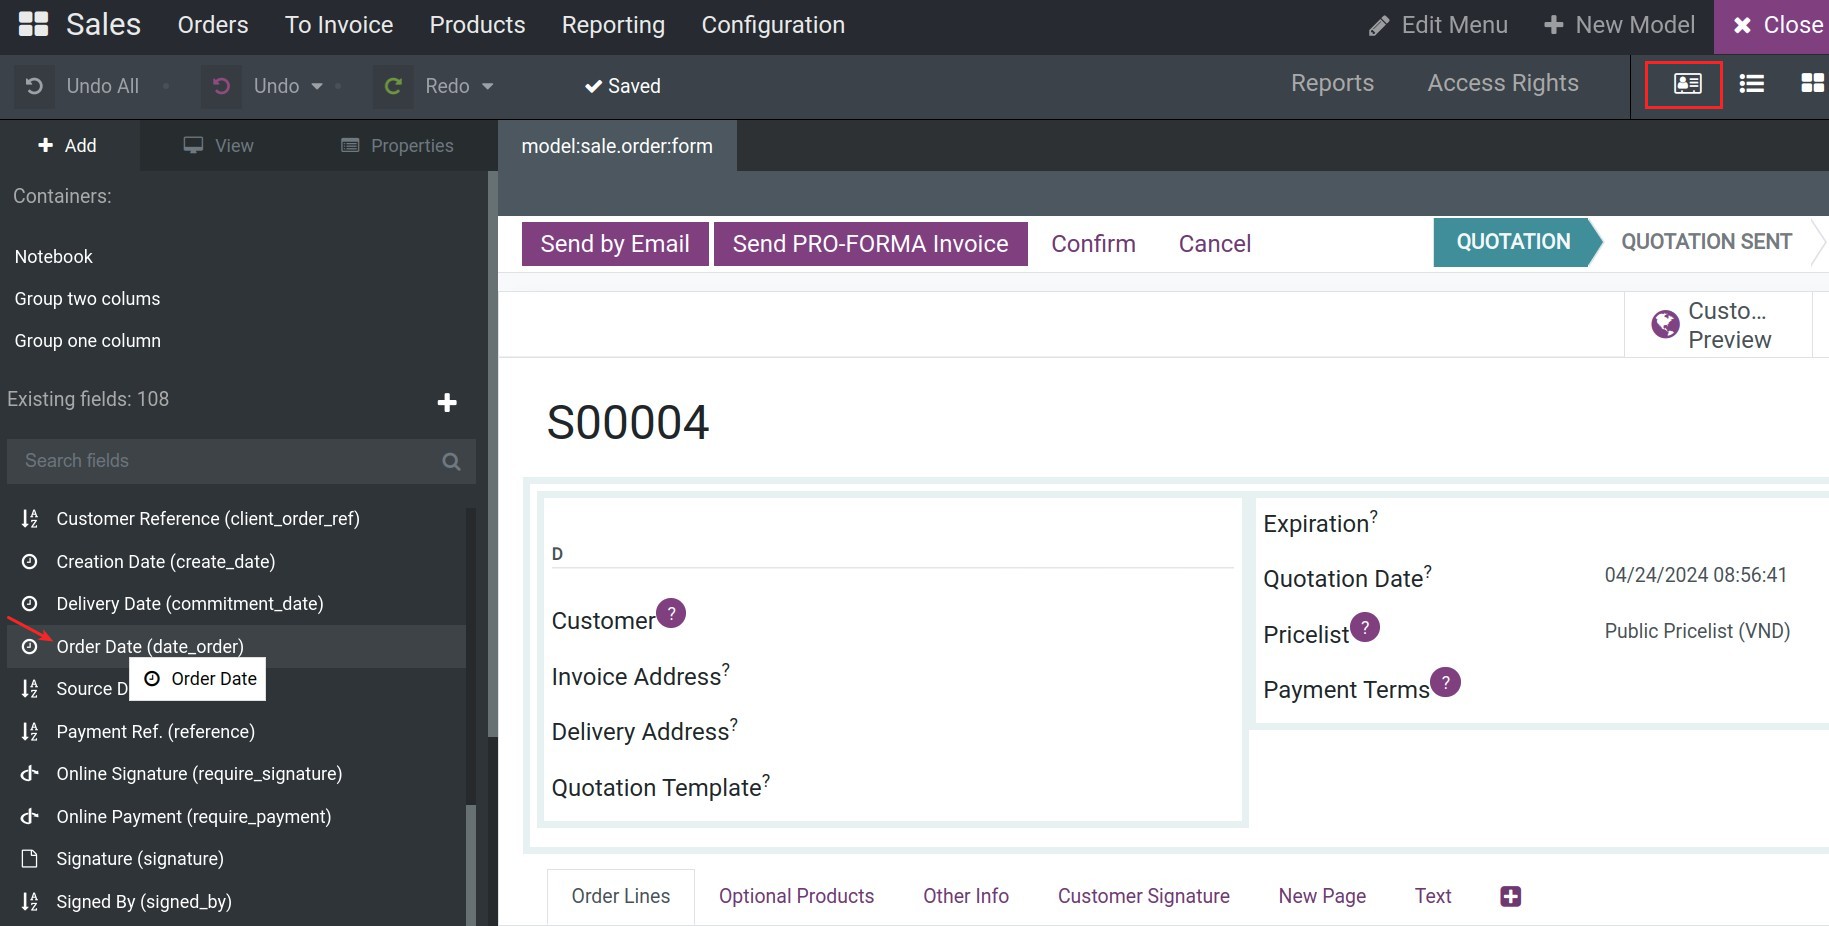
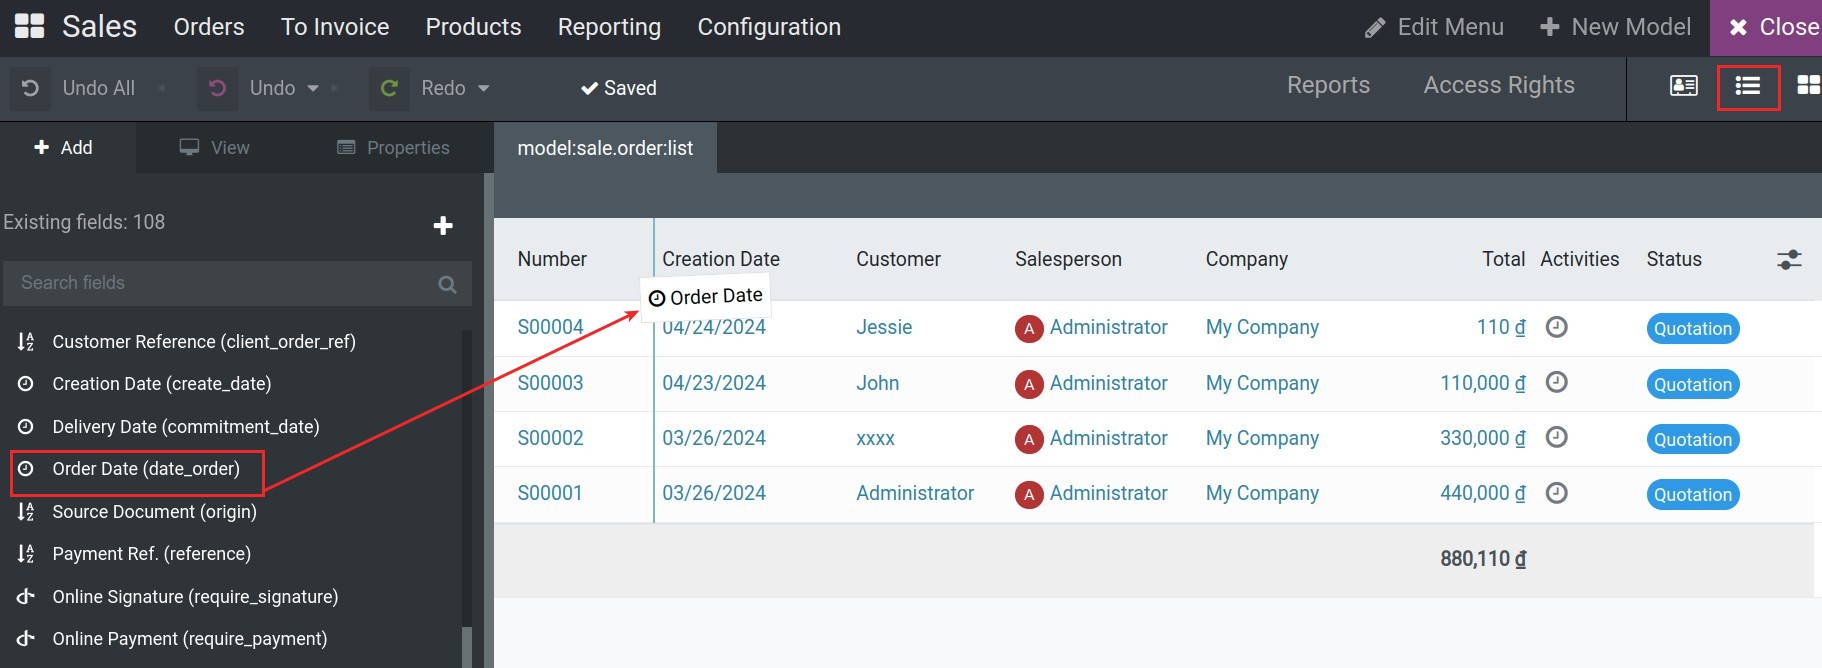
You can add the existing fields and display them on the form view or tree view with the Viindoo Customizer app. In the search bar of the customization panel, search for the name of the needed field, then drag the field to the desired position on the interface.
On the form view
On the tree view
See also
To create a new field and display it on the interface, please visit the guidelines at Create a new apps and models.
Remove a field from an interface
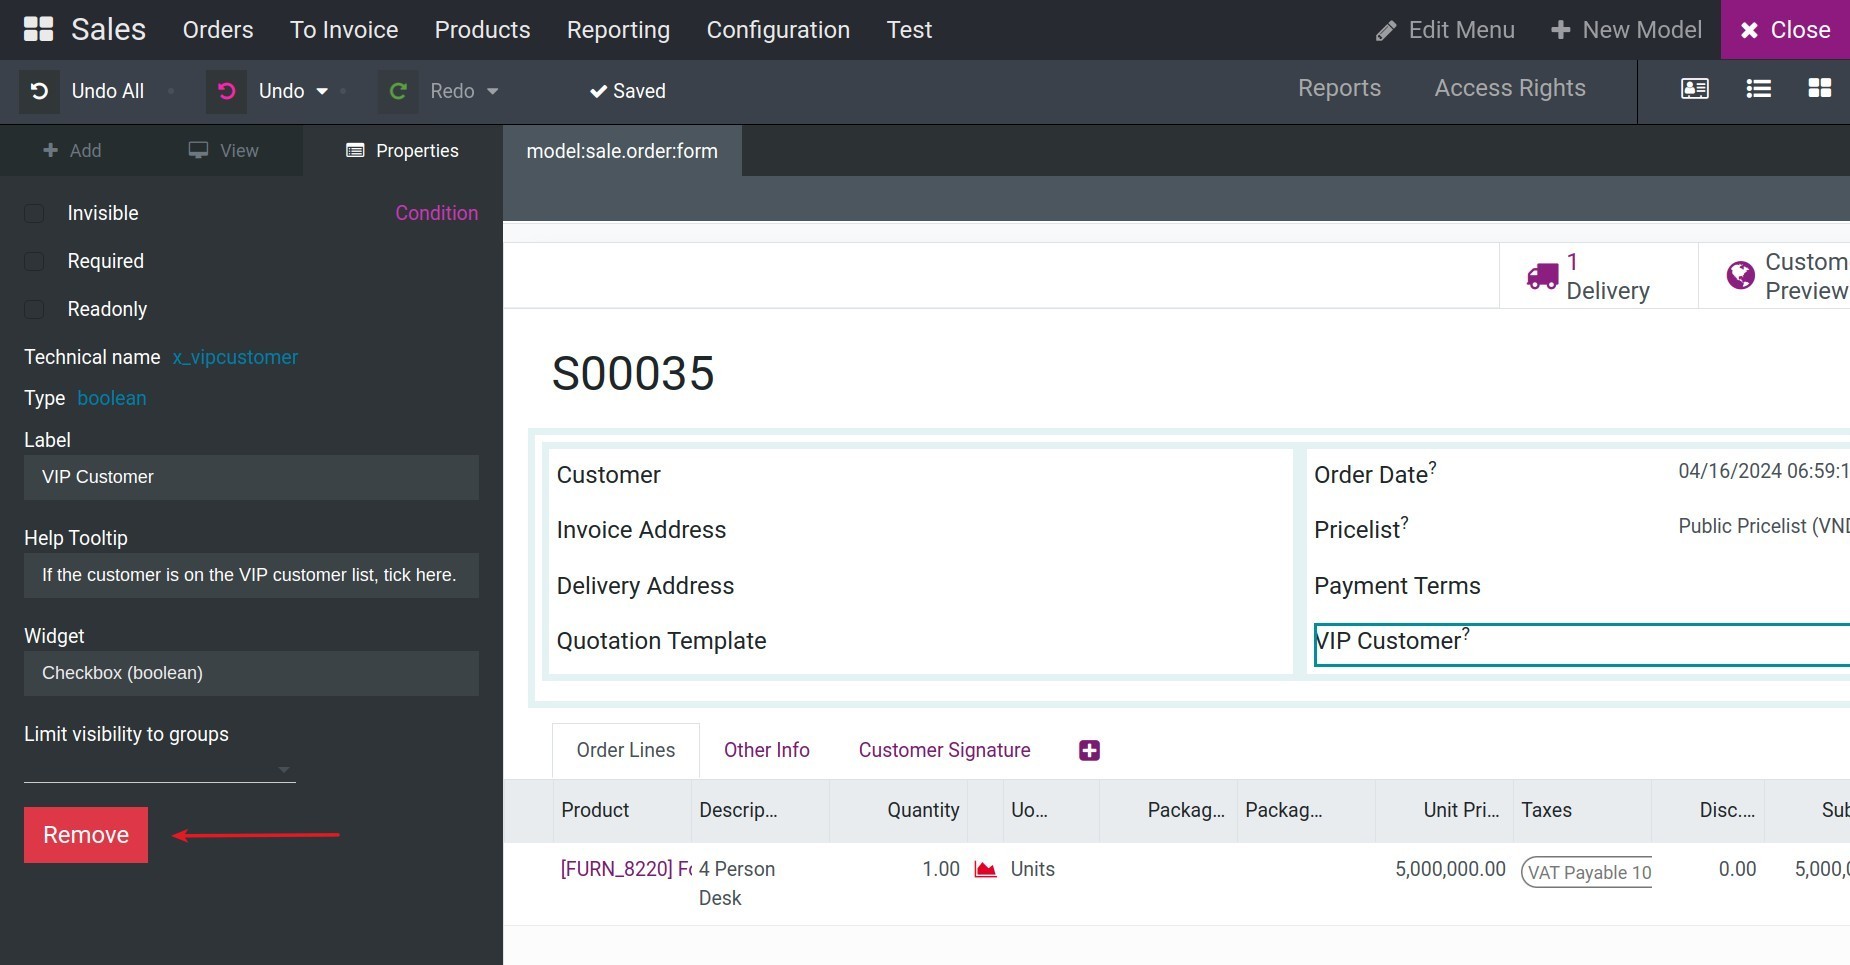
To remove a field from an interface, click on the field to be removed and click Remove.
The system will display the following confirming:
Click OK to remove the selected field from the view of the current interface. Note that this field will not be completely deleted, and you can still bring it back to the interface by searching for the field and dragging it to the desired position.
Note
For changes made when editing a field, you can undo the changes by clicking on the undo buttons.

See also
Related article
Optional module