How to create a Recruitment request
Recruitment demands may come from two sides: the Board of Directors (when there are plans to scale up, find new departments, etc.) or from the heads of departments (when there are job vacancies, resigned employees, etc.). Viindoo supports you in recording all the recruitment demands and managing the whole recruitment process: request, approve, publish, receive applicants’ CVs, interview, and offer the jobs.
Requirements
This tutorial requires the installation of the following applications/modules:
Install the Recruitment Requests/ Approvals module
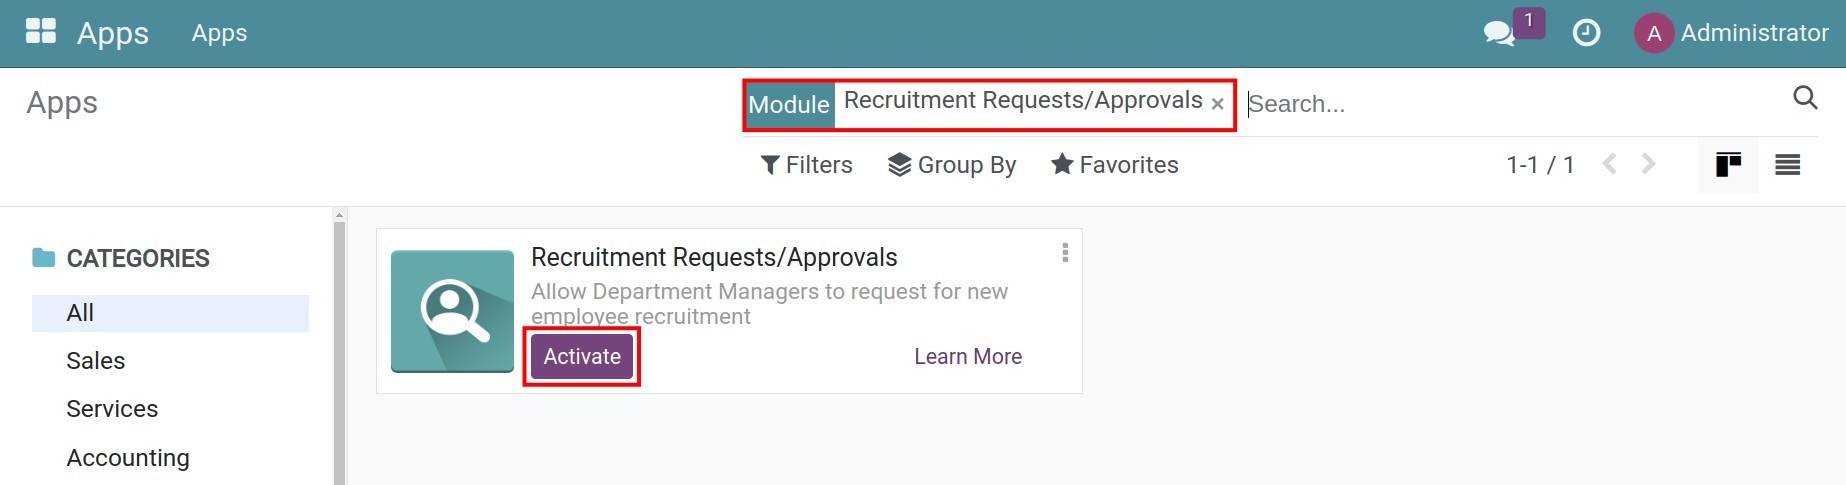
To apply the recruitment request feature, you have to install the module Recruitment Requests/Approvals (viin_hr_recruitment_approval). Access to Viindoo Apps, remove the Apps filter, search the keyword “Recruitment Requests/Approvals” then click on the button Activate.
Set Approval Types
First, you need to configure the approval request type. You need to have the Administrator access right of the Approval app in order to create Approval types.
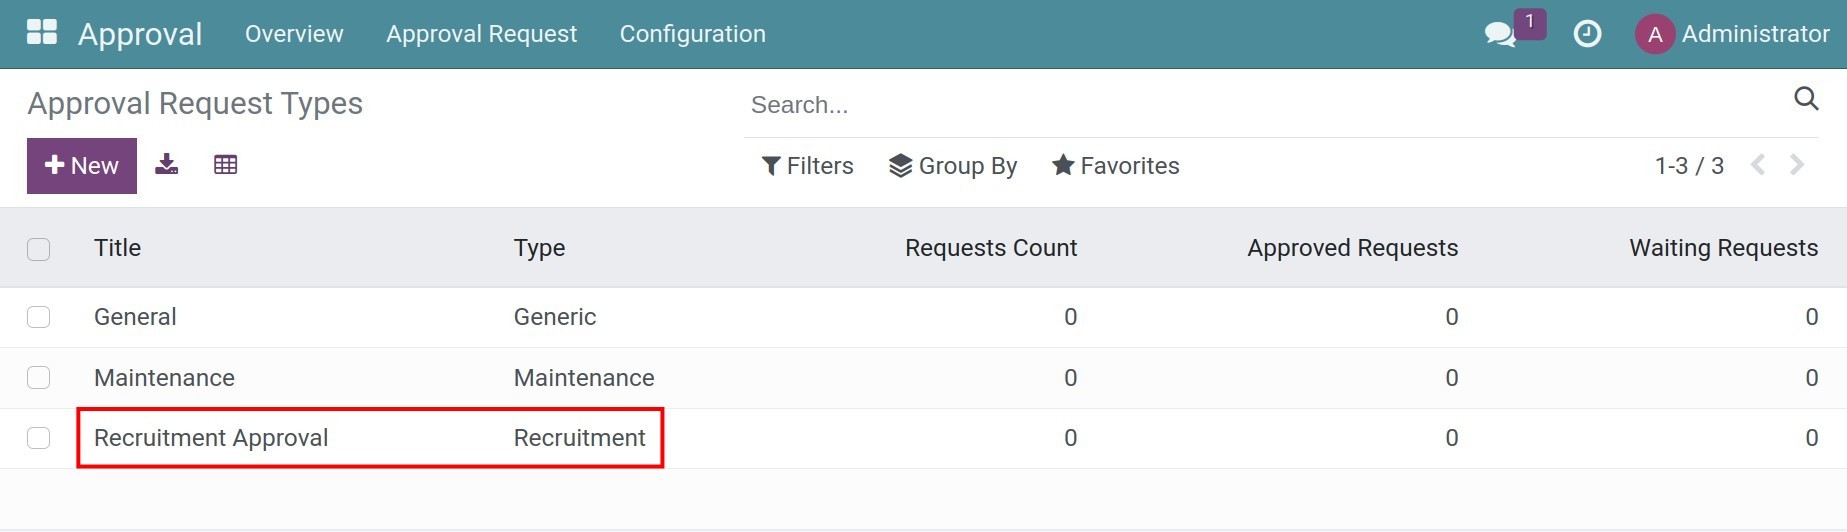
Go to Approval > Configuration > Approval Types. The system will recommend some types as shown in the below image. Click on Recruitment Approval.
Here are the information to configure the recruitment approval:
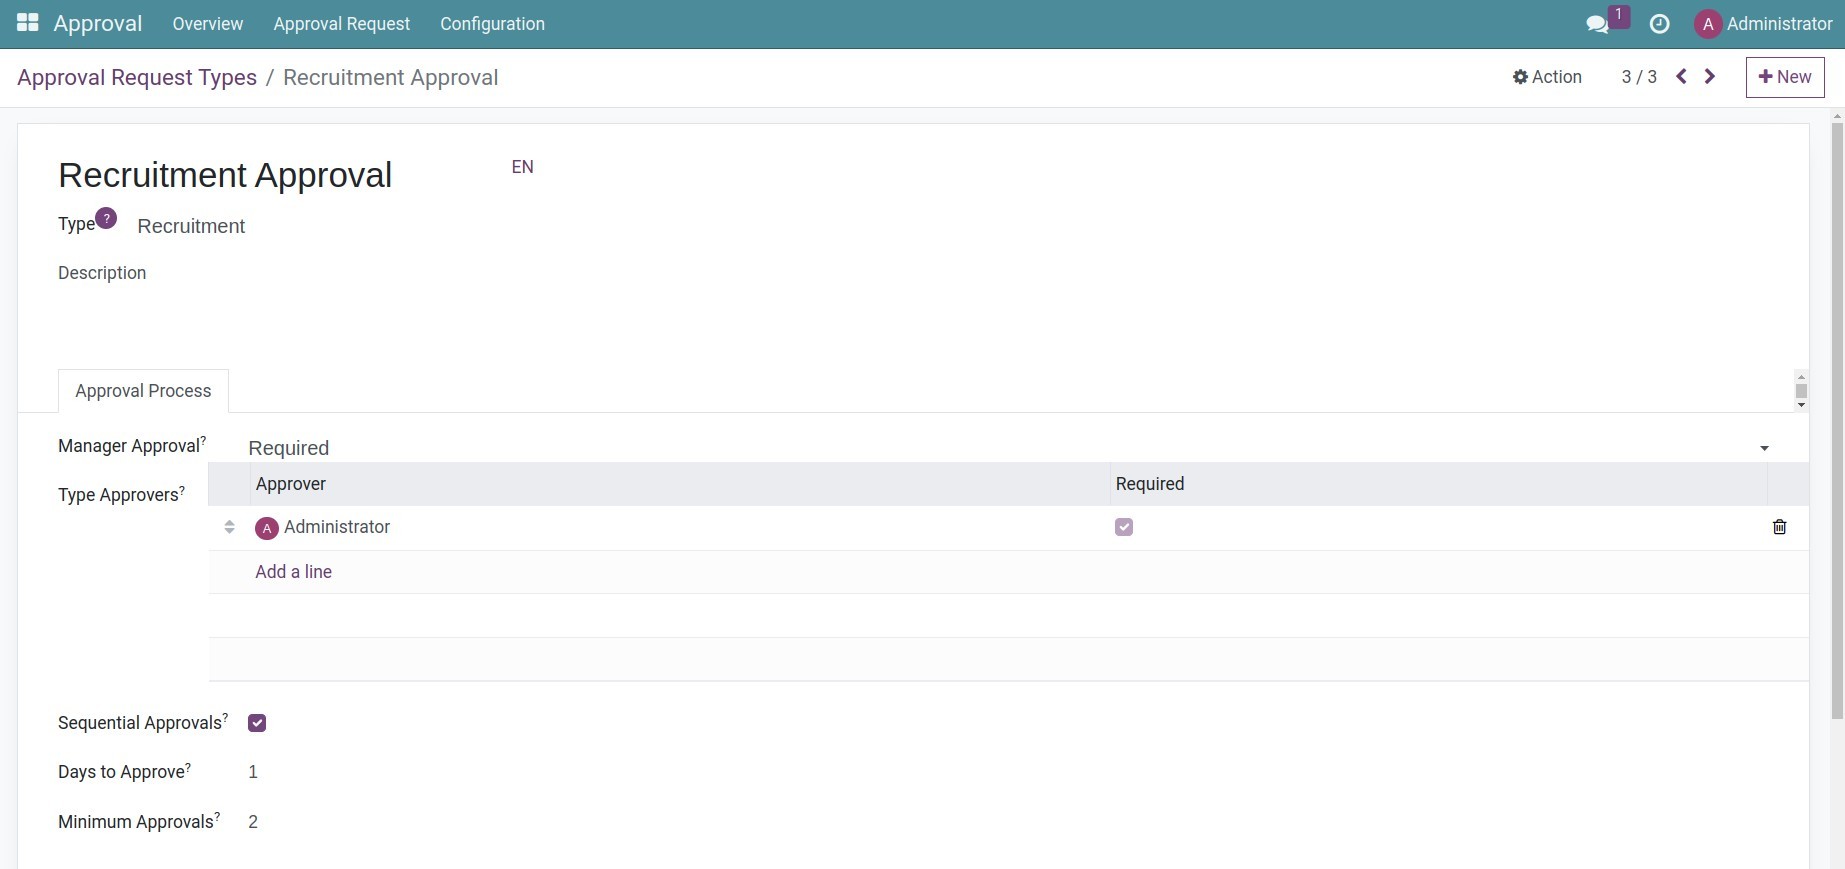
Name: The name should be short, for example: Recruitment Approval.
Type: The system shows you some options to choose from, select “Recruitment”. This action is to add Recruitment approval to the menu bar of the Recruitment app. In this example, the option “Recruitment” is already selected.
Approval Process:
Manager Approval: This is to define whether the request needs approval by the direct manager or not.
- None: There is no need to be approved by the direct manager.
Optional: The direct manager is in the approver list below, however, if the request has the minimum quantity of approvals, it can be done without that manager’s approval.
Required: The direct manager is required to approve the request before it goes to the other approver listed below. In this case, the field “Minimum approvals” equals the number of listed approvers plus one (the manager)
Note
The manager needs to have the right of approval in his/her access rights. To edit the access rights, go to Settings > Manage Users, select the user, then select the option of “Team approver” in the field Approvals.
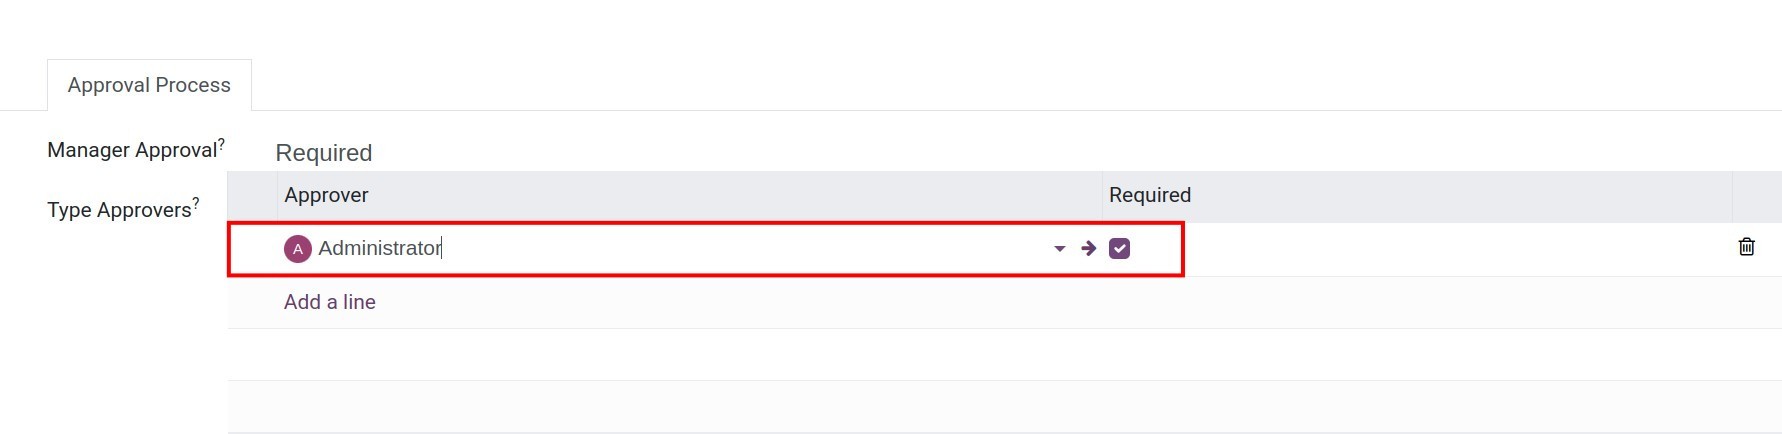
Type Approvers:
Approver: The users listed here will automatically have the right to approve the request.
Add a line in this column to add an approver.
![approver list]()
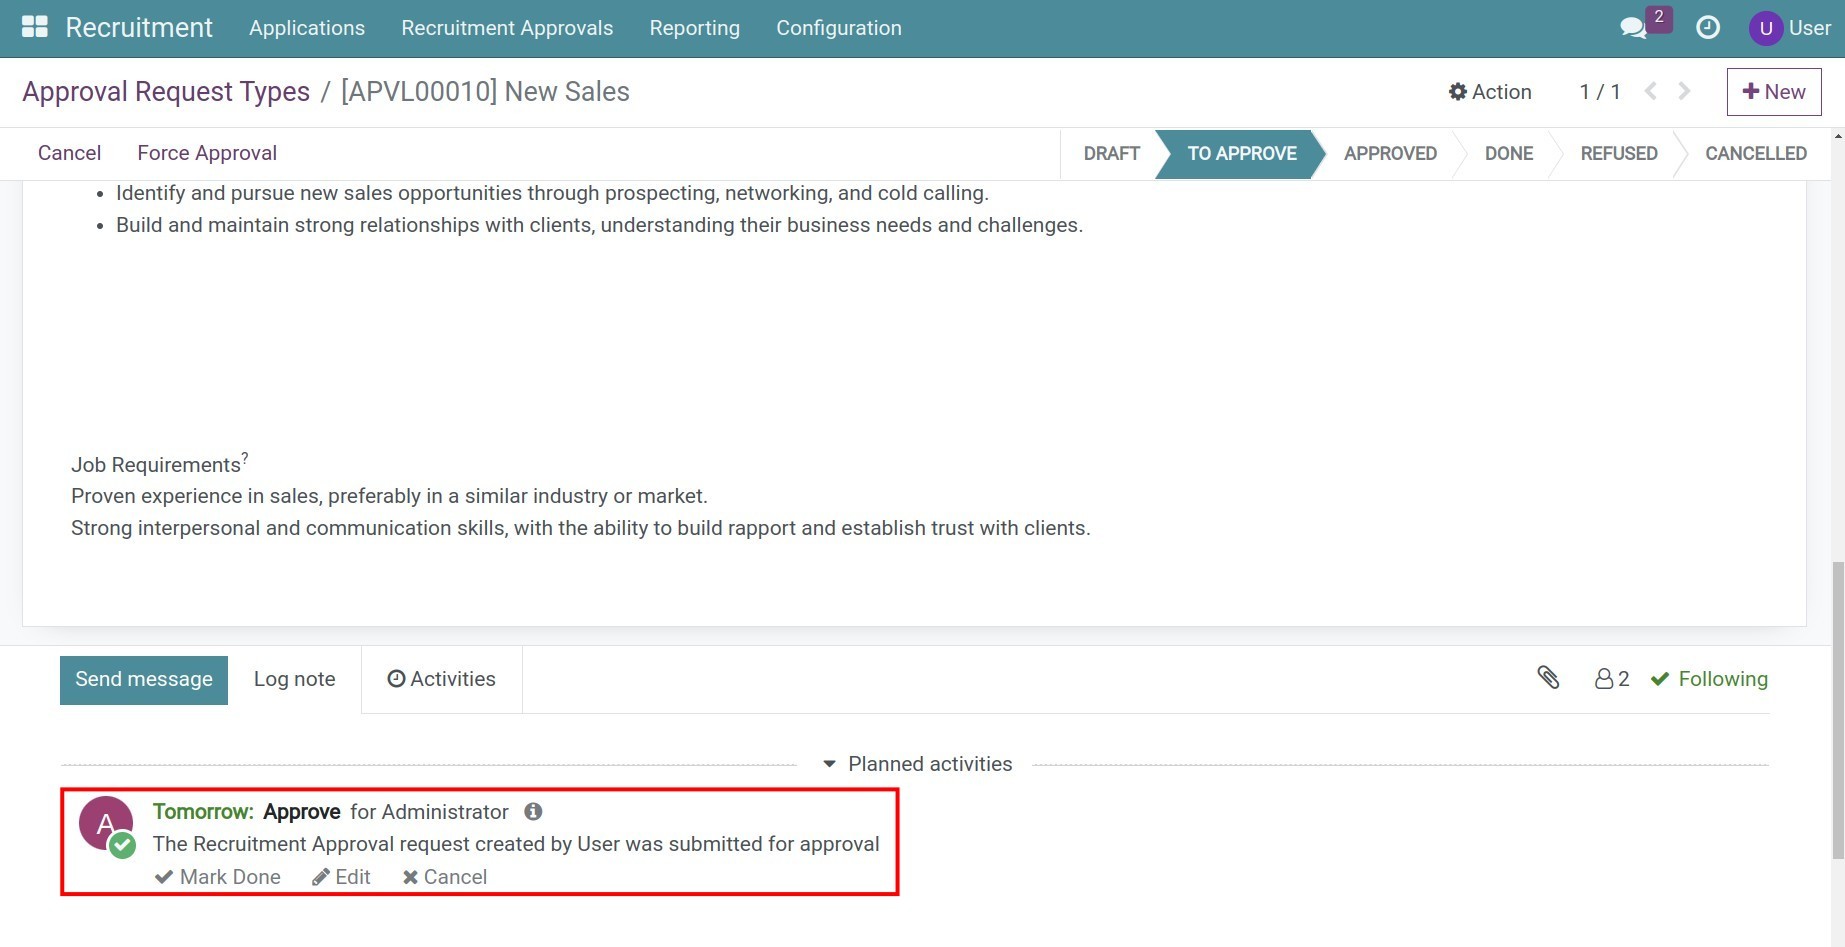
After a recruitment request is confirmed, the system will automatically generate a scheduled activity for the approver.
![scheduled activity for the approver]()
Required: By checking the box in this column, the approver is forced to approve the request for it to be done. Otherwise, the request can be done without his/her approval if it has the minimum quantity of approvals.
Sequential Approvals: Check this box if you want the sequence of approvals follow the approver list. This will make the approval process clearer and easier to track.
Days to Approve: This is the number of days for the request to be approved. The system will be based on it to compute the deadline for the recruitment request.
Minimum Approvals: The number of approvals needed for the request to be moved into the stage Approved. The system will compute this number by counting the required approvers.
Create a Recruitment request
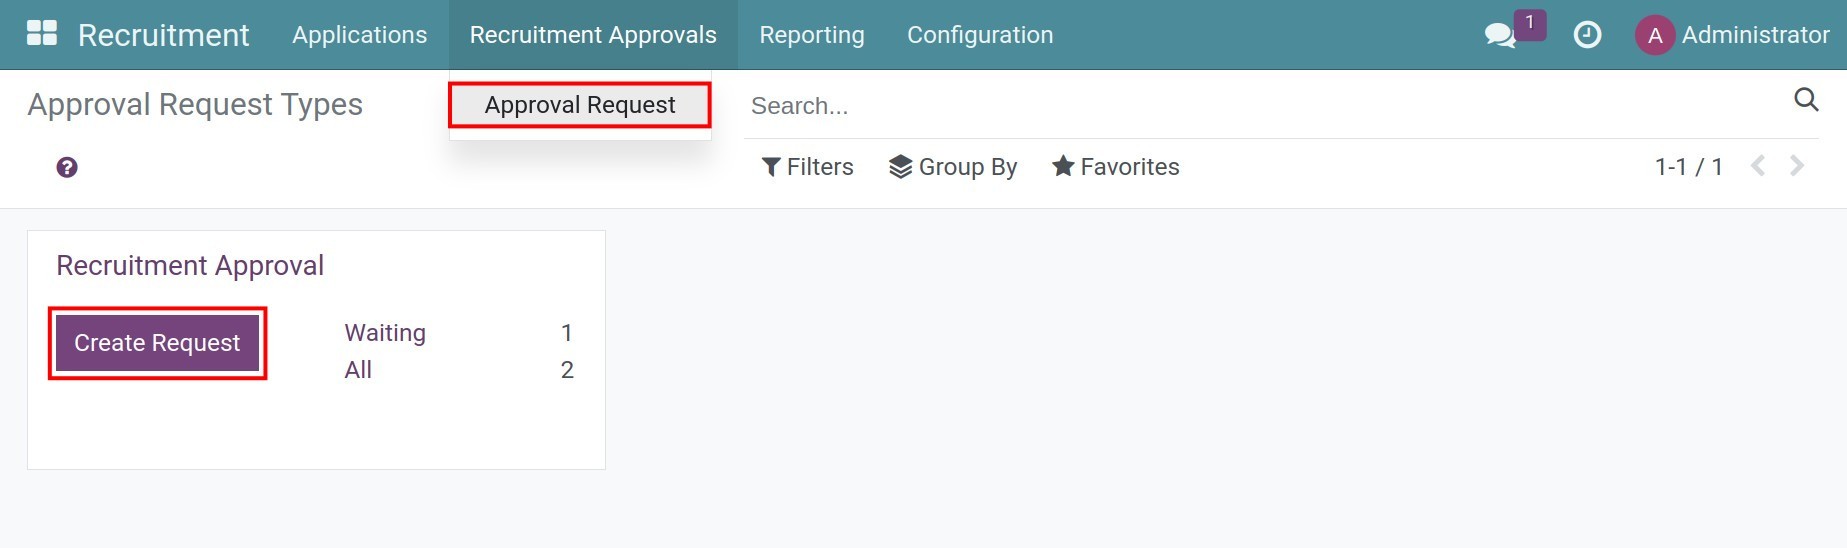
When recruitment demand arises from a department or a team, you need to make a recruitment request. Navigate to Recruitment > Recruitment Approvals > Approval Request > Create Request.
Note
To access the Recruitment app, you need to have the access right. Read more at Introduction of Recruitment in Viindoo
Now you need to fill in the form of the recruitment request.
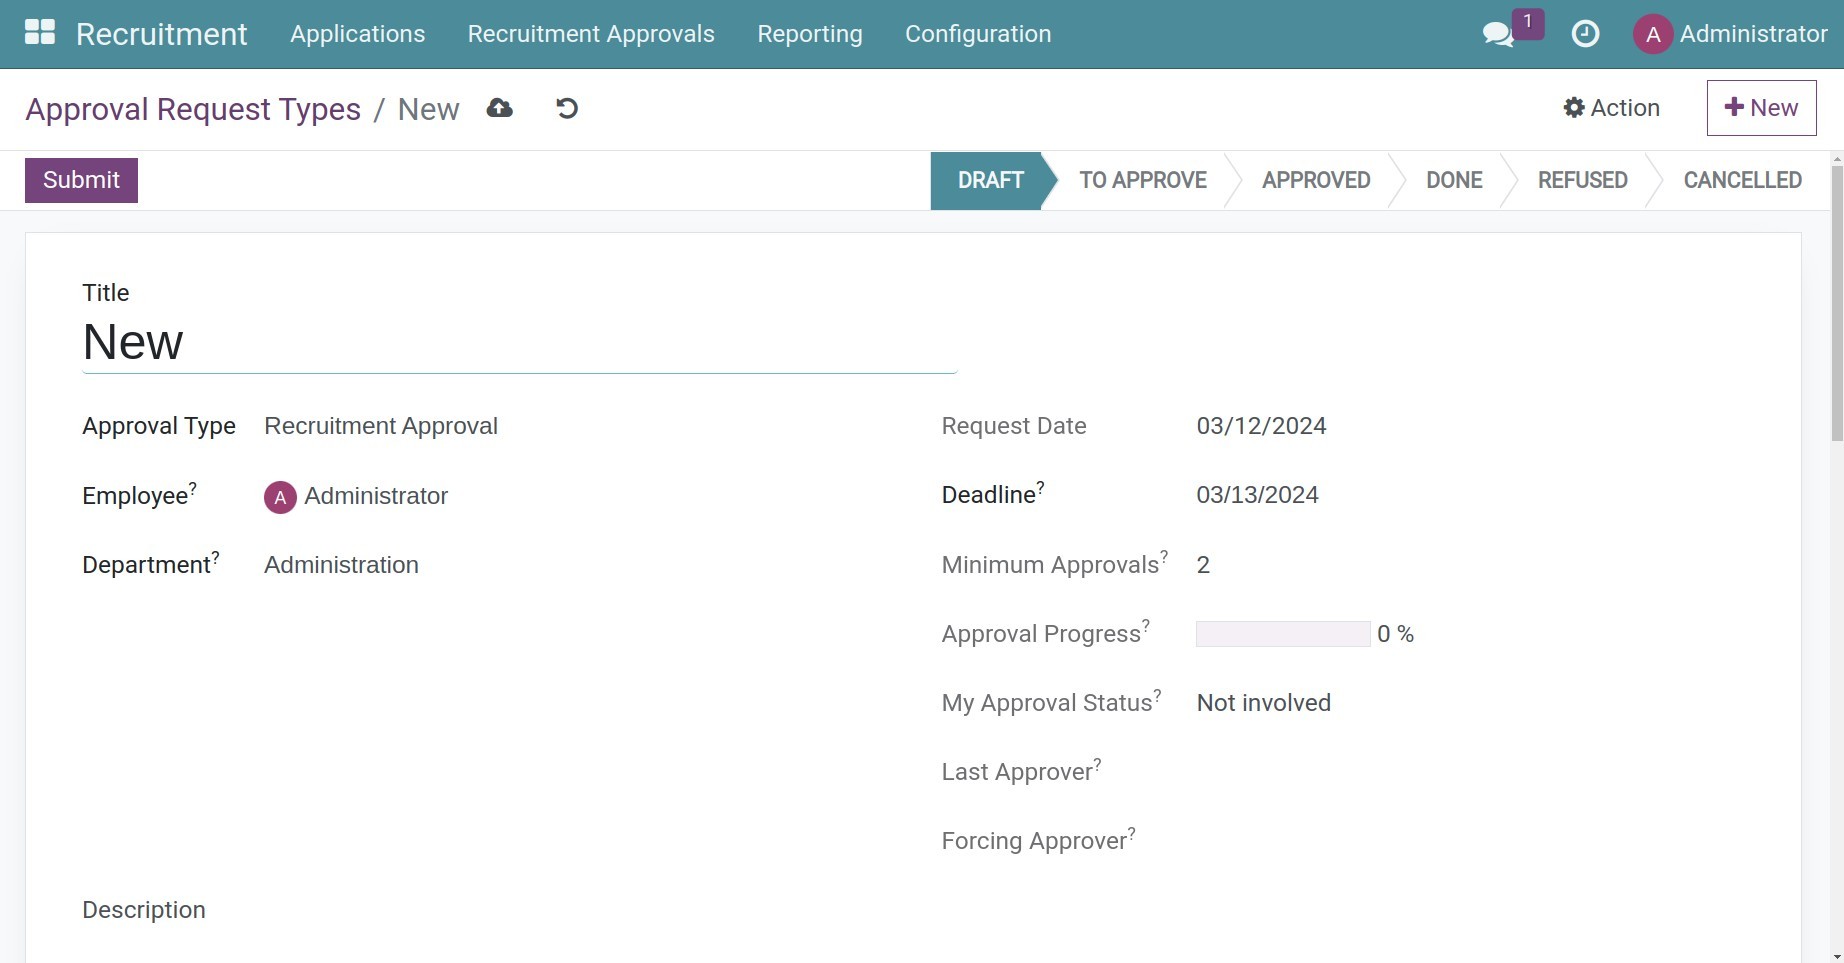
Title: The name of the recruitment request, for example: Recruit Sales Manager.
Approval Type: Select the recruitment approval type.
Employee: The employee who makes request. The system will auto-select the employee creating the request, however, you can change it.
Department: The department that the employee belongs to. The system will auto-fill in this field based on the information in the employee’s profile.
Request Date: The system will auto-fill in the current date.
Deadline: The final date for the request to be approved. The approvers will base on this date to take the action of approval.
Minimum Approvals: The system will pick the data from the Approval type as mentioned above.
Approval Progress: This field is in percentage (%) and calculated by the number of approvers who did approve the request out of the minimum approval number. For example: A request has two approvers (the direct manager and the approval officer), when the manager approves it, the progress will be 50%; then the approval officer approves it, and the progress is 100% and ready to be Done.
My Approval Status: The approval status of the Recruitment request for the current account.
Last Approver: The person who approved this request most recently, which is updated automatically by the system.
Next Approver: When you confirm the request and when one approver clicks on the button Approve, the system will define the next approver as the information of the Approval type. For example, A recruitment request has two approvers (the direct manager and the approval officer), after you confirm the request, the next approver will be the manager; after the manager approves it, the next one will be the approval officer.
Forcing Approver: The user mentioned here will have the right to click on the button Force Approval to move the request to the stage Approved without waiting for other approvers.
Description: You can type in more information about the request here, like: the reason, the purpose of recruitment, etc.
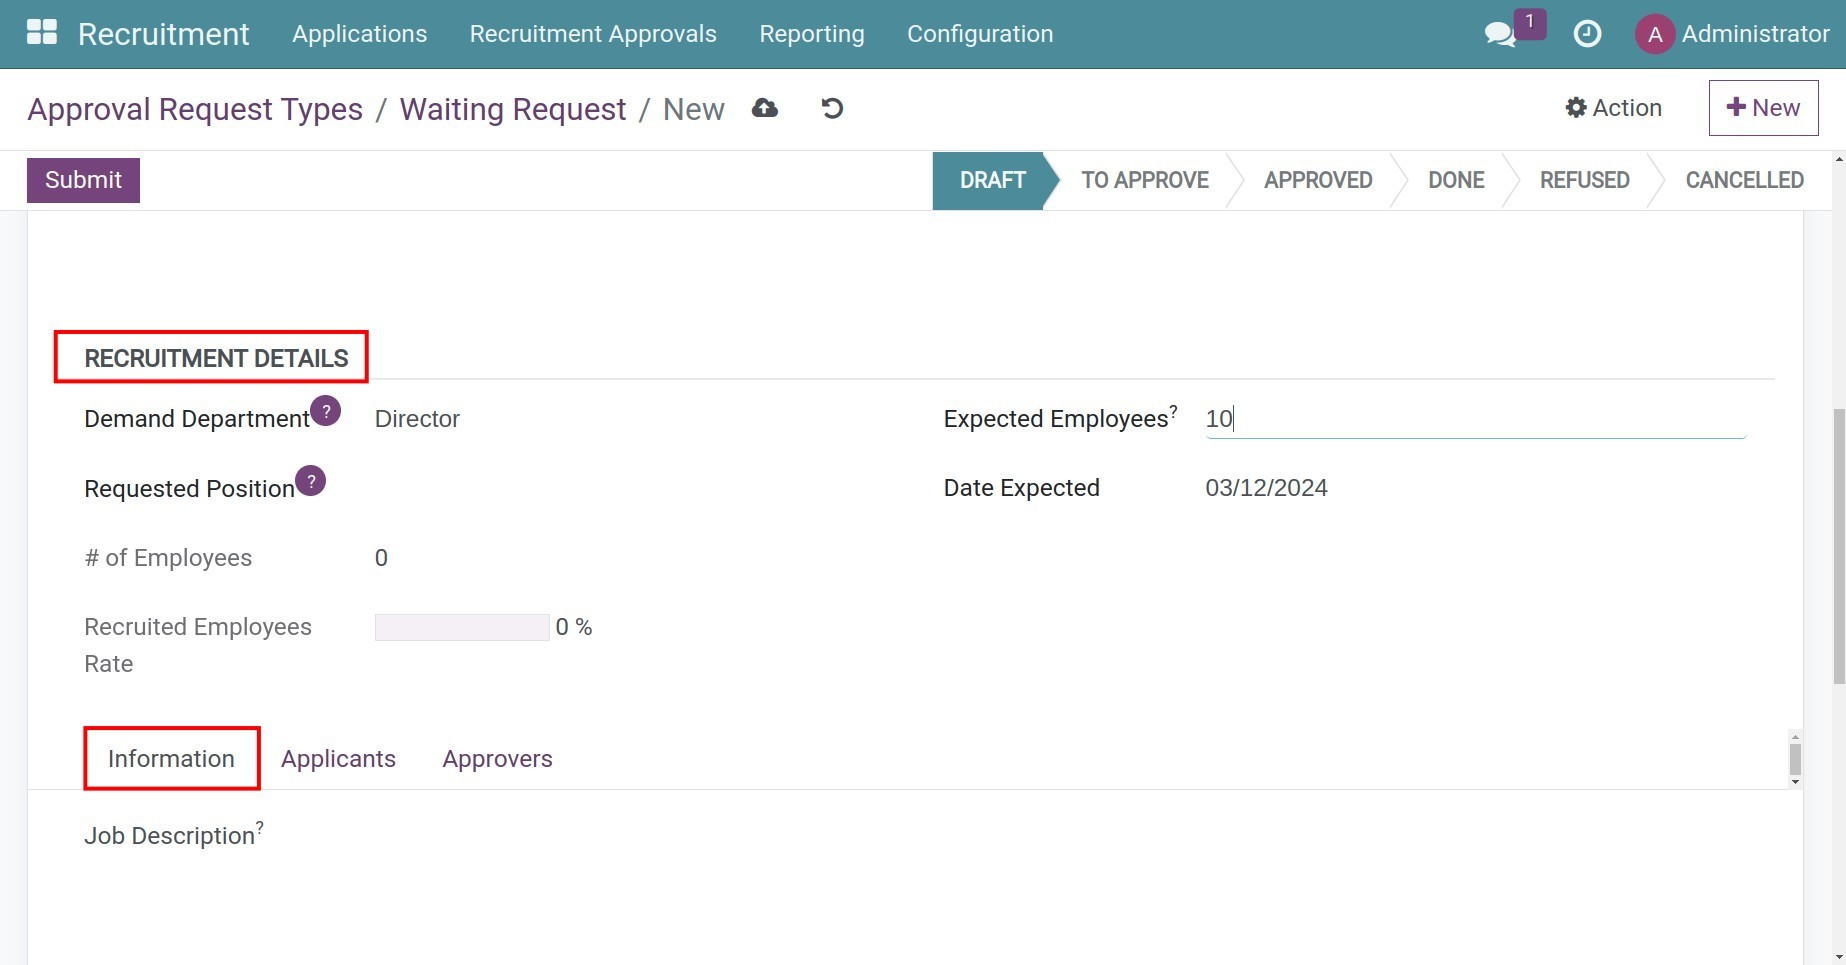
Recruitment Details:
![Recruitment request in Viindoo]()
Demand Department: The system will auto-select the employee’s department, however, you can change it.
Requested Position: The system will show you all the current job positions to choose from. If it is a new position, you can create it.
Number of Employees: The system will auto-compute this number, when an applicant is recruited and changed into an employee, this number will be updated.
Recruited Employees Rate: This percentage is calculated by the Number of Employees out of the Expected Employees.
Expected Employees: The number of employees for this job position.
Date Expected: The date when the Number of Employees reaches the Expected Employees.
Information tab: This is to describe the job and its requirements.
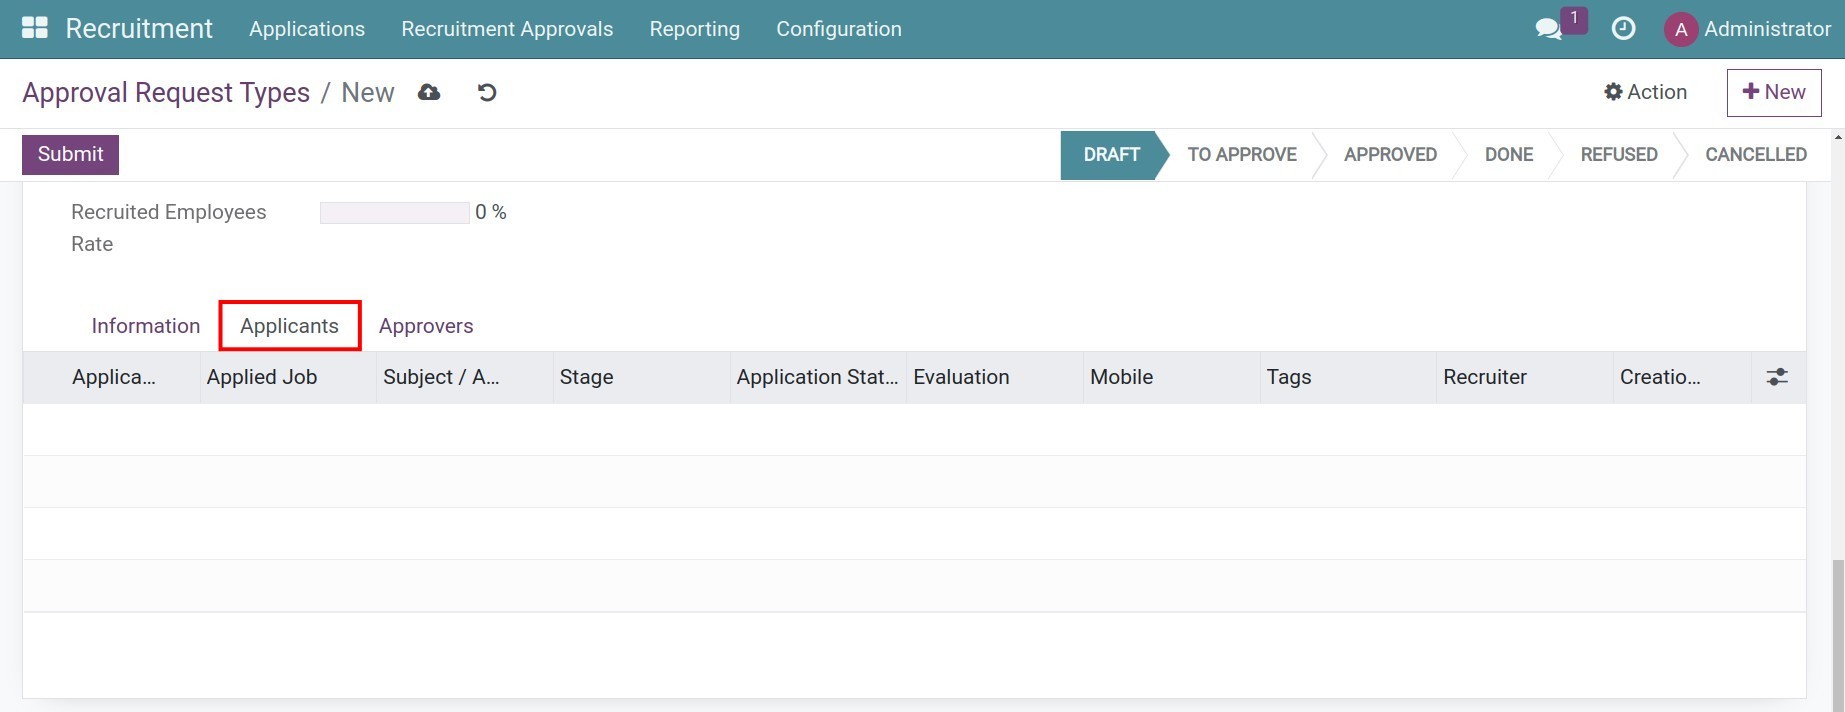
Applicants tab: The system will auto-list all the applicants here.
![Applicant tab]()
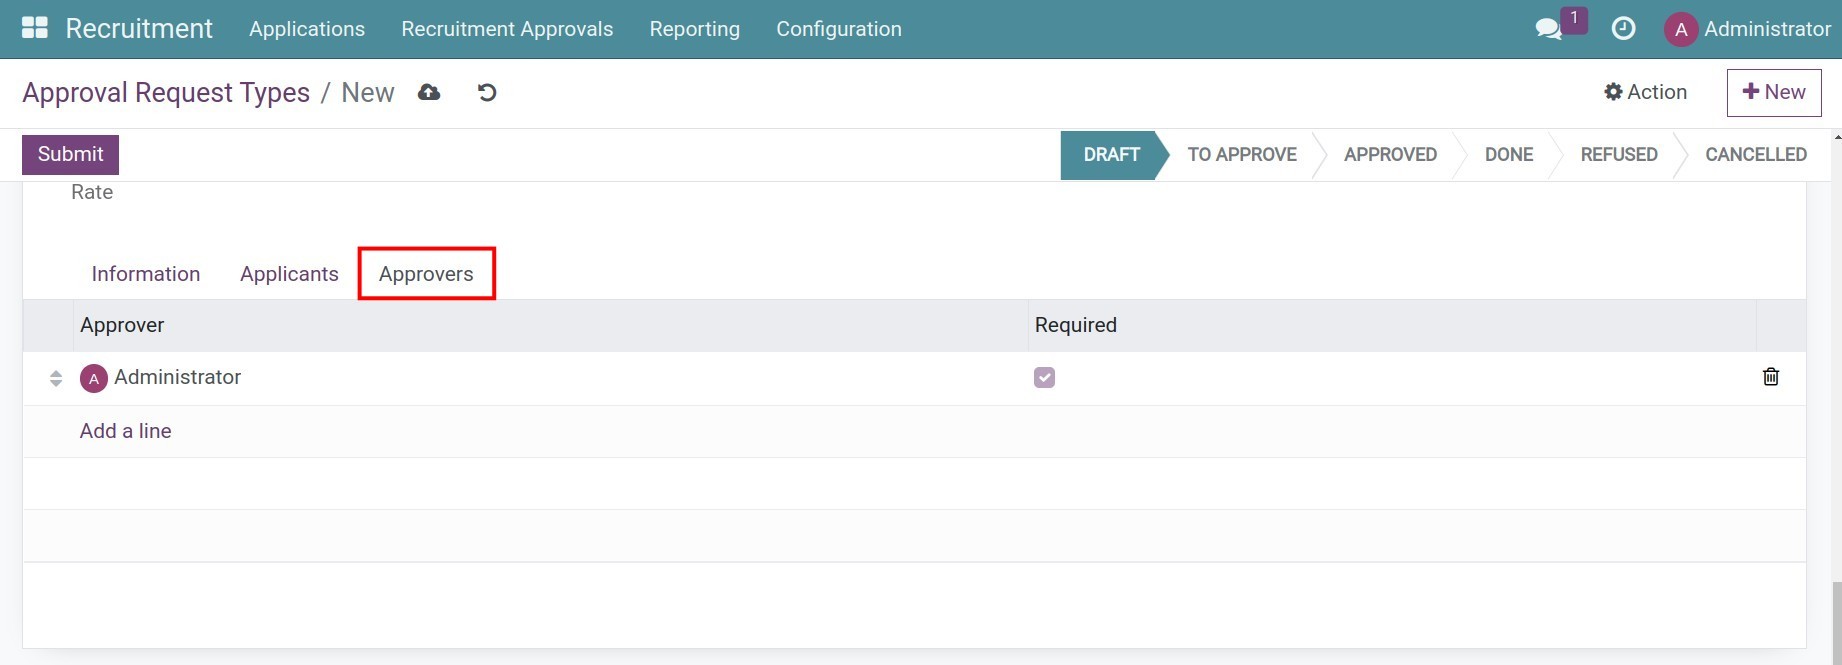
Approvers tab: This shows the approver list setting in the approval type before and updates their latest approval date.
![Approvers in a recruitment request]()
After fulfilling all the necessary information, the stage of the request is now Draft. If you are sure about the requested information, click on the button Submit to move to the To Approve stage. In the meantime, the system will automatically set the scheduled action Approval to the approvers.
Recruitment Approval
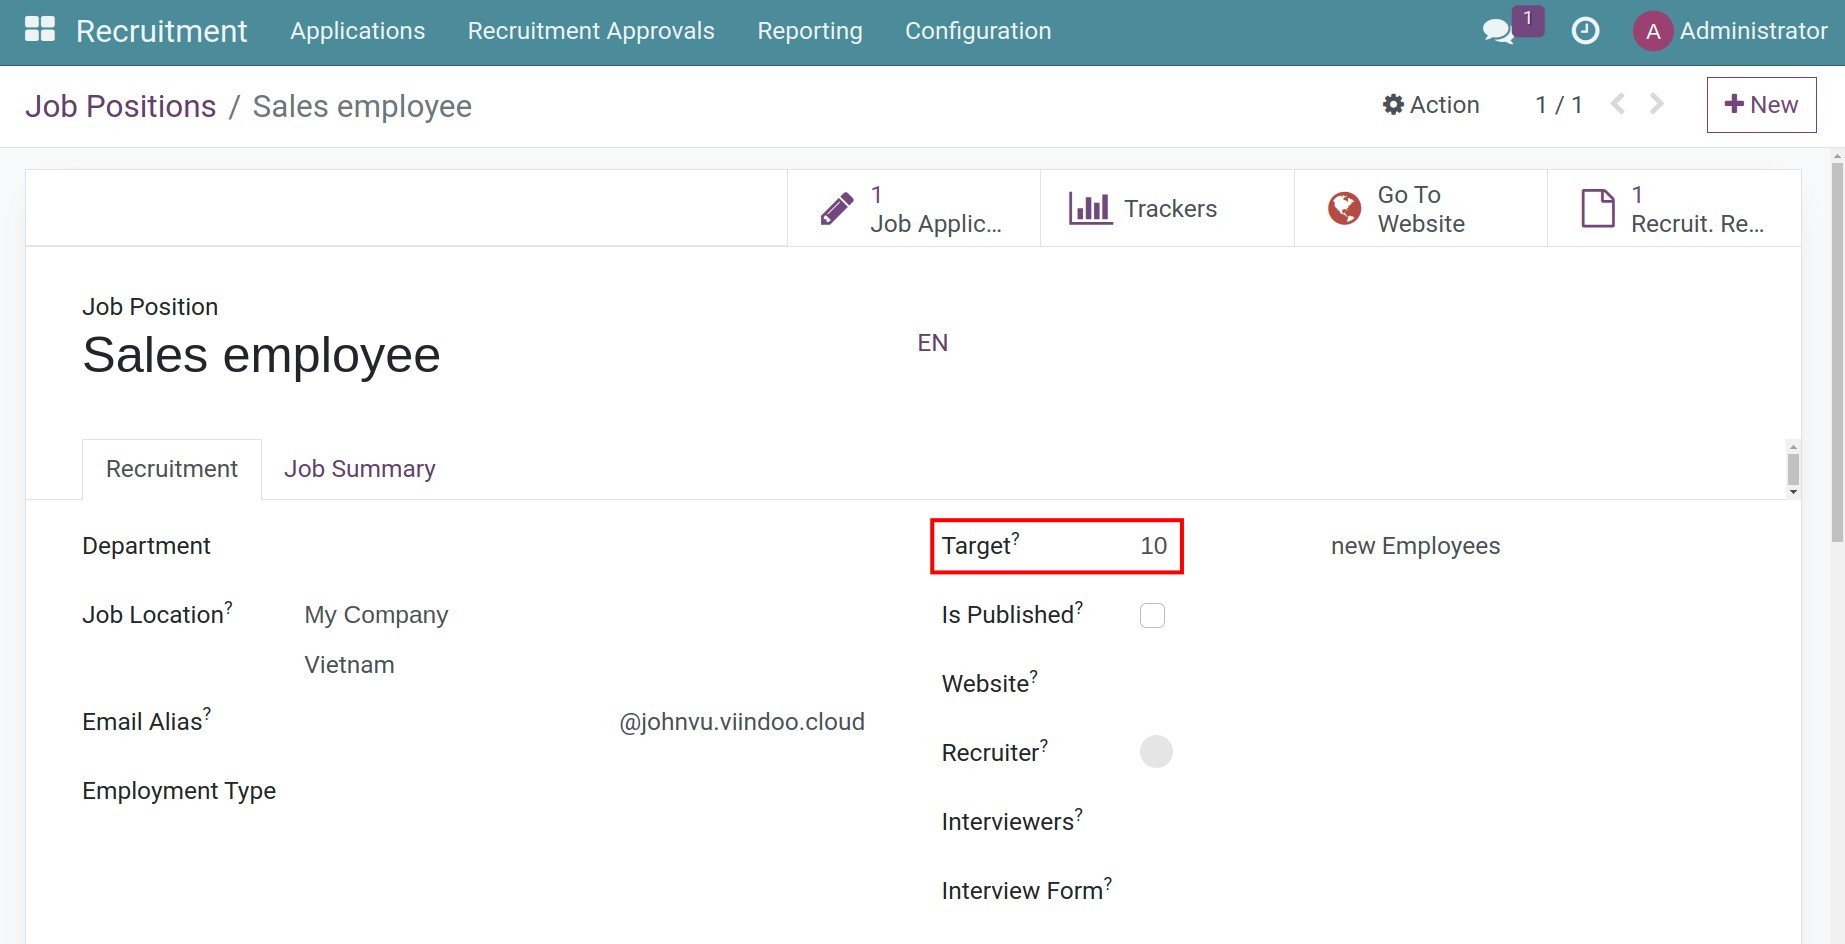
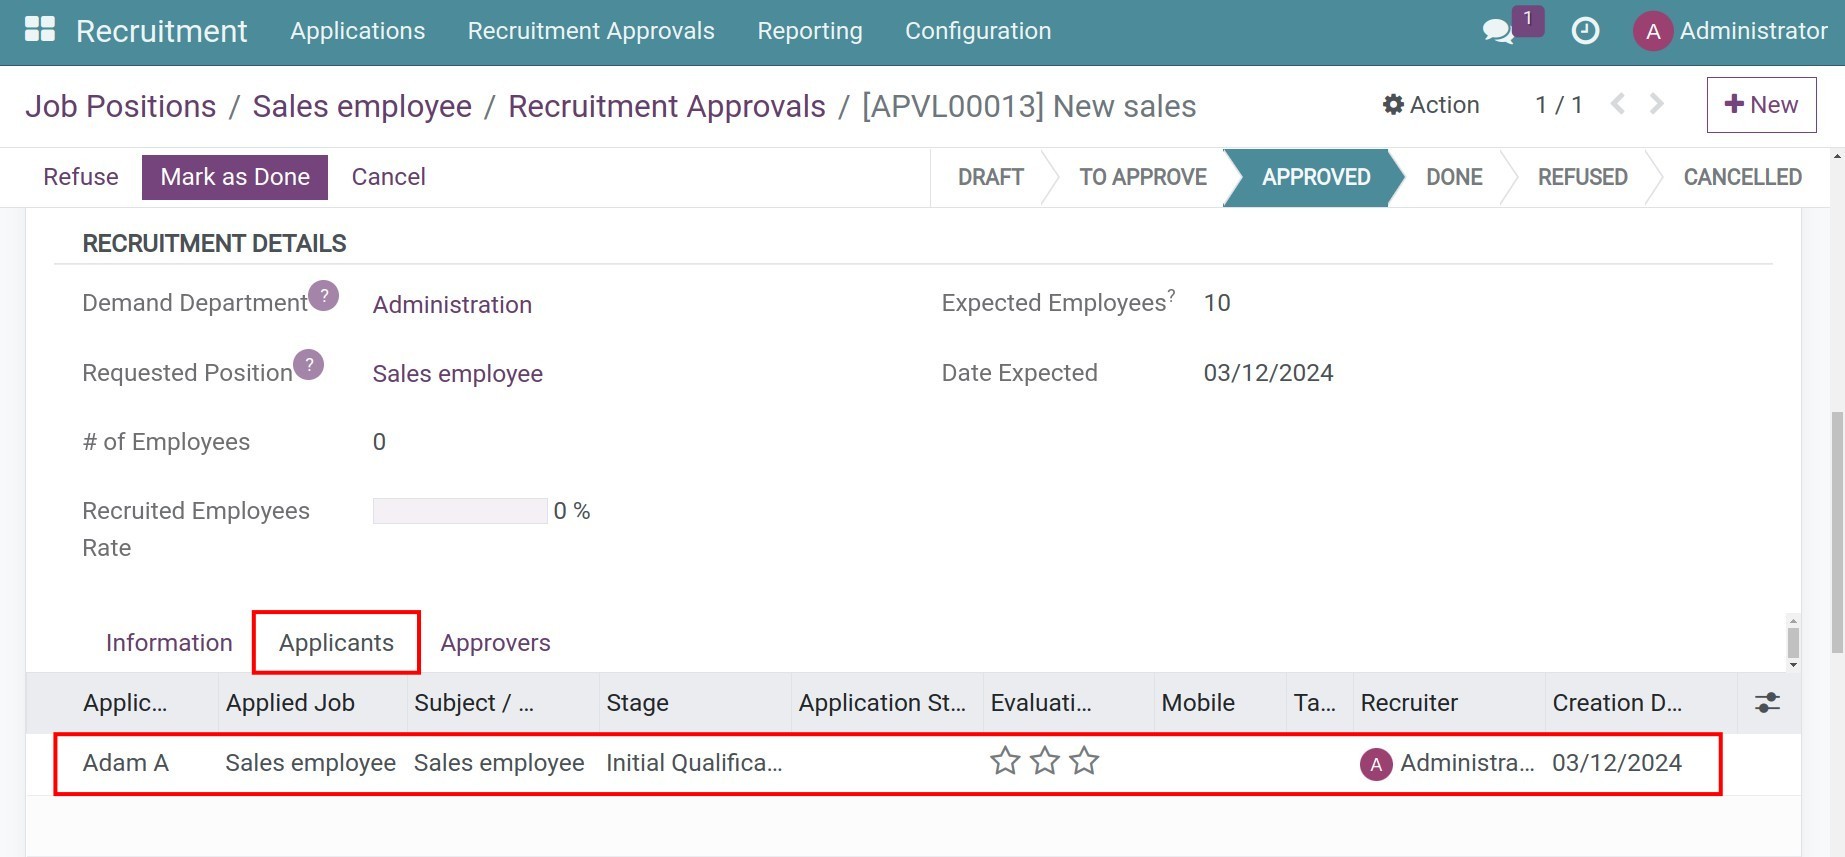
The manager approval the request. After the request is approved, you go to Employees > Configuration > Job positions then see Target amount is updated.
The HR department will proceed with the recruitment process to recruit the employee. The system will auto-update the Applicant applying for this position:
Refer to How to create an employee from an Applicant.
See also
Related article
Optional module