Cash on hand management
Requirements
This tutorial requires the installation of the following applications/modules:
Cash statement creation
On the view Accounting Dashboard of the Accounting app , go to Cash section and hit New transaction.
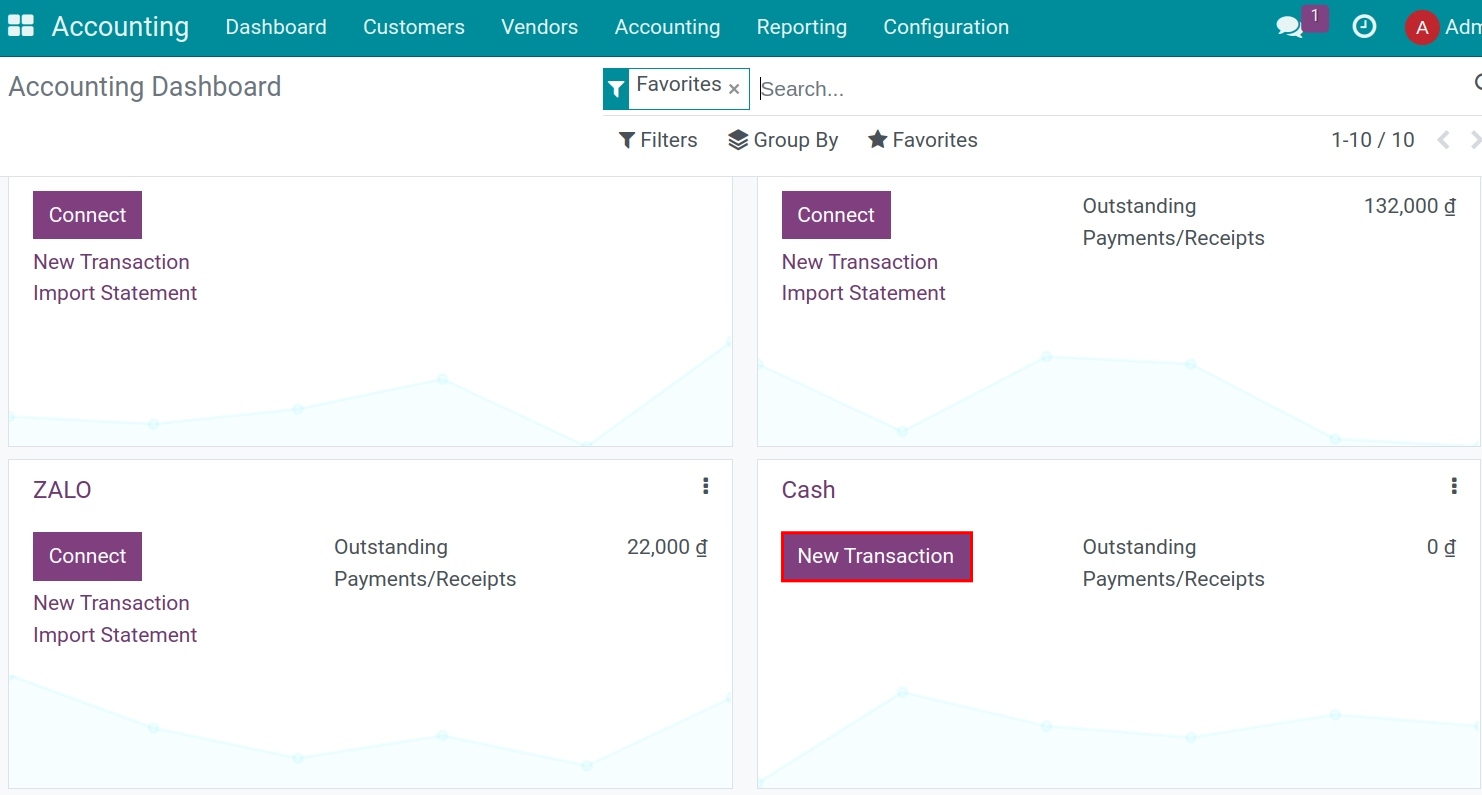
Recording on the cash statement is similar to recording cash receipts and cash payments in the cash journal. On this new view, enter the following information:
Date: the date the statement was created.
Description: for information search purposes. There should be information of the time (e.g. date) so that it is easy to find and easy to read.
Partners: customers, suppliers, or employees within the company.
Statement: Statement name.
Journal: automatically retrieved when adding transactions from the journal on the information board.
Amount: The actual amount spent or received.
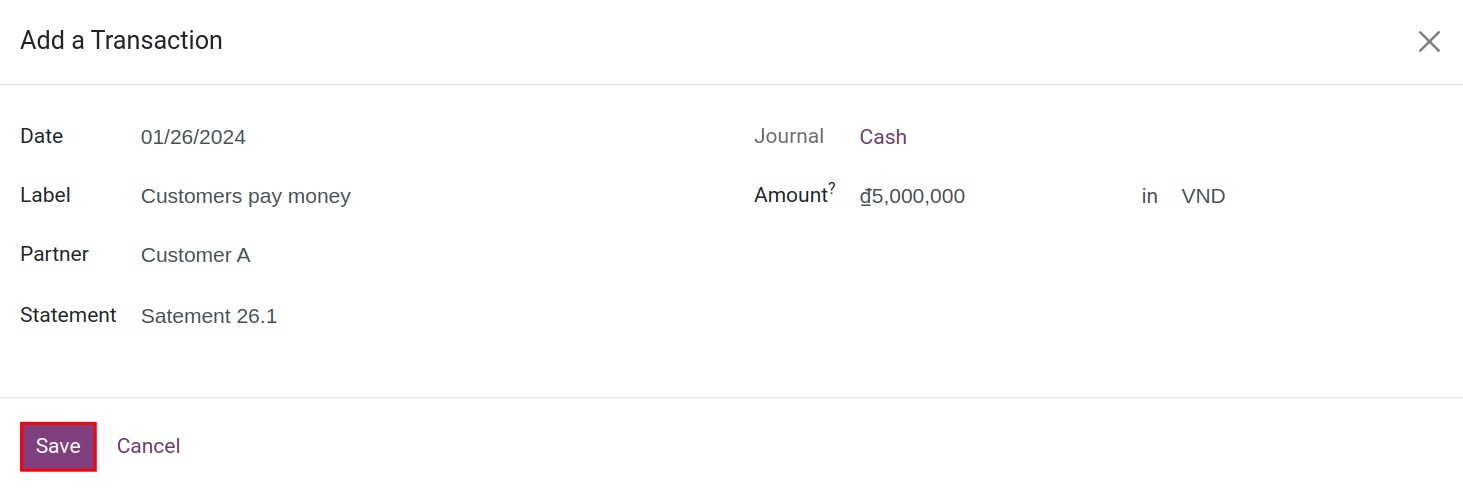
Press Save.
Note
Use negative numbers to record the money out. Use positive numbers to record the money in.
On the statement, the partner information must be filled in correctly and completely (the payer/receiver) for monitoring and reconciliation.
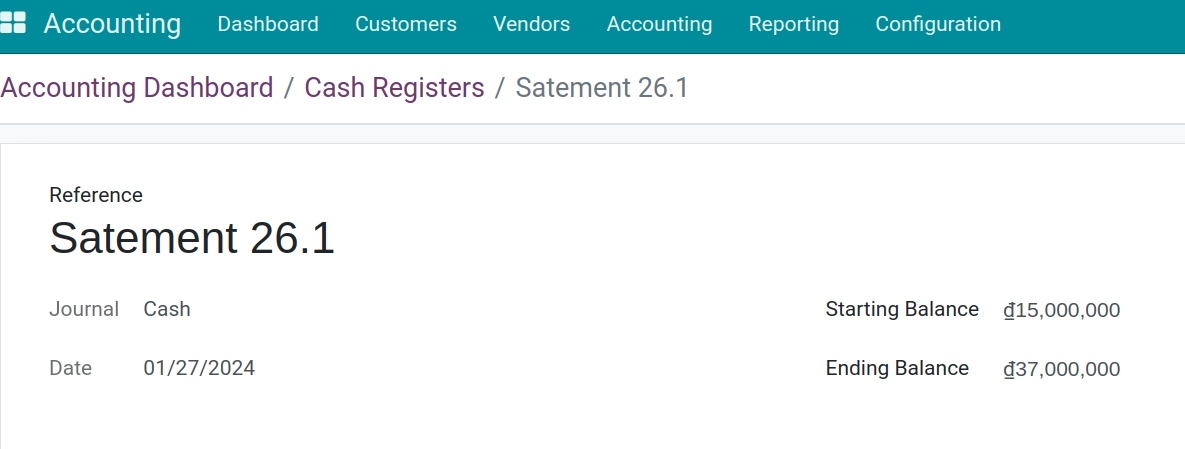
Enter the opening balance - closing balance in the cash book
On the cash book in the accounting information board, click the three-dot icon and select “Cash Registers under the View section and and enter the actual balance in the cash box.
Cash receipts/payments reconciliation
As you know, the reconciliation of the cashier’s statement with the accounting journals is necessary to make the funds transparent.
After completing the addition of transactions, return to the Accounting Dashboard and select Reconcile.
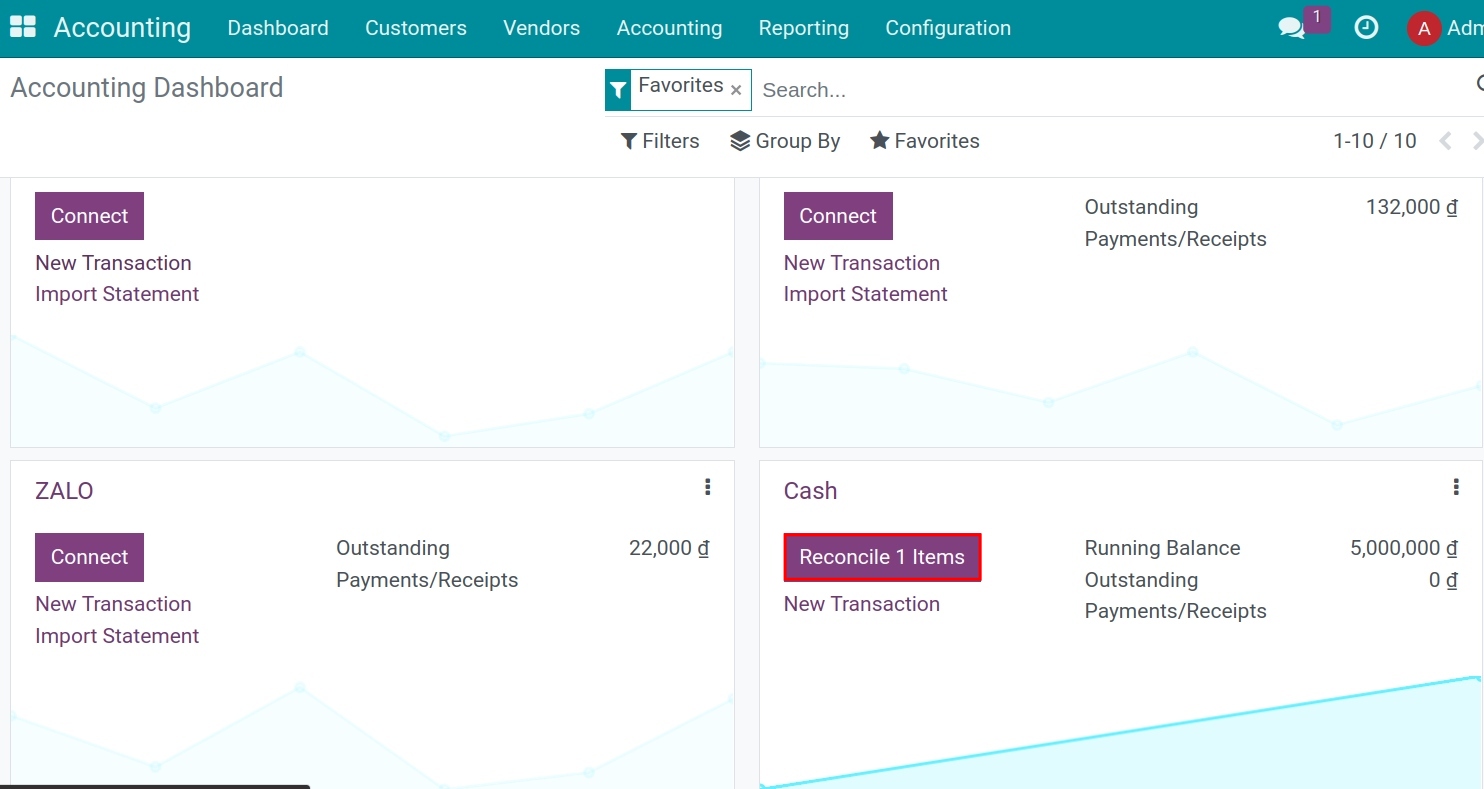
The system will automatically identify and suggest the corresponding arising amounts. Check the information and hit Validate

At this step the behaviors of the system will be:
For a transaction that has a payment slip, the system will generate a matching code to identify this transaction as completed.
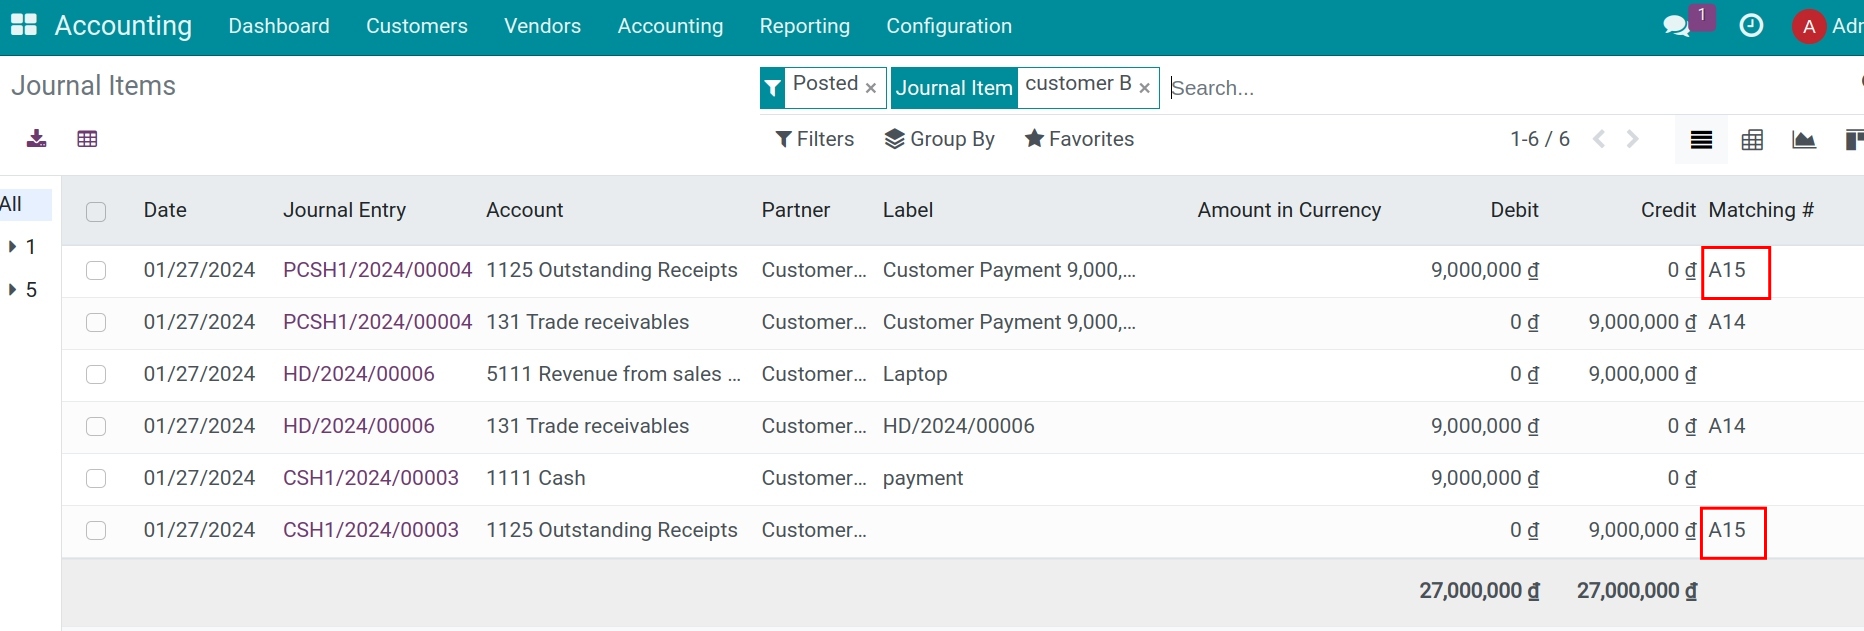
Note
To see the Journal Item and the matching codes, you must enable the developer mode in the system.
For a transaction that has not yet issued a payment slip but has a Vendor bill, the status of the invoice will be changed to Paid and the debt will be 0. A journal entry will be automatically created to register payment .

After completing the reconciliation, return to the journal on the Accounting Dashboard, click the three-dot icon and view the balance on the Cash box.

On the view of the Accounting Dashboard, in the cash journal you will see the balance recorded in the General Ledger and the actual balance of the latest statement.
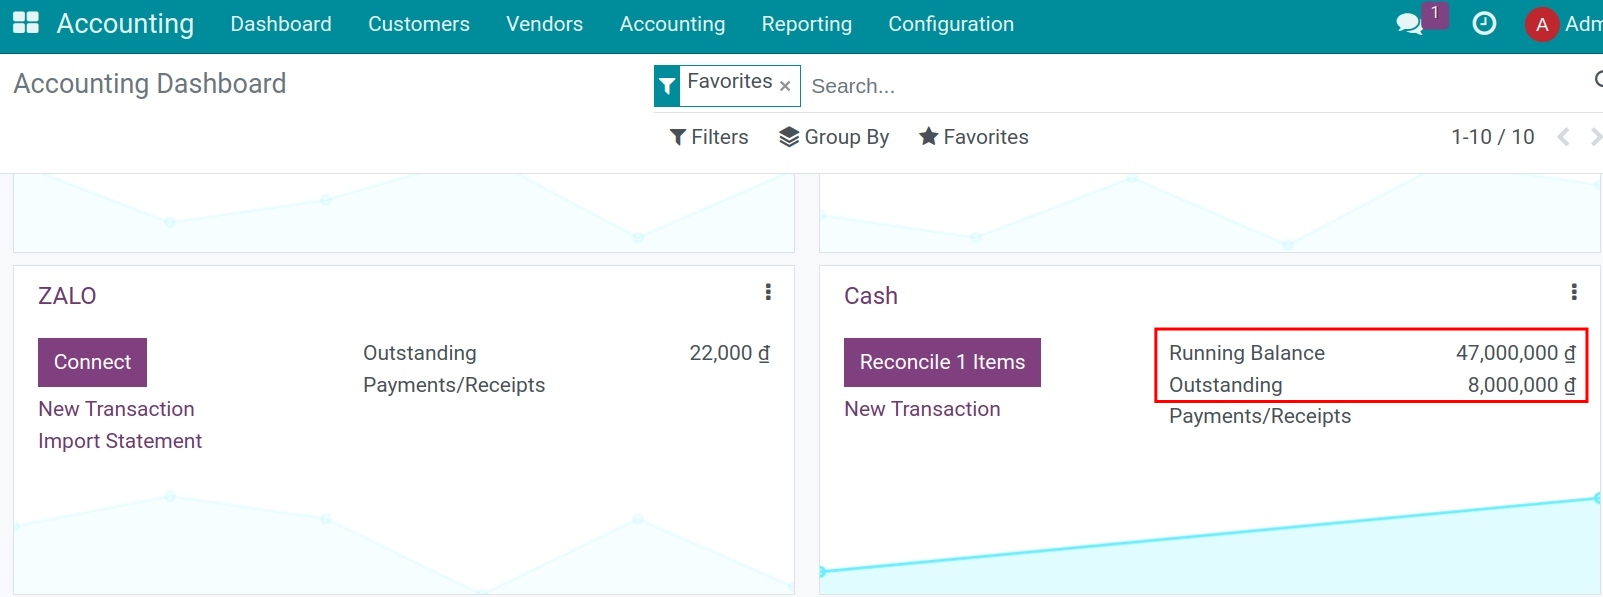
The difference between the starting balance of this period and the ending balance of the previous period
Normally, the system will automatically convert the ending balance of the previous period to the starting balance of the new statement. However, these data can be adjusted and if you do it, it will lead to data heterogeneity (mismatch). The system will display a warning as shown below.
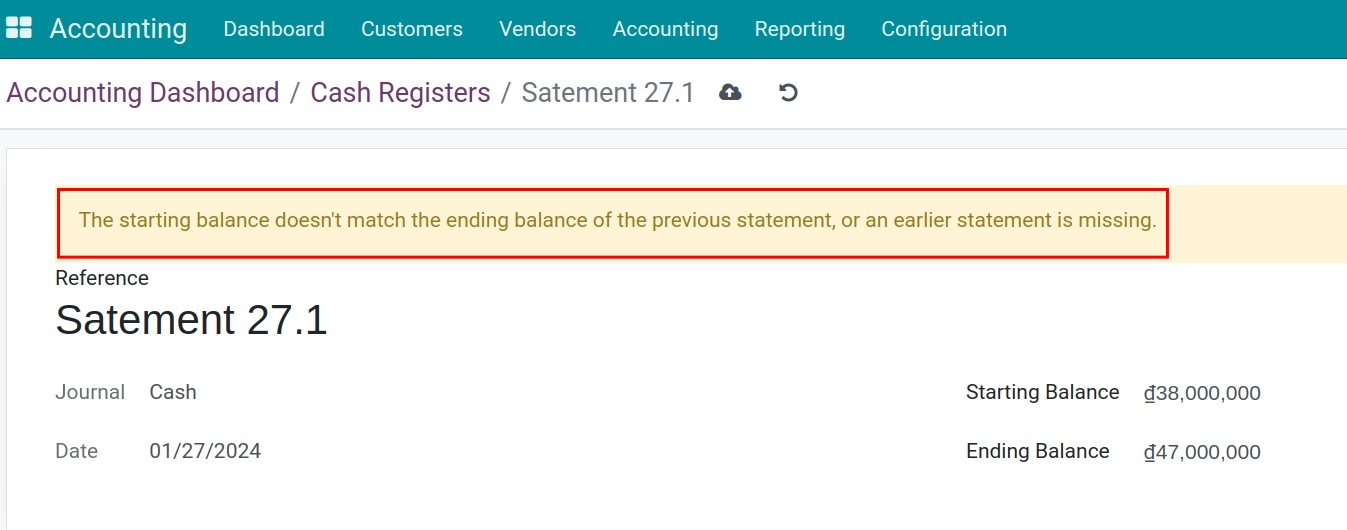
Note
If you want to deactivate the warning, you must find the mistake and solve it by filling the matching starting balance.
See also
Related article
Optional module