Guideline to basic features of Viindoo Project
New project
Create new project
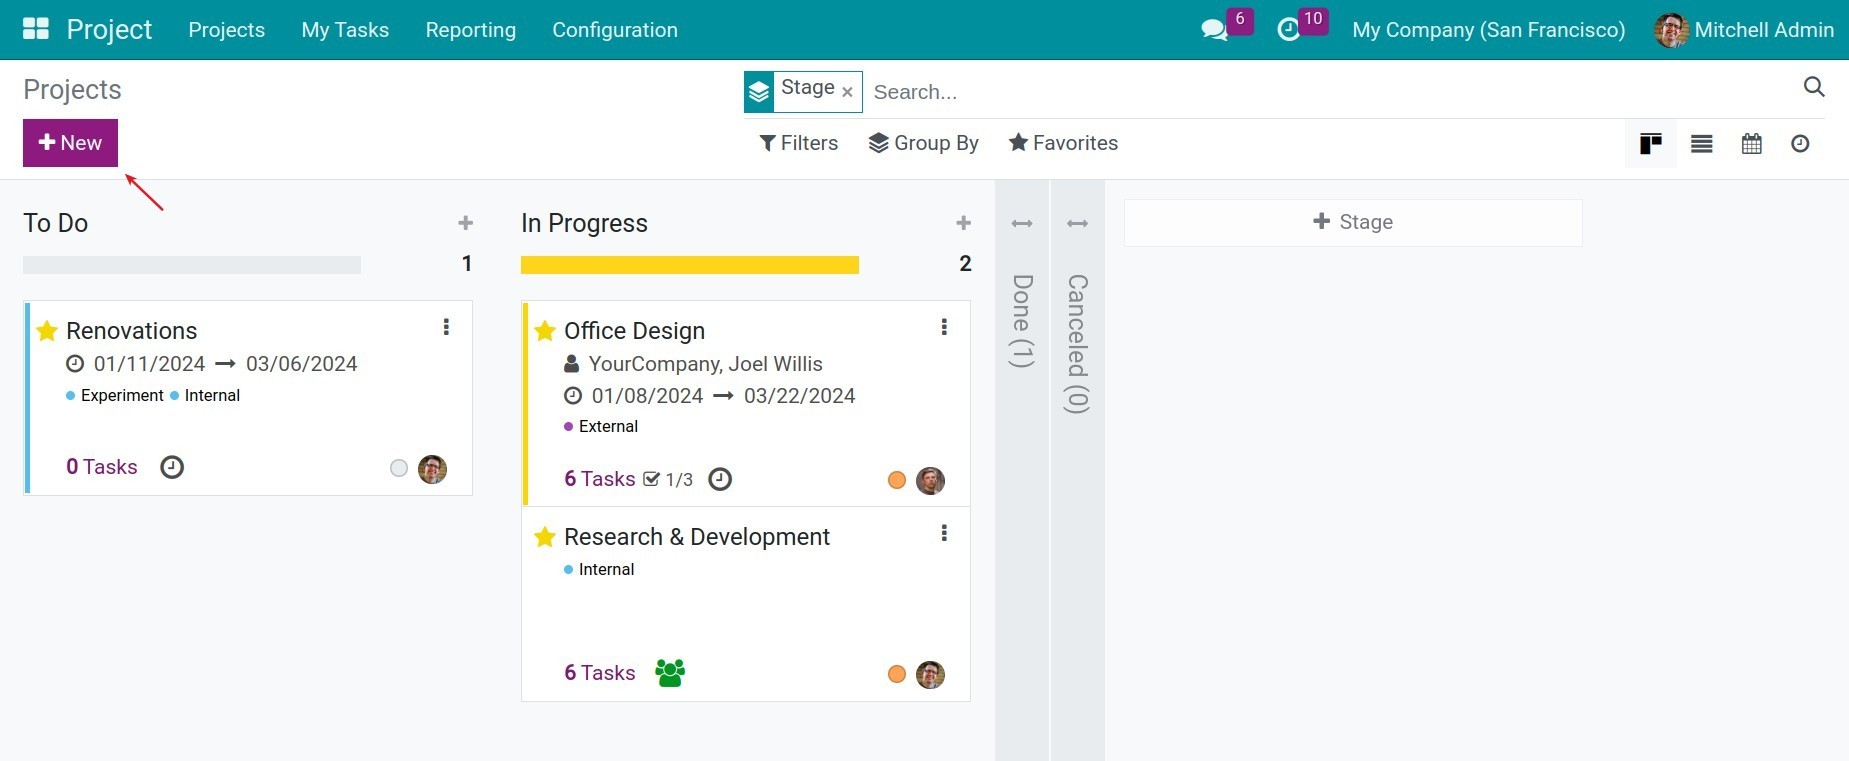
Go to the Project app of the Viindoo system. On this view, you can see an overview of the active projects, hit New.
In the pop-up window, enter the project name. In the field Create tasks by sending an email to, you set up an email alias so that when customers send an email to this address, the system will automatically create tasks for the created project.
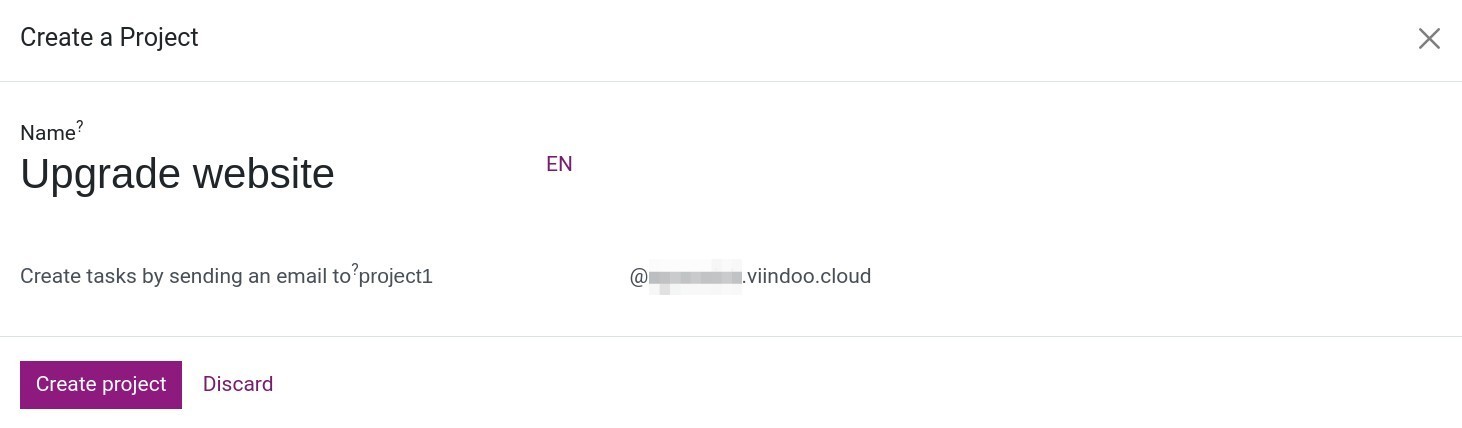
After finishing, click the Create project button.
Project basic configuration
Information settings
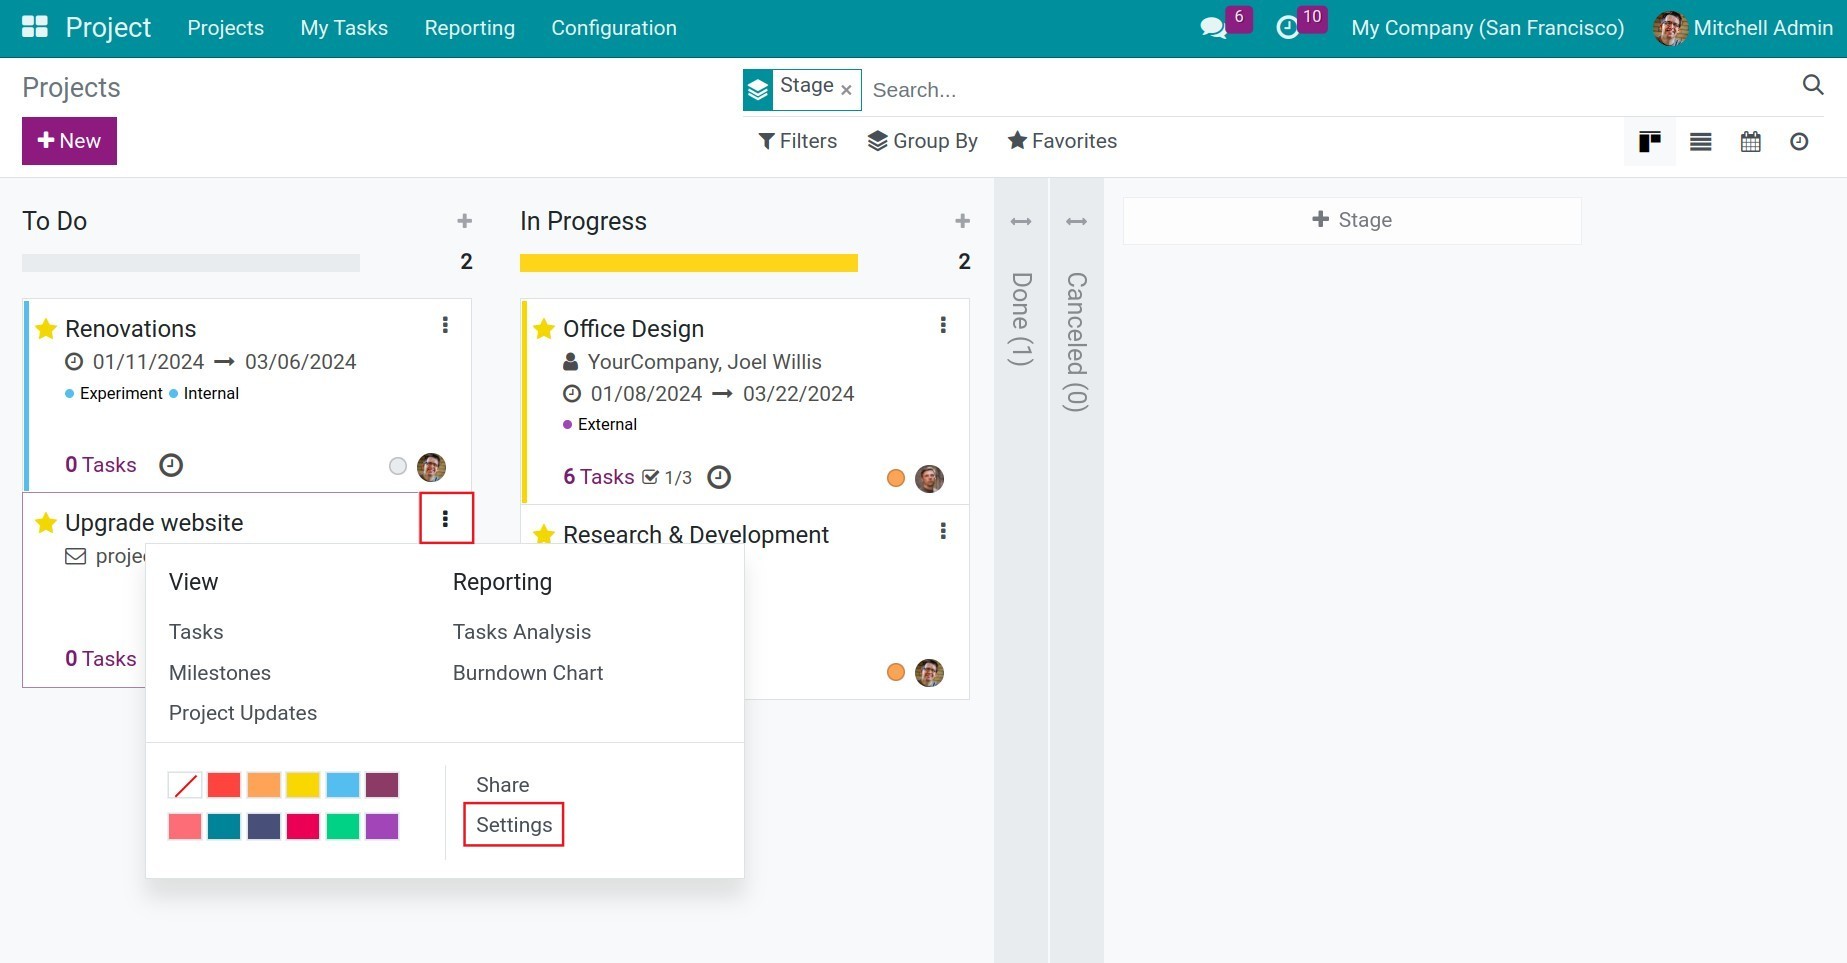
After creating a new project, you can fill in some basic information on it. Select the Kebap icon (three vertical dots icon) on the selected project and hit Settings.
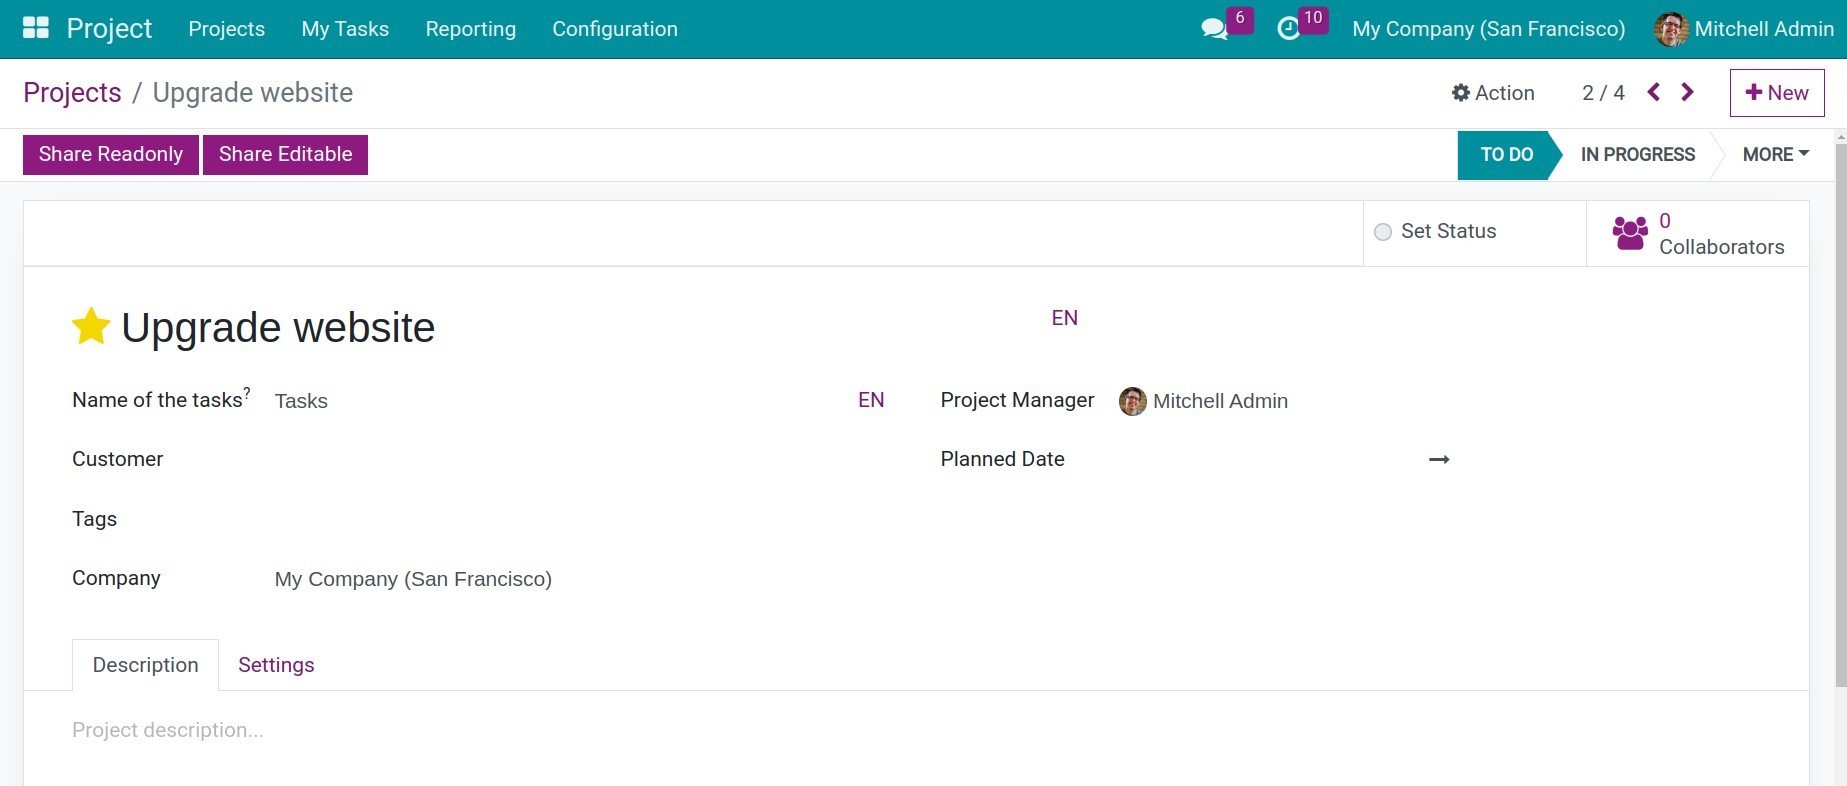
Name of the tasks: You need to define the label used on all the tasks in this project. By default, the name is Tasks, but it is editable;
Customer: The partner related to this project;
Tags: Add tags so you can easily find and filter this project in the future;
Company: The company is executing this project. This field only appears when you are using the multi-company mode.
Project Manager: Assign a manager for this project;
Planned Date: Select the start date and end date of this project.
In the Description tab, briefly describe the content and purposes of the project.
In the Settings tab, fill in the following information:
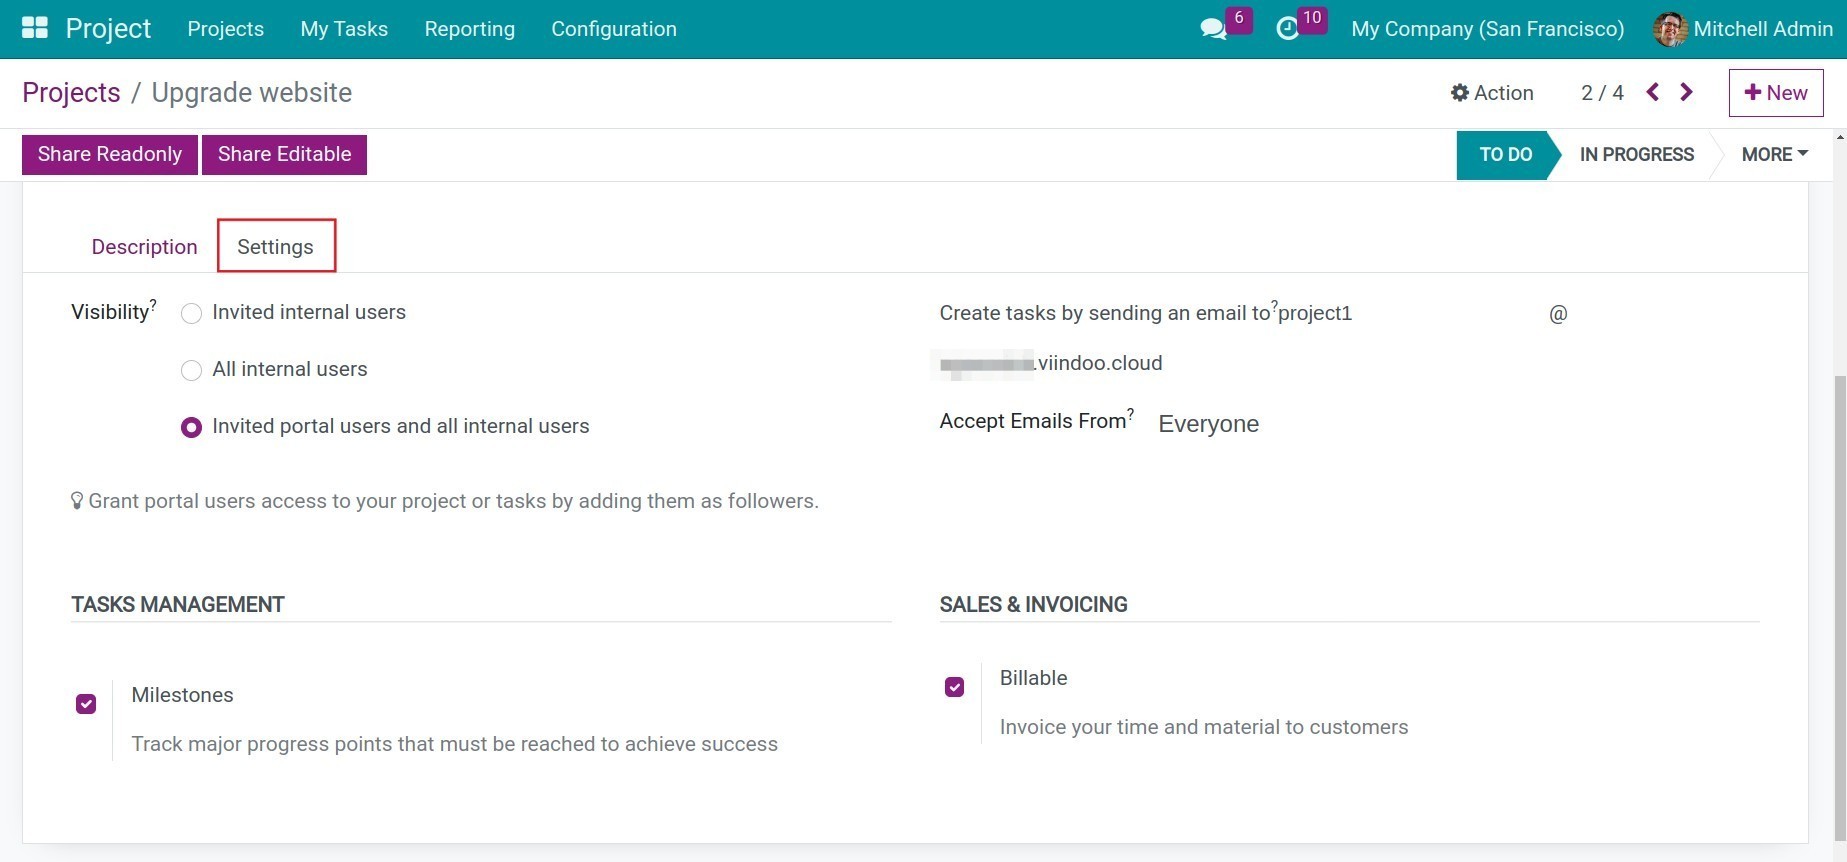
Visibility:
Invited internal users: All invited internal users can view the project and tasks that they are following.
All internal users: All internal users can view the project and all its tasks.
Invited portal users and all internal users:
Invited portal users can view the project and tasks that are followed by them;
All internal users can view the project and its all tasks.
Create tasks by sending an email to: Set up an email alias so that when customers send an email to this address, the system will automatically create tasks for the project.
Accept Emails From: Choose one of the following options. This field only appears when you set up an email alias for the project.
Everyone: Accept emails from anyone and automatically create tasks when someone sends an email to the email address set up above.
Authenticated Partners: Accept emails and automatically create tasks only when authenticated partners in the system send emails to the email address set up above.
Followers only: Accept emails only from people added as followers of the project and automatically create tasks when they send emails to the email address set up above.
Milestones: Check this box if you need to track important project milestones.
Billable: Check this box to generate invoices related to the project for customers.
After creating a new project, you can share the project to your co-worker or customer by pressing the Share buttons:

Share Readonly: This option will open the reading right of this project to the invited person;
Share Editable: This opton will open the editing right of this project to the invited person.
Stages configuration
Project stages configuration
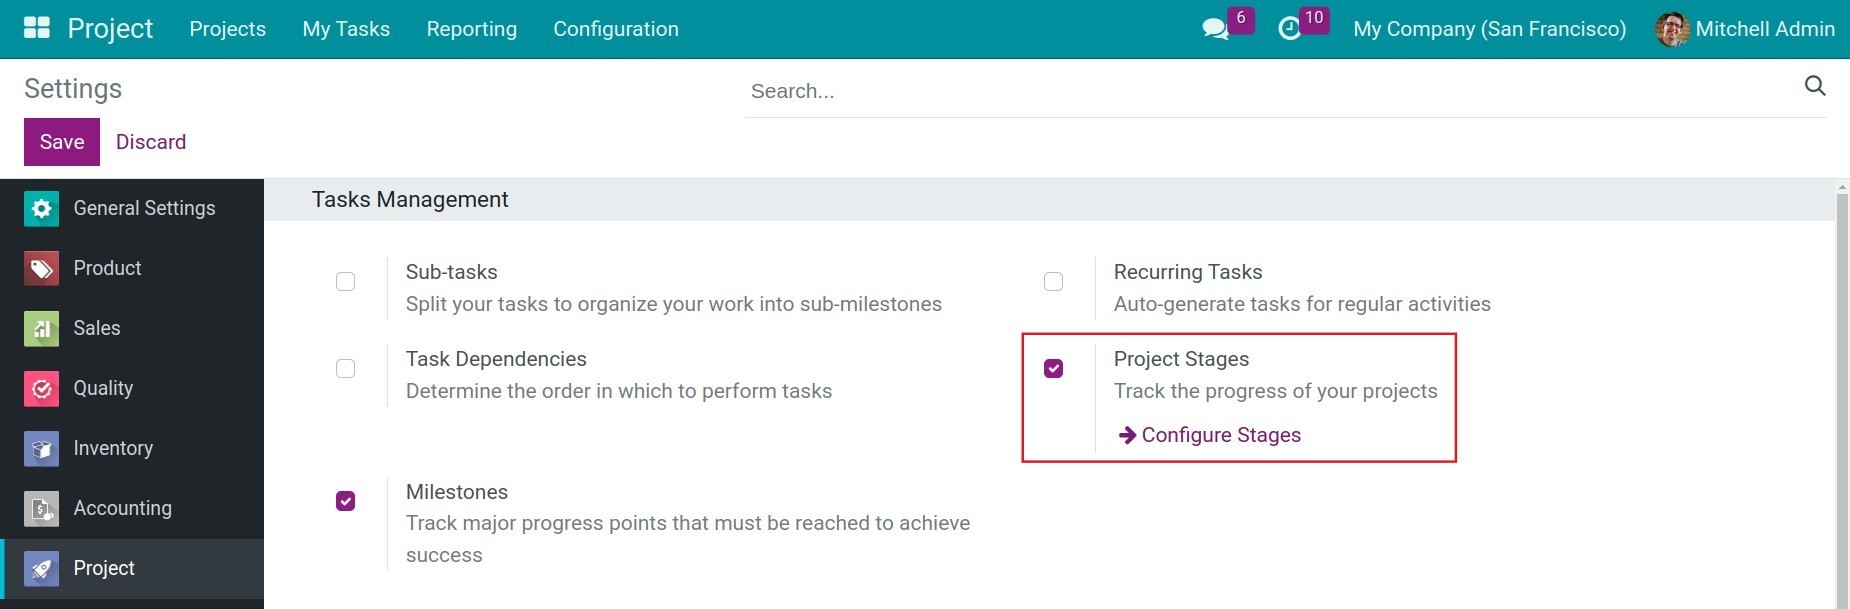
To set up project stages, navigate to Project ‣ Configuration ‣ Settings. Check the Project Stages feature and then press Save to activate it. Click on Configure Stages to set up the stages of the project.
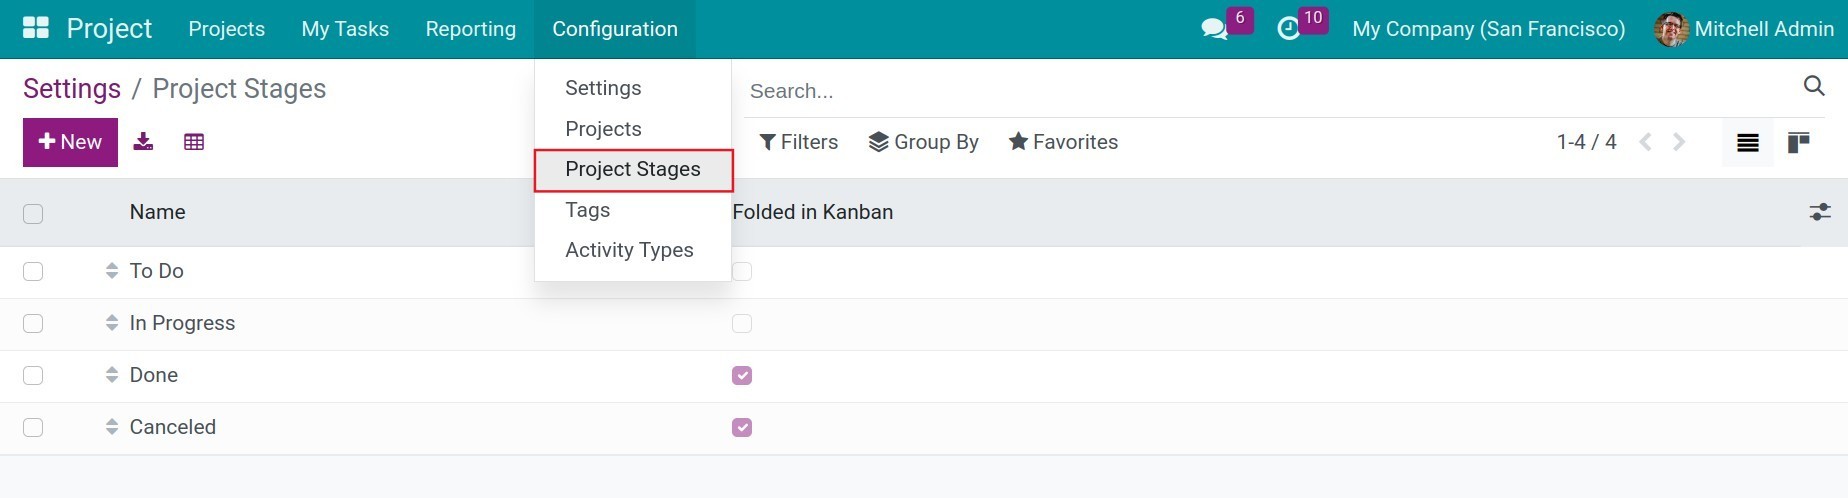
Alternatively, you can navigate to Project ‣ Configuration ‣ Project Stage to set up the stages of the project.
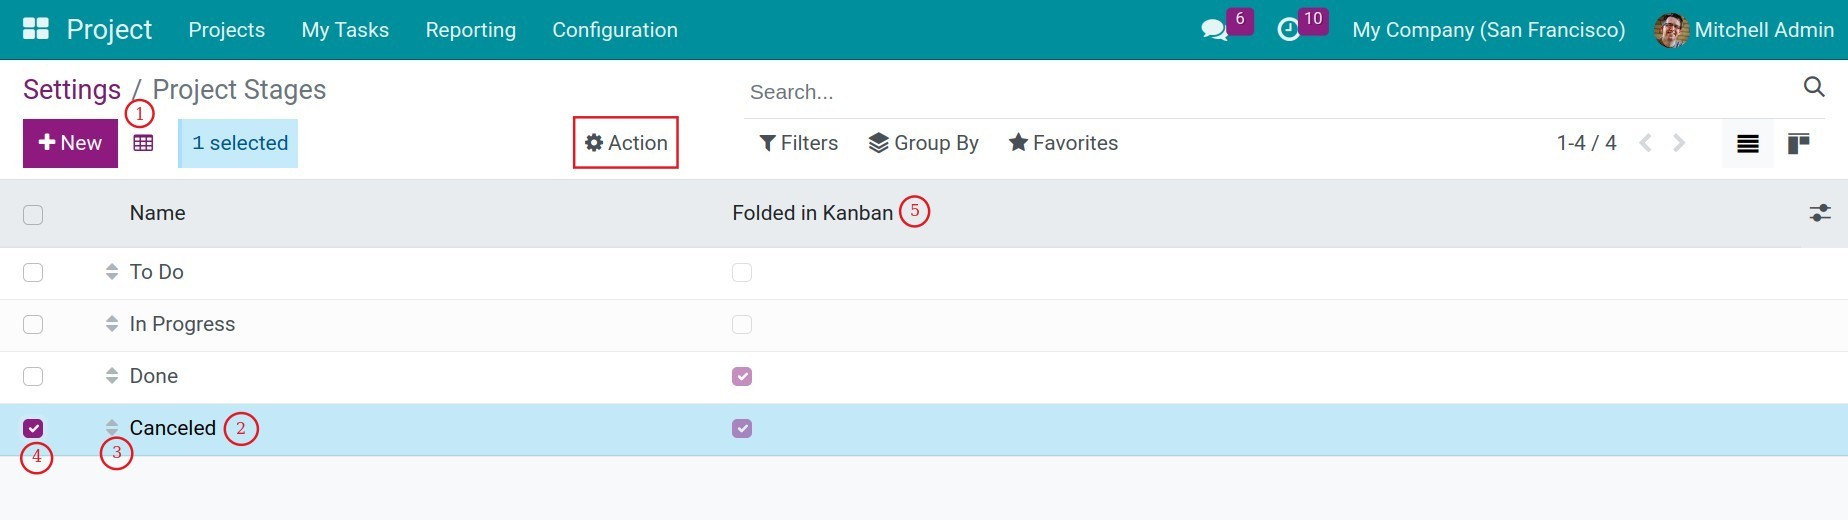
To create a new stage: Press New and type it’s name;
To edit a stage: Press directly on it;
To re-arrange stages order: Point to the arrows, drag and drop the stage to the suitable position;
To delete a stage: Check the box on the left side of the stage and select Action ‣ Delete ‣ Ok;
To fold a stage in Kanban view: Check on the box of the Folded in Kanban column. This will help you to have a better overview of the project.
Task stages configuration
Note
To set up task stages you need to Activating Developer Mode (debug mode).
Navigate to Project ‣ Configuration ‣ Task Stages, hit the New button and enter the following information:

Name: The name of the stage will be displayed in the Kanban view.
SMS Template: If configured, an SMS will be sent to the customer upon reaching this stage.
Email Template: If configured, an email will be sent to the customer upon reaching this stage.
Sequence: The order of this stage within the task.
Folded in Kanban: This stage will always be folded by default in Kanban view.
Projects: Projects using this stage.
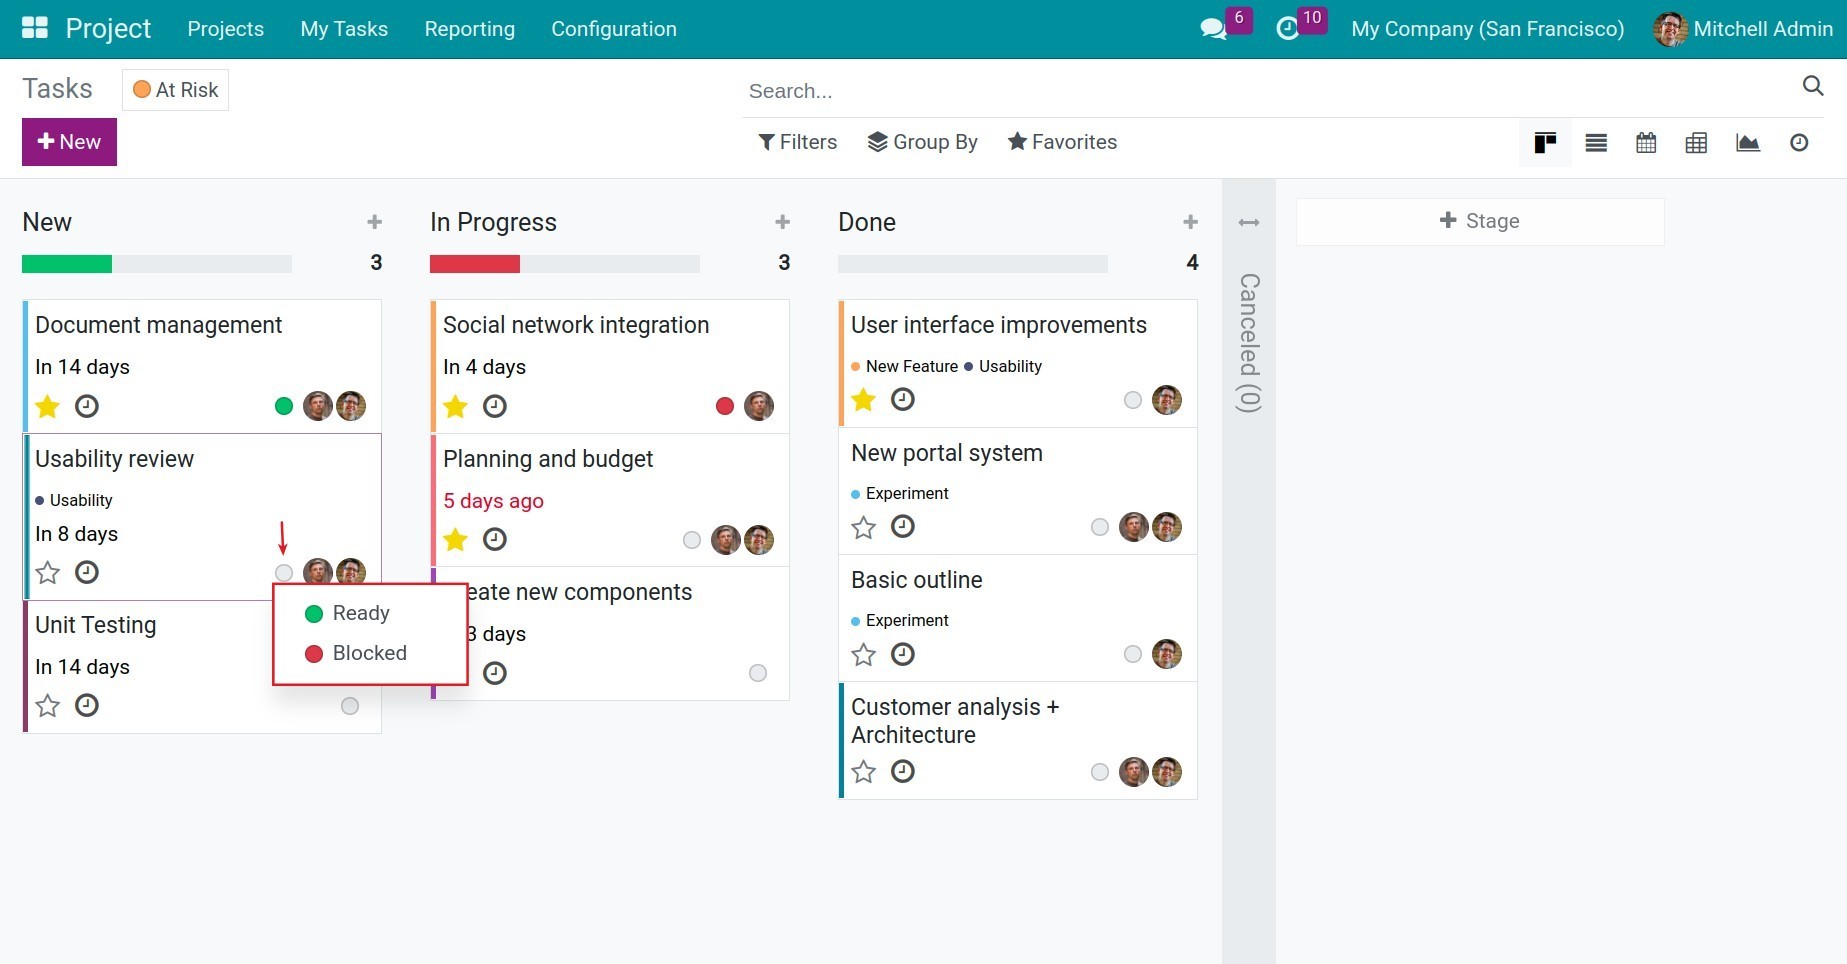
Stage Description and Tooltips: Use colors to indicate the status of the tasks in the stage. The status are determined by using the colors: gray, red and green. As the example below, a task will have three tooltip labels:
Gray: In Progress. All tasks will be initiated with this color.
Red: Blocked. Tasks are blocked due to any technical or functional reason.
Green: Ready. Tasks are finished and can be moved to another stage.
Add a description: briefly describe the main content and purposes of this stage.
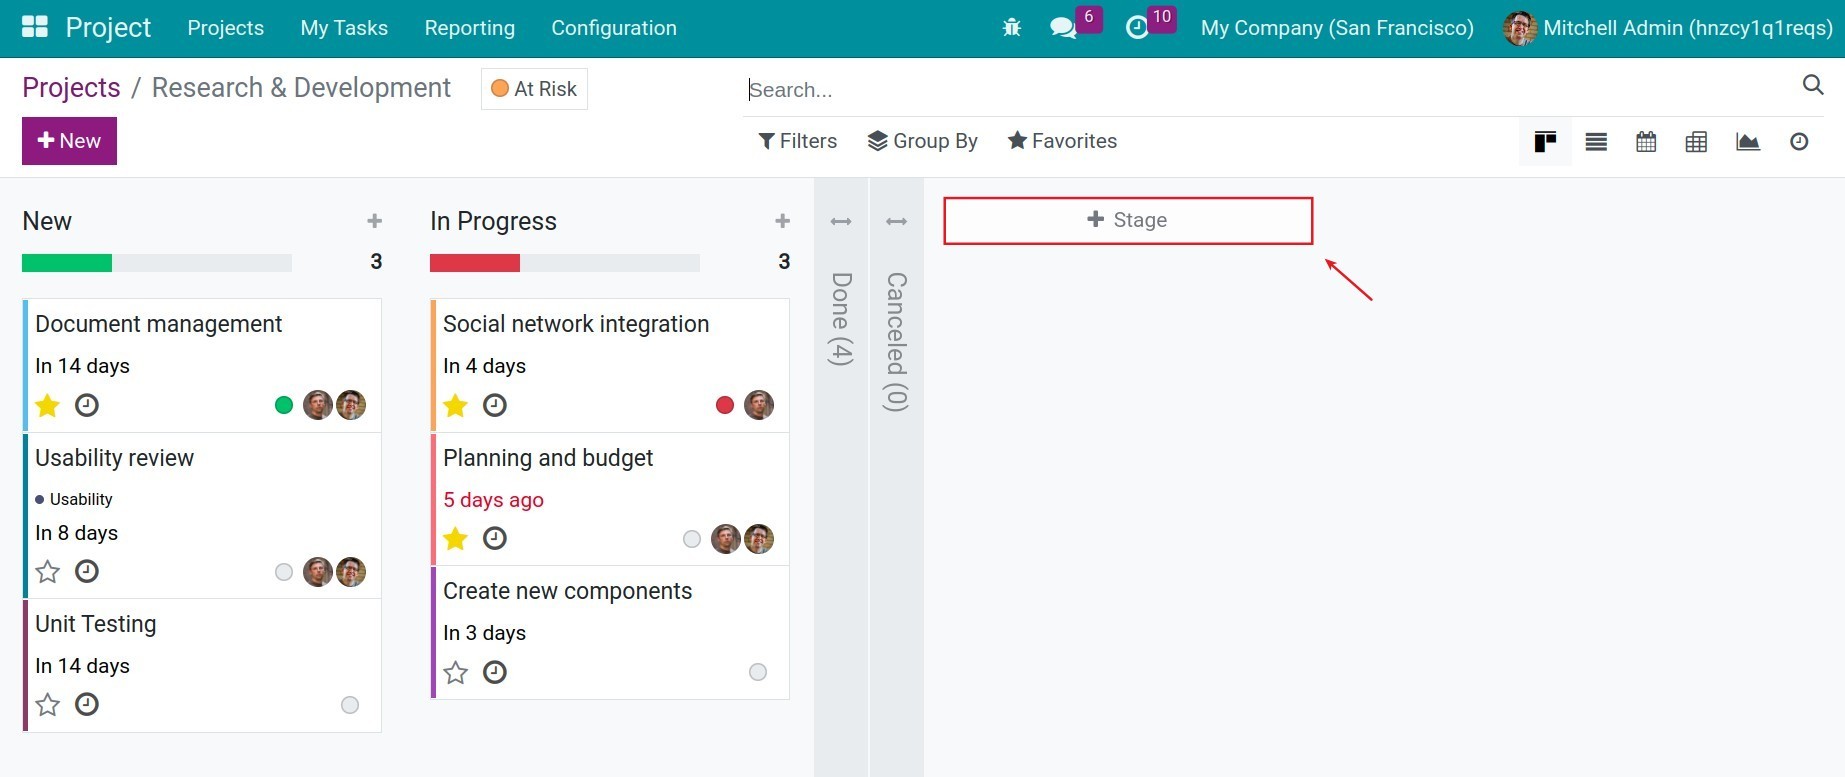
You can also create stages for projects and tasks by pressing on + Stage on the Kanban view.
New tasks
Create new task
In a project, it is necessary to create tasks to divide the work and easily control the progress.
Go to the Project app, select a project, press New, and fill in Task Title. Press Add to add a new new task or Edit to edit the task’s detail.

On the detailed view of a task, you can fill in the following information:
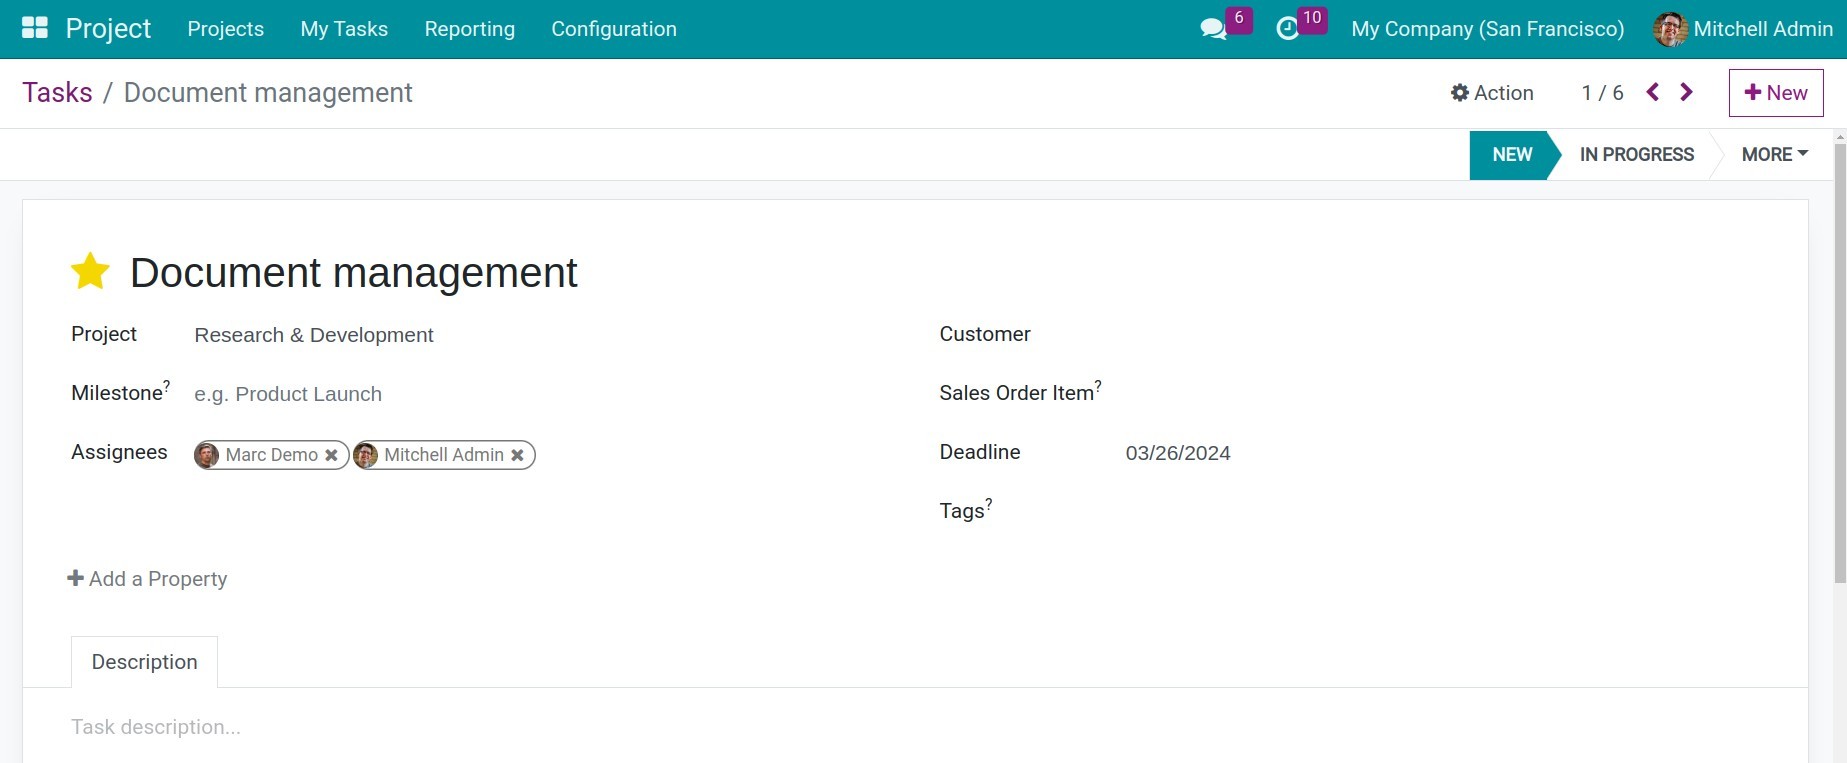
Project: The project that this task belong to;
Milestones: Set a milestone for this task. This field only appears if you activate milestone tracking for the project.
Assignees: The users who is responsible for this task. By default, it is the creator of the task.
Customer: Task-related partner.
Sales Order Item: Select the sales order item that the time you spend on completing this task will be accumulated and calculated to generate an invoice for the customer on the sales order. This field only appears if you have installed the Sales application.
Deadline: Deadline of this task for the assigned person.
Tags: Use tags to categorize tasks and make it easier to search tasks.
Description: Details about the task.
Other settings
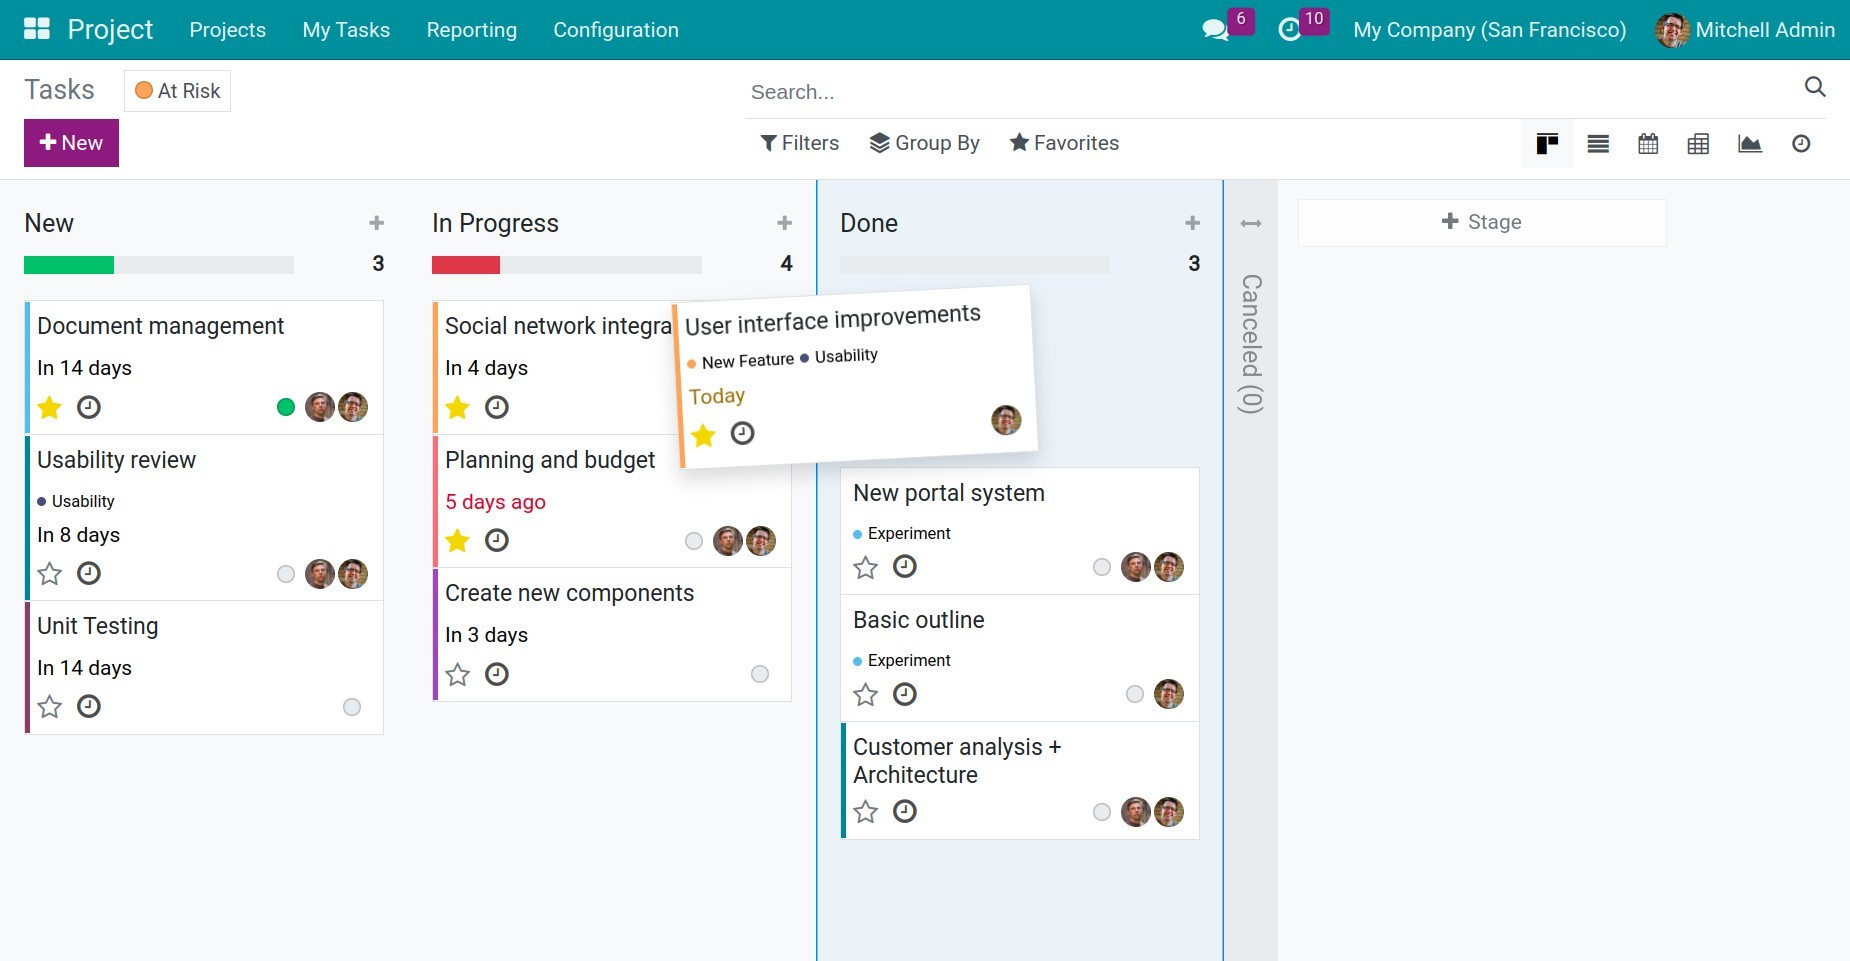
On the Kanban view, you can drag and drop a task to change its stage.
You can change the status of a task by hitting the big dot on the task.
See also
Related articles:
Optional modules: