Managing merchant product categories and products on a Marketplace
Requirements
This tutorial requires the installation of the following application:
Managing merchant product categories on the Marketplace
Merchant product category in Viindoo helps merchants conveniently track, classify, and manage their products according to different criteria and purposes.
How to create a merchant product category
Navigate to Marketplace ‣ Configuration ‣ Merchant Product Categories and click on New to create a new merchant product category.
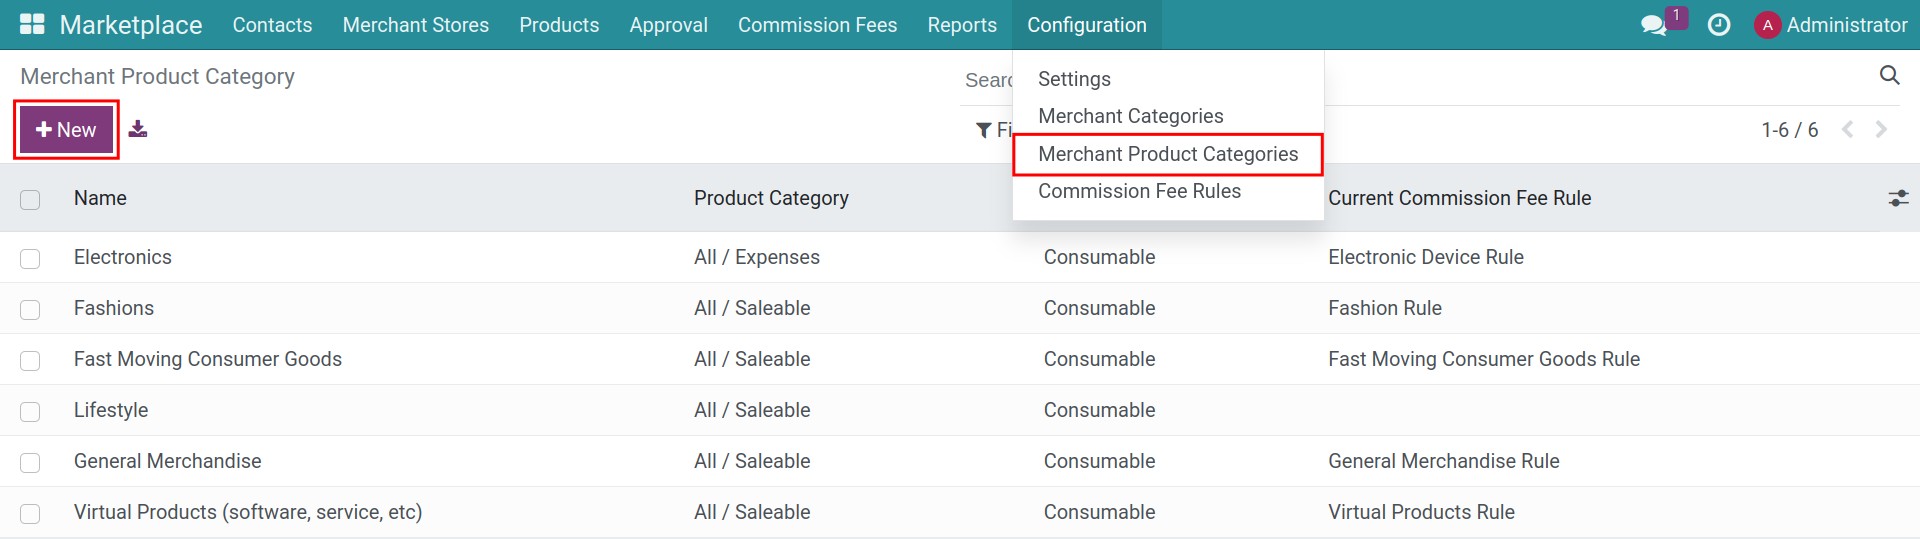
Set up the information:
Name: the name of merchant product category. It should be short, easy to understand and defined.
Product Category: select the product category. Product of the merchant product category will belong to this product category.
Current Commission Fee Rule: the commisson fee rule that is still valid for this category.
Product Type: select the product type. All products of this category have this type.
Customer Taxes: the taxes applied to customers in the quotations and sales orders. All products of this category will be computed following these customer taxs.
Commission Fee Rules button: on the top right corner, click on it to see/create all commission fee rules of this category.
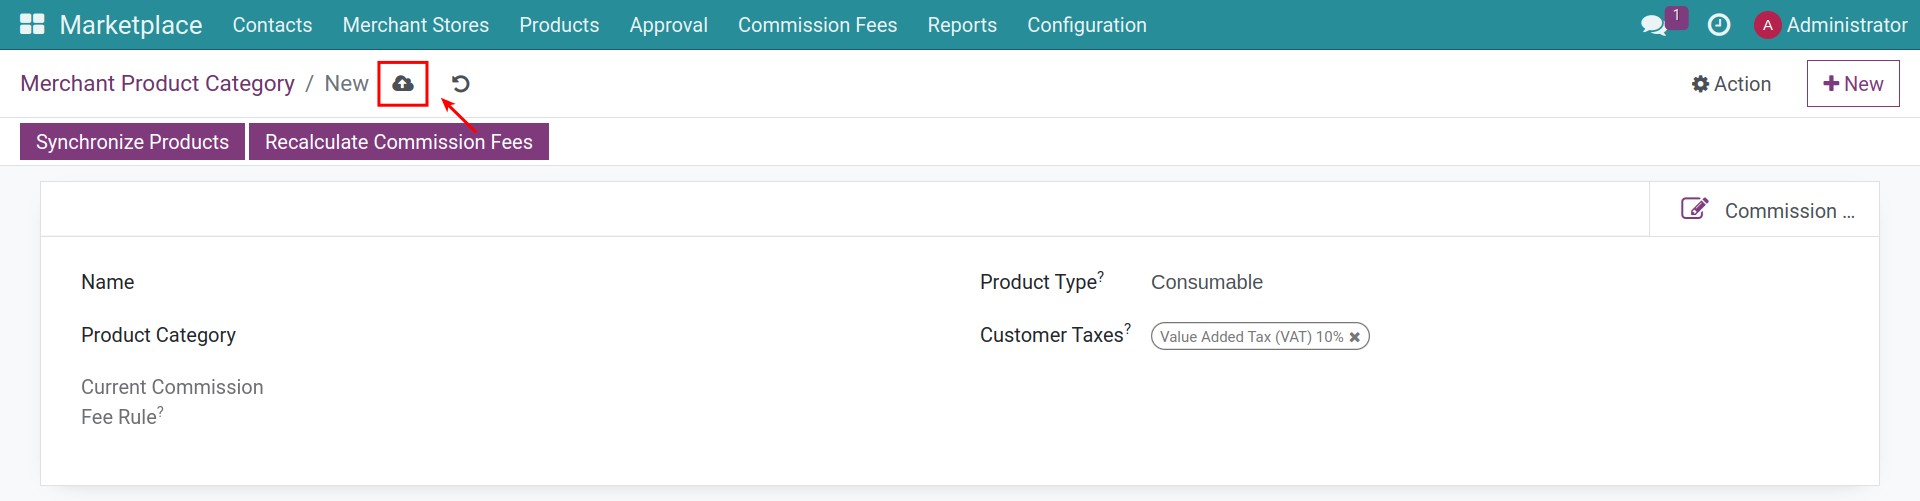
Press on Save button to finish setting up the merchant product category.
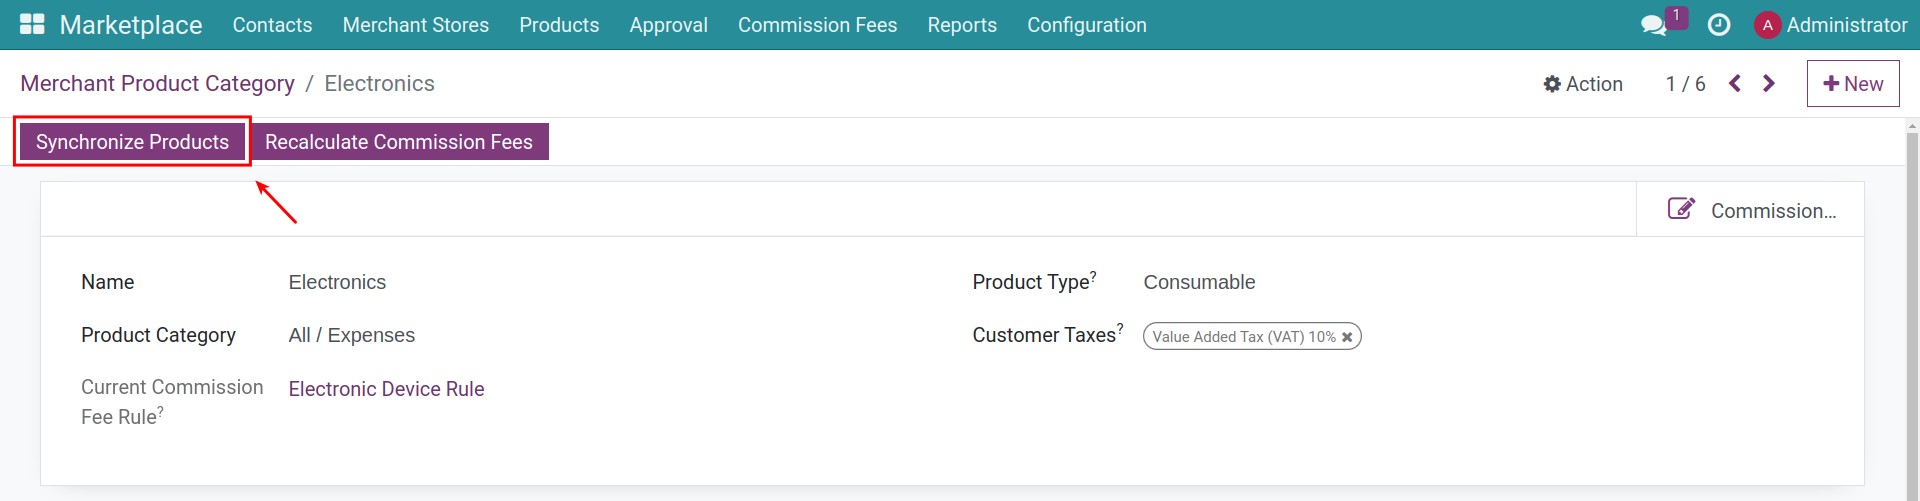
Synchronize products
In case you change the information of the merchant product category and want to update this new information for all products of the category, you need to synchronize the products by navigating to Marketplace ‣ Configuration ‣ Merchant Product Categories. Here you select the merchant product category to sync and press Synchronize Products
Note
Can not change the type of a product that was already used.
Managing merchant product on the Marketplace
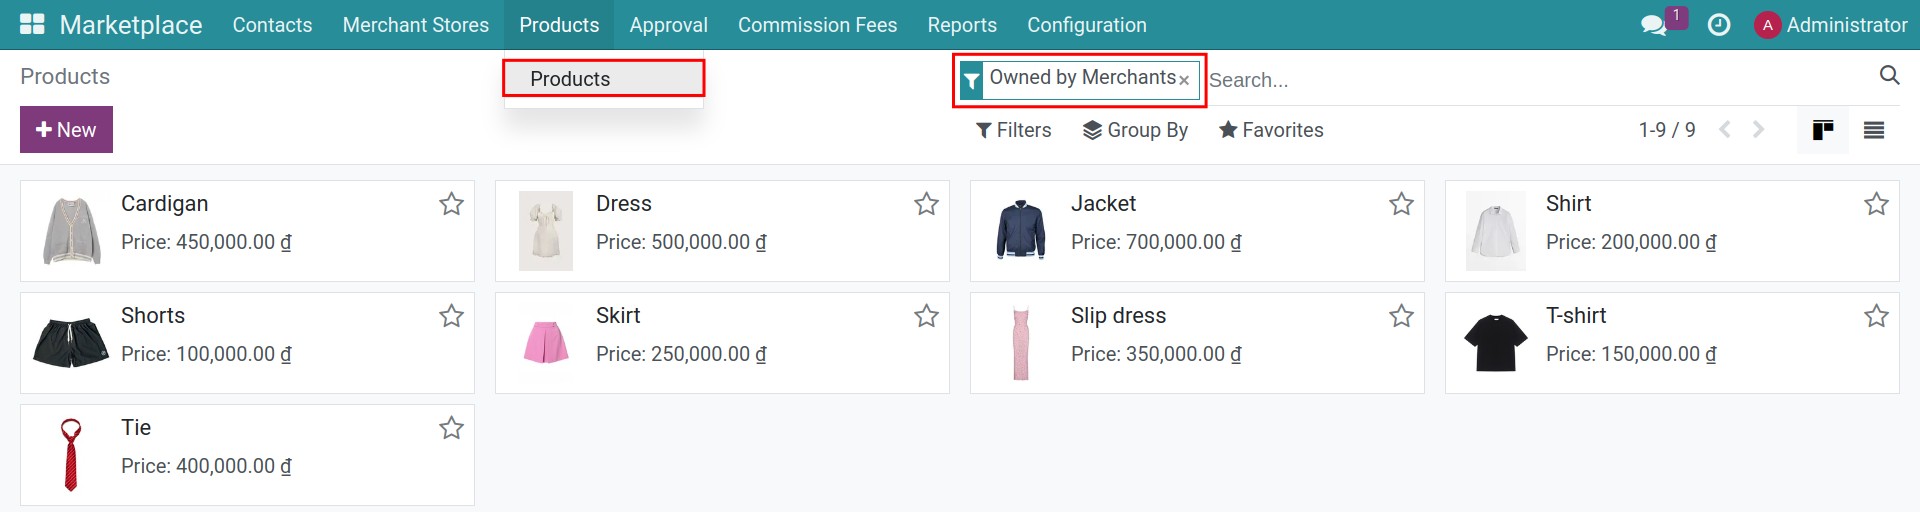
To manage merchant products in Marketplace app, navigate to Marketplace ‣ Products ‣ Products, use the Owned by Merchants filter.
Enable Merchant Product Approval feature
To active the Merchant Product Approval, you need go to Marketplace ‣ Configuration ‣ Settings, on the Marketplace Approval section, check on the box next to Merchant Product Approval feature.
Check on Auto merchant product approval if you want the system to automatically approve merchant products.
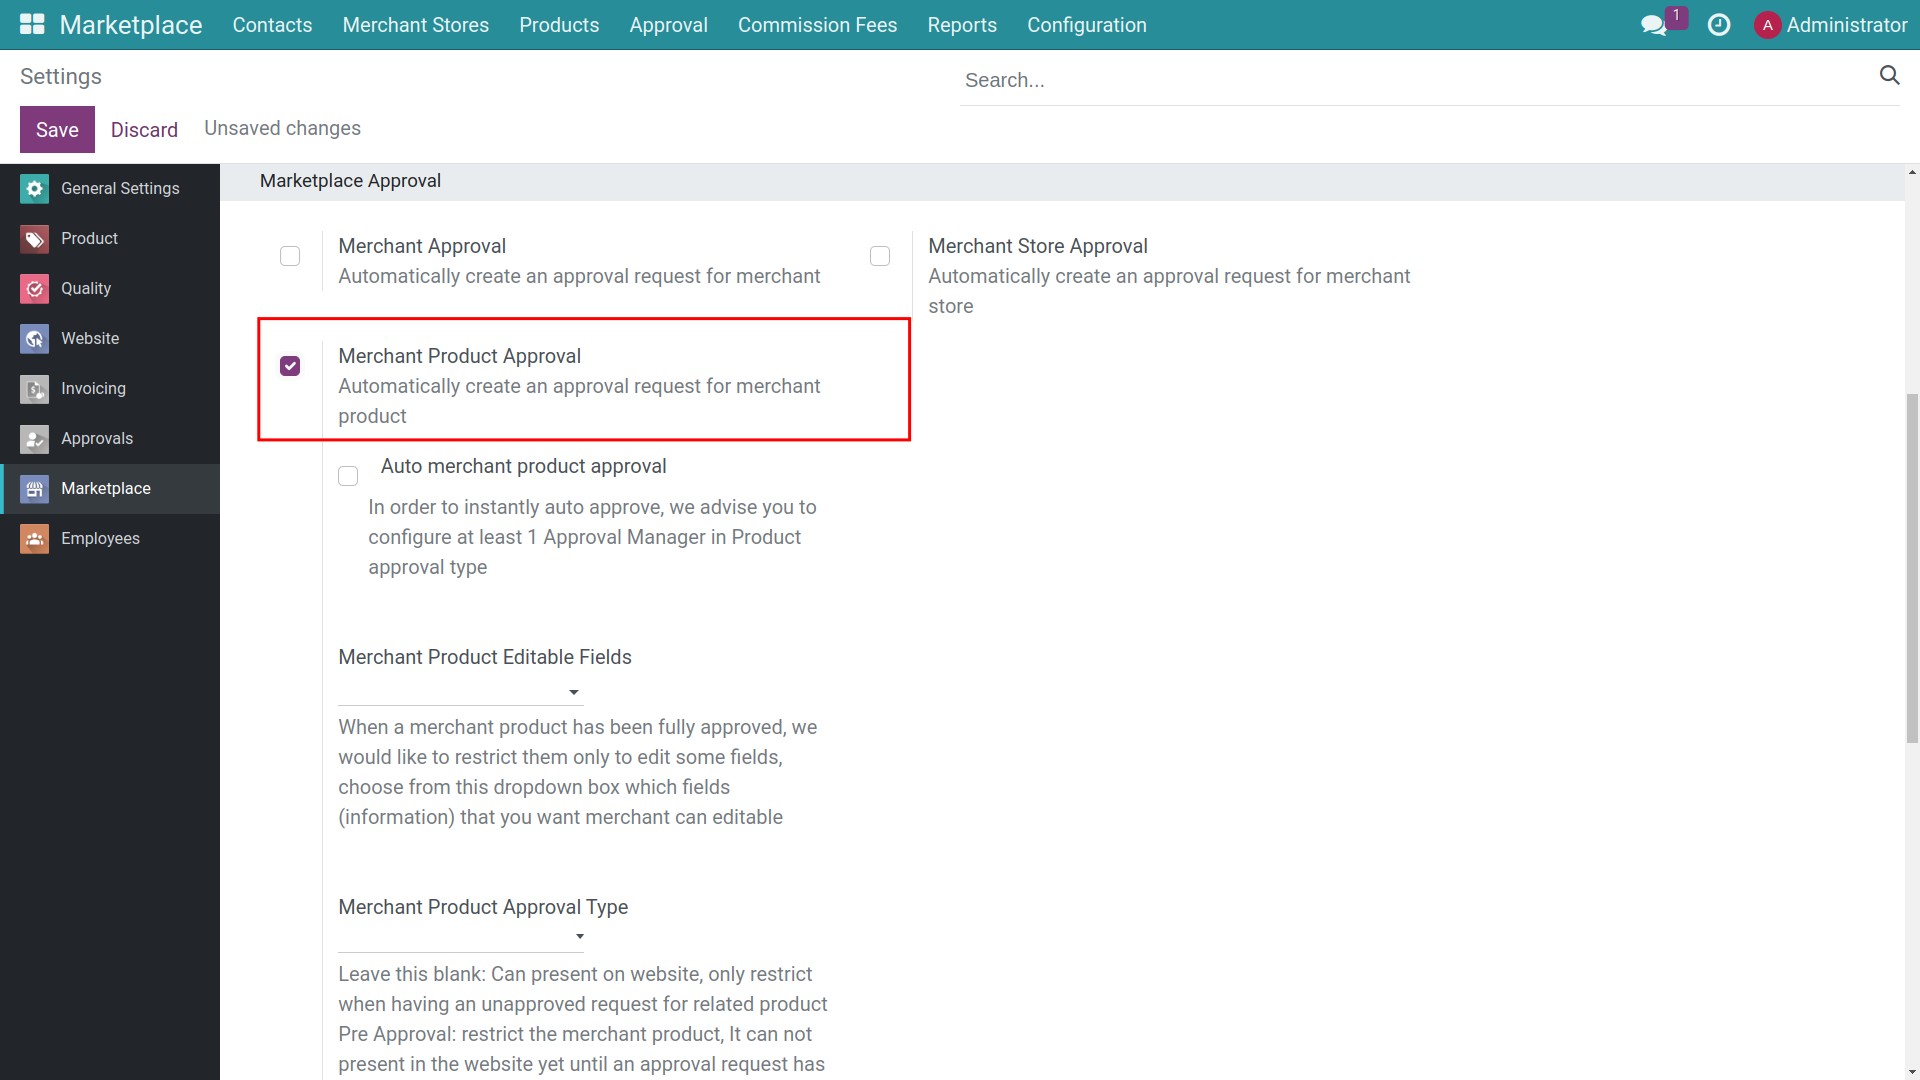
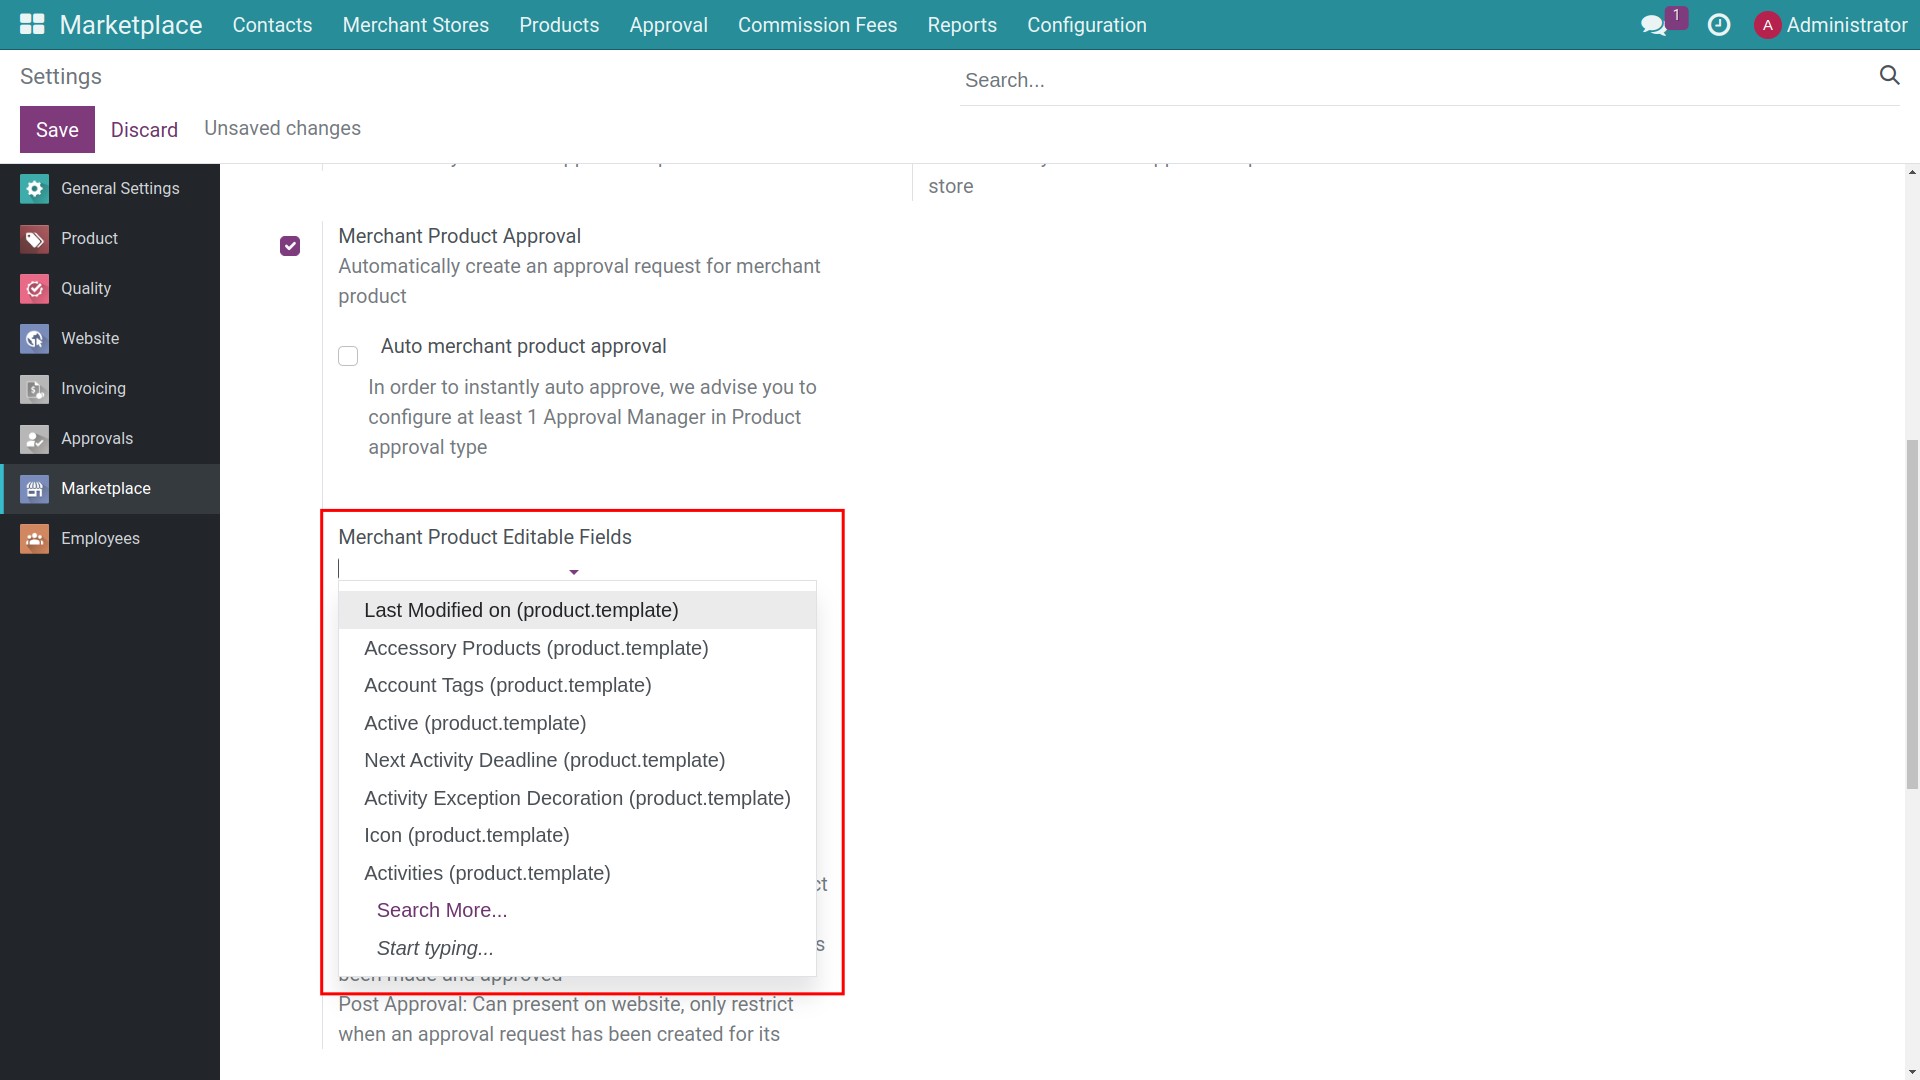
At the Merchant Product Editable Fields, choose the fields (information) that merchants can edit after the product is approved.
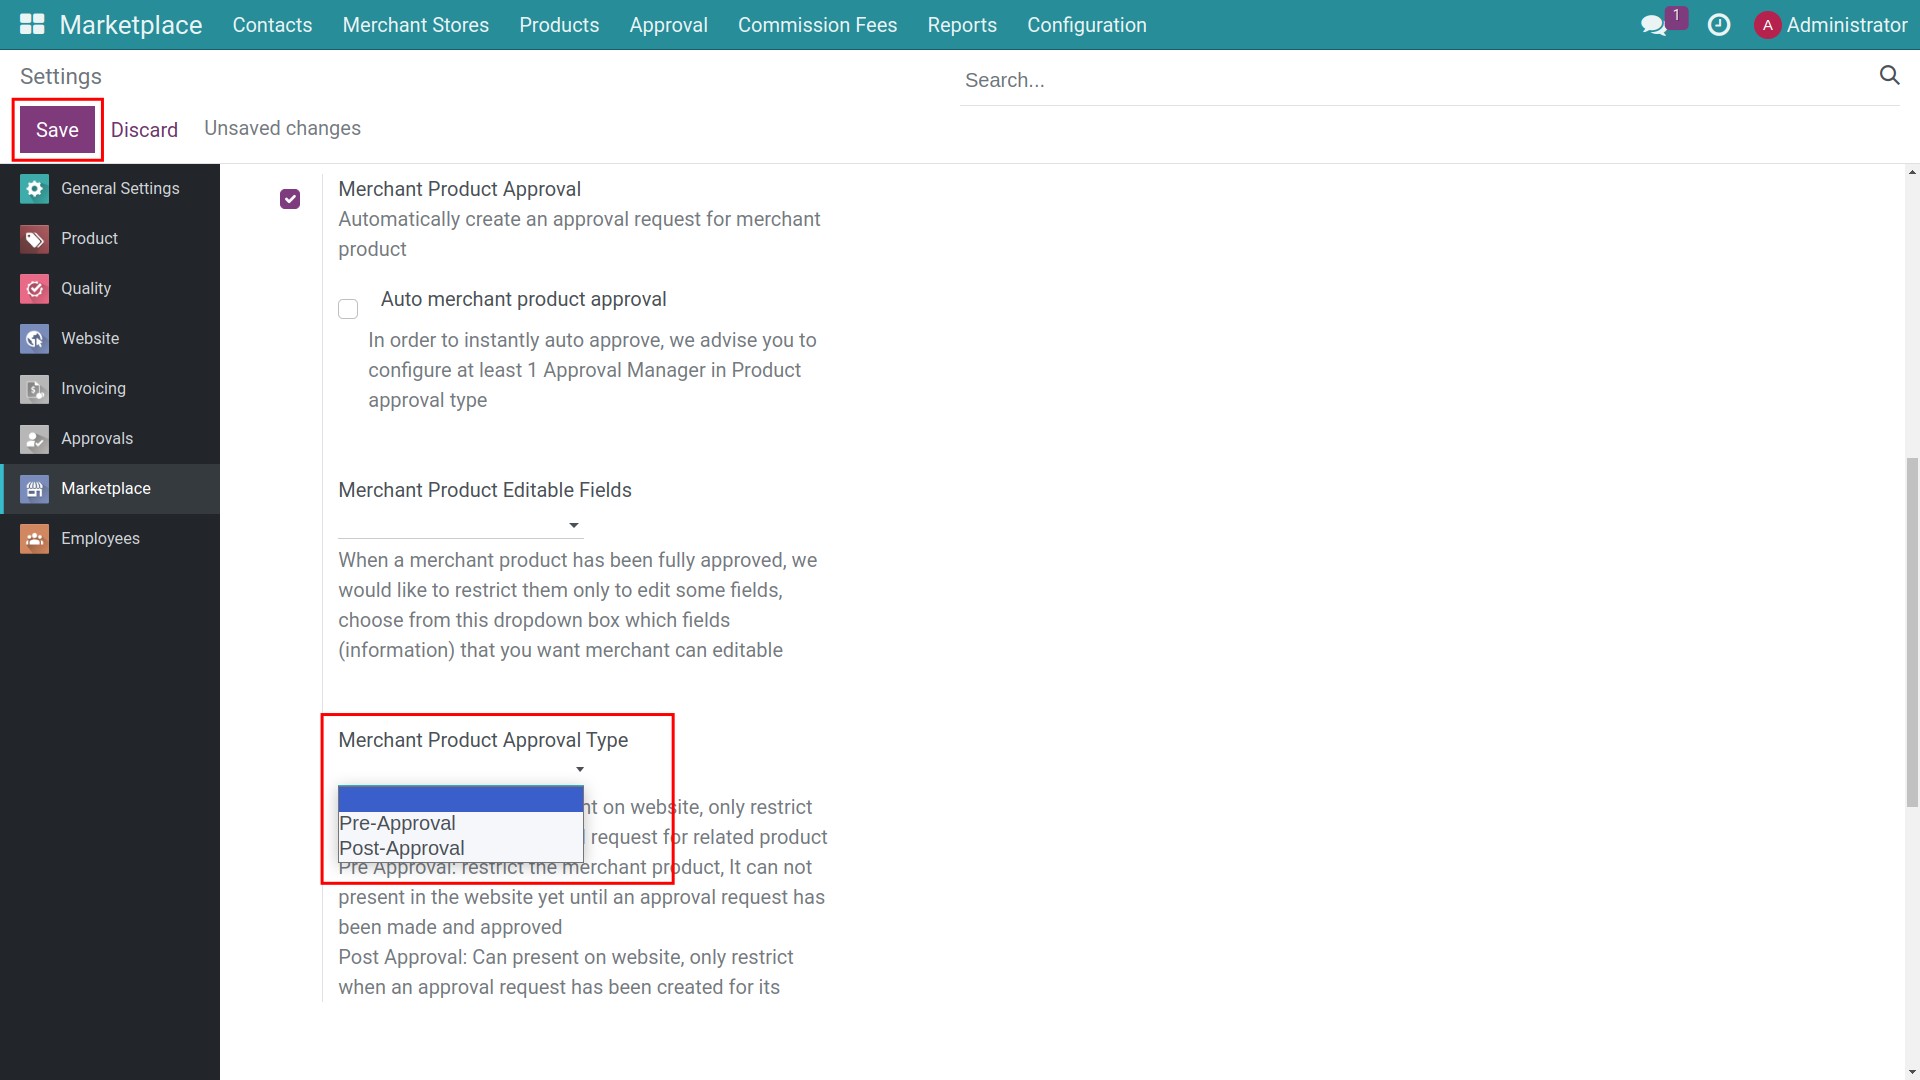
Select the Merchant Product Approval Type:
Pre-Approval: if merchant product has not been approved or not having approval request yet, they cannot present on website.
Post-Approval: merchant product can present on website although it has unprocessed approval request. The manager can review it later.
Tip
Read more at Merchants operate on a Marketplace to know how to display merchant product on the website.
And then press on Save to finish.
Approve Merchant Product
After the merchant creates a product, the system automatically generates an approval request and send a notification to manager.
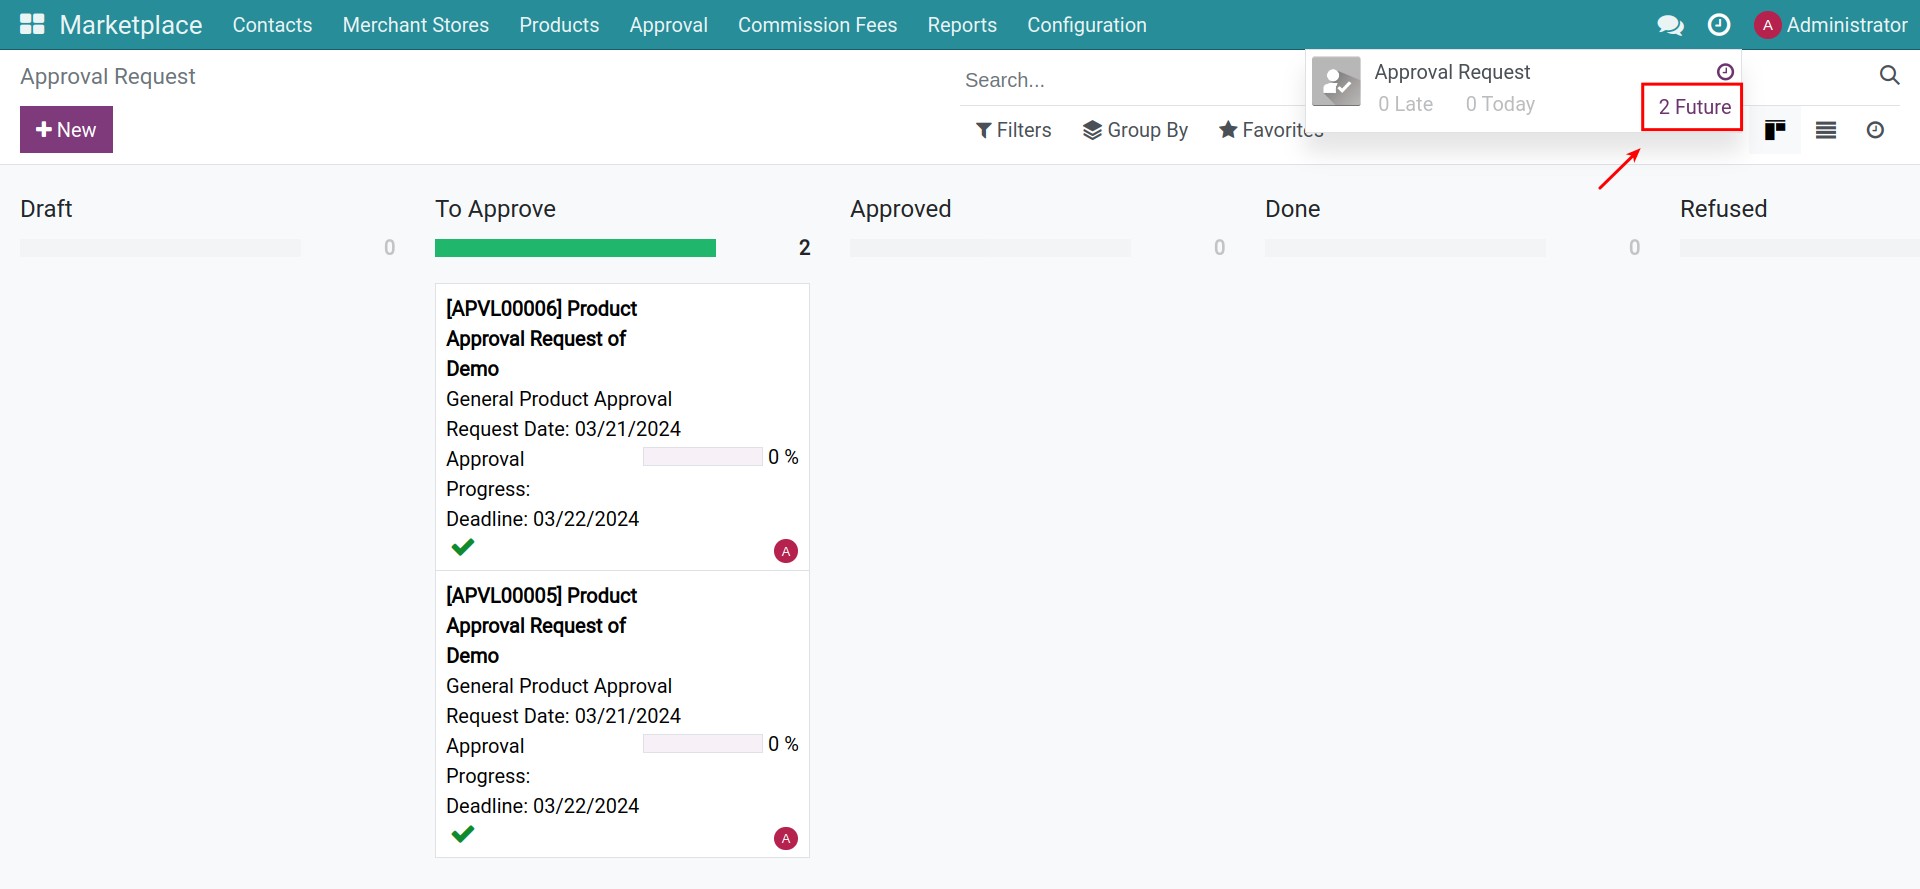
You can also go to Marketplace ‣ Approval ‣ Merchant Product Approval to see all Merchant Product Approval requests.
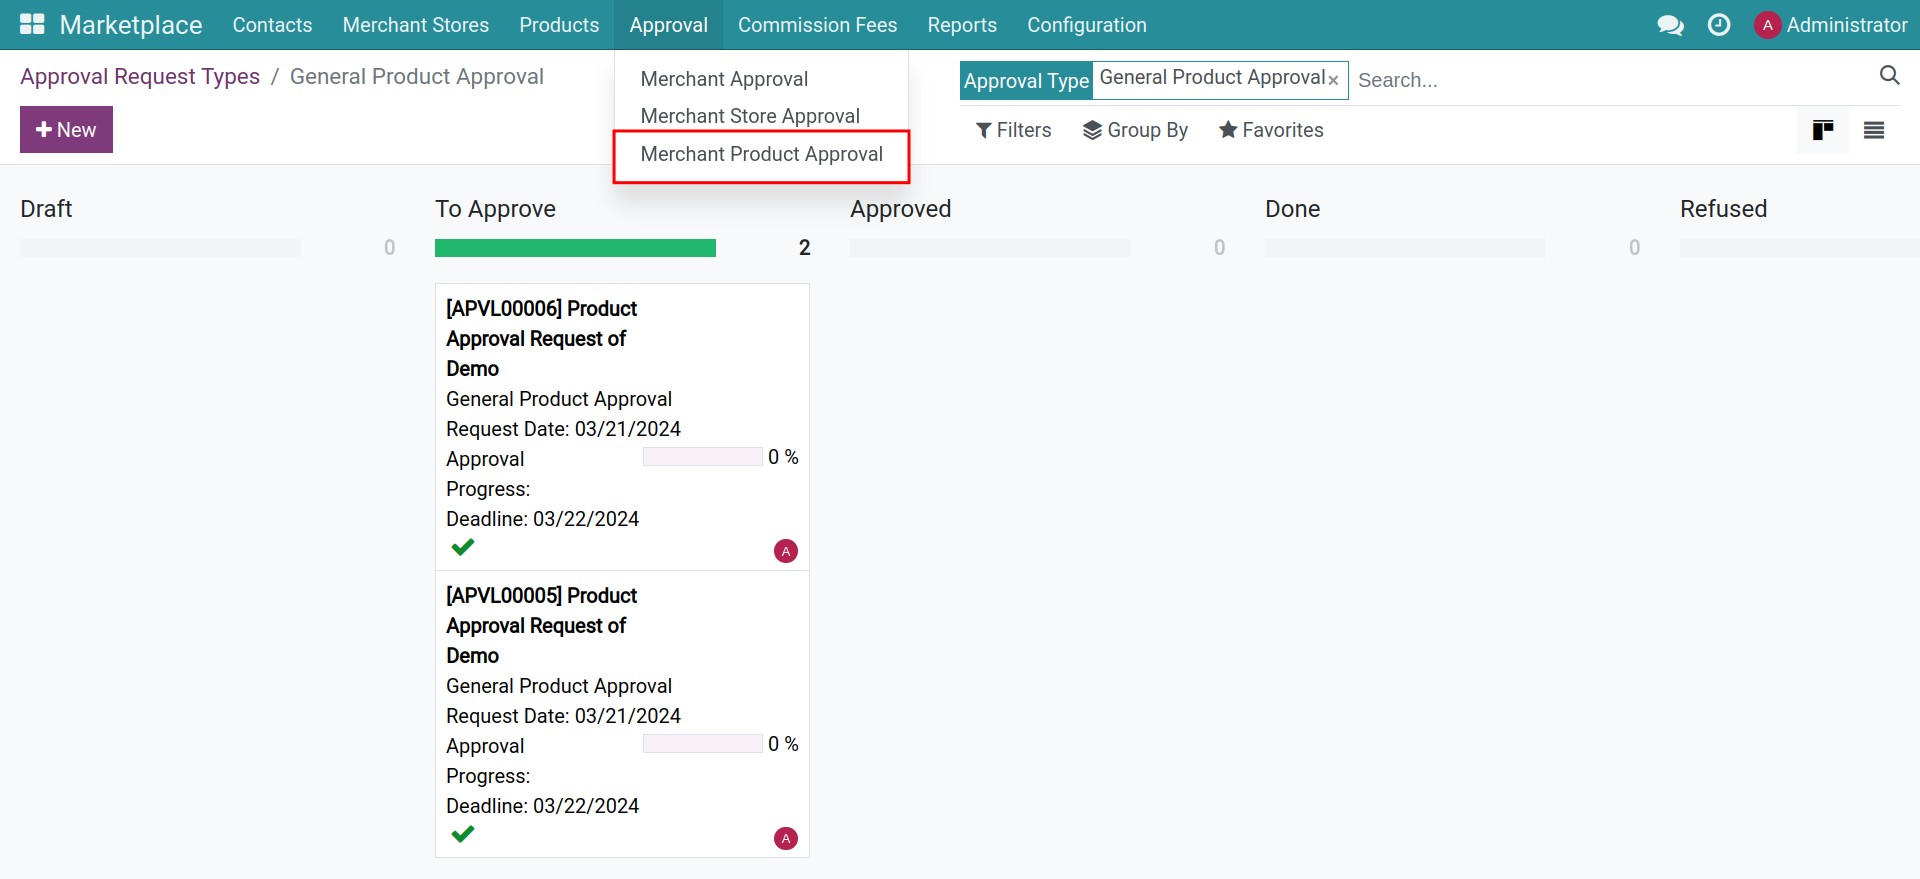
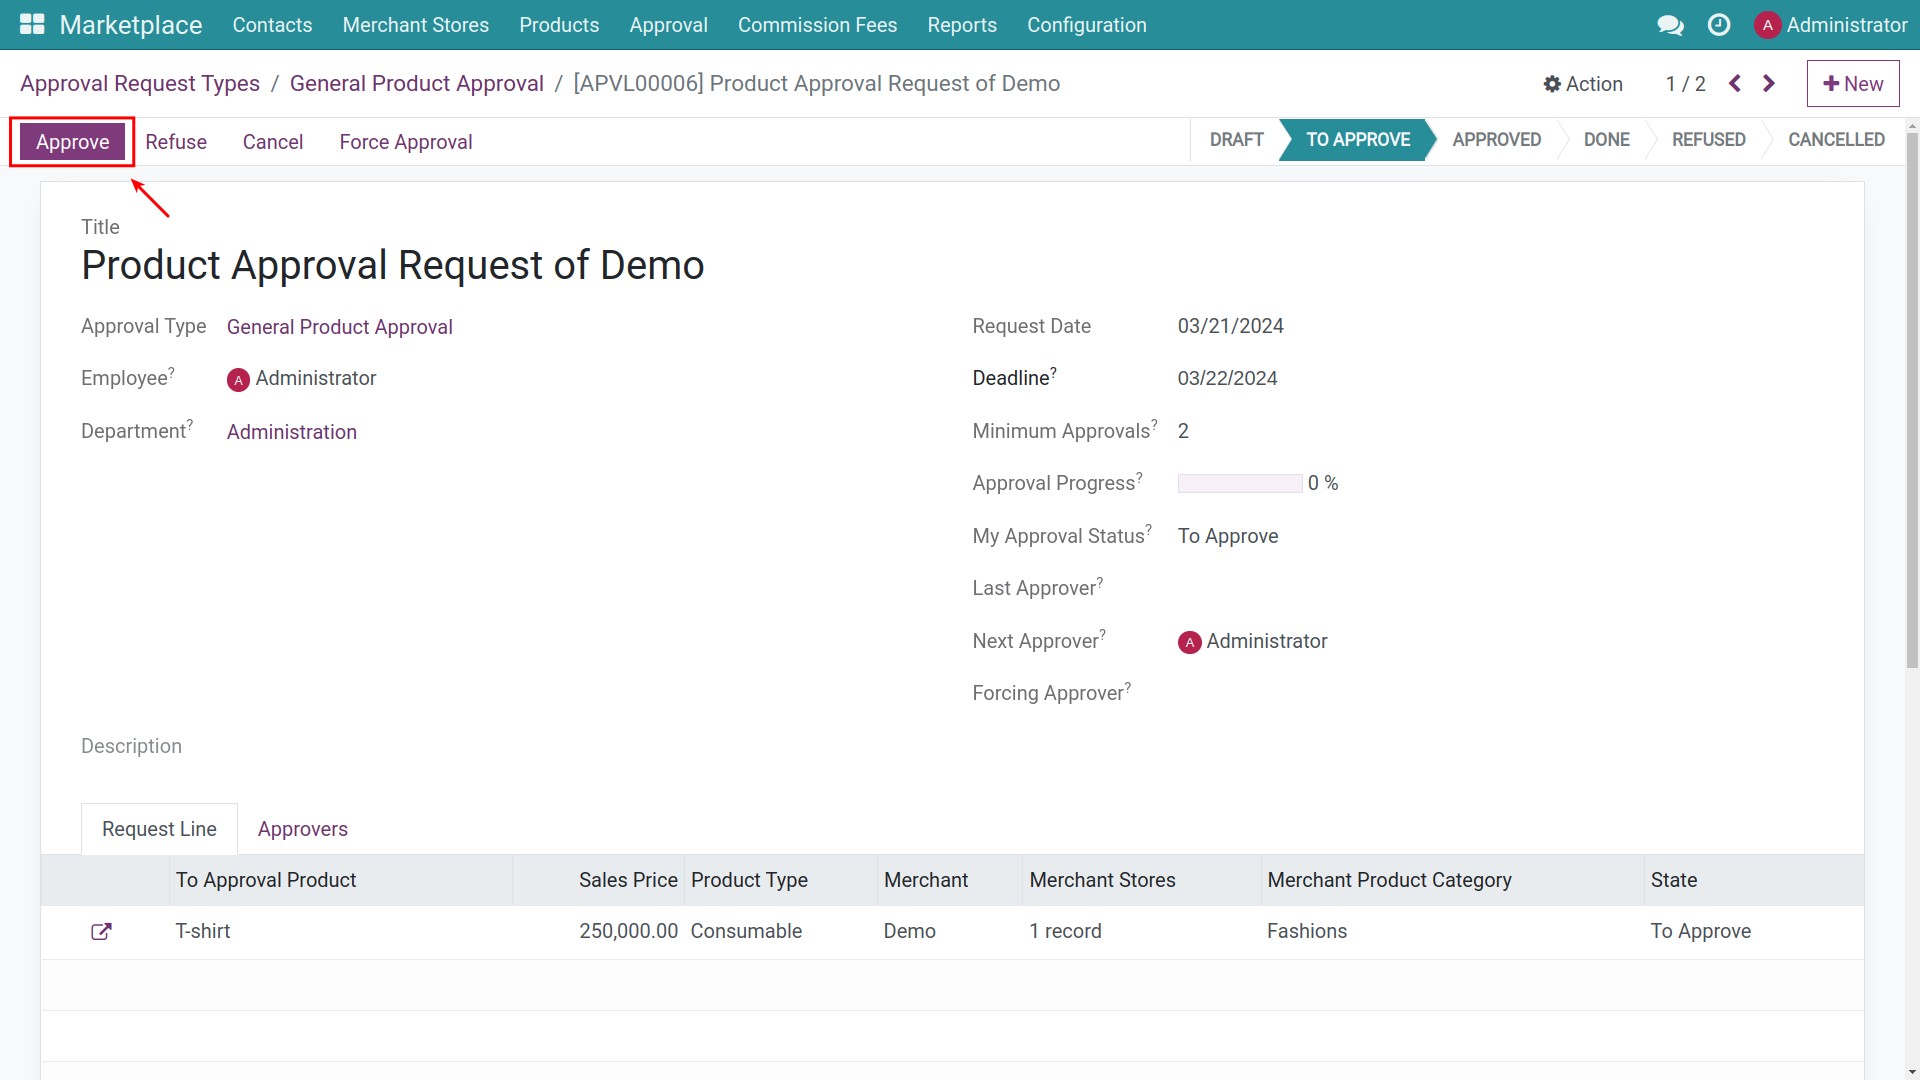
Select an approval request. Here, the manager can review and approve the offer. If you agree to the request, press Approve.
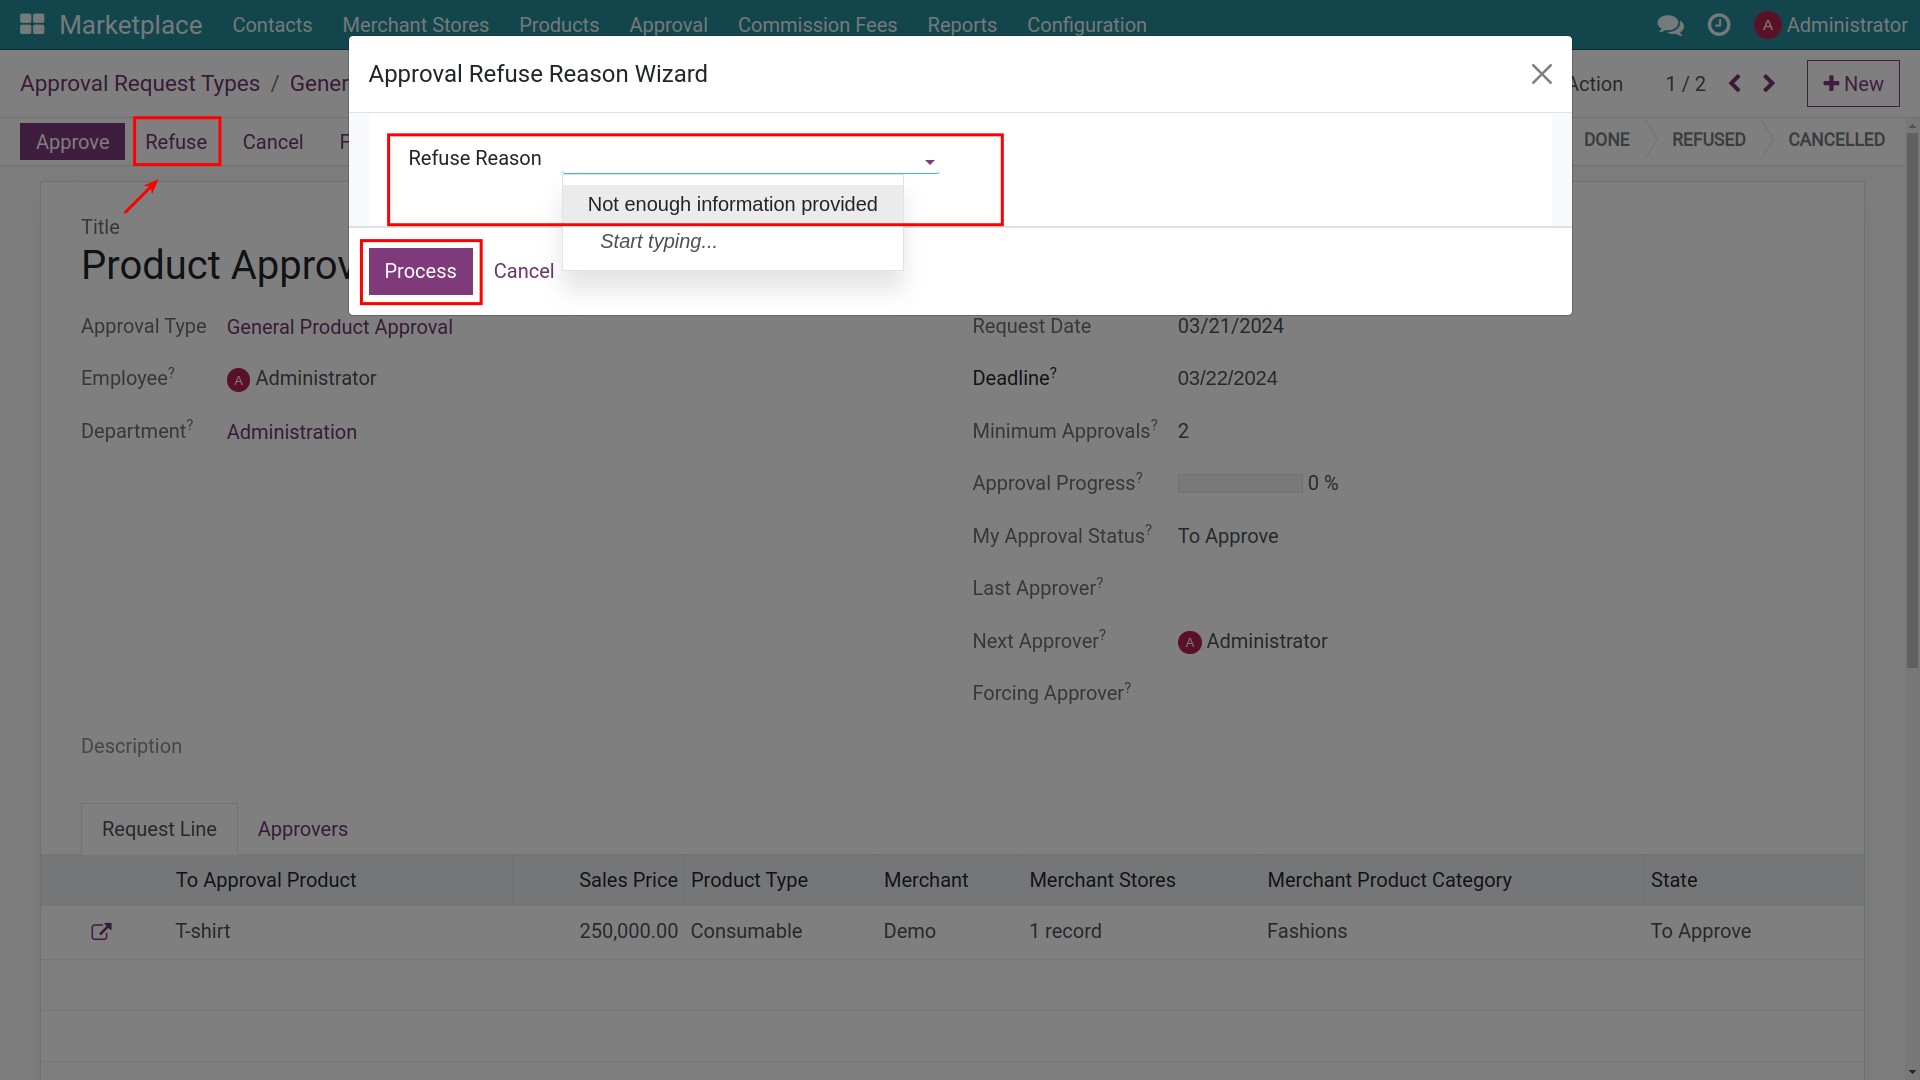
If you want to reject, click on Refuse, select a Refuse Reason, and then press on Process. The product has been denied approval and will not be displayed on Marketplace.
Tip
Learn more about how to manage approval requests at: Manage Approval Requests.
See also
Related article