Schedule activities
Practically every day, individuals and departments of an enterprise has a lot of work that needs to be assigned to a specific person to perform, the deadline to complete these works needs to be set. Viindoo software provides the Schedule Activity feature, which helps you focus on handling your work efficiently.
Activity Types Configuration
To schedule an activity, first you need to create a new type of activities for managing by Activating the developer mode and navigate to Settings > Technical > Activity Types, press the Create button to create one.
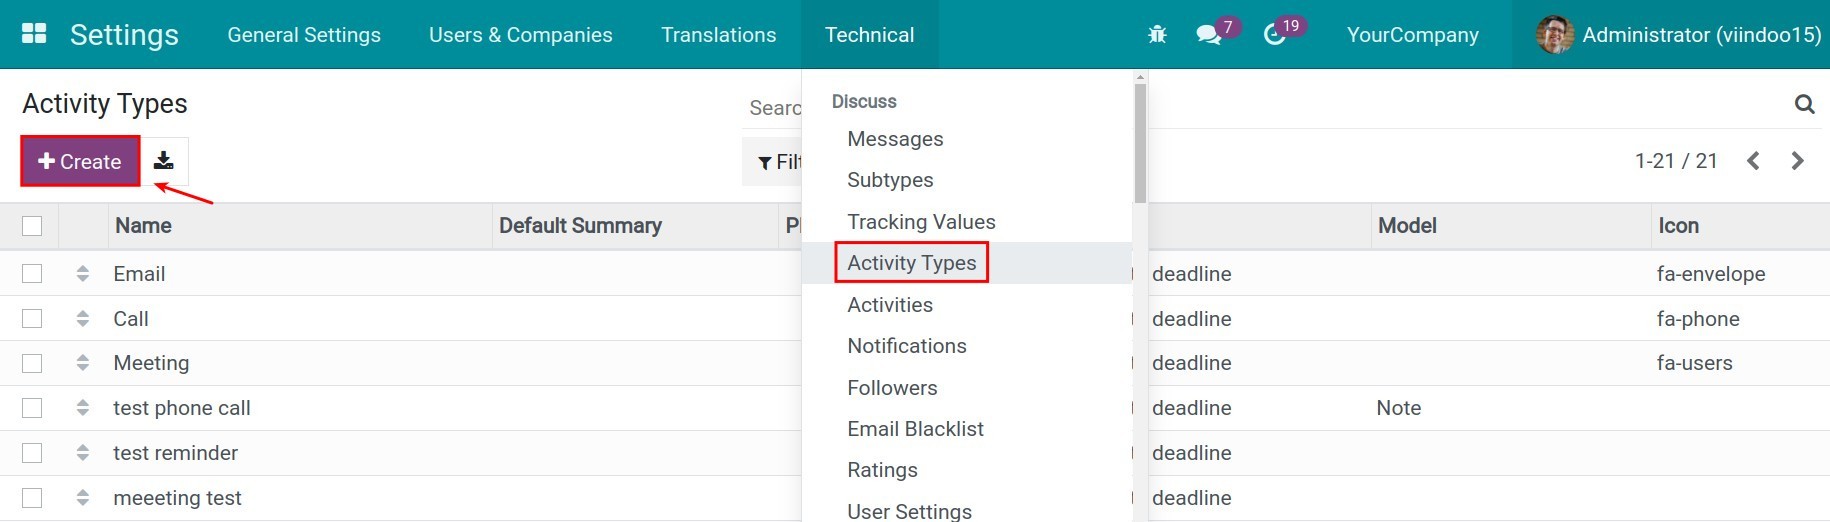
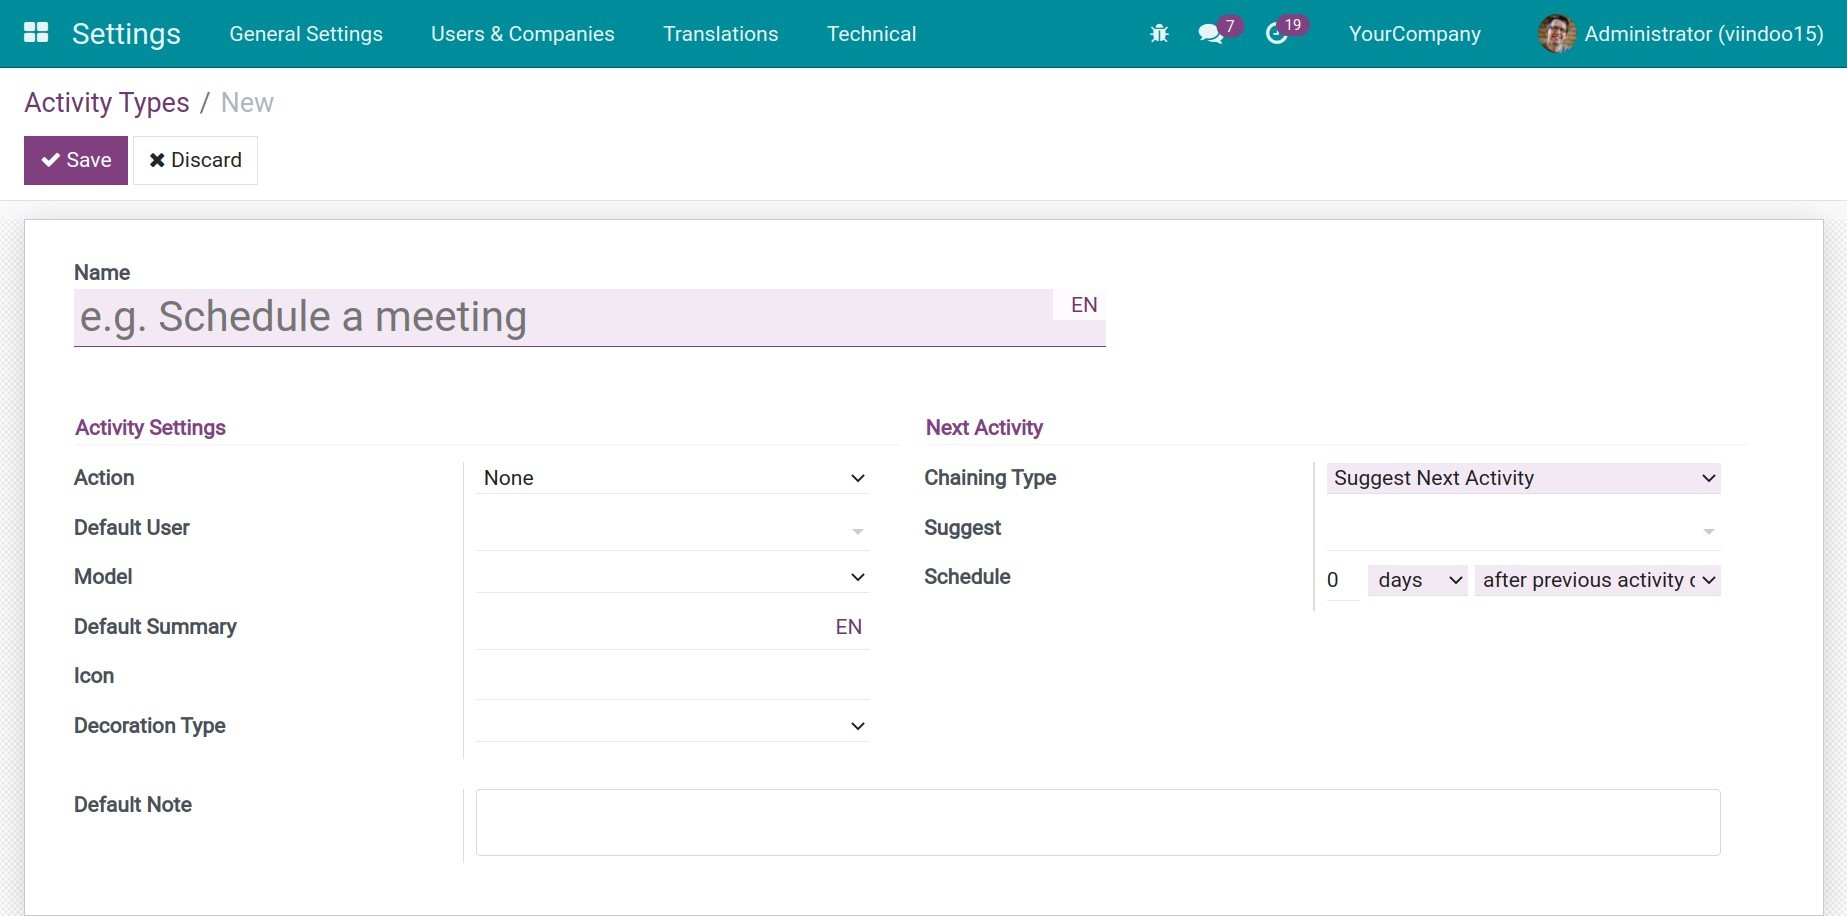
In the Activity Types view, you need to fulfill the information:
- Name: Enter the name of the activity type.
- Action: The action needed to activate when choosing this activity.
None: Choose this option if this activity type does not trigger a particular activity.
Upload Document: The system automatically marks done for the scheduled activity when the document is uploaded.
Phonecall: When you schedule an activity with this action, the system will take you to the Calendar module so you can schedule a call.
Meeting: When you schedule an activity with this action, the system will take you to the Calendar module so you can schedule a meeting.
Approval: Select this option if you want to assign someone to approve the current record.
- Default user: Select a user you want to assign by default for this activity type.
- Model: Specifies the model to which this activity type is applied.
- Default Summary: Enter the default summary to use on a scheduled activity when this activity type is chosen.
- Icon: the icon represents this activity type. You can change the icon font if you want.
- Chaining Type: Select the chaining type.
Suggest Next Activity: After you finish the scheduled activity and press Done & Schedule Next, the system will recommend you the activities selected on the Suggest field below, you can select one and create the next scheduled activity.
Trigger Next Activity: After you finish the scheduled activity and press Done & Schedule Next, the system will automatically create another scheduled activity based on the activity selected on the Trigger field below.
- Schedule: The number of days, weeks, months it takes to get the job done before the deadline is reached.
after completion date: Please refer to Example of after completion date to understand how to use this feature.
after previous activity deadline: Please refer to Example of the type after previous activity deadline to understand how this feature works.
- Default Note: Type a default note that will be suggested on the scheduled activity that uses this activity type.
After fulfilling the information, hit on the Save button to save the configuration.
In addition, you can refer to the following examples to clearly understand the difference between the settings of after completion date and after previous activity deadline on the Schedule field:
- Example of after completion date:
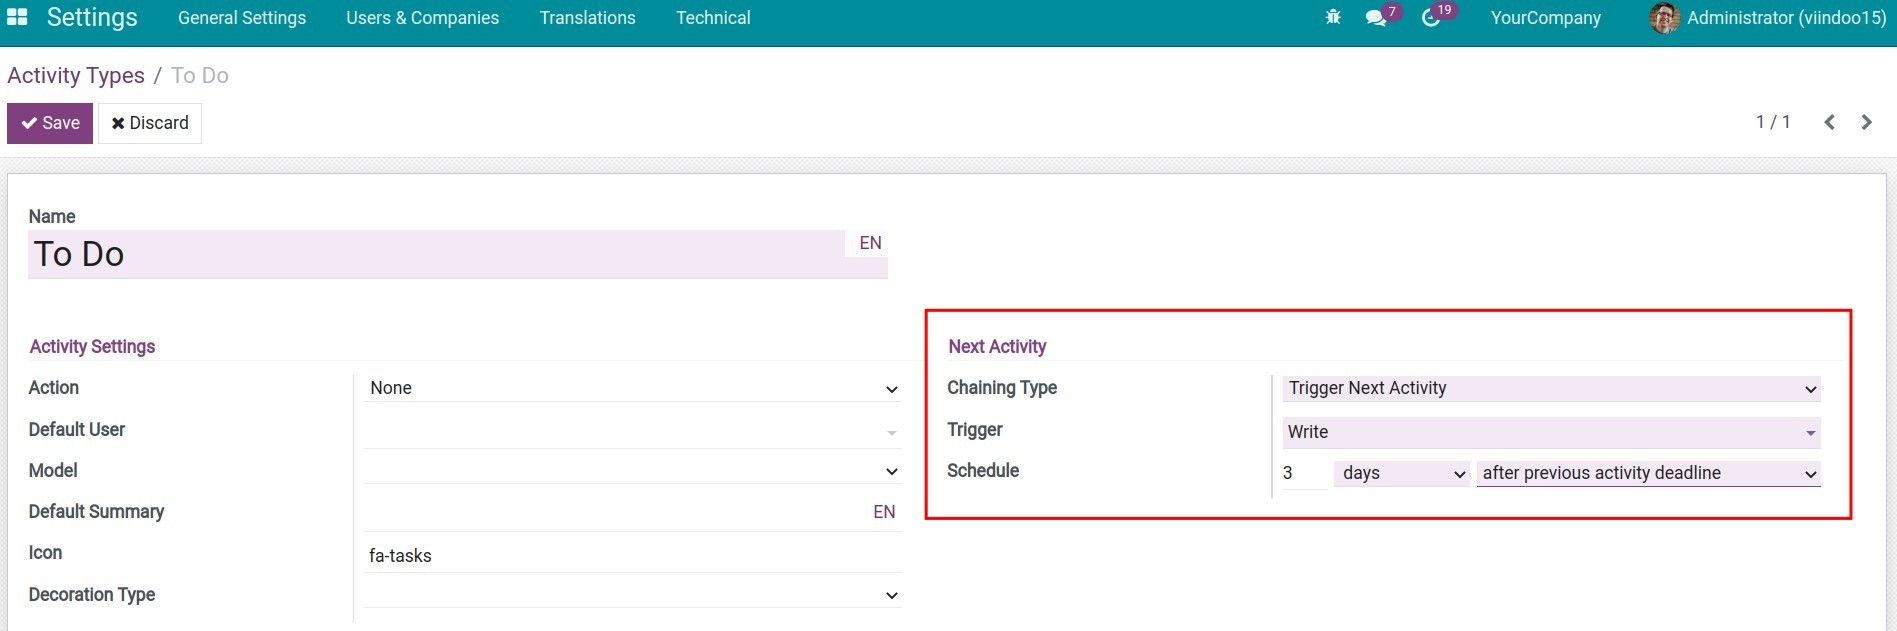
On the To do activity type, select Trigger Next Activity on the Chaining Type field and the Write activity on the Trigger field.
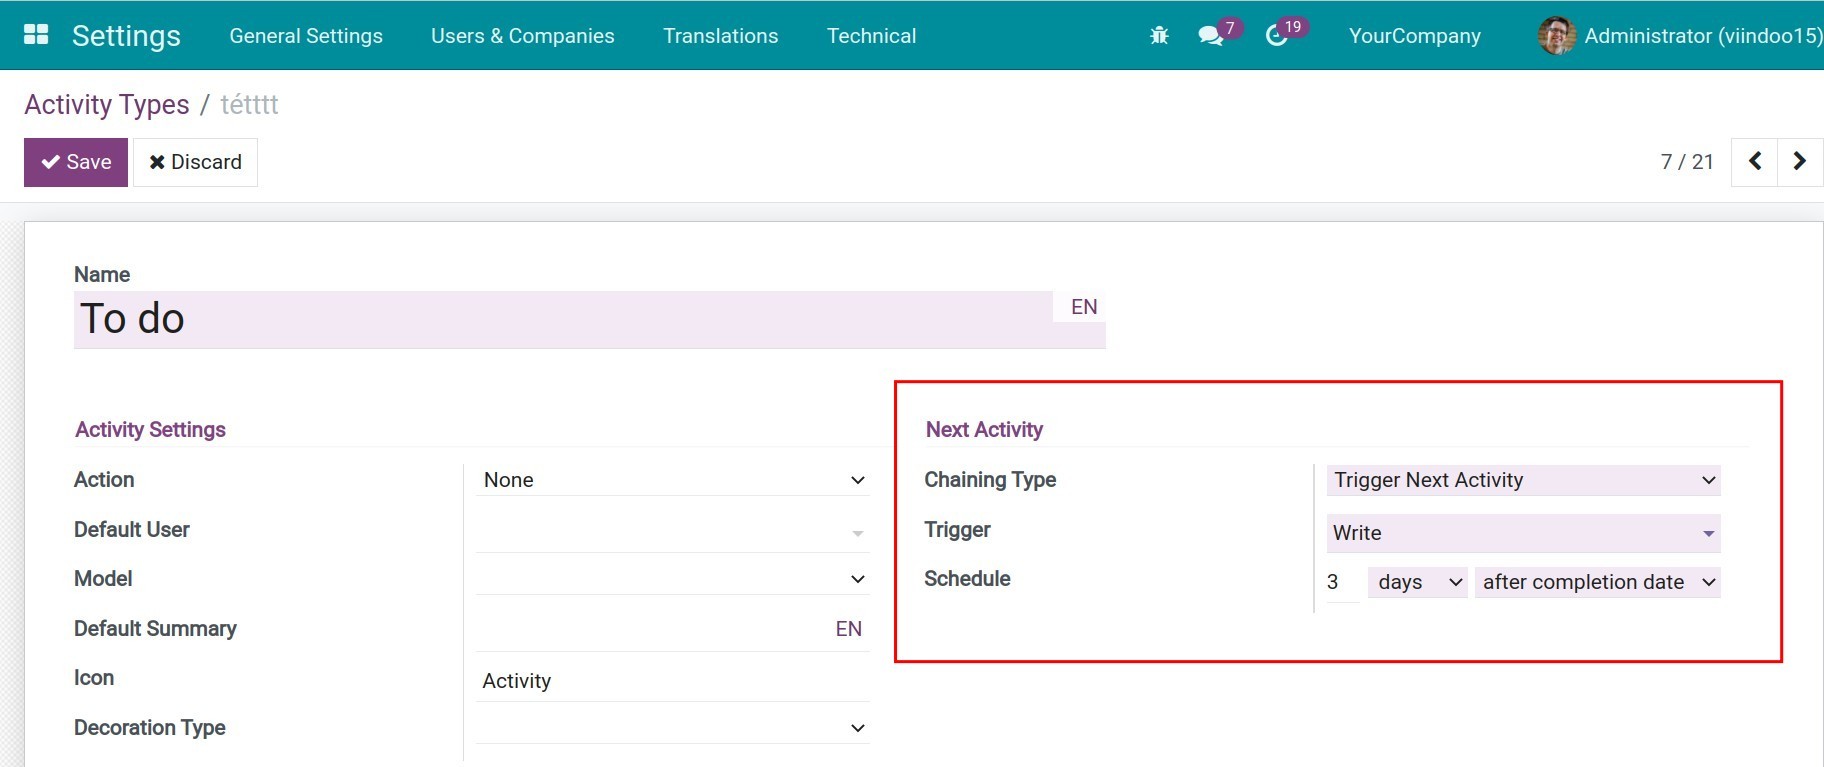
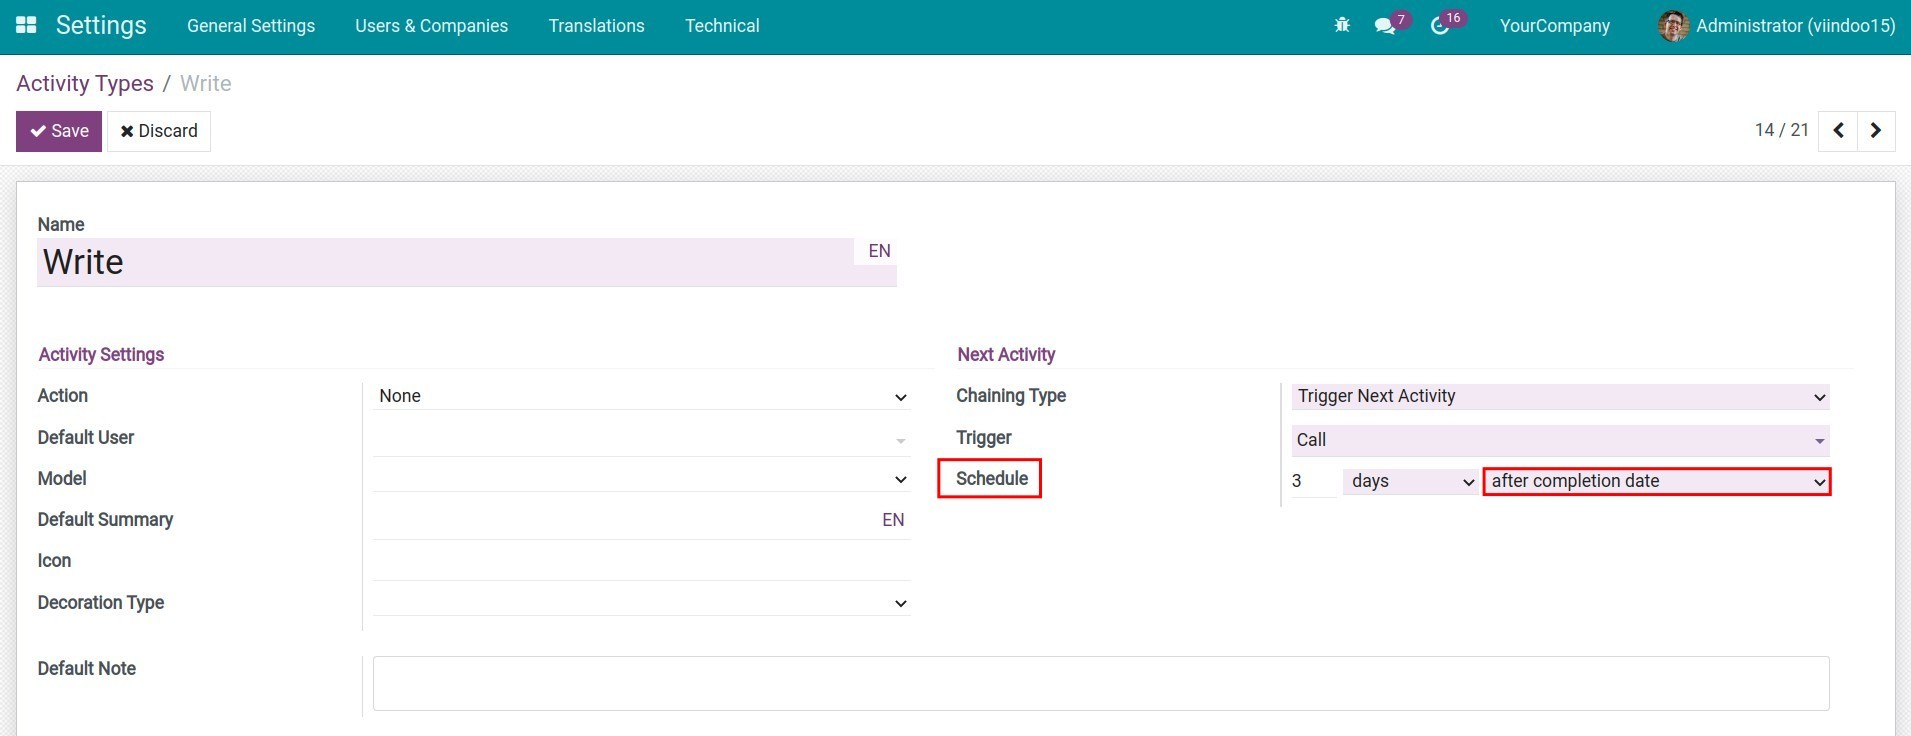
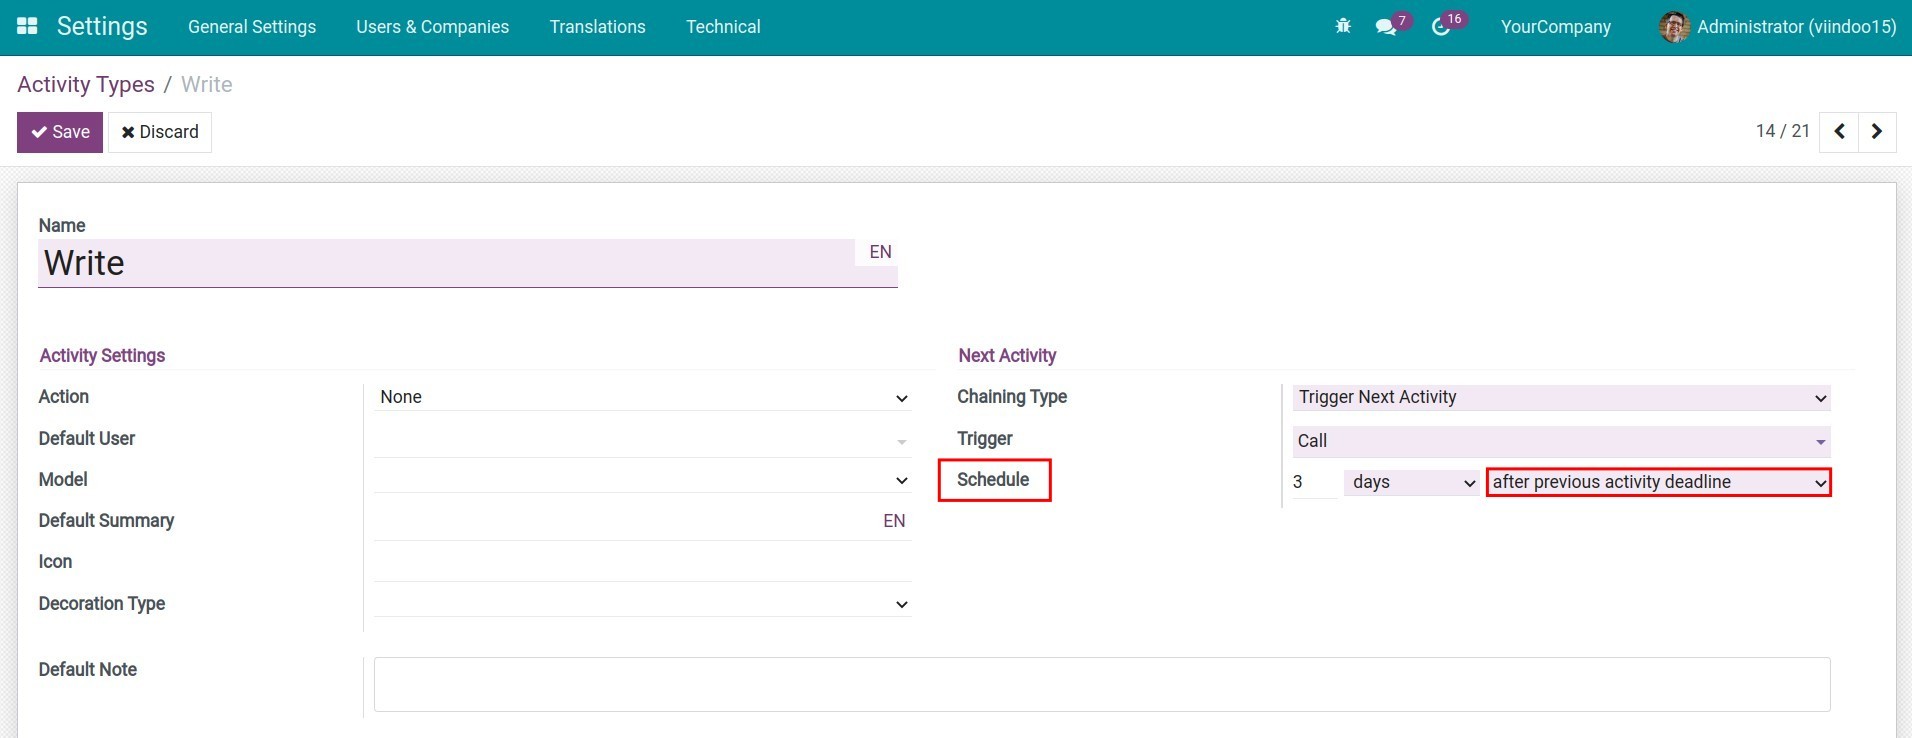
Next, on the Write activity type, set up 3 days after completion date on the Schedule field.
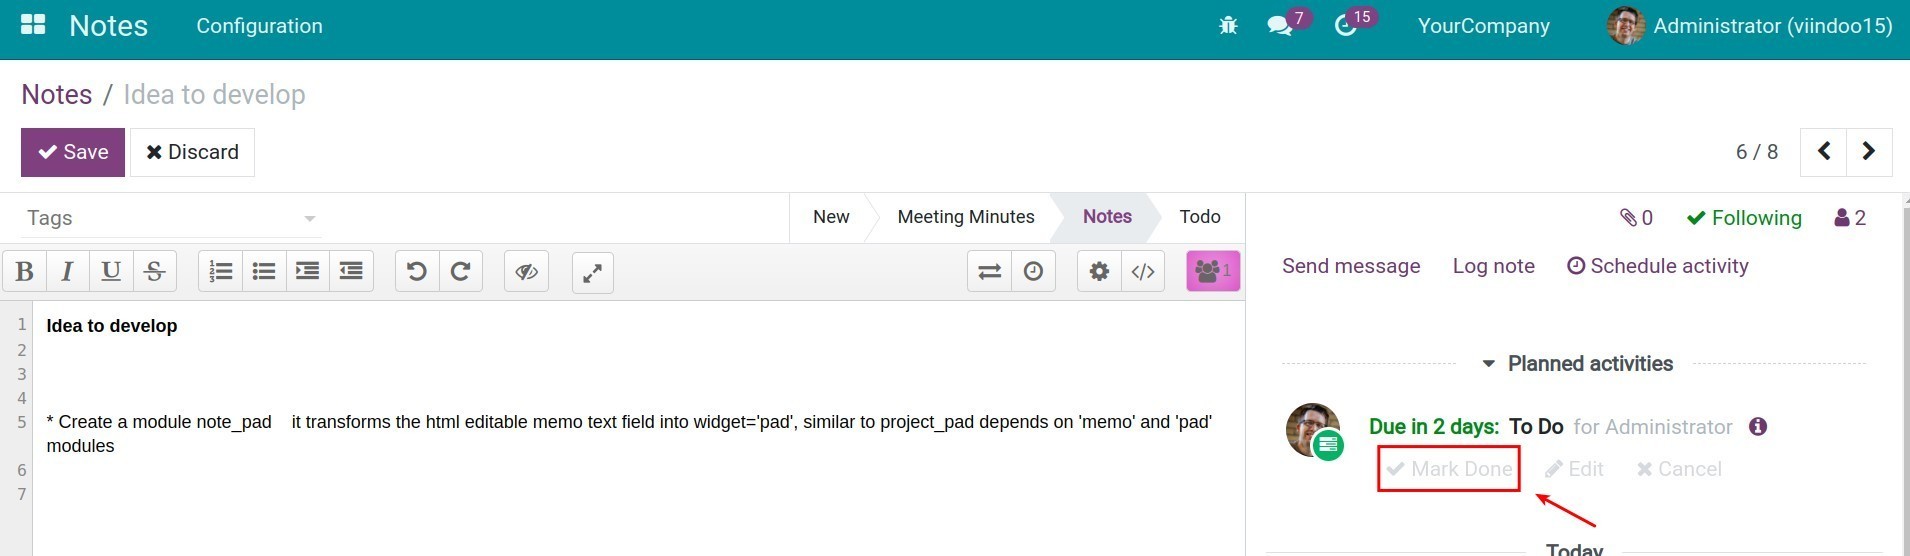
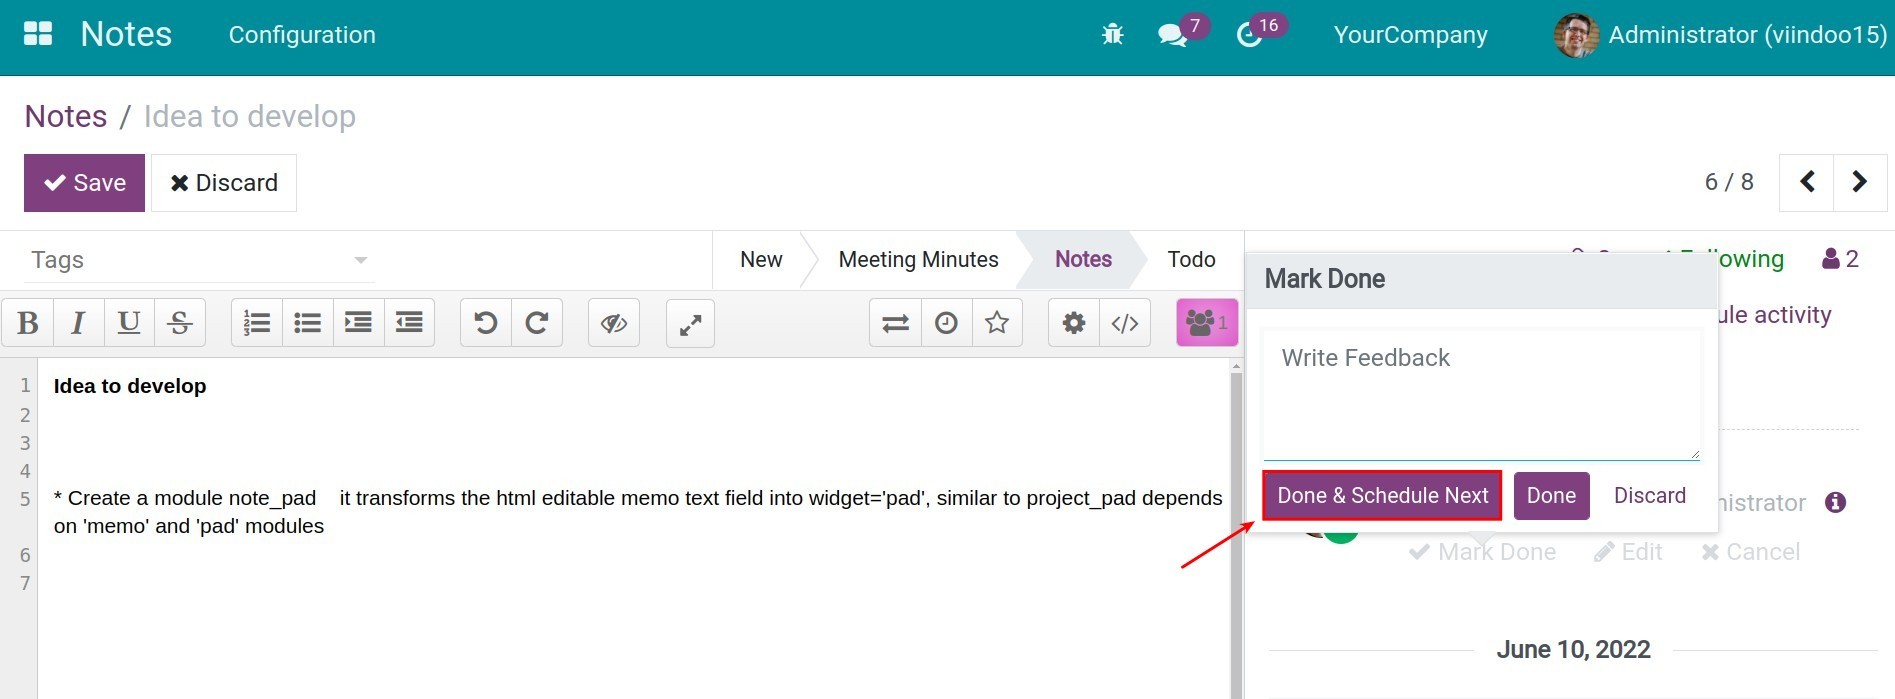
After that, you create a new schedule activity with the type To do and the deadline to complete is after 2 days and then Mark Done.

Next, you select Done and Schedule Next.

The system will automatically create a new schedule activity with the type as Write. The deadline to do will be within 3 days as set up in the Write activity which is 3 days after the confirmation date counting from the current date.
- Example of the after previous activity deadline:
Selecting the activity as Write on the Trigger field with the To do activity type.
Next, on the Write activity type, set up 3 days after previous activity deadline on the Schedule field.
After that, you create a new schedule activity with the type as To do and the deadline to complete is after 2 days and then Mark Done.
Next, you select Done and Schedule Next.
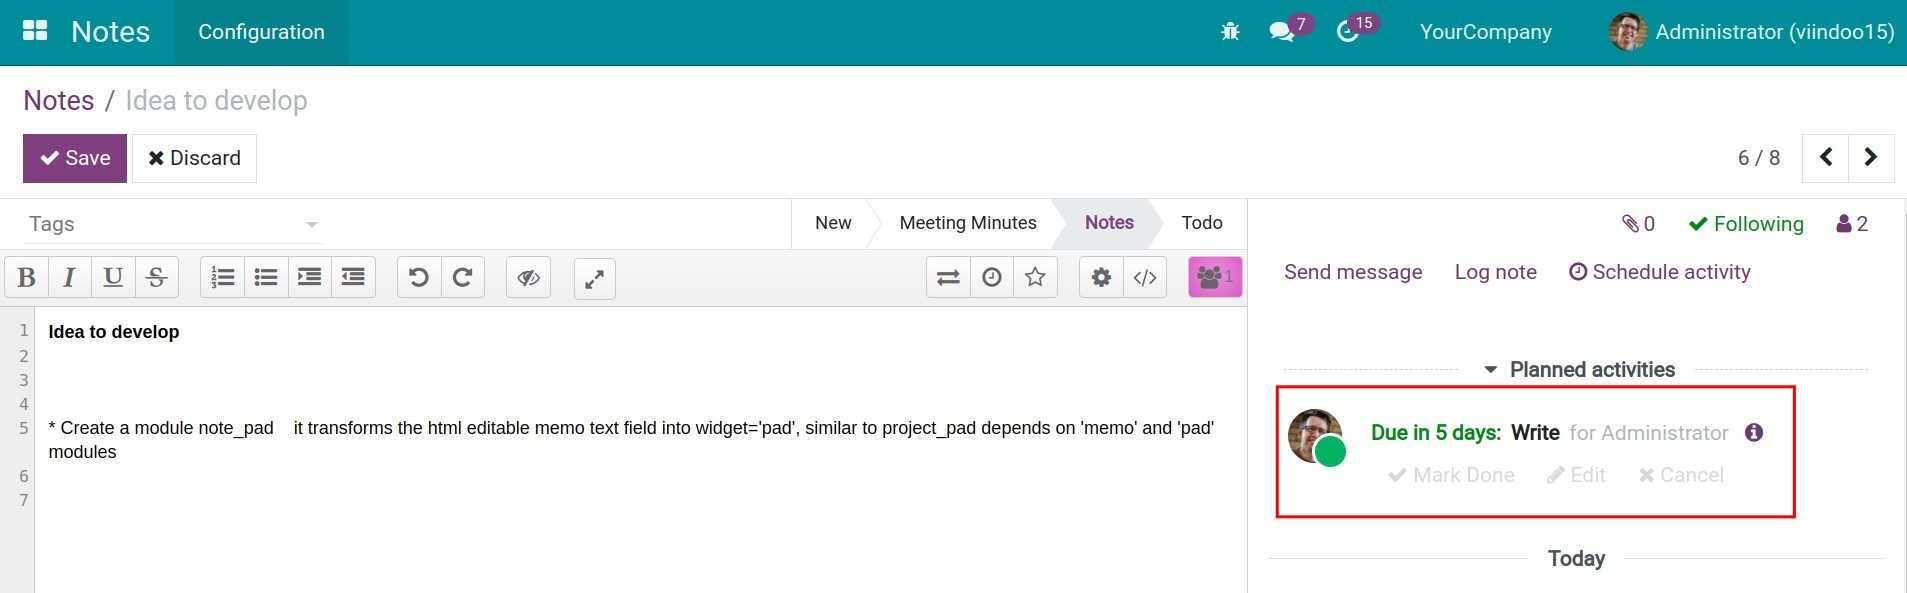
The system will automatically create a new schedule activity with the type as Write. The deadline to perform will be in 5 days as set up in the Write activity, which is 3 days after the previous activity’s deadline is 2 days.
Note
The other apps also allow setting the Activity type on their views including CRM App, Project Management App, Sales Management App, Manufacturing Management App, Recruitment Management App, etc.
Create a new Schedule activity
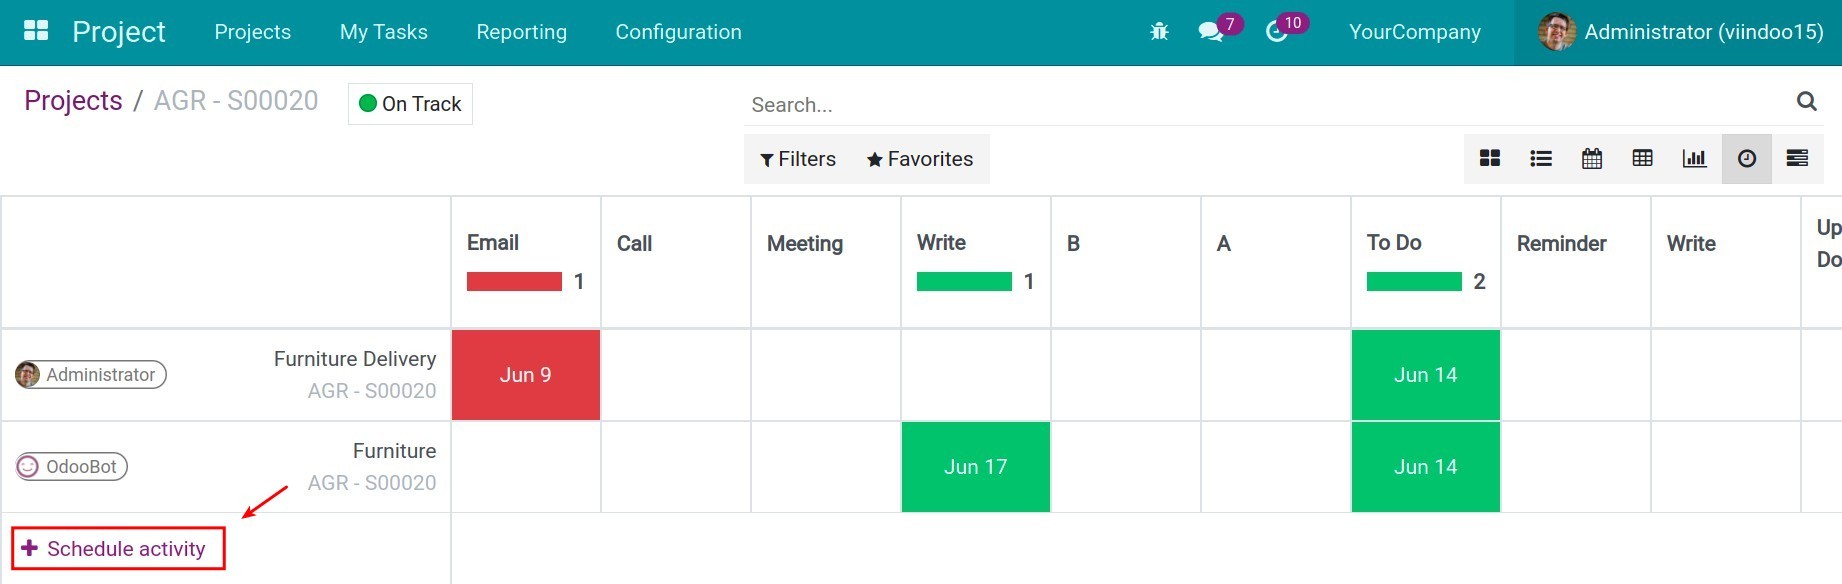
When using the Viindoo software, you will easily see the Chatter section on many views such as Project, Task, Opportunity, Lead, Quotation, etc. In this section, press Schedule activity to create a new activity.

You need to fulfill the information:
- Activity Type: select an existing type of activity.
- Summary: a brief description of the activity needs to be scheduled.
- Due Date: the deadline to finish the activity.
- Assigned to: select the assigned person to perform this activity, you can select the user’s account to assign work here.
- Text Editor Area: enter the detailed description of the work to be done, the system supports the basic text editing tools for the content presented here.
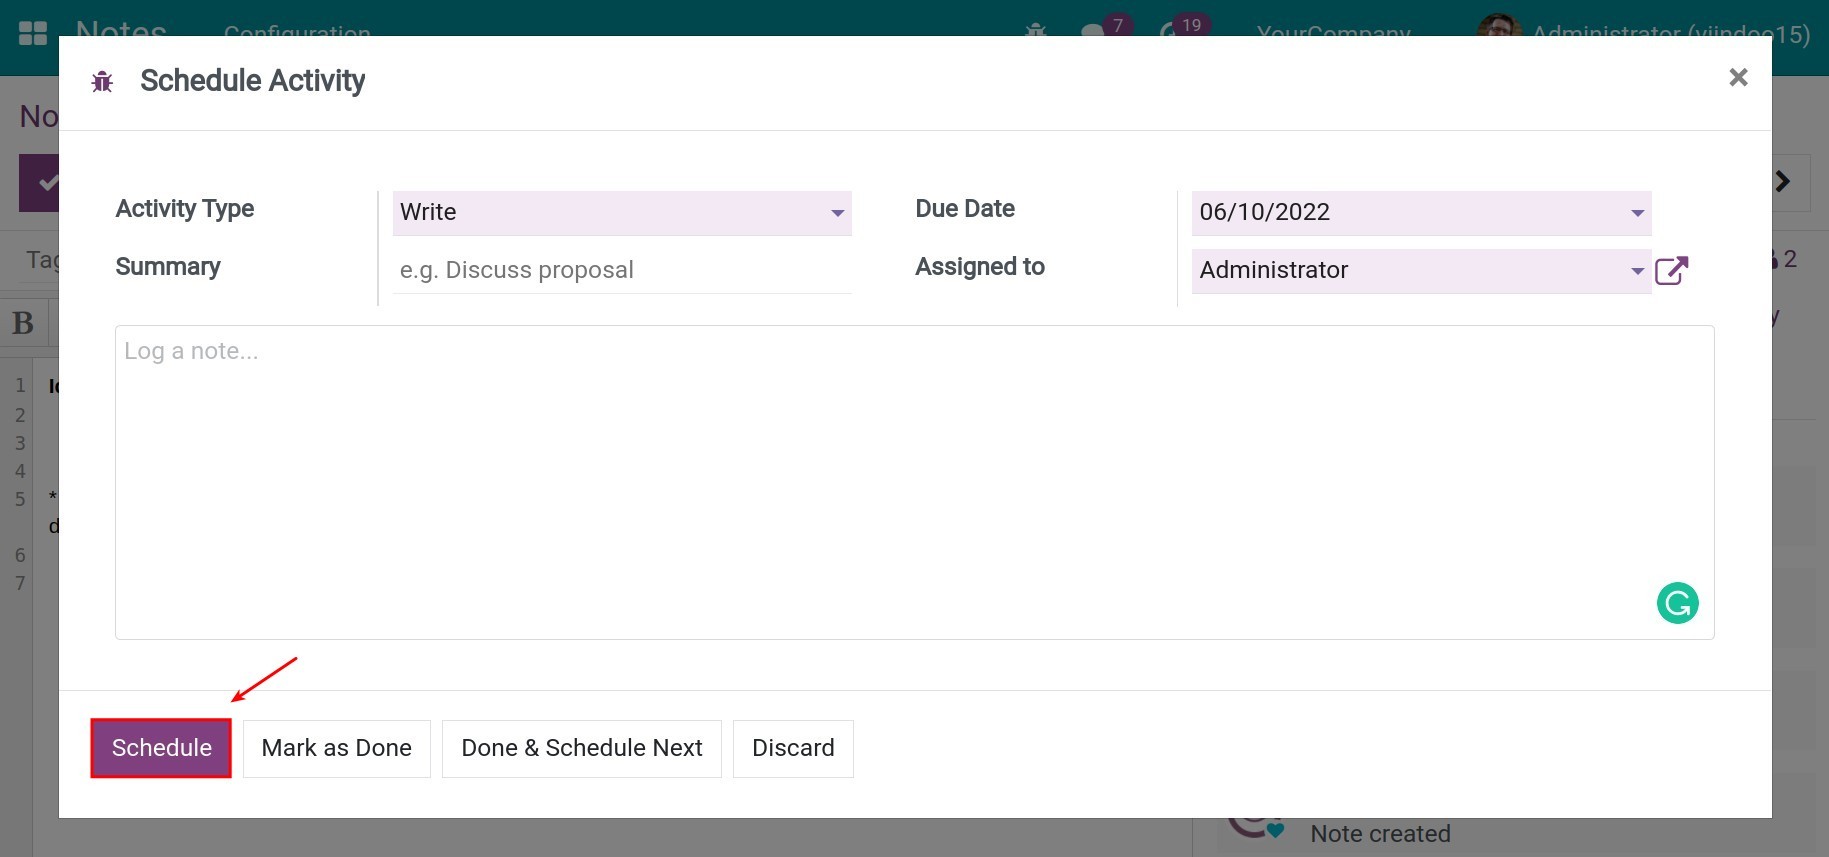
You click on Schedule button to complete scheduling the activity.
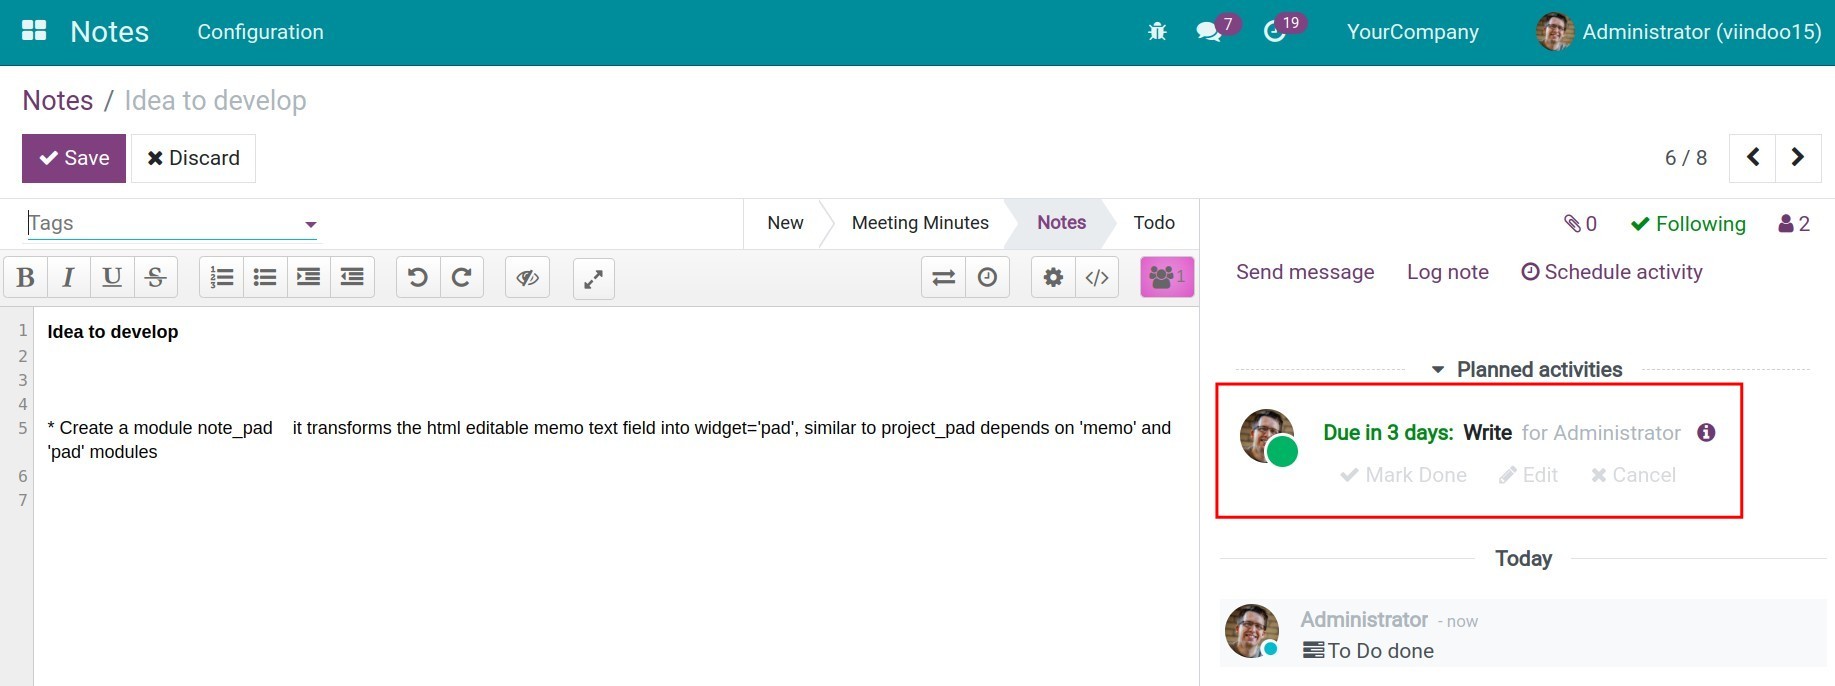
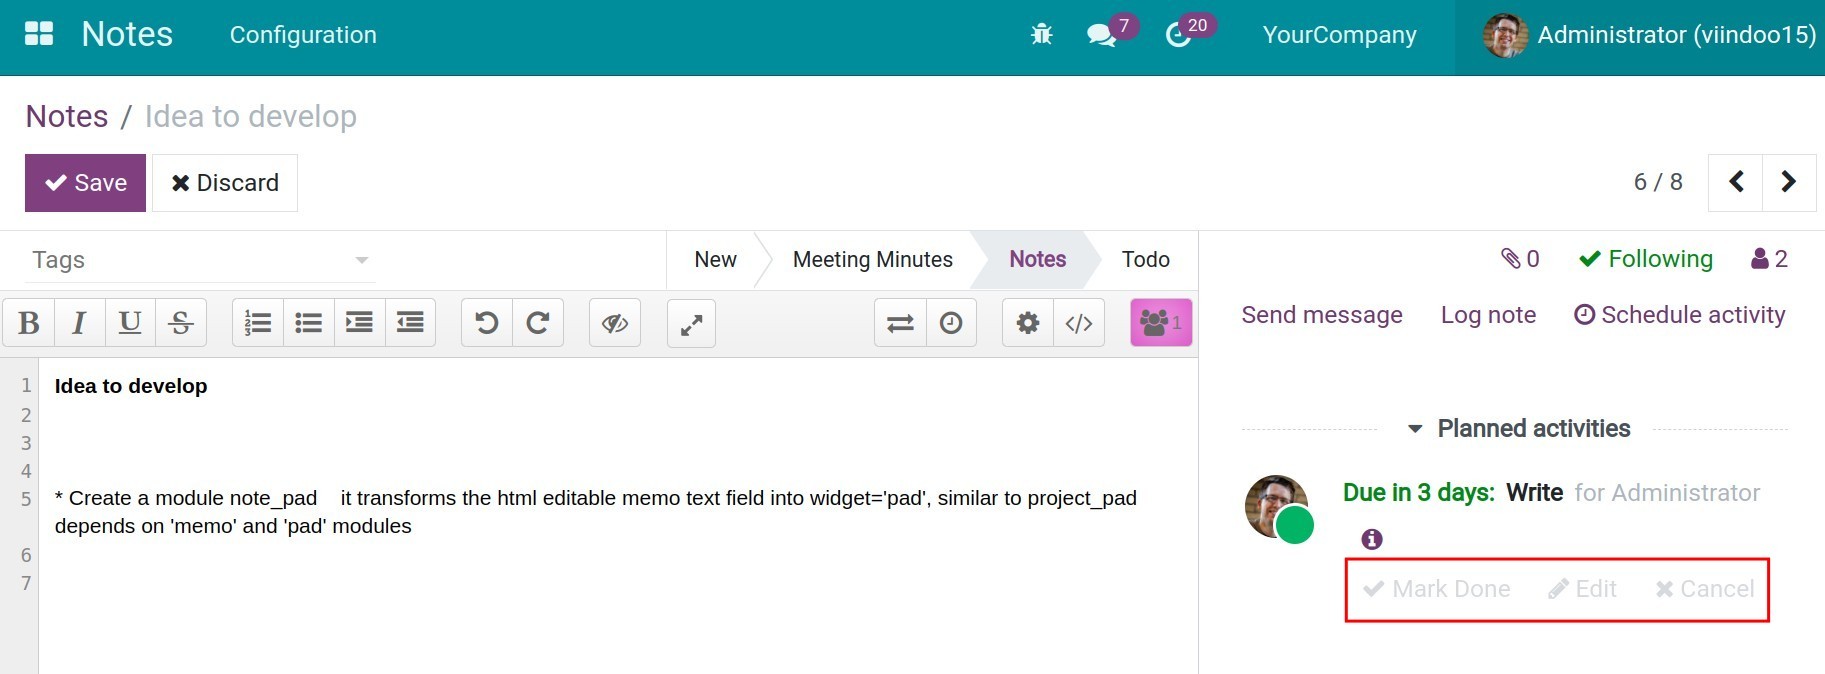
The scheduled activity will be displayed as shown in the Chatter area:
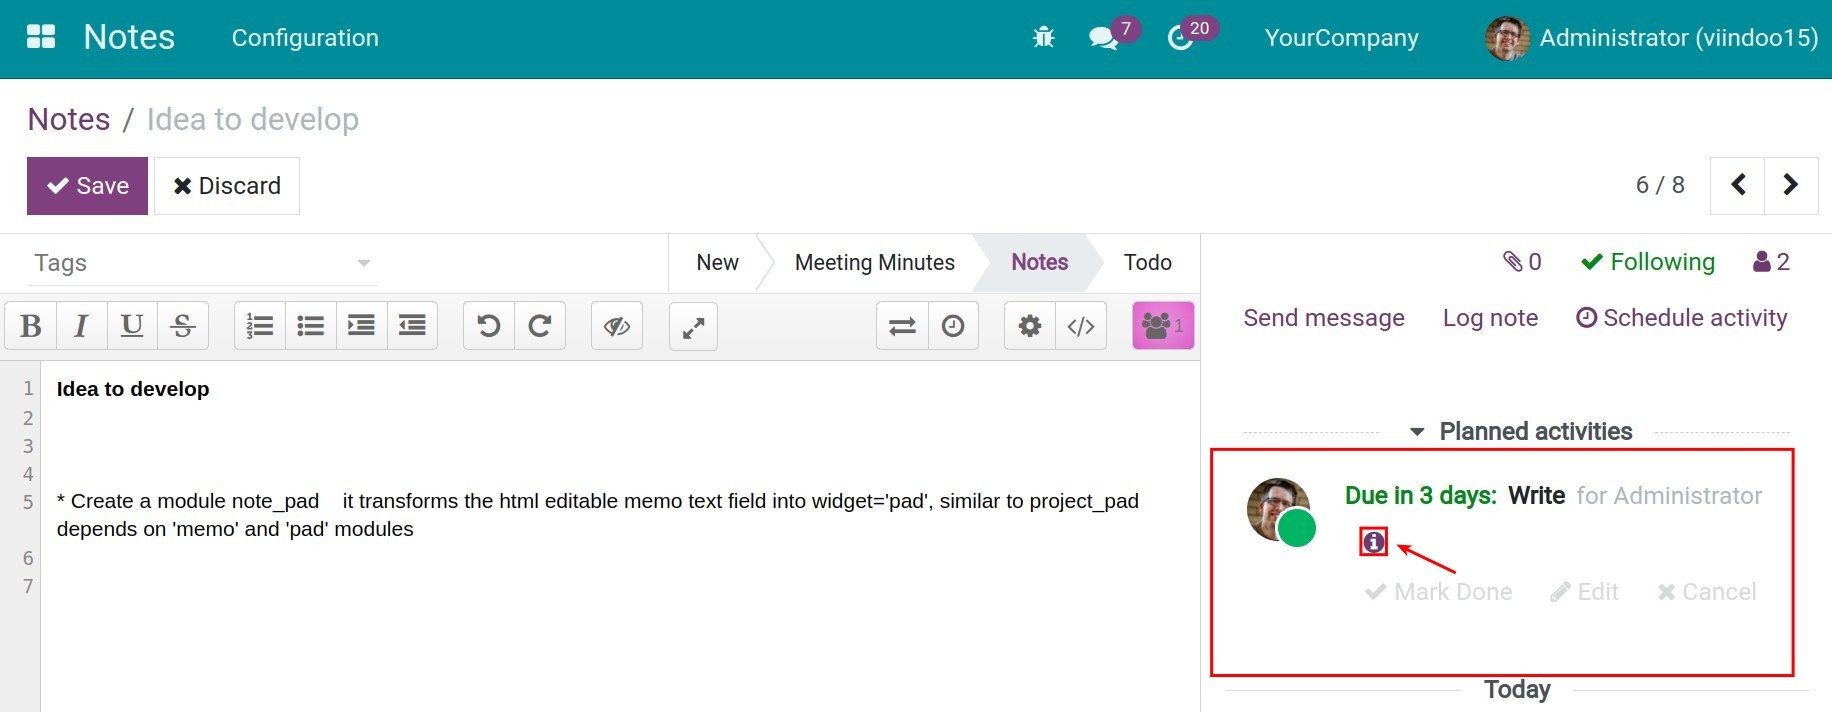
Users can click on the “i” icon to view the detailed configuration of the scheduled activity or do the following actions:
- Mark Done: select this option to record the scheduled activity completion.
- Edit: select this option to adjust the configuration of the scheduled activity.
- Cancel: select this option if you want to delete the scheduled activity.
Manage work efficiently with Schedule activity
You can access the clock icon in the menu bar to review the tasks that you have been assigned using the schedule activity feature which includes the unfinished tasks over the deadline, tasks due today, and to-do in the future.
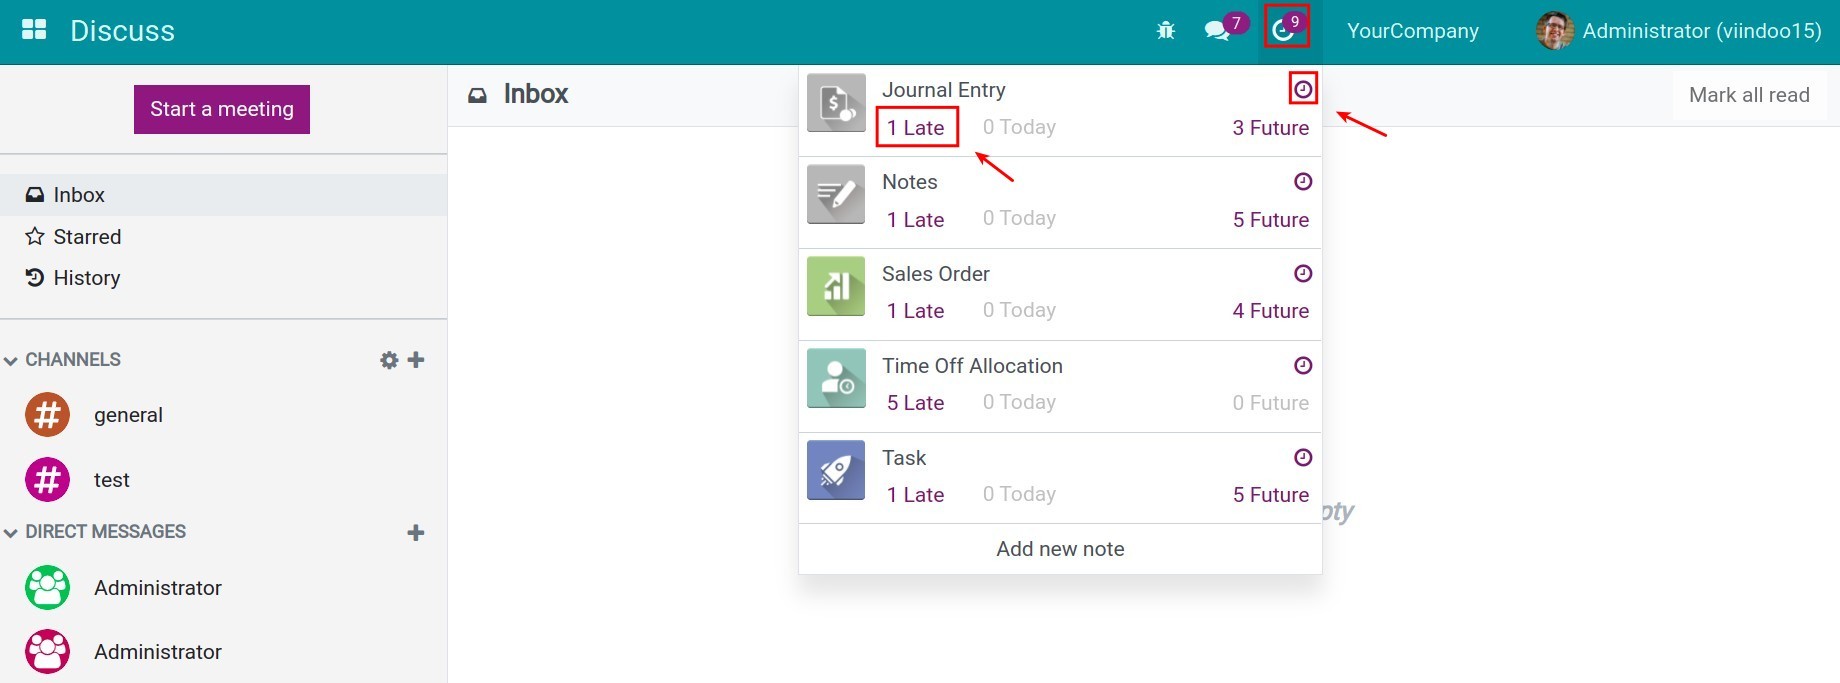
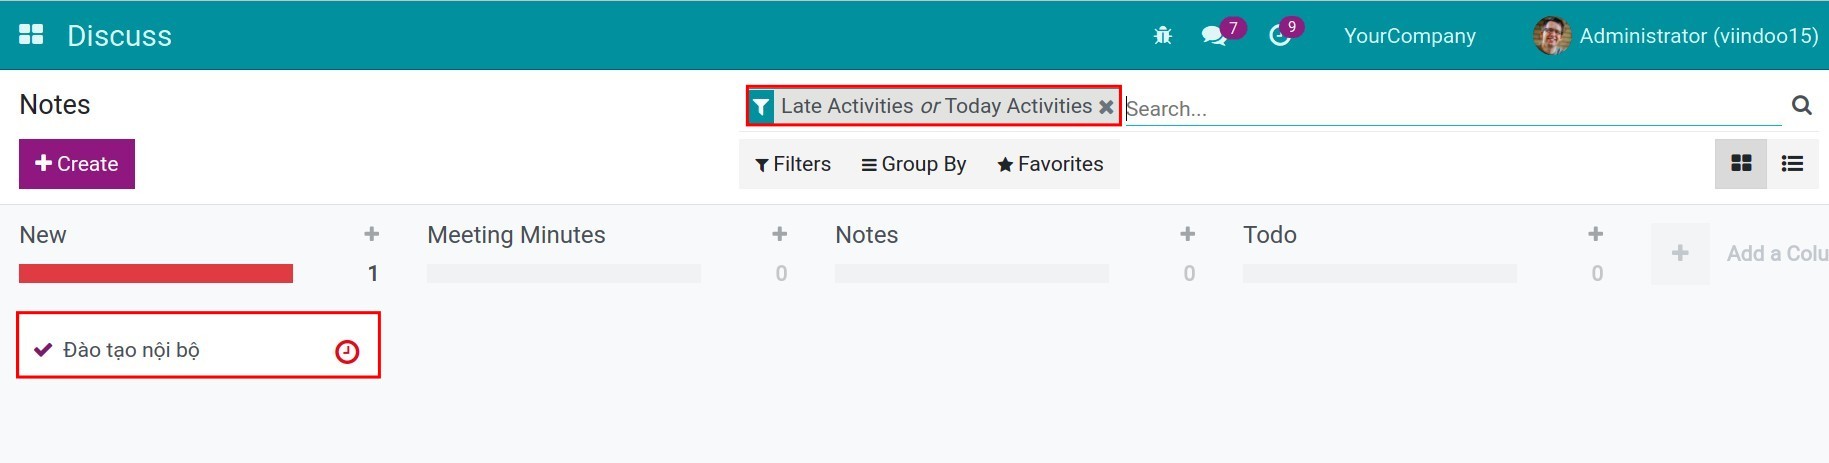
Now you can click on each work item to go to the document view which had been scheduled the activity or select the small clock icon in the right corner to go to the overview of their works.
See also
Related articles:
Optional modules: